
After logging in, navigate to the webpage you want to edit. Select the edit tab.

The edit overlay window will appear giving you the ability to access Layout Options from the Extras tab.

Example Page for Layout Options
There is an Example Page for Layout Options available for use. You must have access to Drupal and login to Drupal to see the example page. It may be helpful to reference this page as you read the instructions below. Please do not make any changes to the example page.
Checkboxes at the Top
The five checkboxes at the top of the Layout Options allow you to hide the page title, breadcrumb, and/or section navigation.
You may also choose the one column option that will allow the content in the body of your page to expand the entirety of the webpage using up the column reserved for the right navigation. If you choose the one column option you will want to hide the section navigation or it will appear at the top of your page.
The checkbox compact college branding reduces the size of the header information. In general, this setting should only be used for unit designs with their own nav bar. Hospital pages ignore this setting and automatically activate compact branding.
Below the checkboxes at the top of Layout Options are Unit and Hospital Options.
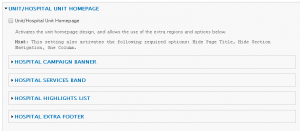
Unit/Hospital Unit Homepage
The Unit/Hospital Unit Homepage checkbox activates the unit homepage design, and allows the use of the extra regions and options below it (Hint: This setting also activates the following required options: Hide Page Title, Hide Section Navigation, One Column.):
 Hospital Campaign Banner
- Hospital Services Band
- Hospital Highlights List
- Hospital Extra Footer

Hospital Campaign Banner

Check the Show Unit Campaign checkbox to show this section on the webpage.
The following information may be completed:
Main Heading
Text overlays the Hospital Campaign Banner in the top most left in large font.
Secondary Heading
Text overlays the Hospital Campaign Banner just below the Main Heading in smaller font.
Background Image
The recommended dimensions are 1440×800. Click the Choose a background image button and upload your image or if you know of an image in the library with these dimensions that you want to use, choose the Library tab and Click Submit.
Link Location Title and URL
The Link Location Title and URL appear at the bottom left of the banner overlaying the image. If you do not complete these fields, they will not appear on the webpage. A location pinpoint icon appears beside the title, so this field is only suitable for an address. Use a <br> tag in the Link Location Title field to create a line-break for a two-line address. The title must be 128 characters or less.
Unit Action Button 1, 2, 3 Title and URL
Text links may be displayed on the bottom right of the banner overlaying the image. If you want these links to overlay the banner image, complete the Unit Action Button fields. The title must be 128 characters or less, and you must enter a URL for each button you want to display.
There is an example page that will allow you to explore the Hospital Campaign Banner and better discover where the fields appear on the page.
Hospital Services Band

To display this section on the page you must check the Show Services Band checkbox. There is a default background image, but you may upload and image by clicking the Background Image Browse button.
Recommended dimensions for the background image are 1440×560. An ideal image would have its main subject matter centered vertically, with extra background above and below. Also keep in mind that there is a 70/30 split of this region. Cropping images to place the subject matter within the left 70% of the image.
The text placed in the Service Band Content text area will be displayed on the right of the page overlaying the background image. This section is intended for a list of information, links, etc. If you placed paragraphs of information here it will not lend the best appearance on the page.
There is an example page that will allow you to explore the Hospital Services Band and better discover where the section appears on the page.
Hospital Highlights List

Check the Show Highlights list checkbox. To add hospital highlights to your page, you must first create a spotlight. After you have your spotlights created, add them in the Highlights field. As you begin typing in the Highlights textboxes, auto-complete will create a dropdown of choices based on the text you type. Select the spotlight you want to appear on your page. For best results, add exactly three (3) or six (6) items.
There is an example page that will allow you to explore the Hospital Highlights List and better discover where the section appears on the page.
Hospital Extra Footer

Check the Show Extra Hospital Footer checkbox to display this section on your webpage. There is a default background image, but you may upload and image by clicking the Background Image Browse button.
Recommended dimensions for the background image are 1440×560. An ideal image would have its main subject matter centered vertically, with extra background above and below. Also keep in mind the 30/70 split of this region, perhaps cropping images to place the subject matter within the right 70% of the image.
The text placed in the Extra Hospital Footer section text area will be displayed on the left and right of the page overlaying the background image. Special style classes must be used. The best way to get started is to go to the example page , go to the Hospital Extra Footer text editor, choose Source on the text editor toolbar, copy all the source code by using the keyboard command Ctrl+C, and pasting this html code on the webpage you are editing.
There is an example page that will allow you to explore the Hospital Extra Footer and better discover where the section appears on the page.