Tag Archives: ornamental

Growing perennial wildflowers from seed

Pink echinacea, and pale purple wild bergamot flowers in a raised bed
Perennial wildflowers add both beauty and food for beneficial insects to your yard.

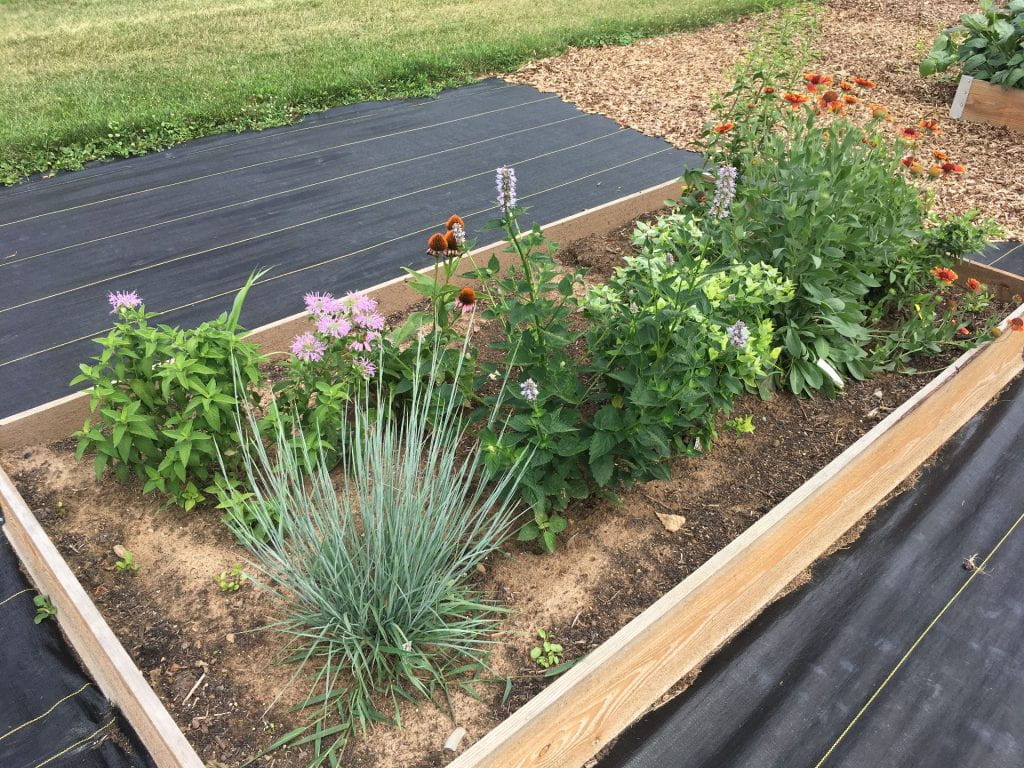
Why grow perennial wildflowers?

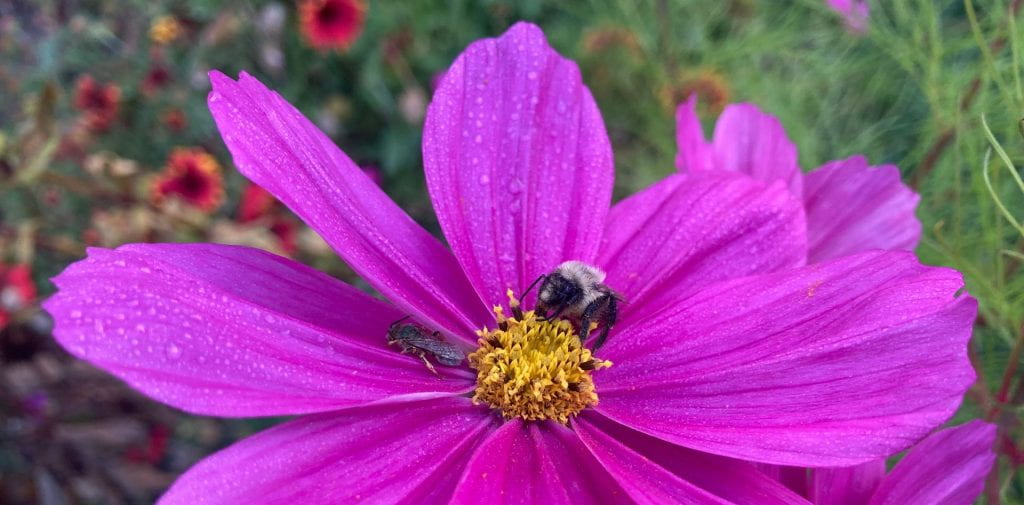
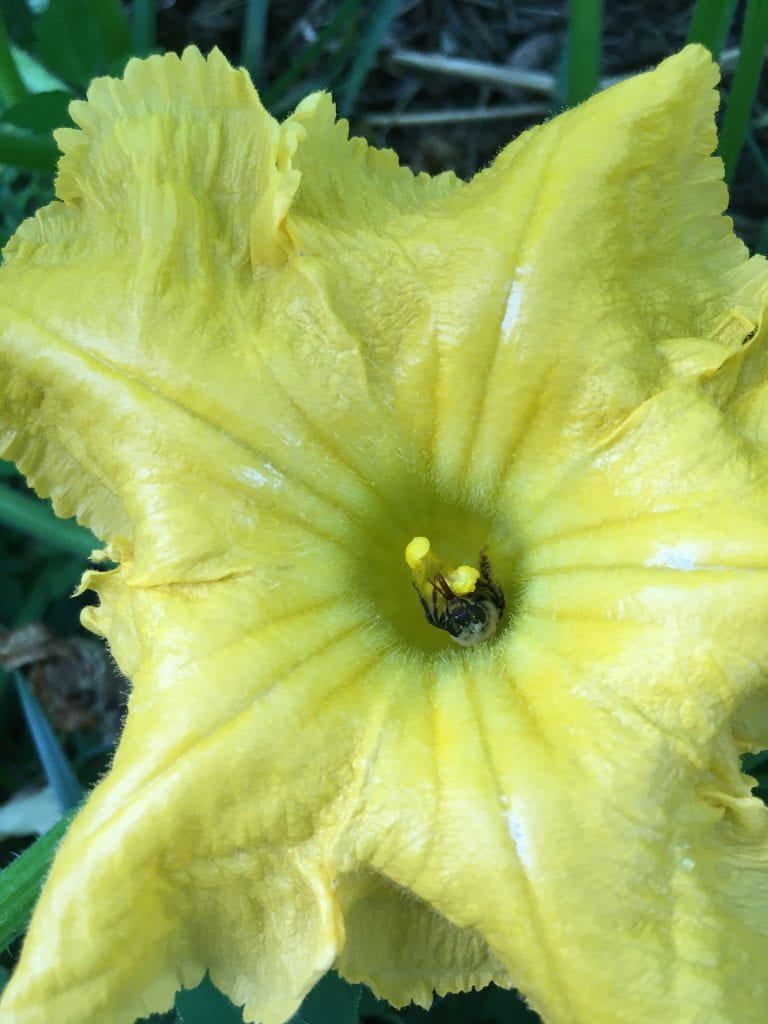
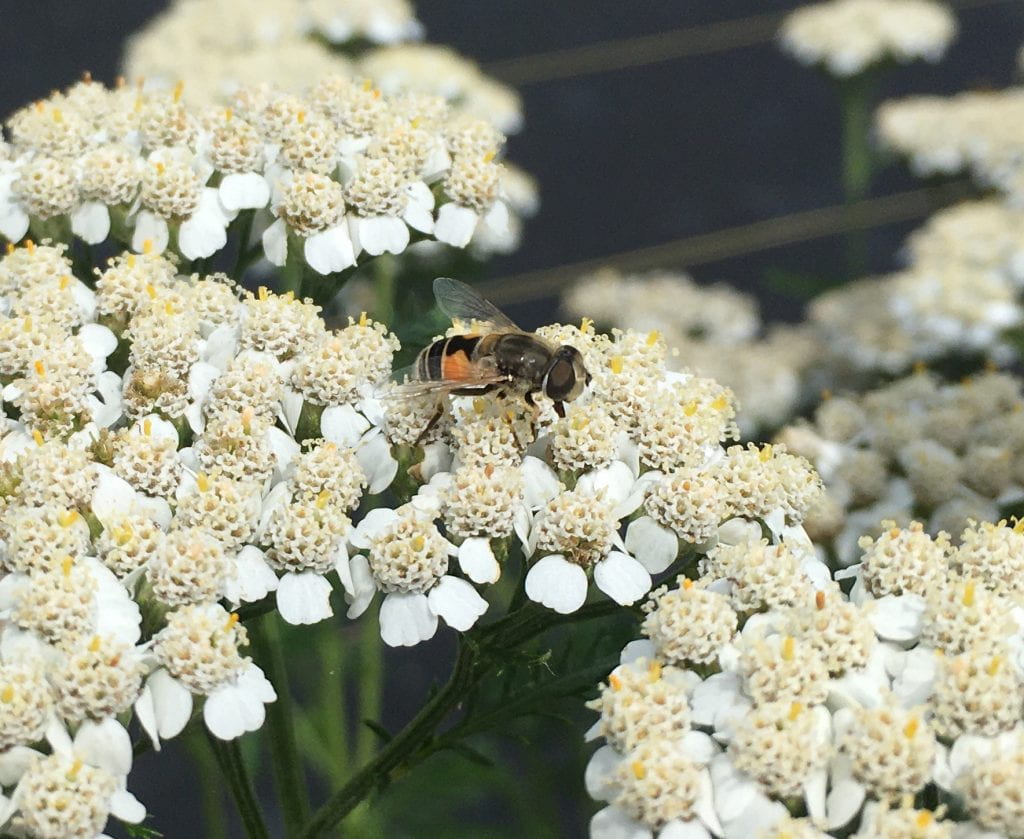
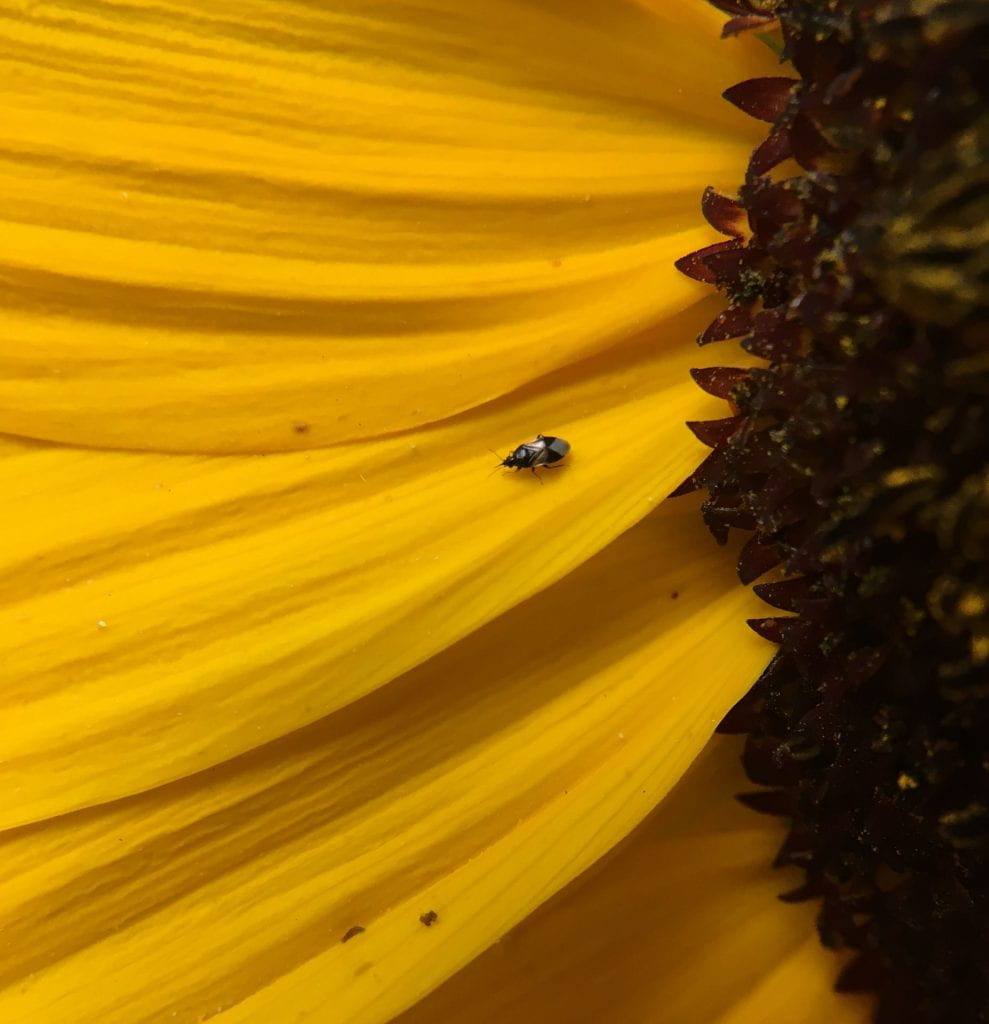
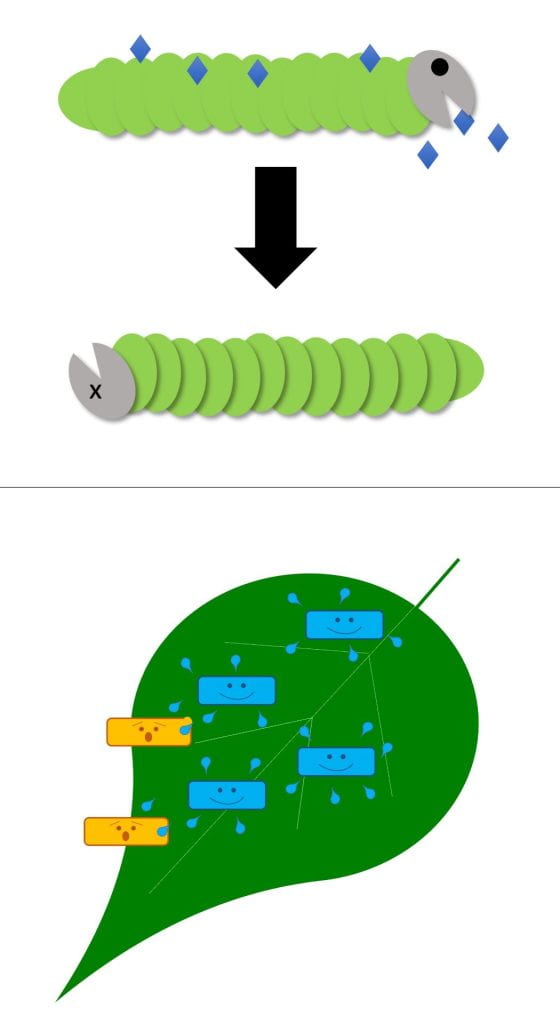
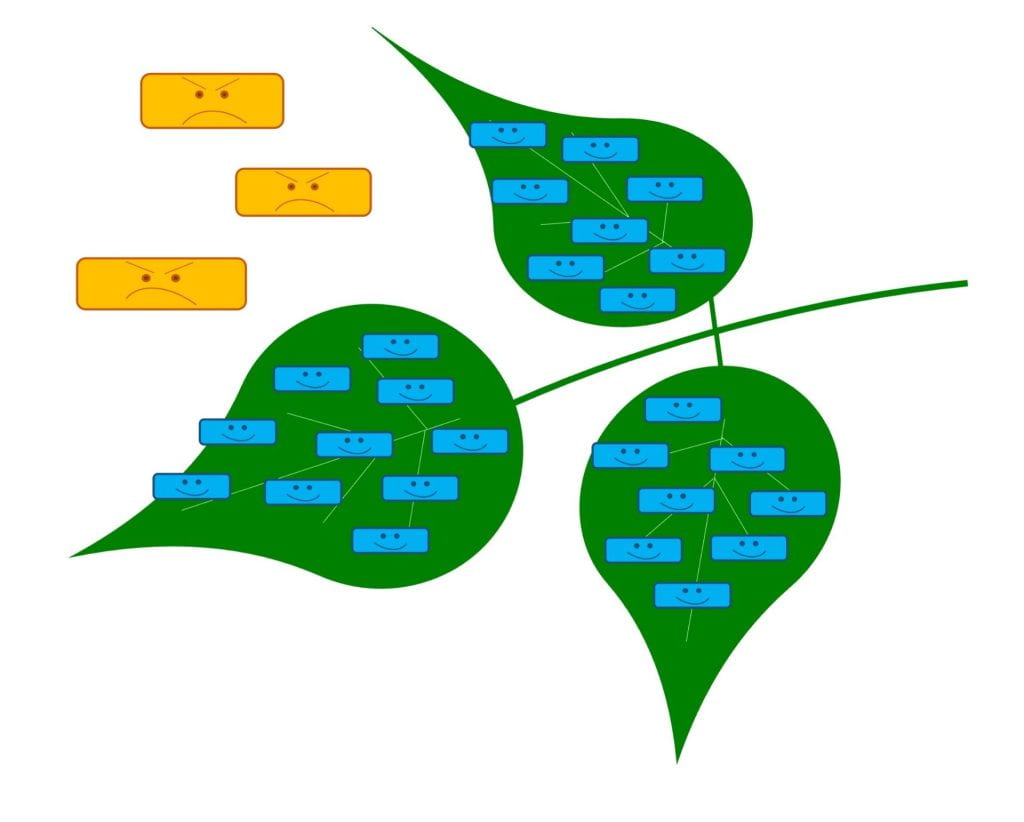
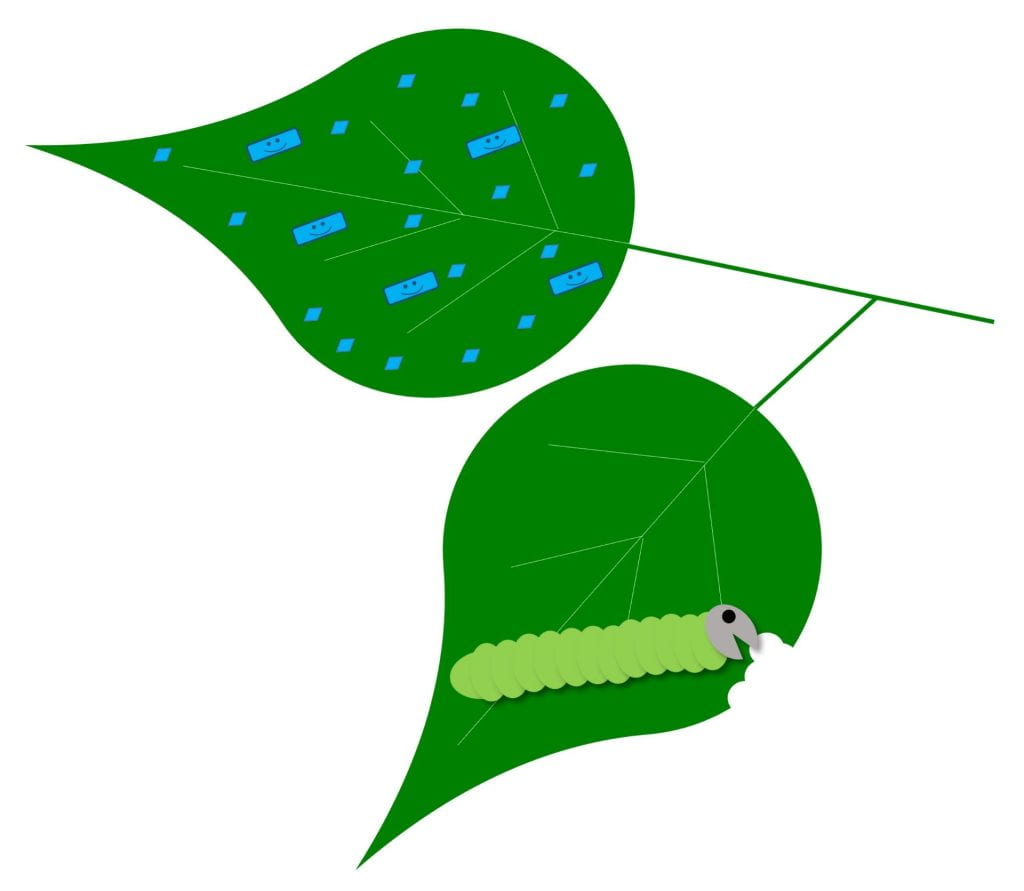
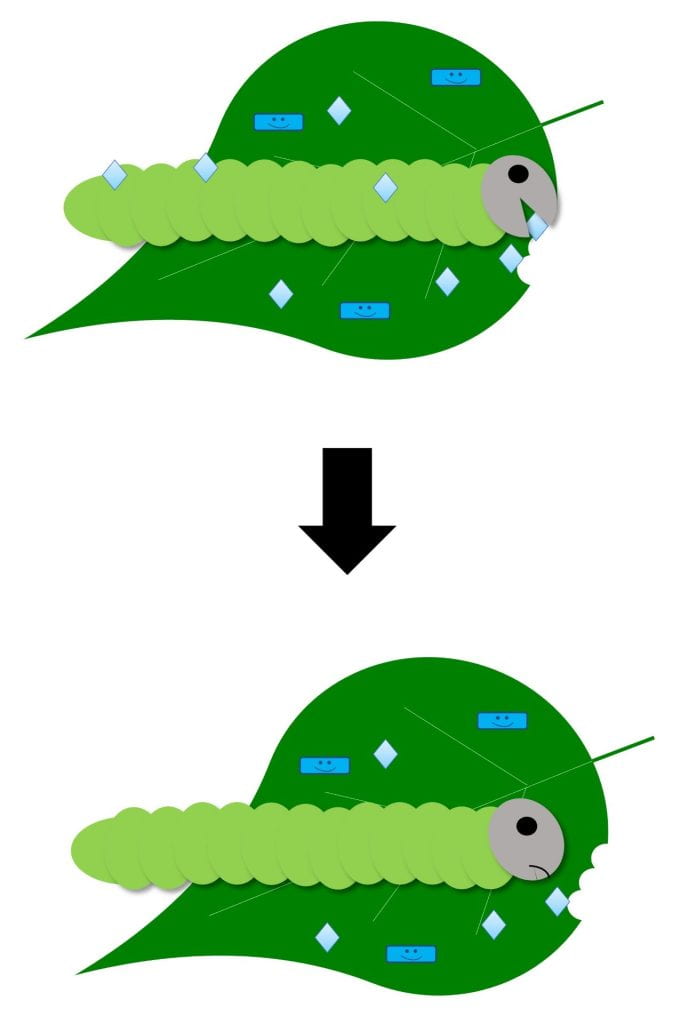
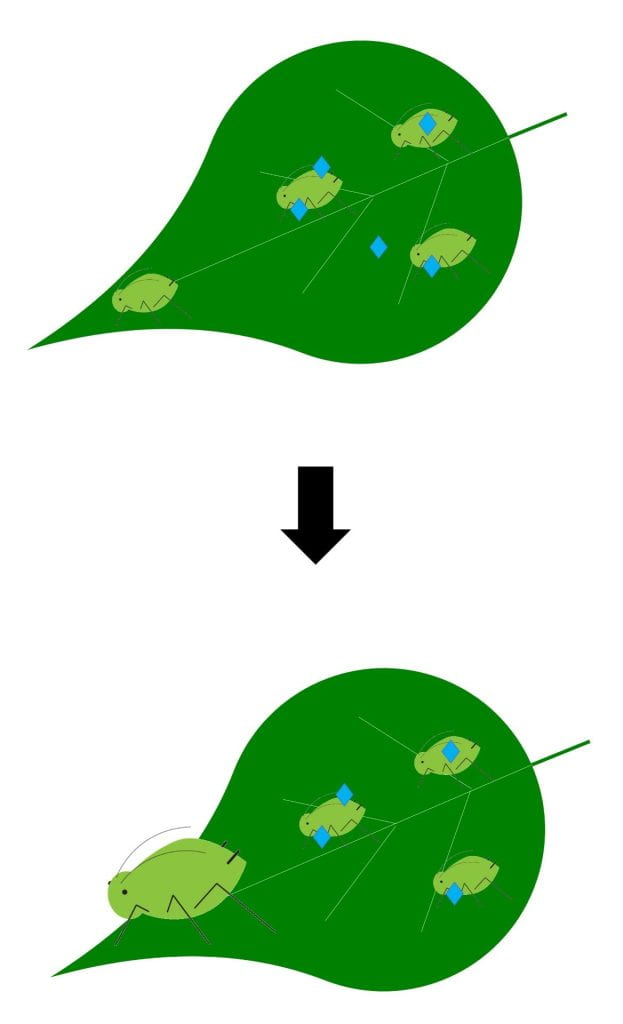
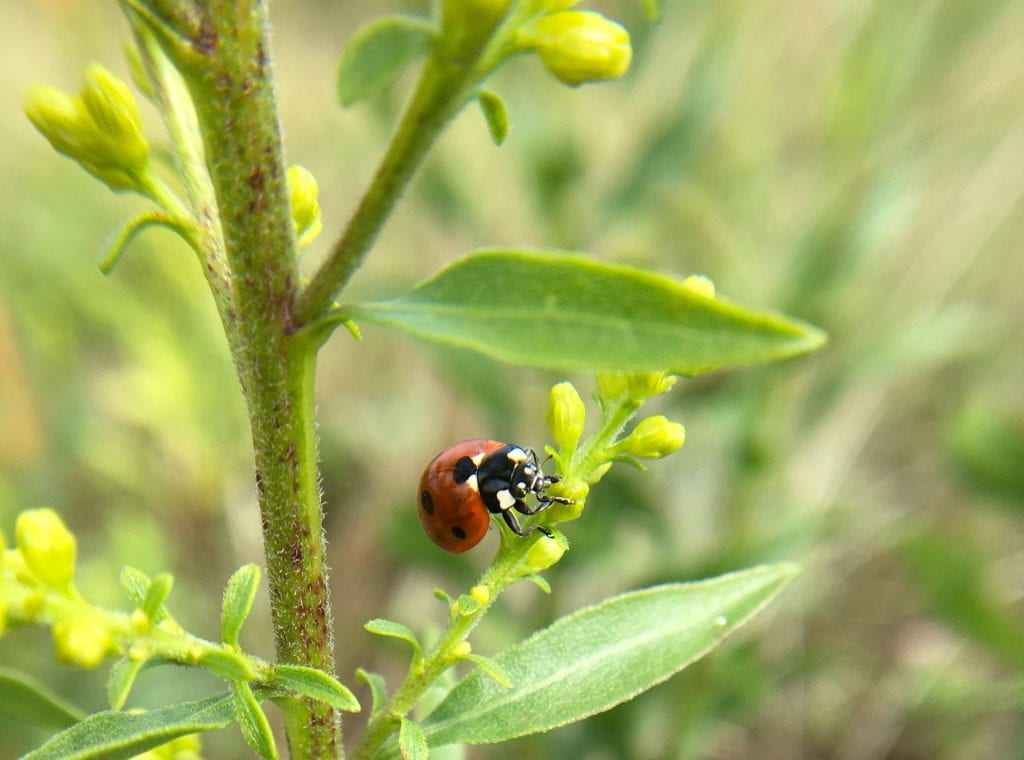
Native wildflowers feed and shelter beneficial insects that pollinate our plants and help us control pests. Beneficial insects include a diverse collection of pollinators — not just honey bees — as well as natural enemies (flies, wasps, beetles, bugs and other insects that kill pests). While not technically insects, spiders and predatory mites also serve as natural enemies of pests. Cooperating with insect natural enemies for pest control helps us reduce damage from pests while reducing risks to the environment and people from other pest management strategies like pesticides.

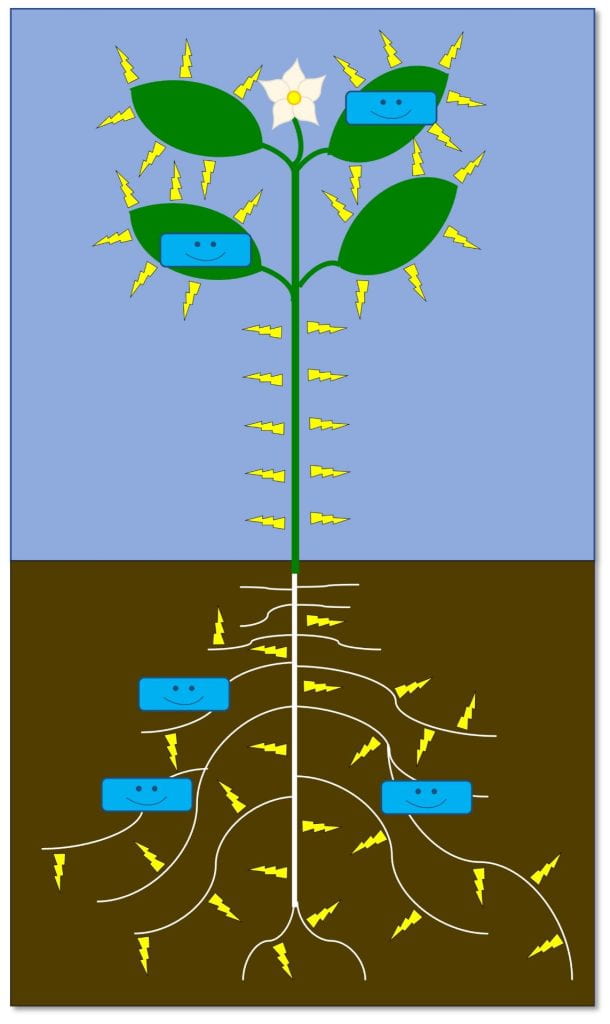
The pollen and nectar produced by these native flowers – and many non-native flowers – either directly feed these friendly insects, or feed other insects that are prey for natural enemies. The leaves and stems also provide shelter for beneficial insects year-round. While we’re focusing on flowers today, many grasses also provide this shelter. Beyond all the ecological benefits, native wildflowers are beautiful!

Preparing perennial seeds to germinate

Seeds with spikey tails held in the palm of a white woman’s hand
Growing perennial flowers from seed does take longer, but it can be fun and rewarding!

In this part of the world (now known as upstate New York), seeds from native perennial wildflowers that mature in summer and fall experience a lot of “weathering” between maturation and germination the following spring. This includes cycles of freezing and thawing temperatures as well as varying levels of moisture during the winter. They may even pass through the digestive system of animals. This is why planting perennial wildflower seed in the fall is a great option. You are allowing nature to do the work of preparing the seeds for germination in the spring. If you harvest seeds of native perennial wildflowers and want to start them in the spring with other seeds, you will need to do this work yourself.

Some seeds have very hard seed coats that need to be broken by physical force (for example scratching with sandpaper, a file, or a knife), heat (for example, submerging in boiling water), cold (for example, freezing), or chemicals (like a strong acid). This is called seed scarification. Seeds that require scarification – and those that don’t – may also require stratification, which signals to the seeds that they can “wake up” (called breaking dormancy) and start germinating. Seed stratification generally requires exposing the seeds to the right level of moisture and the right temperature for the right length of time. Some examples include:

  • Hot water soak – Pour hot water over seeds and allow them to soak overnight or for 24 hours
  • Cold moist stratification – Mix seeds with sterile sand, vermiculite, or another substance that won’t hold too much moisture. You could also place seeds between layers of a damp paper towel or coffee filter. Make sure that whatever medium you use is only damp and not too wet. Put the mixture in a plastic bag or closed container in your refrigerator for the required amount of time.

If you buy perennial wildflower seeds, they may have already been stratified. Follow the instructions that come with your seed or reach out to the seller for more information.

Light brown seeds sitting on top of damp potting mix in a plastic container
One way to stratify seeds (prepare them for germination) is to place them in moist potting mix in the refrigerator for several weeks to several months.

Species-specific instructions

Examples of perennial wildflower seeds that benefit from scarification and/or stratification follow. After these seeds are scarified and/or stratified, germination may be improved by putting them in a warm place (but not for all species). Remember that you can always sprinkle seeds on well-prepared, weed-free soil outside in the fall and let the winter do the work for you! Also, your experience germinating these seeds may differ from the recommendations below. There is so much beautiful diversity in these perennial wildflowers!

  • Blue false indigo (Baptisia australis) – First scarify the seeds. Gently rub them between medium-grit sandpaper to scratch the seed coat. Then use the cold moist stratification method, leaving them in the refrigerator for about 10 days.
  • New York Ironweed (Vernonia noveboracensis) – Use cold moist stratification, keeping seeds chilled for 60 days.
  • Asters (Symphyotrichum spp.) – If you look up how to seed asters, you’ll see different instructions for different species, including seeding them in the spring without stratification and using a 60-day cold stratification period. Amara tried germinating Symphyotrichum oblongifolium (aromatic aster) seed and had better luck with cold moist stratification than seeding without stratification. You might see different results with different species.
  • Milkweed (Asclepias spp.) – Store (well-dried!) seeds in the freezer for several months (e.g., from the time you harvest them in the fall, until you are ready to start them in the spring). Learn more from Petra at Fruition Seeds.
  • Coreopsis (Coreopsis spp.) – Note that some coreopsis species are annuals in upstate NY. Perennial species will likely germinate best with cold moist stratification (30-60 days, depending on species).
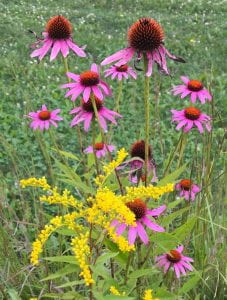
  • Echinacea (Echinacea purpurea) – These seeds will likely germinate just fine if you plant them in moist soil and provide warmth (e.g., a heat mat) just as you would annual seeds.
  • Blazing star (Liatris spicata) – Moist stratify for 60 days before planting seeds.
  • Beard tongue (Penstemon spp.) – Cold stratify for 30-60 days before planting seeds. Some species may require light for germination. Cover seed of these species with only a very thin layer of potting mix (if any) and provide light when germinating.
  • Mountain mints (Pycnanthemum spp.) – You should be able to germinate seeds without stratification, but they will likely germinate better with light. Cover seed with only a very thin layer of potting mix (if any) and provide light when germinating.
  • Rudbeckia (Rudbeckia spp.) – Different species of Rudbeckia may require different stratification (or none) for seed to germinate. For many species, cold moist stratification for at least 30 days is recommended.
  • Goldenrod (Solidago spp.) – There are many species. Most will likely germinate best if seed is moist stratified for 60 days, and then receive light after seeding. Cover seed with only a very thin layer of potting mix (if any) and provide light when germinating.
  • Spiderwort (Tradescantia ohiensis) – For this species, you are better off direct-seeding in the fall. The recommended cold moist stratification period is 120 days, and these seeds will germinate better in cool soil.
  • Golden alexanders (Zizia aurea) – You may have better luck sowing these seeds outside in the fall than trying to start them inside in the spring. Their leaves are fairly distinctive (like celery) so seedlings are easier to spot outdoors. If you do want to try starting them indoors, use a 60-day cold moist stratification.

For some of the species that require longer stratification, you may be worried that you’re running out of time this spring. Remember that even after you have prepared your seeds to germinate, they will likely need around 6 weeks to germinate and grow big enough to consider transplanting outdoors. Don’t despair! Fall is a great time to transplant perennial wildflowers. And perhaps your heat mats and grow lights (or other seed germination spot) are otherwise occupied starting annual vegetable and herb transplants this spring. If you start stratifying seeds in early May, even those that require 60 days in the fridge will be ready for germination in early July. Then your seedlings will have plenty of time to grow big and strong before fall transplanting. Just be sure to keep them watered.


Resources consulted on seed germination:


This post was written by Amara Dunn-Silver, Biocontrol Specialist and Elizabeth Lamb, Ornamentals IPM Coordinator with the NYSIPM Program.

This work is supported by NYS Departments of Environmental Conservation and Agriculture and Markets.

Harvesting and sowing your own native seeds – August 17, 2023

Pink echinacea and bright yellow goldenrod flowers
Echinacea and goldenrod are just two species of native perennial wildflowers that feed beneficial insects.

For the past six years, we’ve been cultivating perennial grasses and wildflowers that feed and support beneficial insects. All of these plants came from seeds—whether sown by us or by others—and we’ll focus this year’s annual open house on these wonderful seeds.

Come join folks from New York State Integrated Pest Management, and Petra Page-Mann from Fruition Seeds to talk about how we harvest, clean, store, and germinate seeds of perennial wildflowers that support beneficial insects. Stop by our open house between 3:30 and 6:30 p.m on Thursday, August 17. We’ll offer guided explorations of our established plots of perennial wildflowers and grasses at 3:45, 4:45, and 5:45 p.m. You are also welcome to explore the field on your own, or browse our interactive resources on display. There will be a few hard copies of resources available at the event, and we’ll continue to add digital resources to this folder up to and following the event. Everyone will go home with seeds of native perennial plants that support beneficial insects.

No registration needed for this free event. Find all the details at our event page. When you arrive at the entrance to the farm, look for signs with the pink echinacea flower and the Christmas tree on them, and follow the signs to our field.

Graphic of pink echinacea flower, Christmas tree, and the NYSIPM logo
Follow these signs to find our field!

Funds for this project were provided by NYS Dept of Ag and Markets and the USDA National Institute of Food and Ag.

New from NYSIPM: Biopesticide Profiles

Screen shot of a website section entitled Biopesticide Profiles. PDFs of these profiles are available for Actinovate, Contans WG, Double Nickel, LifeGard, Regalia, Serifel, Stargus, Theia, and Timorex ACT
Follow the link in the text and scroll to the bottom of the page to find these biopesticide profiles from the NYSIPM program.

I’m excited to announce that the New York State IPM Program has a new resource – Biopesticide Profiles!

(Scroll down to the bottom of the page linked above, past the efficacy summaries, which are also cool.)

So far, we have profiles for nine biopesticides registered for use on various crops in NY (including one for use in home gardens) against plant diseases. I plan to add more profiles over time, and will definitely add some bioinsecticides in the future.

These profiles are not meant to replace pesticide labels; always read and follow the label and only use pesticides that are currently registered in your state or province. These profiles have practical details about how to use biopesticides most effectively, including information on mode of action, compatibility with other pesticides, best storage conditions, and shelf life. I’ve also included information on any known toxicity concerns for not just bees, but other beneficial insects like natural enemies of pests.

Screen shot of the NYSIPM Biopesticide Profile for Actinovate which contains the active ingredient Streptomyces lydicus WYEC 108 (alive). Other information includes the available formulations, types of pests targeted, the fungicide resistance action committee number, the mode of action, and the best environmental conditions under which to use it.
Just some of the practical information you can find on the NYSIPM biopesticide profiles.

I collected this information from pesticide labels, pesticide manufacturers, EPA registration documents, and peer-reviewed literature, to save you time when you’re considering using a biopesticide. But you should still always read the label.

Take a look and let me know what you think! Which biopesticides should be next on my list?


This post was written by Amara Dunn, Biocontrol Specialist with the NYSIPM program. Support for this project was provided by the NY Farm Viability Institute.

Logo for the NY Farm Viability Institute

Protect Pollinators and Natural Enemies of Pests, Choose Pesticides Carefully

A bumble bee and a smaller bee resting on a magenta cosmos covered with tiny water droplets
These bees are just two of the beneficial insects you’ll want to protect from pesticides.

Hopefully we can all agree that protecting friendly insects (pollinators and natural enemies of pests) on our farms and in our gardens and landscapes is important. We want to manage pests, without hurting bees, butterflies, ladybugs, parasitoid wasps, minute pirate bugs, hover flies, ground beetles, and so many more of our insect friends. Using IPM tools other than pesticides is a great way to do this. When it is necessary to use pesticides as an IPM tool, how do you choose a pesticide – whether it is organic, conventional, or biological – that poses the least risk?

Practices that help reduce risk to beneficial insects

No matter how hazardous or toxic any substance is, insects are only at risk if they are exposed to that substance. By using integrated pest management practices like crop rotation, sanitation, and scouting for pests, you can reduce the number of pesticide applications needed to manage pests. Making fewer pesticide applications is a great way to start protecting beneficial insects. Some pesticides are particularly dangerous to insects because they linger so long in the environment after they are applied (have a long residual), posing a greater risk. Other pesticides quickly break down in the environment after being applied to plants, so they pose less risk.

Bee pollinating a cucurbit flower
Wild bees are important pollinators of cucurbit flowers. We can thank them for many of our pumpkins, squashes, cucumbers, and melons.

Being careful about when you apply a pesticide can also reduce the likelihood that a beneficial insect will be exposed to it. Bees are less active at certain times of day (especially early morning and evening). However, some wild bee species forage at different times of day. For example, squash bees are early risers, and can be found visiting squash, pumpkin, and cucumber flowers before honey or bumble bees are active. Check the area where you plan to apply a pesticide, and pick a different time if bees are present. Some pesticide labels require that you do not apply that product while bees are foraging. Some pesticides will still harm bees that visit a flower some time after the pesticide is applied. Avoiding pesticide applications when plants are flowering will provide additional protection to beneficial insects, but may not be practical on all crops.

Where you apply pesticides also matters. Have you planted some habitat for beneficial insects? Prevent pesticide spray drift into these habitats. Are there flowers blooming amongst the grass on the orchard floor? Mowing them before you spray the fruit trees overhead could make insects less likely to visit during or right after you spray.

Resources to consult

First, read the pesticide label (and follow it). The label is the law and will have instructions on how to protect pollinators and other non-target organisms when using a pesticide.

If you know the pesticides you are considering, and especially if you know the specific natural enemies you are trying to protect, you can find some good information from companies that sell beneficial insects, or pesticides. I am aware of searchable databases or charts describing pesticide compatibility from four companies that sell (mostly) arthropod and nematode natural enemies: Agrobio, Biobest, BioWorks, and Koppert.

EIQ stands for Environmental Impact Quotient. You can read more details on the NYSIPM website, but in a nutshell the EIQ quantifies the risks of pesticides. You can use the EIQ calculator on our website to compare these numbers for different pesticides at the rates you plan to use them. The higher the number, the higher the risk. There are different components to the EIQ; risks to consumers, workers, and the environment (ecological). The ecological risk includes risks to natural enemies (as well as fish, birds, and bees). The EIQ calculator will give you an overall EIQ value as well as values for each category of risk (consumers, workers, ecological). Or, you can download this spreadsheet of EIQ values for pesticides, and sort by values for bees or beneficials (columns P and Q).

The University of California IPM Program’s pesticide active ingredients database summarizes the toxicity of some pesticides (including insecticides) to natural enemies and pollinators, as well as other hazards.

The Cornell Pollinator Network produces Pollinator Protection Guides for an increasing number of crop groups to help you understand the toxicity of different pesticide active ingredients to bees.

orange and black-striped fly with large eyes perches on small white flowers
Larvae (maggots) of this hover fly are excellent aphid predators. Killing your hover flies with pesticides could contribute to an aphid outbreak.

A few pesticides to avoid

You’re using good IPM, and you still need to use an insecticide. You’re trying to choose. I used information I collected from a few different sources (listed at the end of this post) to categorize some insecticides as “most” or “moderately” harmful. These are not exhaustive lists.

Most harmful to beneficial insects:

  • Carbaryl – active ingredient found in some products called Sevin
  • Neonicotinoids – active ingredients include imidacloprid, acetamiprid, thiamethoxam and may be found in such products as Admire, Assail, and Actara; In NY many products with these active ingredients are now classified as restricted use, so only certified pesticide applicators are allowed to buy or use them.
  • Natural pyrethrins – PyGanic is one product with this active ingredient; similar to synthetic pyrethroids, but this active ingredient degrades quickly in the environment (short residual)
  • Synthetic pyrethroids – active ingredients include bifenthrin, cypermethrin, lambda-cyhalothrin, permethrin, and others; can be found in products called Sevin, Eight, Warrior, and others; similar to natural pyrethrins, but last much longer in the environment (long residual)
  • Spinetoram – Radiant is one product that contains this active ingredient; a synthetic version of spinosad, but more toxic to beneficial insects than spinosad

Moderately harmful to beneficial insects:

  • Azadirachtin – active ingredient found in products such as Aza-Direct, Azaguard, Neemix
  • Bifenazate – active ingredient found in products such as Acramite
  • Chlorantraniliprole – active ingredient found in Coragen; among natural enemies, parasitoid wasps are probably most at risk. There may be some synergistic effects on bees when combined with other pesticides (see Cornell Pollinator Protection Guides)
  • Indoxacarb – active ingredient found in products such as Avaunt
  • Insecticidal soaps – active ingredient is potassium salts of fatty acids and can be found in M-Pede and many other products; most harmful to soft-bodied insects (including predatory mites), while beetles may be less susceptible
  • Spinosad – active ingredient in Entrust; similar to spinetoram, but it is the natural version of this chemical; not as toxic to beneficial insects as spinetoram

So what are the alternatives?

Remember that pesticides, by definition, are toxic to some living things; that’s why they kill and repel pests. There is no such thing as a completely safe pesticide. But here are a few insecticides that are gentlest on beneficial insects. And let me reiterate: Reducing the use of pesticides through good IPM is the best way to protect insects from pesticides.

  • Beauveria bassiana – several strains of this fungus are active ingredients in different insecticides, including BotaniGard
  • Bt or Bacillus thuringiensis – bacterial active ingredient in pesticides such as Agree, Dipel, and others; quite specific to the insect groups specified on the label; different subspecies are effective against different groups of insects
  • Flonicamid – active ingredient in Beleaf
  • Horticultural oils – there are many different active ingredients that fall in this group; may be more toxic to bees than to natural enemies, but require direct contact with the insect
  • Cordyceps (formerly Isaria or Paecilomyces) fumosorosea – another fungal active ingredient found in products such as PFR-97
  • Clarified hydrophobic neem oil – Note that “whole” neem oil contains azadirachtin (which I listed in the “moderately harmful group”), while clarified hydrophobic neem oil does not. Azadirachtin is extracted from neem oil, leaving the clarified hydrophobic neem oil behind.
Small insect with a black and white diamond pattern on its back on a sunflower petal
This cute little insect is a minute pirate bug. In addition to munching on pollen, it will also eat small pests like thrips, mites, and small caterpillars.

A few reminders…

  • Remember that the information in this post is not a substitute for a pesticide label. The label is the law, and you must read and follow the label of any pesticide you are using. Laws and labels change. It is your responsibility to use pesticides legally. Trade or company names used here are for convenience and information only; no endorsement of products or companies is intended, nor is criticism of unnamed products or companies implied.
  • For questions about pesticide use, regulations, and safety, contact the Cornell Cooperative Extension Pesticide Safety Education Program. If you live in New York State, you can find labels for pesticides that are registered in NY at the DEC’s NYSPAD website.
  • Just because a pesticide isn’t on the “most” or “moderately” harmful lists above, does not mean it is harmless to insects. These lists are not exhaustive, and for some products insufficient information exists.

  Sources consulted:


This post was written by Amara Dunn, Biocontrol Specialist with the NYSIPM program. Special thanks to Diana Obregon Corredor for providing review and input.

This work is supported by NYS Departments of Environmental Conservation and Agriculture and Markets.

Biopesticide modes of action

Diagram showing an unhappy-looking caterpillar that has stopped eating a leaf. Blue diamond shapes and pale blue rectangles with smiling faces are also on the leaf.
Biopesticides include microorganisms, plant extracts, and other naturally-derived compounds that control pests.

Biopesticides are one aspect of biological control. The active ingredients in biopesticides include microorganisms (microbes), plant extracts, and naturally-occurring chemicals (like potassium bicarbonate). As a result, some of the ways they control pests (their modes of action or MOAs) are different from conventional, synthetic chemical pesticides. Also, many of them have several MOAs, and not all MOAs apply to all pests listed on the label. If a biopesticide contains live microbes, and especially if its MOA requires the microbes to stay alive on the plant for some period of time after application, this also has important implications for how the product is stored and applied. Understanding the mode of action of a product will help you get the most out of it.

I like to break down biopesticide MOAs into the following categories:

Diagrams - Tiny spores of insect-killing fungi land on the body of an insect, germinate, infect the insect, grow throughout its body, and eventually kill it. Below, a diagram shows blue spores contacting a yellow rectangle with a frightened face, representing a pathogen. The spores grow and kill the pathogen.
Eat – Some biopesticides contain living spores of a fungus (blue). These spores need to land on the insect pest or plant pathogen (yellow rectangle). Then they germinate (like a seed), invade and grow, eventually killing the pest. If the humidity is high enough, the fungus may even produce more spores and spread to other pests.

Eat live microbe grows on/in pest

Biopesticides with this MOA can work against insect pests (e.g., products that contain Beauveria bassiana) or plant diseases (e.g. Contans, which contains Paraconionthyrium minitans strain CON/M/91-08). Many biopesticides with this MOA contain fungal spores. These spores will germinate once they land on the insect or disease-causing pathogen, and may have temperature and/or humidity requirements for germination. Make sure you store the product correctly, confirm compatibility with other products before tank mixing or applying, and apply under recommended environmental conditions.


Diagram - A caterpillar eats and is sprayed with a bioinsecticide (blue diamonds), and then dies. Plant pathogens (yellow rectangles) are poisoned by biopesticide microbes (blue rectangles) and the antimicrobial compounds they produce (blue droplets).
Poison – Some biopesticides (blue diamonds or blue smiling rectangles with droplets) work much like conventional chemical pesticides. They directly kill or otherwise inhibit the insect pests (like this caterpillar) or plant pathogens (yellow rectangles with frightened faces) when they contact it or are eaten by it.

Poison – biopesticide (or its products) kills the pest directly

Biopesticides with this MOA can work against insect pests (like products containing Bacillus thuringiensis) or plant diseases (e.g., Double Nickel containing Bacillus amyloliquefacies strain D747, or products containing potassium bicarbonate). Obviously, potassium bicarbonate products do not contain live microbes. Some biopesticides that poison pests do have live microbes that continue to produce antimicrobial products after they are applied. Others work because of the compounds the microbes produced while the biopesticide was being made.


Green leaves covered with smiling blue rectangles. Yellow rectangles with angry faces are next to the leaves.
Keep out – Some biopesticides contain microbes (blue smiling rectangles) that grow on the plant. These beneficial microbes use up space and nutrients so there is no room for the pathogen (angry yellow rectangles.

Keep out – live microbe grows on plant, leaving no room for pests

Biopesticides with this MOA can work against plant disease (e.g., Actinovate which contains Streptomyces lydicus WYEC 108, or Serifel, which contains Bacillus amyloliquefaciens strain MBI 600) and may be bacteria or fungi. The microbes in biopesticides with this MOA must be alive when applied and need to be able to grow on the part of the plant that is being protected.


Diagram of a plant with blue smiling rectangles on both leaves and roots. Little yellow lightning bolts surround the roots and leaves.
Turn on resistance – Some biopesticides contain microbes (blue smiling rectangles) or other natural compounds that activate the plants defense system, so that it’s ready when it encounters a pathogen.

Turn on resistance – turns on the plant’s defenses before pest attacks

As far as I know, these biopesticides only work against plant diseases, but as new products are developed, or as we learn more about existing biopesticides, this may change. Some examples include Regalia (giant knotweed extract) and Lifeguard WG (Bacillus mycoides isolate J). Some of these products contain live microbes that need to stay alive (like LifeGard), while others do not. These biopesticides need to be applied before infection.


Diagram - The plant on the left has no smiling blue rectangles on leaves or roots. The plant on the right has these blue rectangles on roots and leaves and is larger.
Grow strong plants – Some biopesticides contain microbes (blue smiling rectangles) or other natural compounds that enable the plant to grow stronger and healthier. As a result, the plant can better withstand attack from a pest.

Grow strong plants – makes plant stronger, healthier, more resilient

These biopesticides primarily work against plant diseases. Some examples include: Serenade (Bacillus subtilis strain QST 713), RootShield (Trichoderma harzianum), and Sil-Matrix (potassium silicate). Some of these products contain live microbes that need to stay alive, while others do not (e.g., Sil-Matrix). These biopesticides need to be applied before infection.


Diagram - One leaf is covered with blue diamonds and smiling rectangles (bioinsecticide), but the other is not. The caterpillar is feeding on the leaf that has no bioinsecticide.
Repel – Some bioinsecticides (blue diamonds and blue rectangles with smiling faces) protect plants because they repel insect and mite pests.

Repel – pest avoids plants treated with biopesticide

Biopesticides with this MOA can work against insect pests, but perhaps only on certain insect life stages. Some products with this MOA could contain live microbes, while others do not. You can evaluate the effectiveness of products with this MOA, not by scouting for dead insects, but by looking for reduced damage or lower insect populations on treated plants. Examples include: Grandevo WDG (Chromobacterium subtsugae strain PRAA4-1 and its spent fermentation products) and products containing azadirachtin.


Diagram - A caterpillar eats or comes in contact with a bioinsecticide, and then stops feeding.
Stop feeding – Some bioinsecticides (diamonds and rectangles on the leaf) cause insect and mite pests to lose their appetites.

Stop feeding – stops pest from feeding; pest eventually starves

Biopesticides with this MOA can work against insect pests either by contact or ingestion and may only be effective against insects of certain ages or life stages. It depends on the biopesticide and pest. Examples include insect-killing viruses and some types of Bacillus thuringiensis products. Some products with this MOA could contain live microbes, while others do not. Live pests will still be present for some time after applying a product that works in this way, since the pests die of starvation. Watch for feeding damage to stop or a reduction in insect numbers over time to know if the product is working.


Diagram – Three aphids on a leaf, two of which are exposed to blue diamonds. The aphids exposed to the diamonds stay the same size. Another aphid that was not exposed grows normally.
Stop growth – Some bioinsecticides (blue diamonds in this diagram) don’t kill insects and mites outright, but they can prevent them from molting and growing into the next life stage. Pests that can’t move on to the next life stage will eventually die.

Stop growth – stops pest from growing or molting; pest eventually dies

Biopesticides with this MOA may work against insect pests either by contact or ingestion and may only be effective against pests of certain ages or life stage. It depends on the biopesticide and pest. Examples include Venerate (Burkholderia spp. strain A396) and some products containing azadirachtin. Some products with this MOA could contain live microbes, while others do not. Products with this MOA will not kill pests immediately, but will prevent them from growing or molting. Watch for insect populations to decline over time, but do not expect pests to die immediately.


Diagram - Two yellow moths surrounded by blue diamonds. A red heart has a line through it.
Stop reproduction – Pheromones (represented here by blue diamonds) are a type of bioinsecticide that confuses insects looking for a mate. As a result, males and females can’t find each other, don’t mate, and females don’t lay eggs.

Stop reproduction – hampers pests’ ability to find a mate or produce eggs

The two main groups of biopesticides I know of with this MOA are (1) pheromones that make it hard for male and female insects to find each other, or (2) products that reduce the number of eggs female insects lay. Grandevo (Chromobacterium subtsugae strain PRAA4-1 and spent fermentation products) is an example of the later, but may not work in this way against all ages and species of pests listed on the label. The products I know of with this MOA do not contain live microbes. This mode of action will reduce insect populations in subsequent generations, not the current one. So use it on a pest with multiple generations per season, or in combination with other MOAs.


Things to keep in mind:

If the biopesticide contains live microbes, make sure you…

  • store the biopesticide correctly (and for the correct amount of time); check the label.
  • confirm compatibility of the biopesticide with other products before tank mixing or applying; read the label and contact the manufacturer with questions.

In addition, if the biopesticide contains microbes that need to stay alive for some period of time after application in order to be effective, make sure you also…

  • pay special attention to the recommended optimal environmental conditions for application; start by reading the label.

Remember!

  • Biopesticides are pesticides. Their labels are the law. Read the labels and follow them, along with other pesticide application laws in your state.
  • Not all biopesticides are permitted for use in certified organic production. Check with your certifier if you have questions.


Questions to ask when you are considering/purchasing a biopesticide

The manufacturer or dealer should be able to tell you:

  • How does it work (MOA)?
  • Is it alive? Does it need to stay alive to work?
  • Special instructions for storage or use? (e.g., temperature, spray tank pH, time of day)
  • Is it compatible (in the tank, greenhouse, or field) with other products in use (e.g., pesticides, fertilizers)?


Additional biopesticide Resources


This post was written by Amara Dunn, Biocontrol Specialist with the NYSIPM program.

Fall is for planting…these resources can help!

A mixture of plant seedlings in plots and trays sitting on a gravel surface
Cooler days and more moisture make fall a less-stressful time for transplanting perennials.

You’ve probably heard that fall is the best time to plant perennials (including seed for perennial wildflowers). Are you planning to start or expand a planting that supports pollinators and natural enemies of pests (beneficial insects) this fall? Trying to decide what to plant? I wanted to make sure you know about some resources from NYSIPM (some of them new this summer) that can help!

Who are you trying to attract?

Red lady beetle with black spots perched on a goldenrod plant
Some lady beetle species weed on pollen, in addition to aphids and other insects.

The good news is that flowers that produce lots of pollen and nectar and provide season-long blooms (usually as part of a mixed planting) will support a diverse group of both natural enemies that eat pests and pollinators. If you want to get a bit more specific than that, you might consider checking out:

  • Natural Enemies and What They Eat in the Field – Targeting a particular pest? This chart can help you determine which natural enemies will help.
  • (New!) Pocket Guide to Beneficial Insects – This guide was created for urban growers in New York City, but fortunately all of the beneficial insects in the Guide can be found throughout NY. It will help you recognize beneficial insects when you see them.

These resources are linked from this page. The NYSIPM website is in the process of migrating, and I’ll update this link once this page moves. You can also read about “friends in the garden” (natural enemies) that you’ll find on the ground and on plants or flying through the air in previous blog posts.

Picking plants

A raised bed containing a variety of different plants (with red, purple, yellow, or pink flowers) and labels naming each plant
Choosing a mixture of flowering plants can provide season-long blooms for beneficial insects.
  • Plants for Natural Enemies (full list) – A very large spreadsheet summarizing data from university research and extension resources; Everything I could find about individual plant species and which insects (especially natural enemies) they support.
  • (New!) Plants for Natural Enemies (2 pg handout) – Much shorter table listing 26 plants (perennials and annuals) that will support natural enemies (and pollinators); Bloom times are for central NY, and may vary in other locations (especially different USDA plant hardiness zones).

These resources are also linked from this page. And I’ve written a few blog posts about choosing plants (here and here).


What are you planting this fall?


This post was written by Amara Dunn, Biocontrol Specialist with the NYSIPM program.

Some great biocontrol events coming up!

Next week is full of great biocontrol events! If you are in the Geneva, NY area, don’t miss out!

Thursday August 11 5:30-7:30 PM

wildflowers growing in a field in the foreground, people standing and talking in the background
Participants enjoying last year’s Habitat for Beneficial Insects Open House.

We are in our 5th year of establishing perennial wildflowers and grasses to support pollinators and natural enemies of pests. Perhaps you’ve been following our progress (although admittedly I owe you all an update post or two). Or maybe you keep up with pictures on my Instagram. Now you can see these plots for yourself at our Habitat for Beneficial Insects Open House!

Come visit us any time between 5:30 and 7:30 PM. This outdoor event is free and no registration is required. Just put this address into your GPS:

1097 County Rd. 4
Geneva, NY 14456

Then look for these signs:

New York State IPM logo next to diagrams of a pink echinacea flower and a green Christmas tree

Funds for this project were provided by NYS Dept of Ag and Markets, the Towards Sustainability Foundation, and the USDA National Institute of Food and Ag.


Friday August 12, 5-7:30 PM

Researcher points to labeled rows of Christmas trees growing in a field, while meeting attendees watch
Bryan Brown talking about integrated weed management at last year’s event.

As part of a larger Christmas tree IPM project, we’re looking at using biopesticides applied to Christmas tree roots at planting to protect the young trees from root diseases (especially Phytophthora). We’re having a Field Day so that you can see both acres of Christmas trees we’ve planted and learn about early results from the project.

Please do register for this event using the “Field Day” link above!

Like the Habitat for Beneficial Insect Open House, put this address into your GPS:

1097 County Rd. 4
Geneva, NY 14456

Then look for these signs:

New York State IPM logo next to diagrams of a pink echinacea flower and a green Christmas tree

This work is supported by Agriculture and Food Research Initiative – Foundational and Applied Science Grant no. 2021-68008-34179/project accession no. 1025660  from the USDA National Institute of Food and Agriculture.


Saturday August 13, 10 AM – 3 PM

raised bed with wildflowers growing in it
This year we planted two new raised beds with perennials that support beneficial insects.

NYS IPM will be at Cornell AgriTech’s 140th Anniversary Open House talking about how to “feed your insect friends”…by creating excellent habitat for them, of course! This spring we planted two raised beds with a mixture of perennials selected to provide pollen and nectar from spring through fall. Come see how these new plantings are growing, learn more about beneficial insects and how to create your own habitat, and pick up some (temporary) tattoos of pest natural enemies! Then visit the rest of the educational displays at Cornell AgriTech.

Funding for our displays at this event is being provided by Cornell AgriTech and NYS Dept of Environmental Conservation.

Include biocontrol in your 2022 garden plans

Graphic of flowering plants and beneficial insects with the words Biological Control: Partners in the Garden March 15 and 16, 2022
Join us for this virtual conference!

I don’t know about you, but I can’t wait to get some seeds into potting mix and some plans for my garden on paper! While you’re planning your garden, why not join NYS IPM for our virtual conference? This year we’re talking about “Biological Control: Partners in the Garden” and we’ve got a great line up of speakers!

  • Carol Glenister form IPM Labs talks about looking for signs that natural enemies (biocontrol agents) are already at work in your garden
  • John Losey from Cornell University talks about everyone’s favorite biocontrol agent – ladybugs
  • NYS IPM staff will talk about biocontrol for weeds (is there any?), conserving our biocontrol partners in the garden, and more!
  • Mary Centrella from the Cornell Pesticide Safety Education Program will talk about proper use of pesticides to protect garden partners
  • Kyle Wickings will talk about using tiny worms (entomopathogenic nematodes) to deal with lawn grubs

The conference will take place the mornings of Tuesday and Wednesday March 15 and 16, with a special interactive workshop being offered (by yours truly) on Tuesday afternoon (1-3 PM). You’ll receive some pre-workshop materials to help you get the most out of the workshop, and leave with a plan to plant flowers that will feed and support natural enemies in your garden.

The conference is just a little more than a week away, so register soon! Pay what you can afford, and please reach out if the registration fee is a barrier. NYS IPM is committed to making this conference (and all of our resources) accessible.

This post was written by Amara Dunn, Biocontrol Specialist with the NYSIPM program.

EPNs: Good worms

light brown dead grub in a petri dish broken open and surrounded by hundreds of tiny, white, crescent-shaped nematodes
Insect-killing nematodes (tiny white crescent) emerging from a dead insect larva. Photo credit: Peggy Greb, USDA Agricultural Research Service, Bugwood.org

Nematodes are tiny worms. While some of them can damage plants, some prefer to eat insects, and these “good worms” (entomopathogenic nematodes is the technical term, but we can call them EPNs for short) can be helpful biocontrol agents. Teresa Rusinek (Cornell Cooperative Extension eastern NY Commercial Horticulture Program) wrote a guest blog post about her work testing EPNs for control of wireworms in sweet potatoes. Elson Shields (Cornell Entomology) has spent many years perfecting the use of persistent EPNs that are native to New York in agricultural fields where they control insect pests. Kyle Wickings is my go-to expert on using EPNs to manage white grubs in turf. A former graduate student in Kyle’s lab (Max Helmberger) made an amazing video describing the life cycle of EPNs. John Sanderson is the Cornell guru of greenhouse biocontrol (including EPNs for greenhouse insect pests).

So many people have developed so many great materials on EPNs, the purpose of this post is to point you to some of these great resources. Why re-invent the wheel? And if I’ve missed something, please let me know!

John Sanderson (Cornell University) has done some great work evaluating different EPN species for controlling insect pests in greenhouses. You can watch a webinar summarizing this work here.

Carol Glenister (IPM Laboratories) and Elson Shields (Cornell University) did a presentation on “Getting the Most Out of Beneficial Nematodes in Organic Production” for the UMass Amherst Extension Vegetable Program. You can watch the recording on YouTube, and you can read their answers to frequently asked questions online.

Screen shot of Grub ID homepage including the url: grubid.cals.cornell.edu
Proper identification is essential to good IPM, and Kyle Wickings’ Grub ID key helps you do just that.

Need help identifying your white grubs (a critical first step to using EPNs effectively in your lawn)? Kyle Wickings developed a simple key.

Are you concerned about grub damage in your home lawn? Put back that pesticide bottle, and start by scouting and identifying grubs, then apply some EPNs (only if you need them). You can find all the details here.

white grub on soil with a few grass plants nearby
Count how many white grubs you actually have per square foot (and identify them) before deciding if an EPN application would help.

If you are growing alfalfa, Elson Shield’s lab has all the information you need to successfully use EPNs to control alfalfa snout beetles, starting with an overview, and including detailed resources to help you be successful.

Wondering if EPNs can help you control fruit and vegetable insect pests? In consultation with my colleagues, I developed a summary of what we know about which fruit, vegetable, and ornamental pests you are likely to be able to manage with EPNs. More research is ongoing, so this list will continue to evolve.

This work is supported by NYS Departments of Environmental Conservation and Agriculture and Markets.

This post was written by Amara Dunn, Biocontrol Specialist with the NYSIPM program, but was only possible due to the great work done by colleagues. All images are Amara’s, unless otherwise noted.

IPM for establishing Christmas trees: Survival and growth in the first season

Rows of small Christmas trees growing in a field on a sunny afternoon; some are surrounded by wood chip mulch, some by cultivated ground, some by bare ground, and some by tall weeds.
The different weed management strategies we are comparing certainly look different in the field. But how do they impact tree growth and quality?

Back in June we introduced you to a new project comparing different methods for weed and root disease management when establishing Christmas tree seedlings. Recall that this is a collaboration among Bryan Brown, Amara Dunn, Brian Eshenaur, Betsy Lamb, and Lynn Sosnoskie. We wrapped up our first season in October, and we have a first look at some of the data. In this post, we’ll focus on tree survival and tree growth. There’s a lot more weed data!

Treatments

Let’s start with a quick reminder of the treatments we were comparing. Each row of 28 trees received the same weed management treatment. Each row was also divided into four plots of seven trees each. Each plot within a row received a different root treatment. Here’s a map of how the treatments were laid out in the field.

Weed management (in-row, within a 30” band around the row of trees; between row zones were seeded with grass and mowed 4 times) :

  • Cultivate – three times early in the season using a tractor drawn KULT Kress Argus Toolbar with sweeps, finger weeders, and a rear side-shift adjustment
  • Herbicide – conventional active ingredients (oxyfluorfen and pendimethalin applied shortly after planting, with a fall application of glyphosate) as a control treatment
  • Mow – mow about every two weeks with a walk-behind mower
  • Mulch – 3 inches of chipped shrub willow mulch
  • Untreated – No weed management at all

Root disease management:

  • ProPhyt (active ingredient: potassium phosphite) – a biopesticide applied by dipping bare roots of seedlings just before planting; mixed 1.28 fl oz in 2 gallons of water for 140 trees (11 fl oz/A if you plant 1,200 trees/A)
  • RootShield PLUS WP (active ingredient: Trichoderma harzianum Rifai strain T-22 and Trichoderma virens strain G-41) – a biopesticide applied twice (the day after planting and 7 weeks later) as a drench around each tree (24 oz/A in 171 gallons of water/A)
  • Subdue Maxx – a conventional fungicide applied twice (the day after planting and 5 months later) as a soil-directed spray (2.5 pt/A in 140 gal/A in a 6-inch band on either side of the row of trees). We made the application with a hand-pump backpack sprayer fitted with a TeeJet TTI11005 nozzle with a shield rotated parallel to the row of trees. The maximum pressure possible with this sprayer is 60 psi. After application, we applied an extra 0.45 gallon of water per plot of 7 trees with the same sprayer (280 gal/A additional water).
  • Water – 1 pt of water poured around each tree at planting, as a control.

What we measured

We’re interested in how the weed and root disease treatments impact survival, growth, and quality of these trees. Thanks to our excellent technicians, Marcus and Erik, for helping us measure all of these trees! Betsy and Amara were helping, too, but in this picture Amara is behind the camera.

A woman in a pink shirt comparing a small Christmas tree to a piece of paper, while a man in a plaid shirt measures the height of a small Christmas tree seedling; both are in a newly planted field with freshly tilled soil
Betsy and Marcus measuring trees and evaluating needle color in May.

On May 25 (about a week after planting) and again on October 6 we measured the height of each tree (from the soil to the tallest part of the tree, even if it wasn’t the leader anymore) and the diameter of the tree trunk 4 inches above the soil. In both May and October, we also rated the color of the needles using this scale. However, we only used: 2 (darkest green), 5 (medium green), 7 (paler green), and 9 (yellow or brown).

Of course, measuring and rating each tree also allowed us to take note of which trees had died (versus a few that unfortunately succumbed to “mower blight”).

What we found

Bar graph showing that trees generally survived better when treated with ProPhyt, except not if weeds were managed with herbicide. The impact of root treatment varied, depending on which weed management strategy was used.
Percentage of trees in each plot (out of seven trees total) that were still alive by October 2021, not counting a couple that were accidentally mowed. Each bar is the average of four plots for each combination of root treatment (color of bars) and weed management strategy (along x-axis). The lines on each bar show variability (one standard error above and below the mean value).

It’s too early to know for sure, but it’s possible that the root treatment that results in the best seedling survival might depend on which weed management strategy you use. For example, after just one year, the RootShield PLUS-treated trees did better than the ProPhyt-treated trees where herbicide was used, but not where the weeds were allowed to grow unchecked (‘Untreated’). We haven’t done a statistical analysis on the data, yet, but the little lines at the top of each bar are an indication of the amount of variability amongst the four plots in each treatment (one standard error above and below the mean percent survival, for those who might be interested).

Bar graph showing that trees might have grown slightly more when weeds were managed with herbicides. The impact of root treatment varied, depending on which weed management strategy was used.
Change in height of Christmas trees from May to October 2021. Each bar is the average of up to 28 trees (7 trees in each of 4 plots) for each combination of root treatment (color of bars) and weed management strategy (along x-axis). The lines on each bar show variability (one standard error above and below the mean value).

These Fraser fir seedlings grew between 1 and 2.5 inches during their first season. Much like the tree survival, the root treatment that produced the most growth wasn’t consistent across all weed management strategies. Results for tree trunk diameter were similar.

Bar graph showing that needle color might be slightly darker in the plots that were treated with herbicide or no weed management. The impact of root treatment varied, depending on which weed management strategy was used.
Average needle color when trees were rated in October. Lower numbers indicate darker green color. Each bar is the median value of up to 28 trees (7 trees in each of 4 plots) for each combination of root treatment (color of bars) and weed management strategy (along x-axis).

Recall that needle color was rated as 2 (darkest green), 5, 7, or 9 (most yellow or brown). So on this graph, shorter bars indicate better needle color. Also, this rating scale impacted how we summarized the data. Instead of taking the mean needle rating, we used the median. (Here’s a quick refresher on the difference.) And the graph doesn’t have those little lines to summarize the variability in each treatment. Too early to draw firm conclusions, but again, there might be some interactions between root treatment and weed management strategy.

What does it cost?

Economic risk is one of the risks we seek to reduce through IPM, so we’ve been keeping track of the costs associated with our pest management strategies. Based on the way we applied the root treatments and some local price estimates, here’s what we would have spent per acre for these treatments, assuming we planted 1,200 trees on each acre (that’s 6 ft x 6 ft spacing).


Fungicide Rate/A Number of applications Cost/A (Supplies) Cost/A (Labor1)
ProPhyt 11 fl oz2 1 $4 $1,037
RootShield PLUS WP 24 oz3 2 $123 $4,150
Subdue Maxx 2.5 pt3 2 $82 $2,074
Water 1 $0 $2,075

1We assumed a labor rate of $20/hr. These costs were calculated based on the time it took us to apply the products. This includes drenching each tree by hand (RootShield PLUS WP and water) and applying Subdue Maxx (and additional water to move it into the soil) with a backpack sprayer. On a larger scale, there’s surely a more efficient way to do this.

2Seedling roots were dipped in a ProPhyt solution prior to planting. The rate on the label is 4 pt/100 gallons of water. We mixed up 2 gallons of root dip solution (containing 1.28 fl oz of ProPhyt) to treat 140 trees. If we had used a fresh 2 gallons for every set of 140 trees, we would have used 11 fl oz of ProPhyt on an acre of 1,200 trees.

3Because RootShield PLUS WP was applied as a drench to each tree and Subdue Maxx was applied as a soil-directed spray banded on either side of the row, these rates are per acre of ground to which pesticide was applied. This is less than the total space taken up by these trees in the field. Read and follow the pesticide label for instructions on calculating quantity of product needed for banded applications.

And here’s a summary of our weed management costs. You can see all the details of these costs (including labor and supplies) here.

In-row weed management Cost/A (labor and supplies)
Cultivate $248
Herbicide $86
Mulch $1,153*
Mow $293
Untreated $0

*Assumes woodchips can be obtained locally at no cost

Take home

With only one season of data, it’s too early to draw conclusions about the effectiveness (or cost effectiveness) of each treatment. So far, survival of trees treated with ProPhyt is looking very good across most weed management strategies. And we’re seeing some indication that the best (in terms of tree survival, growth, or color) root treatment to use may vary depending on what you’re doing to manage weeds.

In late October we also dug up five dead trees and sent them to the Cornell Diagnostic lab to check for Phytophthora. The trees had been dead for a while, so they were only able to test for the presence of any Phytophthora species (which could include some that don’t cause disease on Christmas trees). Four out of five trees came back positive, which makes us feel more confident that we picked a good field for this trial…if by “good” you mean one where trees will be exposed to Phytophthora. For the purposes of this project, that’s exactly what we mean.

Please let us know if you have questions and stay tuned for more updates on this project. We’ve got at least two more years to go! You can check back on this blog (subscribe so you’ll know when new posts are available!), follow Lynn Sosnoskie and Amara Dunn on Twitter or on Instagram (@specialtycropweedscience and @biocontrol.nysipm), or check out Bryan Brown’s webpage. We’ll also be hosting another field event in 2022 and hope to provide updates at future Christmas Tree Farmers Association of NY meetings.

USDA logo, accompanied by the words: National Institute of Food and Agriculture, U.S. Department of Agriculture

This work is supported by Agriculture and Food Research Initiative – Foundational and Applied Science Grant no. 2021-68008-34179/project accession no. 1025660  from the USDA National Institute of Food and Agriculture.


This post was written by Amara Dunn, Biocontrol Specialist with the NYSIPM program, with helpful input from project collaborators. All images are hers, unless otherwise noted.