Tag Archives: mite

How do they work? Bioinsecticide edition

When an insect is treated with the right bioinsecticide, the insect stops damaging plants, and eventually dies.
Bioinsecticides include microorganisms and other naturally-derived compounds that control insect pests.

My post from last February described modes of action for biopesticides that target plant diseases…as well as the difference between a biopesticide and a biostimulant. January’s post described the modes of action of five biofungicides in an ongoing vegetable trial. But there are plenty of insect and mite pests out there, too. You can attract or release predatory or parasitic insects and mites or beneficial nematodes to deal with these arthropod (insect and mite) pests. But you can also use bioinsecticides that control insects and mites. The active ingredients include microorganisms (bacteria, fungi, viruses), plant extracts, or other naturally-occurring substances. Want to know how they work? Keep reading.

Bioinsecticides can have one (or more) of the following modes of action:

  1. Kill on contact
  2. Kill after ingestion
  3. Repel
  4. Inhibit feeding
  5. Inhibit growth
  6. Inhibit reproduction

The examples included in the following descriptions are reported either on the bioinsecticide labels or in promotional materials produced by the manufacturers. And these are just examples, not meant to be an exhaustive list of bioinsecticides with each mode of action.

Killing on contact

Tiny spores of insect-killing fungi land on the body of an insect, germinate, infect the insect, grow throughout its body, and eventually kill it.
Some bioinsecticides contain living spores of a fungus. These spores need to land on the insect. Then they germinate (like a seed), invade and grow throughout the body of the insect, and eventually kill it. If the humidity is high enough, the fungus may even produce more spores on the body of the dead insect.

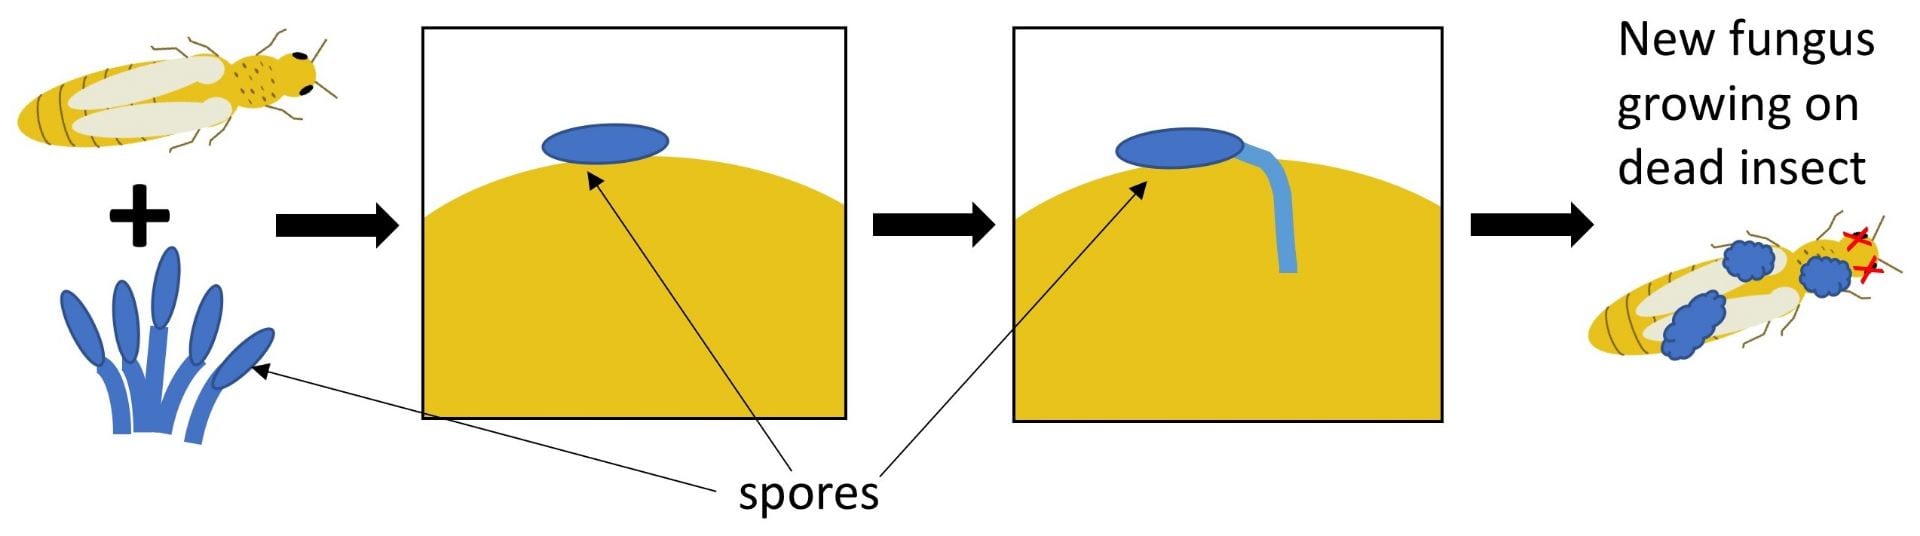
Some bioinsecticides need to directly contact the body of the insect or mite in order to kill it. Bioinsecticides that contain living fungi work this way. The tiny fungal spores land on the insect or mite pest, germinate (like a seed), and infect the body of the pest. The fungus grows throughout the pest’s body, eventually killing it. If the relative humidity is high enough, you might even see insects that look like they are covered with powder or fuzz (but this is not necessary for the pest to die). This powdery or fuzzy stuff growing on the pest is the fungus producing more spores. Bioinsecticides that contain the fungal species Beauveria bassiana (e.g., BotaniGard, Mycotrol), Metarhizium anisopliae or brunneum (e.g., Met52), or Isaria fumosorosea (NoFly) are examples of fungal bioinsecticides with contact activity.

An insect covered in the white powdery fungus that has started growing out of its body following infection.
If the relative humidity is high enough, insects infected with a fungus may start growing new fungus on the outside of their bodies, appearing fuzzy or like they are covered in powder. Photo credit: Louis Tedders, USDA ARS, Bugwood.org

Bioinsecticides that contain spinosad (including Entrust, SpinTor, and others) work because the active ingredient affects the nervous and muscular systems of the insect or mite, paralyzing and eventually killing it. It can kill the pest either through contact, or through ingestion (more on that in a moment). The bioinsecticide Venerate contains dead Burkholderia bacteria (strain A396) and compounds produced while growing the bacteria. One mode of action of Venerate is that it contains enzymes that degrade the exoskeleton (outer shell) of insects and mites on contact.

Killing by ingestion

Some bioinsecticides need to be eaten (ingested) in order to kill. Pesticides that contain the bacteria Bacillus thuringiensis (often called Bt for short) as the active ingredient are a good example. Proteins that were made by Bt while the bioinsecticide was being manufactured are eaten by insects and destroy their digestive systems. Several different subspecies of Bt are available as bioinsecticides, and the subspecies determines which insect pest it will be effective against. There are many bioinsecticides registered in NY that contain Bt as an active ingredient. Check NYSPAD for labels, and make sure you choose the right pesticide for the pest and setting where you need control. Bt products do not work on mites, aphids, or whiteflies.

A caterpillar eats a bioinsecticides that kills by ingestion. Later, the caterpillar dies.
Some bioinsecticides (blue diamonds in this diagram) will only kill pests if they are eaten first. Pesticides that contain Bacillus thuringiensis (Bt) bacteria or insect viruses are examples of this mode of action.

Insect viruses are another example of a bioinsecticide active ingredient that kills through ingestion. For example, Gemstar contains parts of a virus that infects corn earworms and tobacco budworms. Once these caterpillars eat the Gemstar, the virus replicates inside the pest, eventually killing it.

Repel

Some bioinsecticides repel insects from the plants you want to protect. However, this mode of action may only work on certain pest species, or certain life stages of the pest. Read and follow the label. Bioinsecticides containing azadirachtin or neem oil, and Grandevo are reported to have repellent activity for some pests. Grandevo contains dead bacteria (Chromobacterium substugae strain PrAA4-1) and compounds produced by the bacteria while they were alive and growing.

One leaf has been treated with a bioinsecticides that repels pests, but one leaf has not. The caterpillars are feeding on the leaf that was not treated.
Some bioinsecticides (blue diamonds and happy microbes in this diagram) protect plants because they repel insect and mite pests. This protects treated plants from pest damage.

Inhibit feeding

If you want insect and mite pests dead as soon as possible, I understand the sentiment. But in many cases stopping the pests from eating your plants would be just as good, right? Some bioinsecticides cause pests to lose their appetite days before they actually die. Like bioinsecticides that kill pests outright, some bioinsecticides that inhibit feeding require ingestion, while others work on contact. And these bioinsecticides may work this way for only certain pest species of certain ages. Read and follow those labels! Bioinsecticides containing Bt require ingestion and some can stop pest feeding before actually killing the pest. The same goes for Gemstar (corn earworm virus). This is another mode of action of azadirachtin products against some pests.

A caterpillar eats or comes in contact with a bioinsecticide that causes the caterpillar to stop feeding.
Some bioinsecticides (blue diamonds and happy microbes in this diagram) cause insect and mite pests to lose their appetites. Depending on the bioinsecticide, it either needs to contact the pest or be eaten by it.

Inhibit growth

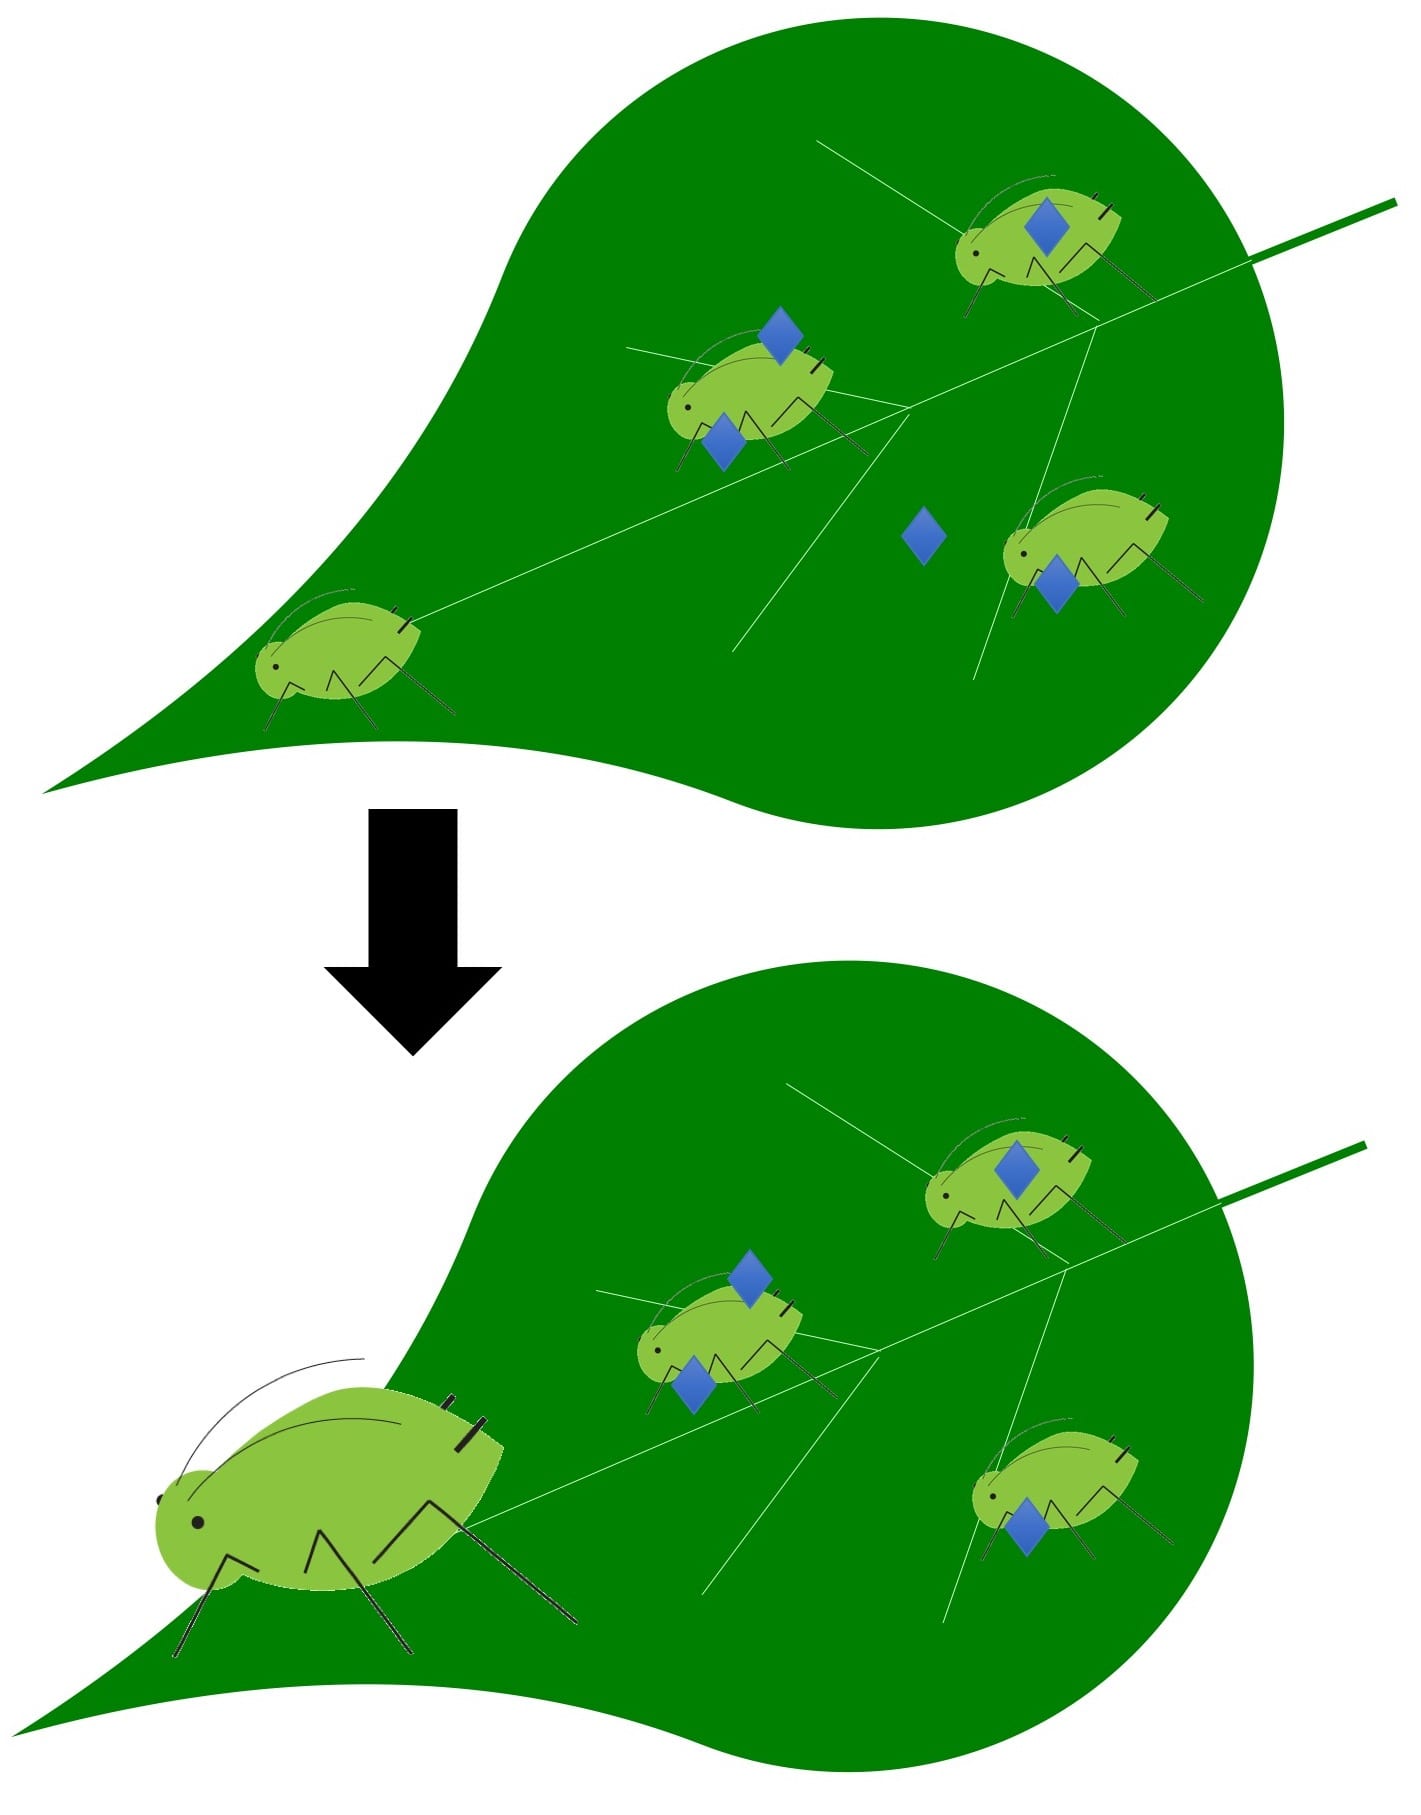
Many insects and mites need to molt (shed their skin as they go from one life stage to another). Bioinsecticides that interfere with molting prevent pests from completing their life cycle. Like feeding inhibitors, these bioinsecticides won’t directly kill the pests you have, but they can prevent them from multiplying. This is another mode of action (again, for certain pests at certain stages of development) listed for azadirachtin products and Venerate (Burkholderia spp. strain A396).

Some aphids were treated with a bioinsecticides that inhibits growth. They stay the same size. Another aphid that was not treated grows and molts normally.
Some bioinsecticides (blue diamonds in this diagram) don’t kill insects and mites outright, but they can prevent them from molting and growing into the next life stage. Pests that can’t move on to the next life stage will eventually die without completing their life cycle.

Inhibit reproduction

There are two main types of bioinsecticides that prevent or slow insect reproduction. Pheromones are compounds that confuse insects that are looking for mates. If males and females can’t find each other, there won’t be a next generation of the pest. Pheromones can be especially useful when the adults that are looking for mates don’t feed (e.g., moths). Isomate and Checkmate are two examples of pheromones available for certain fruit pests. Other bioinsecticides actually reduce the number of offspring produced by a pest. This is one of the modes of action of Grandevo (Chromobacterium substugae strain PRAA4-1) against certain pests.

Male and female moths are unable to find each other and mate because of the presence of pheromones nearby.
Pheromones (represented here by blue diamonds) are a type of bioinsecticide that confuses insects looking for a mate. As a result, males and females can’t find each other, don’t mate, and don’t lay eggs.

Why do I care?

Do you mean besides the fact that you are a curious person and you want to know how biopesticides work? Knowing the mode of action for the pesticide you use (among other things) allows you to maximize its efficacy. Does the bioinsecticide need to contact the pest, or be eaten by it? This determines where, when, and how you apply it. Do you want to use a bioinsecticide that inhibits growth of the pest? Make sure you use it when pests are young. (Sidenote: Like all biopesticides, bioinsecticides generally work best on smaller populations of younger pests.) Is the first generation of the pest the one that causes the most damage? Don’t rely on a bioinsecticide that inhibits reproduction. Although if the pest overwinters in your field and doesn’t migrate in, maybe you could reduce the population for the next season.

Now is a great time of year to consider the insect and mite pests you are likely to encounter this season, then learn which bioinsecticides include these pests (and your crop and setting) on the label. Always read and follow the label of any pesticide (bio or not). How do you know whether these bioinsecticides are likely to work in NY on the pests listed on the label? That’s a topic for another post. In the meantime, the Organic Production Guides for fruit and vegetables from NYS IPM are a great place to start. When available, they report efficacy of OMRI-listed insecticides (including some bioinsecticides). Your local extension staff are another great resource.

Creating habitat for beneficial insects – early summer 2018 project update

Betsy, Deb, and Brian transplanting native wildflowers and grasses that will provide habitat for beneficial insects
Dr. Betsy Lamb, Deb Marvin, and Brian Eshenaur (left to right) transplanting native wildflowers and grasses on the edge of a research Christmas tree planting at Cornell AgriTech in Geneva, NY. These plants will provide food and shelter for pollinators and natural enemies of pests.

As I mentioned in my January post, I am excited to be working with two NYS IPM colleagues (Dr. Betsy Lamb and Brian Eshenaur) to demonstrate the costs, labor, and effectiveness of different methods for establishing habitat plants for pollinators and other beneficial insects. Remember, habitat for pollinators is also habitat for insects and mites that are natural enemies of pests on your farm or in your garden. Thus, planting for pollinators enables you to practice conservation biocontrol. These demonstration plots are located around a new research planting of Christmas trees at Cornell AgriTech at the New York State Agricultural Experiment Station in Geneva, NY. What we learn from this project can help you choose the best way to establish your own beneficial habitat (on your farm, around your home, near your school, etc.)

We are comparing 6 different methods of establishing habitat for beneficial insects, plus a control (Treatment E). Treatment E plots were sprayed with herbicide last fall and this spring, and will be mowed once this year. A summary of the plan for the other treatments is below.

List of treatments in this study. Each treatment is a different method for establishing habitat for beneficial insects
Comparing different methods for establishing plants that provide habitat and food for beneficial insects (pollinators and natural enemies of pests). Treatment E is the control.
seeds for plants that will provide habitat for beneficial insects
Native wildflower and grass seeds (A) were mixed with boiled rice hulls (B) to make them easier to broadcast (C). Much of what you see on the soil surface is just the rice hulls, but there are a few seeds that will hopefully grow into habitat for beneficial insects.

Because of when spring tillage occurred, plots that were scheduled to be tilled in the spring did not need a second herbicide application. About a week after spring tillage, Treatment C plots were direct seeded. I hand-broadcast a mixture of native wildflower and grass seeds at a rate of half a pound per 1,000 square feet. This worked out to be 26 g of seed for each 5-foot by 23-foot plot. To make it easier to broadcast such a small amount of seed, I first mixed the seed for each plot with about 3 cups of boiled rice hulls. After raking the seed in gently with a garden rake, I stomped the seed into the ground to ensure good contact with the soil. In a larger plot, you might use equipment like a cultipacker or lawn roller to achieve the same result.


young buckwheat plants
Two weeks (and three-quarters of an inch of rain) after seeding, buckwheat is establishing. It will hopefully crowd out weeds that would otherwise grow in these plots over the summer.

I broadcast (again, by hand) buckwheat seeds in the Treatment D plots at a rate of 70 pounds per acre (84 g for each of these small plots), and raked them in on May 31st. If the buckwheat establishes well, it will smother weeds during the summer, and we can mow and transplant into these plots in the fall. We plan to mow this crop of buckwheat when it starts flowering and then reseed it, for a total of two buckwheat plantings this summer.


We transplanted by hand 15 species of wildflowers and 1 grass species into plots assigned to Treatments A and B on June 4th. Because we were able to transplant right after it rained, it wasn’t too difficult to plant into the untilled plots (Treatment A). Some of them still had some stubble from the cover crops and weeds that had been growing in this field last year, and were killed by fall and spring herbicide applications.

Young wildflower and grass plants transplanted into untilled soil.
Native wildflowers and grasses transplanted into untilled soil. Some dead weeds and cover crop still remain on the soil surface.

The day after we transplanted into Treatment B plots, we mulched the plants to a depth of about 3 inches to (hopefully) control weeds for the rest of the summer while the habitat plants get established. We used chips from shrub willow because they were available, but other types of mulch would work, too.

wildflower and grass plants surrounded by mulch for weed control
These wildflowers and grasses will have help out-competing weeds from 3 inches of willow chip mulch.

Finally, we laid clear high tunnel plastic over the plots receiving Treatment F. Ongoing research from the University of Maine suggests that soil solarization can be an effective form of weed control, even in the northeast. So we’re giving it a try! To maximize the efficacy of this technique, we laid the plastic when the soil had been tilled relatively recently, and was still very moist. To keep the plastic firmly in place for the whole summer, we rolled the edges and buried them 4-5 inches deep, then stomped the soil down around all the edges. In the fall, we will hand broadcast a mixture of native wildflower and grass seeds over these plots (same mix as Treatment C).

a trench being dug around the edge of a plot to bury the edge of a sheet of clear plastic
Deb Marvin and Brian Eshenaur (left to right) dig a trench to bury the edge of this sheet of clear plastic. The goal is weed control by soil solarization.

We’ll give weed seeds in the Treatment G plots a few more weeks to germinate and grow (depending on the rain). Then we’ll kill them with an herbicide, and till these plots again to induce more weed seeds to germinate. Then we will repeat the herbicide application, till again, and so on. This should reduce the weed seed bank in the soil over the course of the summer. After a final tillage in the fall, we will broadcast seed from the same wildflower and grass mix we used for Treatment C. Fall is the recommended time for direct seeding beneficial insect habitat in the northeast. This treatment will also have the advantage of a full season of weed control prior to planting (also recommended). The downside is that it will take longer to establish the beneficial insect habitat.

As we get these plots established, we’re keeping track of the time spent on each treatment and the costs of materials. In the late summer or fall, Dr. Bryan Brown will assess weeds in each treatment, and I will photo document how well our beneficial insect habitat plants have established in each plot. All of these data will help you choose the method that fits your timeline, budget, and equipment/labor availability. Stay tuned for more updates…including an invitation to a field day (not this year), so that you can come see the results of this project for yourself!


This work is supported by:

  • Crop Protection and Pest Management -Extension Implementation Program Area grant no. 2017-70006-27142/project accession no. 1014000, from the USDA National Institute of Food and Agriculture.
  • New York State Department of Agriculture and Markets

But does it work? Efficacy of biological control

yellow sticky card for monitoring insect pests in a greenhouse
Biocontrol should be preventative. This yellow sticky card lets you monitor which pests are present and when so that the correct biocontrol (or other management tool) can be used at the right time. It will also help you assess whether your management strategy is working.

If you are thinking about trying biological control, of course you want to know if it is effective. The short answer is, “Yes!” But of course it depends on which biocontrol organism you want to use (and how), which pest you want to manage, and where.

First, you should ask yourself a question: What do I hope to achieve? Some great reasons to use biocontrol for pest management include:

  • Protecting the environment and human health by using more environmentally-friendly pest management strategies
  • Reducing the number of chemical pesticide applications to a crop
  • Preventing (or dealing with) pesticide resistance
  • Meeting a need for a short REI (re-entry interval) or PHI (pre-harvest interval) on the crop
  • Biocontrols are the most effective (and cost-effective) management strategy (definitely true for some pests and settings!)

Second, in what context are you using biocontrol? Biocontrol is best used within a larger integrated pest management strategy. Are you using good sanitation and cultural practices (e.g., adequate but not excessive nutrition and water) that promote healthy plants? Are you regularly checking your plants so that you will notice pests when they are still infrequent (scouting)?

peppers in flooded field
Biocontrol should be used as part of an IPM plan. The excess rain and poorly-drained soil in this field make it unlikely that a biocontrol will be able to protect these peppers from a soil-borne disease.

Biocontrol should also be preventative (before pest pressure becomes high). If you are expecting to use only biological control to solve an already out-of-control pest problem, you will probably be disappointed. Similarly, if environmental conditions are very favorable for a pest, a biocontrol solution will probably be insufficient.

Each year, university researchers, extension staff, and private companies conduct efficacy trials to quantify how well pest management strategies work. Knowing how a biocontrol product/organism performed in these trials can help you decide if you want to try it on your farm or in your yard. It helps to know a little about how these trials are structured. Efficacy trials typically include some combination of the following types of control treatments:

  • non-treated control – plants are exposed to pests (either naturally, or deliberately by the researcher), but no pest management strategy is used; disease/damage severity should be highest in this treatment
  • chemical control – plants are exposed to pests, and a chemical pesticide is applied to manage the pest; sometimes an “industry standard” (what is typically used to manage that pest in that crop and setting) is designated by the author of the study; if no industry standard is designated, comparisons can still be made to the chemical treatment that worked best; disease/damage severity should be very low in this treatment
  • non-inoculated control – no pest pressure (i.e., plants were not deliberately exposed to the pest); sometimes disease or damage still occurs because of natural pest pressure, or because disease or insects spread from other treatments in the trial; disease/damage severity should be lowest in this treatment

Efficacy trials also include statistical analysis. In a nutshell, this analysis tells you whether two values are really different (often described as “statistically different”), or not. If two numbers are not statistically different from each other, it means that only by chance is one larger or smaller than the other. If you did the same experiment again, you might see a different relationship. One common way of expressing these differences is by using letters. If two treatments are assigned the same letter, then they are not statistically different. So in the example below, Bio1 is statistically different from Bio3 but neither Bio1 nor Bio3 is different from Bio2.

graph of sample efficacy trial results
An efficacy trial may compare biocontrol products (Bio1, Bio2, Bio3, and Bio4) to non-treated (high disease/damage), chemical (low disease/damage), and non-inoculated (low disease/damage) controls.


When interpreting an efficacy trial, you should compare a biocontrol of interest to the control treatments. Of course, it would be great to see biocontrol products that are just as effective as the chemical control (like Bio4), and sometimes they are. Sometimes, a biocontrol may be less effective than the chemical control, but more effective than taking no pest control action (like Bio3). Sometimes there’s so much variability (represented by the lines extending above and below the blue bars on the chart, called error bars), that a biocontrol product is not statistically different from either the non-treated control, or the chemical control (like Bio2). This makes it difficult to draw conclusions about how well the product worked.

But, it’s not always quite that simple. For example, in these efficacy trials, researchers deliberately expose plants to pests, and often they manipulate the environment to favor pest populations. For example, they might over-water plants to promote a soil-borne disease like damping off. While there can be value in assessing product efficacy in a “worst case scenario”, this may be much higher pest pressure than you are likely to encounter on your farm or in your yard. When looking at efficacy trials, you should consider:

  • How much disease/damage was observed on plants that were not protected in any way (non-treated control)? If it’s too low, it’s hard to be confident that the biocontrols being tested were effective, since even unprotected plants were pretty healthy.
  • How much did the most successful treatment (chemical control) reduce disease/damage? If even the “best” pest management strategy in the trial was not very effective, then pest pressure may have been too high, and it’s not surprising that the biocontrol was ineffective. If you practice good IPM, you likely won’t experience such high pest pressure.
  • How was the biocontrol applied (alone, or as part of a spray program with other products)? Applying single products in an efficacy trial can simplify interpretation, but may not mimic how you plan to use a biocontrol product. If a biocontrol was applied in combination with other products, you should compare the “biocontrol + other products” treatment to the “other products alone”  treatment to see what the biocontrol added to pest management.
  • What was your goal, again? For example, if you are hoping to replace one or two chemical applications in a larger spray program with a biocontrol, then a moderately effective biocontrol product (like Bio3) may meet this goal.

Because the efficacy of a biocontrol can depend a lot on the environment in which it is used (temperature, humidity, soil conditions, etc.), it’s also a good idea to initially try a new biocontrol in a small area of your farm or yard, and keep notes on what you did and how well it worked for you. You can modify your plan to find what works best for you. The manufacturer or distributor should be able to provide you with important details on how (and for how long) the biocontrol should be stored, and exactly how and when to apply it. And (as always!) if you are using a biocontrol that is also a pesticide (see previous post), make sure that you read, understand, and follow the label.

The following resources summarize efficacy results for biocontrol of plant diseases. As I find efficacy summaries of insect and mite pest biocontrol, I will add them. Or, feel free to suggest efficacy resources you know of in the comments!