Category Archives: IPM

Biopesticide modes of action

Diagram showing an unhappy-looking caterpillar that has stopped eating a leaf. Blue diamond shapes and pale blue rectangles with smiling faces are also on the leaf.
Biopesticides include microorganisms, plant extracts, and other naturally-derived compounds that control pests.

Biopesticides are one aspect of biological control. The active ingredients in biopesticides include microorganisms (microbes), plant extracts, and naturally-occurring chemicals (like potassium bicarbonate). As a result, some of the ways they control pests (their modes of action or MOAs) are different from conventional, synthetic chemical pesticides. Also, many of them have several MOAs, and not all MOAs apply to all pests listed on the label. If a biopesticide contains live microbes, and especially if its MOA requires the microbes to stay alive on the plant for some period of time after application, this also has important implications for how the product is stored and applied. Understanding the mode of action of a product will help you get the most out of it.

I like to break down biopesticide MOAs into the following categories:
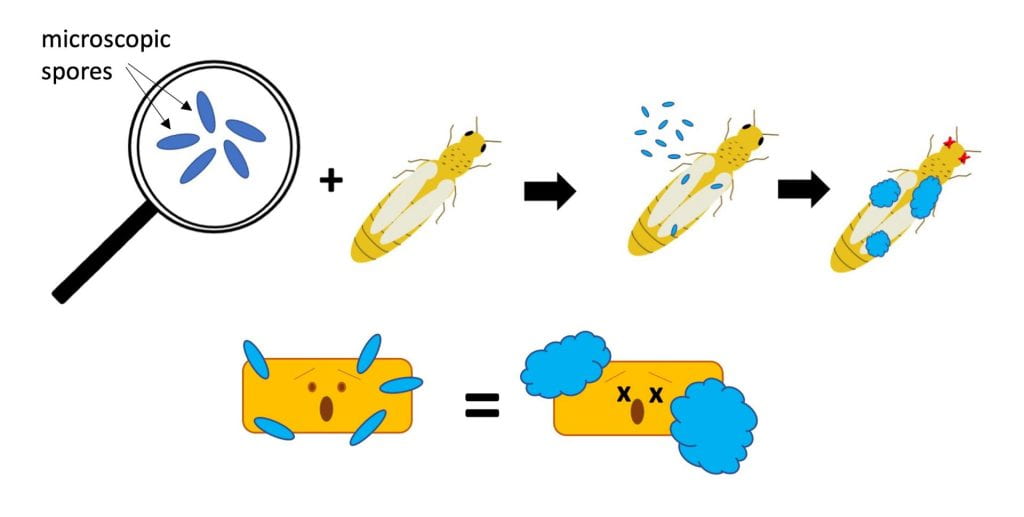
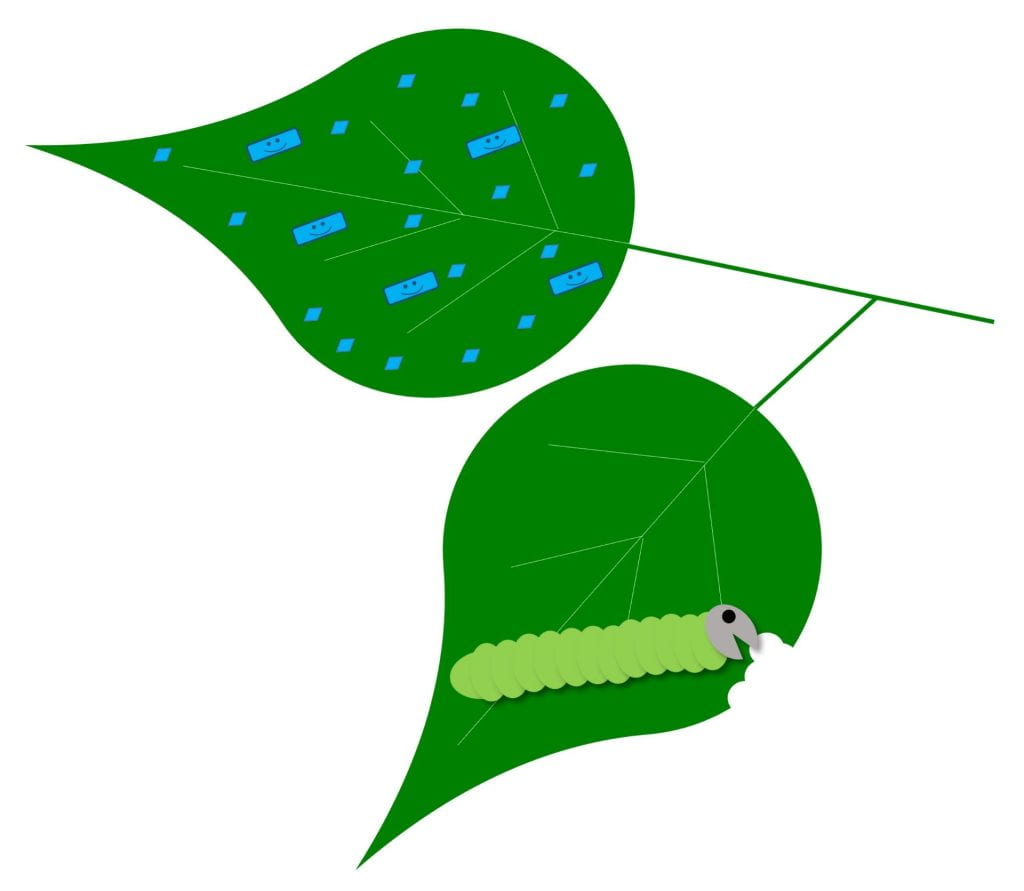
Diagrams - Tiny spores of insect-killing fungi land on the body of an insect, germinate, infect the insect, grow throughout its body, and eventually kill it. Below, a diagram shows blue spores contacting a yellow rectangle with a frightened face, representing a pathogen. The spores grow and kill the pathogen.
Eat – Some biopesticides contain living spores of a fungus (blue). These spores need to land on the insect pest or plant pathogen (yellow rectangle). Then they germinate (like a seed), invade and grow, eventually killing the pest. If the humidity is high enough, the fungus may even produce more spores and spread to other pests.

Eat live microbe grows on/in pest

Biopesticides with this MOA can work against insect pests (e.g., products that contain Beauveria bassiana) or plant diseases (e.g. Contans, which contains Paraconionthyrium minitans strain CON/M/91-08). Many biopesticides with this MOA contain fungal spores. These spores will germinate once they land on the insect or disease-causing pathogen, and may have temperature and/or humidity requirements for germination. Make sure you store the product correctly, confirm compatibility with other products before tank mixing or applying, and apply under recommended environmental conditions.


Diagram - A caterpillar eats and is sprayed with a bioinsecticide (blue diamonds), and then dies. Plant pathogens (yellow rectangles) are poisoned by biopesticide microbes (blue rectangles) and the antimicrobial compounds they produce (blue droplets).
Poison – Some biopesticides (blue diamonds or blue smiling rectangles with droplets) work much like conventional chemical pesticides. They directly kill or otherwise inhibit the insect pests (like this caterpillar) or plant pathogens (yellow rectangles with frightened faces) when they contact it or are eaten by it.

Poison – biopesticide (or its products) kills the pest directly

Biopesticides with this MOA can work against insect pests (like products containing Bacillus thuringiensis) or plant diseases (e.g., Double Nickel containing Bacillus amyloliquefacies strain D747, or products containing potassium bicarbonate). Obviously, potassium bicarbonate products do not contain live microbes. Some biopesticides that poison pests do have live microbes that continue to produce antimicrobial products after they are applied. Others work because of the compounds the microbes produced while the biopesticide was being made.


Green leaves covered with smiling blue rectangles. Yellow rectangles with angry faces are next to the leaves.
Keep out – Some biopesticides contain microbes (blue smiling rectangles) that grow on the plant. These beneficial microbes use up space and nutrients so there is no room for the pathogen (angry yellow rectangles.

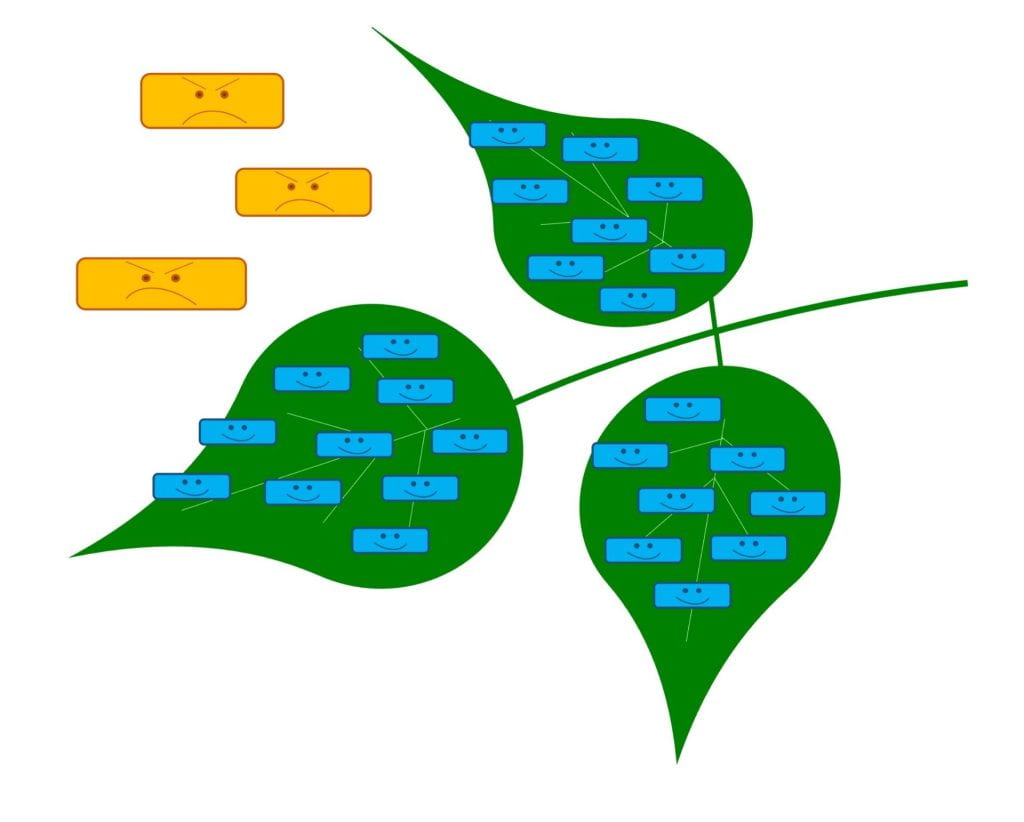
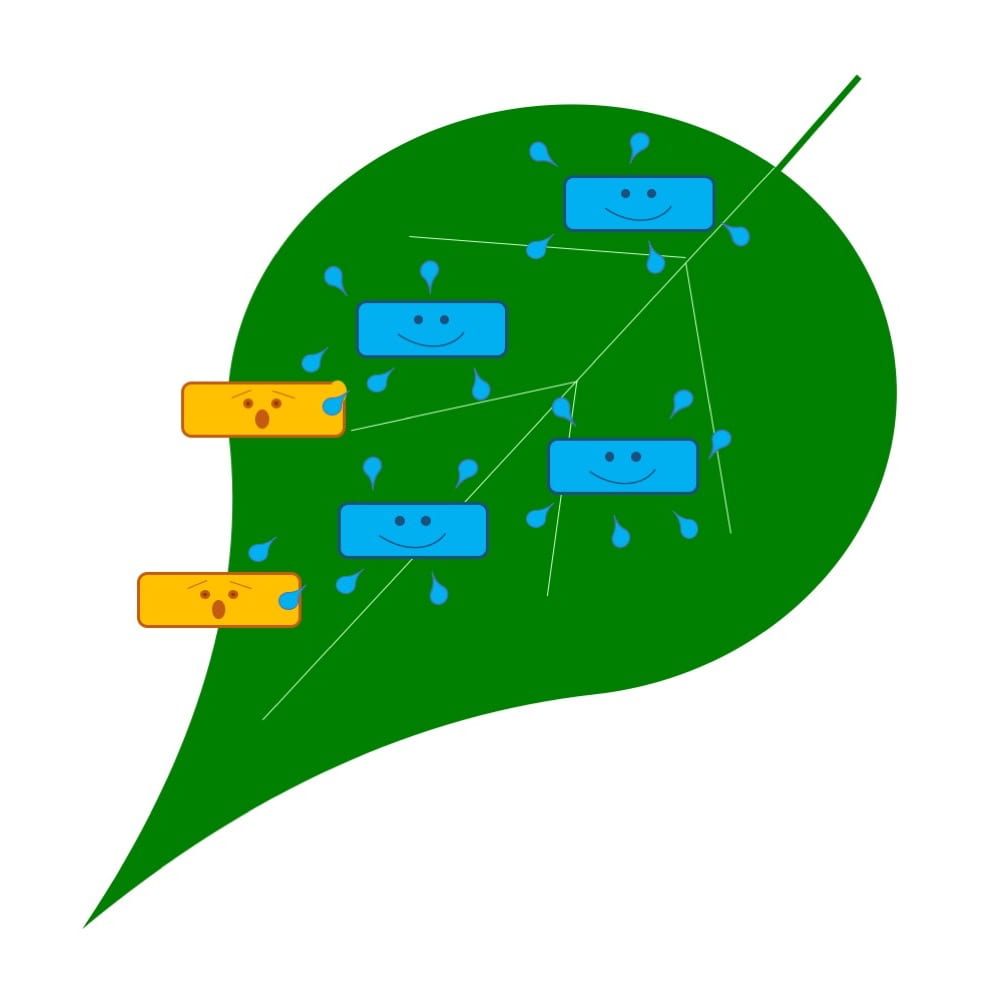
Keep out – live microbe grows on plant, leaving no room for pests

Biopesticides with this MOA can work against plant disease (e.g., Actinovate which contains Streptomyces lydicus WYEC 108, or Serifel, which contains Bacillus amyloliquefaciens strain MBI 600) and may be bacteria or fungi. The microbes in biopesticides with this MOA must be alive when applied and need to be able to grow on the part of the plant that is being protected.


Diagram of a plant with blue smiling rectangles on both leaves and roots. Little yellow lightning bolts surround the roots and leaves.
Turn on resistance – Some biopesticides contain microbes (blue smiling rectangles) or other natural compounds that activate the plants defense system, so that it’s ready when it encounters a pathogen.

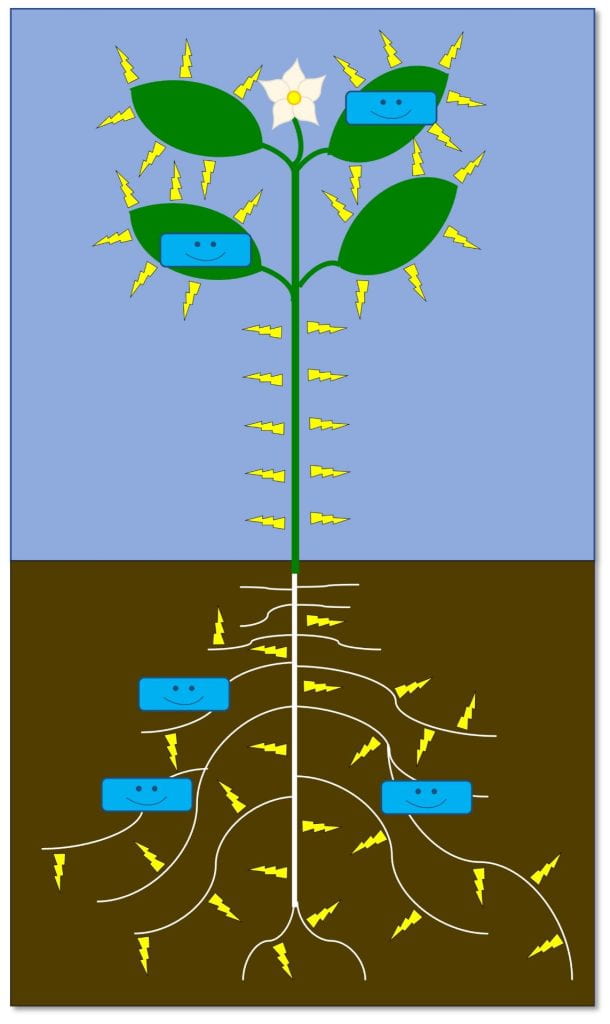
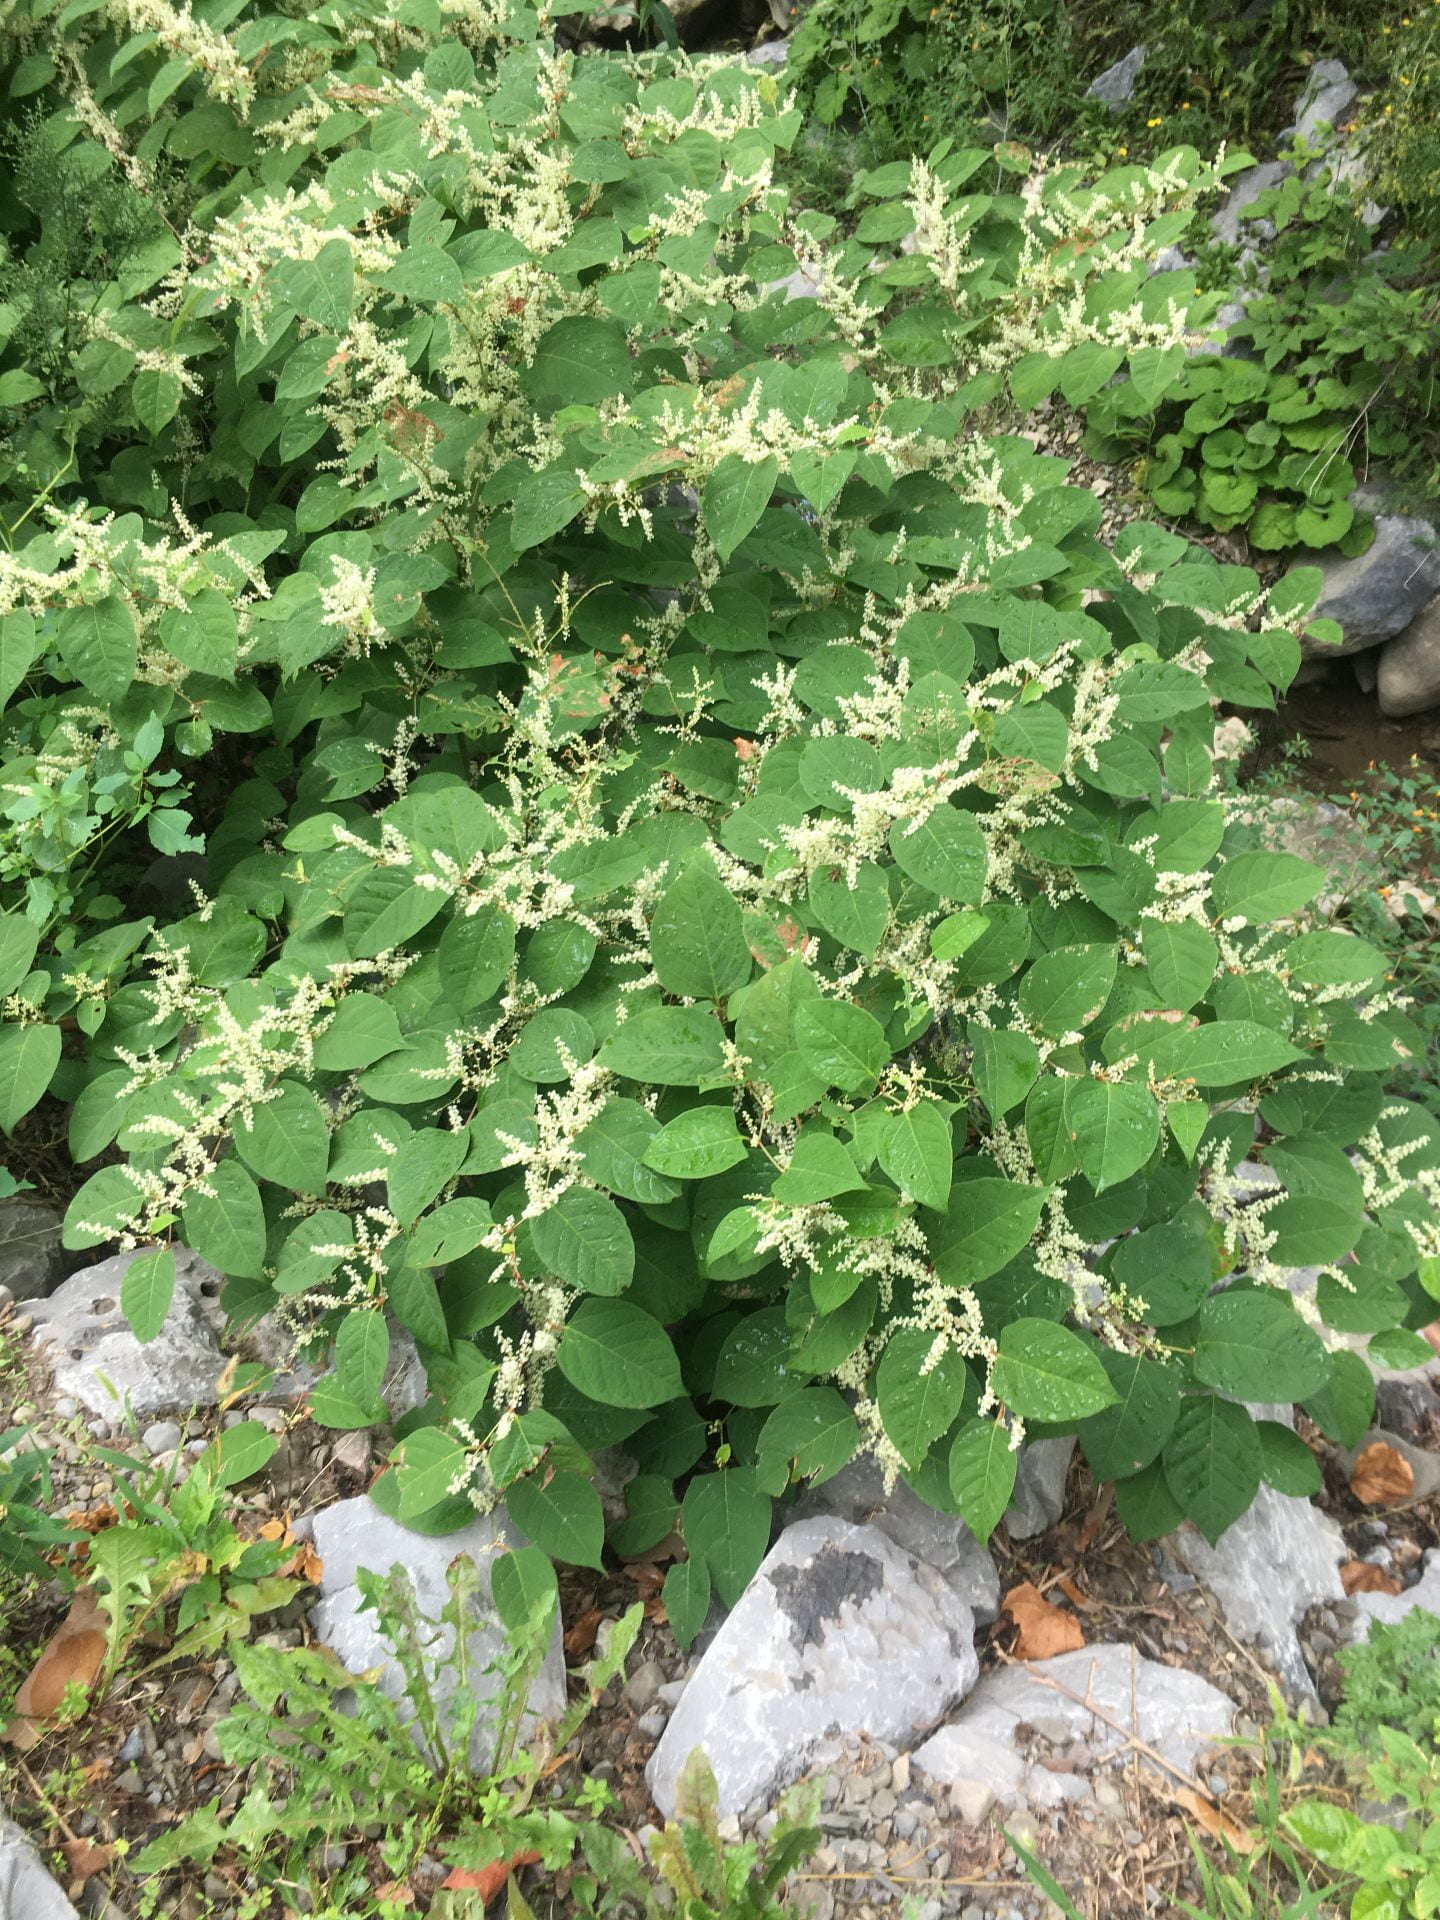
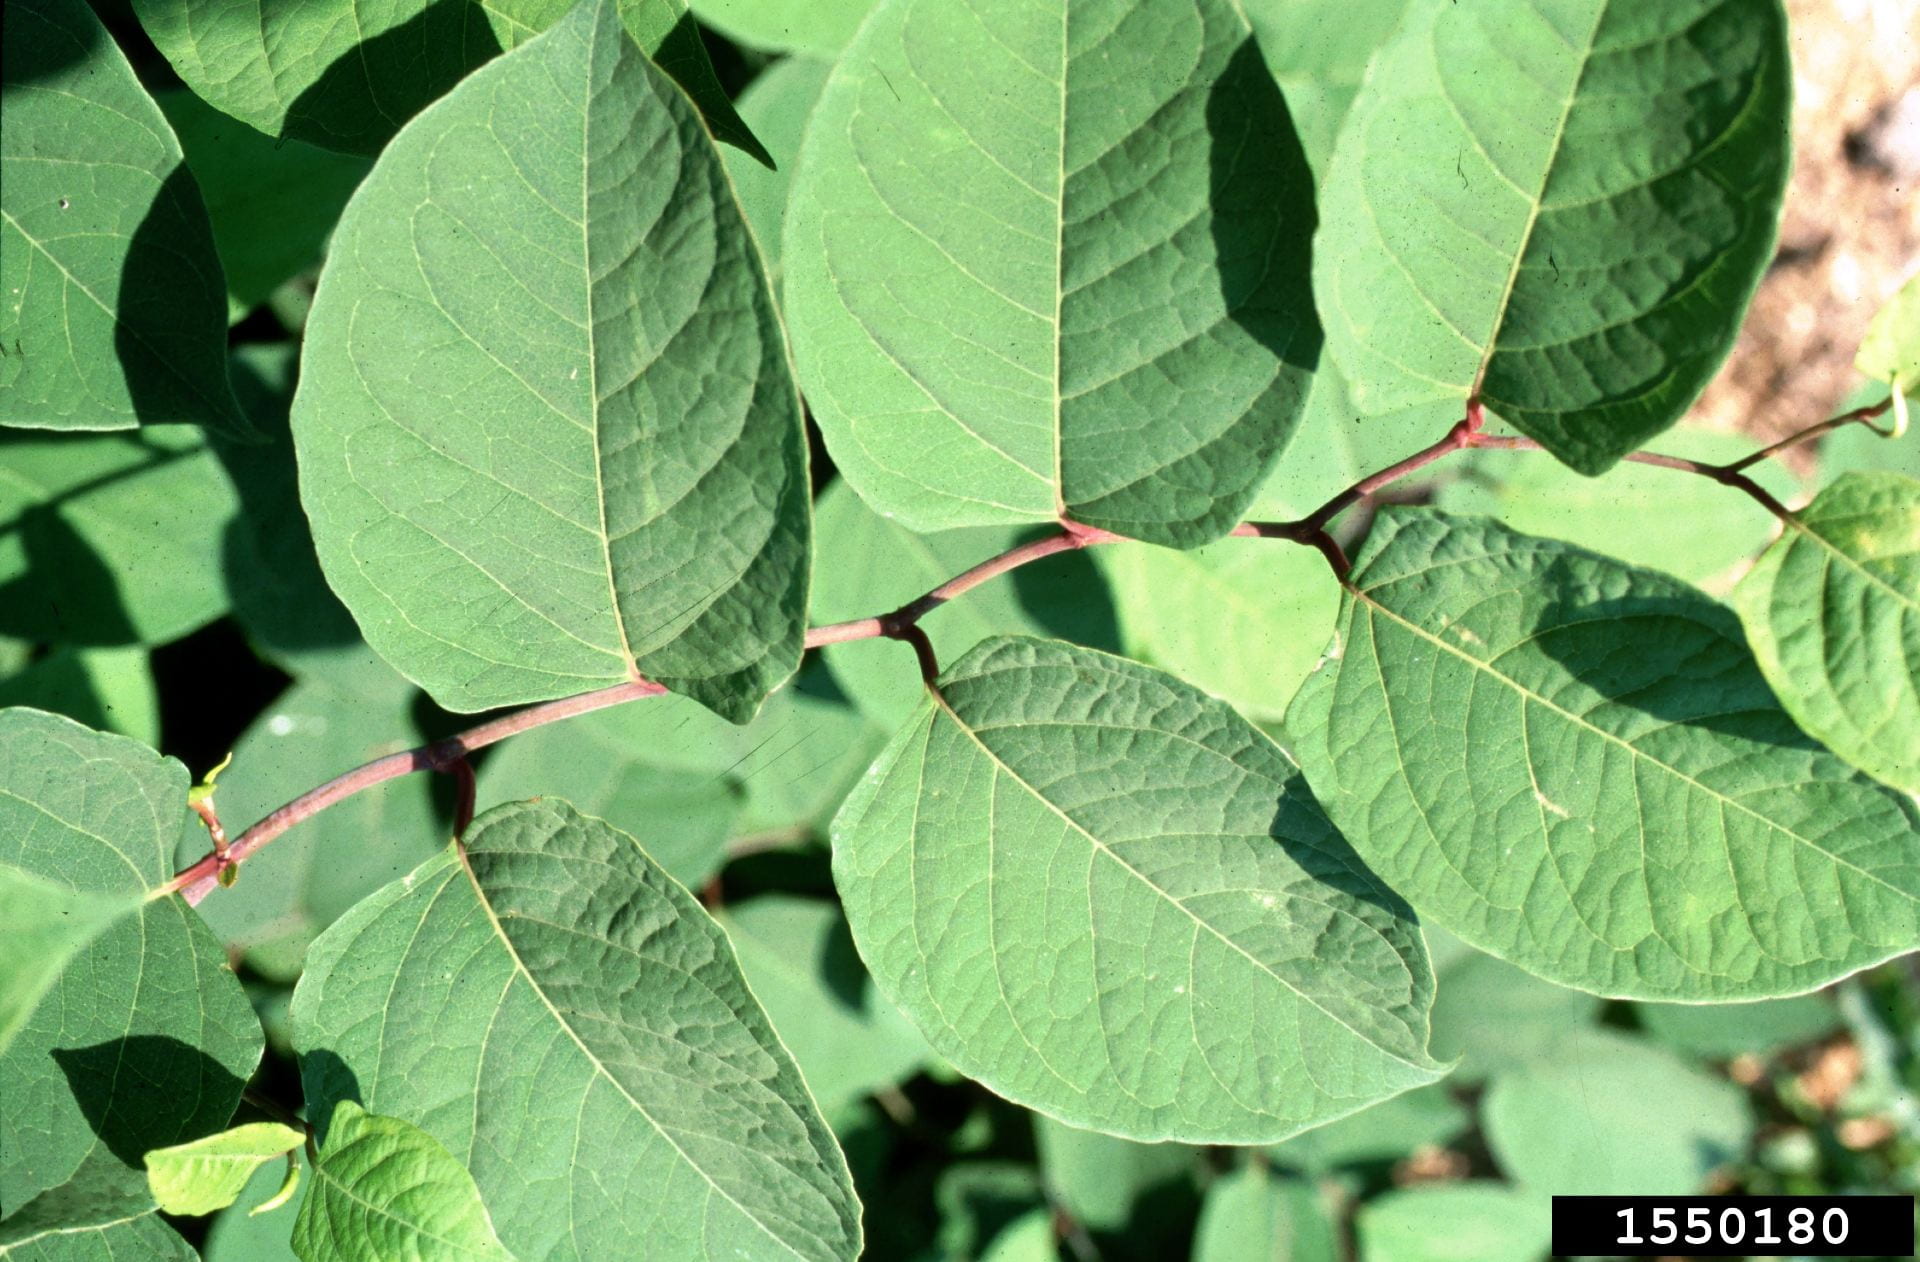
Turn on resistance – turns on the plant’s defenses before pest attacks

As far as I know, these biopesticides only work against plant diseases, but as new products are developed, or as we learn more about existing biopesticides, this may change. Some examples include Regalia (giant knotweed extract) and Lifeguard WG (Bacillus mycoides isolate J). Some of these products contain live microbes that need to stay alive (like LifeGard), while others do not. These biopesticides need to be applied before infection.


Diagram - The plant on the left has no smiling blue rectangles on leaves or roots. The plant on the right has these blue rectangles on roots and leaves and is larger.
Grow strong plants – Some biopesticides contain microbes (blue smiling rectangles) or other natural compounds that enable the plant to grow stronger and healthier. As a result, the plant can better withstand attack from a pest.

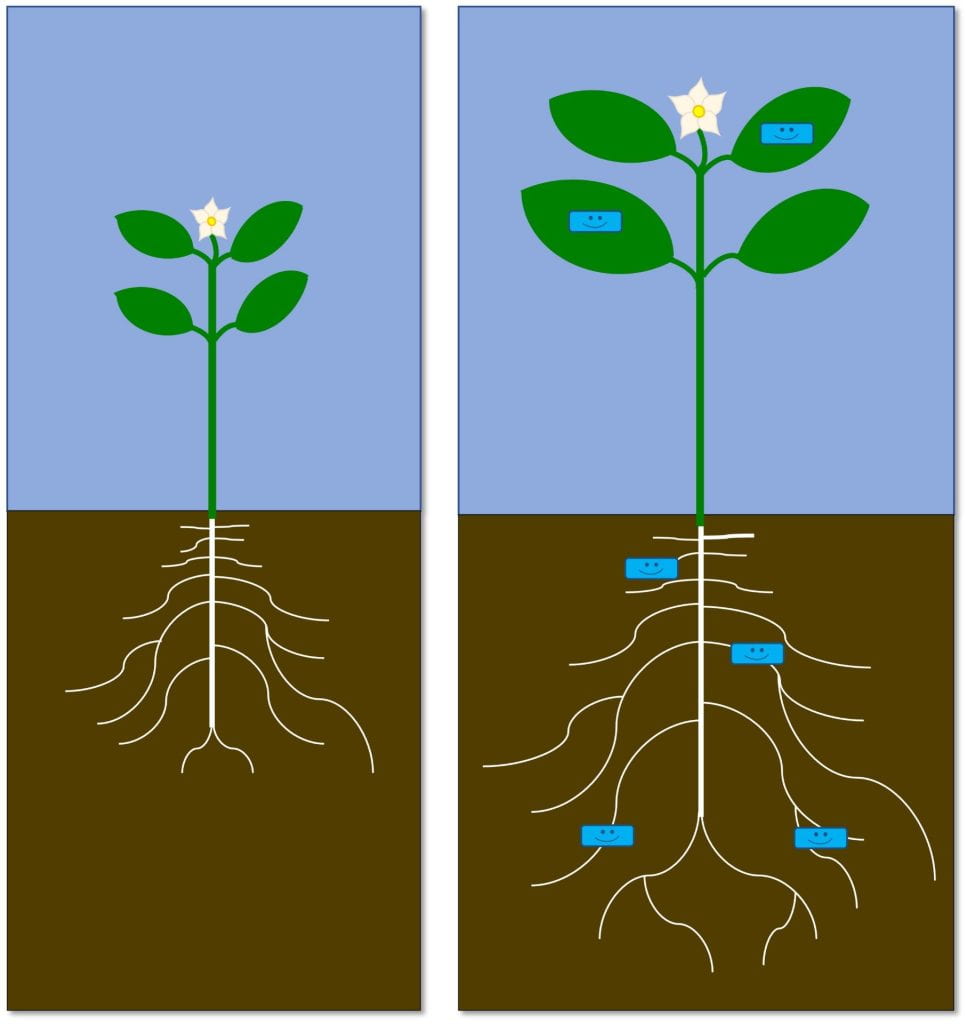
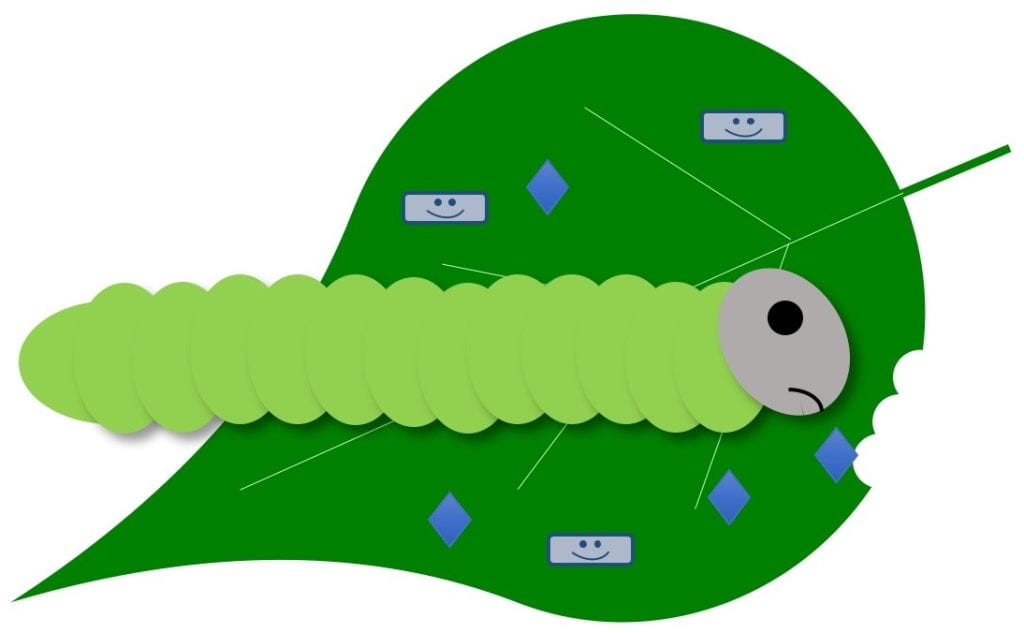
Grow strong plants – makes plant stronger, healthier, more resilient

These biopesticides primarily work against plant diseases. Some examples include: Serenade (Bacillus subtilis strain QST 713), RootShield (Trichoderma harzianum), and Sil-Matrix (potassium silicate). Some of these products contain live microbes that need to stay alive, while others do not (e.g., Sil-Matrix). These biopesticides need to be applied before infection.


Diagram - One leaf is covered with blue diamonds and smiling rectangles (bioinsecticide), but the other is not. The caterpillar is feeding on the leaf that has no bioinsecticide.
Repel – Some bioinsecticides (blue diamonds and blue rectangles with smiling faces) protect plants because they repel insect and mite pests.

Repel – pest avoids plants treated with biopesticide

Biopesticides with this MOA can work against insect pests, but perhaps only on certain insect life stages. Some products with this MOA could contain live microbes, while others do not. You can evaluate the effectiveness of products with this MOA, not by scouting for dead insects, but by looking for reduced damage or lower insect populations on treated plants. Examples include: Grandevo WDG (Chromobacterium subtsugae strain PRAA4-1 and its spent fermentation products) and products containing azadirachtin.


Diagram - A caterpillar eats or comes in contact with a bioinsecticide, and then stops feeding.
Stop feeding – Some bioinsecticides (diamonds and rectangles on the leaf) cause insect and mite pests to lose their appetites.

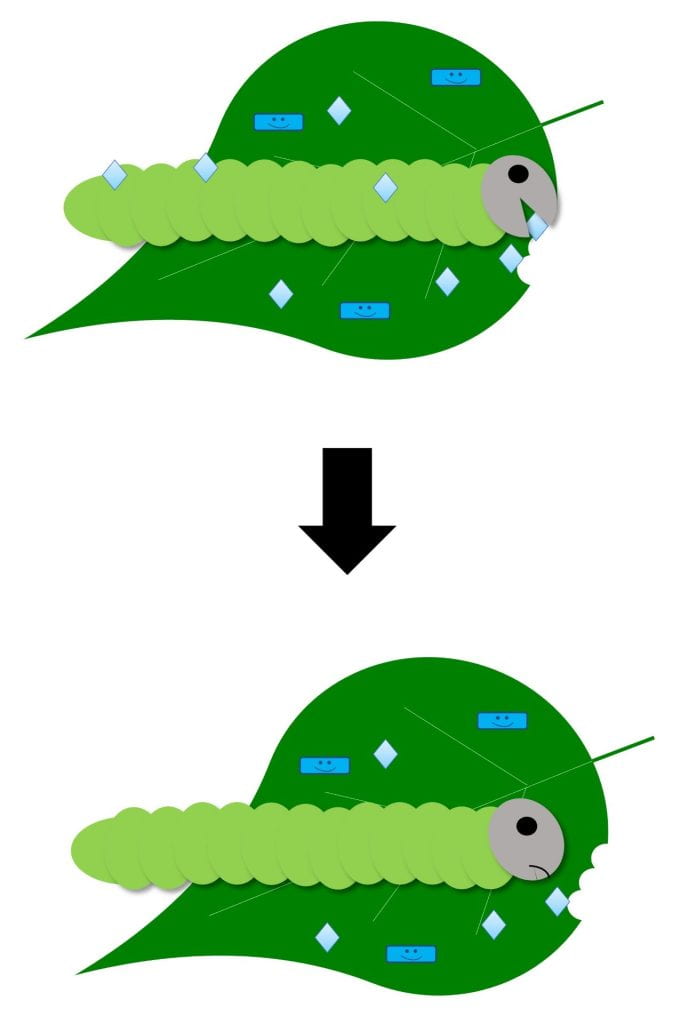
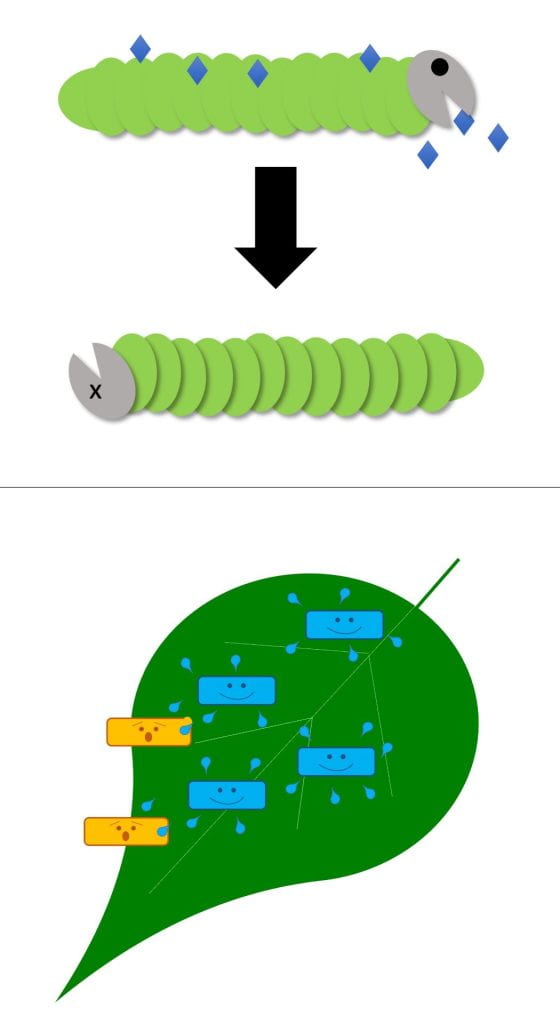
Stop feeding – stops pest from feeding; pest eventually starves

Biopesticides with this MOA can work against insect pests either by contact or ingestion and may only be effective against insects of certain ages or life stages. It depends on the biopesticide and pest. Examples include insect-killing viruses and some types of Bacillus thuringiensis products. Some products with this MOA could contain live microbes, while others do not. Live pests will still be present for some time after applying a product that works in this way, since the pests die of starvation. Watch for feeding damage to stop or a reduction in insect numbers over time to know if the product is working.


Diagram – Three aphids on a leaf, two of which are exposed to blue diamonds. The aphids exposed to the diamonds stay the same size. Another aphid that was not exposed grows normally.
Stop growth – Some bioinsecticides (blue diamonds in this diagram) don’t kill insects and mites outright, but they can prevent them from molting and growing into the next life stage. Pests that can’t move on to the next life stage will eventually die.

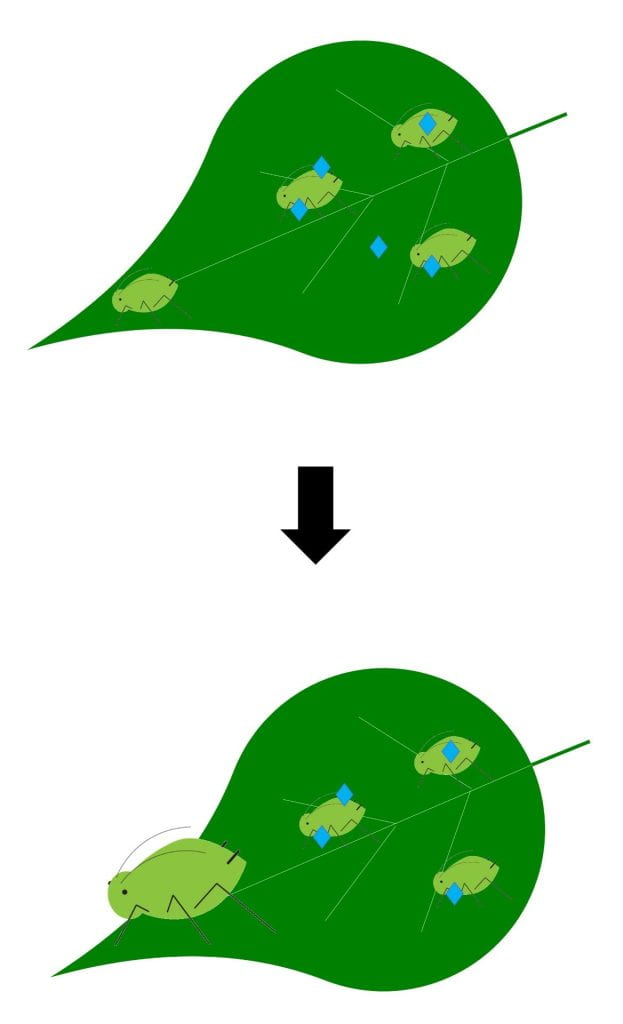
Stop growth – stops pest from growing or molting; pest eventually dies

Biopesticides with this MOA may work against insect pests either by contact or ingestion and may only be effective against pests of certain ages or life stage. It depends on the biopesticide and pest. Examples include Venerate (Burkholderia spp. strain A396) and some products containing azadirachtin. Some products with this MOA could contain live microbes, while others do not. Products with this MOA will not kill pests immediately, but will prevent them from growing or molting. Watch for insect populations to decline over time, but do not expect pests to die immediately.


Diagram - Two yellow moths surrounded by blue diamonds. A red heart has a line through it.
Stop reproduction – Pheromones (represented here by blue diamonds) are a type of bioinsecticide that confuses insects looking for a mate. As a result, males and females can’t find each other, don’t mate, and females don’t lay eggs.

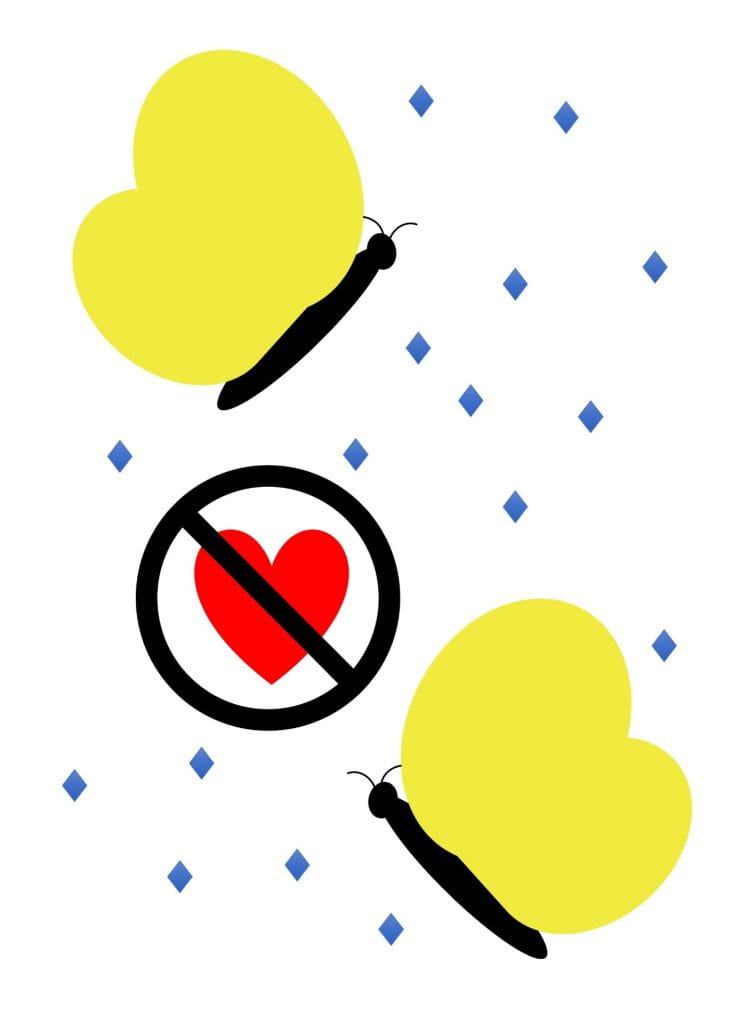
Stop reproduction – hampers pests’ ability to find a mate or produce eggs

The two main groups of biopesticides I know of with this MOA are (1) pheromones that make it hard for male and female insects to find each other, or (2) products that reduce the number of eggs female insects lay. Grandevo (Chromobacterium subtsugae strain PRAA4-1 and spent fermentation products) is an example of the later, but may not work in this way against all ages and species of pests listed on the label. The products I know of with this MOA do not contain live microbes. This mode of action will reduce insect populations in subsequent generations, not the current one. So use it on a pest with multiple generations per season, or in combination with other MOAs.


Things to keep in mind:

If the biopesticide contains live microbes, make sure you…

  • store the biopesticide correctly (and for the correct amount of time); check the label.
  • confirm compatibility of the biopesticide with other products before tank mixing or applying; read the label and contact the manufacturer with questions.

In addition, if the biopesticide contains microbes that need to stay alive for some period of time after application in order to be effective, make sure you also…

  • pay special attention to the recommended optimal environmental conditions for application; start by reading the label.

Remember!

  • Biopesticides are pesticides. Their labels are the law. Read the labels and follow them, along with other pesticide application laws in your state.
  • Not all biopesticides are permitted for use in certified organic production. Check with your certifier if you have questions.


Questions to ask when you are considering/purchasing a biopesticide

The manufacturer or dealer should be able to tell you:

  • How does it work (MOA)?
  • Is it alive? Does it need to stay alive to work?
  • Special instructions for storage or use? (e.g., temperature, spray tank pH, time of day)
  • Is it compatible (in the tank, greenhouse, or field) with other products in use (e.g., pesticides, fertilizers)?


Additional biopesticide Resources


This post was written by Amara Dunn, Biocontrol Specialist with the NYSIPM program.

IPM for establishing Christmas trees: Survival and growth in the first season

Rows of small Christmas trees growing in a field on a sunny afternoon; some are surrounded by wood chip mulch, some by cultivated ground, some by bare ground, and some by tall weeds.
The different weed management strategies we are comparing certainly look different in the field. But how do they impact tree growth and quality?

Back in June we introduced you to a new project comparing different methods for weed and root disease management when establishing Christmas tree seedlings. Recall that this is a collaboration among Bryan Brown, Amara Dunn, Brian Eshenaur, Betsy Lamb, and Lynn Sosnoskie. We wrapped up our first season in October, and we have a first look at some of the data. In this post, we’ll focus on tree survival and tree growth. There’s a lot more weed data!

Treatments

Let’s start with a quick reminder of the treatments we were comparing. Each row of 28 trees received the same weed management treatment. Each row was also divided into four plots of seven trees each. Each plot within a row received a different root treatment. Here’s a map of how the treatments were laid out in the field.

Weed management (in-row, within a 30” band around the row of trees; between row zones were seeded with grass and mowed 4 times) :

  • Cultivate – three times early in the season using a tractor drawn KULT Kress Argus Toolbar with sweeps, finger weeders, and a rear side-shift adjustment
  • Herbicide – conventional active ingredients (oxyfluorfen and pendimethalin applied shortly after planting, with a fall application of glyphosate) as a control treatment
  • Mow – mow about every two weeks with a walk-behind mower
  • Mulch – 3 inches of chipped shrub willow mulch
  • Untreated – No weed management at all

Root disease management:

  • ProPhyt (active ingredient: potassium phosphite) – a biopesticide applied by dipping bare roots of seedlings just before planting; mixed 1.28 fl oz in 2 gallons of water for 140 trees (11 fl oz/A if you plant 1,200 trees/A)
  • RootShield PLUS WP (active ingredient: Trichoderma harzianum Rifai strain T-22 and Trichoderma virens strain G-41) – a biopesticide applied twice (the day after planting and 7 weeks later) as a drench around each tree (24 oz/A in 171 gallons of water/A)
  • Subdue Maxx – a conventional fungicide applied twice (the day after planting and 5 months later) as a soil-directed spray (2.5 pt/A in 140 gal/A in a 6-inch band on either side of the row of trees). We made the application with a hand-pump backpack sprayer fitted with a TeeJet TTI11005 nozzle with a shield rotated parallel to the row of trees. The maximum pressure possible with this sprayer is 60 psi. After application, we applied an extra 0.45 gallon of water per plot of 7 trees with the same sprayer (280 gal/A additional water).
  • Water – 1 pt of water poured around each tree at planting, as a control.

What we measured

We’re interested in how the weed and root disease treatments impact survival, growth, and quality of these trees. Thanks to our excellent technicians, Marcus and Erik, for helping us measure all of these trees! Betsy and Amara were helping, too, but in this picture Amara is behind the camera.

A woman in a pink shirt comparing a small Christmas tree to a piece of paper, while a man in a plaid shirt measures the height of a small Christmas tree seedling; both are in a newly planted field with freshly tilled soil
Betsy and Marcus measuring trees and evaluating needle color in May.

On May 25 (about a week after planting) and again on October 6 we measured the height of each tree (from the soil to the tallest part of the tree, even if it wasn’t the leader anymore) and the diameter of the tree trunk 4 inches above the soil. In both May and October, we also rated the color of the needles using this scale. However, we only used: 2 (darkest green), 5 (medium green), 7 (paler green), and 9 (yellow or brown).

Of course, measuring and rating each tree also allowed us to take note of which trees had died (versus a few that unfortunately succumbed to “mower blight”).

What we found

Bar graph showing that trees generally survived better when treated with ProPhyt, except not if weeds were managed with herbicide. The impact of root treatment varied, depending on which weed management strategy was used.
Percentage of trees in each plot (out of seven trees total) that were still alive by October 2021, not counting a couple that were accidentally mowed. Each bar is the average of four plots for each combination of root treatment (color of bars) and weed management strategy (along x-axis). The lines on each bar show variability (one standard error above and below the mean value).

It’s too early to know for sure, but it’s possible that the root treatment that results in the best seedling survival might depend on which weed management strategy you use. For example, after just one year, the RootShield PLUS-treated trees did better than the ProPhyt-treated trees where herbicide was used, but not where the weeds were allowed to grow unchecked (‘Untreated’). We haven’t done a statistical analysis on the data, yet, but the little lines at the top of each bar are an indication of the amount of variability amongst the four plots in each treatment (one standard error above and below the mean percent survival, for those who might be interested).

Bar graph showing that trees might have grown slightly more when weeds were managed with herbicides. The impact of root treatment varied, depending on which weed management strategy was used.
Change in height of Christmas trees from May to October 2021. Each bar is the average of up to 28 trees (7 trees in each of 4 plots) for each combination of root treatment (color of bars) and weed management strategy (along x-axis). The lines on each bar show variability (one standard error above and below the mean value).

These Fraser fir seedlings grew between 1 and 2.5 inches during their first season. Much like the tree survival, the root treatment that produced the most growth wasn’t consistent across all weed management strategies. Results for tree trunk diameter were similar.

Bar graph showing that needle color might be slightly darker in the plots that were treated with herbicide or no weed management. The impact of root treatment varied, depending on which weed management strategy was used.
Average needle color when trees were rated in October. Lower numbers indicate darker green color. Each bar is the median value of up to 28 trees (7 trees in each of 4 plots) for each combination of root treatment (color of bars) and weed management strategy (along x-axis).

Recall that needle color was rated as 2 (darkest green), 5, 7, or 9 (most yellow or brown). So on this graph, shorter bars indicate better needle color. Also, this rating scale impacted how we summarized the data. Instead of taking the mean needle rating, we used the median. (Here’s a quick refresher on the difference.) And the graph doesn’t have those little lines to summarize the variability in each treatment. Too early to draw firm conclusions, but again, there might be some interactions between root treatment and weed management strategy.

What does it cost?

Economic risk is one of the risks we seek to reduce through IPM, so we’ve been keeping track of the costs associated with our pest management strategies. Based on the way we applied the root treatments and some local price estimates, here’s what we would have spent per acre for these treatments, assuming we planted 1,200 trees on each acre (that’s 6 ft x 6 ft spacing).


Fungicide Rate/A Number of applications Cost/A (Supplies) Cost/A (Labor1)
ProPhyt 11 fl oz2 1 $4 $1,037
RootShield PLUS WP 24 oz3 2 $123 $4,150
Subdue Maxx 2.5 pt3 2 $82 $2,074
Water 1 $0 $2,075

1We assumed a labor rate of $20/hr. These costs were calculated based on the time it took us to apply the products. This includes drenching each tree by hand (RootShield PLUS WP and water) and applying Subdue Maxx (and additional water to move it into the soil) with a backpack sprayer. On a larger scale, there’s surely a more efficient way to do this.

2Seedling roots were dipped in a ProPhyt solution prior to planting. The rate on the label is 4 pt/100 gallons of water. We mixed up 2 gallons of root dip solution (containing 1.28 fl oz of ProPhyt) to treat 140 trees. If we had used a fresh 2 gallons for every set of 140 trees, we would have used 11 fl oz of ProPhyt on an acre of 1,200 trees.

3Because RootShield PLUS WP was applied as a drench to each tree and Subdue Maxx was applied as a soil-directed spray banded on either side of the row, these rates are per acre of ground to which pesticide was applied. This is less than the total space taken up by these trees in the field. Read and follow the pesticide label for instructions on calculating quantity of product needed for banded applications.

And here’s a summary of our weed management costs. You can see all the details of these costs (including labor and supplies) here.

In-row weed management Cost/A (labor and supplies)
Cultivate $248
Herbicide $86
Mulch $1,153*
Mow $293
Untreated $0

*Assumes woodchips can be obtained locally at no cost

Take home

With only one season of data, it’s too early to draw conclusions about the effectiveness (or cost effectiveness) of each treatment. So far, survival of trees treated with ProPhyt is looking very good across most weed management strategies. And we’re seeing some indication that the best (in terms of tree survival, growth, or color) root treatment to use may vary depending on what you’re doing to manage weeds.

In late October we also dug up five dead trees and sent them to the Cornell Diagnostic lab to check for Phytophthora. The trees had been dead for a while, so they were only able to test for the presence of any Phytophthora species (which could include some that don’t cause disease on Christmas trees). Four out of five trees came back positive, which makes us feel more confident that we picked a good field for this trial…if by “good” you mean one where trees will be exposed to Phytophthora. For the purposes of this project, that’s exactly what we mean.

Please let us know if you have questions and stay tuned for more updates on this project. We’ve got at least two more years to go! You can check back on this blog (subscribe so you’ll know when new posts are available!), follow Lynn Sosnoskie and Amara Dunn on Twitter or on Instagram (@specialtycropweedscience and @biocontrol.nysipm), or check out Bryan Brown’s webpage. We’ll also be hosting another field event in 2022 and hope to provide updates at future Christmas Tree Farmers Association of NY meetings.

USDA logo, accompanied by the words: National Institute of Food and Agriculture, U.S. Department of Agriculture

This work is supported by Agriculture and Food Research Initiative – Foundational and Applied Science Grant no. 2021-68008-34179/project accession no. 1025660  from the USDA National Institute of Food and Agriculture.


This post was written by Amara Dunn, Biocontrol Specialist with the NYSIPM program, with helpful input from project collaborators. All images are hers, unless otherwise noted.

Introducing a new Christmas tree project

Field with mostly bare ground and small Christmas tree seedlings, each marked by a flag. In the background are some trees and a blue sky with puffy clouds.
We planted a new field of Christmas trees this spring!

If you’ve been following this blog for a bit, you might recall that the beneficial insect habitat plots I’ve been helping to establish and monitor with my colleagues Betsy Lamb and Brian Eshenaur are located on the edges of a field of Christmas trees. Once the trees get a bit bigger, we’ll be able to start assessing whether trees closer to these wildflowers have fewer pests or not.

New in 2021, I’m collaborating with Bryan Brown, Brian Eshenaur, Betsy Lamb, and Lynn Sosnoskie on a three-year project funded by the USDA to look at IPM when you’re establishing a new field of Christmas trees. An important part of IPM is the integration of multiple strategies when managing pests. So in this project we’re looking at some tools for managing both weeds and root diseases (specifically Phytophthora).

Weeds

Our weed management strategies include:

  • Mulching with approximately 3 inches of chipped shrub willow
  • Cultivating three times early in the season using a KULT Kress Argus Toolbar with rear side-shift adjustment pulled by a tractor
  • Mowing grass seeded around the trees
  • Conventional herbicides (oxyfluorfen and pendimethalin applied shortly after planting, with the possibility of additional applications depending on the length of the residual control) as a control treatment
  • No weed management at all (another control treatment)

We planted 560 Fraser firs in 20 rows on May 19th, and four of these rows will be receiving each of these different weed management treatments. So far, we’ve spread mulch…

Four people spreading mulch around small Christmas tree seedlings in a field with rakes or by hand.
Mulch was dumped in small piles along the row of trees, and we raked it in to place. Photo taken by Lynn Sosnoskie.

…and applied herbicides.

Woman in Tyvek suit with backpack sprayer applying herbicides to rows of Christmas tree seedlings. Seedlings receiving herbicide have plastic cylinders around them to protect them.
Since a few of the trees were getting close to budbreak, we shielded them when applying the herbicide.

Lynn and her team collected soil from the field to assess which weed seeds are currently present in the seedbank. They will continue to evaluate the weed seedbank yearly to determine whether different weed management programs result in different weed seeds in the seedbank. Bryan, Lynn, and technicians working for them will also be assessing the success of each weed control strategy throughout the season (weed density and biomass).

Disease

Within each row, plots of seven trees have been assigned to one of four different treatments for root disease control. The biocontrol piece of this project is the root disease management tools. The biofungicide RootShield PLUS WP contains two different species of the fungus Trichoderma. These fungi may protect the trees by:

  • Inducing resistance – turning on the plants defense mechanisms ahead of pathogen attack
  • Exclusion – growing on the roots so there’s no space for the pathogen to grow
  • “Eating” the pathogen – Trichoderma is a fungus that parasitizes other fungi (and water molds)
  • Poisoning the pathogen – Trichoderma produces antimicrobial compounds
  • Promoting plant growth – Stronger, healthier trees are more likely to survive pathogen attack (and probably be more resilient to water stress).

A study done in Oregon on Douglas fir found that Trichoderma species might help improve survival of trees in pots when they are being attacked by the water mold Pythium. So we’re curious if we can document similar results in the field. We applied RootShield PLUS as a soil drench immediately after transplanting, and will repeat the application 6-8 weeks later.

There’s also been some work done by Richard Cowles in Connecticut suggesting that ProPhyt could improve the color of Fraser firs when they are planted in a field known to have Phytophthora. The active ingredient in ProPhyt is potassium phosphite (equivalent to phosphorous acid), so this product is also classified as a biopesticide by the EPA. I think of it as not really a biological control, since it neither contains a (current or formerly) living organism, nor was made by a living organism. We applied ProPhyt as a root dip immediately before planting. It works by inducing plant resistance, and also inhibiting (“poisoning”) water molds like Phytophthora.

The other two root disease treatments are controls: Subdue Maxx (active ingredient mefenoxam) and just water. Subdue Maxx was applied as a shielded, soil-directed spray the day after we transplanted the trees. All the trees were watered in right after planting because we planted a bit late in the season and it was a pretty warm day. The label calls for a second application in the fall.

So far, we’ve collected data on the initial height, stem diameter (4 inches above the soil) and needle color of every tree in the field. We’ll do this again in the fall to assess tree growth over this first season, and tree health (needle color). We will also record how many trees in each treatment survive. Bi-weekly weed surveys have also been initiated. Bryan has started cultivating the trees in that weed control treatment.

Video of Christmas tree cultivation

For updates on this project, you can check back on this blog (subscribe so you’ll know when new posts are available), follow Lynn and Amara on Twitter or on Instagram (@specialtycropweedscience and @biocontrol.nysipm), or listen to Bryan’s podcast. We’ll also be hosting events at the field (Geneva, NY) in this and subsequent years (put August 19th on your calendars, and stay tuned for more details), and hope to provide updates at future Christmas Tree Farmers Association of NY meetings.

USDA logo, accompanied by the words: National Institute of Food and Agriculture, U.S. Department of AgricultureThis work is supported by Agriculture and Food Research Initiative – Foundational and Applied Science Grant no. 2021-68008-34179/project accession no. 1025660  from the USDA National Institute of Food and Agriculture.


This post was written by Amara Dunn, Biocontrol Specialist with the NYSIPM program. All images are hers, unless otherwise noted.

Creating Habitat for Beneficial Insects: 2020 Growing Season Update

panoramic view of a field with some pink and purple wildflowers blooming in the foreground and rows of small Christmas trees in the background
Trips to our beneficial insect habitat and Christmas tree research plots this year were very solitary, but it was good to get outside.

As many people did, we had to change our plans for this project in response to COVID-19. The biggest change was that we didn’t collect any insects this year. If you follow me on Twitter or Instagram, you saw some pictures of different insects I spotted while visiting these plots this summer. Here are a few highlights:

Composite of images showing a blue dragonfly, several bees (brown and green), a large black and yellow spider, a red ladybug with black spots, a black and yellow striped hover fly, and an orange and black ladybug larva.
Just a few of the cool insects (and one arachnid) I was able to photograph during my weekly visits to the habitat plots.

The Christmas trees are still growing, and Brian Eshenaur and I made sure that the weeds didn’t take over. One Christmas tree grower suggested that they might need some trimming next year. I’m adding “Christmas tree shearing” to the list of new things I will try (learn?) in 2021.

Several smaller Christmas trees growing in a field
Slowly but steadily, the Christmas trees adjacent to our beneficial insect habitat plots are growing!

From May through mid-October, I visited our beneficial insect habitat plots once a week to take pictures and document what was blooming. Brian and I also mowed plots that were direct seeded in fall 2018 twice (May and June). Those of you reading this from NY know how dry much of our summer was, and there really wasn’t a need for more frequent mowing. We decided not to mow Treatment C, which had been direct seeded in spring of 2018. The standard recommendation for establishing perennial wildflowers from seed is to mow for the first two growing seasons, and in the third year to start scaling back on the mowing. Since this was the third season for these spring-seeded plots, we skipped the mowing. I’m not sure we made the right decision for our plots.

Plot of mostly grass and small white asters with a few blackeyed susans and purple coneflowers mixed in.
One plot that was direct seeded in the spring of 2018 and not mowed this year. There were a lot of weeds (some blooming) in addition to some of the species we seeded.

Some of the perennials we seeded bloomed, but mostly these plots were over-run by grass and some weedy asters. It could be that the wildflower establishment was poor. Spring is not the recommended time for planting perennial wildflower seeds. Or it could be that these plots needed to be mowed at least once this season. Since 2021 will be the third year for the fall-seeded plots, I’m wondering about reducing the mowing in these plots, instead of stopping “cold turkey”.

In the meantime, the fall-seeded Treatments F and G (mowed twice in 2020) are developing nicely! Even when there weren’t many flowers, I could recognize lots of wildflower seedlings.

Picture of mixed species plants, with only two yellow flowers. Purple circles and labels identify butterfly milkweed, blackeyed susan, wild bergamot, smooth blue aster, purple coneflower, and coreopsis seedlings.
At first glance, this might look like a patch of weeds, but I’ve learned to spot some of the seedling perennial wildflowers direct seeded in fall 2018.

In July and August, there were abundant blackeyed susan blossoms, and in September and October all four aster species bloomed.

Somewhat weedy plot with lots of blackeyed susan blooms (yellow with dark brown centers); some Christmas trees, grass, and blue sky with puffy clouds are in the background
The fall-seeded habitat plots don’t look manicured like the plots that were transplanted in spring and mulched, but there were a lot of blackeyed susans blooming in mid to late summer this year!
Mixture of seedlings, some with daisy-shaped flowers in various shades of purple
Direct seeded plots contained New England asters (darker purple flowers), zigzag asters (pale flowers, stems grow in zigzag pattern), smooth blue asters (pale purple flowers, smooth leaves and stems), and aromatic asters (more compact growth habit, light purple flowers).

This year, I kept notes not only on what was blooming each week, but on whether blossoms had just started to open (E = early bloom), were fully open (P = peak bloom), or were fading (F = fading bloom). Because there were 12 plots for each transplanted or direct seeded species, if the plots were evenly split between early and peak (E/P) or peak and fading (P/F), I included these two intermediate categories. You can see a color version of the following tables here. The colors give a nice visual of the progression of blooms over the season (including some weeks when there was a bit of a lull in blooms).

E early bloom
E/P evenly mixed early & peak bloom in different plots
P peak bloom
P/F evenly mixed peak & fading bloom in different plots
F fading blooms

When transplanted wildflowers bloomed in 2020

May Jun Jul Aug Sep Oct
5 12 21 27 1 9 16 23 30 6 14 21 28 6 12 17 26 1 8 15 22 28 6 14
Golden alexanders E P P P F F
Ohio spiderwort E E E P P P F F F F F F F F
Catmint E P P P/F F F F F F F F F F F F F F F F F
Lanceleaf coreopsis E P F F F
Blue false indigo E P
Tall white beard tongue E P F F F F
Common milkweed E F
Purple coneflower E E P P P F F F F F F F
Wild bergamot E P/F F F F F F
Anise hyssop E P P F F F F F
Boneset E P P F F F F
NY ironweed E E E P P P P F F
Orange coneflower E E P P P P P/F F F F F
New England aster E E E E P P P F
Showy goldenrod E P P F F

When direct seeded wildflowers bloomed in 2020

May Jun Jul Aug Sep Oct
5 12 21 27 1 9 16 23 30 6 14 21 28 6 12 17 26 1 8 15 22 28 6 14
Golden alexanders E P P/F
Hairy beard tongue E E
Lanceleaf coreopsis E P/F F F F F F E P F F F F F F
Tall white beard tongue E
Blackeyed susan E E P P P P P P P/F P/F F F F F F F
Purple coneflower E E P P P P F F F F F F E/P
Wild bergamot E F F
Butterfly milkweed P F E
Orange coneflower E P P P/F F F
Smooth blue aster E E P P P P
Gray goldenrod E E E/P P F F
New England aster E E P P P
Zigzag aster E E P P P
Aromatic aster E/P E/P P
Yellow false indigo
Partridge pea
Marsh blazing star
Narrowleaf mountainmint
Wild senna
Maryland senna
Early goldenrod
Ohio spiderwort


Common name Scientific name
Anise hyssop Agastache foeniculum
Aromatic aster Symphyotrichum oblongifolius
Blackeyed susan Rudbeckia hirta
Blue false indigo Baptisia australis
Boneset Eupatorium perfoliatum
Butterfly milkweed Asclepias tuberosa
Catmint Nepeta faassinii
Common milkweed Asclepias syriaca
Early goldenrod Solidago juncea
Golden alexanders Zizia aurea
Gray goldenrod Solidago nemoralis
Hairy beard tongue Penstemon hirsutus
Lanceleaf coreopsis Coreopsis lanceolata
Marsh blazing star Liatris spicata
Maryland senna Senna marilandica
Narrowleaf mountainmint Pycnanthemum tenuifolium
New England aster Symphyotrichum novae-angliae
NY ironweed Vernonia noveboracensis
Ohio spiderwort Tradescantia ohiensis
Orange coneflower Rudbeckia fulgida va. Fulgida
Partridge pea Chamaecrista fasciculata
Purple coneflower Echinacea purpurea
Showy goldenrod Solidago speciosa
Smooth blue aster Symphyotrichum laeve
Tall white beard tongue Penstemon digitalis
Wild bergamot Monarda fistulosa
Wild senna Senna hebecarpa
Yellow false indigo Baptisia tinctoria
Zigzag aster Symphyotrichum prenanthoides

From the second or third week of May through the second week of October, there was always something blooming in these plots, whether they were transplanted or direct seeded. You can also see that a fair number of species in the seeded plots did not bloom this year. Hopefully next year.

In the meantime, I’ll be making plans for the 2021 growing season, which will hopefully include a return to insect sampling. Stay well and stay safe!


This post was written by Amara Dunn, Biocontrol Specialist with the NYSIPM program. All images are hers, unless otherwise noted.

This work is supported by:

  • Crop Protection and Pest Management -Extension Implementation Program Area grant no. 2017-70006-27142/project accession no. 1014000, from the USDA National Institute of Food and Agriculture.
  • New York State Department of Agriculture and Markets
  • The Towards Sustainability Foundation

Creating beneficial habitat at home: Fall update

The picture on the left was taken on May 2, 2020 and shows a small yard on the side of a house with mostly grass and a few small mulched garden beds with hostas and daffodils growing in them. The picture on the right was taken on August 14, 2020 and shows the same yard next to the house, this time full of blooming flowers and a squash plant.
Having before and after pictures really helps me appreciate how far my beneficial insect habitat (plus a few vegetables thrown in for good measure) have come!

Well, the days are getting shorter, the air is getting cooler, and pumpkins are starting to show up on front porches. I guess it’s time for me to admit that fall is coming. So it seemed like a good time to provide an update on my efforts to establish habitat for beneficial insects around my home. If you need to catch up on this project, you can read more about site selection, plant selection, and weed control in previous posts.

#BeneficialHabitatAtHome in pictures

Overall, I’m pretty happy with how the garden turned out this first year! If you follow me on Instagram or Twitter, you’ve seen some of these pictures already.

I attracted quite a few pollinators…

A collection of eight pictures in two rows. Pictures in the top row (A-D) show a small bee on a red strawflower, an orange and black monarch butterfly on a zinnia flower that is cream colored with pink speckles, a small bee on a yellow calendula flower, and two bees on a pink cosmos flower. The bottom row shows a smaller green bee on a pink cosmos flower, a bee on a red and yellow blanketflower, a yellow and black striped hover fly visiting a purple bachelor’s button, and a small orange and black butterfly visiting an orange and yellow zinnia.
These are just some of the pollinators that visited my (A) strawflowers, (B) zinnia cultivar ‘Candy Cane Mix’, (C) calendula cultivar ‘Remembrance Mix’; (D) and (E) cosmos, (F) blanketflower, (G) bachelor’s buttons and (H) ‘Persian Carpet’ zinnia.

…and natural enemies.

Four pictures, clockwise from top left: black and yellow ambush bug on a cream-colored zinnia flower flecked with pink speckles; a red ladybug with black spots on a leaf next to a zinnia bud; a pink ladybug with black spots perched on a pale pink and yellow zinnia flower; a translucent yellow-green “worm” amongst black aphids on a plant stem.
Most of the natural enemies I spotted this summer were ladybugs, like the seven-spotted ladybug in B and the pink spotted ladybug in C. But I also saw an ambush bug (A) and a hover fly larva (D). I saw plenty of adult hover flies, but the larvae are a bit less conspicuous.

I also picked a lot of cut flowers!

A small vase of yellow, orange and red zinnia and calendula flowers next to a larger vase of mixed flowers (sunflowers, cosmos, blanketflowers, calendula, bachelor’s button, and zinnias) in red, yellow, orange, pink, and purple.
Admittedly, one of my goals in creating this habitat was to be able to pick cut flowers for myself and others this summer. I was hoping that I could grow flowers that would be attractive both to people and natural enemies of pests. I think I succeeded!

Plant establishment success

This spring, I planted four perennials: arnica (Arnica chamissonis), blanketflower (Gaillardia aristata), echinacea (Echinacea purpurea), pyrethrum daisy (Chrysanthemum coccineum), and ‘Chim chiminee’ rudbeckia (Rudbeckia hirta). I started some blue vervain from seed, but by the time I’d figured out that stratification was needed, it was pretty late in the spring. The seedlings that did emerge didn’t survive. The blanketflowers and rudbeckia bloomed already this first year.

A small mulched garden bed next to a house with yellow and orange rudbeckia flowers blooming on the left and red blanketflowers blooming on the right. There are also some yellow calendula blooming around these plants.
Although they are perennials, the ‘Chim Chiminee’ rudbeckia and the blanketflowers bloomed this first year, and also looked nice as cut flowers.

The arnica, echinacea, and pyrethrum daisy put their energy into vegetative growth, and hopefully they will bloom next year.

Composite showing pictures of three non-flower plants growing on mulch. One has elongated heart-shaped leaves (A), one has leaves like those on a carrot (B), and one has longer, narrower leaves (C).
Three of the five perennials I planted this spring are growing, but haven’t bloomed this year: (A) echinacea, (B) pyrethrum daisy, and (C) arnica. Hopefully next year!

Not surprisingly, the annuals produced abundant blooms. Others have noted that there can be value in  mixing annuals with perennials when you are establishing habitat for beneficial insects. The annuals will provide abundant flower resources right away, while it may take a few years to achieve peak bloom production on perennials.

Eight pictures of different flowers in two rows. Top row left to right (A-D): yellow sunflower, pale pink snap dragon, bachelor’s buttons in various shades of purple, yellow and orange ‘Persian Carpet’ zinnias. Bottom row left to right (E-H): pink cosmos, yellow calendula, red poppy, zinnias in two colors - white with pink speckles and yellow.
A few glamour shots of some of the annuals I grew this year: (A) sunflower, (B) snap dragon, (C) bachelor’s buttons, (D) ‘Persian Carpet’ zinnia, (E) cosmos, (F) calendula, (G) poppy, (H) zinnia.

Fall planting

Hopefully this is not the first time you’ve heard that “fall is for planting”. In preparation for this, I started some butterfly milkweed (Asclepias tuberosa) and columbine (Aquilegia sp.) seeds back in late July so that I’d have some seedlings ready to go in the ground this fall. The columbine benefitted from spending about three weeks in my fridge (after I’d seeded them in moist potting mix) before giving them some light and warmth. (Don’t judge me. The real question is why not reserve one shelf of your fridge for seed storage and germination!) Columbine seedlings will go in my backyard where there’s less sun.

seven small peat pots filled with potting mix, with a few seedlings growing out of each
Some of the seedlings I’m planting this fall.

I also snagged a few seed heads from the golden alexanders and the blackeyed susans (also Rudbeckia hirta, but the straight species) in our beneficial insect habitat research plots. I’m going to plant them this fall, too and hope to see some seedlings next spring.

A mixture of round and elongated seeds in a pile in the middle of a woman’s outstretched hand
I’ll let the winter weather scarify these golden alexander and blackeyed susan seeds, preparing them to germinate in the spring.

Whether I’m working remotely next year or not, I’ll keep providing periodic updates on my efforts to establish habitat for beneficial insects around my house.


This post was written by Amara Dunn, Biocontrol Specialist with the NYSIPM program. All images are hers, unless otherwise noted.

This work is supported by:

  • Crop Protection and Pest Management -Extension Implementation Program Area grant no. 2017-70006-27142/project accession no. 1014000, from the USDA National Institute of Food and Agriculture
  • New York State Department of Agriculture and Markets

New biocontrol solution coming to invasive weeds near you? Probably not yet.

Large clump of knotweed with large heart-shaped leaves and clusters of small white flowers
Japanese knotweed is very invasive. Photo credit: Amara Dunn, NYSIPM

At a previous residence, Japanese knotweed was the bane of my backyard gardening endeavors. Masses of these invasive plants can easily stifle native or non-invasive plants. The roots grow deep and even small pieces left in the ground can re-grow new plants. I used frequent hand-pulling and digging in an attempt to keep it in check, and I knew that if I stopped it would just grow back. For more information on this invasive weed, refer to this excellent fact sheet.

Large leaves with smooth edges attached alternately along a red stem.
Close-up of Japanese knotweed leaves. Photo credit: John Cardina, The Ohio State University, Bugwood.org

I have read that you can cook and eat it, but I haven’t tried. And no matter how delicious it might be, it would still be horribly invasive. While bees will visit the flowers late in the summer, there are better ways to feed the bees.

small white flowers of Japanese knotweed being visited by a wasp
Japanese knotweed can provide food for pollinators, like this wasp.

You may have heard that Cornell researchers led by Dr. Bernd Blossey released the Knotweed Psyllid (Aphalara itadori) in June 2020 in Tioga and Broome counties as a potential biocontrol agent for this invasive weed. This release came only after thorough testing and permission from the U.S. Department of Agriculture, since this insect is native to Japan. You can learn more about the process of using classical biocontrol to manage weeds here. Be assured, many precautions are taken before non-native species are intentionally released in the U.S.

Tiny brown insects perched on a large smooth leaf and a small folded up leaf
Tiny psyllids released in Tioga County in an attempt to control invasive Japanese knotweed. Photo credit: Bernd Blossey, Cornell University

Unfortunately, attempts to establish this insect in both the United Kingdom and Canada have not been successful. Preliminary results from the NY releases suggest that this psyllid will not be the biocontrol solution we need for Japanese knotweed. Most of the insects that were released do not seem to have survived and even when the insects were protected in cages put around the knotweed plants, they didn’t reduce the growth of the plants.

It seems that if we are going to solve this weed problem with biocontrol, we will need to find other insects from the native range of Japanese knotweed. Assessing these insects prior to release in the U.S. will be a lengthy process, so in the meantime keep using other IPM tools for this invasive weed.

If you’d like to learn more about this project, the New York Invasive Species Research Institute is hosting a webinar on September 30, 2020 at 11:00 AM.


This post was written by Amara Dunn (NYSIPM) and Dr. Bernd Blossey (Cornell Department of Natural Resources).

Beneficial habitat at home: Weed control and mid-summer update

Red and black lady beetle on zinnia leaf
With all the Japanese beetles I’ve been pulling off my zinnias, it was a pleasant surprise to find a more friendly beetle!

It’s been two months since I since I wrote about the plants I selected to provide habitat for beneficial insects around my home. Today I’ll talk a bit about weed control and how my spring transplants are doing.

Weed control

I have mentioned before that managing weeds turns out to be far more than half the battle when it comes to establishing perennial wildflowers as habitat for beneficial insects. Based on the results from the habitat plots we planted on the edges of our Christmas tree research field, I decided to use mulch for weed management in my home gardens. While mulch does add extra cost, after you make the initial investment of time to spread the mulch, it really cuts down on the time required to manage weeds during the rest of the season. I had a relatively small area to mulch, and was able to purchase some relatively inexpensive mulch made from the brush and leaves picked up by my city. Also, while I haven’t tested the organic matter content of my soil, just digging up some of the grass told me that my soil could use more organic matter. The mulch will eventually help with that as it breaks down. One downside to mulch is that it could block access to the soil for ground-nesting bees. There are some spots of bare ground in other parts of my yard, and perhaps next year I will be a little more deliberate about keeping some areas bare to support these pollinators.

Several freshly-mulched garden beds with small seedlings alongside a house
I decided to use mulch for weed control in my home beneficial insect habitat.

If mulch isn’t for you, you can read more about different weed management strategies we are demonstrating in our habitat plots.

How are things growing?

Like many (but not all) New Yorkers, I have found myself frequently wishing for more rain this summer. According to the closest NEWA station, we only got 1.3 inches of rain in May, 1.44 inches in June, and 1.48 inches in July (so far). This spring and summer is an excellent illustration of why experts recommend transplanting perennials in the fall, and not in the spring. Hot and dry are not ideal conditions for young seedlings just trying to get started. We often get more rain in the fall, and the cooler temperatures mean the transplants are subjected to less stress.

I started my plants from seed, and most of my seedlings were pretty small when I transplanted them the first week of June.

Three seedlings surrounded by mulch just starting to produce their second set of true leaves
This picture was actually taken about 2 weeks after I transplanted my seedlings. They were a little on the small side.

I admit that I also didn’t harden off my seedlings exactly the way you are supposed to. After losing some un-protected plants to marauding bands of squirrels, and lacking a protective structure that would let me keep my seedlings in full sun, I hardened them off on my screen porch. Moving from this environment to the south side of my house in full sun was a bit of a shock, especially when it got so hot and dry so soon after transplanting. I’ve done a lot of watering over the past month and a half, and I still lost more of my perennial seedlings (and some annuals) than I had hoped.

One seedling, surrounded by mulch
There were supposed to be three echinacea plants in this picture. At least one of them survived!

In spite of these obstacles, quite a few of my transplants survived. The blanketflowers (Gaillardia aristata) are the only perennials that look like they will bloom this season. If I had bought seedlings from a local nursery, they might have been bigger and might have established faster. But I can be patient.

Plant with scalloped leaves and a very young flower bud forming at the top
I think I can see the beginnings of a flower bud on this blanketflower.

You already saw the echinacea. Here are some of the other perennials.

Two seedlings with oblong and very hairy leaves on the left (rudbeckia); one seedling with leaves that look like a carrot on the right (pyrethrum daisy). All are growing surrounded by mulch.
Some of the surviving rudbeckia (left) and pyrethrum daisy (right) seedlings.

Not surprisingly, the annuals have grown faster. (Remember, they’re in a race to reproduce and pass on their genes before winter returns!)

Japanese beetles are eating the common zinnias.

Several Japanese beetles crawling over zinnia leaves with many holes
A small consolation is that the Japanese beetles seem to like my roses even more than they like the zinnias. The roses are functioning as a sort of trap crop.

But they are leaving the ‘Persian Carpet’ zinnias alone. It turns out these are a variety of Mexican zinnias (Zinnia haageana), which is a different species than the common zinnias (Zinnia elegans).

Small yellow and red zinnia flower growing on a plant with small, narrow leaves
‘Persian Carpet’ zinnias have smaller flowers, smaller leaves, and no Japanese beetle damage, even though I planted them right next to my roses.

I’ve been picking the Japanese beetles off by hand (adding them to my compost bin after they drown). I found the beetles to be more sluggish in the evenings (although admittedly I wasn’t out at the break of dawn), and a colleague recently shared this article with me that suggests that hand-picking Japanese beetles in the evening is indeed the best option. This strategy has not prevented all damage (especially on my roses), but I think my plants will survive. And I admit I haven’t picked them every single day.

Looking down into a yogurt container half-filled with water and many dead Japanese beetles
Japanese beetles picked off of my plants and drowned

The snap dragons have started blooming.

Pink, peach, and white snap dragon flowers in bloom
I planted snap dragons mostly because I like them as cut flowers, although I have seen reports that they support bees.

And so have the calendulas.

Plant with yellow flowers starting to open
Calendula in bloom.

I’ve seen hover flies on the bachelor’s buttons. Remember the adult hover flies are pollinators, while their larvae are voracious aphid predators.

Pink and purple flower with a black and yellow striped fly visiting it
I’ve seen a few hover flies visiting the bachelor’s buttons.

The cosmos and sunflowers (that survived the squirrels and a local rabbit) haven’t started blooming yet, but they’re looking good!

Sunflower and cosmos plants growing well next to the chimney of a house
The squirrels must not have found my first planting of sunflowers, because they and the cosmos planted with them look great!

This spring I ran out of space to start seeds indoors, and since fall is a better time for planting I saved a few perennials for the fall. Last week I seeded butterfly milkweed (Asclepias tuberosa) and some columbine. In the absence of grow lights, and since I’m not an expert transplant producer, I wanted to give these seedlings a good two and a half months to grow before I transplant them.


This post was written by Amara Dunn, Biocontrol Specialist with the NYSIPM program. All images are hers, unless otherwise noted.

This work is supported by:

  • Crop Protection and Pest Management -Extension Implementation Program Area grant no. 2017-70006-27142/project accession no. 1014000, from the USDA National Institute of Food and Agriculture.
  • New York State Department of Agriculture and Markets

Creating habitat for beneficial insects: We planted it. Did they come?

Woman wearing sunglasses and a baseball cap is emptying blue and yellow bowls filled with soapy water and dead insects into a deli cup.
Here I am collecting insects from our yellow and blue pan traps last September.

Hopefully you’ve been following along with a project I’m working on with Betsy Lamb and Brian Eshenaur to establish (and document the impacts of) habitat for natural enemies of pests and pollinators (collectively, beneficial insects). In December, I wrote about how the plants were growing, and in February I wrote about the time and money we’d invested in the project so far and the success of our weed management strategies. I promised an update on insect sampling, and here it is!

First of all, let me clarify that we were collecting more than just insects. Insects only have six legs. We also collected arachnids like spiders (and harvestmen), which usually have eight legs, and pillbugs, millipedes, and centipedes, which have many more than eight legs. All of these “bugs” could be correctly called arthropods. But there’s more! We also counted earthworms (which are annelids) and slugs and snails (which are mollusks). Hopefully the entomologists in my audience will pardon my use of the term “insect” to include creatures that crawl or fly but may have more (or less) than six legs throughout the rest of this post.

I described the ways that we collected insects in an earlier post. As a quick refresher:

  • Pan traps catch flying insects, especially those attracted to the colors yellow and blue.
  • Pitfall traps catch insects that crawl along the soil surface.
  • Sweep nets catch insects that are flying or hanging out on plants.
The left picture (pan traps) shows a yellow and a blue plastic bowl sitting amongst grass and weeds. Each contains a rock and is filled with soapy water. The middle picture (pitfall trap) shows a deli cup buried in the ground to its rim and filled with liquid. A clear plastic dinner plate is held above the deli cup by wire legs. The picture on the right (sweep net) shows a woman wearing a t-shirt, jeans and a baseball cap sweeping a large white canvas net just above the ground as she walks through a field.
Different methods used for sampling insect from our habitat plots included pan traps, pitfall traps, and a sweep net.

Below is a quick reminder of our treatments. You can read all the details here. Except for Treatment H. These are “new” plots that we added in 2019. I just measured out four, 23-foot long sections of grass planted between rows of Christmas trees in the middle of the field. These row middles are mowed by the excellent Field Research Unit staff at Cornell AgriTech, where our research field is located. The grass mixture was seeded right after the Christmas trees were planted in Spring 2018, but it does include some blooming weeds from time to time (dandelions and clover, especially).

Treatment Description
A Spring transplant, no mulch
B Spring transplant with mulch
C Spring direct seed
D Buckwheat cover crop, then fall transplant
E – control Whatever was growing there, just keep it mowed
F Soil solarization, then fall direct seed
G Herbicide and tillage, then fall direct seed
H – control Mow seeded orchard grass mix
Mowed grass between rows of small Christmas trees
Mowed grass between rows of Christmas trees in the middle of the field is a second control treatment for insect sampling.

And one last note before we get into the actual results. These are still preliminary results. Many, many thanks to Jason Dombroskie and Paige Muñiz for helping us with insect identification. Identification and number crunching of the data are still ongoing.


Ok, ready to see some cool insects (etc.)? Here we go!


Spiders and harvestmen

On the left, a harvestman with a plump body lacking distinct segments. In the middle, a spider with two distinct body segments. These two pictures were taken by David Cappaert, and are available on Bugwood.org. On the right, a black and yellow garden spider.
Spiders and harvestmen both have eight legs and are useful predators to have in a field or garden. The garden spider on the right was probably the largest arachnid I spotted in our habitat plots. The left and middle pictures were taken by David Cappaert.

We caught a lot of spiders and harvestmen, mostly in pan and pitfall traps. What’s a harvestman? You might know it by the name daddy long legs. It looks a lot like a spider, but instead of having a distinct narrowed “waist” (actually where the two body segments of the arachnid meet), their bodies just look like single “blobs”. Both spiders and harvestmen are predators and will eat many other insects (including some pests). They may also eat nectar and pollen. Very few spiders you are likely to encounter in New York are venomous, so welcome these eight-legged biocontrol agents to your fields and gardens without fear!

A bar graph showing numbers of spiders and harvestmen caught in each treatment (mostly in pan and pitfall traps). The most spiders and harvestmen were caught in treatments C (spring seeded) and H (grass control). Treatment B (transplanted and mulched) had the fewest spiders and harvestmen.
I added up all of the spiders and harvestmen we caught in each plot, then took the average of these summer-long counts from the four plots of each treatment in our field. The black lines stretching above and below the top edge of each bar show one standard error (measure of variability amongst the four plots) above and below the mean value.

We caught a lot of spiders and harvestmen, but it looks like there were fewer in the plots that were mulched at transplanting or solarized prior to seeding.

Carabid beetles

Top: several tiger beetles with brown backs but iridescent green bellies; Bottom: picture of a black ground beetle taken by Mary C. Legg and available at Bugwood.org
We caught a lot of tiger beetles (top picture) in our plots last summer, but carabid beetles come in many shapes, sizes, and colors.

You may not notice carabid beetles (also called ground beetles) because they crawl along the surface of the soil and are usually more active at night. Also, many of them move very quickly. They are great predators of insects (and other arthropods), as well as mollusks like slugs. Some also eat seeds.


A bar graph showing numbers of carabid beetles caught in each treatment (mostly in pitfall traps). The most carabid beetles were caught in treatments D (fall transplant after buckwheat), F (fall seed after solarizing soil), and G (fall seeding after using tillage and herbicide to control weeds). The fewest carabid beetles were caught in the control plots (E and H).
I added up all of the carabid beetles we caught in each plot, then took the average of these summer-long counts from the four plots of each treatment in our field. The black lines stretching above and below the top edge of each bar show one standard error (measure of variability amongst the four plots) above and below the mean value.

From these preliminary results, it looks like we tended to catch more carabid beetles in the fall-planted treatments (whether they were transplanted or direct-seeded). We’ll have to see if this turns out to be a consistent pattern. There were generally fewer carabids in the two control treatments.

Rove beetles

Two pictures of insects. The one on the left has an arrow pointing to the short wing covers visible on its back (labeled ‘elytra’). The one on the right is courtesy of Joseph Berger, and can be found at Bugwood.org.
Rove beetles come in different sizes, but they all have short wing covers called elytra.

We did not catch very many rove beetles (only 55 in all of the plots for the entire summer), but like carabid beetles these predators live at the soil surface or in the soil. Some also scavenge things that are already dead or eat seeds. You can recognize them by the short wing covers (called elytra) on their backs. I think they look like mini capes.

Hover flies

Left: black and yellow hover fly on a bright yellow coreopsis flower; Middle: a different kind of adult hover fly perched on a person’s skin; Right: a larval hover fly that looks like a small translucent caterpillar on a leaf near a green aphid. This picture was taken by Ken Wise.
Adult hover flies (left and middle pictures) have only two wings and big eyes, even though they are often black and yellow striped like bees. The visually unimpressive larva in the picture on the right is about to eat an aphid.

Hover flies (also called syrphids) come in many shapes and sizes and get their name from the way the adults hover in the air when traveling between flowers. Many look like bees, but if they hold still long enough and you look closely, you will see that they only have two wings (bees have four), and they have very large eyes. The adults feed on pollen and nectar and are also pollinators. The larvae are predators, eating aphids, whiteflies, and scales.

A bar graph showing numbers of hover flies (syrphids) caught in each treatment (mostly in pan traps and sweep nets). More hover flies were caught in direct-seeded treatments (C, F, and G), treatment D (buckwheat during the summer, transplanted in the fall), or the weedy control (treatment E). Fewer hover flies were caught in the spring transplanted treatments (A and B) or the grass control.
I added up all of the hover flies we caught in each plot, then took the average of these summer-long counts from the four plots of each treatment in our field. The black lines stretching above and below the top edge of each bar show one standard error (measure of variability amongst the four plots) above and below the mean value.

We were surprised to see similarly low numbers of hover flies in the two spring transplanted plots (in which deliberately-planted wildflowers were largest and produced the most flowers) and in the mowed grass control. More hover flies were collected from the weedy control, all the direct seeded plots, and the fall transplanted plots (which had smaller wildflowers with fewer blooms). We don’t know why.

Lady beetles

Spiny black and orange larval lady beetle on a green leaf.
Although lady beetles are familiar as natural enemies of pests, their larvae (like this one) are not always so easily recognized. Larvae are often (but not always) elongated, look a bit spiny, and are orange and black.

Lady beetles may be the most well-recognized biocontrol agent, but they were not the most abundant one collected in our sampling. We only collected 65 larvae or adults from all plots over the entire summer. Both life stages are predators, but adults of at least some species will also eat pollen and nectar. We identified the species of each adult (but not the larvae), and a picture of each is below.

From left to right: Pink lady beetle with black spots on a dandelion flower is the pink spotted lady beetle (Coleomegilla maculata); red lady beetle with black spots crawling on a plant stem is a seven-spotted lady beetle (Coccinella septempunctata); another red lady beetle with black spots - including two elongated spots near its rear end that look like parentheses – is the parenthesis lady beetle (Hippodamia parenthesis) whose picture was taken by Whitney Cranshaw, Colorado State University and is available on Bugwood.org; another red lady with black spots is the variegated lady beetle (Hippodamia variegata) and its picture was taken by Frank Peairs from Colorado State University and is available at Bugwood.org; the final lady beetle has a black and orange-yellow checkerspot pattern and is the checkerspot lady beetle (Propylea quatuordecimpuctata) whose picture was taken by Ken Wise with the NYSIPM Program.
We collected adults of these five lady beetle species in our plots during Summer 2019.

Lacewings

Top picture is a magnified picture of an elongated larval lacewing with prominent pincher-like jaws; bottom picture is a green lacewing feeding on pollen from a white buckwheat flower.
Lacewing larva (top) and adult (bottom). Adults may also be brown, but will have a similar shape.

All lacewing larvae are predators, and the more easily recognized adults of some species are also predators. Others eat pollen as adults. We did not catch very many in our plots; only 40 all summer from all plots.

Minute pirate bugs

Small black and white insect, magnified.
Minute pirate bugs may be small, but they are mighty predators!

This may be one of my new favorite natural enemies. They are definitely minute (no more than a quarter of an inch long) but feed on small insect pests like aphids, mites, scales, and thrips, as well as pollen and nectar. We only collected 19 from all plots over the whole summer. At home, I sometimes find them running across my table after I’ve brought freshly cut flowers inside. In this video, you can see one exploring the map of a corn maze. Actually, it was looking for thrips to eat.

minute pirate bug on corn maze map

Bees

Six pictures of different bees. Some are large like bumble bees or carpenter bees, some are smaller, and one is green.
When we think of bees, sometimes we think of just honey bees and bumble bees. But many different bees utilized the pollen and nectar from the wildflowers we planted. Just a few are pictured here.

Interestingly, while we collected a lot of bees of many different kinds over the summer (at least 18 different genera), very few were the iconic honey bees or bumble bees. I have been told by a bee expert that the pan traps tend to catch bees other than honey or bumble bees, and we did set these traps about twice as often as we used sweep nets. So this may have impacted the types and numbers of bees we collected. Nevertheless, these data are a reminder that there are lots of bees out there besides the ones we’re most familiar with. I encourage you to learn more about wild bees of New York.

A bar graph showing the average number of bees caught in each treatment (mostly in pan traps) summed over the entire summer. The most bees were caught in spring-planted treatments (A, B, and C) and the least bees were caught in the grass control treatment (H). The bars contain very small orange (for honey bee) and yellow (for bumble bee sections) sections. The vast majority of bees caught were other wild bees (green).
We caught quite a few bees last summer! However, the vast majority of them were not honey or bumble bees. Importantly, we don’t have bee counts for all sampling dates, yet.

Butterflies

At the beginning of this post, I listed three methods we used to collect insects. Well, actually there was a fourth method, but it was used to count insects rather than to collect them. We did a Pollard Walk through each plot once a month by simply walking along the side of the plot and counting the number and type of butterflies we saw. We counted very few butterflies during these walks, but here are pictures of the species that did visit our plots (either in the adult or caterpillar life stage).

Collage of six different butterflies (Milbert’s tortoiseshell, viceroy, clouded sulphur, red admiral (photo by Daniel Herms, The Ohio State University and available on Bugwood.org), cabbage white (photo by Mary C Legg, available on Bugwood.org), and painted lady) and two caterpillars (monarch and swallowtail).
These are the butterflies we observed in our beneficial insect habitat plots during Summer 2019. Some, like the monarch and swallowtail we only saw as caterpillars; never as adults.

So that’s it for the beneficial insects I’m going to write about today. We also caught some not-so-beneficial insects (and mollusks).

Tarnished plant bugs

Three pictures of tarnished plant bugs, feeding on the stem of a yellow flower, up close, and sitting on a white aster flower.
Tarnished plant bugs have a distinct pattern on their backs, and also benefit from the same floral resources that support beneficial insects.

These are generalist herbivores, feeding on leaves, fruits and flowers of many plants. They can be damaging pests on some fruits (like strawberries) and vegetables. In our plots, I think they caused some damage to the coreopsis flowers. We’re not too worried because they aren’t pests of Christmas trees, but we were disappointed to find the largest numbers of tarnished plant bugs in the more mature habitat plots (those started by transplanting, as opposed to direct-seeding). Other researchers also reported that planting wildflower strips adjacent to strawberries could increase tarnished plant bug populations.

A bar graph showing numbers of tarnished plant bugs caught in each treatment (mostly in sweep nets, but some in pan traps). More tarnished plant bugs were caught in treatments with transplanted wildflowers (A, B, and D), and also quite a few in the weedy control. The fewest tarnished plant bugs were caught in the grass control plots.
I added up all of the tarnished plant bugs we caught in each plot, then took the average of these summer-long counts from the four plots of each treatment in our field. The black lines stretching above and below the top edge of each bar show one standard error (measure of variability amongst the four plots) above and below the mean value.

Leafhoppers

Two different leafhoppers (one yellow and one green) magnified to clearly show their pointy heads and bristled back legs.
There are many different species of leafhoppers out there, but they all have pointy heads that are flattened and bristles on their back legs. The bristles are much easier to see with magnification, as in these pictures.

Leafhoppers are another insect that we aren’t too concerned about with Christmas trees, but can be a pest of other crops. I learned that you can distinguish this group of insects by their pointy flattened (top to bottom) heads and the bristles on their back legs. The spring transplanted plots in which wildflower plants were most mature and produced the most blooms also had fewer leafhoppers than other treatments.

A bar graph showing numbers of leafhoppers caught in each treatment (mostly in pan traps, but many in pitfall and sweep nets, too). Although we caught a lot of leafhoppers, we caught fewer in the treatments where wildflowers were transplanted in the spring (A and B).
I added up all of the leafhoppers we caught in each plot, then took the average of these summer-long counts from the four plots of each treatment in our field. The black lines stretching above and below the top edge of each bar show one standard error (measure of variability amongst the four plots) above and below the mean value.


Slugs

Slimy slug being held next to a ball point pen for size comparison. The slug is about one third the length of the pen.
Biggest slug of 2019 insect sampling!

As I mentioned at the beginning of this post, slugs are mollusks, not insects (or even arthropods) and they can be pests of many different crops. The picture above is definitely the largest slug that we collected during 2019. Interestingly, there seemed to be fewer slugs in the plots where we solarized the soil during the 2018 growing season. I was interested to learn that soil solarization is known to kill slug eggs, and I wonder if we’re seeing that effect here. I don’t know how far slugs move from where the eggs hatch, and it will be interesting to see if this effect persists in future years.

A bar graph showing numbers of slugs caught in each treatment (mostly in pitfall traps, but some in pan traps). We caught fewer slugs in the plots that were solarized and had wildflowers direct seeded in the fall (treatment F) than in other treatments.
I added up all of the slugs we caught in each plot, then took the average of these summer-long counts from the four plots of each treatment in our field. The black lines stretching above and below the top edge of each bar show one standard error (measure of variability amongst the four plots) above and below the mean value.

Believe it or not, this is not the full list of insect (or arthropod, mollusk, or annelid) groups we collected and counted. Also, I will remind you again that these data (especially the bee data) are preliminary. Although I’m sad to be unable to collect insects this summer due to COVID-19, I’m looking forward to finishing the analysis of the 2019 data and getting ready to hopefully collect insects again in 2021. In the meantime, you can see pictures of what’s happening in these plots throughout the summer on my Twitter and Instagram accounts. And I will write at least one more post about this project later this year.


This post was written by Amara Dunn. All pictures or videos were taken by her, unless otherwise credited.

This work is supported by:

  • Crop Protection and Pest Management -Extension Implementation Program Area grant no. 2017-70006-27142/project accession no. 1014000, from the USDA National Institute of Food and Agriculture.
  • New York State Department of Agriculture and Markets
  • Towards Sustainability Foundation

Choosing plants for Beneficial Habitat At Home

light pink flower with a fuzzy bee crawling on it
A bee gathers pollen from a cosmos flower.

Recall from this post that I’m creating habitat for beneficial arthropods (including insects, spiders, predatory mites, etc.) around my house this spring. Because more of us may be doing this while we’re staying home to keep each other safe, I’m sharing my experiences here (as well as on Twitter and Instagram). The previous post covered site selection. Today I will talk about the species I’ve chosen (and why).

What I’m planting in my yard

Sunny yard alongside a house with several freshly-dug garden beds
My side yard faces south and gets the most sun. But it’s a pretty small area and I want it to look reasonably tidy. I’m still building rapport with my neighbors.

The front and side yards get plenty of sun (because they face south and west), so I’m looking for plants that thrive in full sun. And I’ll admit that I’m interested in more than just supporting beneficial arthropods. I also want my front and side yards to look reasonably nice. (I don’t want to make enemies of my new neighbors!) And I want to grow flowers for cutting. So I am not sticking strictly to native plant species or to perennials. Some plants I picked just because I thought they looked nice. For example, I was beguiled by ‘Chim Chiminee’ Rudbeckia. The pollen and nectar produced by the native species may have been bred out of this variety. I’ll find out. I also just love ‘Persian Carpet’ zinnias.

Plants growing in a large clump with smaller flowers in combinations of yellow, orange, and red.
I grew these ‘Persian Carpet’ zinnias in my garden last year. I love the mix of colors and the abundant blooms that last well when cut.

I’ve started a lot of plants from seeds I had in my fridge (e.g., snap dragons, echinacea, bachelor’s buttons). Others I will direct-seed outside (e.g., sunflowers, zinnia, cosmos), and I may also purchase some transplants from local nurseries (many have great strategies for safe curbside pick-up!).

Several small seedlings growing in paper pots.
I’m starting some plants from seed at home. Using paper pots means that I can compost them when I’m done, and not worry about carrying pathogens over from year to year on plastic pots that I would have to wash very thoroughly after use. Once a plant pathologist, always a plant pathologist!

Choosing plants for beneficial arthropods – the basics

Which plant species to grow to support beneficial arthropods (whether it’s pollinators or natural enemies of pests, or both) is a common question. The answer is both straight-forward, and also complicated. In addition to shelter and protection from pesticides, all beneficial arthropods need something to eat. In general, plants that provide plenty of nectar and pollen help to provide this food. Many natural enemies of pests will also eat pollen or nectar (e.g., at certain life stages, or as a supplement to the pests they eat). Even if they don’t, the pollen and nectar will often attract small arthropods that natural enemies can feed on. So, the simple answer is that a plant that produces lots of pollen and nectar, will thrive in the setting where you want to plant it, and is not invasive is a good choice for supporting beneficial arthropods. Plants that are marketed as supporting pollinators are easy to find and are likely to also support natural enemies.

Bright purple flower with three petals with a yellow and black striped fly perched on it
This Ohio spiderwort (Tradescantia ohiensis) in our beneficial arthropod habitat plots is being visited by a hover fly. Hover fly larvae are excellent aphid predators!

But, of course, it’s not exactly that simple…

Choosing plants – natives, cultivars, and more

Many people ask if they should only grow native plant species, or if it’s ok to plant cultivated varieties of native species, or non-native species. (Hopefully it’s obvious that you should never plant an invasive species in your yard!) Annie White at the University of Vermont wrote a 254-page dissertation on the topic. These two sentences from her abstract summarize her findings nicely: “Our study shows that many insect pollinators prefer to forage on native species over cultivated varieties of the native species, but not always, and not exclusively. Some native cultivars may be comparable substitutions for native species in pollinator habitat restoration projects, but all cultivars should be evaluated on an individual basis.” You might also want to take a look at this article from the University of Maryland and this one from the Xerces Society. In summary, I would say it’s up to you whether you want to plant exclusively native species, or not.

According to David Smitley from Michigan State University, perennials are usually better choices for bees than annuals, but this article includes a list of annuals that are attractive to bees. Alyssum is an annual that definitely supports natural enemies, but many of the other annuals on this list may also support natural enemies.

Deep orange sunflower with a bee visiting it, starting to gather pollen
Although they are annuals, sunflowers are still very attractive to bees. Also, I like them as cut flowers.

Choosing plants – attracting specific arthropods

If you are trying to attract very specific natural enemies (e.g., parasitoid wasps, lady beetles) your plant choice can also get more complicated. Some great work has been done by researchers at Michigan State University documenting which arthropods (pollinators, natural enemies, and some pests) visited different plant species native to Michigan. They also offer a simplified summary. “Habitat Planning for Beneficial Insects” from the Xerces Society includes notes in the charts at the end about which beneficial insects are particularly attracted to the species listed. This resource from Oregon State University describes some specific plants and the arthropods they support. Finally, although this study was conducted in the United Kingdom, there might be some relevance to the Northeast U.S.

Update: During Summer 2020 (while I was doing less field work), I reviewed the literature I could find on the value of specific plants for specific natural enemies. Here is the spreadsheet I compiled.

Lists and searchable databases

In addition to the resources already listed, you may find the following helpful in selecting plants:

If you want to focus on native plants, there are many organizations committed to supporting local native plants…too many to list here, but some online searching may turn up an organization that is local for you.

My current plant list

This table lists what I either have already seeded (inside or outside), or am planning to direct seed outside when it gets a little warmer. In addition to the common, scientific, and cultivar name of each plant and whether it is a perennial or an annual in NY, I also included information about why I chose it. I only marked plants as supporting bees or natural enemies if I could find documentation of that fact in the resources above. It may be that more of the plants on this list support beneficial arthropods. If you have additional information on these plants, please let me know! In some cases (for example, zinnia) the species is reported to support beneficial arthropods, but I don’t know if the cultivars I’m growing will. In many cases, the decorative value of the plant was a big part of why I chose it. The arnica? Well, I just saw that in a seed catalog this winter and ordered some on a whim.

Common name Scientific name Cultivar Annual or Perennial in NY Bees Natural enemies Decorative
Arnica Arnica chamissonis perennial
Bachelor’s buttons Centaurea cyanus annual X X
Blanketflower Gaillardia aristata Burgundy perennial X X X
Blue vervain Verbena hastata perennial X
Calendula Calendula officinalis Remembrance Mix annual X X
Celosia Celosia argentea cristata Red Flame annual X X
Cosmos Cosmos bipnnatus Dwarf Sensation annual X X X
Echinacea Echinacea purpurea perennial X X
Marigold Tagetes erecta Senate House annual X X
Poppy Papaver somniferum Frilled White Poppy annual maybe X
Poppy Papaver sp. seed saved by a colleague annual maybe X
Pyrethrum daisy Chrysanthemum cocineum perennial X
Rudbeckia Rudbeckia hirta Chim chiminee perennial maybe X
Snap dragon Antirrhinum majus annual X X
Strawflower Xerochrysum bracteatum annual X
Sunflower Helianthus anus Mammoth Greystripe annual X probably X
Sunflower Helianthus anus Evening Sun annual X probably X
Sunflower Helianthus anus Sonja Dwarf annual X probably X
Zinnia Zinnia elegans Queen Lime with Blush annual maybe X
Zinnia Zinnia elegans Candy Cane Mix annual maybe X
Zinnia Zinnia elegans Benary’s Wine annual maybe X
Mexican zinnia Zinnia haageana Persian Carpet annual maybe X


This post was written by Amara Dunn, Biocontrol Specialist with the NYSIPM program. All images are hers, unless otherwise noted.

This work is supported by:

  • Crop Protection and Pest Management -Extension Implementation Program Area grant no. 2017-70006-27142/project accession no. 1014000, from the USDA National Institute of Food and Agriculture.
  • New York State Department of Agriculture and Markets
  • Towards Sustainability Foundation

Compatibility: Pesticides and natural enemies of pests

Green insect with lacey wings
Lacewings (especially larvae; this one is an adult) are great natural enemies of pests. You want to keep them happy and healthy!

Natural enemies of pests are going to help you out with pest control, so when you are applying pesticides, it’s in your best interest to choose products that will have the least impact on them. Two quick points before we get into details for where to find this information:

  1. Remember that the information in this post is not a substitute for a pesticide label. The label is the law, and you must read and follow the label of any pesticide you are using. Laws and labels change. It is your responsibility to use pesticides legally. Trade names used here are for convenience only; no endorsement of products is intended, nor is criticism of unnamed products implied. For questions about pesticide use, regulations, and safety, contact the Cornell Pesticide Management Education Program: pmep_webmaster@cornell.edu.
  2. A great way to protect natural enemies is by following the steps for IPM. Preventing pests (e.g., through cultural strategies and exclusion), scouting to detect pests early when populations are low, and proper identification of pests will help you reduce your need to use pesticides and can save you money. Win win!

Ok, let’s assume you’re doing good IPM and you’ve gotten to the point where you need to choose a pesticide. How do you make the best choice for protecting natural enemies? Here are a few options. (Note that I did post about this about 2 years ago. I’ve learned more, so I thought an update would be in order.)

Read the label

This should go without saying. You should be doing this anyway when you are considering using a pesticide. The label may contain information about the compatibility of a pesticide with either natural enemies or pollinators. And of course it will contain important information about how to minimize risks to yourself and the environment when you use it.

EIQ

EIQ stands for Environmental Impact Quotient. You can read more details on the NYSIPM website, but in a nutshell the EIQ puts a number on the risks of pesticides at the rates they are applied in the field. You can use the EIQ calculator on our website to compare these numbers for different pesticides. The higher the number, the higher the risk. There are different components to the EIQ; risks to consumers, workers, and the environment (ecological). The ecological risk will include risks to natural enemies (as well as fish, birds, and bees).

Pocket IPM Greenhouse Scout App

The Greenhouse Scout app provides information for doing IPM in greenhouses, including pest insects, beneficial insects, application technology, and pesticide interactions. It also gives you a place to record scouting results and track product applications.
A screenshot from the home screen of the Pocket IPM Greenhouse Scout App. You can find information about compatibility with natural enemies under either “Beneficials” or “Pesticide Interactions”.

Temporary update: As of January 2024, this app is in the process of being updated and is not currently available. Hopefully a new and improved version will be available again soon!

Especially if you are growing in a greenhouse and releasing a lot of natural enemies, you may find this app helpful. In addition to providing information about compatibility of pesticides with arthropod natural enemies you may be releasing, you can also use it to help you keep records of scouting and product applications.


Cornell Guidelines

If you are a commercial producer, hopefully you are already utilizing the Cornell Guidelines, as they are a wealth of information on many subjects. At least some of them also include information on the toxicity of different pesticides to natural enemies. For example, if you have the grape guidelines, check out Table 4.2.2 for insecticide toxicity to natural enemies.

Websites and apps from companies that produce natural enemies

Companies that sell natural enemies (especially predatory and parasitoid arthropods for greenhouse pest control) have an interest in making sure that customers don’t inadvertently kill the natural enemies they buy with pesticides they are applying. I am aware of searchable databases, apps, or charts describing pesticide compatibility from four companies that sell (mostly) arthropod and nematode natural enemies: Agrobio, Biobest, BioWorks, and Koppert. If you know of some I’ve missed, please let me know! There are of course other companies that supply natural enemies. Here I’m focusing on resources that help you choose pesticides to conserve natural enemies.

Agrobio

This website is also available as an app for Android (but not Apple) devices. To use it, start by clicking Organisms selection and choose the natural enemies you want to conserve. Then, click Ingredients selection and choose the pesticides you are thinking about applying. You can only search active ingredients, not product names. Finally, click Query. Use the legend to help you interpret the table that’s produced.

Biobest

Biobest has put their compatibility information into an app for Android and Apple devices. Select pesticides by either active ingredient or commercial product name. Then, search for the name of the Beneficial organism you want to conserve. Note that there are a lot of pesticide/natural enemy combinations for which toxicity data just aren’t available. If you select a pesticide, then natural enemies for which no data are available will be grayed out in the Beneficial organism list. As you check boxes next to pesticides and natural enemies, a chart is automatically generated. The results include information on toxicity to different life stages of the beneficial organisms and persistence of the product.

BioWorks

BioWorks provides a table of the compatibility of their products with pesticides, fertilizers, and adjuvants. You can filter the table by several criteria to find the information you’re looking for.

Koppert

This website is also available as an app for Android and Apple devices. Start by entering the name of the Beneficial organism you want to protect. You can search by either the Koppert product name, or the Latin (scientific) name, but you can’t select from a drop-down menu. Just start typing. Then, choose the Agent (pesticide you are considering applying), by either trade name or active ingredient. Again, you need to know the name; you can’t select from a drop-down list. Start typing, and then check the box next to the product you are interested in. Click Results and be sure to click on ‘Legend’ at the bottom to help you interpret the table. There is also a more complete explanation of information in the legend under Info.

Some caveats about these websites

Admittedly, finding information about conserving natural enemies that are not commercially available for release (e.g., in greenhouses) has some challenges. These websites tend to focus on what you can buy and release, rather than on what may be naturally occurring in a field. Although sometimes there is some overlap. These apps/websites don’t include all natural enemies, and data aren’t available for all natural enemy/pesticide combinations. Also, these websites/apps usually list natural enemies by scientific names. Do you know what the scientific name of a lacewing is? I didn’t before I started this job!

To help with this last barrier, I created a chart (also below) to help you figure out what scientific names you should look for on these websites/apps if you want to conserve a particular natural enemy. It also includes information about which pests the natural enemies target, whether they are commercially available, and whether they are naturally occurring (not necessarily native) in NY.

Arthropod and nematode natural enemies

Can I buy them? Found in NY? If I want to conserve this beneficial arthropod… (whose scientific name is…) that helps me control… I should look for these names on the compatibility apps: 
yes yes aphid midges Aphidoletes aphidimyza aphids Aphidoletes aphidimyza
some yes beetles that are predators (for example, rove beetles, ground beetles, and others) Coleoptera is the scientific name of the insect group that includes all beetles. The following families are generally predatory: Coccinellidae (lady beetles), Carabidae (ground beetles), Staphylinidae (rove beetles), Cantharidae (soldier beetles), Melyridae (flower beetles) many insect pests Coleoptera is a beneficial insect listed on at least one compatibility app. However, some coleoptera are pests. And, since this is such a broad group, the compatibility information provided may not be correct for all beneficial beetle species.
yes hover flies, syrphid flies Syrphus spp, and many, many others aphids Syrphus spp.; Syrphus corollae; Episyrphus balteatus
some yes lacewings Chrysoperla spp. and some others aphids, insect eggs, small larvae Chrysopa carnea = Chrysoperla carnea; Chrysoperla spp.
some yes lady beetles Coccinellidae aphids, mites, small insects, insect eggs Coccinelidae, Coccinella 7-punctata, Hippodamia convergens
some yes minute pirate bug Orius insidiosus insect eggs, small caterpillars, thrips, mites, aphids Orius laevigatus may be a reasonable proxy; Orius spp.; Orius insidiosus
yes yes nematodes Steinernema spp., Heterorhabditis spp. thrips, fungus gnats, shore flies, some grubs Nematodes (note that this is a very broad category and it’s possible there are differences among species), Heterorhabditis bacteriophora, Steinernema, Steinernema feltiae, Steinernema carpocapsae
some yes parasitoid wasp Aphidius spp. aphids Aphidius spp., Aphidius colemani, Aphidius matricariae, Aphidius ervi
some yes parasitoid wasp Eulophidae, Diglyphus spp. leafminer larvae Diglyphus isaea
yes yes parasitoid wasp Braconids, Dacnusa sibirica leafminers Dacnusa sibirica
yes parasitoid wasp Aphelinidae, Aphelinus semiflavus aphids on potatoes Aphelinus abdominalis or Aphelinus mali may be reasonable proxies
yes yes predatory gall midge Feltiella acarisuga spider mites Feltiella acarisuga
some yes predatory mites Amblyseius (= Neoseiulus) fallacis, Typhlodromus spp., and probably others thrips, whitefly, pest mites; may vary among natural enemy species Amblyseius californicus, Amblyseius cucumeris, Amblyseius swirskii, Phytoseiulus persimilis are sold commercially and may be good proxies for the pesticide compatibility of naturally-occurring predatory mites
yes yes spined soldier bug Podisus maculiventris many immature insects, including many species of caterpillars Podisus maculiventris
 

some

some trichogramma wasps Trichogramma spp. moth eggs Trichogramma spp., Trichogramma brassicae, Trichogramma cacoeciae, Trichogramma evanescens, Trichogramma pretiosum

Other species of interest…

Can I buy them? Found in NY? If I want to conserve this beneficial insect… (whose scientific name is…) that helps me control… I should look for these names on the compatibility apps: 
yes yes bumble bee Bombus spp. NA – pollinator Bombus spp., Bombus terrestris
yes yes European honey bee Apis mellifera NA – pollinator Apis, Apis mellifera

Notes:

Different strains or populations of these natural enemies are sold by different companies and each population may differ from natural populations. Each company is most likely to report compatibility data that applies to their population. It’s not perfect, but it’s a start.

When the first word in the scientific name of an insect (e.g. Trichogramma) is followed by the designation ‘spp.’, it means multiple species that all belong to the same genus. Some compatibility information is given for only the larger group (e.g., Aphidius spp. or Syrphus spp.).

Natural enemies that are pesticides (active ingredients are microorganisms, i.e., fungi, bacteria, viruses)

If I want to conserve this microbial natural enemy… (whose scientific name is…) that helps me control… I should look for these names on the compatibility apps: 
Bt Bacillus thuringiensis (various strains are available, and they control different pests) many caterpillars and some immature beetle and fly pests (target pest varies by strain) Bacillus thuringiensis
entomopathogenic fungus Paecilomyces fumosoroseus = Isaria fumosorosea, Beauveria bassiana, Metarhizium anisopliae (= M. brunneum) (various strains) many insects (target pest depends on fungal species and strain) Paecilomyces (=Isaria) fumosoroseus, Beauveria bassiana, Metarhizium anisopliae (= M. brunneum)
fungi that attack plant diseases there are multiple species, including Trichoderma harzianum (several strains) Plant pathogens (the target pathogen depends on the fungal strain) Trichoderma harzianum T-22 is the only fungal natural enemy I found on these apps, so far. It is unlikely that its compatibility is representative of other fungi that are natural enemies.

Notes:

Different strains or populations of these microorganisms are sold by different companies and each of these populations may differ from natural populations. Each company is most likely to report compatibility data that applies to their population. It’s not perfect, but it’s a start.

In these apps/websites, the microbial active ingredient may be listed as the natural enemy (e.g., Paecilomyces fumosoroseus on Biobest website), but sometimes it’s only listed as a pesticide active ingredient. For compatibility of biopesticides with chemical pesticides, you should start by reading the label, then seek information provided by the manufacturer. I am starting to create biopesticide profiles that include available compatibilitiy information for these products.

All tables were assembled by Amara Dunn, NYSIPM using information from Natural Enemies of Vegetable Insect Pests (Hoffman & Frodsham) and were last updated January 2020.

Give it a try!

Imagine you were considering using one of the following active ingredients:

abamectin

acequinocyl

fenpyroximate

…to control spider mites. (Of course, before you did this, you’d read the labels and be sure that the use you were considering was legal!) If you were concerned about hurting parasitoids that help with aphid control (for example, the species Aphidius colemani and Aphidius ervi) which of these active ingredients would be the best choice (from a compatibility standpoint)?


Go ahead!


Look it up!


A note about microorganisms as natural enemies

Green leaf with blue rectangles with smiling faces representing microbes as natural enemies of the pest microbes (yellow rectangles with shocked faces). The blue microbes are producing blue droplets (representing antimicrobial compounds).
Microbes used to control pests are biopesticides. In this conceptual diagram, the happy blue microbes are producing antimicrobial compounds that are killing the plant pathogens (represented by yellow rectangles with shocked faces).

There are a few “natural enemies” on this chart that are actually biopesticides, and I have listed them separately. Remember that microorganisms (fungi, bacteria, viruses) that are natural enemies of pests are biopesticides. A few of them can be found in the websites/apps summarized above. There are two compatibility questions when it comes to using biopesticides with living microorganisms as active ingredients: (1) Will this biopesticide harm other natural enemies (e.g., predators and parasitoids)? and (2) Will the living microbe in this biopesticide be killed by other pesticides I might use? The websites/apps have some information about the compatibility of biopesticides with arthropod natural enemies. If you’re wondering about the compatibility of biopesticides with other pesticides, that may be a topic for another post (so many posts to write, so little time!). I’ll just offer two quick pieces of advice here:

  1. Read the label of the biopesticide. If it doesn’t contain compatibility information (for use with other pesticides) or doesn’t answer your questions about compatibility with other natural enemies, contact the manufacturer to get your questions answered.
  2. If you happen to be using one of their products, BioWorks describes the compatibility of their products with other pesticides, and this information is linked to individual product pages.

And what about the bees?

Take a look at the resources created by the Pollinator Network @ Cornell. They have prepared decision-making guides for several crops already, with more to come.


This post was written by Amara Dunn, Biocontrol Specialist with the NYSIPM program. All images are hers, unless otherwise noted.