Tag Archives: lawn

Protect Pollinators and Natural Enemies of Pests, Choose Pesticides Carefully

A bumble bee and a smaller bee resting on a magenta cosmos covered with tiny water droplets
These bees are just two of the beneficial insects you’ll want to protect from pesticides.

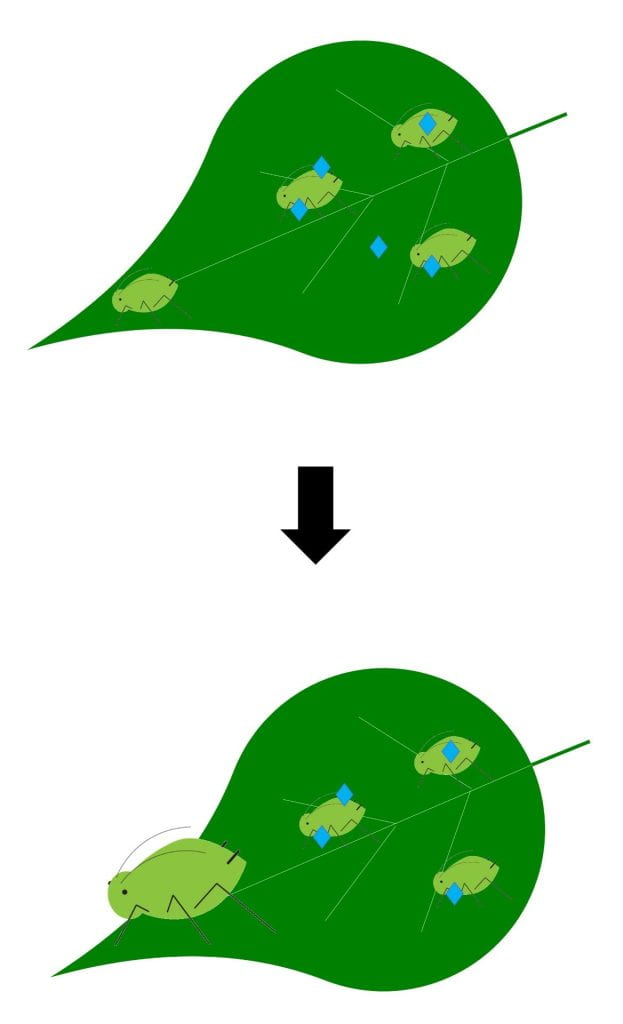
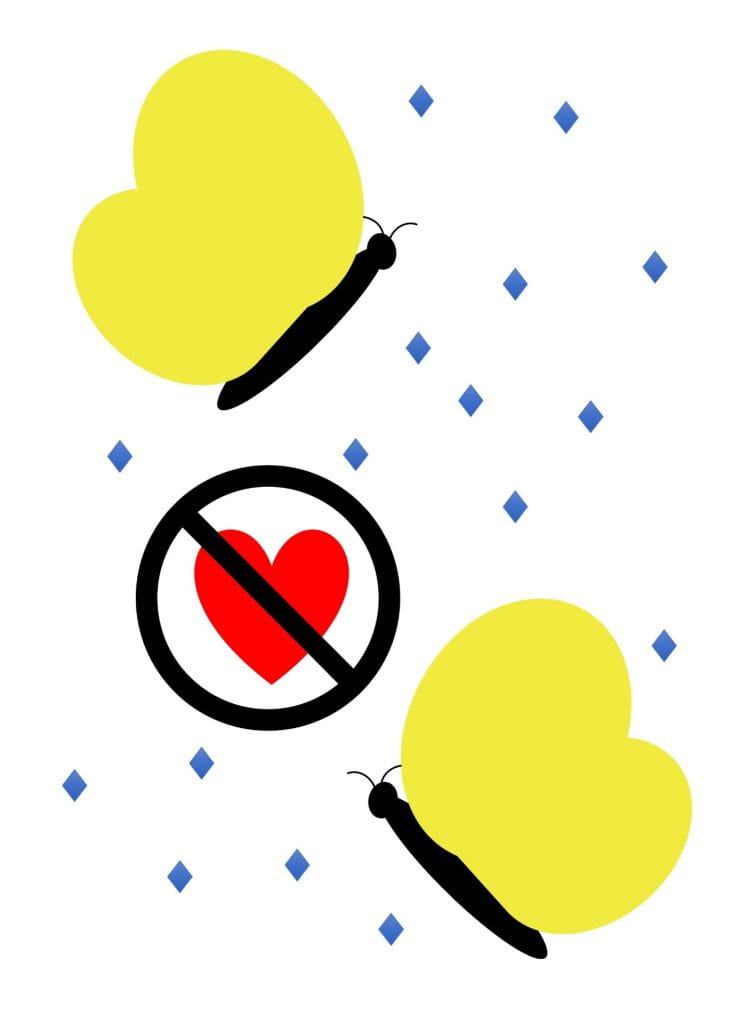
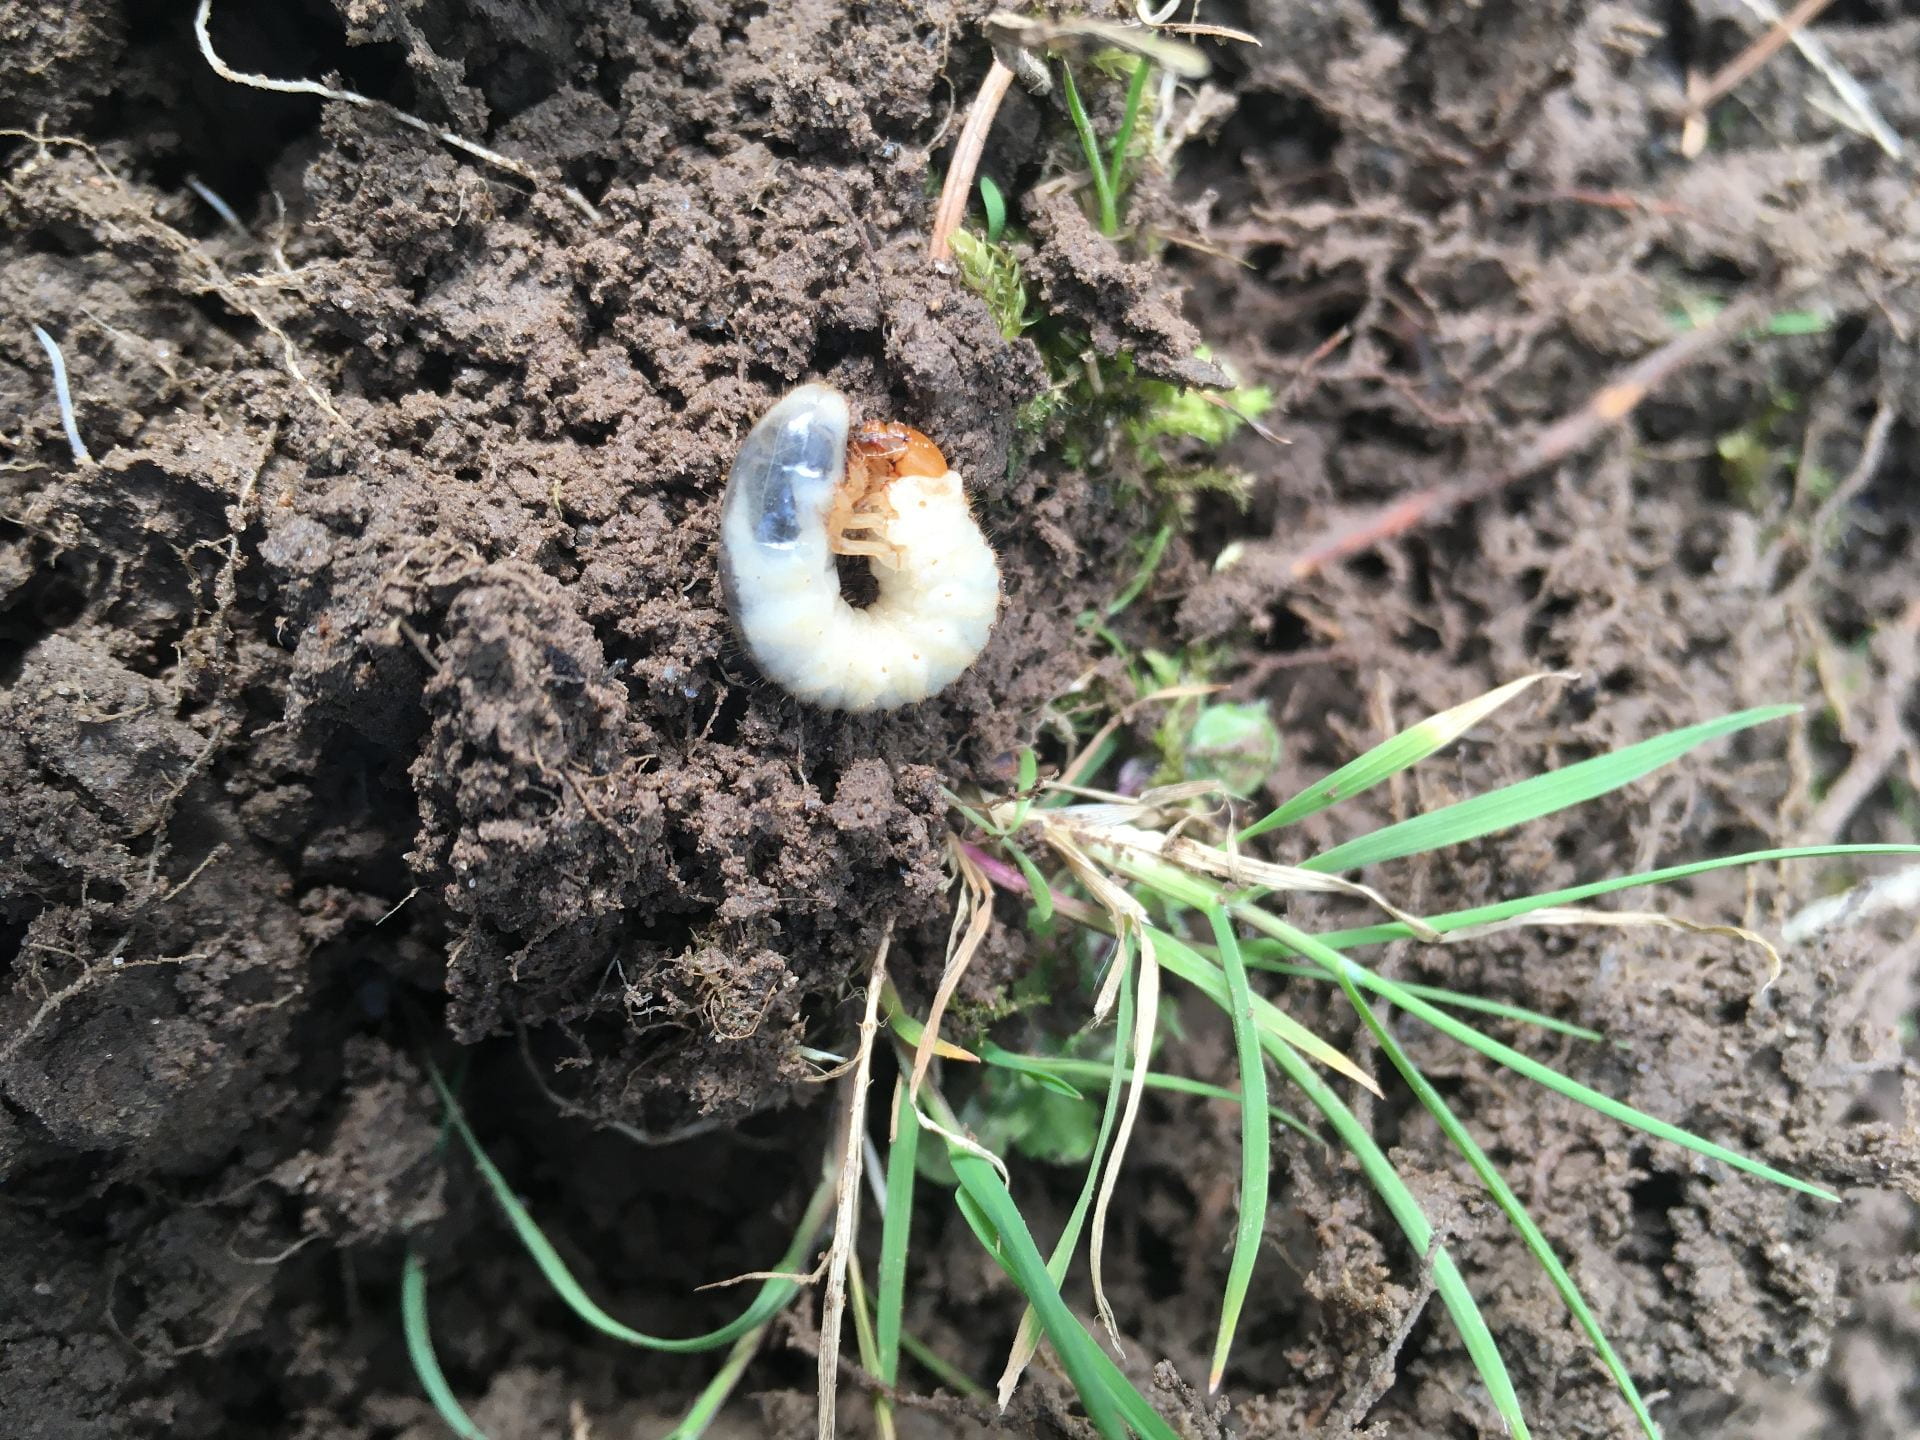
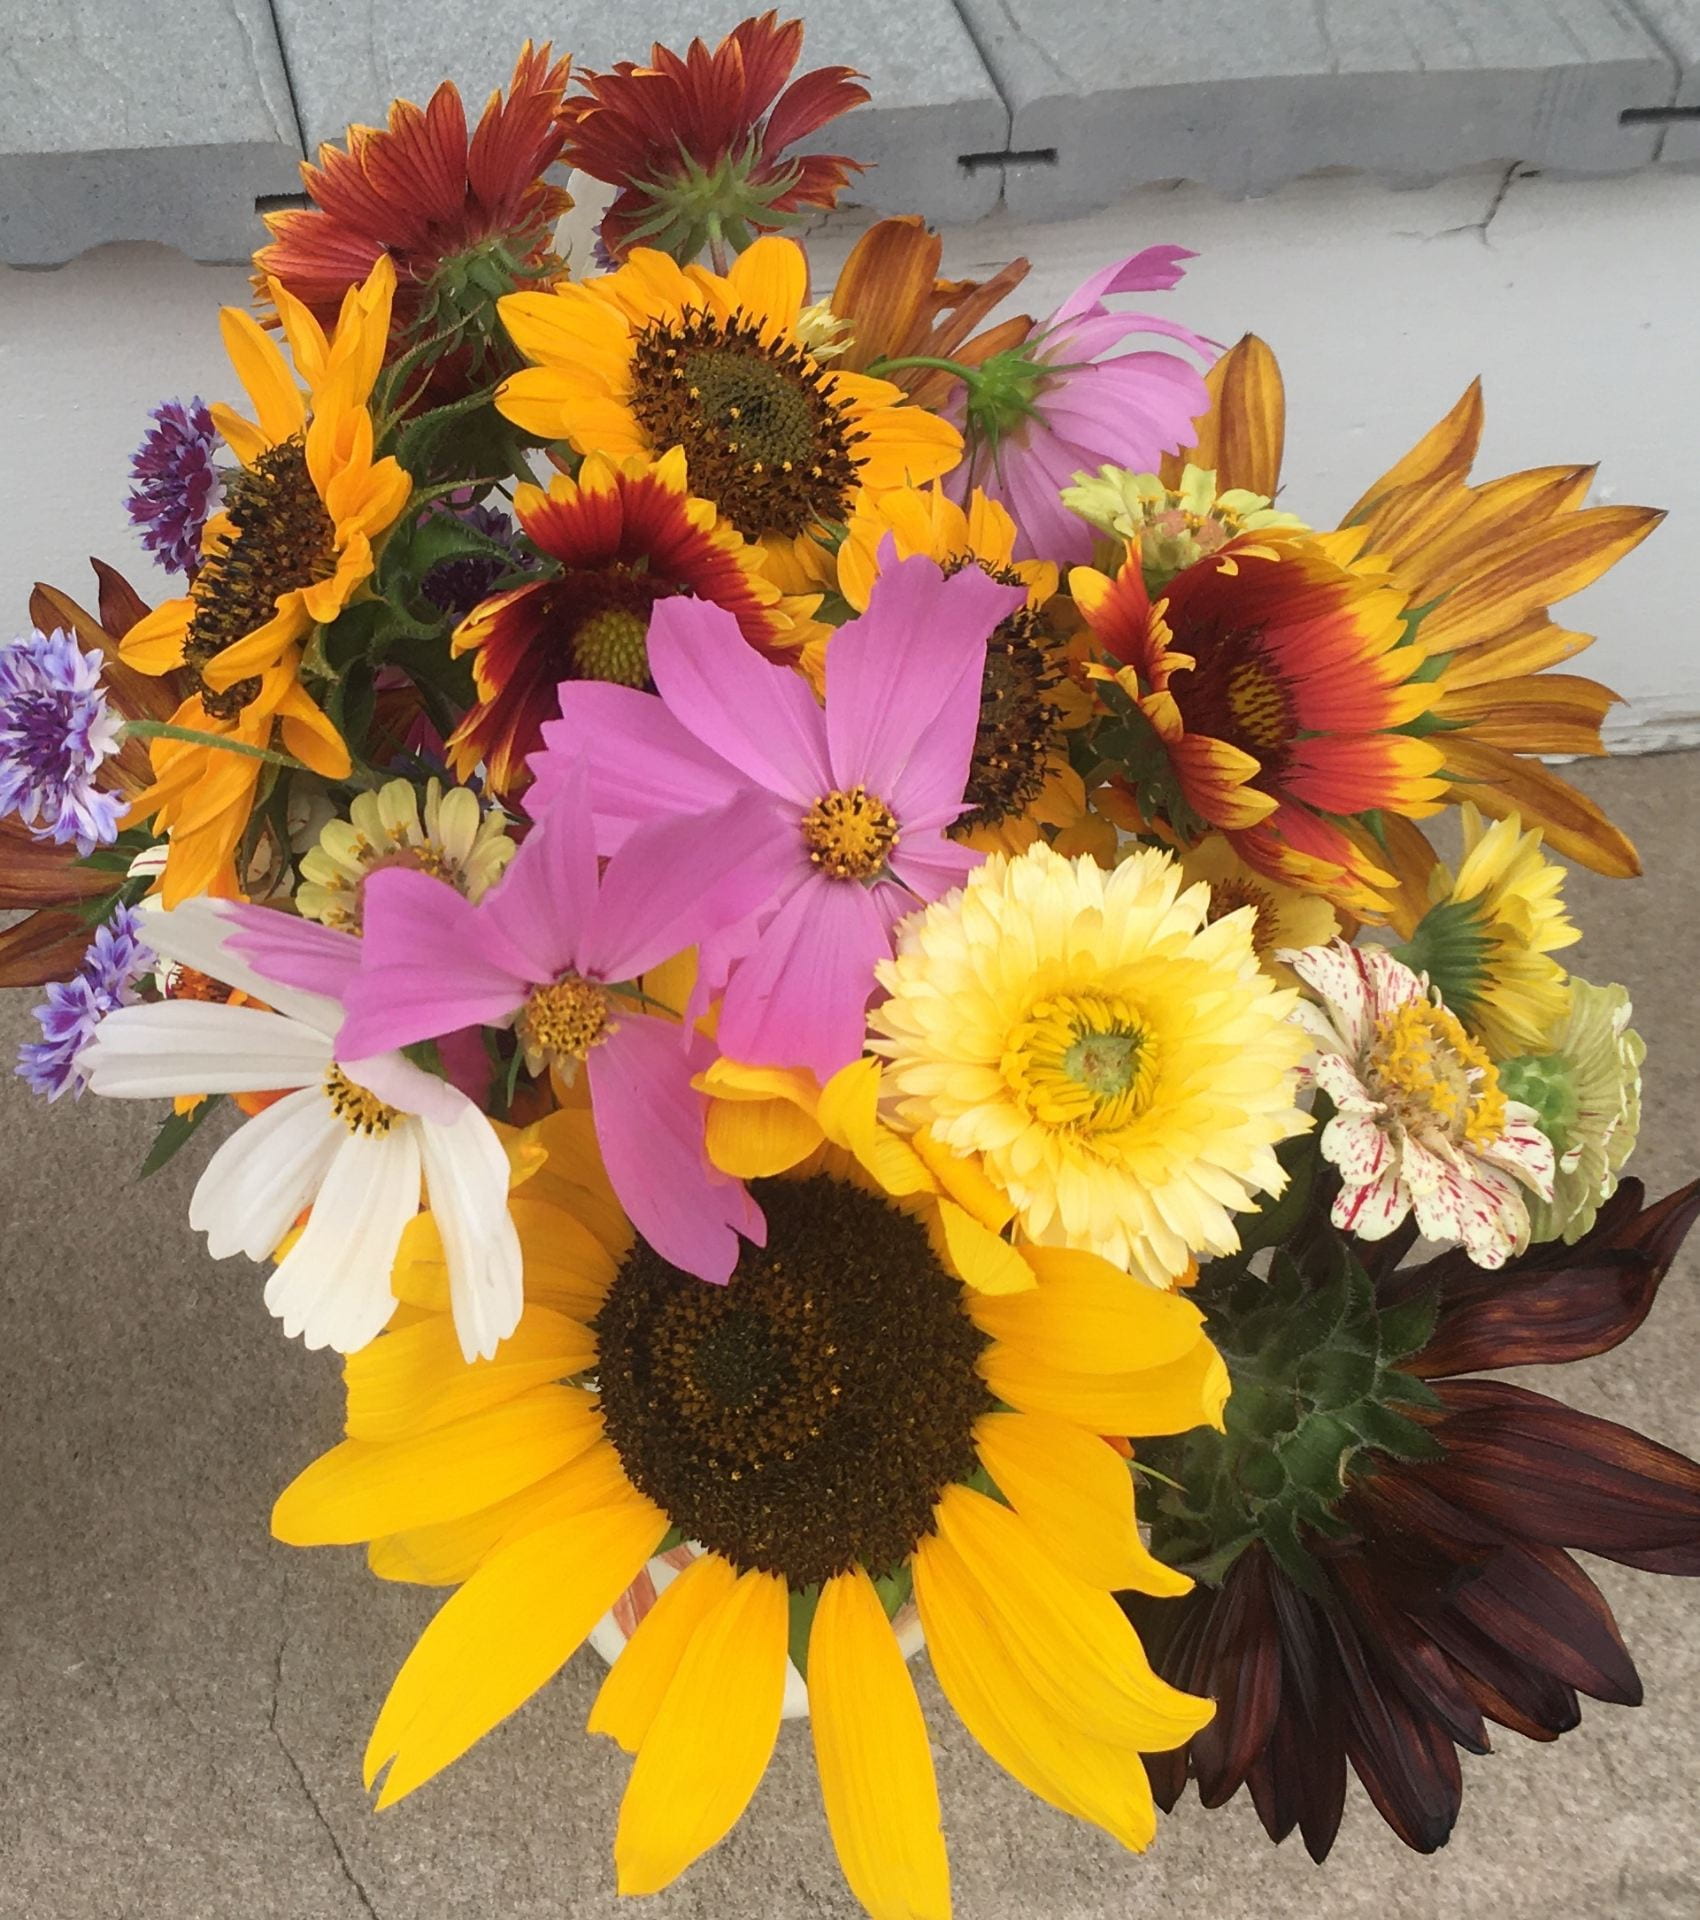
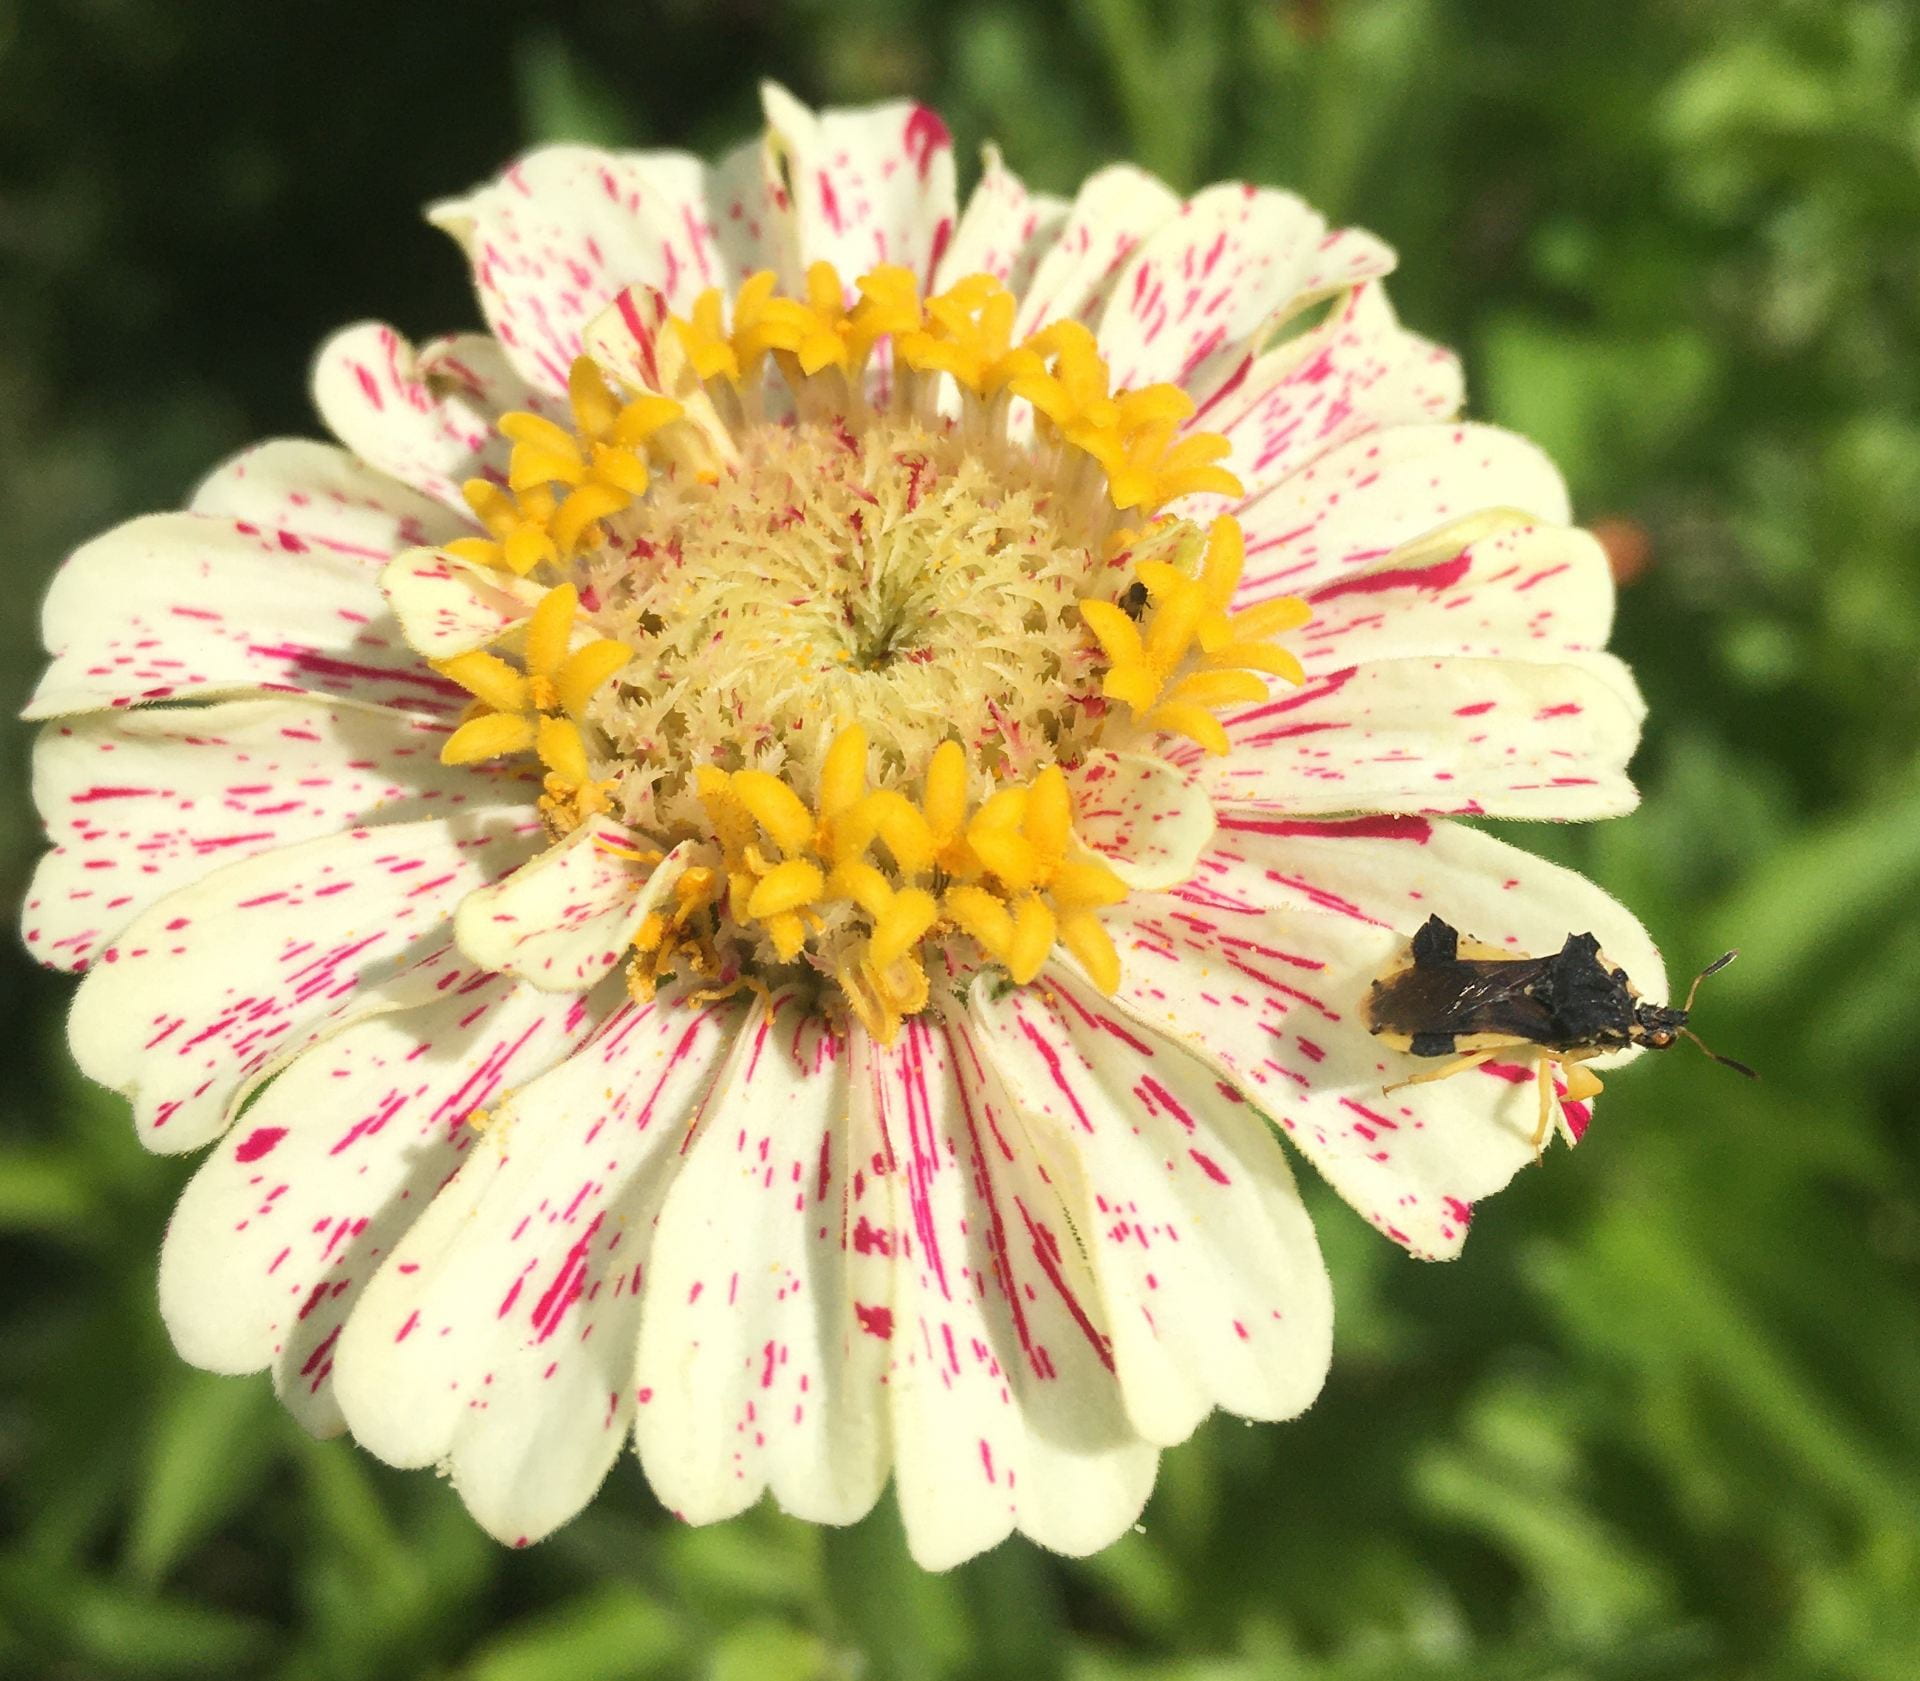
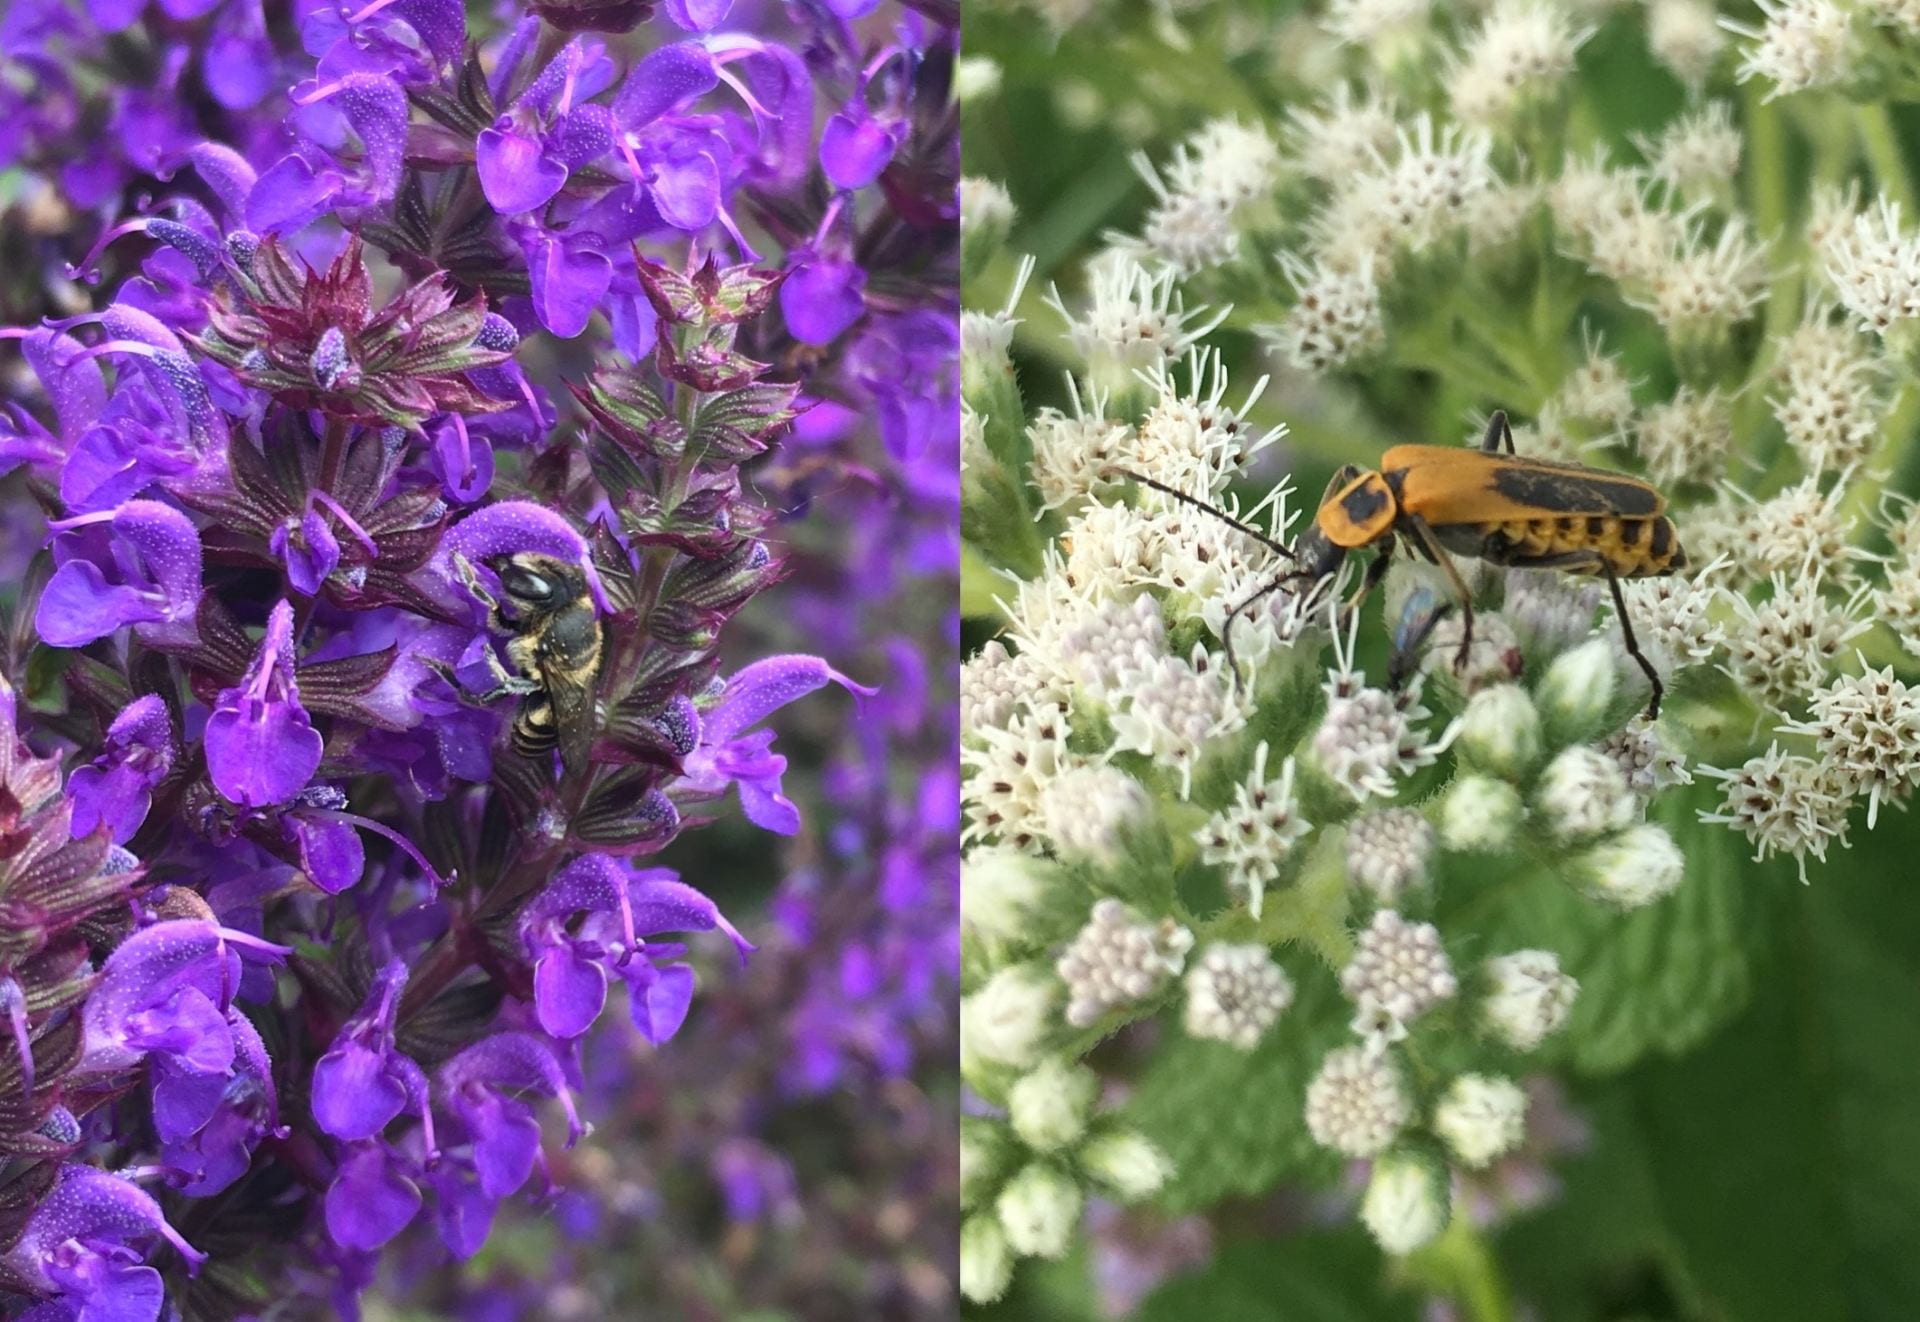
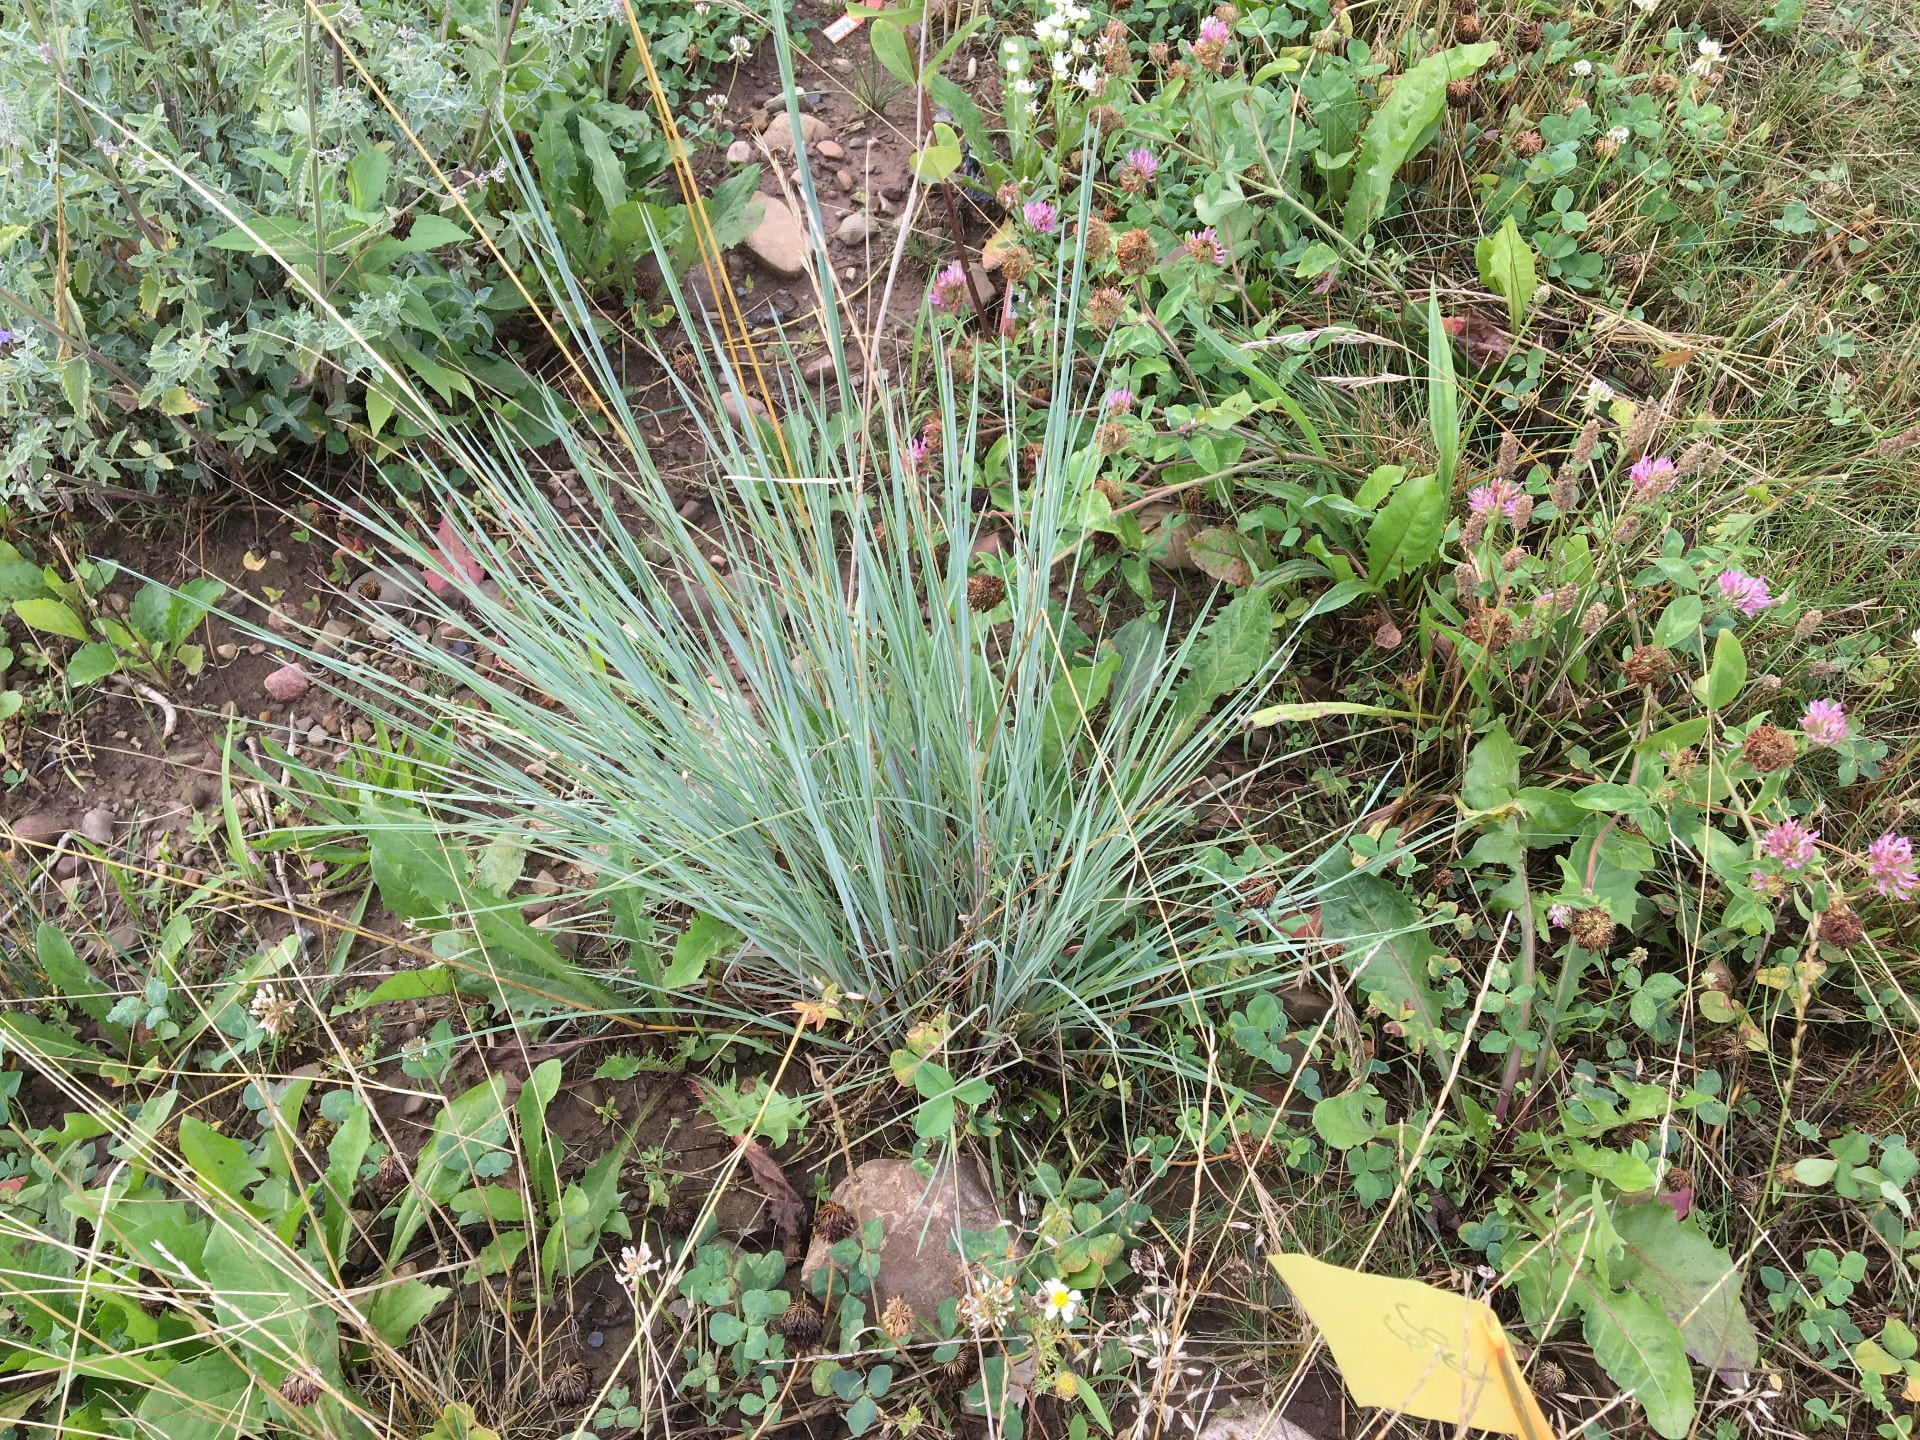
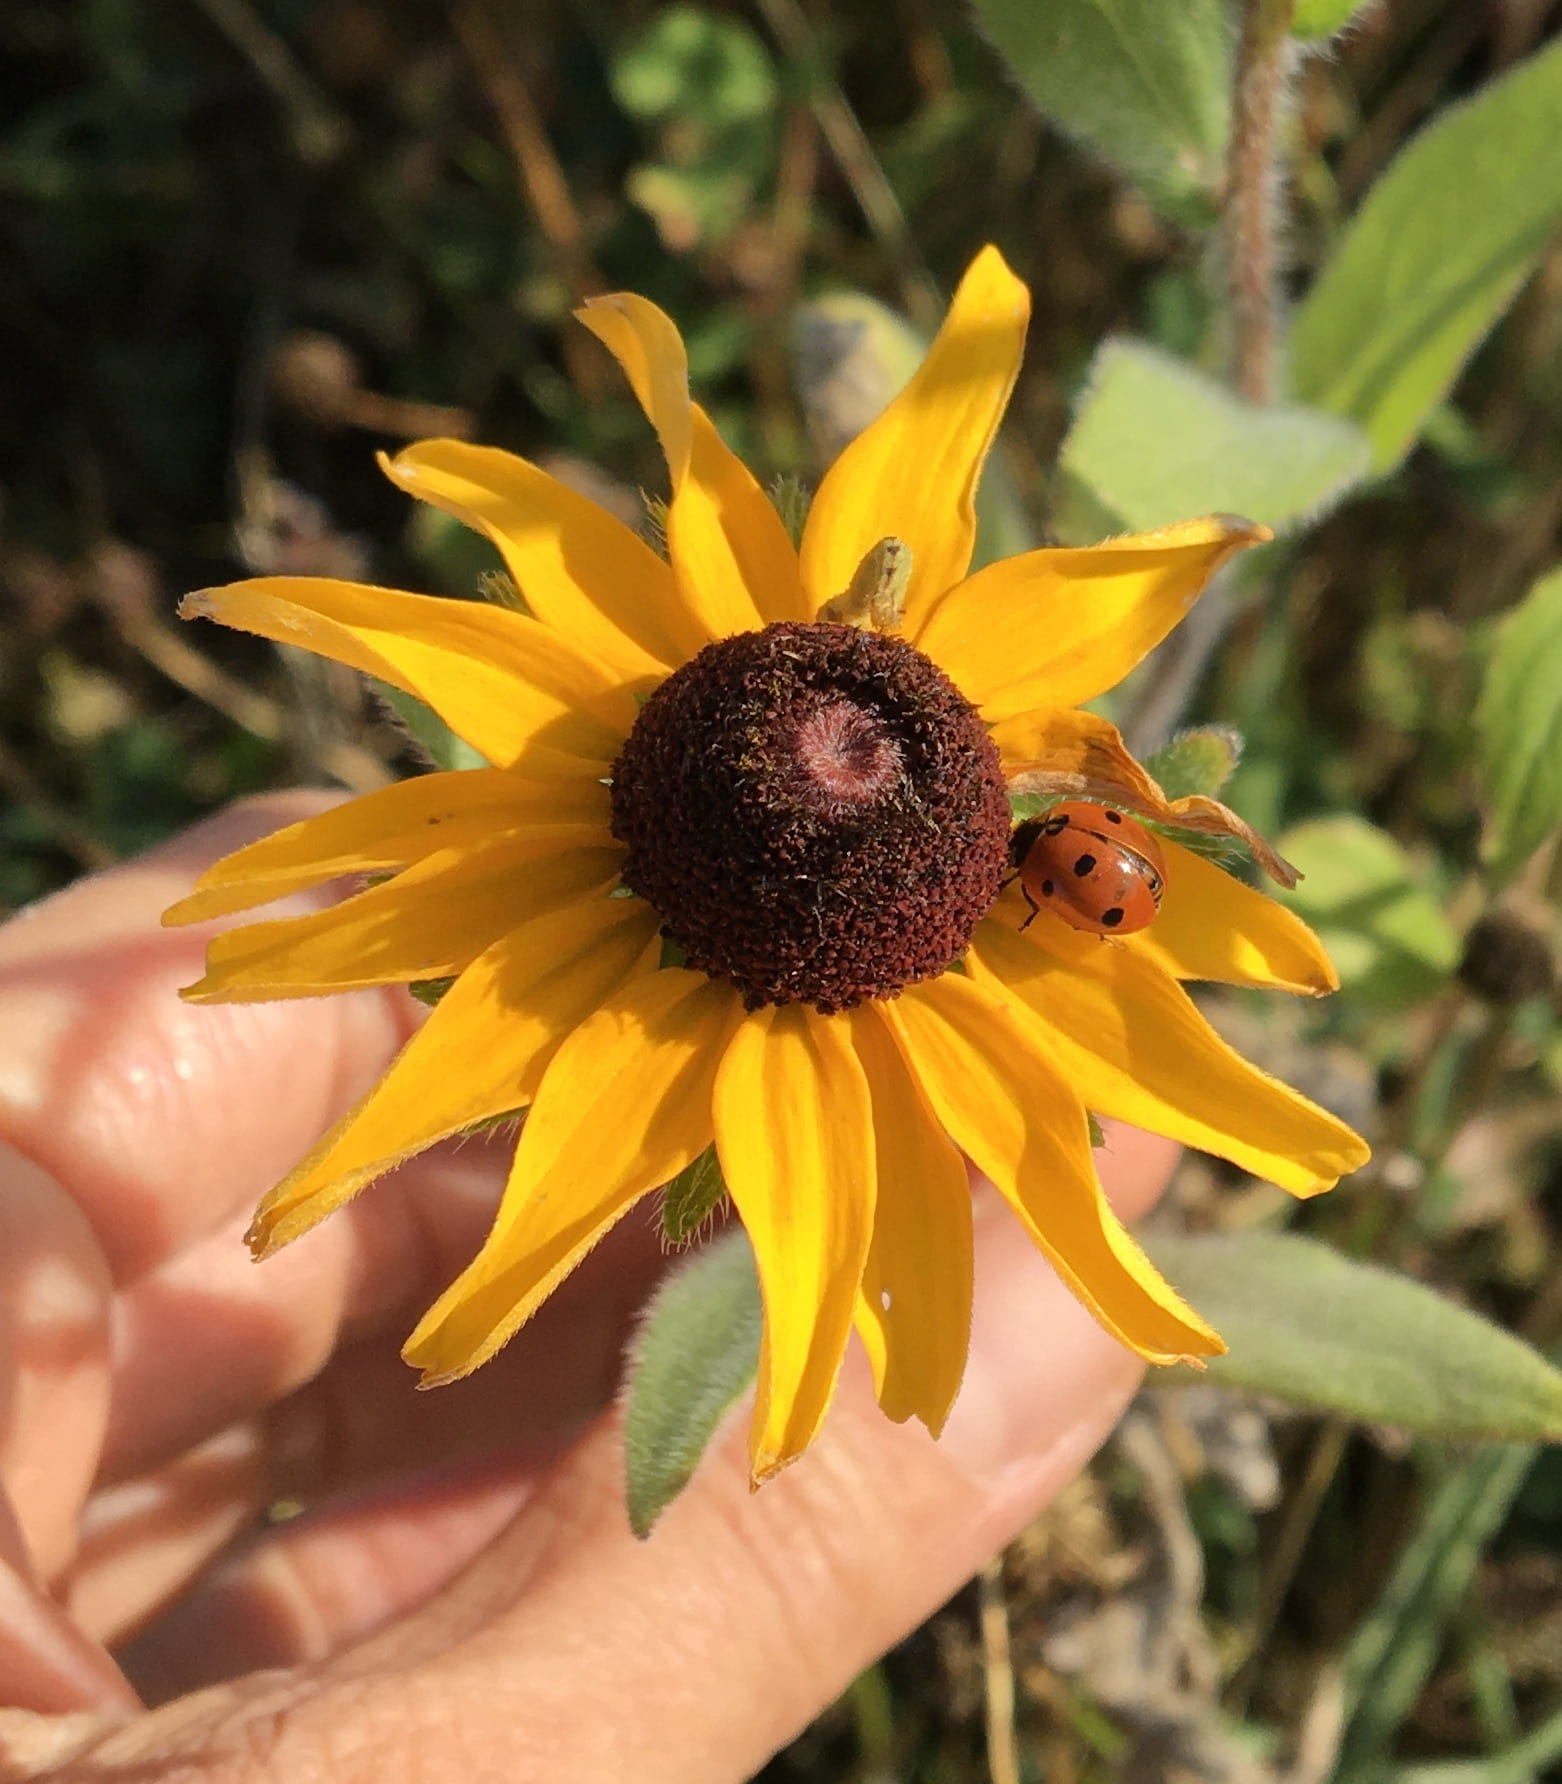
Hopefully we can all agree that protecting friendly insects (pollinators and natural enemies of pests) on our farms and in our gardens and landscapes is important. We want to manage pests, without hurting bees, butterflies, ladybugs, parasitoid wasps, minute pirate bugs, hover flies, ground beetles, and so many more of our insect friends. Using IPM tools other than pesticides is a great way to do this. When it is necessary to use pesticides as an IPM tool, how do you choose a pesticide – whether it is organic, conventional, or biological – that poses the least risk?

Practices that help reduce risk to beneficial insects

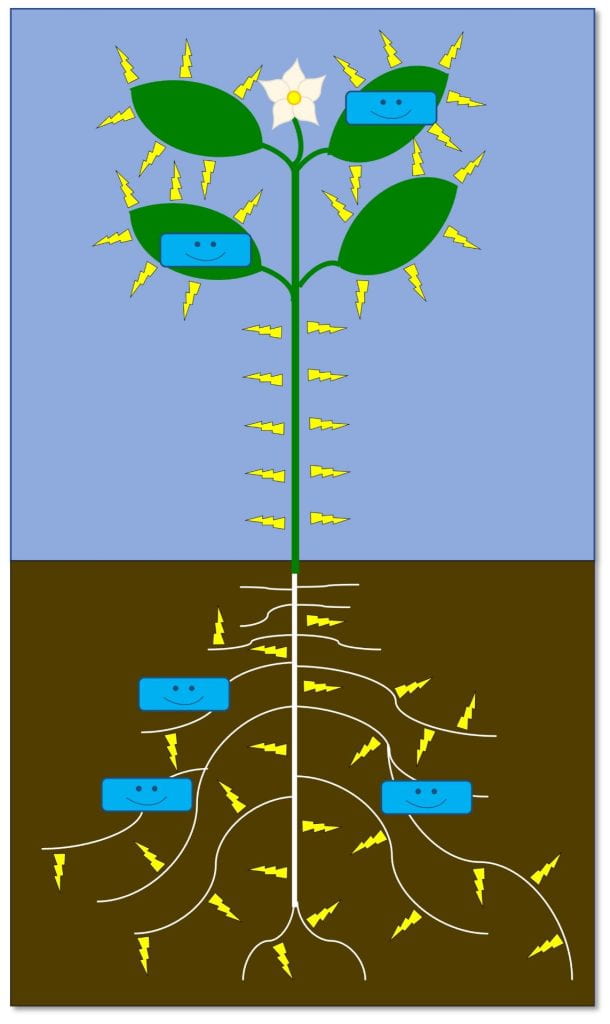
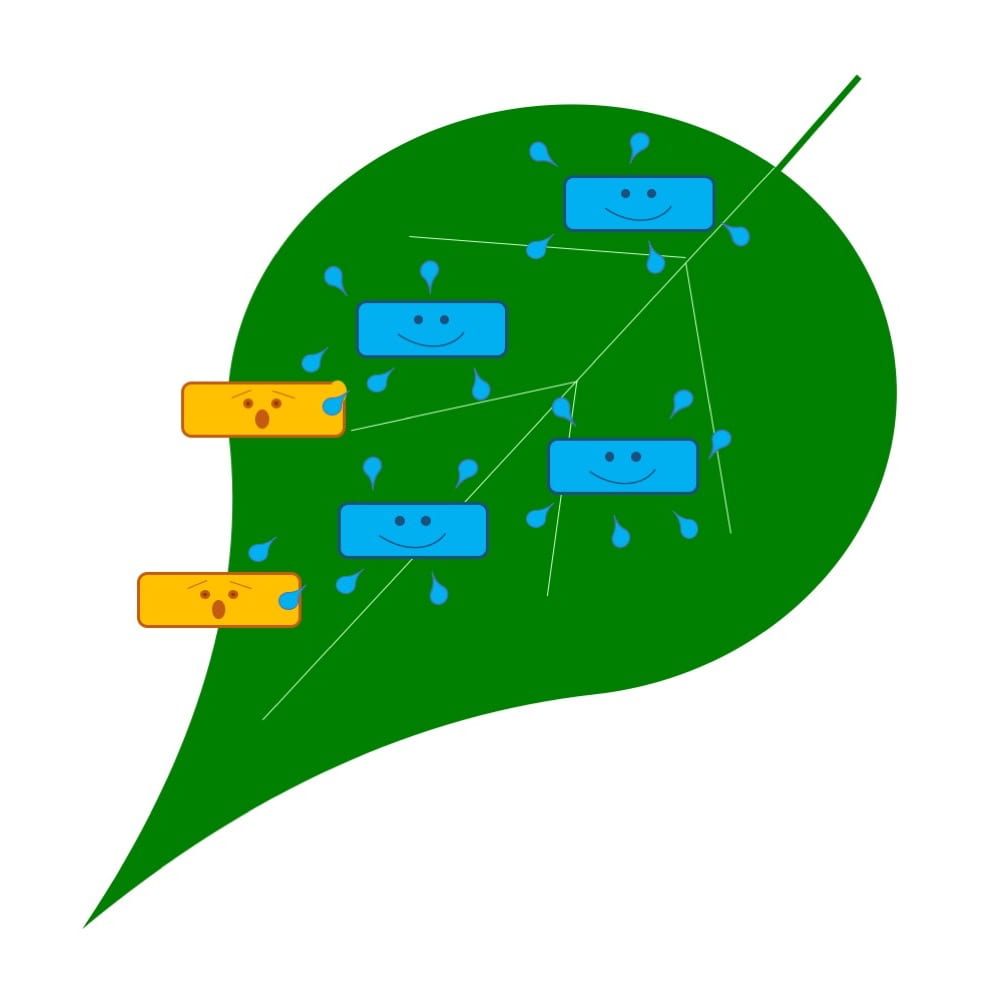
No matter how hazardous or toxic any substance is, insects are only at risk if they are exposed to that substance. By using integrated pest management practices like crop rotation, sanitation, and scouting for pests, you can reduce the number of pesticide applications needed to manage pests. Making fewer pesticide applications is a great way to start protecting beneficial insects. Some pesticides are particularly dangerous to insects because they linger so long in the environment after they are applied (have a long residual), posing a greater risk. Other pesticides quickly break down in the environment after being applied to plants, so they pose less risk.

Bee pollinating a cucurbit flower
Wild bees are important pollinators of cucurbit flowers. We can thank them for many of our pumpkins, squashes, cucumbers, and melons.

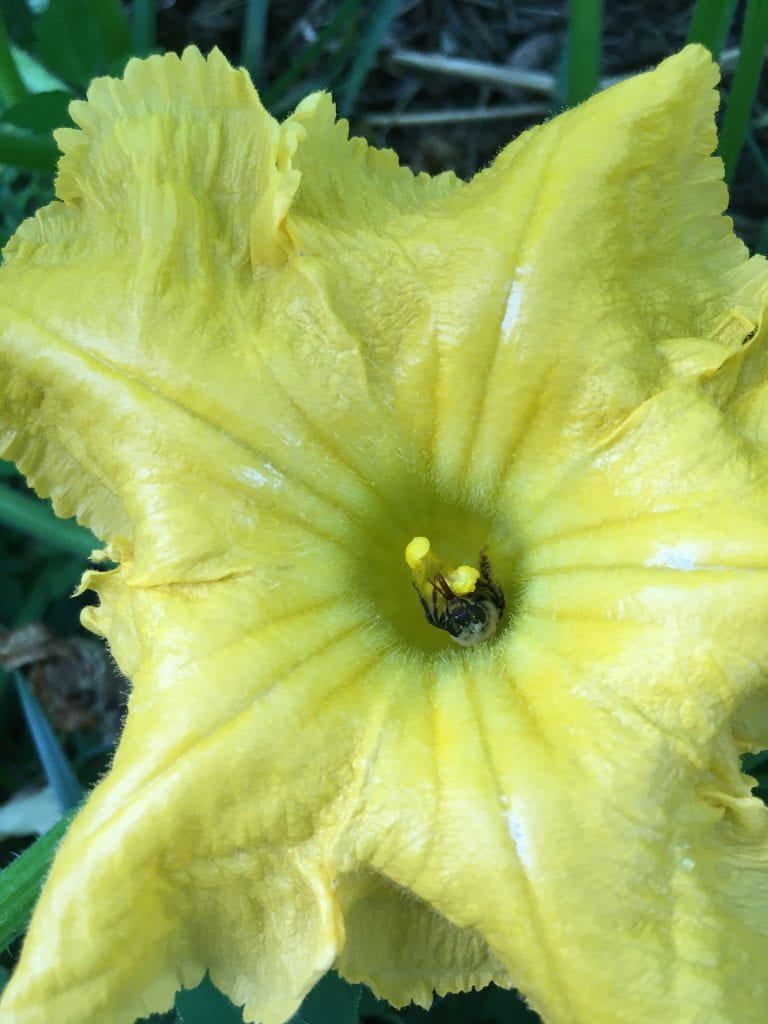
Being careful about when you apply a pesticide can also reduce the likelihood that a beneficial insect will be exposed to it. Bees are less active at certain times of day (especially early morning and evening). However, some wild bee species forage at different times of day. For example, squash bees are early risers, and can be found visiting squash, pumpkin, and cucumber flowers before honey or bumble bees are active. Check the area where you plan to apply a pesticide, and pick a different time if bees are present. Some pesticide labels require that you do not apply that product while bees are foraging. Some pesticides will still harm bees that visit a flower some time after the pesticide is applied. Avoiding pesticide applications when plants are flowering will provide additional protection to beneficial insects, but may not be practical on all crops.

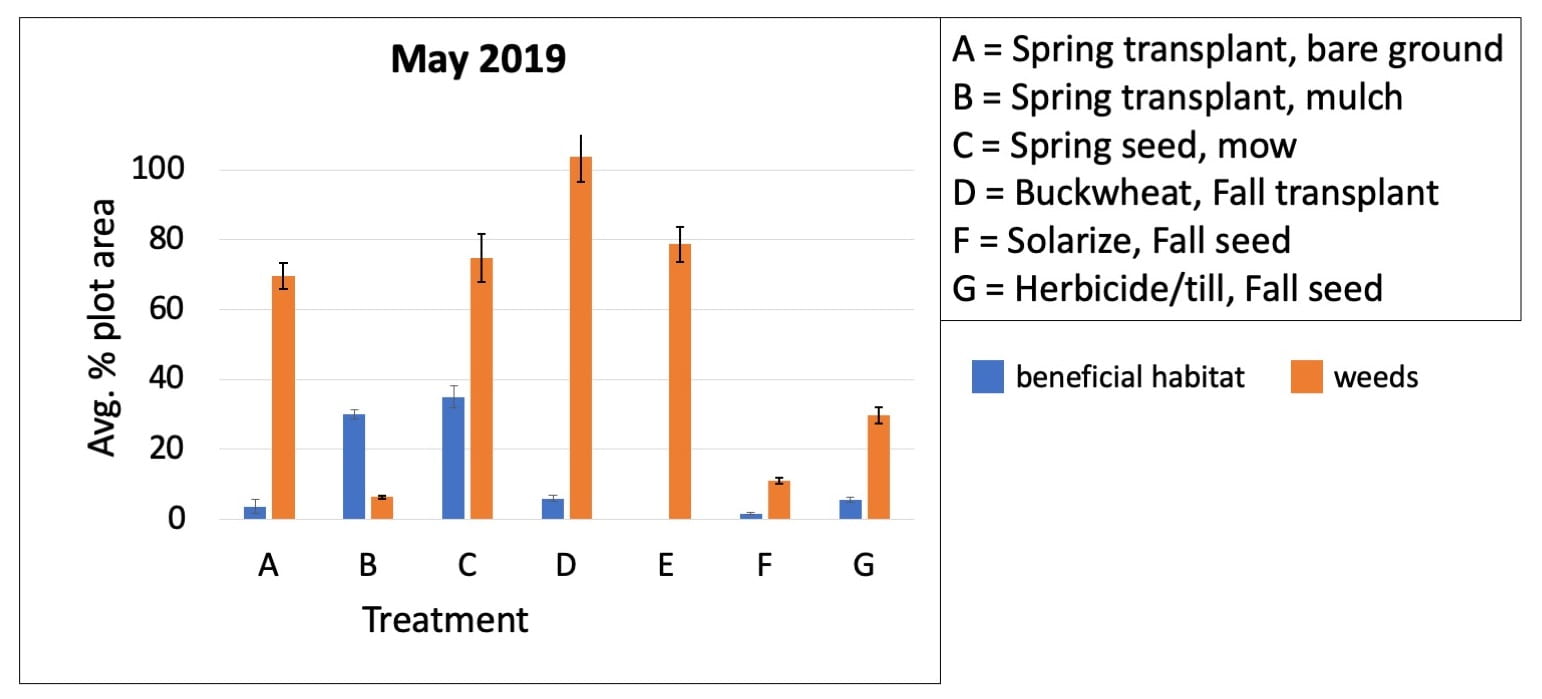
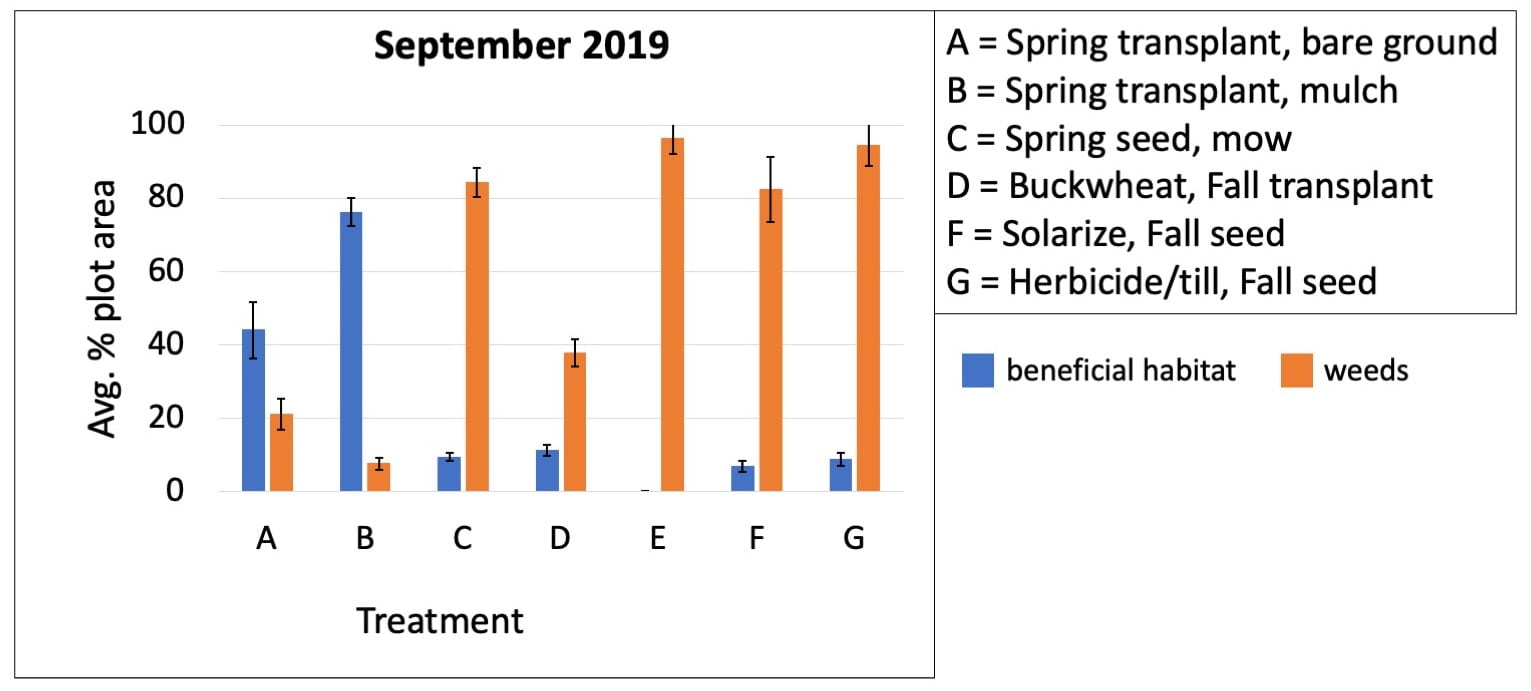
Where you apply pesticides also matters. Have you planted some habitat for beneficial insects? Prevent pesticide spray drift into these habitats. Are there flowers blooming amongst the grass on the orchard floor? Mowing them before you spray the fruit trees overhead could make insects less likely to visit during or right after you spray.

Resources to consult

First, read the pesticide label (and follow it). The label is the law and will have instructions on how to protect pollinators and other non-target organisms when using a pesticide.

If you know the pesticides you are considering, and especially if you know the specific natural enemies you are trying to protect, you can find some good information from companies that sell beneficial insects, or pesticides. I am aware of searchable databases or charts describing pesticide compatibility from four companies that sell (mostly) arthropod and nematode natural enemies: Agrobio, Biobest, BioWorks, and Koppert.

EIQ stands for Environmental Impact Quotient. You can read more details on the NYSIPM website, but in a nutshell the EIQ quantifies the risks of pesticides. You can use the EIQ calculator on our website to compare these numbers for different pesticides at the rates you plan to use them. The higher the number, the higher the risk. There are different components to the EIQ; risks to consumers, workers, and the environment (ecological). The ecological risk includes risks to natural enemies (as well as fish, birds, and bees). The EIQ calculator will give you an overall EIQ value as well as values for each category of risk (consumers, workers, ecological). Or, you can download this spreadsheet of EIQ values for pesticides, and sort by values for bees or beneficials (columns P and Q).

The University of California IPM Program’s pesticide active ingredients database summarizes the toxicity of some pesticides (including insecticides) to natural enemies and pollinators, as well as other hazards.

The Cornell Pollinator Network produces Pollinator Protection Guides for an increasing number of crop groups to help you understand the toxicity of different pesticide active ingredients to bees.

orange and black-striped fly with large eyes perches on small white flowers
Larvae (maggots) of this hover fly are excellent aphid predators. Killing your hover flies with pesticides could contribute to an aphid outbreak.

A few pesticides to avoid

You’re using good IPM, and you still need to use an insecticide. You’re trying to choose. I used information I collected from a few different sources (listed at the end of this post) to categorize some insecticides as “most” or “moderately” harmful. These are not exhaustive lists.

Most harmful to beneficial insects:

  • Carbaryl – active ingredient found in some products called Sevin
  • Neonicotinoids – active ingredients include imidacloprid, acetamiprid, thiamethoxam and may be found in such products as Admire, Assail, and Actara; In NY many products with these active ingredients are now classified as restricted use, so only certified pesticide applicators are allowed to buy or use them.
  • Natural pyrethrins – PyGanic is one product with this active ingredient; similar to synthetic pyrethroids, but this active ingredient degrades quickly in the environment (short residual)
  • Synthetic pyrethroids – active ingredients include bifenthrin, cypermethrin, lambda-cyhalothrin, permethrin, and others; can be found in products called Sevin, Eight, Warrior, and others; similar to natural pyrethrins, but last much longer in the environment (long residual)
  • Spinetoram – Radiant is one product that contains this active ingredient; a synthetic version of spinosad, but more toxic to beneficial insects than spinosad

Moderately harmful to beneficial insects:

  • Azadirachtin – active ingredient found in products such as Aza-Direct, Azaguard, Neemix
  • Bifenazate – active ingredient found in products such as Acramite
  • Chlorantraniliprole – active ingredient found in Coragen; among natural enemies, parasitoid wasps are probably most at risk. There may be some synergistic effects on bees when combined with other pesticides (see Cornell Pollinator Protection Guides)
  • Indoxacarb – active ingredient found in products such as Avaunt
  • Insecticidal soaps – active ingredient is potassium salts of fatty acids and can be found in M-Pede and many other products; most harmful to soft-bodied insects (including predatory mites), while beetles may be less susceptible
  • Spinosad – active ingredient in Entrust; similar to spinetoram, but it is the natural version of this chemical; not as toxic to beneficial insects as spinetoram

So what are the alternatives?

Remember that pesticides, by definition, are toxic to some living things; that’s why they kill and repel pests. There is no such thing as a completely safe pesticide. But here are a few insecticides that are gentlest on beneficial insects. And let me reiterate: Reducing the use of pesticides through good IPM is the best way to protect insects from pesticides.

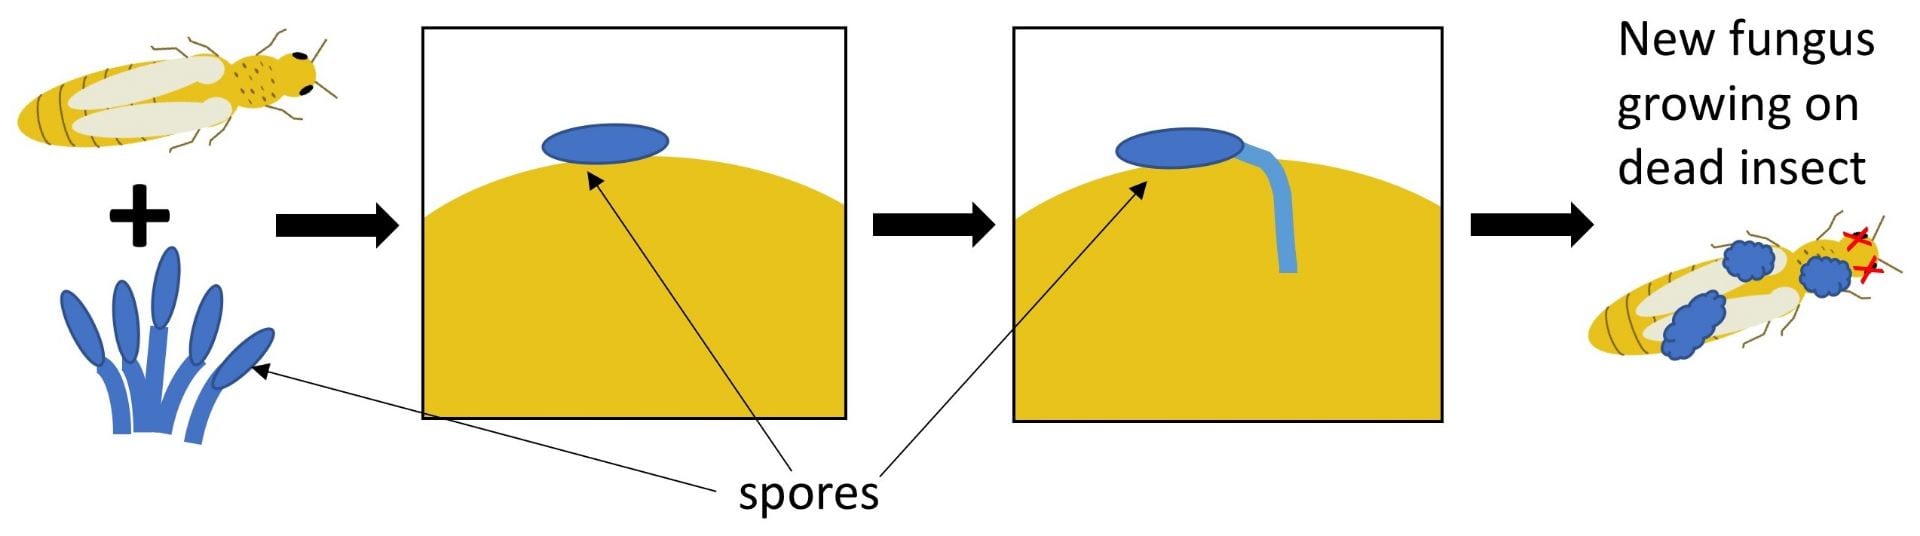
  • Beauveria bassiana – several strains of this fungus are active ingredients in different insecticides, including BotaniGard
  • Bt or Bacillus thuringiensis – bacterial active ingredient in pesticides such as Agree, Dipel, and others; quite specific to the insect groups specified on the label; different subspecies are effective against different groups of insects
  • Flonicamid – active ingredient in Beleaf
  • Horticultural oils – there are many different active ingredients that fall in this group; may be more toxic to bees than to natural enemies, but require direct contact with the insect
  • Cordyceps (formerly Isaria or Paecilomyces) fumosorosea – another fungal active ingredient found in products such as PFR-97
  • Clarified hydrophobic neem oil – Note that “whole” neem oil contains azadirachtin (which I listed in the “moderately harmful group”), while clarified hydrophobic neem oil does not. Azadirachtin is extracted from neem oil, leaving the clarified hydrophobic neem oil behind.
Small insect with a black and white diamond pattern on its back on a sunflower petal
This cute little insect is a minute pirate bug. In addition to munching on pollen, it will also eat small pests like thrips, mites, and small caterpillars.

A few reminders…

  • Remember that the information in this post is not a substitute for a pesticide label. The label is the law, and you must read and follow the label of any pesticide you are using. Laws and labels change. It is your responsibility to use pesticides legally. Trade or company names used here are for convenience and information only; no endorsement of products or companies is intended, nor is criticism of unnamed products or companies implied.
  • For questions about pesticide use, regulations, and safety, contact the Cornell Cooperative Extension Pesticide Safety Education Program. If you live in New York State, you can find labels for pesticides that are registered in NY at the DEC’s NYSPAD website.
  • Just because a pesticide isn’t on the “most” or “moderately” harmful lists above, does not mean it is harmless to insects. These lists are not exhaustive, and for some products insufficient information exists.

  Sources consulted:


This post was written by Amara Dunn, Biocontrol Specialist with the NYSIPM program. Special thanks to Diana Obregon Corredor for providing review and input.

This work is supported by NYS Departments of Environmental Conservation and Agriculture and Markets.

Biopesticide modes of action

Diagram showing an unhappy-looking caterpillar that has stopped eating a leaf. Blue diamond shapes and pale blue rectangles with smiling faces are also on the leaf.
Biopesticides include microorganisms, plant extracts, and other naturally-derived compounds that control pests.

Biopesticides are one aspect of biological control. The active ingredients in biopesticides include microorganisms (microbes), plant extracts, and naturally-occurring chemicals (like potassium bicarbonate). As a result, some of the ways they control pests (their modes of action or MOAs) are different from conventional, synthetic chemical pesticides. Also, many of them have several MOAs, and not all MOAs apply to all pests listed on the label. If a biopesticide contains live microbes, and especially if its MOA requires the microbes to stay alive on the plant for some period of time after application, this also has important implications for how the product is stored and applied. Understanding the mode of action of a product will help you get the most out of it.

I like to break down biopesticide MOAs into the following categories:

Diagrams - Tiny spores of insect-killing fungi land on the body of an insect, germinate, infect the insect, grow throughout its body, and eventually kill it. Below, a diagram shows blue spores contacting a yellow rectangle with a frightened face, representing a pathogen. The spores grow and kill the pathogen.
Eat – Some biopesticides contain living spores of a fungus (blue). These spores need to land on the insect pest or plant pathogen (yellow rectangle). Then they germinate (like a seed), invade and grow, eventually killing the pest. If the humidity is high enough, the fungus may even produce more spores and spread to other pests.

Eat live microbe grows on/in pest

Biopesticides with this MOA can work against insect pests (e.g., products that contain Beauveria bassiana) or plant diseases (e.g. Contans, which contains Paraconionthyrium minitans strain CON/M/91-08). Many biopesticides with this MOA contain fungal spores. These spores will germinate once they land on the insect or disease-causing pathogen, and may have temperature and/or humidity requirements for germination. Make sure you store the product correctly, confirm compatibility with other products before tank mixing or applying, and apply under recommended environmental conditions.


Diagram - A caterpillar eats and is sprayed with a bioinsecticide (blue diamonds), and then dies. Plant pathogens (yellow rectangles) are poisoned by biopesticide microbes (blue rectangles) and the antimicrobial compounds they produce (blue droplets).
Poison – Some biopesticides (blue diamonds or blue smiling rectangles with droplets) work much like conventional chemical pesticides. They directly kill or otherwise inhibit the insect pests (like this caterpillar) or plant pathogens (yellow rectangles with frightened faces) when they contact it or are eaten by it.

Poison – biopesticide (or its products) kills the pest directly

Biopesticides with this MOA can work against insect pests (like products containing Bacillus thuringiensis) or plant diseases (e.g., Double Nickel containing Bacillus amyloliquefacies strain D747, or products containing potassium bicarbonate). Obviously, potassium bicarbonate products do not contain live microbes. Some biopesticides that poison pests do have live microbes that continue to produce antimicrobial products after they are applied. Others work because of the compounds the microbes produced while the biopesticide was being made.


Green leaves covered with smiling blue rectangles. Yellow rectangles with angry faces are next to the leaves.
Keep out – Some biopesticides contain microbes (blue smiling rectangles) that grow on the plant. These beneficial microbes use up space and nutrients so there is no room for the pathogen (angry yellow rectangles.

Keep out – live microbe grows on plant, leaving no room for pests

Biopesticides with this MOA can work against plant disease (e.g., Actinovate which contains Streptomyces lydicus WYEC 108, or Serifel, which contains Bacillus amyloliquefaciens strain MBI 600) and may be bacteria or fungi. The microbes in biopesticides with this MOA must be alive when applied and need to be able to grow on the part of the plant that is being protected.


Diagram of a plant with blue smiling rectangles on both leaves and roots. Little yellow lightning bolts surround the roots and leaves.
Turn on resistance – Some biopesticides contain microbes (blue smiling rectangles) or other natural compounds that activate the plants defense system, so that it’s ready when it encounters a pathogen.

Turn on resistance – turns on the plant’s defenses before pest attacks

As far as I know, these biopesticides only work against plant diseases, but as new products are developed, or as we learn more about existing biopesticides, this may change. Some examples include Regalia (giant knotweed extract) and Lifeguard WG (Bacillus mycoides isolate J). Some of these products contain live microbes that need to stay alive (like LifeGard), while others do not. These biopesticides need to be applied before infection.


Diagram - The plant on the left has no smiling blue rectangles on leaves or roots. The plant on the right has these blue rectangles on roots and leaves and is larger.
Grow strong plants – Some biopesticides contain microbes (blue smiling rectangles) or other natural compounds that enable the plant to grow stronger and healthier. As a result, the plant can better withstand attack from a pest.

Grow strong plants – makes plant stronger, healthier, more resilient

These biopesticides primarily work against plant diseases. Some examples include: Serenade (Bacillus subtilis strain QST 713), RootShield (Trichoderma harzianum), and Sil-Matrix (potassium silicate). Some of these products contain live microbes that need to stay alive, while others do not (e.g., Sil-Matrix). These biopesticides need to be applied before infection.


Diagram - One leaf is covered with blue diamonds and smiling rectangles (bioinsecticide), but the other is not. The caterpillar is feeding on the leaf that has no bioinsecticide.
Repel – Some bioinsecticides (blue diamonds and blue rectangles with smiling faces) protect plants because they repel insect and mite pests.

Repel – pest avoids plants treated with biopesticide

Biopesticides with this MOA can work against insect pests, but perhaps only on certain insect life stages. Some products with this MOA could contain live microbes, while others do not. You can evaluate the effectiveness of products with this MOA, not by scouting for dead insects, but by looking for reduced damage or lower insect populations on treated plants. Examples include: Grandevo WDG (Chromobacterium subtsugae strain PRAA4-1 and its spent fermentation products) and products containing azadirachtin.


Diagram - A caterpillar eats or comes in contact with a bioinsecticide, and then stops feeding.
Stop feeding – Some bioinsecticides (diamonds and rectangles on the leaf) cause insect and mite pests to lose their appetites.

Stop feeding – stops pest from feeding; pest eventually starves

Biopesticides with this MOA can work against insect pests either by contact or ingestion and may only be effective against insects of certain ages or life stages. It depends on the biopesticide and pest. Examples include insect-killing viruses and some types of Bacillus thuringiensis products. Some products with this MOA could contain live microbes, while others do not. Live pests will still be present for some time after applying a product that works in this way, since the pests die of starvation. Watch for feeding damage to stop or a reduction in insect numbers over time to know if the product is working.


Diagram – Three aphids on a leaf, two of which are exposed to blue diamonds. The aphids exposed to the diamonds stay the same size. Another aphid that was not exposed grows normally.
Stop growth – Some bioinsecticides (blue diamonds in this diagram) don’t kill insects and mites outright, but they can prevent them from molting and growing into the next life stage. Pests that can’t move on to the next life stage will eventually die.

Stop growth – stops pest from growing or molting; pest eventually dies

Biopesticides with this MOA may work against insect pests either by contact or ingestion and may only be effective against pests of certain ages or life stage. It depends on the biopesticide and pest. Examples include Venerate (Burkholderia spp. strain A396) and some products containing azadirachtin. Some products with this MOA could contain live microbes, while others do not. Products with this MOA will not kill pests immediately, but will prevent them from growing or molting. Watch for insect populations to decline over time, but do not expect pests to die immediately.


Diagram - Two yellow moths surrounded by blue diamonds. A red heart has a line through it.
Stop reproduction – Pheromones (represented here by blue diamonds) are a type of bioinsecticide that confuses insects looking for a mate. As a result, males and females can’t find each other, don’t mate, and females don’t lay eggs.

Stop reproduction – hampers pests’ ability to find a mate or produce eggs

The two main groups of biopesticides I know of with this MOA are (1) pheromones that make it hard for male and female insects to find each other, or (2) products that reduce the number of eggs female insects lay. Grandevo (Chromobacterium subtsugae strain PRAA4-1 and spent fermentation products) is an example of the later, but may not work in this way against all ages and species of pests listed on the label. The products I know of with this MOA do not contain live microbes. This mode of action will reduce insect populations in subsequent generations, not the current one. So use it on a pest with multiple generations per season, or in combination with other MOAs.


Things to keep in mind:

If the biopesticide contains live microbes, make sure you…

  • store the biopesticide correctly (and for the correct amount of time); check the label.
  • confirm compatibility of the biopesticide with other products before tank mixing or applying; read the label and contact the manufacturer with questions.

In addition, if the biopesticide contains microbes that need to stay alive for some period of time after application in order to be effective, make sure you also…

  • pay special attention to the recommended optimal environmental conditions for application; start by reading the label.

Remember!

  • Biopesticides are pesticides. Their labels are the law. Read the labels and follow them, along with other pesticide application laws in your state.
  • Not all biopesticides are permitted for use in certified organic production. Check with your certifier if you have questions.


Questions to ask when you are considering/purchasing a biopesticide

The manufacturer or dealer should be able to tell you:

  • How does it work (MOA)?
  • Is it alive? Does it need to stay alive to work?
  • Special instructions for storage or use? (e.g., temperature, spray tank pH, time of day)
  • Is it compatible (in the tank, greenhouse, or field) with other products in use (e.g., pesticides, fertilizers)?


Additional biopesticide Resources


This post was written by Amara Dunn, Biocontrol Specialist with the NYSIPM program.

Include biocontrol in your 2022 garden plans

Graphic of flowering plants and beneficial insects with the words Biological Control: Partners in the Garden March 15 and 16, 2022
Join us for this virtual conference!

I don’t know about you, but I can’t wait to get some seeds into potting mix and some plans for my garden on paper! While you’re planning your garden, why not join NYS IPM for our virtual conference? This year we’re talking about “Biological Control: Partners in the Garden” and we’ve got a great line up of speakers!

  • Carol Glenister form IPM Labs talks about looking for signs that natural enemies (biocontrol agents) are already at work in your garden
  • John Losey from Cornell University talks about everyone’s favorite biocontrol agent – ladybugs
  • NYS IPM staff will talk about biocontrol for weeds (is there any?), conserving our biocontrol partners in the garden, and more!
  • Mary Centrella from the Cornell Pesticide Safety Education Program will talk about proper use of pesticides to protect garden partners
  • Kyle Wickings will talk about using tiny worms (entomopathogenic nematodes) to deal with lawn grubs

The conference will take place the mornings of Tuesday and Wednesday March 15 and 16, with a special interactive workshop being offered (by yours truly) on Tuesday afternoon (1-3 PM). You’ll receive some pre-workshop materials to help you get the most out of the workshop, and leave with a plan to plant flowers that will feed and support natural enemies in your garden.

The conference is just a little more than a week away, so register soon! Pay what you can afford, and please reach out if the registration fee is a barrier. NYS IPM is committed to making this conference (and all of our resources) accessible.

This post was written by Amara Dunn, Biocontrol Specialist with the NYSIPM program.

EPNs: Good worms

light brown dead grub in a petri dish broken open and surrounded by hundreds of tiny, white, crescent-shaped nematodes
Insect-killing nematodes (tiny white crescent) emerging from a dead insect larva. Photo credit: Peggy Greb, USDA Agricultural Research Service, Bugwood.org

Nematodes are tiny worms. While some of them can damage plants, some prefer to eat insects, and these “good worms” (entomopathogenic nematodes is the technical term, but we can call them EPNs for short) can be helpful biocontrol agents. Teresa Rusinek (Cornell Cooperative Extension eastern NY Commercial Horticulture Program) wrote a guest blog post about her work testing EPNs for control of wireworms in sweet potatoes. Elson Shields (Cornell Entomology) has spent many years perfecting the use of persistent EPNs that are native to New York in agricultural fields where they control insect pests. Kyle Wickings is my go-to expert on using EPNs to manage white grubs in turf. A former graduate student in Kyle’s lab (Max Helmberger) made an amazing video describing the life cycle of EPNs. John Sanderson is the Cornell guru of greenhouse biocontrol (including EPNs for greenhouse insect pests).

So many people have developed so many great materials on EPNs, the purpose of this post is to point you to some of these great resources. Why re-invent the wheel? And if I’ve missed something, please let me know!

John Sanderson (Cornell University) has done some great work evaluating different EPN species for controlling insect pests in greenhouses. You can watch a webinar summarizing this work here.

Carol Glenister (IPM Laboratories) and Elson Shields (Cornell University) did a presentation on “Getting the Most Out of Beneficial Nematodes in Organic Production” for the UMass Amherst Extension Vegetable Program. You can watch the recording on YouTube, and you can read their answers to frequently asked questions online.

Screen shot of Grub ID homepage including the url: grubid.cals.cornell.edu
Proper identification is essential to good IPM, and Kyle Wickings’ Grub ID key helps you do just that.

Need help identifying your white grubs (a critical first step to using EPNs effectively in your lawn)? Kyle Wickings developed a simple key.

Are you concerned about grub damage in your home lawn? Put back that pesticide bottle, and start by scouting and identifying grubs, then apply some EPNs (only if you need them). You can find all the details here.

white grub on soil with a few grass plants nearby
Count how many white grubs you actually have per square foot (and identify them) before deciding if an EPN application would help.

If you are growing alfalfa, Elson Shield’s lab has all the information you need to successfully use EPNs to control alfalfa snout beetles, starting with an overview, and including detailed resources to help you be successful.

Wondering if EPNs can help you control fruit and vegetable insect pests? In consultation with my colleagues, I developed a summary of what we know about which fruit, vegetable, and ornamental pests you are likely to be able to manage with EPNs. More research is ongoing, so this list will continue to evolve.

This work is supported by NYS Departments of Environmental Conservation and Agriculture and Markets.

This post was written by Amara Dunn, Biocontrol Specialist with the NYSIPM program, but was only possible due to the great work done by colleagues. All images are Amara’s, unless otherwise noted.

Finding plants that feed friendly insects

bouquet of yellow, orange, pink, red, purple, and white flowers
The prospect of growing cut flowers is so very appealing during February in upstate NY!

I don’t know about you, but this time of year I start daydreaming of all the plants I can’t wait to grow in my garden once it gets warm. The virtual and hard copy seed catalogs that fill my mailbox and my inbox are full of so many beautiful pictures and inviting suggestions. How to choose?

Well, if one of your goals for your 2021 garden is to provide good habitat for beneficial insects that eat pest insects (natural enemies of pests), here’s some advice…

Look for pollen and nectar producers

Flowers that provide plenty of pollen and nectar make great habitat for natural enemies. This is because some natural enemies also eat pollen or nectar (or both). For example, this adult hover fly feeds on the pollen and nectar produced by this bachelor’s button.

Black and yellow hover fly visiting a purple flower made up of a cluster of small petals
An appreciation for bachelor’s button flowers is something I share with this hover fly.

Flowers that produce pollen and nectar also attract other insects that natural enemies feed on (including lots of neutral insects, so the net effect is positive). This ambush bug is hanging out on a zinnia waiting for other insects to wander by and become lunch.

Dark brown and yellow insect on a zinnia with cream-colored petals flecked with pink
This ambush bug doesn’t seem too well camouflaged to me, but hopefully its prey didn’t notice it.

How do you know if a plant will produce flowers rich in pollen and nectar? Well, plants marketed as being good for pollinators are often a good bet, since bees, butterflies, and other pollinators also feed on pollen and nectar. Be aware that sometimes – but not always – “fancy” cultivars (with double blossoms or exotic colors) do not provide the same pollen and nectar resources as the “plain” cultivars or simply native species. You can read a bit more about this in my post from last spring.

Flower shape matters

While some bees have long tongues that help them reach into deep, tube-shaped flowers, lots of natural enemies (like flies, small wasps, and beetles) prefer small, shallow, and open flowers. The pollen and nectar are easier to access, and these flower shapes also give them a nice spot to land or sit.

Two pictures; on the left a bee is feeding on one of many small, tubular purple flowers; on the right an orange and black beetle is feeding on tiny white flowers.
The bee on the left has no problem reaching into these tubular flowers. The soldier beetle on the right is happy on the small boneset flowers.

Plan for season-long blooms

Natural enemies need food (whether it’s pollen and nectar or other insects) from early in the spring until late in the fall. If you only have blooms in July and August, the natural enemies will be very hungry, and will find another spot to hang out. Of course, continuous blooms have aesthetic value, too.

While annuals tend to bloom for a longer period of time during the growing season (especially if you pick off dead blooms), it can be hard to find annuals that bloom early (at least in NY).

Plant with a large cluster of small yellow flowers
Golden alexanders is an early-blooming perennial. I took this picture in the middle of May.

Including some early-blooming perennials will feed your natural enemies before your annuals take off. This site lets you search for plants by a variety of characteristics, including when they bloom.

Put away those pesticides!

Or at least pause and assess whether you really need them and what impact they might have on natural enemies and other non-pests before you use them. Of course, you must always read and follow the label on any pesticide, no matter where you plan to use it. The label is the law!

Plants that don’t bloom are still useful

For example, bunching grasses not only provide some visual contrast to blooming plants, but they make great shelter for predatory beetles, spiders, and other insects.

Clump of grass with blue-green blades surrounded by a few weeds
Grass that grows in clumps like this little bluestem provides shelter for ground-dwelling natural enemies.

If you love spreadsheets like me…

While looking for pollinator-friendly plants is an easy way to choose plants that will probably support natural enemies, sometimes I am asked “yes, but if I want to attract this specific natural enemy, what should I plant?” So I reviewed university research and extension resources from around the United States to see which plants have been documented to support specific natural enemies. Here’s the link to that spreadsheet. If you want the “cliffs notes”, here are the plant families that had the largest number of species documented as supporting natural enemies:

  • Aster (same as the daisy or composite family)
  • Carrot (same as the parsley family)
  • Mint
Yellow flower with a brown center (blackeyed susan) being visited by a lady beetle
Lots of members of the aster (daisy, composite) family produce plenty of easily-accessible pollen to feed natural enemies like this lady beetle.

Got a pest and you’re wondering which natural enemies will eat it? There’s a chart for that, too!

So, what will you be growing in 2021? I already placed my first seed order (hint: it included a few different kinds of both zinnias and sunflowers), but I can’t promise I won’t place a second one.


This post was written by Amara Dunn, Biocontrol Specialist with the NYSIPM program. All images are hers, unless otherwise noted.

Compatibility: Pesticides and natural enemies of pests

Green insect with lacey wings
Lacewings (especially larvae; this one is an adult) are great natural enemies of pests. You want to keep them happy and healthy!

Natural enemies of pests are going to help you out with pest control, so when you are applying pesticides, it’s in your best interest to choose products that will have the least impact on them. Two quick points before we get into details for where to find this information:

  1. Remember that the information in this post is not a substitute for a pesticide label. The label is the law, and you must read and follow the label of any pesticide you are using. Laws and labels change. It is your responsibility to use pesticides legally. Trade names used here are for convenience only; no endorsement of products is intended, nor is criticism of unnamed products implied. For questions about pesticide use, regulations, and safety, contact the Cornell Pesticide Management Education Program: pmep_webmaster@cornell.edu.
  2. A great way to protect natural enemies is by following the steps for IPM. Preventing pests (e.g., through cultural strategies and exclusion), scouting to detect pests early when populations are low, and proper identification of pests will help you reduce your need to use pesticides and can save you money. Win win!

Ok, let’s assume you’re doing good IPM and you’ve gotten to the point where you need to choose a pesticide. How do you make the best choice for protecting natural enemies? Here are a few options. (Note that I did post about this about 2 years ago. I’ve learned more, so I thought an update would be in order.)

Read the label

This should go without saying. You should be doing this anyway when you are considering using a pesticide. The label may contain information about the compatibility of a pesticide with either natural enemies or pollinators. And of course it will contain important information about how to minimize risks to yourself and the environment when you use it.

EIQ

EIQ stands for Environmental Impact Quotient. You can read more details on the NYSIPM website, but in a nutshell the EIQ puts a number on the risks of pesticides at the rates they are applied in the field. You can use the EIQ calculator on our website to compare these numbers for different pesticides. The higher the number, the higher the risk. There are different components to the EIQ; risks to consumers, workers, and the environment (ecological). The ecological risk will include risks to natural enemies (as well as fish, birds, and bees).

Pocket IPM Greenhouse Scout App

The Greenhouse Scout app provides information for doing IPM in greenhouses, including pest insects, beneficial insects, application technology, and pesticide interactions. It also gives you a place to record scouting results and track product applications.
A screenshot from the home screen of the Pocket IPM Greenhouse Scout App. You can find information about compatibility with natural enemies under either “Beneficials” or “Pesticide Interactions”.

Temporary update: As of January 2024, this app is in the process of being updated and is not currently available. Hopefully a new and improved version will be available again soon!

Especially if you are growing in a greenhouse and releasing a lot of natural enemies, you may find this app helpful. In addition to providing information about compatibility of pesticides with arthropod natural enemies you may be releasing, you can also use it to help you keep records of scouting and product applications.


Cornell Guidelines

If you are a commercial producer, hopefully you are already utilizing the Cornell Guidelines, as they are a wealth of information on many subjects. At least some of them also include information on the toxicity of different pesticides to natural enemies. For example, if you have the grape guidelines, check out Table 4.2.2 for insecticide toxicity to natural enemies.

Websites and apps from companies that produce natural enemies

Companies that sell natural enemies (especially predatory and parasitoid arthropods for greenhouse pest control) have an interest in making sure that customers don’t inadvertently kill the natural enemies they buy with pesticides they are applying. I am aware of searchable databases, apps, or charts describing pesticide compatibility from four companies that sell (mostly) arthropod and nematode natural enemies: Agrobio, Biobest, BioWorks, and Koppert. If you know of some I’ve missed, please let me know! There are of course other companies that supply natural enemies. Here I’m focusing on resources that help you choose pesticides to conserve natural enemies.

Agrobio

This website is also available as an app for Android (but not Apple) devices. To use it, start by clicking Organisms selection and choose the natural enemies you want to conserve. Then, click Ingredients selection and choose the pesticides you are thinking about applying. You can only search active ingredients, not product names. Finally, click Query. Use the legend to help you interpret the table that’s produced.

Biobest

Biobest has put their compatibility information into an app for Android and Apple devices. Select pesticides by either active ingredient or commercial product name. Then, search for the name of the Beneficial organism you want to conserve. Note that there are a lot of pesticide/natural enemy combinations for which toxicity data just aren’t available. If you select a pesticide, then natural enemies for which no data are available will be grayed out in the Beneficial organism list. As you check boxes next to pesticides and natural enemies, a chart is automatically generated. The results include information on toxicity to different life stages of the beneficial organisms and persistence of the product.

BioWorks

BioWorks provides a table of the compatibility of their products with pesticides, fertilizers, and adjuvants. You can filter the table by several criteria to find the information you’re looking for.

Koppert

This website is also available as an app for Android and Apple devices. Start by entering the name of the Beneficial organism you want to protect. You can search by either the Koppert product name, or the Latin (scientific) name, but you can’t select from a drop-down menu. Just start typing. Then, choose the Agent (pesticide you are considering applying), by either trade name or active ingredient. Again, you need to know the name; you can’t select from a drop-down list. Start typing, and then check the box next to the product you are interested in. Click Results and be sure to click on ‘Legend’ at the bottom to help you interpret the table. There is also a more complete explanation of information in the legend under Info.

Some caveats about these websites

Admittedly, finding information about conserving natural enemies that are not commercially available for release (e.g., in greenhouses) has some challenges. These websites tend to focus on what you can buy and release, rather than on what may be naturally occurring in a field. Although sometimes there is some overlap. These apps/websites don’t include all natural enemies, and data aren’t available for all natural enemy/pesticide combinations. Also, these websites/apps usually list natural enemies by scientific names. Do you know what the scientific name of a lacewing is? I didn’t before I started this job!

To help with this last barrier, I created a chart (also below) to help you figure out what scientific names you should look for on these websites/apps if you want to conserve a particular natural enemy. It also includes information about which pests the natural enemies target, whether they are commercially available, and whether they are naturally occurring (not necessarily native) in NY.

Arthropod and nematode natural enemies

Can I buy them? Found in NY? If I want to conserve this beneficial arthropod… (whose scientific name is…) that helps me control… I should look for these names on the compatibility apps: 
yes yes aphid midges Aphidoletes aphidimyza aphids Aphidoletes aphidimyza
some yes beetles that are predators (for example, rove beetles, ground beetles, and others) Coleoptera is the scientific name of the insect group that includes all beetles. The following families are generally predatory: Coccinellidae (lady beetles), Carabidae (ground beetles), Staphylinidae (rove beetles), Cantharidae (soldier beetles), Melyridae (flower beetles) many insect pests Coleoptera is a beneficial insect listed on at least one compatibility app. However, some coleoptera are pests. And, since this is such a broad group, the compatibility information provided may not be correct for all beneficial beetle species.
yes hover flies, syrphid flies Syrphus spp, and many, many others aphids Syrphus spp.; Syrphus corollae; Episyrphus balteatus
some yes lacewings Chrysoperla spp. and some others aphids, insect eggs, small larvae Chrysopa carnea = Chrysoperla carnea; Chrysoperla spp.
some yes lady beetles Coccinellidae aphids, mites, small insects, insect eggs Coccinelidae, Coccinella 7-punctata, Hippodamia convergens
some yes minute pirate bug Orius insidiosus insect eggs, small caterpillars, thrips, mites, aphids Orius laevigatus may be a reasonable proxy; Orius spp.; Orius insidiosus
yes yes nematodes Steinernema spp., Heterorhabditis spp. thrips, fungus gnats, shore flies, some grubs Nematodes (note that this is a very broad category and it’s possible there are differences among species), Heterorhabditis bacteriophora, Steinernema, Steinernema feltiae, Steinernema carpocapsae
some yes parasitoid wasp Aphidius spp. aphids Aphidius spp., Aphidius colemani, Aphidius matricariae, Aphidius ervi
some yes parasitoid wasp Eulophidae, Diglyphus spp. leafminer larvae Diglyphus isaea
yes yes parasitoid wasp Braconids, Dacnusa sibirica leafminers Dacnusa sibirica
yes parasitoid wasp Aphelinidae, Aphelinus semiflavus aphids on potatoes Aphelinus abdominalis or Aphelinus mali may be reasonable proxies
yes yes predatory gall midge Feltiella acarisuga spider mites Feltiella acarisuga
some yes predatory mites Amblyseius (= Neoseiulus) fallacis, Typhlodromus spp., and probably others thrips, whitefly, pest mites; may vary among natural enemy species Amblyseius californicus, Amblyseius cucumeris, Amblyseius swirskii, Phytoseiulus persimilis are sold commercially and may be good proxies for the pesticide compatibility of naturally-occurring predatory mites
yes yes spined soldier bug Podisus maculiventris many immature insects, including many species of caterpillars Podisus maculiventris
 

some

some trichogramma wasps Trichogramma spp. moth eggs Trichogramma spp., Trichogramma brassicae, Trichogramma cacoeciae, Trichogramma evanescens, Trichogramma pretiosum

Other species of interest…

Can I buy them? Found in NY? If I want to conserve this beneficial insect… (whose scientific name is…) that helps me control… I should look for these names on the compatibility apps: 
yes yes bumble bee Bombus spp. NA – pollinator Bombus spp., Bombus terrestris
yes yes European honey bee Apis mellifera NA – pollinator Apis, Apis mellifera

Notes:

Different strains or populations of these natural enemies are sold by different companies and each population may differ from natural populations. Each company is most likely to report compatibility data that applies to their population. It’s not perfect, but it’s a start.

When the first word in the scientific name of an insect (e.g. Trichogramma) is followed by the designation ‘spp.’, it means multiple species that all belong to the same genus. Some compatibility information is given for only the larger group (e.g., Aphidius spp. or Syrphus spp.).

Natural enemies that are pesticides (active ingredients are microorganisms, i.e., fungi, bacteria, viruses)

If I want to conserve this microbial natural enemy… (whose scientific name is…) that helps me control… I should look for these names on the compatibility apps: 
Bt Bacillus thuringiensis (various strains are available, and they control different pests) many caterpillars and some immature beetle and fly pests (target pest varies by strain) Bacillus thuringiensis
entomopathogenic fungus Paecilomyces fumosoroseus = Isaria fumosorosea, Beauveria bassiana, Metarhizium anisopliae (= M. brunneum) (various strains) many insects (target pest depends on fungal species and strain) Paecilomyces (=Isaria) fumosoroseus, Beauveria bassiana, Metarhizium anisopliae (= M. brunneum)
fungi that attack plant diseases there are multiple species, including Trichoderma harzianum (several strains) Plant pathogens (the target pathogen depends on the fungal strain) Trichoderma harzianum T-22 is the only fungal natural enemy I found on these apps, so far. It is unlikely that its compatibility is representative of other fungi that are natural enemies.

Notes:

Different strains or populations of these microorganisms are sold by different companies and each of these populations may differ from natural populations. Each company is most likely to report compatibility data that applies to their population. It’s not perfect, but it’s a start.

In these apps/websites, the microbial active ingredient may be listed as the natural enemy (e.g., Paecilomyces fumosoroseus on Biobest website), but sometimes it’s only listed as a pesticide active ingredient. For compatibility of biopesticides with chemical pesticides, you should start by reading the label, then seek information provided by the manufacturer. I am starting to create biopesticide profiles that include available compatibilitiy information for these products.

All tables were assembled by Amara Dunn, NYSIPM using information from Natural Enemies of Vegetable Insect Pests (Hoffman & Frodsham) and were last updated January 2020.

Give it a try!

Imagine you were considering using one of the following active ingredients:

abamectin

acequinocyl

fenpyroximate

…to control spider mites. (Of course, before you did this, you’d read the labels and be sure that the use you were considering was legal!) If you were concerned about hurting parasitoids that help with aphid control (for example, the species Aphidius colemani and Aphidius ervi) which of these active ingredients would be the best choice (from a compatibility standpoint)?


Go ahead!


Look it up!


A note about microorganisms as natural enemies

Green leaf with blue rectangles with smiling faces representing microbes as natural enemies of the pest microbes (yellow rectangles with shocked faces). The blue microbes are producing blue droplets (representing antimicrobial compounds).
Microbes used to control pests are biopesticides. In this conceptual diagram, the happy blue microbes are producing antimicrobial compounds that are killing the plant pathogens (represented by yellow rectangles with shocked faces).

There are a few “natural enemies” on this chart that are actually biopesticides, and I have listed them separately. Remember that microorganisms (fungi, bacteria, viruses) that are natural enemies of pests are biopesticides. A few of them can be found in the websites/apps summarized above. There are two compatibility questions when it comes to using biopesticides with living microorganisms as active ingredients: (1) Will this biopesticide harm other natural enemies (e.g., predators and parasitoids)? and (2) Will the living microbe in this biopesticide be killed by other pesticides I might use? The websites/apps have some information about the compatibility of biopesticides with arthropod natural enemies. If you’re wondering about the compatibility of biopesticides with other pesticides, that may be a topic for another post (so many posts to write, so little time!). I’ll just offer two quick pieces of advice here:

  1. Read the label of the biopesticide. If it doesn’t contain compatibility information (for use with other pesticides) or doesn’t answer your questions about compatibility with other natural enemies, contact the manufacturer to get your questions answered.
  2. If you happen to be using one of their products, BioWorks describes the compatibility of their products with other pesticides, and this information is linked to individual product pages.

And what about the bees?

Take a look at the resources created by the Pollinator Network @ Cornell. They have prepared decision-making guides for several crops already, with more to come.


This post was written by Amara Dunn, Biocontrol Specialist with the NYSIPM program. All images are hers, unless otherwise noted.

Creating habitat for beneficial insects: Time, money, and weeds

On the left is a picture of a woman in a sundress and straw hat standing in the middle of a sunny sunflower field with her arms raised in the air. Written at the top of the picture is the title “What I thought establishing habitat for beneficial insects would be like…”. On the right is a picture of three people, either on their hands and knees or bending over, pulling weeds (including dandelions) that are several feet tall. This picture has the title: “What it’s actually like.”In December, I updated you on how perennial wildflowers and grasses were establishing in our beneficial insect habitat plots during the 2019 growing season. As I wrote that post, I quickly realized that there was too much good information for just one post. So here’s the rest of the story when it comes to plant establishment – time, money, and weeds.

Before I get started, below is a quick reminder of what our treatments were. You can read all the details here.

Treatment Description
A Spring transplant, no mulch
B Spring transplant with mulch
C Spring direct seed
D Buckwheat cover crop, then fall transplant
E – control Whatever was growing there, just keep it mowed
F Soil solarization, then fall direct seed
G Herbicide and tillage, then fall direct seed

Weed control

One thing that has surprised me about this project (although others certainly gave me fair warning) was how big a role weed management plays in establishing habitat for beneficial insects. It’s definitely still a struggle in our plots.

Bryan Brown did weed assessments for us in May and September of 2019. The graph below shows the average percent of the area of each plot covered by either weeds (orange) or beneficial habitat flowers and grasses (blue).

Bar graph shows the average percent of plots covered with either weed or beneficial habitat plants in May 2019. Weed control in the treatment (B) where transplants were mulched had the best weed control. The worst weed control was in treatment D, where seedlings were planted in Fall 2018 after a buckwheat cover crop.
Mulching provided the best weed management when plots were assessed in May of 2019. Each bar shows the average of four plots per treatment, and has an error bar showing variation among these plots (one standard error above or below the average for the treatment).

This was before we did any hand-weeding. By far, the plots that were mulched in Spring 2018 (treatment B) had the fewest weeds compared to beneficial habitat plants. You’ll also notice that in May there were still relatively few weeds in the plots where we tried to deplete the weed seed bank in the soil through solarization (treatment F) or repeated herbicide and tillage (treatment G).

Picture on the left is of treatment B (Spring transplant and mulch) and shows small wildflower plants surrounded by mulch and few weeds. The middle picture shows treatment C (spring direct seed), a weedy plot. The picture on the right shows treatment F (solarization and fall direct seed), where you can still see at least 50% of the plot is bare soil, although many small and a few larger weeds are visible.
What some of the plots looked like on May 16, 2019 when Bryan did the weed assessment.

By September 2019, the spring transplant treatments looked even better. Our wildflowers grew well during 2019 (with the help of some extra hand weeding). The plants we transplanted in Fall 2018 are still struggling and not nearly as large as the wildflowers in treatments A and B. I think this may have more to do with the weed competition they experienced that first fall (when we couldn’t plant for a few weeks after the buckwheat was mowed) than transplant timing. Hopefully they will catch up.

Picture on the left is of treatment A (spring transplant, no mulch) and shows tall wildflower plants with some weeds. The middle picture shows treatment B (Spring transplant and mulch), full of large wildflowers and few weeds. The picture on the right shows treatment D (buckwheat and fall transplant), where the wildflower plants are much smaller, there are more weeds, and some bare ground is visible.
What some of the plots looked like on September 19, 2019 when Bryan did the weed assessment.

There are still a lot of weeds in the direct-seeded treatments (C, F, or G). Remember that our weed management strategy in these plots is repeated mowing to control annual weeds. Over time, the perennial wildflowers and grasses should take over. But it’s not supposed to be a quick method.

Bar graph shows the average percent of plots covered with either weed or beneficial habitat plants in September 2019. Weed control in the treatment (B) where transplants were mulched still had the best weed control. The worst weed control (besides the control plot where no beneficial habitat plants were planted) was in the three treatments using spring or fall direct seeding (C = spring direct seeding, F = soil solarization and fall direct seeding, G = herbicide and tillage with fall direct seeding).
Spring transplant treatments (A and B) looked the best after their second full growing season. The fall transplants (D) had more weeds, but these plants also have been in the ground for one less growing season. I’m still hoping they will catch up. Each bar shows the average of four plots per treatment, and has an error bar showing variation among these plots (one standard error above or below the average for the treatment).

Effort

Most of the treatments we are comparing required much less work in their second year (2019) than in their first (2018). The exception is that we spent a lot more time hand weeding treatment D (buckwheat cover crop followed by fall transplanting) in 2019. Although we weeded the two spring transplanted plots the same number of times in 2019 (twice), it took longer to hand weed the plots without mulch. I’m not surprised. If you’re looking for the right establishment method for your project, you really need to ask yourself how much help you have available and when. If you can get a lot of people excited about helping you install the planting, but worry about getting consistent volunteers year after year, mulch may be the right choice for you. In the direct seeded treatments (C – spring; F – fall following solarization; G – fall following herbicide and tillage), the time input for 2019 was mowing, which was relatively quick. And we did just a little hand weeding of perennial weeds.

Bar graph shows time (in person hours) spent on each treatment for both 2018 (in blue) and 2019 (in orange). The tallest bars are for treatments A, B, and D, but most of the bar for treatment B is blue (representing transplanting, mulching, and hand weeding in 2018). For treatment D, half the bar is orange (representing hand weeding in 2019). Treatment A shows more orange than treatment B, but less than treatment D.
Transplanting (treatments A, B, and D) still takes more time than direct seeding, but the extra time we spent mulching in 2018 paid off in 2019 when we spent less time hand weeding (treatment B compared to A and D).

Costs

Nearly all of our costs were incurred in the first year of the project (2018). The only additional costs from 2019 were for gas to run the mower. We did replace a few plants in transplanted plots in Fall 2019, but we used some extra plants we had purchased in 2018. Below is the total cost of the plants and other supplies for each treatment. Transplanting will always be more expensive than direct seeding.

Treatment Costs
A $417.12
B $539.29
C $18.83
D $390.55
E $3.40
F $149.10
G $23.12


You may remember that we were also collecting insects. I promise I will write more about the insects we caught in another post. If you are tired of looking at snow and bare trees outside, you can see pictures of some of the insects we caught in my post from August 2019.

This post was written by Amara Dunn. All pictures were taken by her, unless otherwise credited.

This work is supported by:

  • Crop Protection and Pest Management -Extension Implementation Program Area grant no. 2017-70006-27142/project accession no. 1014000, from the USDA National Institute of Food and Agriculture.
  • New York State Department of Agriculture and Markets
  • Towards Sustainability Foundation

How do they work? Bioinsecticide edition

When an insect is treated with the right bioinsecticide, the insect stops damaging plants, and eventually dies.
Bioinsecticides include microorganisms and other naturally-derived compounds that control insect pests.

My post from last February described modes of action for biopesticides that target plant diseases…as well as the difference between a biopesticide and a biostimulant. January’s post described the modes of action of five biofungicides in an ongoing vegetable trial. But there are plenty of insect and mite pests out there, too. You can attract or release predatory or parasitic insects and mites or beneficial nematodes to deal with these arthropod (insect and mite) pests. But you can also use bioinsecticides that control insects and mites. The active ingredients include microorganisms (bacteria, fungi, viruses), plant extracts, or other naturally-occurring substances. Want to know how they work? Keep reading.

Bioinsecticides can have one (or more) of the following modes of action:

  1. Kill on contact
  2. Kill after ingestion
  3. Repel
  4. Inhibit feeding
  5. Inhibit growth
  6. Inhibit reproduction

The examples included in the following descriptions are reported either on the bioinsecticide labels or in promotional materials produced by the manufacturers. And these are just examples, not meant to be an exhaustive list of bioinsecticides with each mode of action.

Killing on contact

Tiny spores of insect-killing fungi land on the body of an insect, germinate, infect the insect, grow throughout its body, and eventually kill it.
Some bioinsecticides contain living spores of a fungus. These spores need to land on the insect. Then they germinate (like a seed), invade and grow throughout the body of the insect, and eventually kill it. If the humidity is high enough, the fungus may even produce more spores on the body of the dead insect.

Some bioinsecticides need to directly contact the body of the insect or mite in order to kill it. Bioinsecticides that contain living fungi work this way. The tiny fungal spores land on the insect or mite pest, germinate (like a seed), and infect the body of the pest. The fungus grows throughout the pest’s body, eventually killing it. If the relative humidity is high enough, you might even see insects that look like they are covered with powder or fuzz (but this is not necessary for the pest to die). This powdery or fuzzy stuff growing on the pest is the fungus producing more spores. Bioinsecticides that contain the fungal species Beauveria bassiana (e.g., BotaniGard, Mycotrol), Metarhizium anisopliae or brunneum (e.g., Met52), or Isaria fumosorosea (NoFly) are examples of fungal bioinsecticides with contact activity.

An insect covered in the white powdery fungus that has started growing out of its body following infection.
If the relative humidity is high enough, insects infected with a fungus may start growing new fungus on the outside of their bodies, appearing fuzzy or like they are covered in powder. Photo credit: Louis Tedders, USDA ARS, Bugwood.org

Bioinsecticides that contain spinosad (including Entrust, SpinTor, and others) work because the active ingredient affects the nervous and muscular systems of the insect or mite, paralyzing and eventually killing it. It can kill the pest either through contact, or through ingestion (more on that in a moment). The bioinsecticide Venerate contains dead Burkholderia bacteria (strain A396) and compounds produced while growing the bacteria. One mode of action of Venerate is that it contains enzymes that degrade the exoskeleton (outer shell) of insects and mites on contact.

Killing by ingestion

Some bioinsecticides need to be eaten (ingested) in order to kill. Pesticides that contain the bacteria Bacillus thuringiensis (often called Bt for short) as the active ingredient are a good example. Proteins that were made by Bt while the bioinsecticide was being manufactured are eaten by insects and destroy their digestive systems. Several different subspecies of Bt are available as bioinsecticides, and the subspecies determines which insect pest it will be effective against. There are many bioinsecticides registered in NY that contain Bt as an active ingredient. Check NYSPAD for labels, and make sure you choose the right pesticide for the pest and setting where you need control. Bt products do not work on mites, aphids, or whiteflies.

A caterpillar eats a bioinsecticides that kills by ingestion. Later, the caterpillar dies.
Some bioinsecticides (blue diamonds in this diagram) will only kill pests if they are eaten first. Pesticides that contain Bacillus thuringiensis (Bt) bacteria or insect viruses are examples of this mode of action.

Insect viruses are another example of a bioinsecticide active ingredient that kills through ingestion. For example, Gemstar contains parts of a virus that infects corn earworms and tobacco budworms. Once these caterpillars eat the Gemstar, the virus replicates inside the pest, eventually killing it.

Repel

Some bioinsecticides repel insects from the plants you want to protect. However, this mode of action may only work on certain pest species, or certain life stages of the pest. Read and follow the label. Bioinsecticides containing azadirachtin or neem oil, and Grandevo are reported to have repellent activity for some pests. Grandevo contains dead bacteria (Chromobacterium substugae strain PrAA4-1) and compounds produced by the bacteria while they were alive and growing.

One leaf has been treated with a bioinsecticides that repels pests, but one leaf has not. The caterpillars are feeding on the leaf that was not treated.
Some bioinsecticides (blue diamonds and happy microbes in this diagram) protect plants because they repel insect and mite pests. This protects treated plants from pest damage.

Inhibit feeding

If you want insect and mite pests dead as soon as possible, I understand the sentiment. But in many cases stopping the pests from eating your plants would be just as good, right? Some bioinsecticides cause pests to lose their appetite days before they actually die. Like bioinsecticides that kill pests outright, some bioinsecticides that inhibit feeding require ingestion, while others work on contact. And these bioinsecticides may work this way for only certain pest species of certain ages. Read and follow those labels! Bioinsecticides containing Bt require ingestion and some can stop pest feeding before actually killing the pest. The same goes for Gemstar (corn earworm virus). This is another mode of action of azadirachtin products against some pests.

A caterpillar eats or comes in contact with a bioinsecticide that causes the caterpillar to stop feeding.
Some bioinsecticides (blue diamonds and happy microbes in this diagram) cause insect and mite pests to lose their appetites. Depending on the bioinsecticide, it either needs to contact the pest or be eaten by it.

Inhibit growth

Many insects and mites need to molt (shed their skin as they go from one life stage to another). Bioinsecticides that interfere with molting prevent pests from completing their life cycle. Like feeding inhibitors, these bioinsecticides won’t directly kill the pests you have, but they can prevent them from multiplying. This is another mode of action (again, for certain pests at certain stages of development) listed for azadirachtin products and Venerate (Burkholderia spp. strain A396).

Some aphids were treated with a bioinsecticides that inhibits growth. They stay the same size. Another aphid that was not treated grows and molts normally.
Some bioinsecticides (blue diamonds in this diagram) don’t kill insects and mites outright, but they can prevent them from molting and growing into the next life stage. Pests that can’t move on to the next life stage will eventually die without completing their life cycle.

Inhibit reproduction

There are two main types of bioinsecticides that prevent or slow insect reproduction. Pheromones are compounds that confuse insects that are looking for mates. If males and females can’t find each other, there won’t be a next generation of the pest. Pheromones can be especially useful when the adults that are looking for mates don’t feed (e.g., moths). Isomate and Checkmate are two examples of pheromones available for certain fruit pests. Other bioinsecticides actually reduce the number of offspring produced by a pest. This is one of the modes of action of Grandevo (Chromobacterium substugae strain PRAA4-1) against certain pests.

Male and female moths are unable to find each other and mate because of the presence of pheromones nearby.
Pheromones (represented here by blue diamonds) are a type of bioinsecticide that confuses insects looking for a mate. As a result, males and females can’t find each other, don’t mate, and don’t lay eggs.

Why do I care?

Do you mean besides the fact that you are a curious person and you want to know how biopesticides work? Knowing the mode of action for the pesticide you use (among other things) allows you to maximize its efficacy. Does the bioinsecticide need to contact the pest, or be eaten by it? This determines where, when, and how you apply it. Do you want to use a bioinsecticide that inhibits growth of the pest? Make sure you use it when pests are young. (Sidenote: Like all biopesticides, bioinsecticides generally work best on smaller populations of younger pests.) Is the first generation of the pest the one that causes the most damage? Don’t rely on a bioinsecticide that inhibits reproduction. Although if the pest overwinters in your field and doesn’t migrate in, maybe you could reduce the population for the next season.

Now is a great time of year to consider the insect and mite pests you are likely to encounter this season, then learn which bioinsecticides include these pests (and your crop and setting) on the label. Always read and follow the label of any pesticide (bio or not). How do you know whether these bioinsecticides are likely to work in NY on the pests listed on the label? That’s a topic for another post. In the meantime, the Organic Production Guides for fruit and vegetables from NYS IPM are a great place to start. When available, they report efficacy of OMRI-listed insecticides (including some bioinsecticides). Your local extension staff are another great resource.

Could your lawn use some biocontrol? Scout first.

white grubs found in a lawn
These white grubs can damage your lawn…but only if enough of them are present. Don’t waste time and money treating for them if you don’t need to!

For much of this summer, many people in NY had “water” at the top of their lawn care list. White grubs are another concern for home lawns. But finding a grub in your lawn does not automatically mean that you need to treat. Before you think about doing anything to your lawn to kill grubs, you should know how many grubs you have, and which species they are. If you do need to treat, consider using biocontrol.

Good news! It’s the perfect time of year to scout for white grubs. Starting in mid to late August, and continuing into October, grubs that hatched from eggs laid during the summer will be just beneath the surface of your lawn, feeding on the roots of your grass plants. This is the time to look for grubs. You might also notice some damage to your lawn from white grub feeding during this window.

life cycle of a white grub in your lawn
Late August through October is the perfect time of year to look for grubs in your lawn. The grubs will be young and close to the surface.


map of lawn and places you plan to sample for grubs
X marks the spot (to sample for grubs)! Select parts of your lawn where you think there might be grubs, sample in these places, and take notes on what you find.

Take a look at this fact sheet for detailed instructions on sampling your lawn. All you need is a piece of paper, something to write with, and a shovel or trowel. Check 1 foot by 1 foot squares around the lawn. If you have a bulb planter with a diameter of approximately 4.25 inches, or a golf course cup cutter, this works, too. Make notes about where you’ve sampled and how many grubs you found in each spot. Save the grubs from each sampling location separately.

peeling back turf from a 1 foot by 1 foot section and finding a grub
Cut a 1 foot by 1 foot square at each sampling location, and look for grubs in the roots of the grass. (Photo credit: NYS IPM)

If you didn’t find any grubs, please don’t treat your lawn! You are wasting money, and applying unneeded pesticides (or biocontrol nematodes) is never a good idea. If you did find grubs, it’s important that you determine which species they are. Why? Because the white grubs you are likely to find in NY are the immature (larval) stage of many different insect species. And each species causes different amounts of damage to your lawn. This means that the number of grubs your lawn can tolerate before it’s damaged – and therefore the number of grubs you should tolerate before treating for grubs – depends not only on the overall resilience of your turf, but also on the grub species you have. Check out the following table:

Number of grubs of each species before a treatment is justified
White grubs may look very similar, but they are not! Different species cause different amounts of damage to your lawn. If you find more than the number of grubs per square foot (or per 4.25-inch diameter soil core), you might consider treating your lawn for grubs. If not, you don’t need to do anything!

Fortunately, identifying grubs is easy, too! All you need is a penny, a hand lens with at least 15x magnification, and this online Grub ID tool. First, use the green “Learn how to identify grubs” button to find out which part of the grub to look at and how to hold it. Next, follow the instructions to compare each grub you found to the size of a penny.

online grub ID tool
The Grub ID tool explains exactly which part of the white grub to look at when you are identifying it. Just click the green button.
close-up picture of the rear end of a white grub, used in identification
Take a close look at the rear end of a white grub (using a 15x hand lens) to find out which species you have.

Finally, inspect its rear end with a hand lens to determine which species you have. Once you’ve identified the species, click on the species name to find specific management information. Now, look at that table again. For the species you found in your yard, do you have more than the listed number per square foot (or per 4.25-inch diameter soil core)? If not, then don’t waste time or money treating your lawn.

Most likely, only a few spots in your lawn (if any) warrant grub treatment. This is why you took careful notes about where you found grubs. Late August through September is also a good time to use a curative treatment for grubs in NY. The grubs are small and easier to kill. Some chemicals are effective when used at this time (but not the ones that are taken up by the plant!). A preventative pesticide that is taken up by the plant and kills the next generation of grubs when they start feeding in the late summer and fall should be applied in May or June. Before using any pesticide, find out if it is allowed in NY and find the product label using the New York State Pesticide Administration Database (NYSPAD). If a product isn’t listed in this database, you may not use it in NYS (even if you can buy it online). You must follow all instructions on the label.

Screen shot of the NYSPAD database search page
Use the product registration section of the New York State’s Pesticide Administration Database (NYSPAD) to check if a white grub pesticide is allowed in NY. When you get to the website, follow the three simple steps shown here.
Dark reddish brown grub (unlike healthy white grubs) killed by nematodes
Unlike the healthy white grubs you saw earlier in this post, this grub has been killed by nematodes.

But why use a chemical when you could use a biological control? Entomopathogenic nematodes are tiny beneficial worms that don’t harm plants, but kill grubs. See how they do it by watching this short video.  Why wouldn’t you want these nematodes working for you? Beneficial nematodes are a curative white grub treatment, so they should be applied between mid to late August and October. But you still only need to apply them to spots where grub numbers exceeded the thresholds in this table. You can purchase nematodes from garden centers or online garden supply stores. Look for the nematode species Heterorhabditis bacteriophora and Steinernema feltiae.

Dry, powdered form of nematodes used to kill grubs in your lawn
Grub-killing nematodes are sold as what looks like a dry powder. Dissolve them in non-chlorinated water (if available) before applying them to your lawn. Follow all package instructions.

For both species, make sure to follow the instructions on the package for storing and applying them. Nematodes will be harmed by ultraviolet light, so apply them around dawn or dusk, and water them afterwards to wash them into the root zone of the grass (where the grubs are). Any type of sprayer (as long as it doesn’t contain a fine mesh) or even a watering can will work to apply nematodes. If you use a sprayer, keep the pressure below 30 pounds per square inch. When you’re mixing up the nematodes, if non-chlorinated water is available, use that. Chlorinated water is fine for watering them in after you apply them.

Regardless of what treatment you use, scout your lawn again next year to find out how well your IPM strategy worked, and if there are other areas you need to treat (or not).

This post was written by Amara Dunn (NYS IPM) and Kyle Wickings (Department of Entomology, Cornell University).

Creating habitat for beneficial insects – early summer 2018 project update

Betsy, Deb, and Brian transplanting native wildflowers and grasses that will provide habitat for beneficial insects
Dr. Betsy Lamb, Deb Marvin, and Brian Eshenaur (left to right) transplanting native wildflowers and grasses on the edge of a research Christmas tree planting at Cornell AgriTech in Geneva, NY. These plants will provide food and shelter for pollinators and natural enemies of pests.

As I mentioned in my January post, I am excited to be working with two NYS IPM colleagues (Dr. Betsy Lamb and Brian Eshenaur) to demonstrate the costs, labor, and effectiveness of different methods for establishing habitat plants for pollinators and other beneficial insects. Remember, habitat for pollinators is also habitat for insects and mites that are natural enemies of pests on your farm or in your garden. Thus, planting for pollinators enables you to practice conservation biocontrol. These demonstration plots are located around a new research planting of Christmas trees at Cornell AgriTech at the New York State Agricultural Experiment Station in Geneva, NY. What we learn from this project can help you choose the best way to establish your own beneficial habitat (on your farm, around your home, near your school, etc.)

We are comparing 6 different methods of establishing habitat for beneficial insects, plus a control (Treatment E). Treatment E plots were sprayed with herbicide last fall and this spring, and will be mowed once this year. A summary of the plan for the other treatments is below.

List of treatments in this study. Each treatment is a different method for establishing habitat for beneficial insects
Comparing different methods for establishing plants that provide habitat and food for beneficial insects (pollinators and natural enemies of pests). Treatment E is the control.
seeds for plants that will provide habitat for beneficial insects
Native wildflower and grass seeds (A) were mixed with boiled rice hulls (B) to make them easier to broadcast (C). Much of what you see on the soil surface is just the rice hulls, but there are a few seeds that will hopefully grow into habitat for beneficial insects.

Because of when spring tillage occurred, plots that were scheduled to be tilled in the spring did not need a second herbicide application. About a week after spring tillage, Treatment C plots were direct seeded. I hand-broadcast a mixture of native wildflower and grass seeds at a rate of half a pound per 1,000 square feet. This worked out to be 26 g of seed for each 5-foot by 23-foot plot. To make it easier to broadcast such a small amount of seed, I first mixed the seed for each plot with about 3 cups of boiled rice hulls. After raking the seed in gently with a garden rake, I stomped the seed into the ground to ensure good contact with the soil. In a larger plot, you might use equipment like a cultipacker or lawn roller to achieve the same result.


young buckwheat plants
Two weeks (and three-quarters of an inch of rain) after seeding, buckwheat is establishing. It will hopefully crowd out weeds that would otherwise grow in these plots over the summer.

I broadcast (again, by hand) buckwheat seeds in the Treatment D plots at a rate of 70 pounds per acre (84 g for each of these small plots), and raked them in on May 31st. If the buckwheat establishes well, it will smother weeds during the summer, and we can mow and transplant into these plots in the fall. We plan to mow this crop of buckwheat when it starts flowering and then reseed it, for a total of two buckwheat plantings this summer.


We transplanted by hand 15 species of wildflowers and 1 grass species into plots assigned to Treatments A and B on June 4th. Because we were able to transplant right after it rained, it wasn’t too difficult to plant into the untilled plots (Treatment A). Some of them still had some stubble from the cover crops and weeds that had been growing in this field last year, and were killed by fall and spring herbicide applications.

Young wildflower and grass plants transplanted into untilled soil.
Native wildflowers and grasses transplanted into untilled soil. Some dead weeds and cover crop still remain on the soil surface.

The day after we transplanted into Treatment B plots, we mulched the plants to a depth of about 3 inches to (hopefully) control weeds for the rest of the summer while the habitat plants get established. We used chips from shrub willow because they were available, but other types of mulch would work, too.

wildflower and grass plants surrounded by mulch for weed control
These wildflowers and grasses will have help out-competing weeds from 3 inches of willow chip mulch.

Finally, we laid clear high tunnel plastic over the plots receiving Treatment F. Ongoing research from the University of Maine suggests that soil solarization can be an effective form of weed control, even in the northeast. So we’re giving it a try! To maximize the efficacy of this technique, we laid the plastic when the soil had been tilled relatively recently, and was still very moist. To keep the plastic firmly in place for the whole summer, we rolled the edges and buried them 4-5 inches deep, then stomped the soil down around all the edges. In the fall, we will hand broadcast a mixture of native wildflower and grass seeds over these plots (same mix as Treatment C).

a trench being dug around the edge of a plot to bury the edge of a sheet of clear plastic
Deb Marvin and Brian Eshenaur (left to right) dig a trench to bury the edge of this sheet of clear plastic. The goal is weed control by soil solarization.

We’ll give weed seeds in the Treatment G plots a few more weeks to germinate and grow (depending on the rain). Then we’ll kill them with an herbicide, and till these plots again to induce more weed seeds to germinate. Then we will repeat the herbicide application, till again, and so on. This should reduce the weed seed bank in the soil over the course of the summer. After a final tillage in the fall, we will broadcast seed from the same wildflower and grass mix we used for Treatment C. Fall is the recommended time for direct seeding beneficial insect habitat in the northeast. This treatment will also have the advantage of a full season of weed control prior to planting (also recommended). The downside is that it will take longer to establish the beneficial insect habitat.

As we get these plots established, we’re keeping track of the time spent on each treatment and the costs of materials. In the late summer or fall, Dr. Bryan Brown will assess weeds in each treatment, and I will photo document how well our beneficial insect habitat plants have established in each plot. All of these data will help you choose the method that fits your timeline, budget, and equipment/labor availability. Stay tuned for more updates…including an invitation to a field day (not this year), so that you can come see the results of this project for yourself!


This work is supported by:

  • Crop Protection and Pest Management -Extension Implementation Program Area grant no. 2017-70006-27142/project accession no. 1014000, from the USDA National Institute of Food and Agriculture.
  • New York State Department of Agriculture and Markets