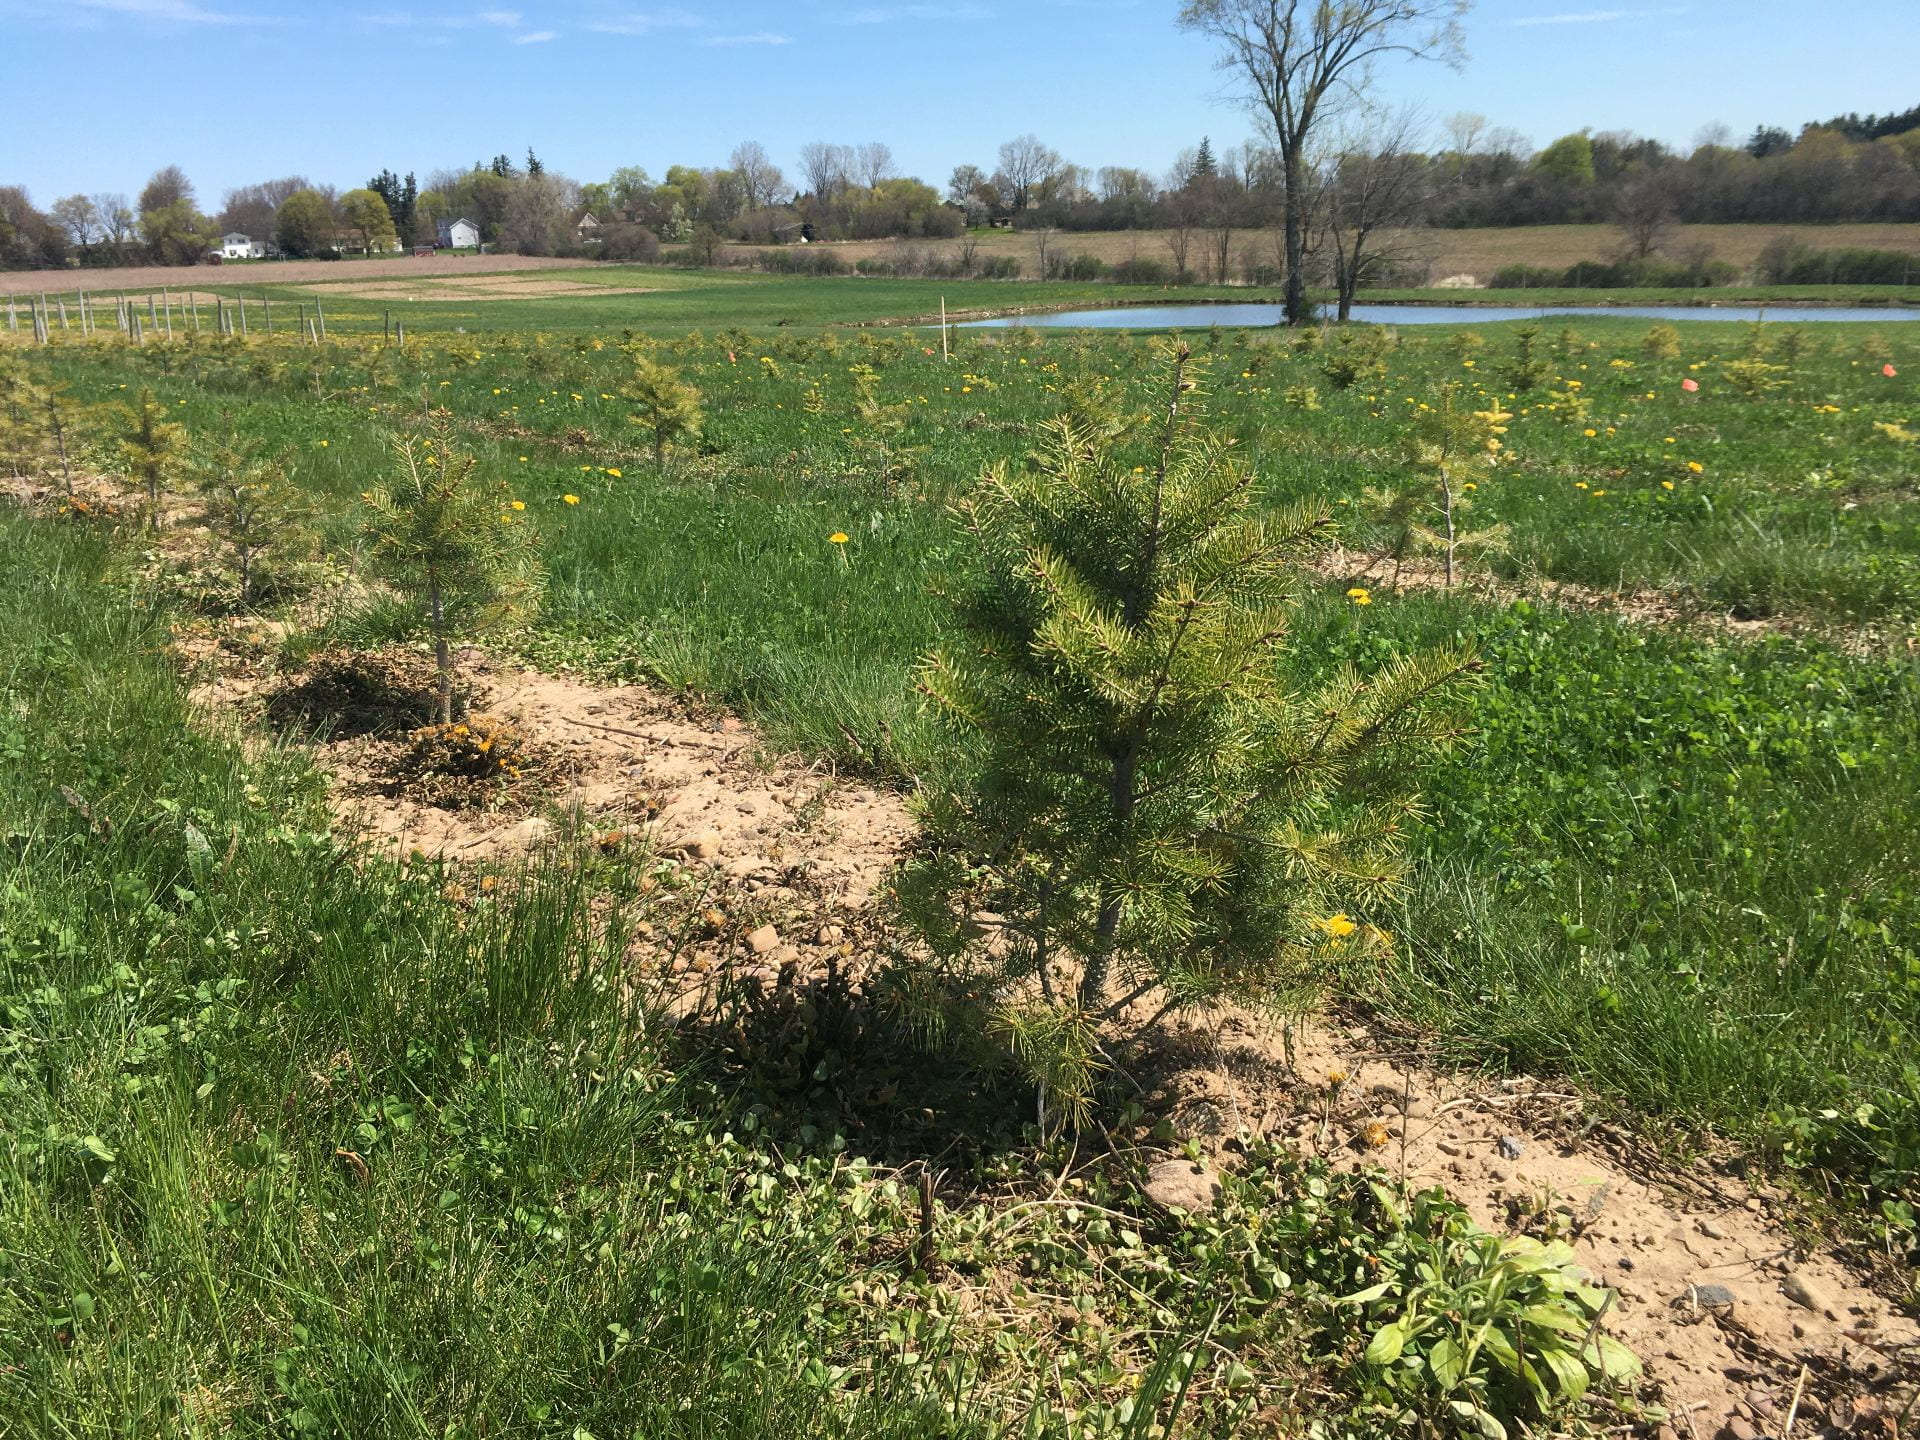
I was so excited to check on our Christmas tree and beneficial insect habitat plots on this sunny May day!
Thanks to everyone who’s been following the project I’ve been working on with Betsy Lamb and Brian Eshenaur to establish (and document the impacts of) habitat for natural enemies of pests and pollinators (collectively, beneficial insects) around a research planting of Christmas trees! For many people, life does not look the same as it did in January, and we are no exception. Don’t worry, we and the excellent Field Research Unit staff at Cornell AgriTech will be maintaining our research beneficial insect habitat plots (and the Christmas trees around them) so that we can continue to do research here in future years. But, in the interest of keeping people safe and working remotely as much as possible, we won’t collect insects this season. I will be going out about once a week to take pictures of both plants and insects (by myself, with a mask on hand just in case). You can see these pictures on either my Twitter or Instagram accounts.
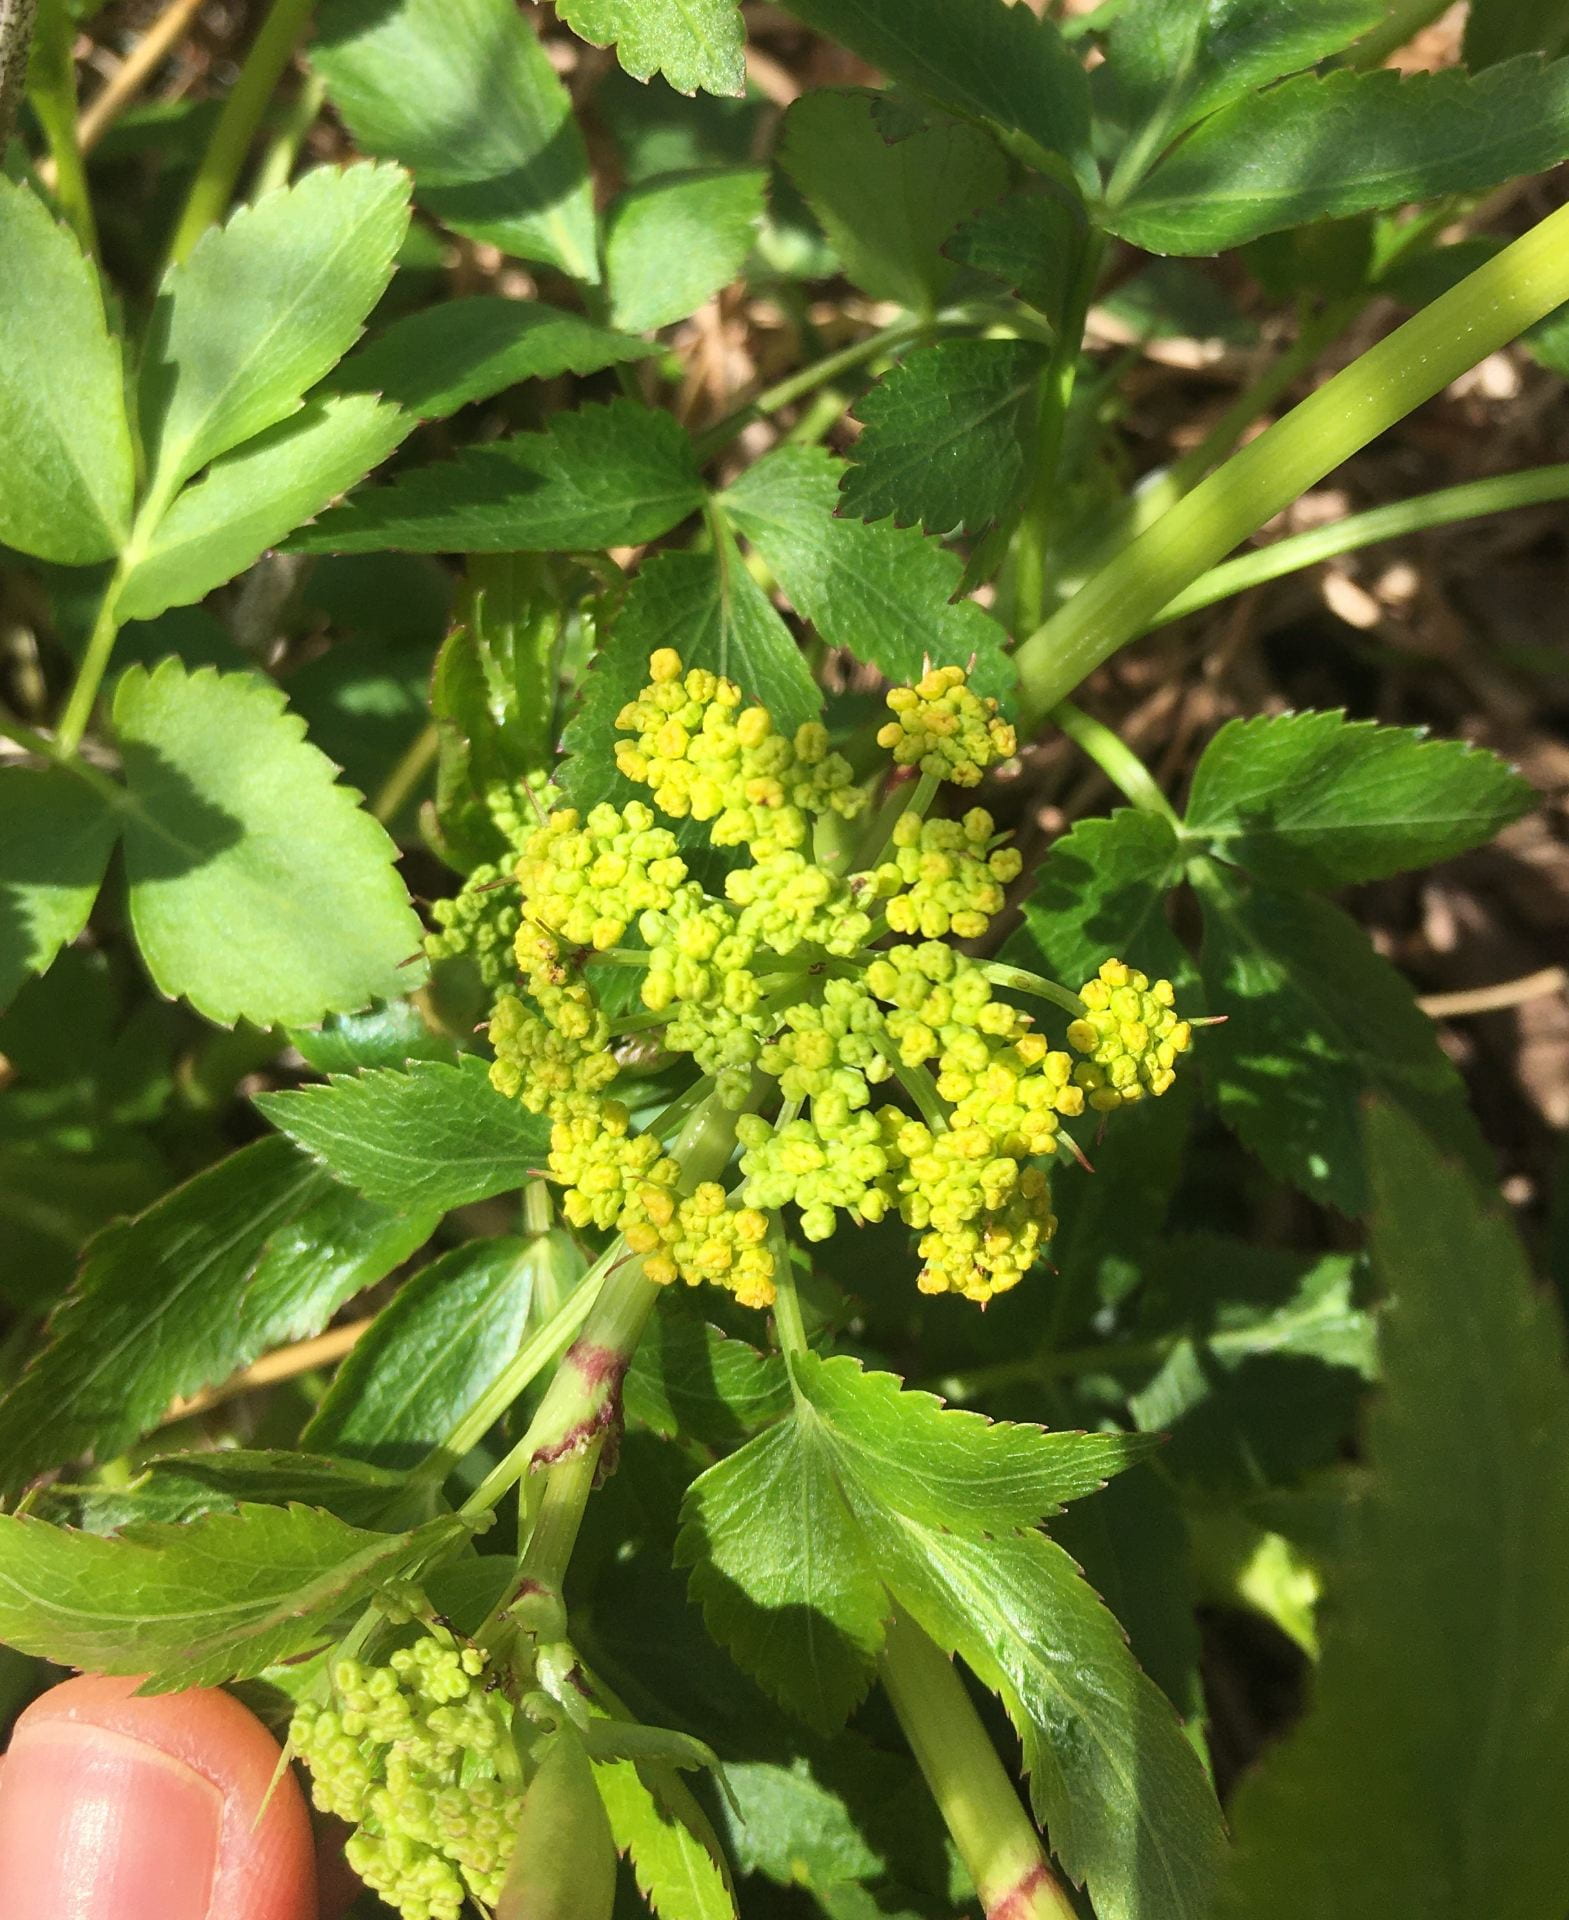
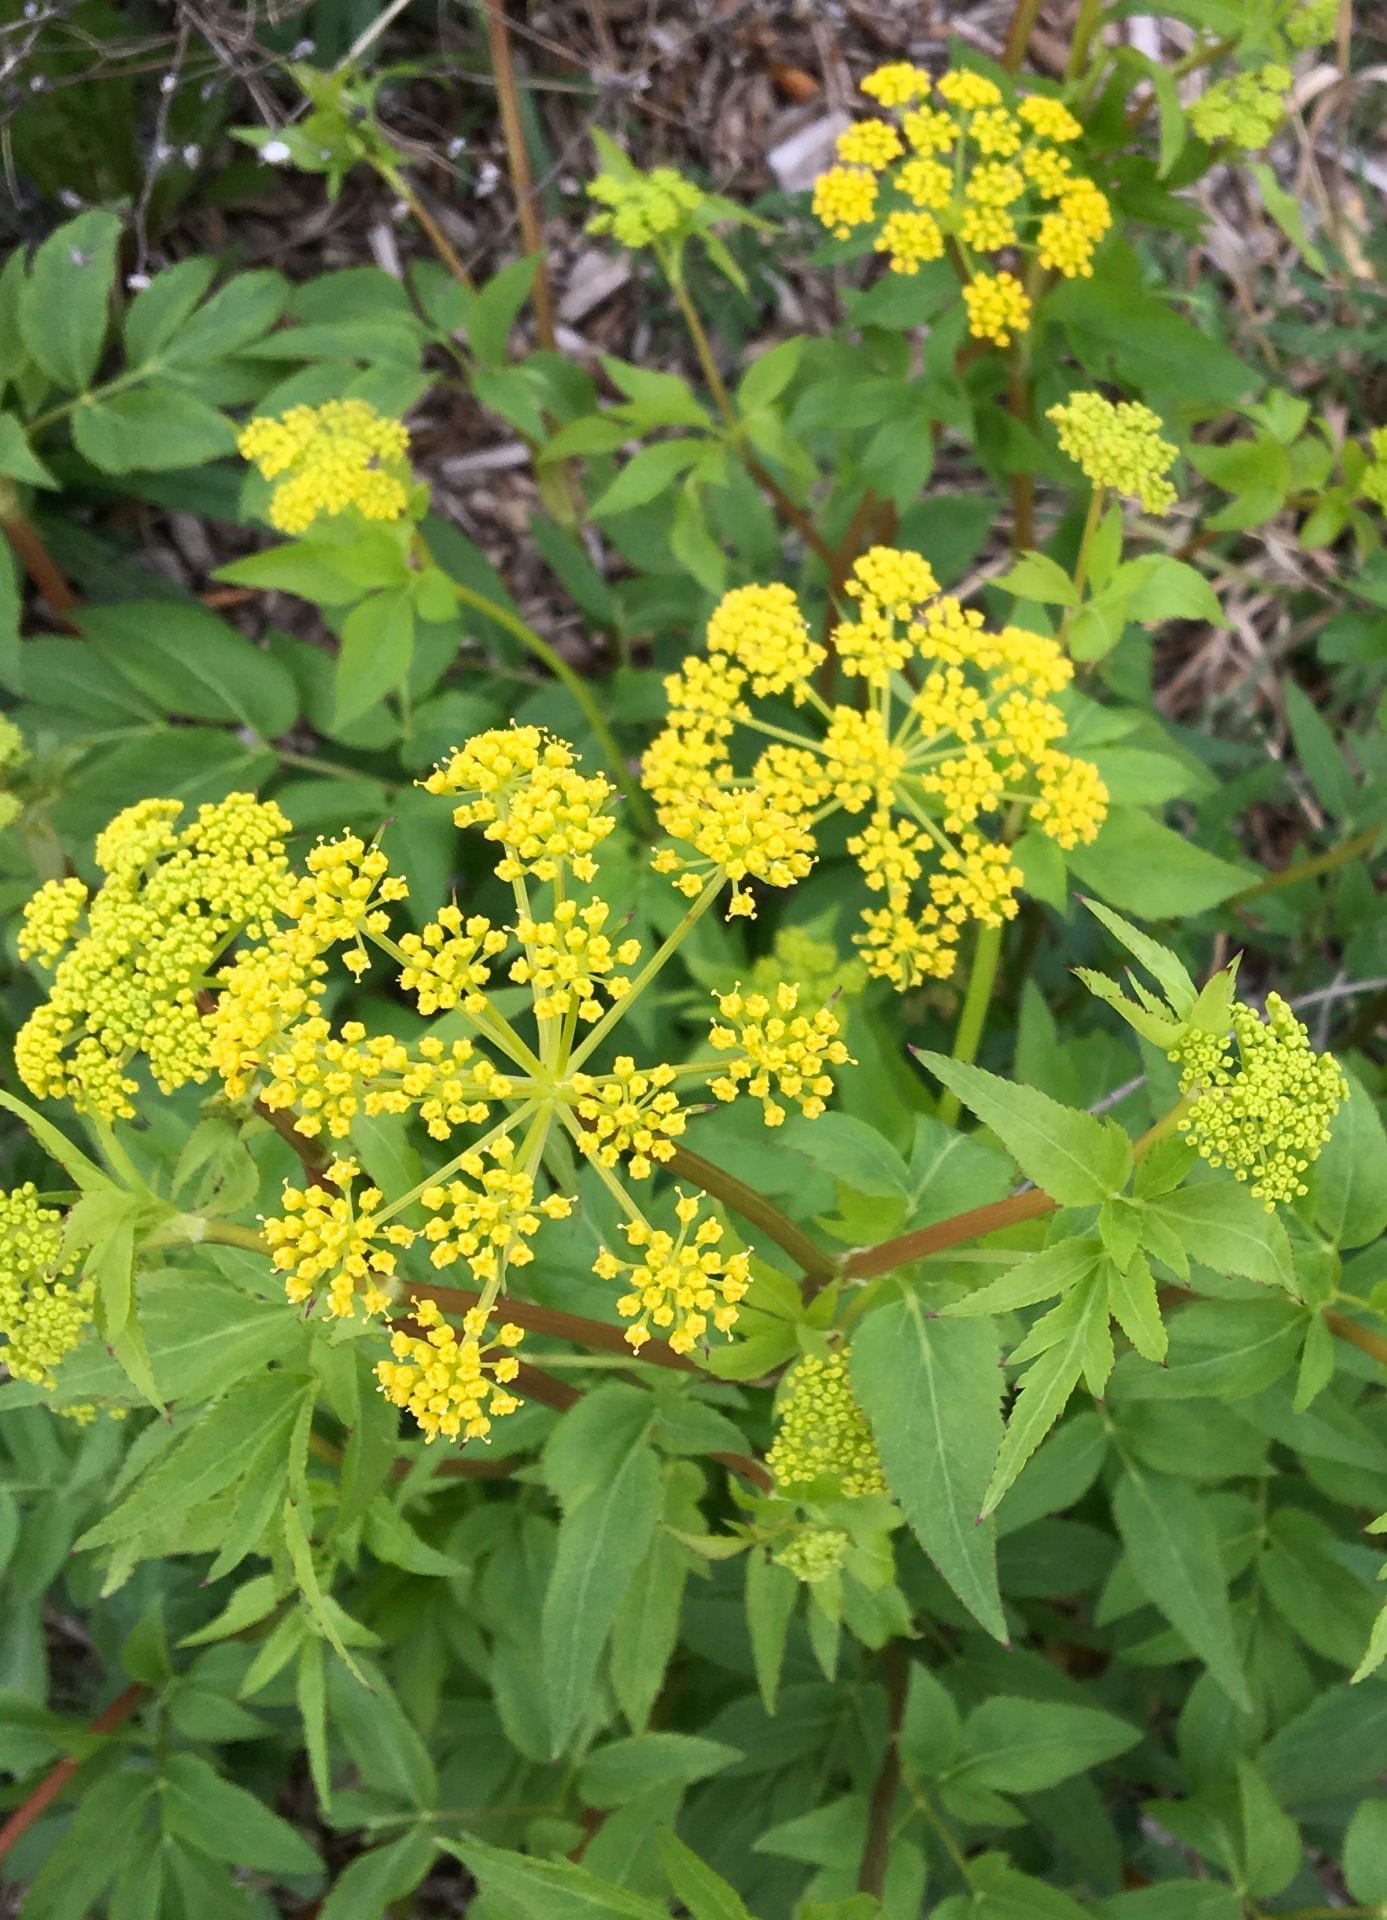
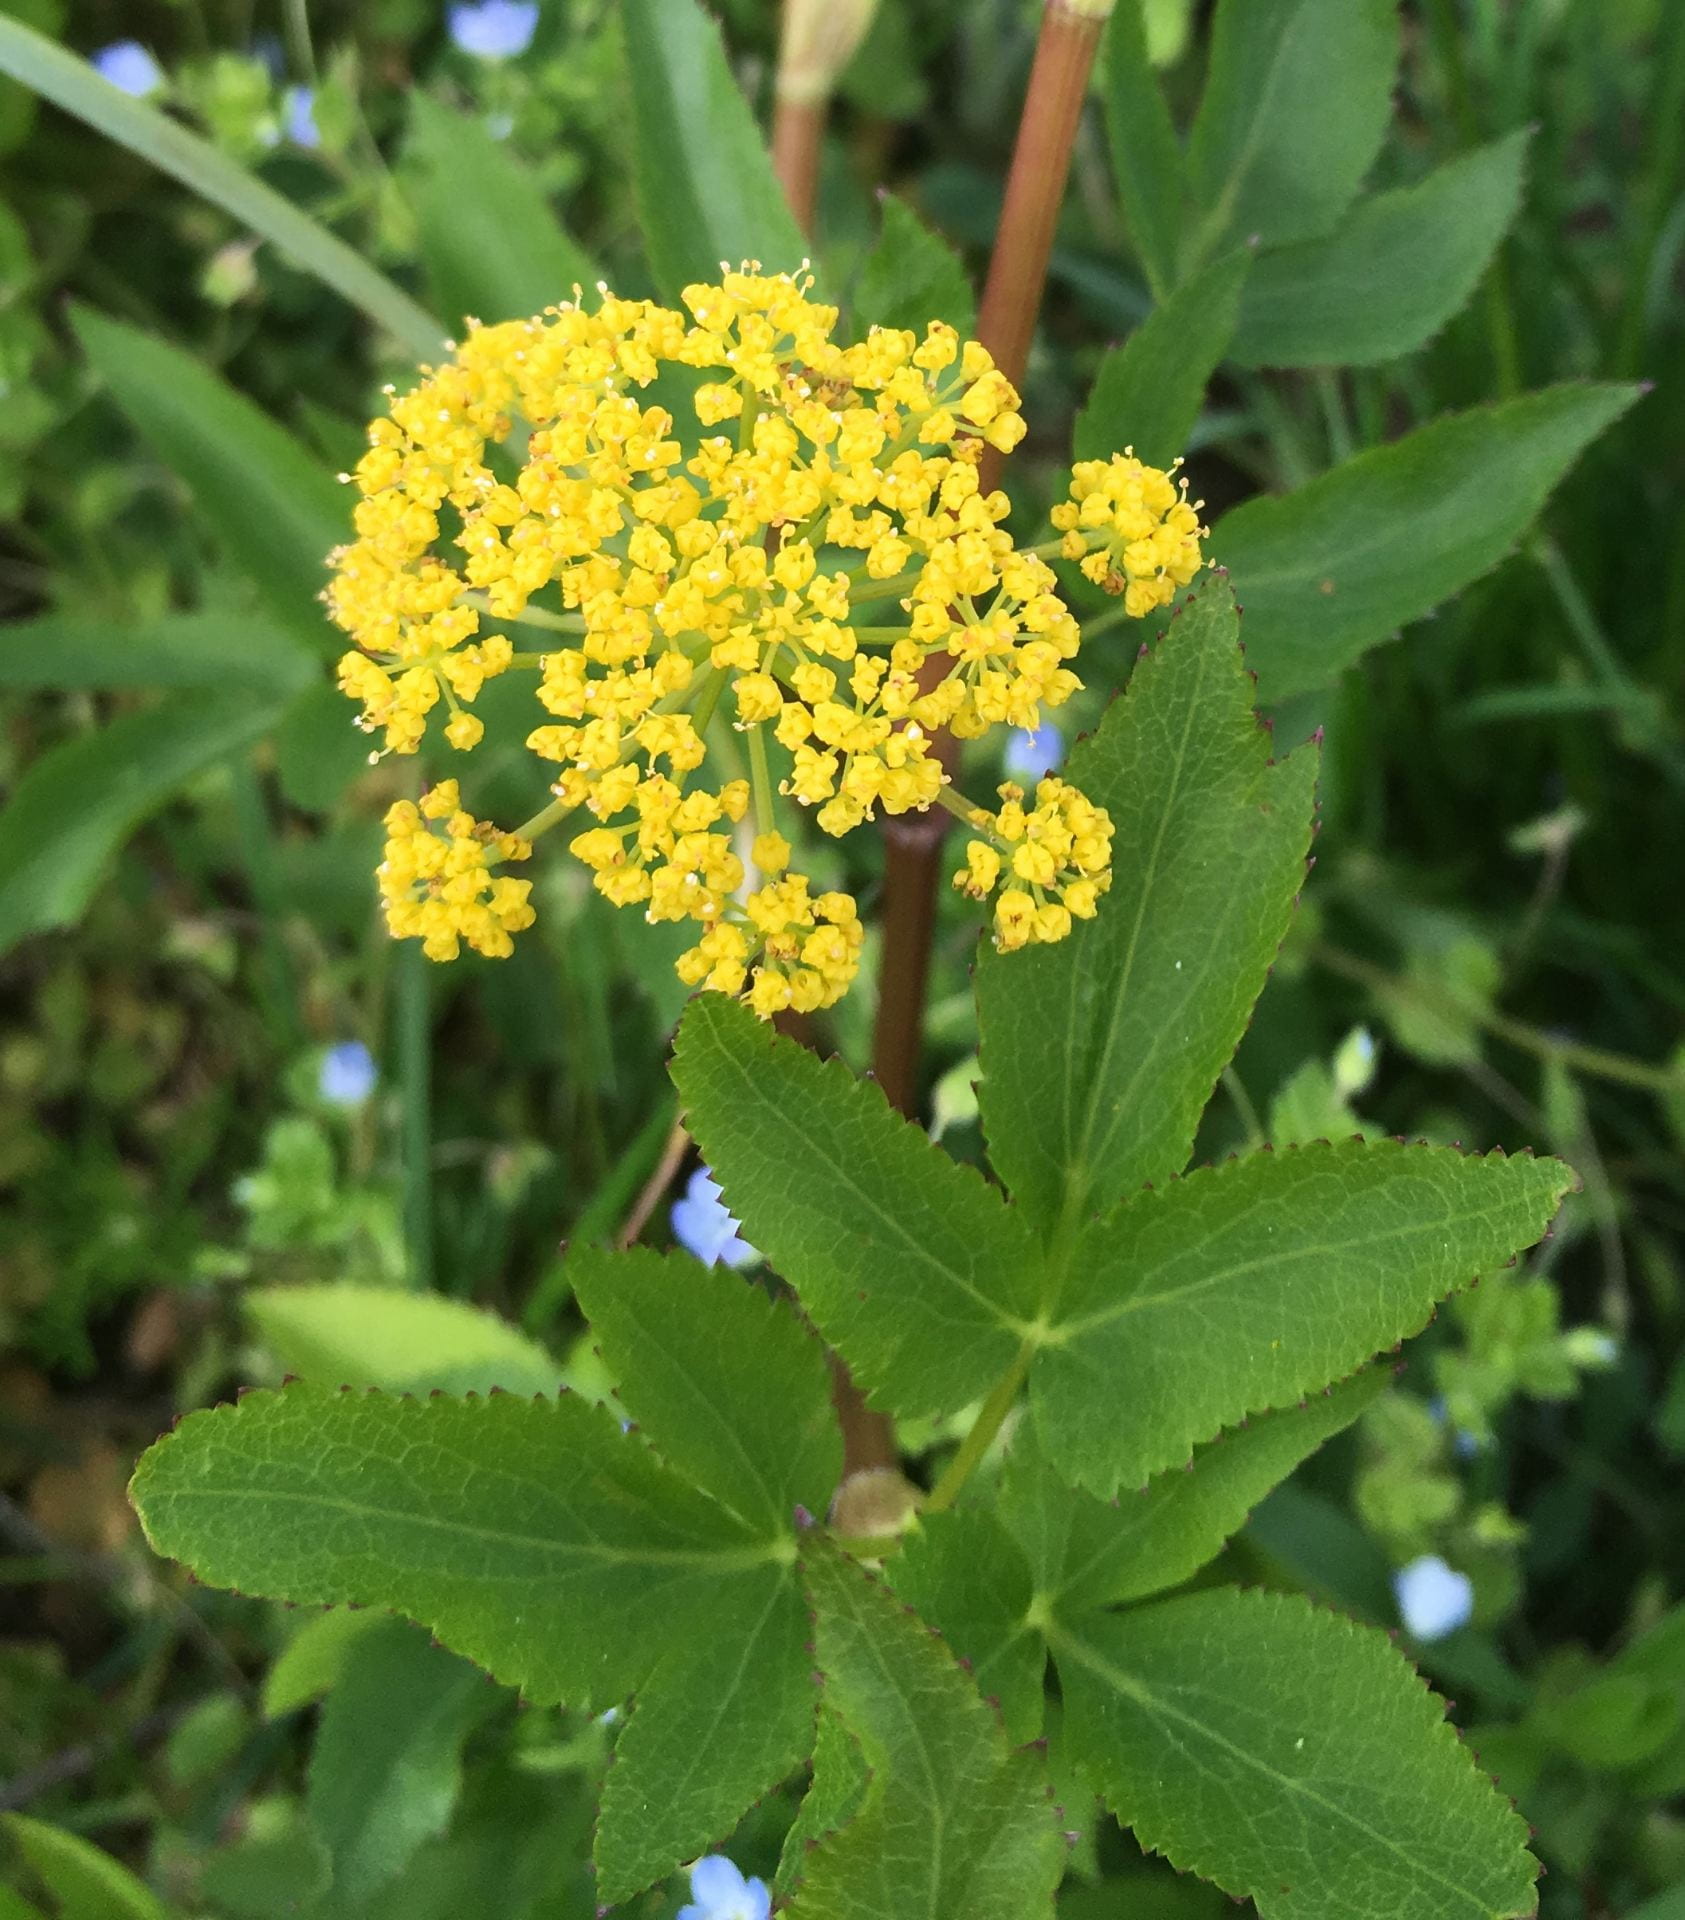
Zizia aurea (golden alexander) is the earliest-blooming plant species we have in our beneficial insect habitat plots. And it wasn’t blooming yet the first week of May.
There’s also a new project you can follow this spring and summer (here, and on Twitter and Instagram)! I recently moved into a new house, and was already planning to put in a (mostly flower) garden, including plants that support beneficial insects. Since many people are doing more things at home, this seemed like a good year to share my experience establishing habitat for beneficial insects in a home garden.
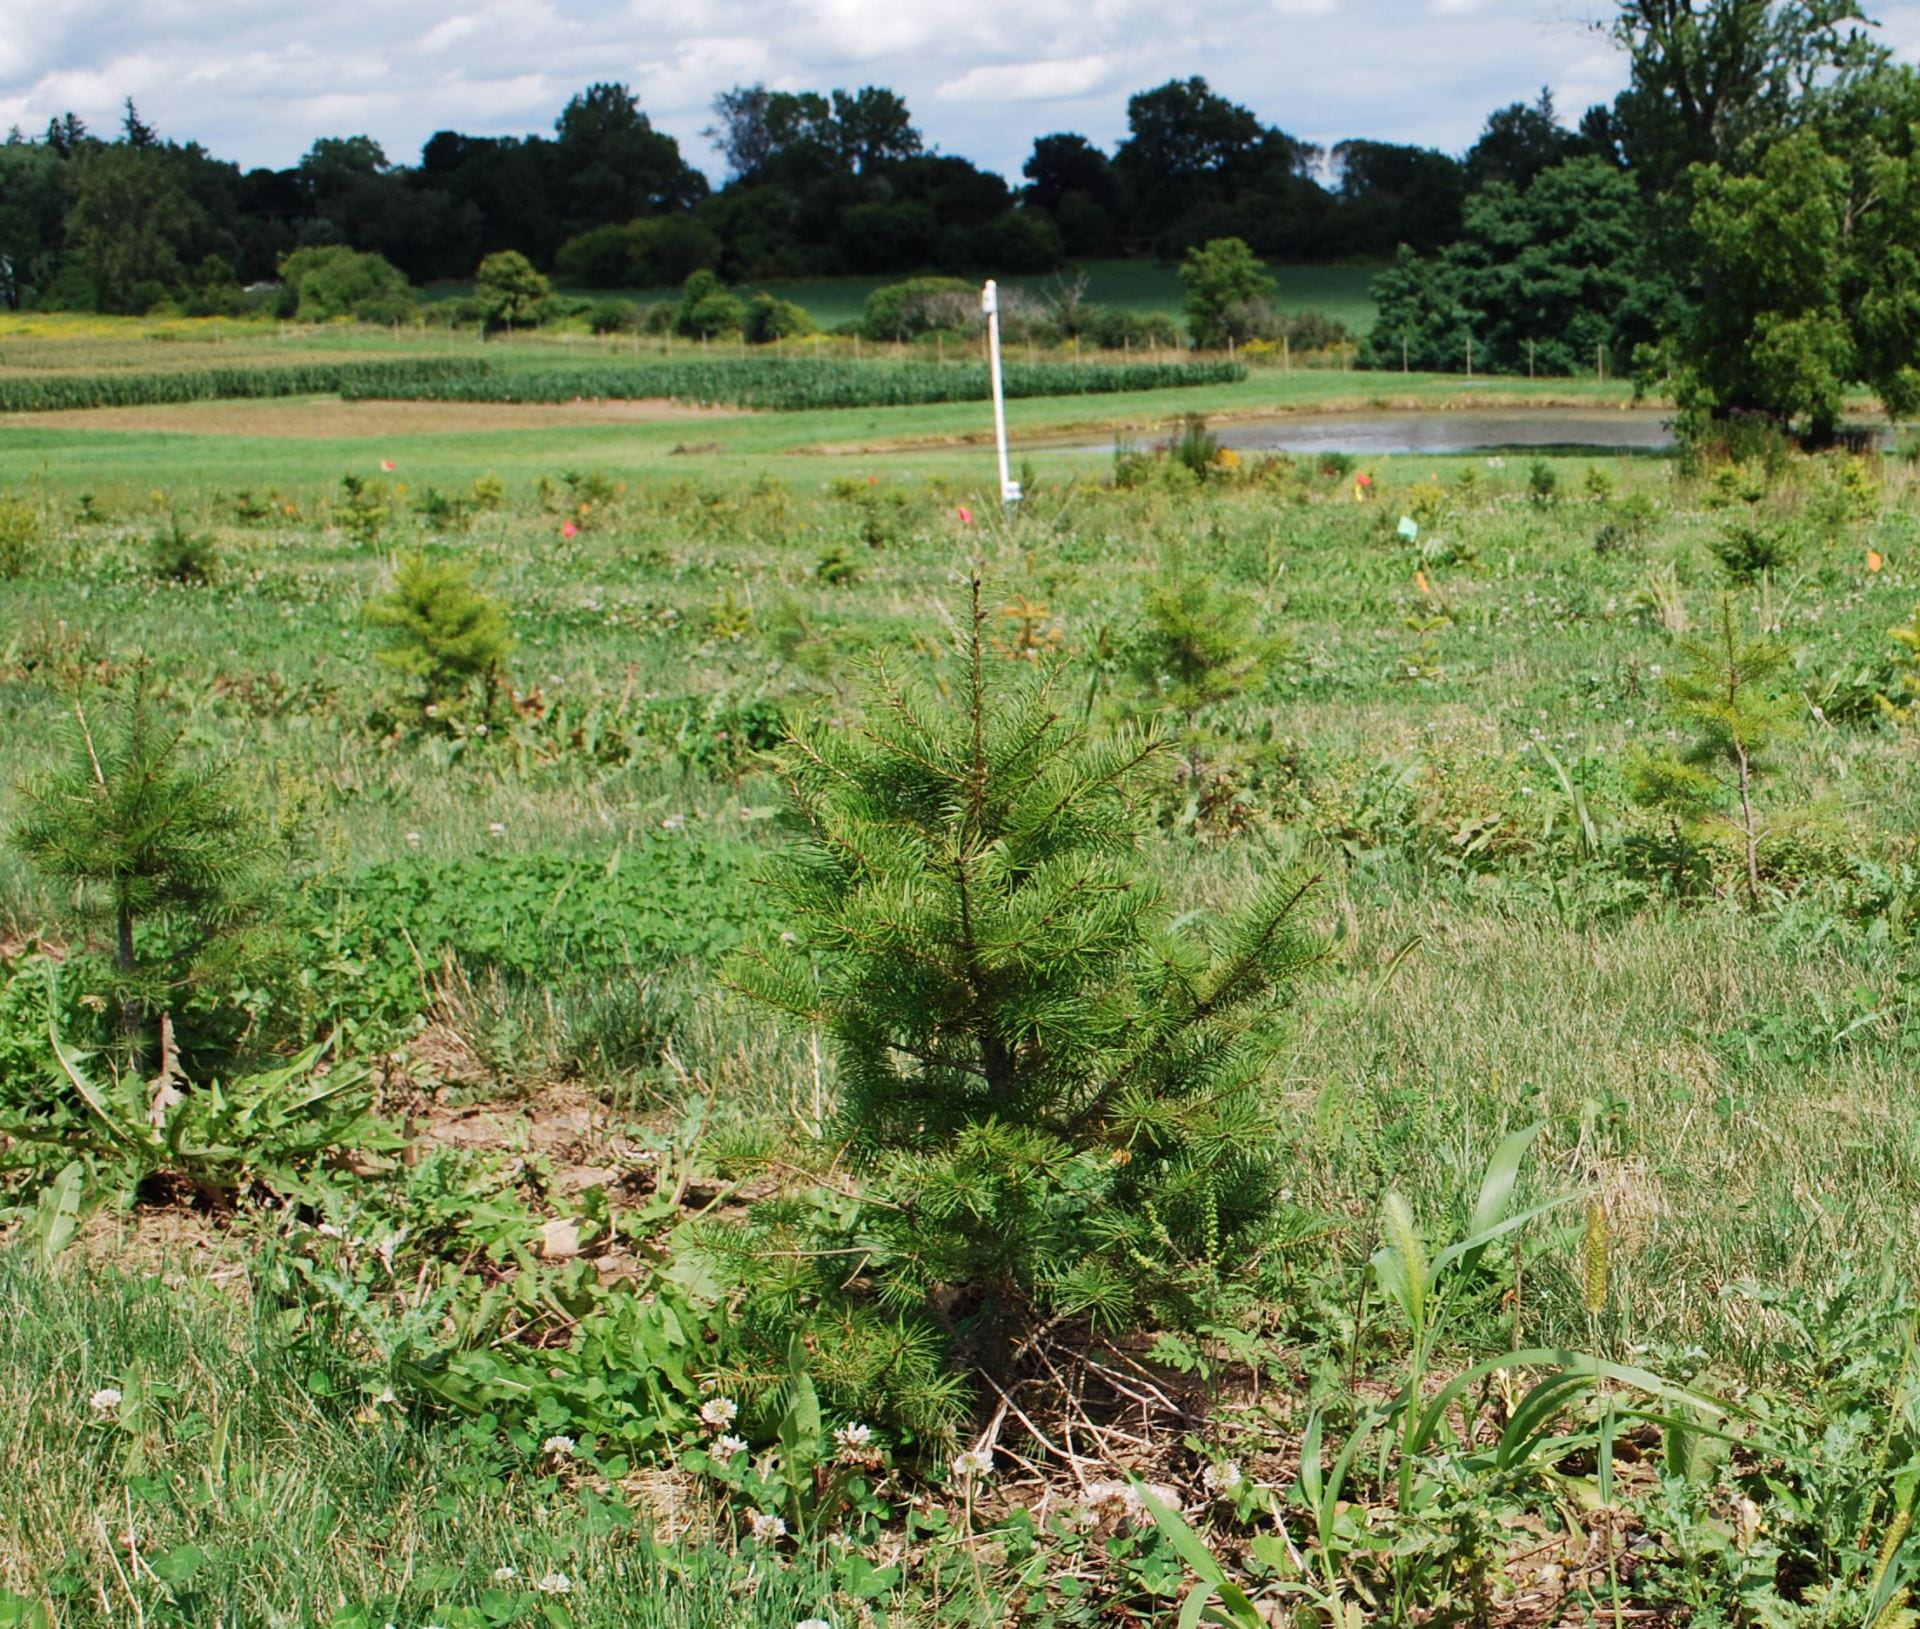
First step? Site selection. My backyard is a bit shady (and I suspect it will be shadier when the leaves come out). You can’t tell from this picture, but the ground also tends to be a little squishy after it rains.
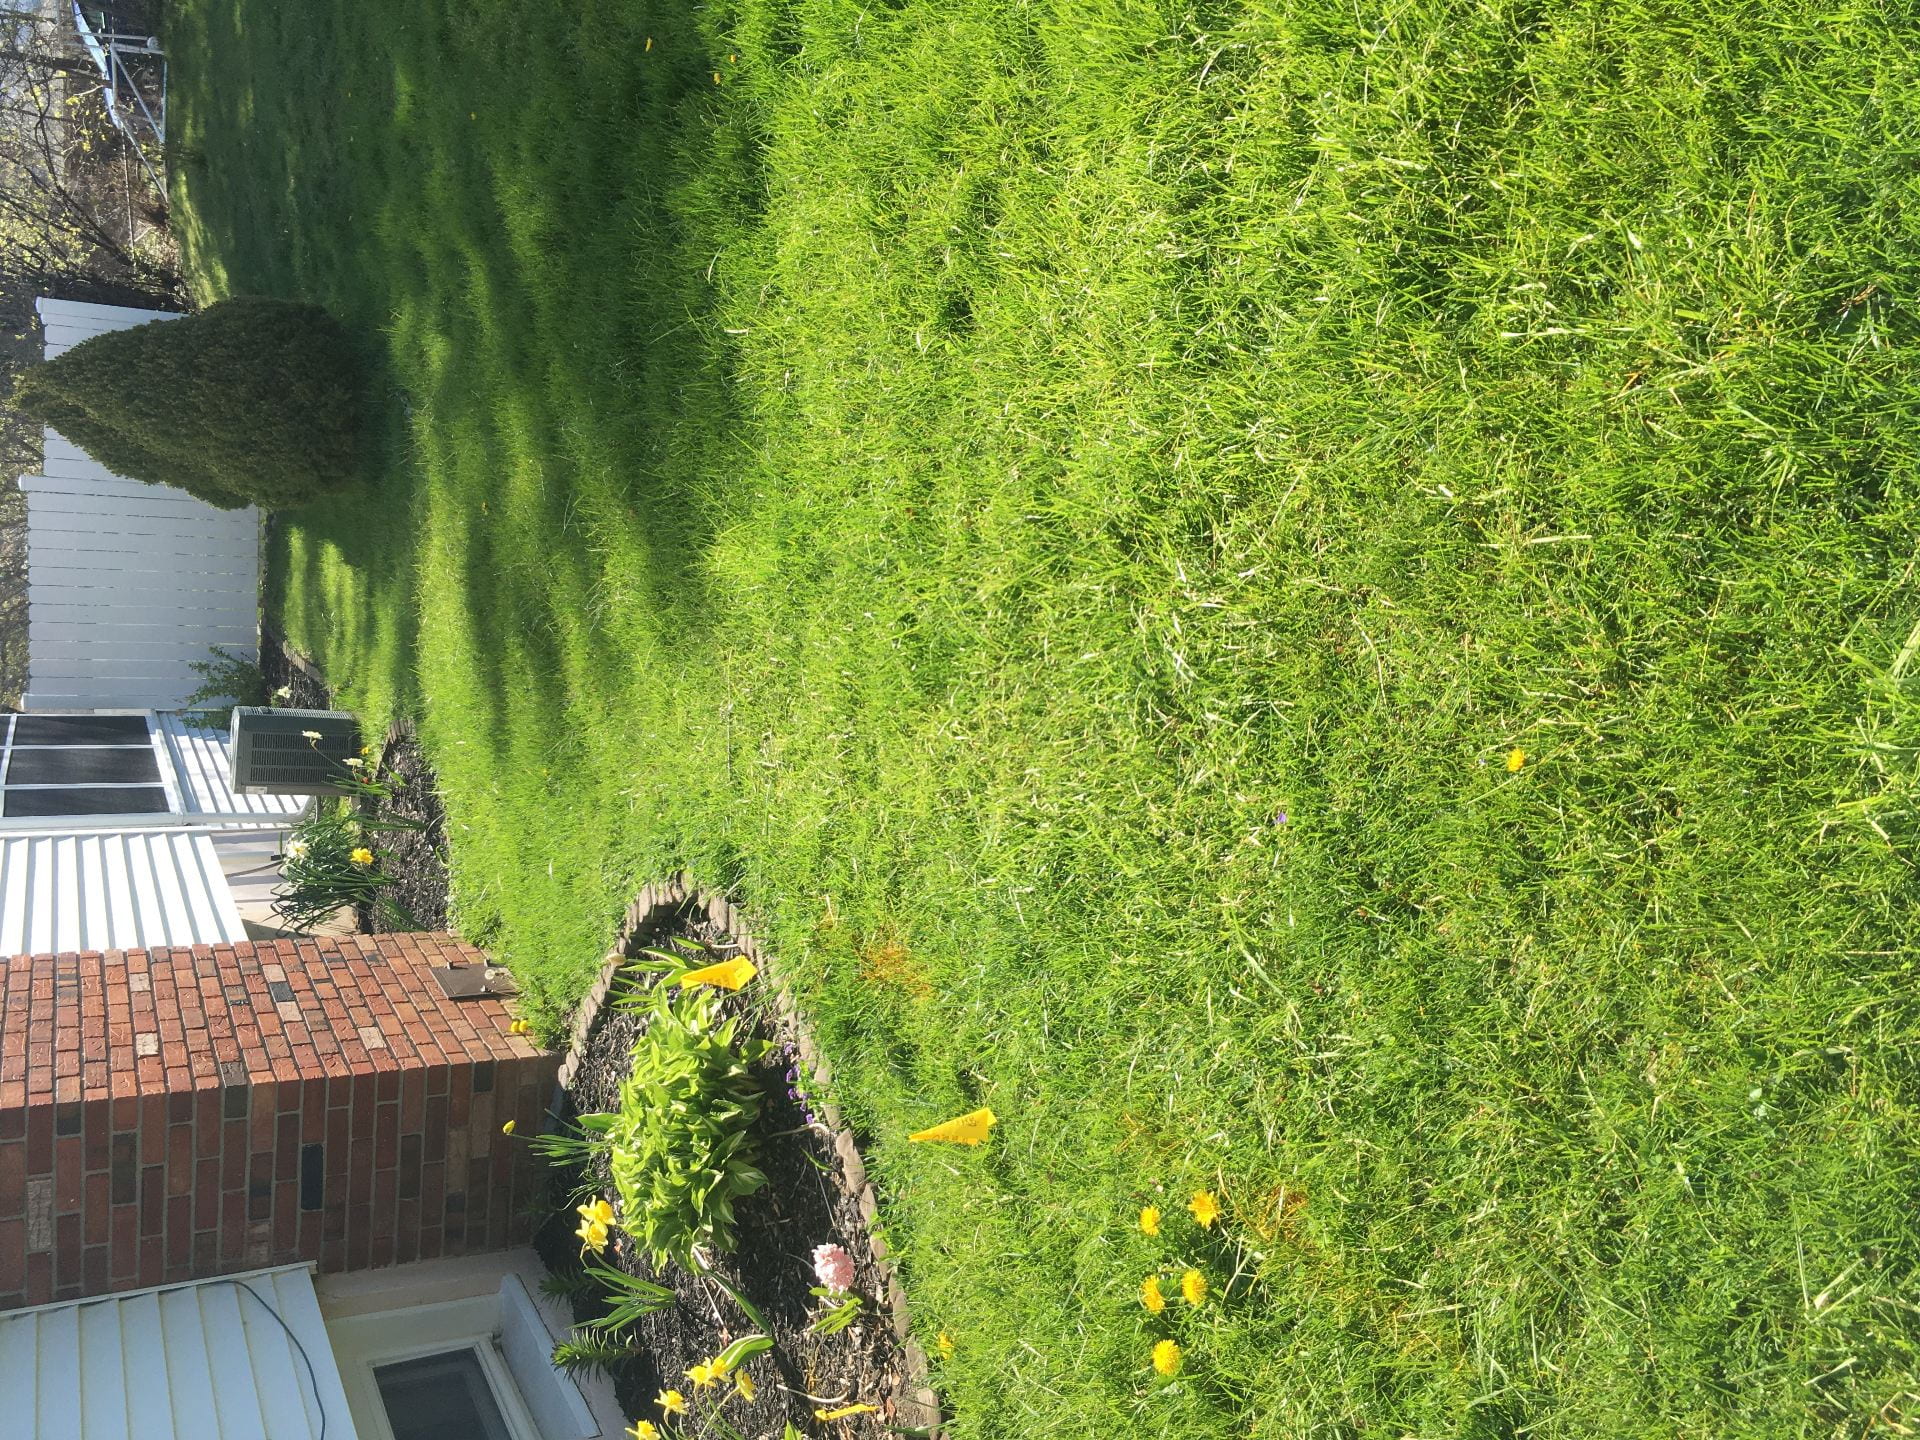
Even before the leaves have come out, I can tell that my backyard is not going to be the sunniest.
The front and side yards face south and west and are drier.
The side yard at my house faces south, and gets more sun (except first thing in the morning).
In my experience, the list of plants that support beneficial insects is longer if you have plenty of sun and reasonably dry soil. This doesn’t mean that you can’t support beneficial insects in a wet and/or shady spot. But you need to choose plant species carefully. You will be more successful if you choose plants that will thrive in the conditions you have. More on plant selection in a later post.
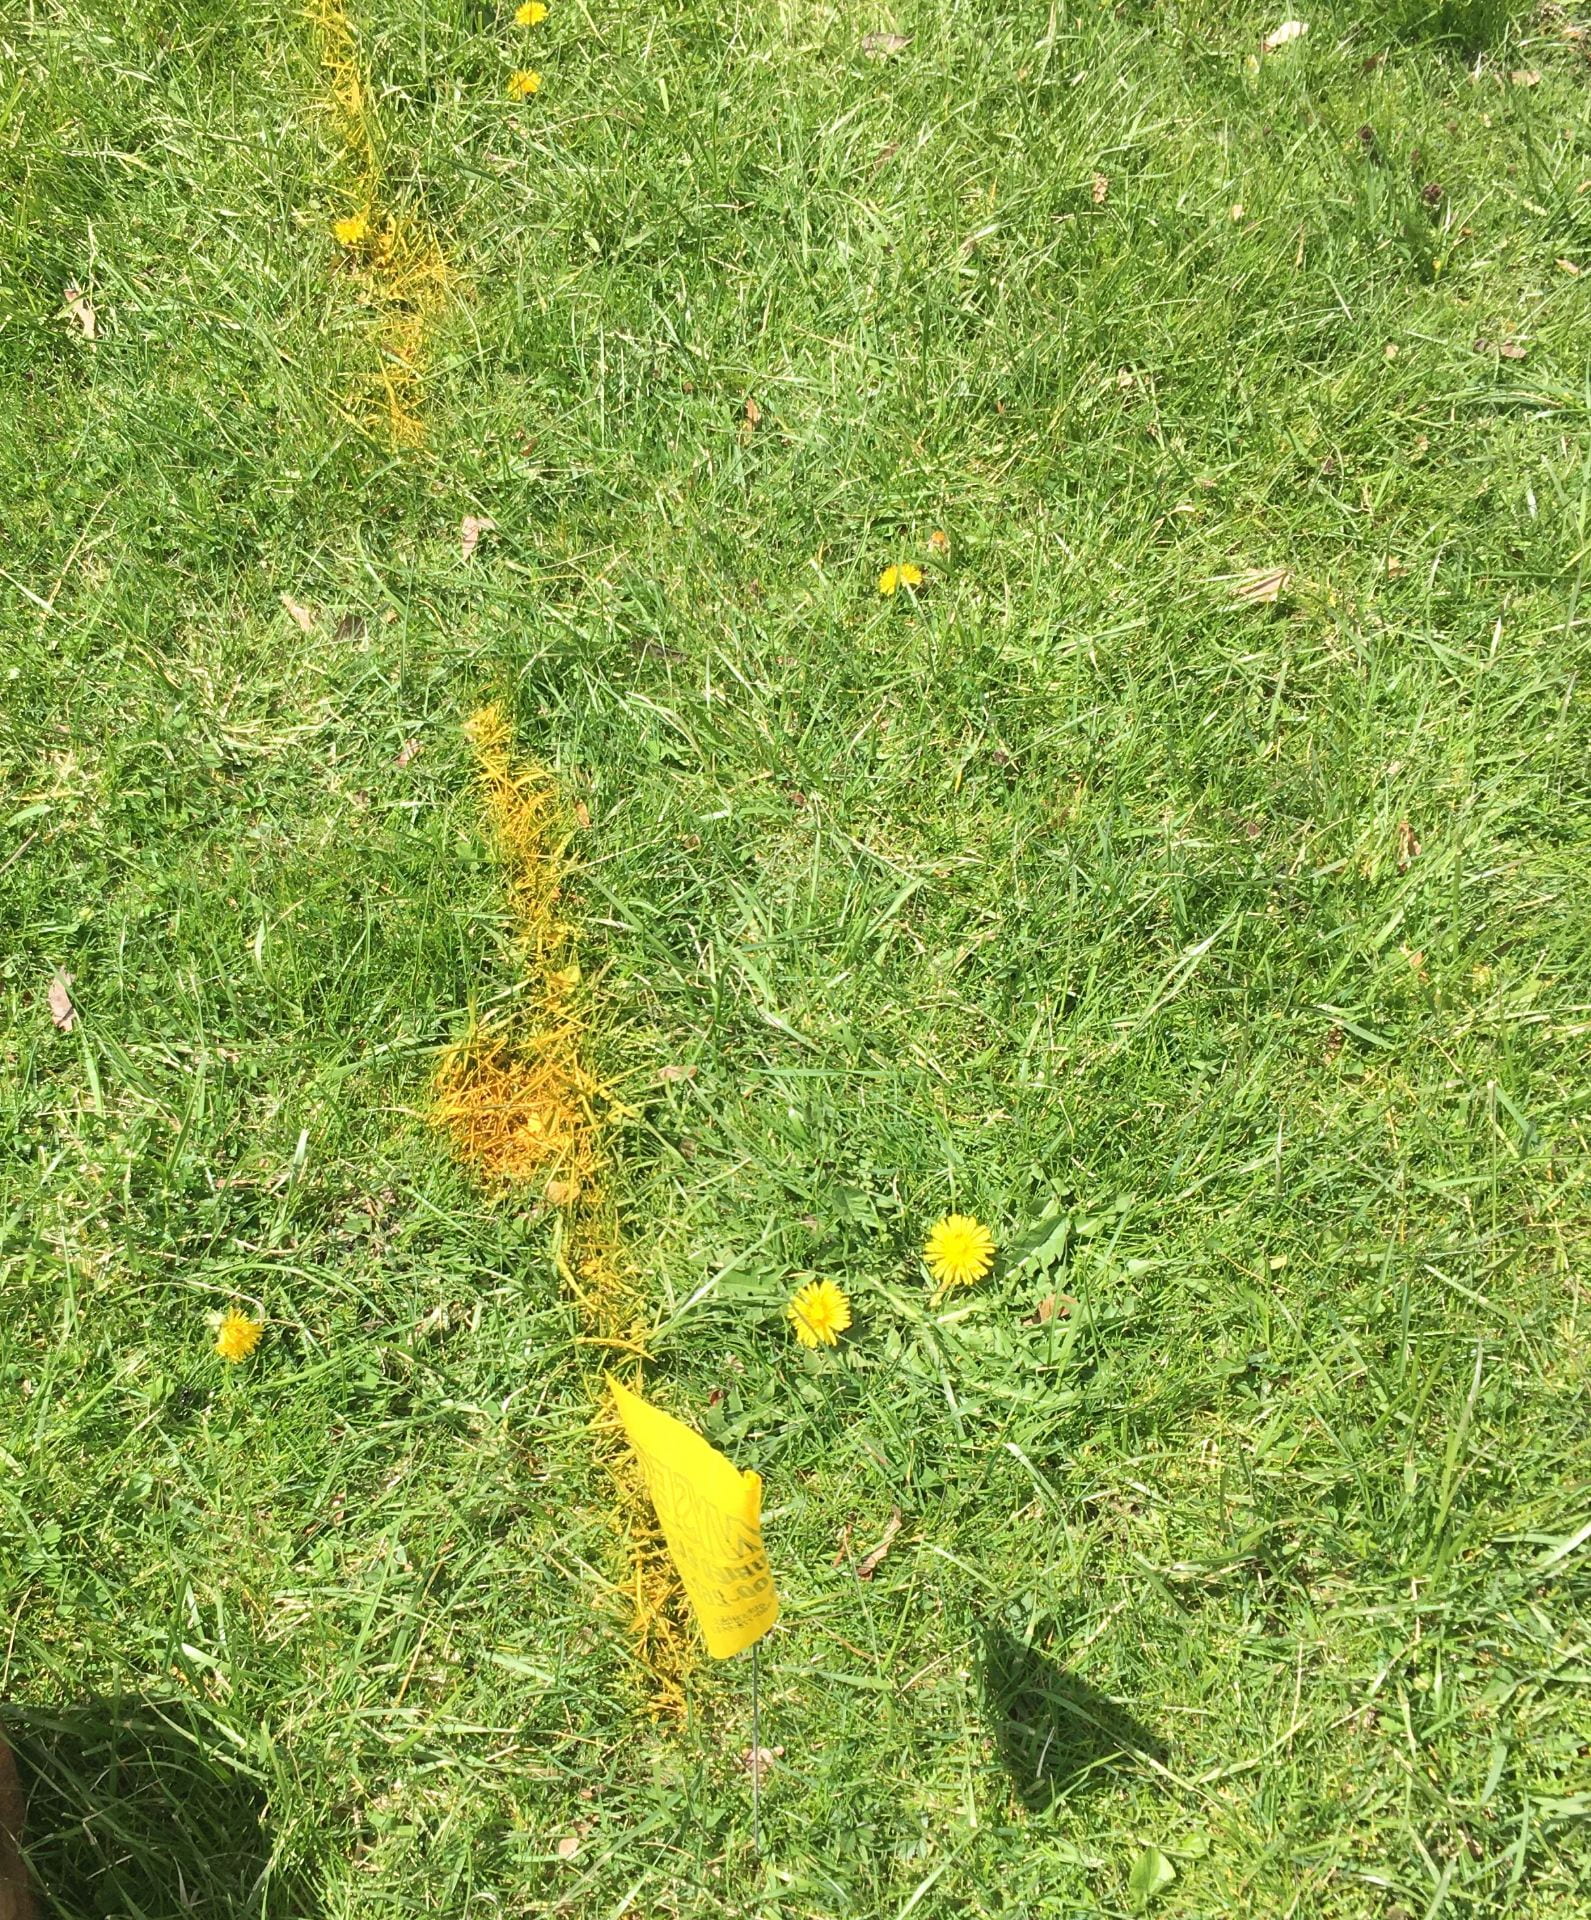
In addition to simple aesthetics, another important part of site selection around the home is knowing what’s underneath the ground. My local utility company provided information about getting water, gas, electric, and internet service lines on my property marked before I start digging. They recommended marking these lines even if I’m just planning to dig by hand with a shovel. If you are planning to use larger equipment, this is even more important (and may be required, depending on where you live). Better safe than sorry. Call before you dig!
My buried gas line runs through the side yard. I got it marked before I started digging.
Out of an abundance of caution, I’m going to use the location of the buried gas line on my property as a good place to locate a path (rather than a flower bed that requires digging).
I’ll talk more about weed control in a future post, but when you are selecting a site (and deciding how big an area you want to plant), you should also be thinking about how you are going to manage weeds. I am planning to get mulch. But I have resigned myself to the fact that I may be doing some extra hand weeding this summer. It will be a good activity to get me out of the house in the evenings and on the weekends.
Stay tuned for more updates on this project!
This post was written by Amara Dunn, Biocontrol Specialist with the New York State Integrated Pest Management Program. All pictures in this post were taken by her.
This work is supported by:
Crop Protection and Pest Management -Extension Implementation Program Area grant no. 2017-70006-27142/project accession no. 1014000, from the USDA National Institute of Food and Agriculture.
New York State Department of Agriculture and Markets
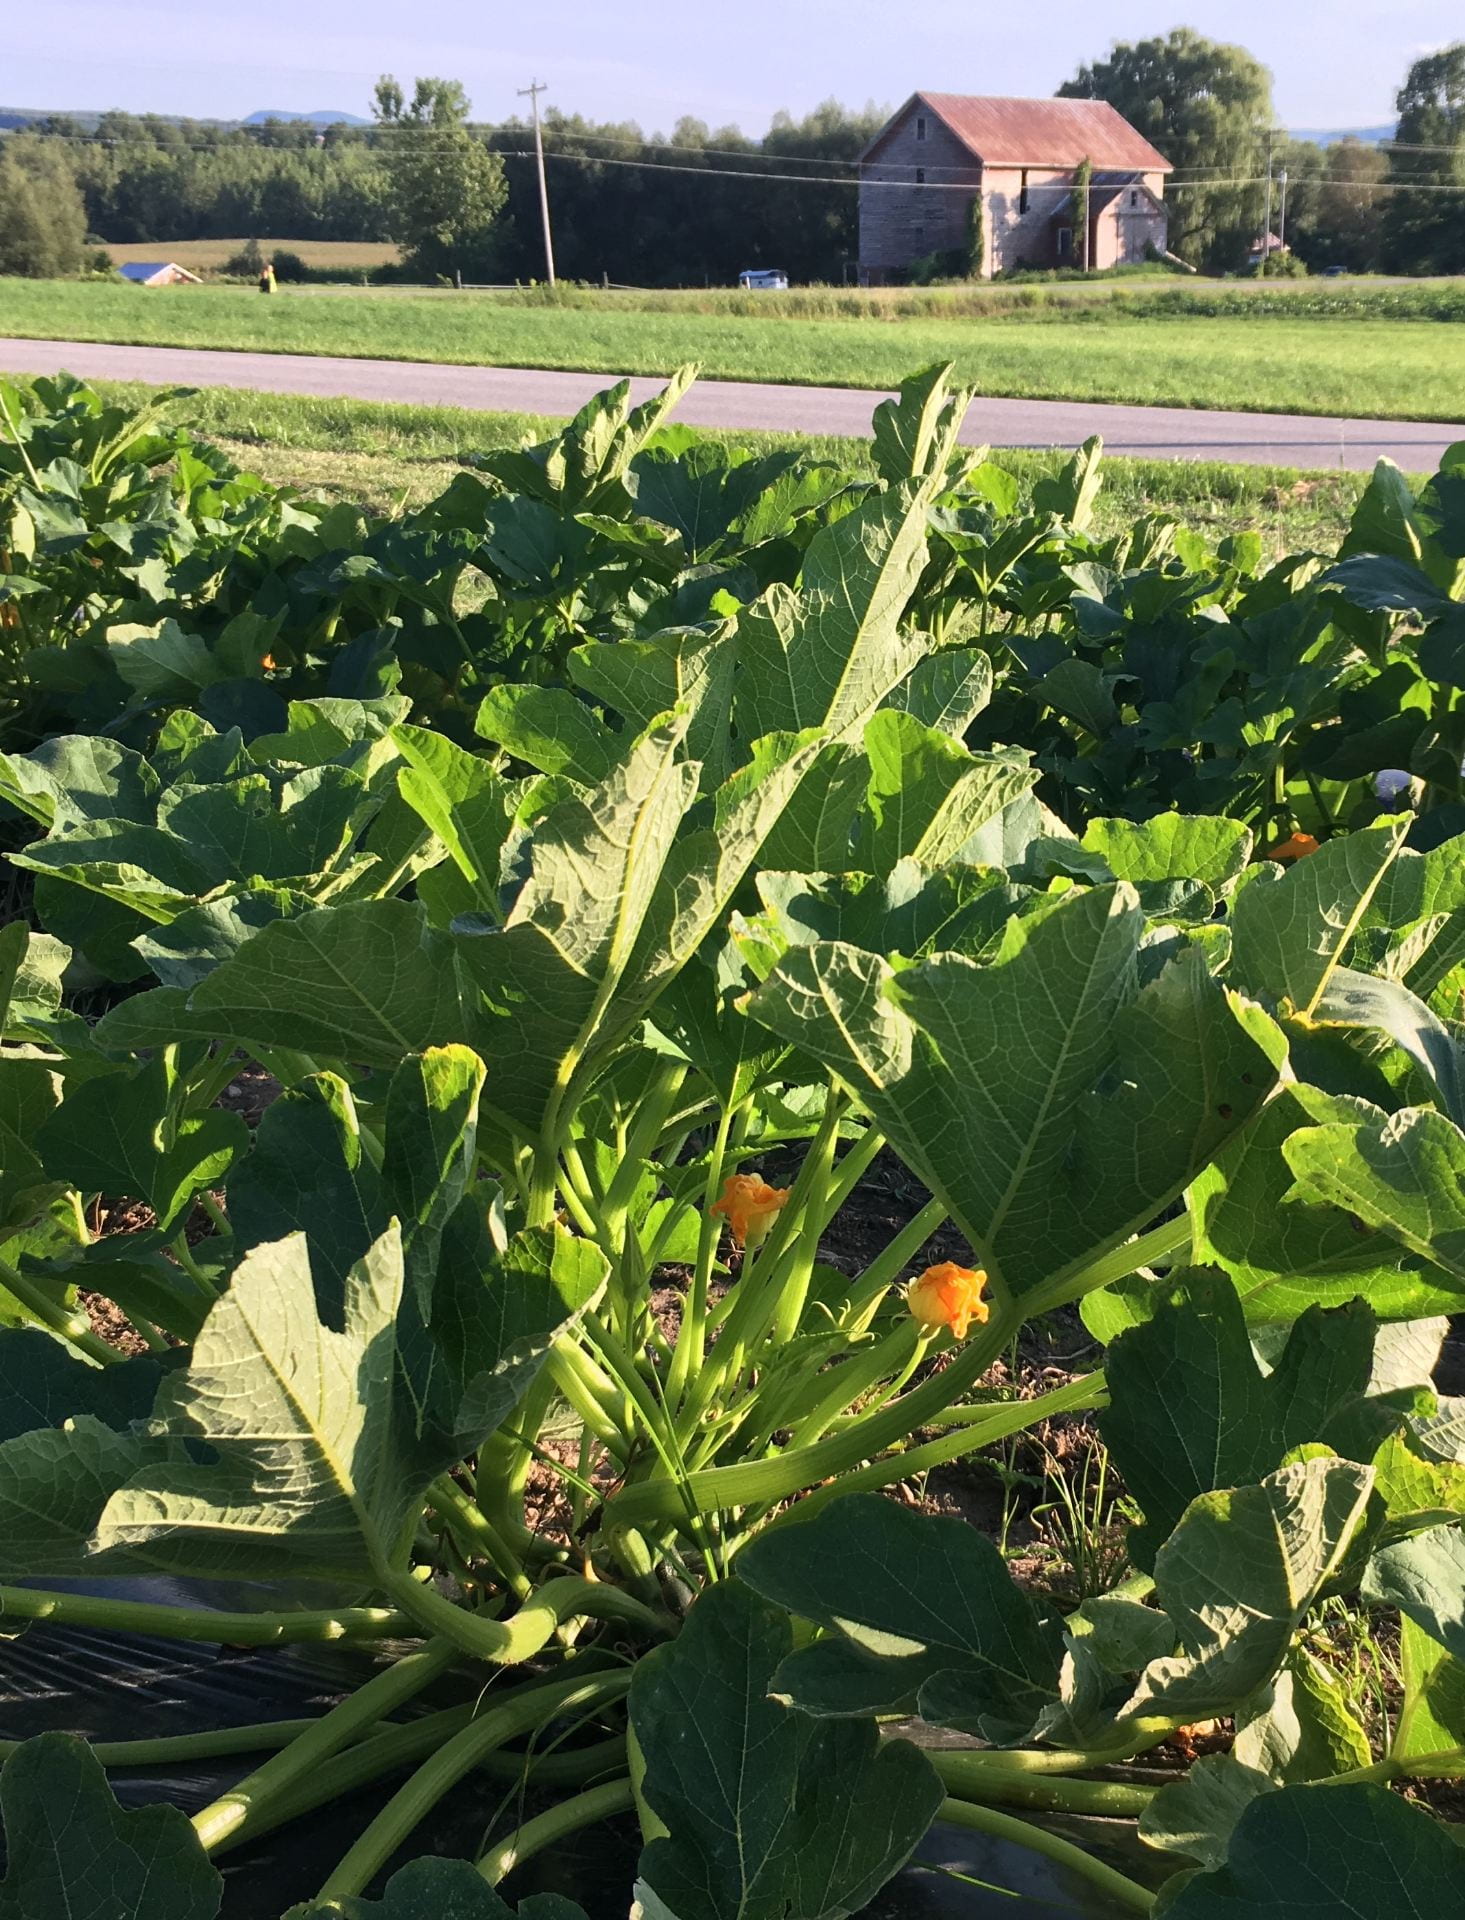
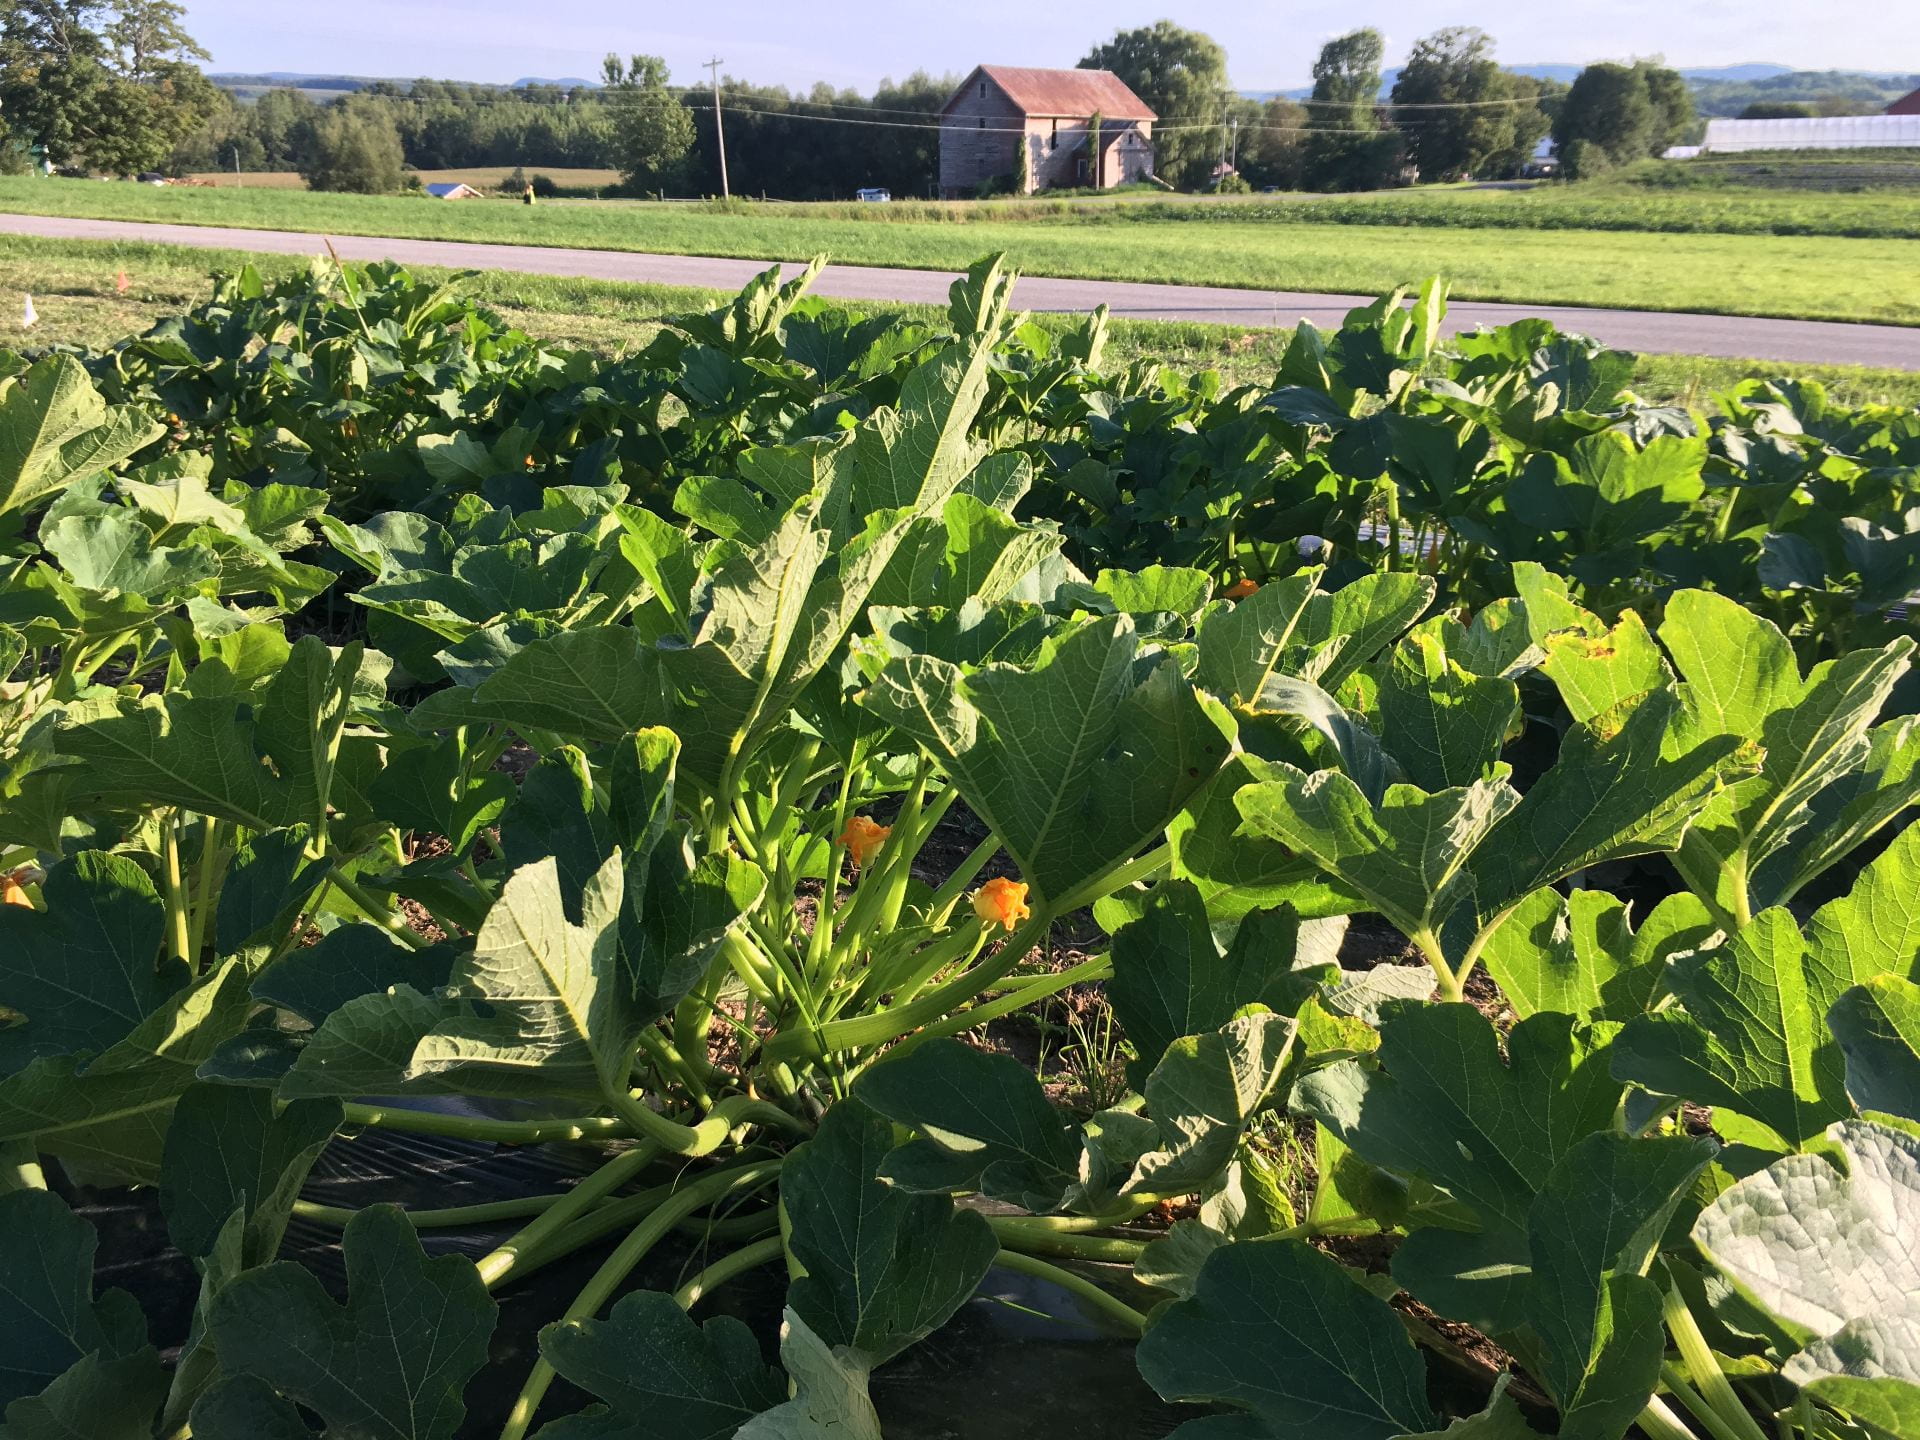
Some of the squash plants in one of our 2019 field trials looking at the role of biofungicides in managing cucurbit powdery mildew.
We have been working on a 2-year project funded by the New York Farm Viability Institute to look at adding biofungicides to the management of two vegetable diseases: cucurbit powdery mildew and white mold. In addition to summarizing results from Year 1 of the trial, previous blog posts also covered some of the details about how to best use the biofungicides we’re testing. During the summer of 2019, we completed our second year of trials. The numbers have all been crunched, and here’s a summary of what we learned. If you want to read all the nitty gritty details, a lengthy full report from Year 2 is available here.
Project goals
During the second year of this project, we wanted to answer a few questions for growers:
Can you replace some conventional fungicide applications for cucurbit powdery mildew in winter squash with one of three OMRI-listed biofungicides (LifeGard, Regalia, or Serifel) while maintaining disease control, crop quality, and yield?
Can you get better control of white mold in green beans by Contans prior to planting, and Double Nickel at bloom?
What are the costs (versus benefits) of using these biofungicides in these ways?
Can NDVI sensors help us detect disease early? Can they help us detect differences in plant health as a result of using biofungicides?
White mold – what we did
This table summarizes the white mold treatments in green beans. Replicated plots were treated with Contans in the third week of May, prior to planting; Double Nickel when snap beans were at 10% bloom (late June or early July) and 7 days later; both Double Nickel and Contans; or neither. Treatments are summarized below.
Timing
Non-treated
Contans
Double Nickel
Contans + Double Nickel
Pre-plant
–
Contans
(2 lb/A)
–
Contans (2 lb/A)
10% bloom
–
–
Double Nickel LC (2 qt/A)
Double Nickel LC (2 qt/A)
7 days later
–
–
Double Nickel LC (2 qt/A)
Double Nickel LC (2 qt/A)
White mold – what we saw and what it means
There was very little disease in the white mold trials on either collaborating farm in 2019. This is great news for the collaborating farms, but it means that we couldn’t answer our question about whether using both Contans and Double Nickel in a single season would improve control of white mold. Sarah Pethybridge did three years of efficacy trials with Double Nickel and other OMRI-approved products. In small plot trials with uniform disease pressure Double Nickel was as effective as the conventional fungicides it was compared to in reducing disease. You can read about her results here.
Cucurbit powdery mildew – what we did
We conducted the cucurbit powdery mildew trials on one farm in Eastern NY and on research farms on Long Island and in Western NY, always using the bush acorn squash variety ‘Honey Bear’. This table summarizes the treatments we compared. Essentially, we started with two early biofungicide sprays, then shifted to rotating products when disease was detected. But, in some treatments we replaced the scheduled conventional product with a biofungicide every other week. The biofungicides we looked at were the same as last year: LifeGard, Regalia, and Serifel. We compared these treatments to both a regular conventional fungicide program and a “Conventional + skip” program where we just skipped every other conventional fungicide. And, we included an organic program with traditional OMRI-listed products plus the biofungicides. Important note: Luna Experience is NOT allowed for use on Long Island. We used it in a research plot in order to be able to make comparisons to trials conducted in other parts of the state. You can learn more about fungicide options for managing cucurbit powdery mildew here, and here.
Date
Non-treated
Conventional
Conventional + skip
Conventional + LifeGarda
Conventional + Regaliaa
Conventional + Serifelb
Organicab
~14 days before disease
–
–
–
LifeGard WG (4 oz/100 gal)
Regalia (2 qt/A)
Serifel
(8 oz/A)
LifeGard WG (4 oz/100 gal)
~7 days before disease
–
–
–
LifeGard WG (4 oz/100 gal)
Regalia (2 qt/A)
Serifel
(8 oz/A)
LifeGard WG (4 oz/100 gal)
First disease detection
–
Vivando (15 fl oz/A)
Vivando (15 fl oz/A)
Vivando (15 fl oz/A)
Vivando (15 fl oz/A)
Vivando (15 fl oz/A)
MilStop (3 lb/A)
+7-10 days
–
Luna Experiencec (10 fl oz/A)
–
LifeGard WG (4 oz/100 gal)
Regalia (2 qt/A)
Serifel
(8 oz/A)
Serifel (8 oz/A)
+14-17 days
–
Quintec (6 fl oz/A)
Quintec (6 fl oz/A)
Quintec (6 fl oz/A)
Quintec (6 fl oz/A)
Quintec (6 fl oz/A)
Suffoil-X (1% v/v)
+21-24 days
–
Vivando (15 fl oz/A)
–
LifeGard WG (4 oz/100 gal)
Regalia (2 qt/A)
Serifel
(8 oz/A)
MilStop (3 lb/A)
+28-31 days
–
Luna Experiencec (10 fl oz/A)
Luna Experiencec (10 fl oz/A)
Luna Experiencec (10 fl oz/A)
Luna Experiencec (10 fl oz/A)
Luna Experiencec (10 fl oz/A)
Serifel (8 oz/A)
+35-38 days
–
Quintec (6 fl oz/A)
–
LifeGard WG (4 oz/100 gal)
Regalia (2 qt/A)
Serifel
(8 oz/A)
Suffoil-X (1% v/v)
a LifeGard and Regalia were tank mixed with Nu Film P (1 qt/100 gal)
b Serifel was tank mixed with EcoSpreader (4 fl oz/100 gal) when applied at spray volumes of 30 to 40 gal/A.
c Luna Experience is not allowed for use on Long Island. The Long Island trial was conducted on a research farm.
We summarized disease severity on multiple dates over the season by calculating the area under the disease progress curve (AUDPC). This value describes with a single number how quickly disease developed and how bad it got. We also measured NDVI using a GreenSeeker as a way to quantify how green and healthy the leaves were. At the end of the season, we collected yield and Brix data.
Cucurbit powdery mildew – what we saw
Not surprisingly, there was some variability among sites. But at two sites disease severity was not statistically different when we compared the standard weekly conventional fungicide program to skipping every other fungicide spray. This was disappointing, since we were expecting more severe powdery mildew from extending the spray interval, providing room for the biopesticides to improve control. However, in the Long Island trial, although powdery mildew was more severe when the spray interval was extended, applying a biopesticide during the skip week did not improve control.
For the most part, replacing alternate conventional fungicides with biofungicides resulted in disease levels that were somewhere between the conventional fungicide program and the non-treated control. At two sites LifeGard and Serifel performed slightly better than Regalia. To keep this post a reasonable length, we’re only showing results from the Long Island trial, here.
In the Long Island trial, the conventional, conventional + skip, and all three of the conventional/biofungicide programs provided pretty good powdery mildew control. The organic program was still better than the non-treated control. This graph shows only disease on the upper surface of the leaves (AUDPC = area under the disease progress curve). The black lines on each bar show one standard error above and below the mean value for that treatment. Bars with the same letter are not statistically different from each other. This graph also shows the cost (per acre) of the cucurbit powdery mildew fungicides for each treatment above each bar.
The above graph shows a summary of disease on the upper leaf surface over the whole season. We’re not reporting the data here, but if you look at disease ratings on individual dates or on the lower surface of the leaves, skipping every other fungicide or alternating conventional fungicides with biofungicides were not as good as the weekly conventional fungicide program.
At all three sites, yield was not statistically different when we compared the standard weekly conventional fungicide program to skipping every other fungicide spray. There were no statistically significant differences in yield in the Eastern NY trial, and few differences in the Western NY trial. In both trials, when Regalia was alternated with conventional fungicides the yield was slightly but not significantly lower than the conventional/LifeGard and the conventional/Serifel treatments. In the Long Island trial, only the full conventional treatment and treatments that included LifeGard or Regalia had significantly higher yields than the non-treated control. Again, we’ll show just the data from Long Island to keep this story briefer.
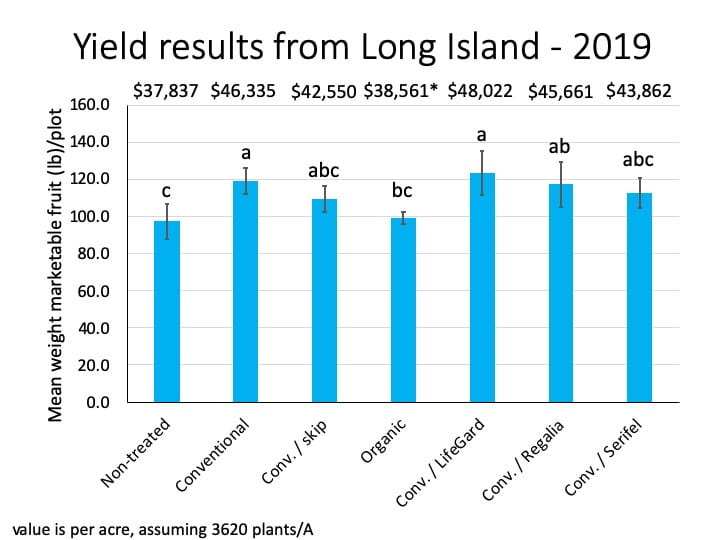
Yields from all treatments in the Long Island trial were pretty high. The black lines on each bar show one standard error above and below the mean value for that treatment. Bars with the same letter are not statistically different from each other. The yield per plot of 12 plants was extrapolated to the yield per acre (assuming 6 ft between rows and 2 ft between plants within rows, resulting in 3,620 plants/A) and used to estimate the average grocery store value (per acre) of each treatment, shown above each bar. The value of the organic treatment (*) was not adjusted to account for presumably higher prices for certified organic produce.
Our data did not suggest that NDVI readings taken with the GreenSeeker were a good replacement for visual scouting, or that this was a good tool for detecting differences in plant health among treatments. When NDVI readings differed among treatments, powdery mildew symptoms were readily evident. The most substantial differences in NDVI values among treatments were in the Long Island trial, where both the non-treated control and the organic treatment had much lower average NDVI values over the season.
On the whole, Brix were unaffected by powdery mildew management strategy. The only statistically significant differences in Brix values among treatments were in the Eastern NY trial where the conventional/LifeGard treatment had significantly lower Brix than the conventional/Serifel treatment.
Cucurbit powdery mildew – what it means
When the full conventional fungicide program didn’t result in statistically better disease control than skipping every other spray at 2 of the 3 sites, it’s not possible to say whether or not the biofungicides were good replacements for conventional fungicides against powdery mildew. However, they did not prove to be in the Long Island trial. Our results did not suggest that measurement of NDVI values with a GreenSeeker should replace visual scouting for cucurbit powdery mildew.
Depending on the trial location (and accompanying variations in spray schedules and rates), replacing some conventional fungicides with biofungicides ranged from slightly less expensive than the full conventional program to more than twice the cost. Although in most cases there were no statistically significant differences in the value of the crop between the conventional/biofungicide programs and the full conventional program, the numerical value of the marketable crop ranged from being slightly higher (LifeGard alternated with conventional fungicides on Long Island) to lower (all other biofungicide treatments). Again, the lack of statistically significant differences between the full conventional spray program and the conventional spray program with skips in 2 of the 3 trials makes any conclusions about the economics of replacing some conventional fungicides with biofungicides, tentative, at best. There’s a lot of room to fine-tune incorporation of biofungicides into spray programs to maximize cost effectiveness.
Recall from last year’s results that we did not detect any benefit from adding biofungicides to a full cucurbit powdery mildew fungicide program. So if you’d like to use biofungicides for cucurbit powdery mildew, replacing a conventional fungicide application or two is probably a better way to go. If you’ve tried this, we’d love to hear how it worked for you!
Remember that the information in this post is not a substitute for a pesticide label. The label is the law, and you must read and follow the label of any pesticide you are using. It is your responsibility to use pesticides legally.
This post was written by Amara Dunn (NYSIPM) and Meg McGrath (Plant Pathology & Plant-Microbe Biology, School of Integrative Plant Science, Cornell University). Thank you to the New York Farm Viability Institute for funding.
In December, I updated you on how perennial wildflowers and grasses were establishing in our beneficial insect habitat plots during the 2019 growing season. As I wrote that post, I quickly realized that there was too much good information for just one post. So here’s the rest of the story when it comes to plant establishment – time, money, and weeds.
Before I get started, below is a quick reminder of what our treatments were. You can read all the details here.
Treatment
Description
A
Spring transplant, no mulch
B
Spring transplant with mulch
C
Spring direct seed
D
Buckwheat cover crop, then fall transplant
E – control
Whatever was growing there, just keep it mowed
F
Soil solarization, then fall direct seed
G
Herbicide and tillage, then fall direct seed
Weed control
One thing that has surprised me about this project (although others certainly gave me fair warning) was how big a role weed management plays in establishing habitat for beneficial insects. It’s definitely still a struggle in our plots.
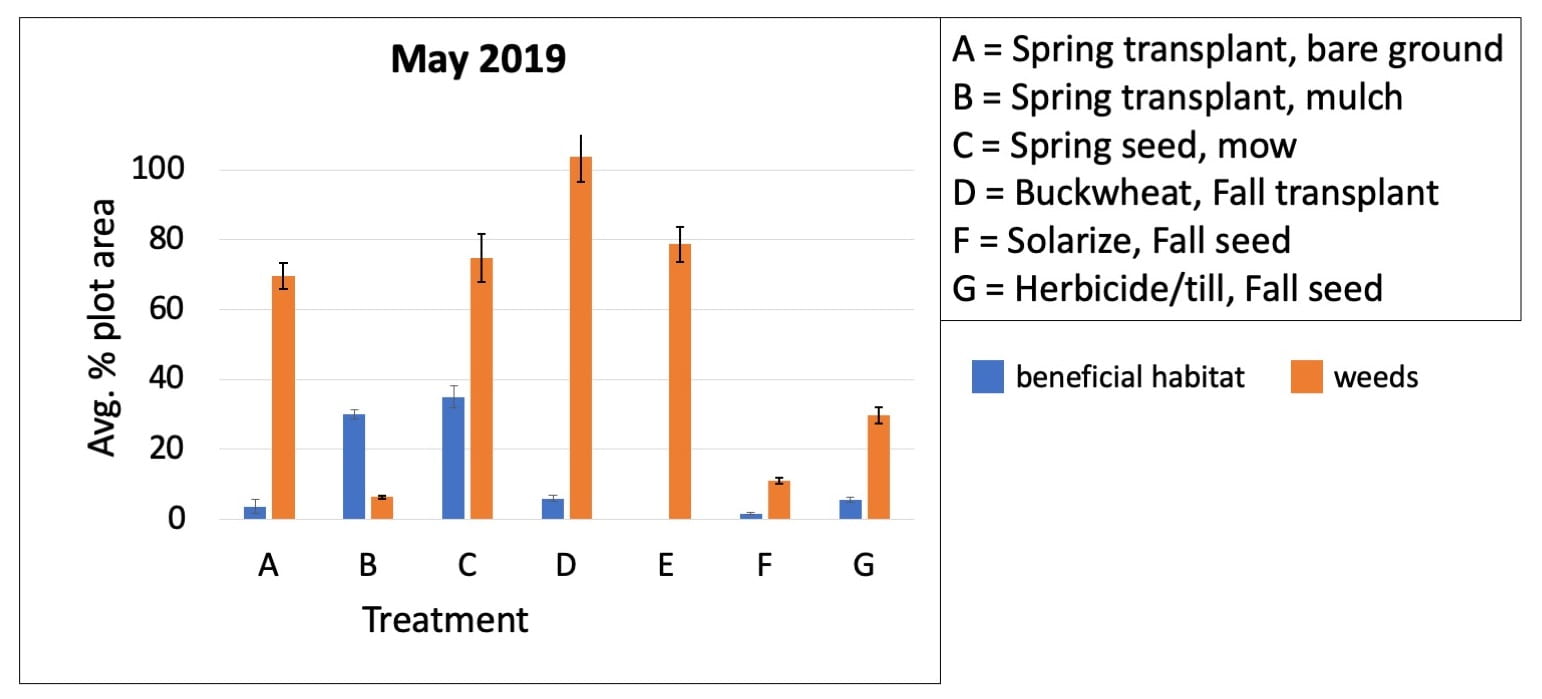
Bryan Brown did weed assessments for us in May and September of 2019. The graph below shows the average percent of the area of each plot covered by either weeds (orange) or beneficial habitat flowers and grasses (blue).
Mulching provided the best weed management when plots were assessed in May of 2019. Each bar shows the average of four plots per treatment, and has an error bar showing variation among these plots (one standard error above or below the average for the treatment).
This was before we did any hand-weeding. By far, the plots that were mulched in Spring 2018 (treatment B) had the fewest weeds compared to beneficial habitat plants. You’ll also notice that in May there were still relatively few weeds in the plots where we tried to deplete the weed seed bank in the soil through solarization (treatment F) or repeated herbicide and tillage (treatment G).
What some of the plots looked like on May 16, 2019 when Bryan did the weed assessment.
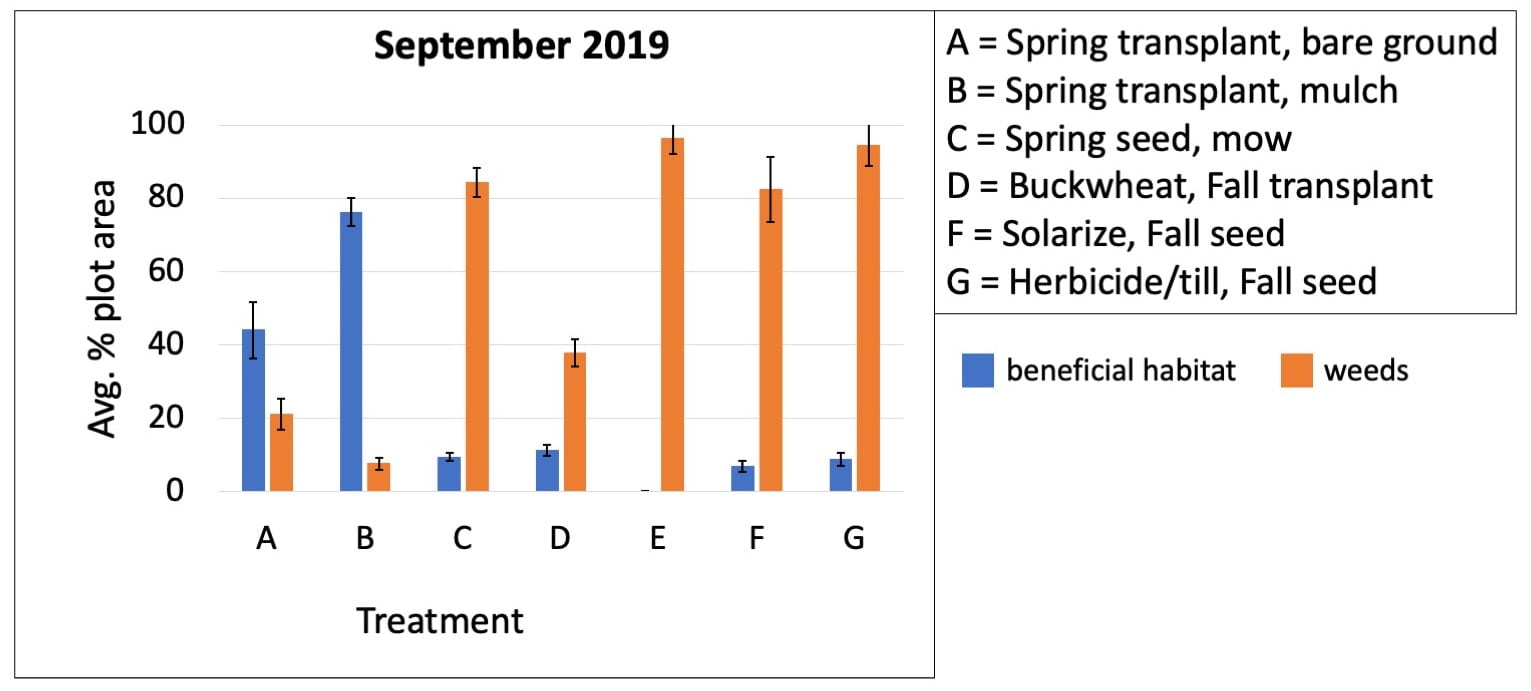
By September 2019, the spring transplant treatments looked even better. Our wildflowers grew well during 2019 (with the help of some extra hand weeding). The plants we transplanted in Fall 2018 are still struggling and not nearly as large as the wildflowers in treatments A and B. I think this may have more to do with the weed competition they experienced that first fall (when we couldn’t plant for a few weeks after the buckwheat was mowed) than transplant timing. Hopefully they will catch up.
What some of the plots looked like on September 19, 2019 when Bryan did the weed assessment.
There are still a lot of weeds in the direct-seeded treatments (C, F, or G). Remember that our weed management strategy in these plots is repeated mowing to control annual weeds. Over time, the perennial wildflowers and grasses should take over. But it’s not supposed to be a quick method.
Spring transplant treatments (A and B) looked the best after their second full growing season. The fall transplants (D) had more weeds, but these plants also have been in the ground for one less growing season. I’m still hoping they will catch up. Each bar shows the average of four plots per treatment, and has an error bar showing variation among these plots (one standard error above or below the average for the treatment).
Effort
Most of the treatments we are comparing required much less work in their second year (2019) than in their first (2018). The exception is that we spent a lot more time hand weeding treatment D (buckwheat cover crop followed by fall transplanting) in 2019. Although we weeded the two spring transplanted plots the same number of times in 2019 (twice), it took longer to hand weed the plots without mulch. I’m not surprised. If you’re looking for the right establishment method for your project, you really need to ask yourself how much help you have available and when. If you can get a lot of people excited about helping you install the planting, but worry about getting consistent volunteers year after year, mulch may be the right choice for you. In the direct seeded treatments (C – spring; F – fall following solarization; G – fall following herbicide and tillage), the time input for 2019 was mowing, which was relatively quick. And we did just a little hand weeding of perennial weeds.
Transplanting (treatments A, B, and D) still takes more time than direct seeding, but the extra time we spent mulching in 2018 paid off in 2019 when we spent less time hand weeding (treatment B compared to A and D).
Costs
Nearly all of our costs were incurred in the first year of the project (2018). The only additional costs from 2019 were for gas to run the mower. We did replace a few plants in transplanted plots in Fall 2019, but we used some extra plants we had purchased in 2018. Below is the total cost of the plants and other supplies for each treatment. Transplanting will always be more expensive than direct seeding.
Treatment
Costs
A
$417.12
B
$539.29
C
$18.83
D
$390.55
E
$3.40
F
$149.10
G
$23.12
You may remember that we were also collecting insects. I promise I will write more about the insects we caught in another post. If you are tired of looking at snow and bare trees outside, you can see pictures of some of the insects we caught in my post from August 2019.
This post was written by Amara Dunn. All pictures were taken by her, unless otherwise credited.
This work is supported by:
Crop Protection and Pest Management -Extension Implementation Program Area grant no. 2017-70006-27142/project accession no. 1014000, from the USDA National Institute of Food and Agriculture.
New York State Department of Agriculture and Markets
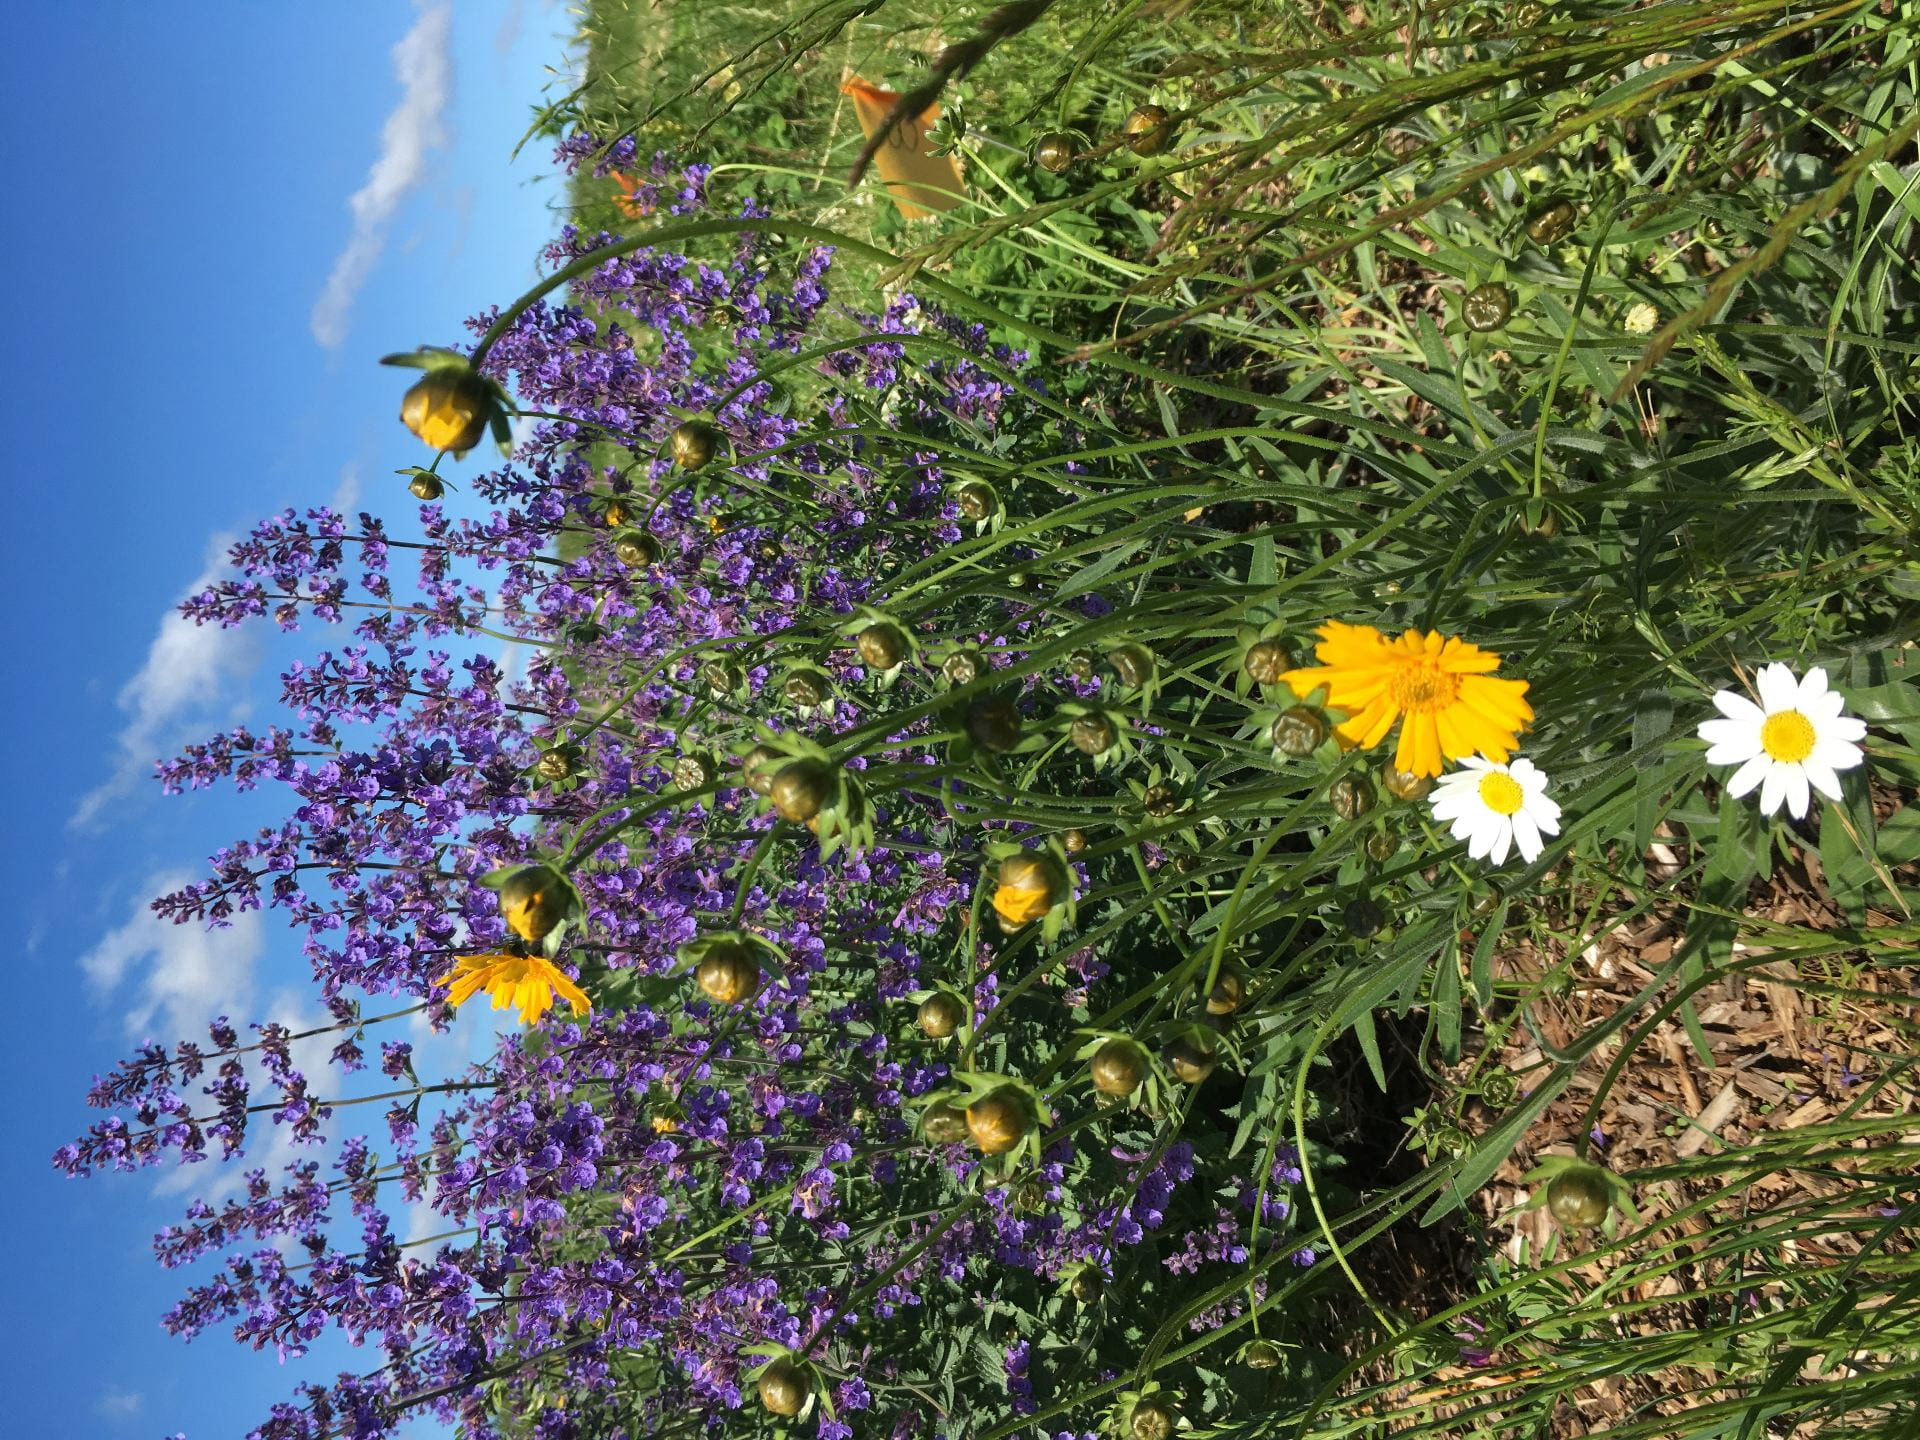
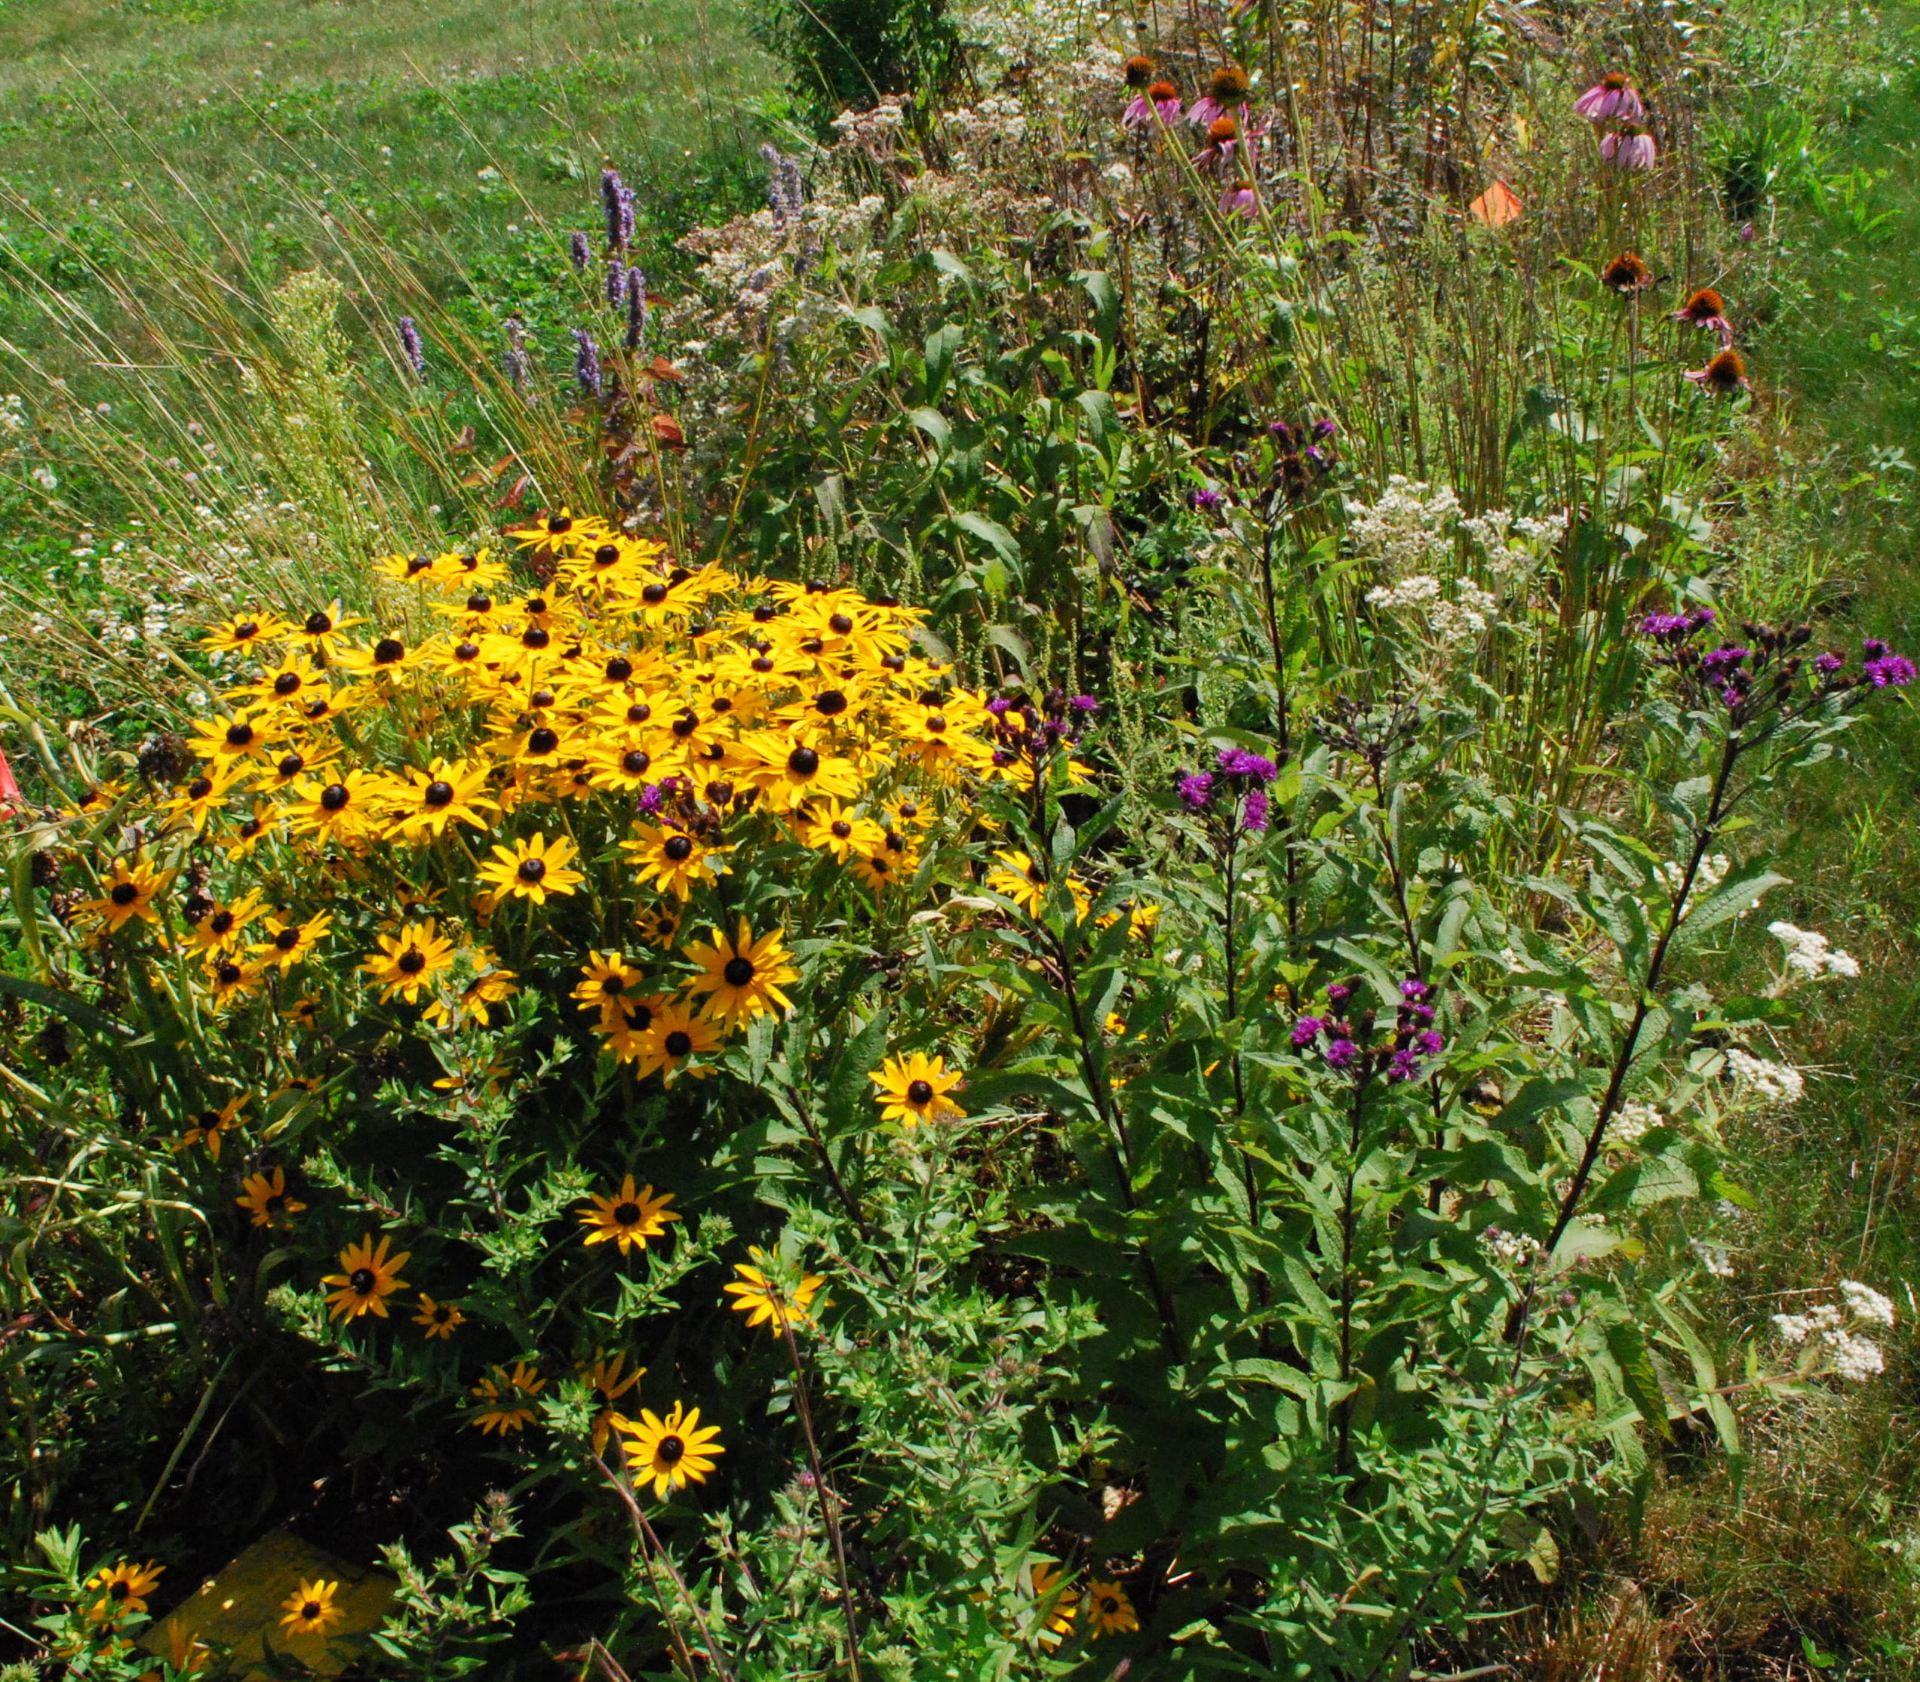
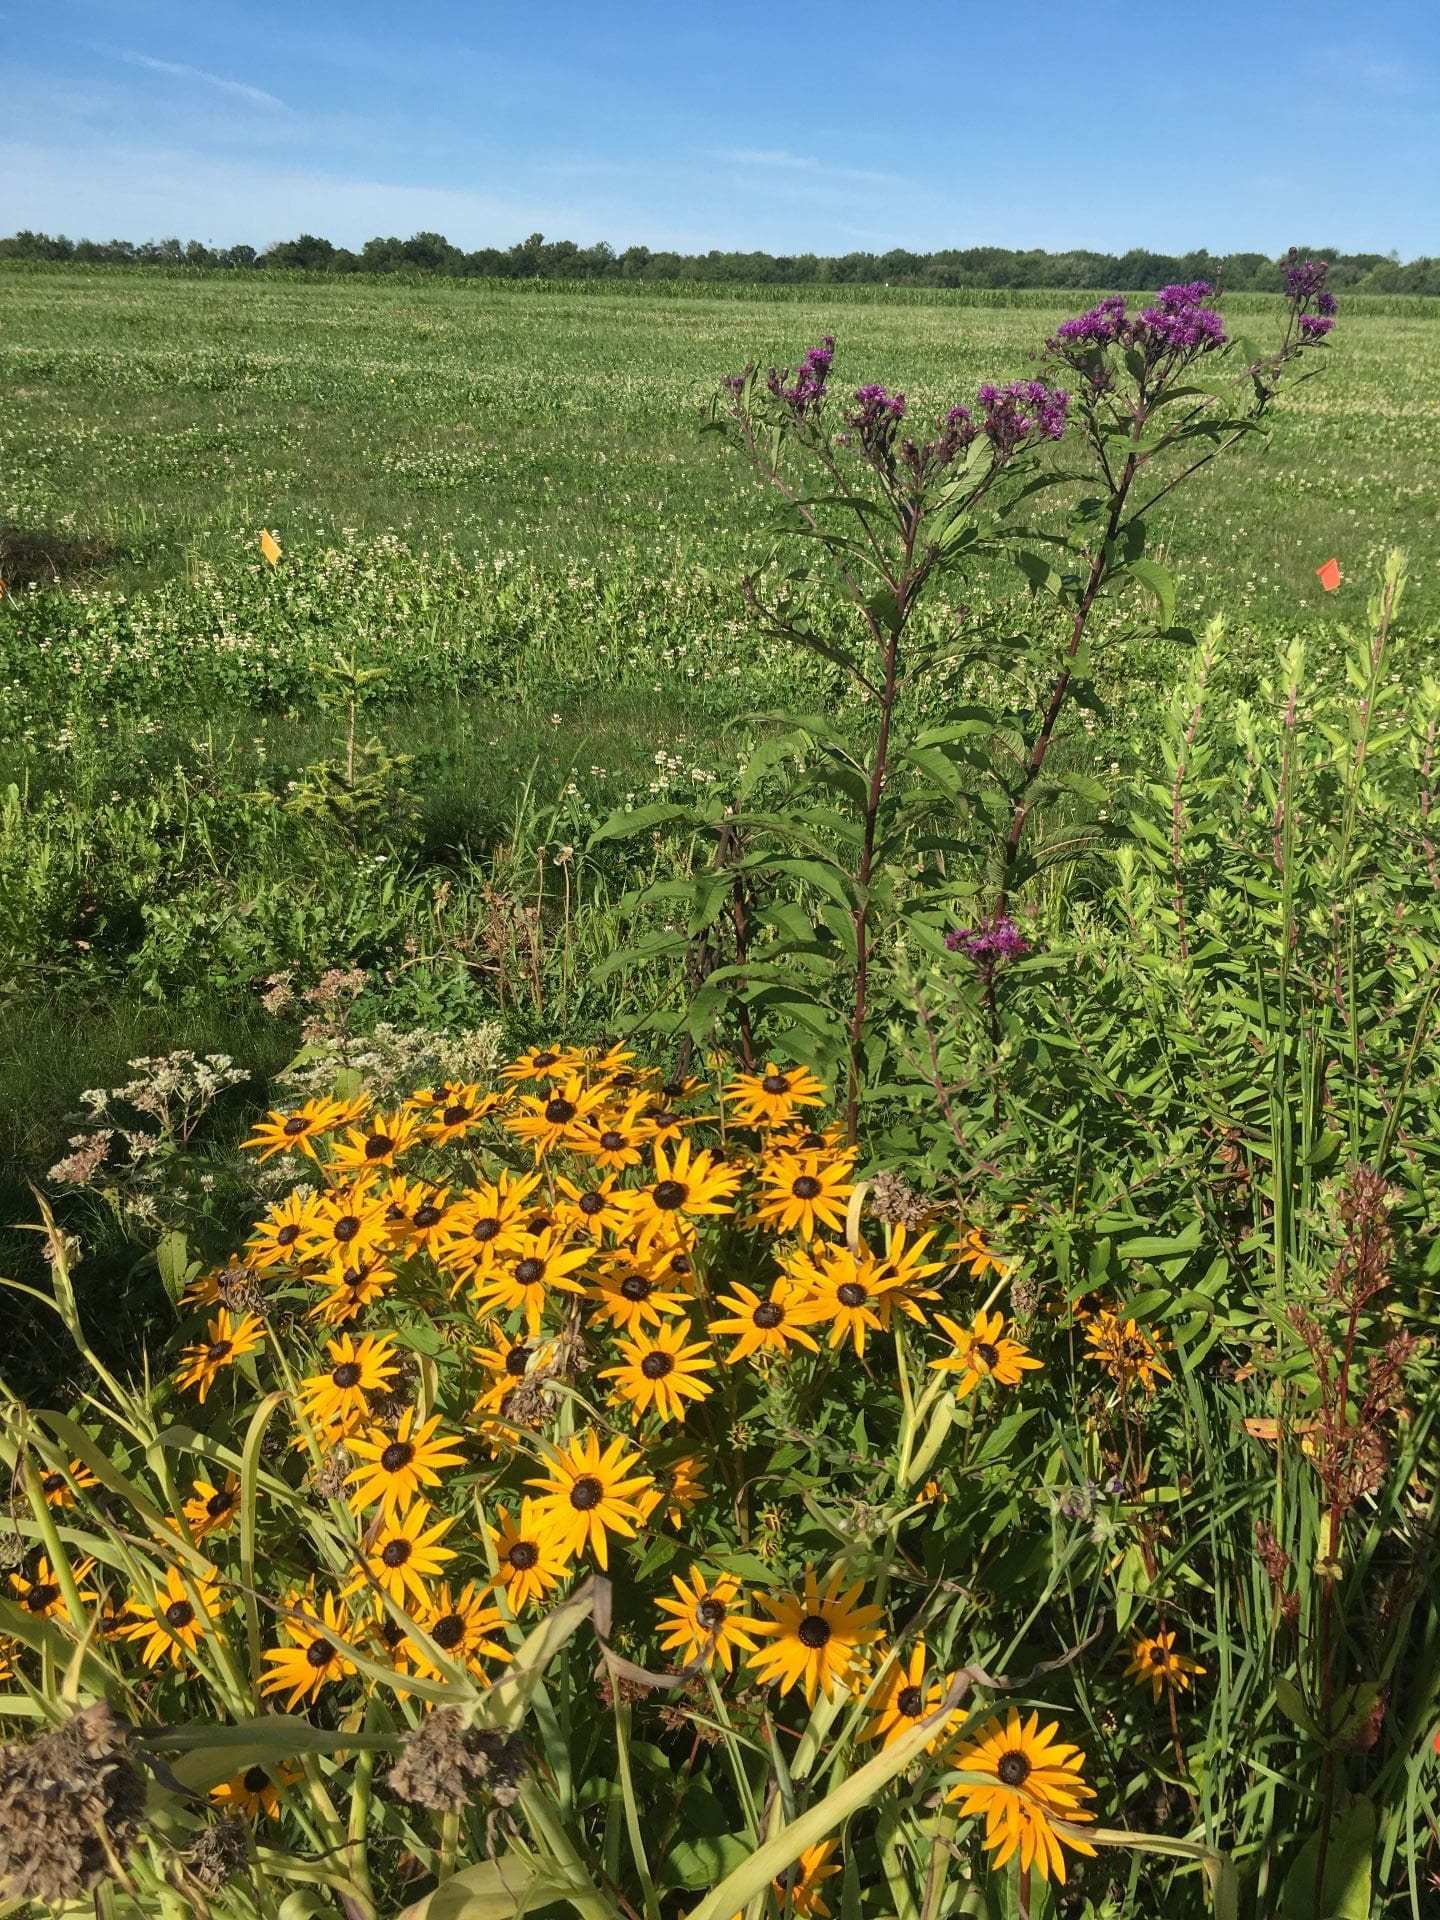
Lots of flowers bloomed in 2019 in our habitat plots. Some we had planted, and some we hadn’t.
Obviously, nothing is growing right now, but I thought this would be a good time to update you on the success of our beneficial insect habitat plots during the 2019 growing season.
When things bloomed
Recall that the goal is to have at least one plant blooming all season long. We choose wildflower species accordingly, and it worked! The following table shows which months each species bloomed in 2019 (at least in the transplanted plots). An ‘X’ means the species was blooming during that month.
Wildflower
May
June
July
Aug
Sep
Golden alexanders
X
X
Catmint
X
X
X
X
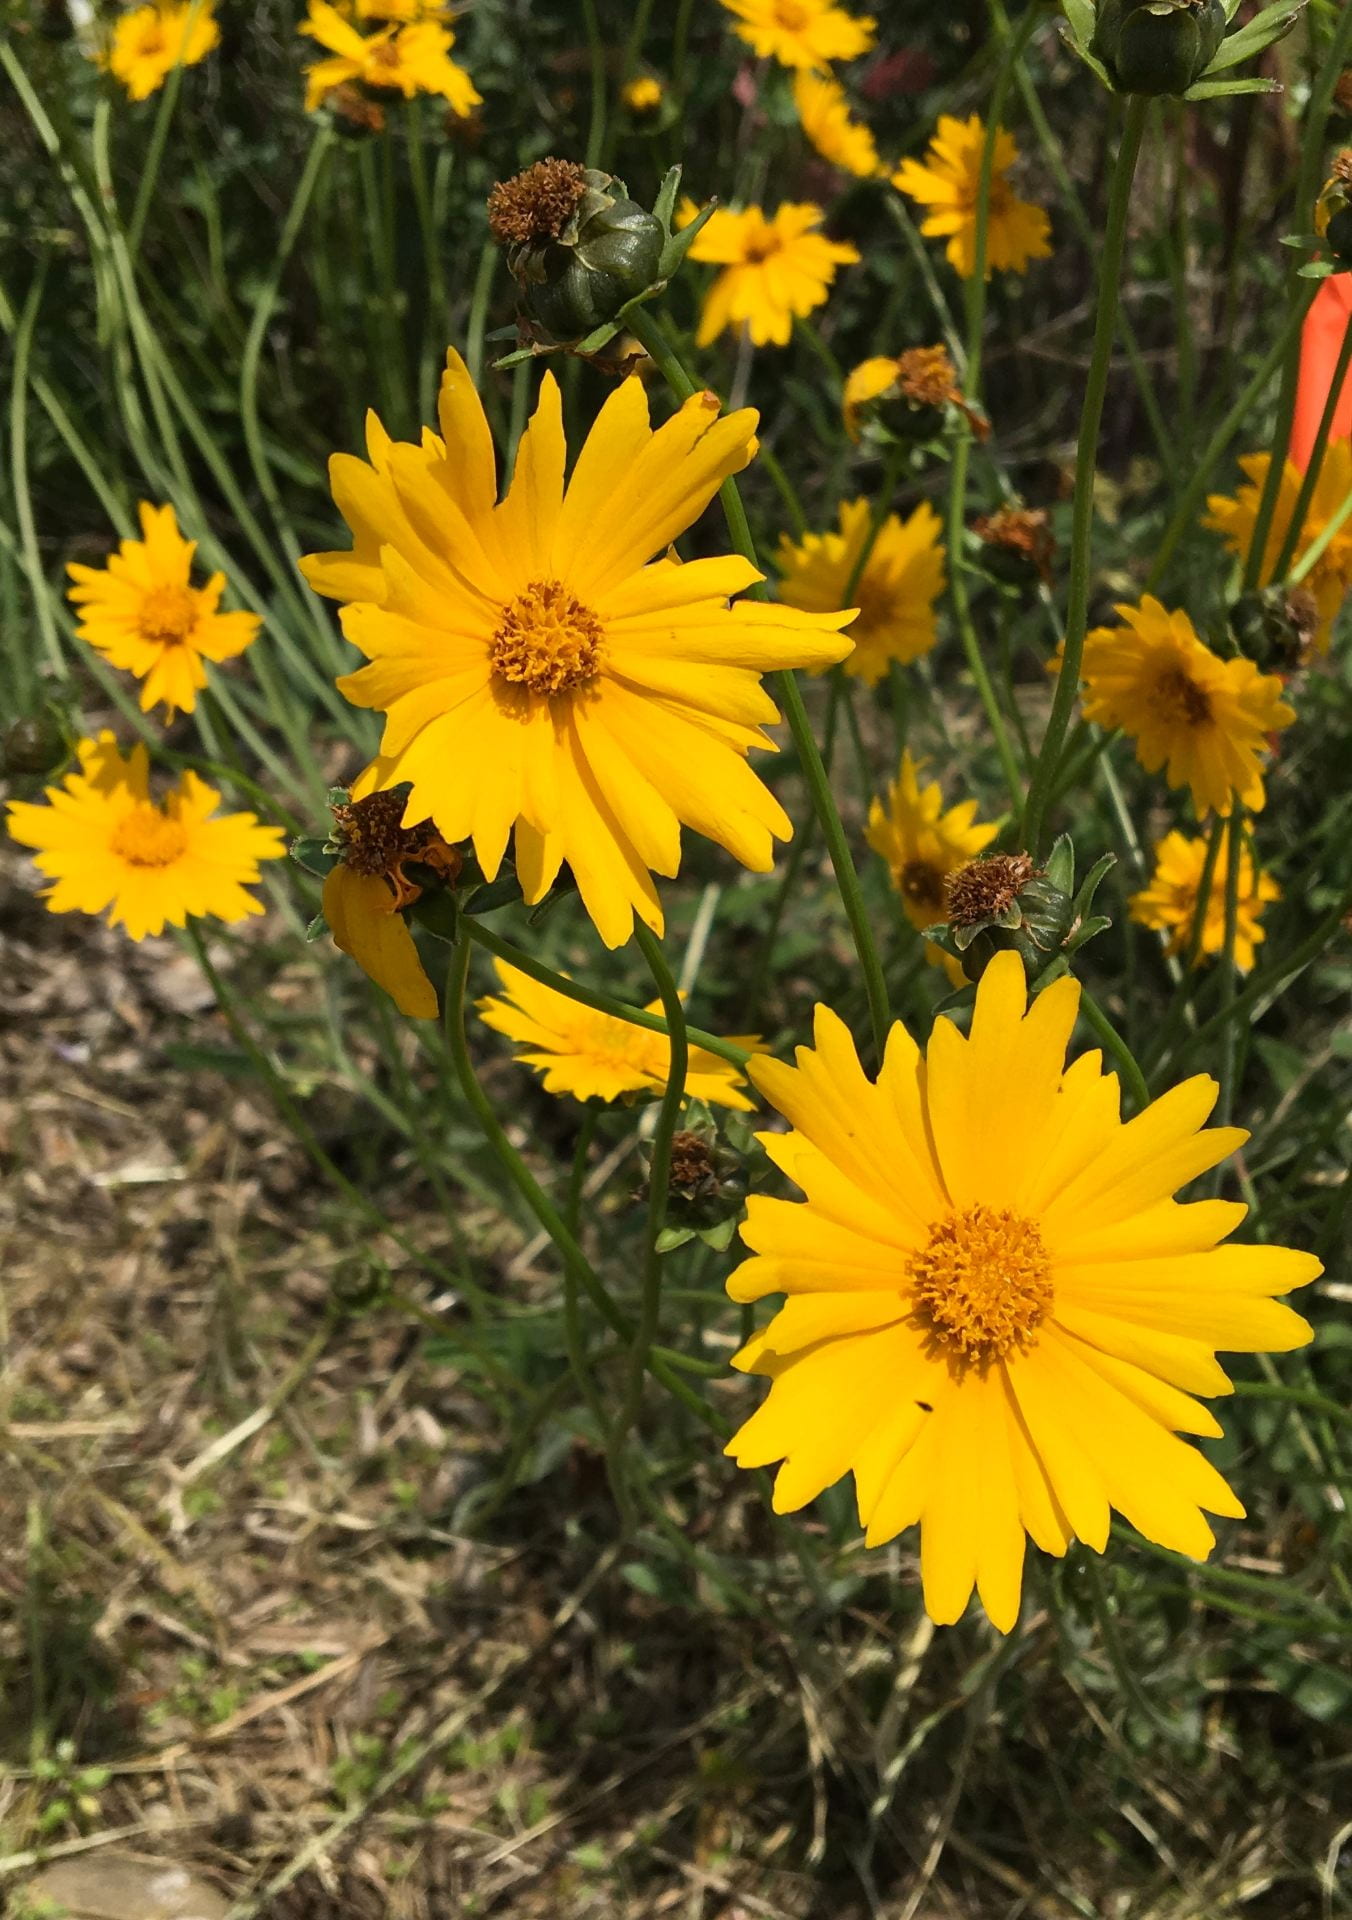
Lanced-leaved coreopsis
X
X
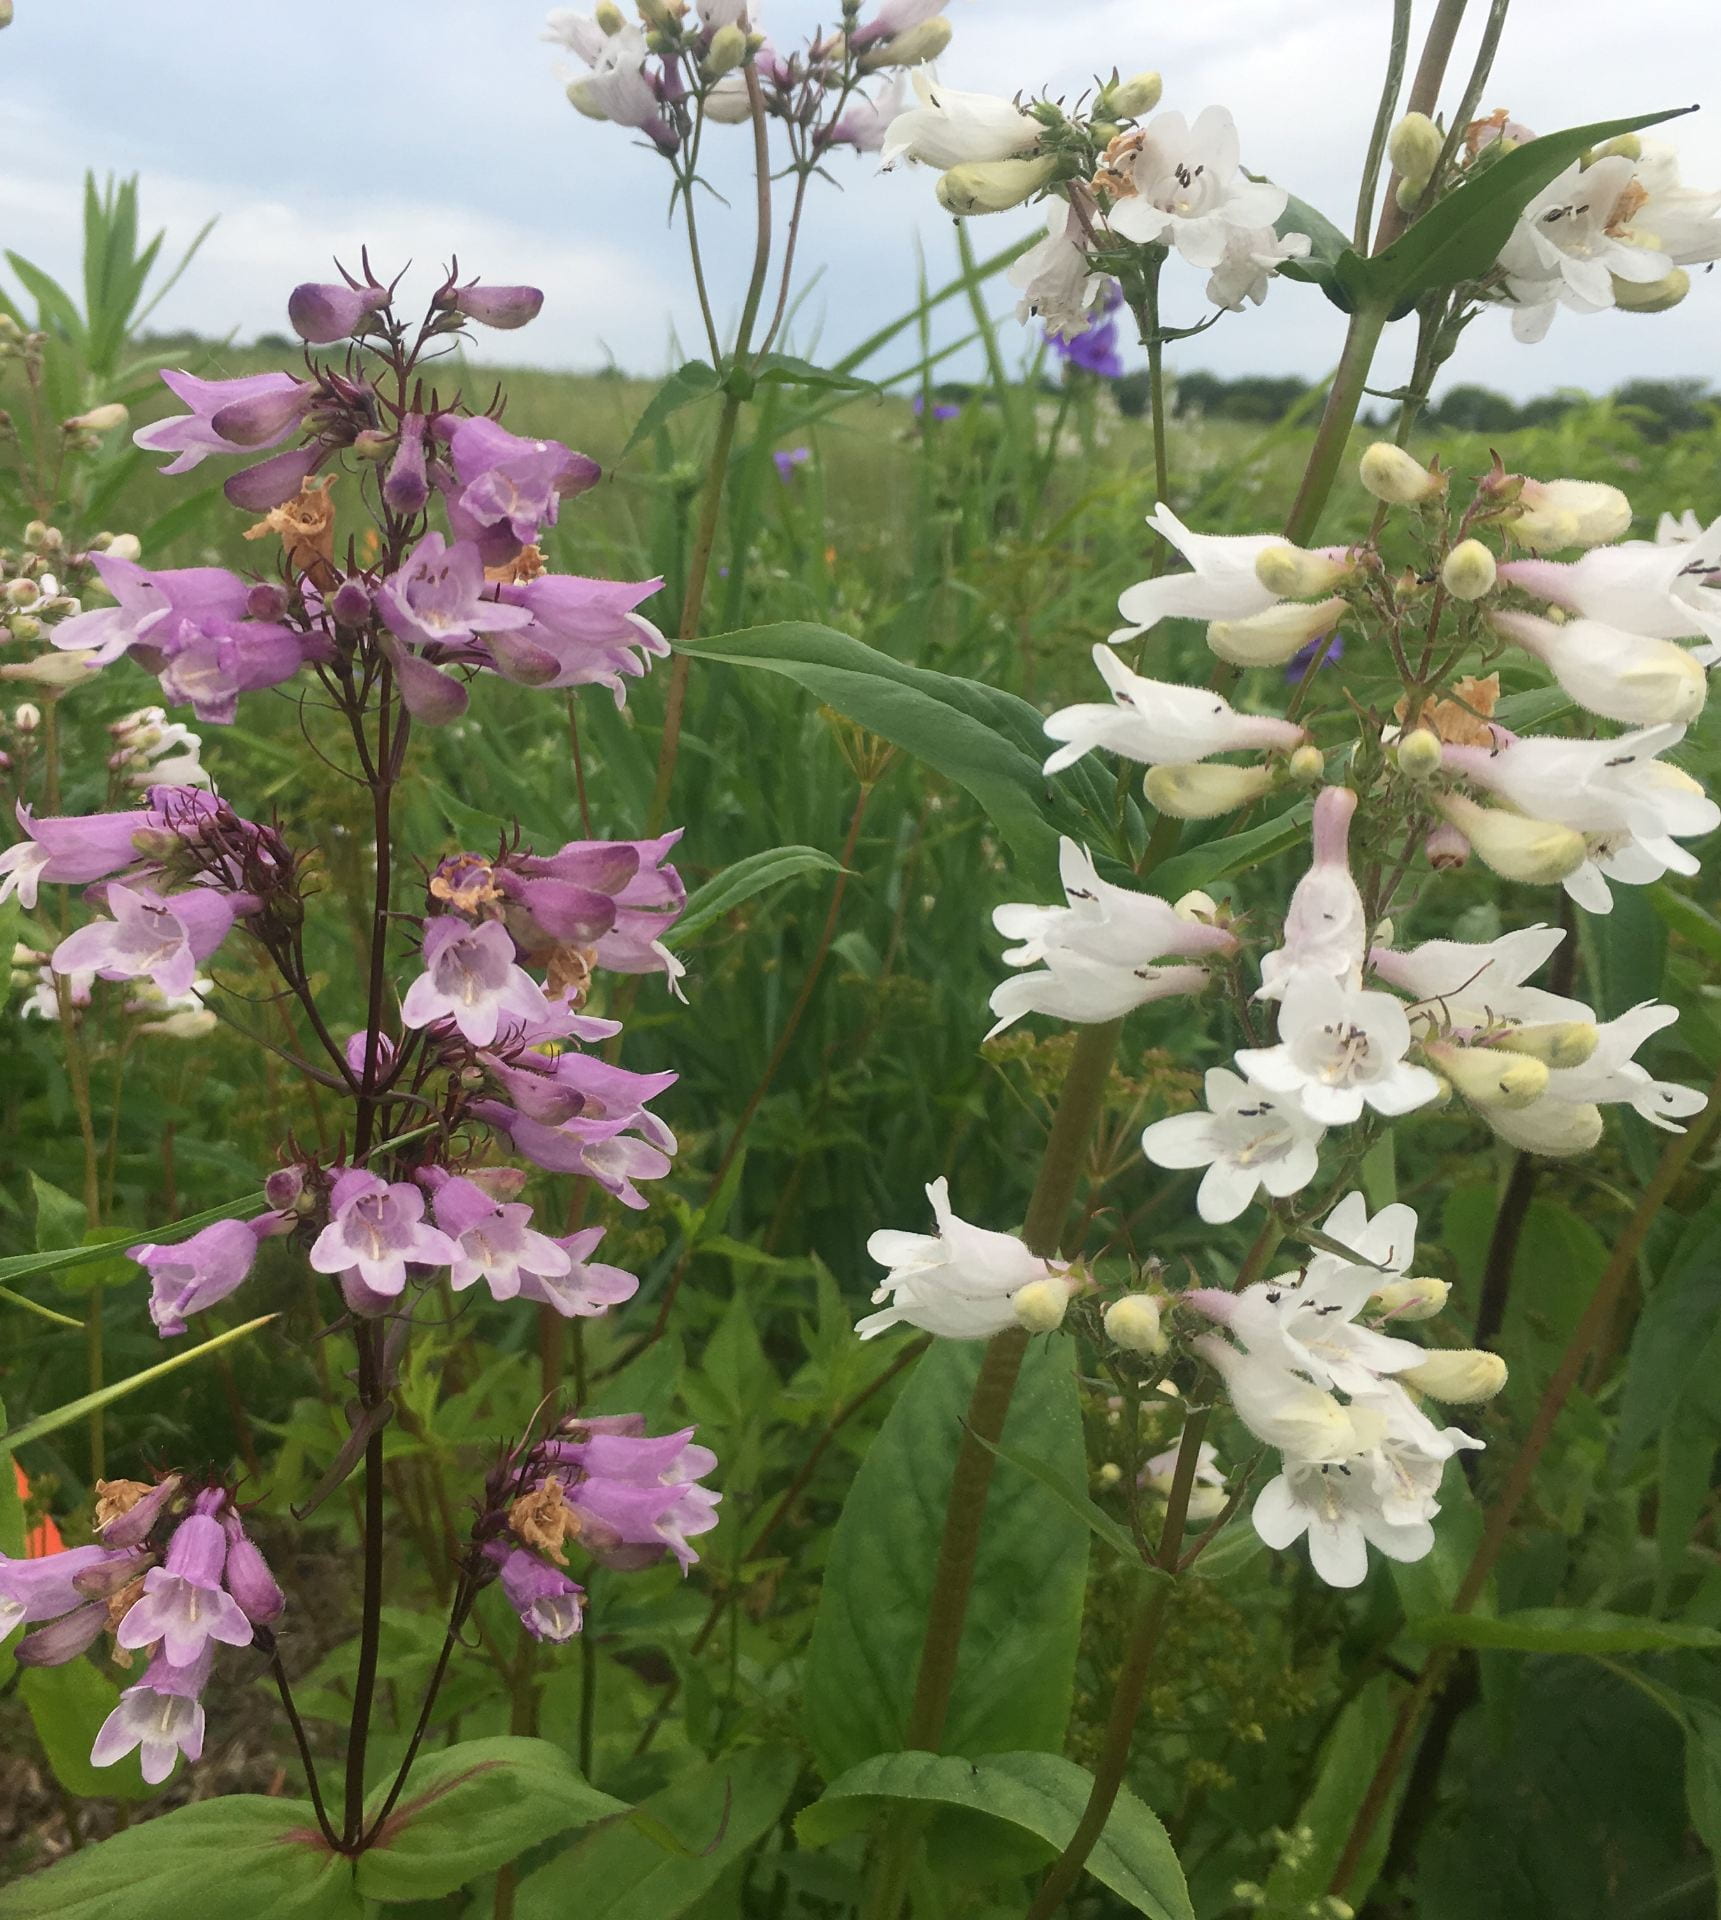
Tall white beard tongue
X
X
Ohio spiderwort
X
X
Anise hyssop
X
X
X
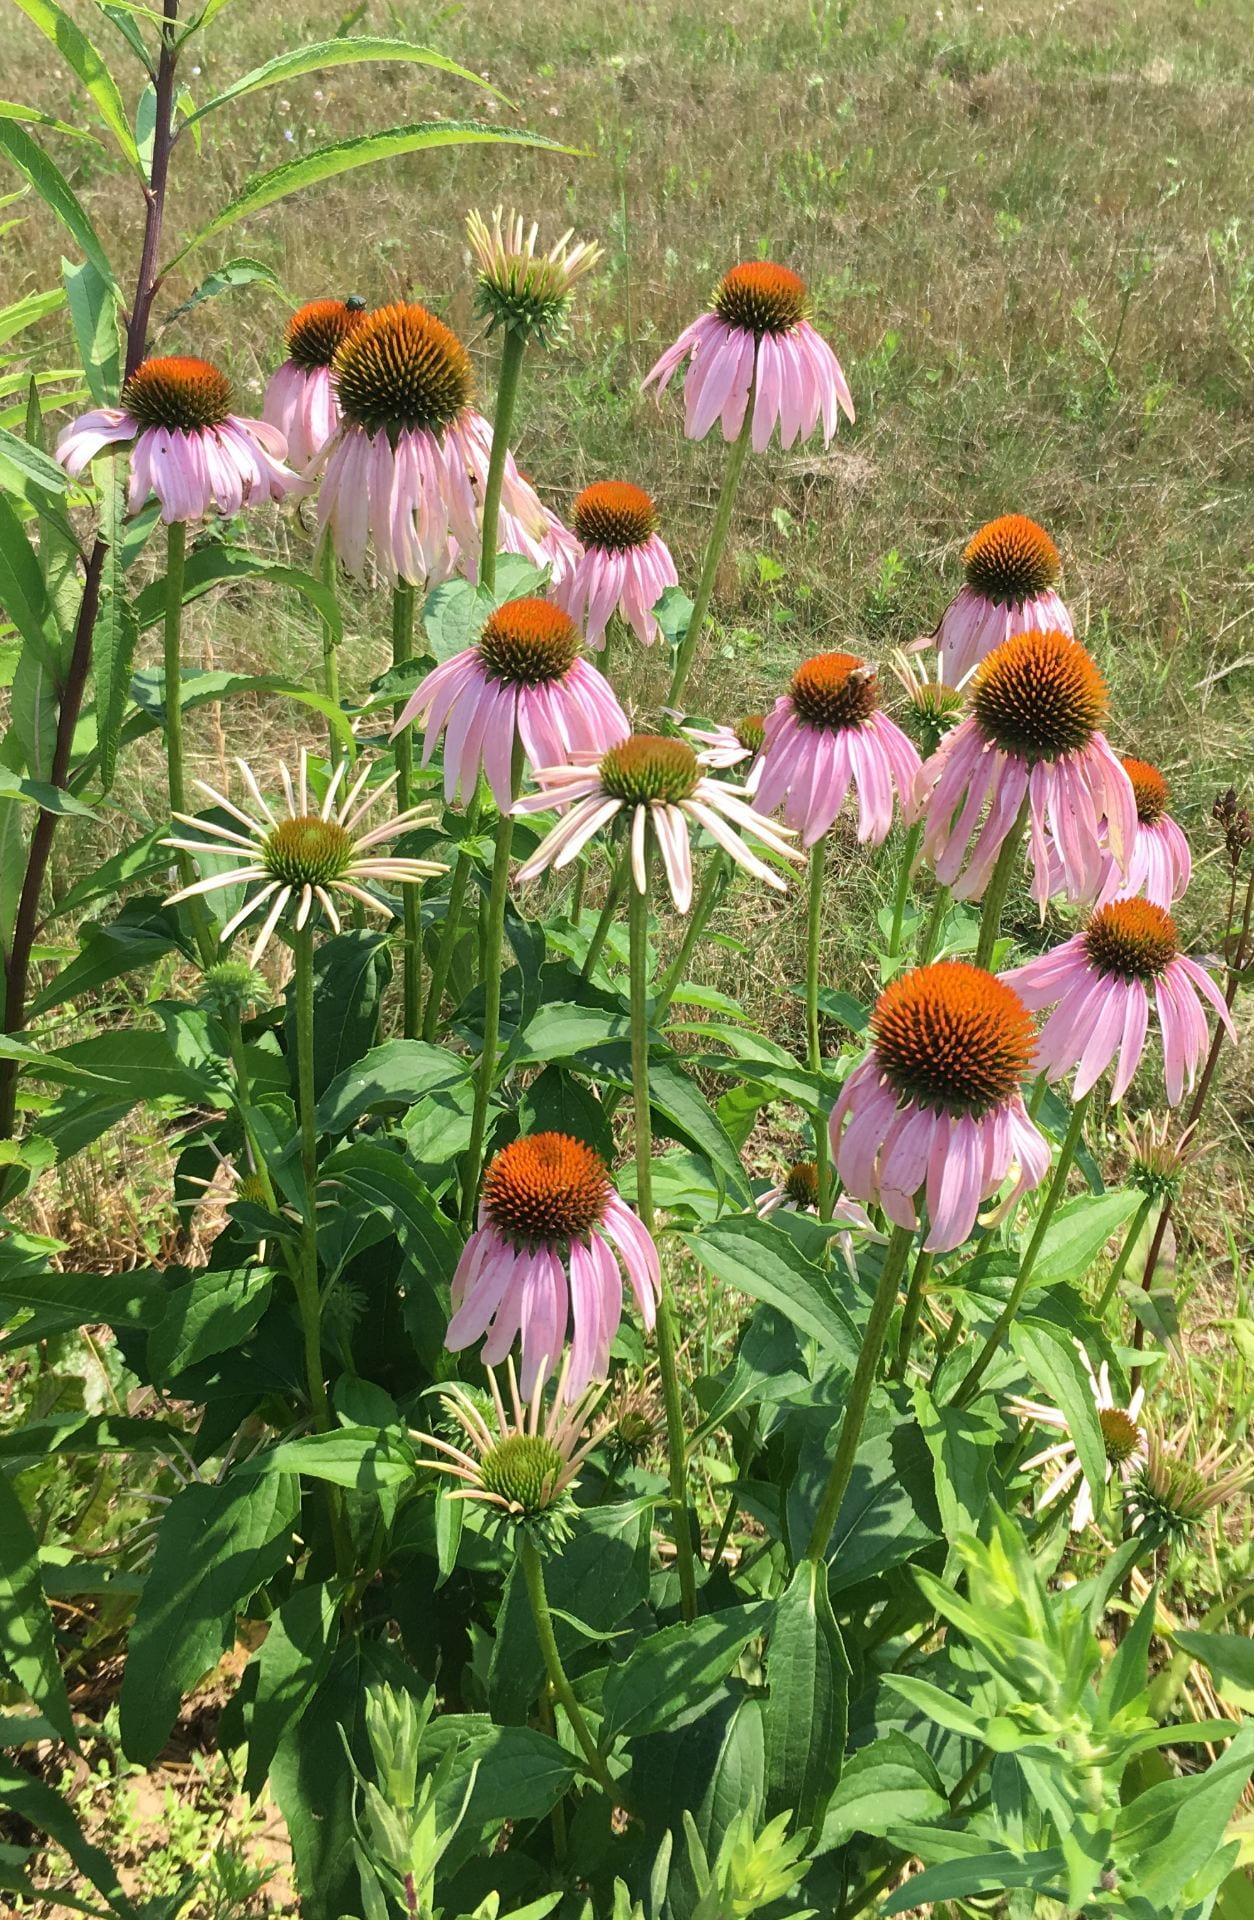
Echinacea
X
X
X
Orange coneflower
X
X
X
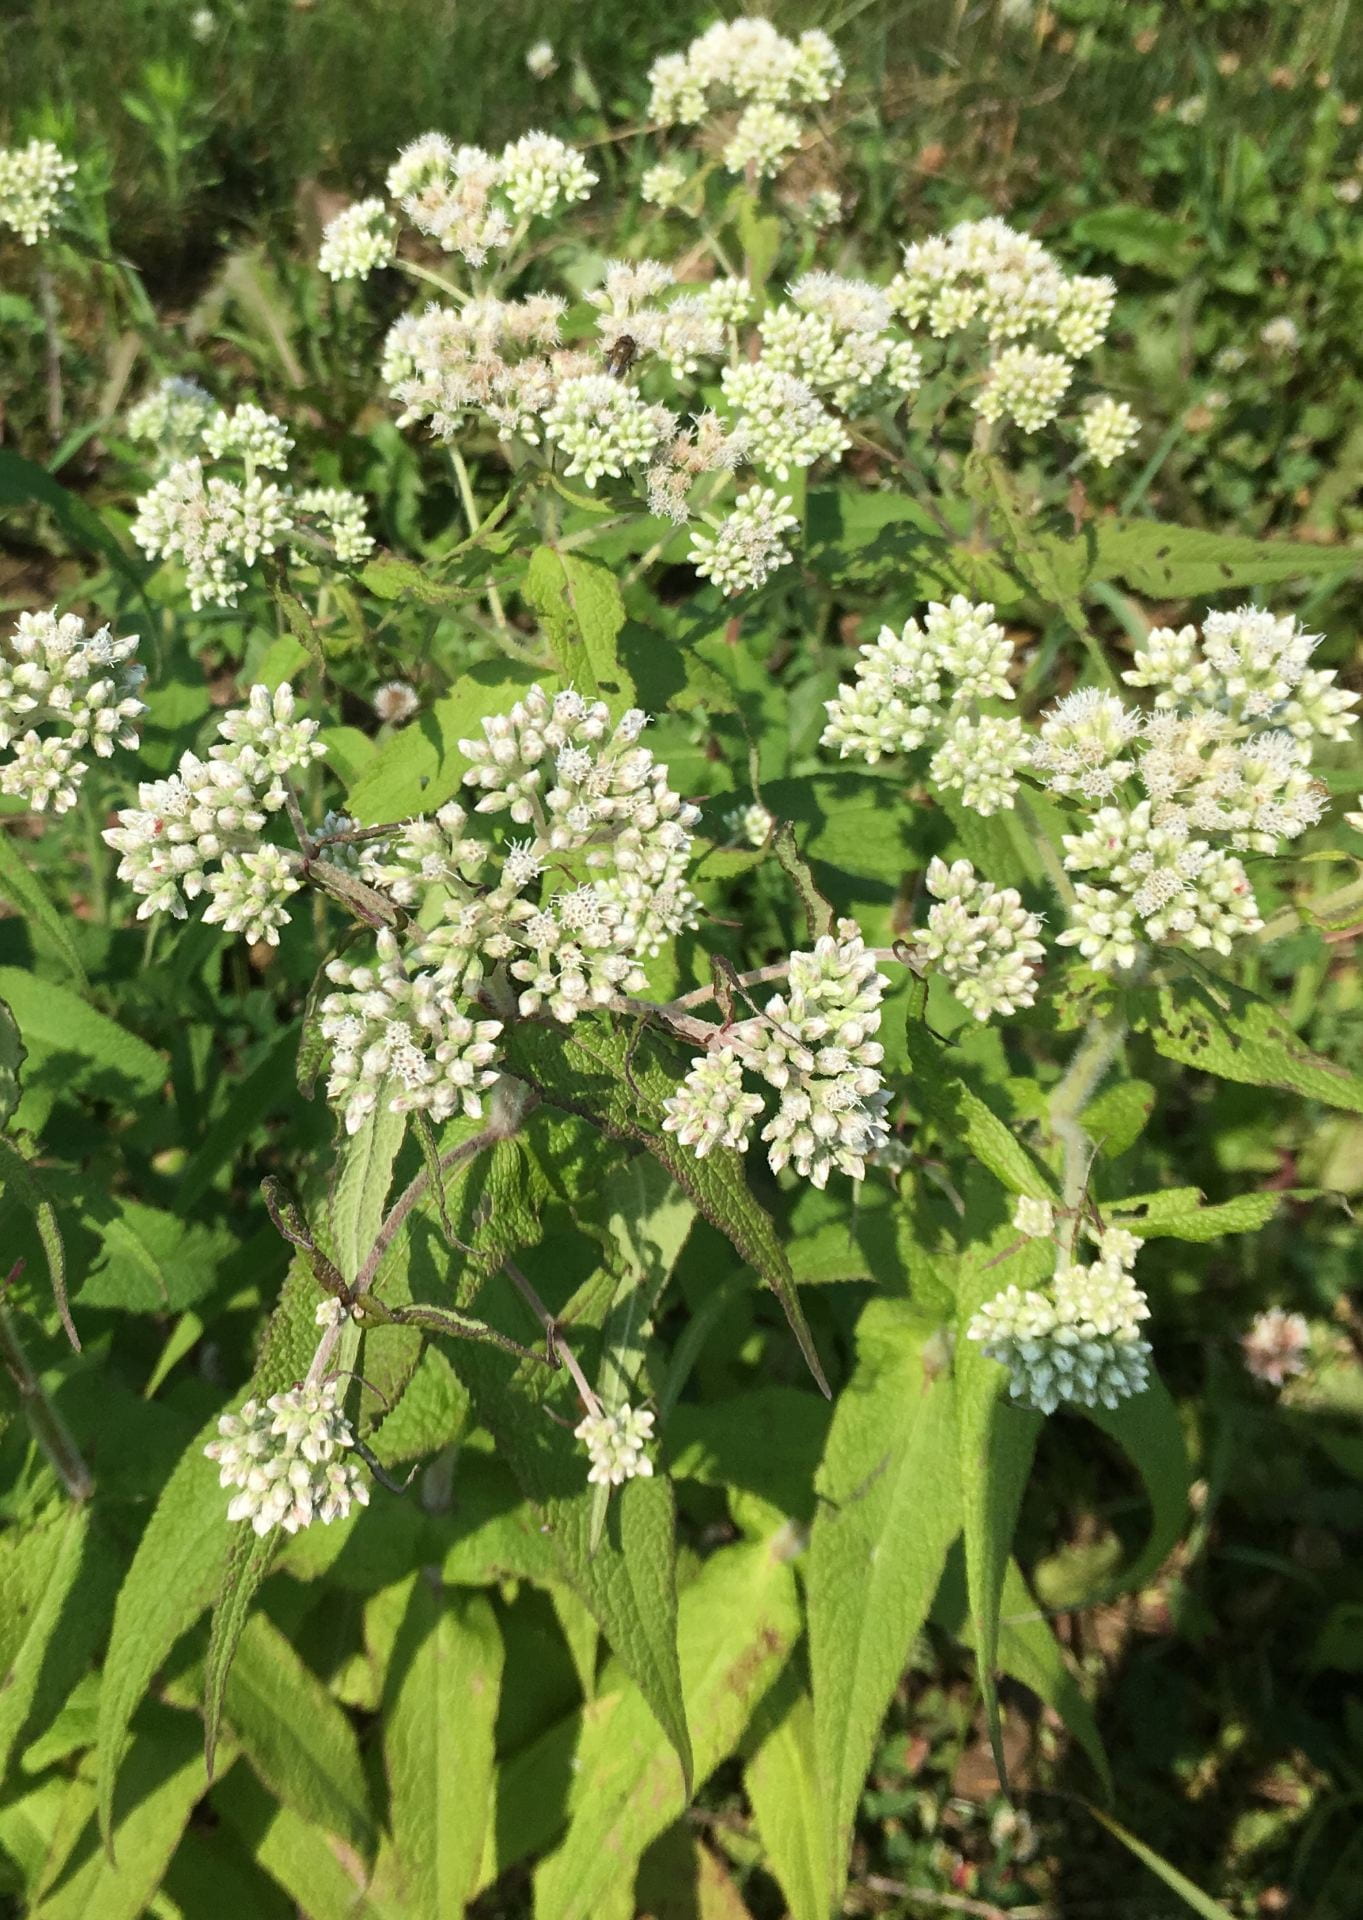
Boneset
X
X
X
Wild bergamot
X
X
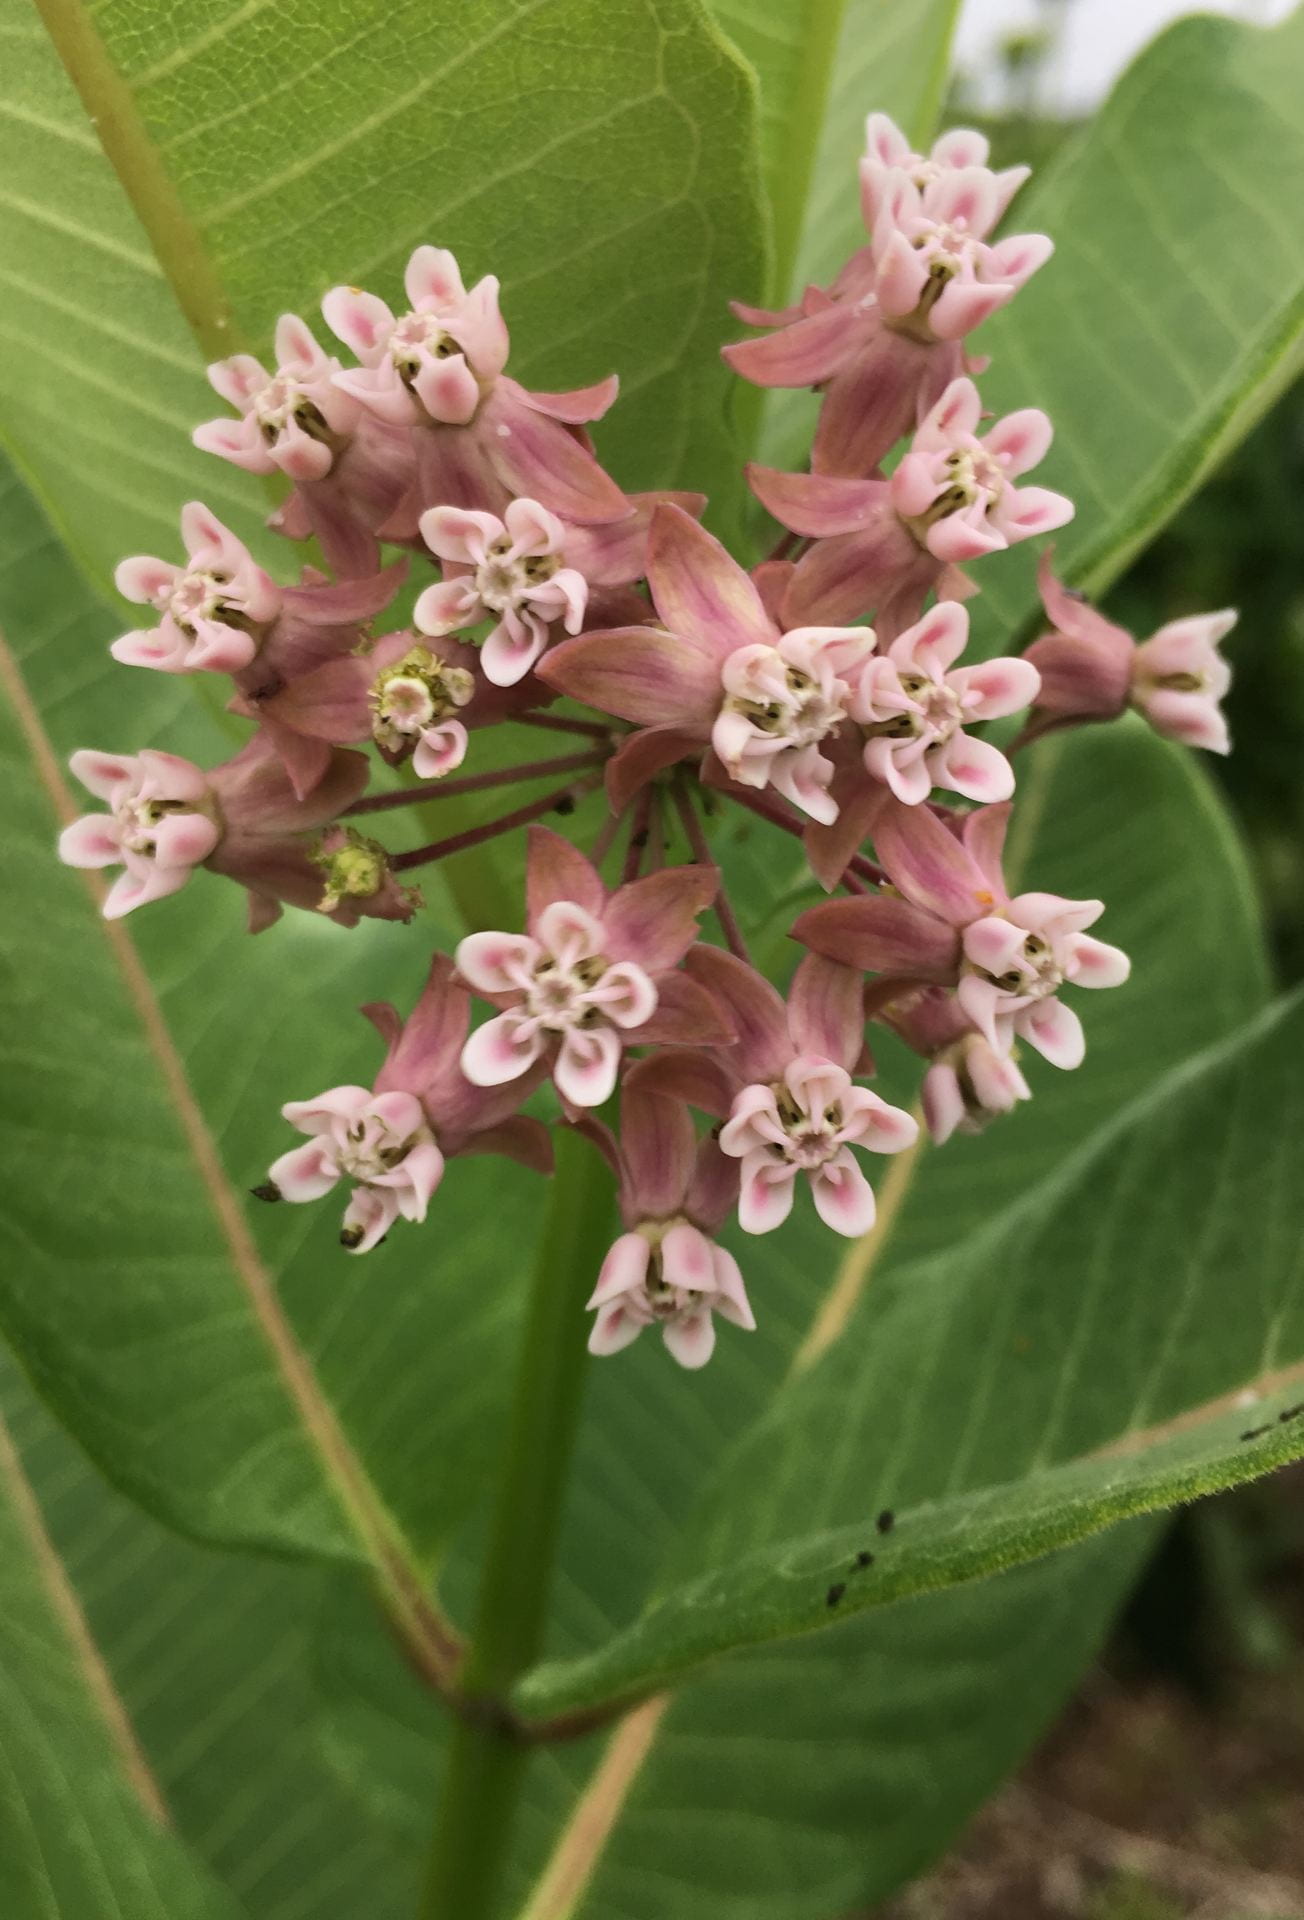
Common milkweed
X
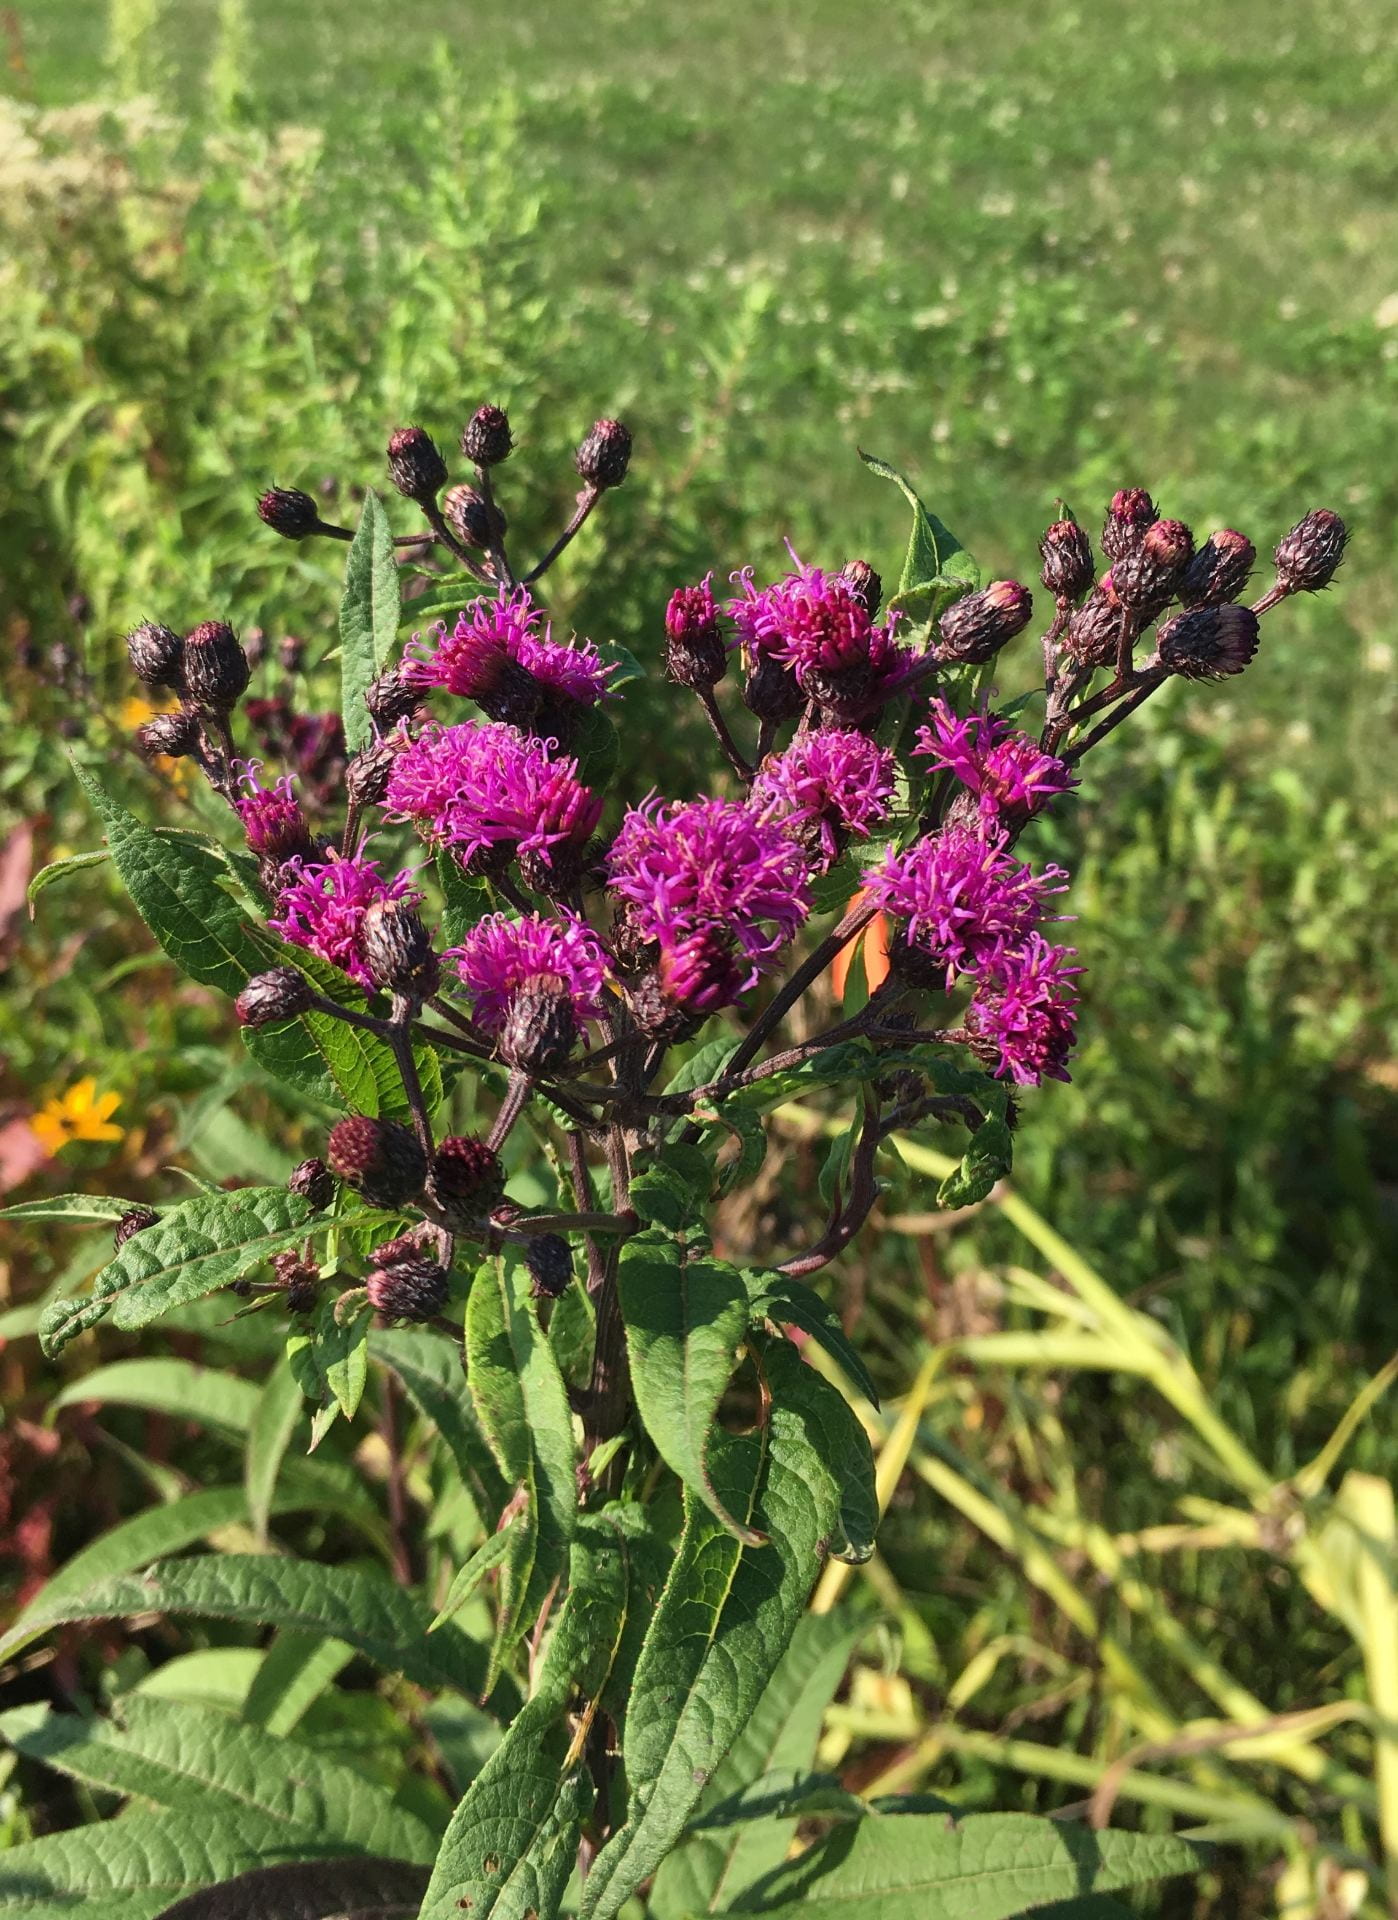
NY ironweed
X
X
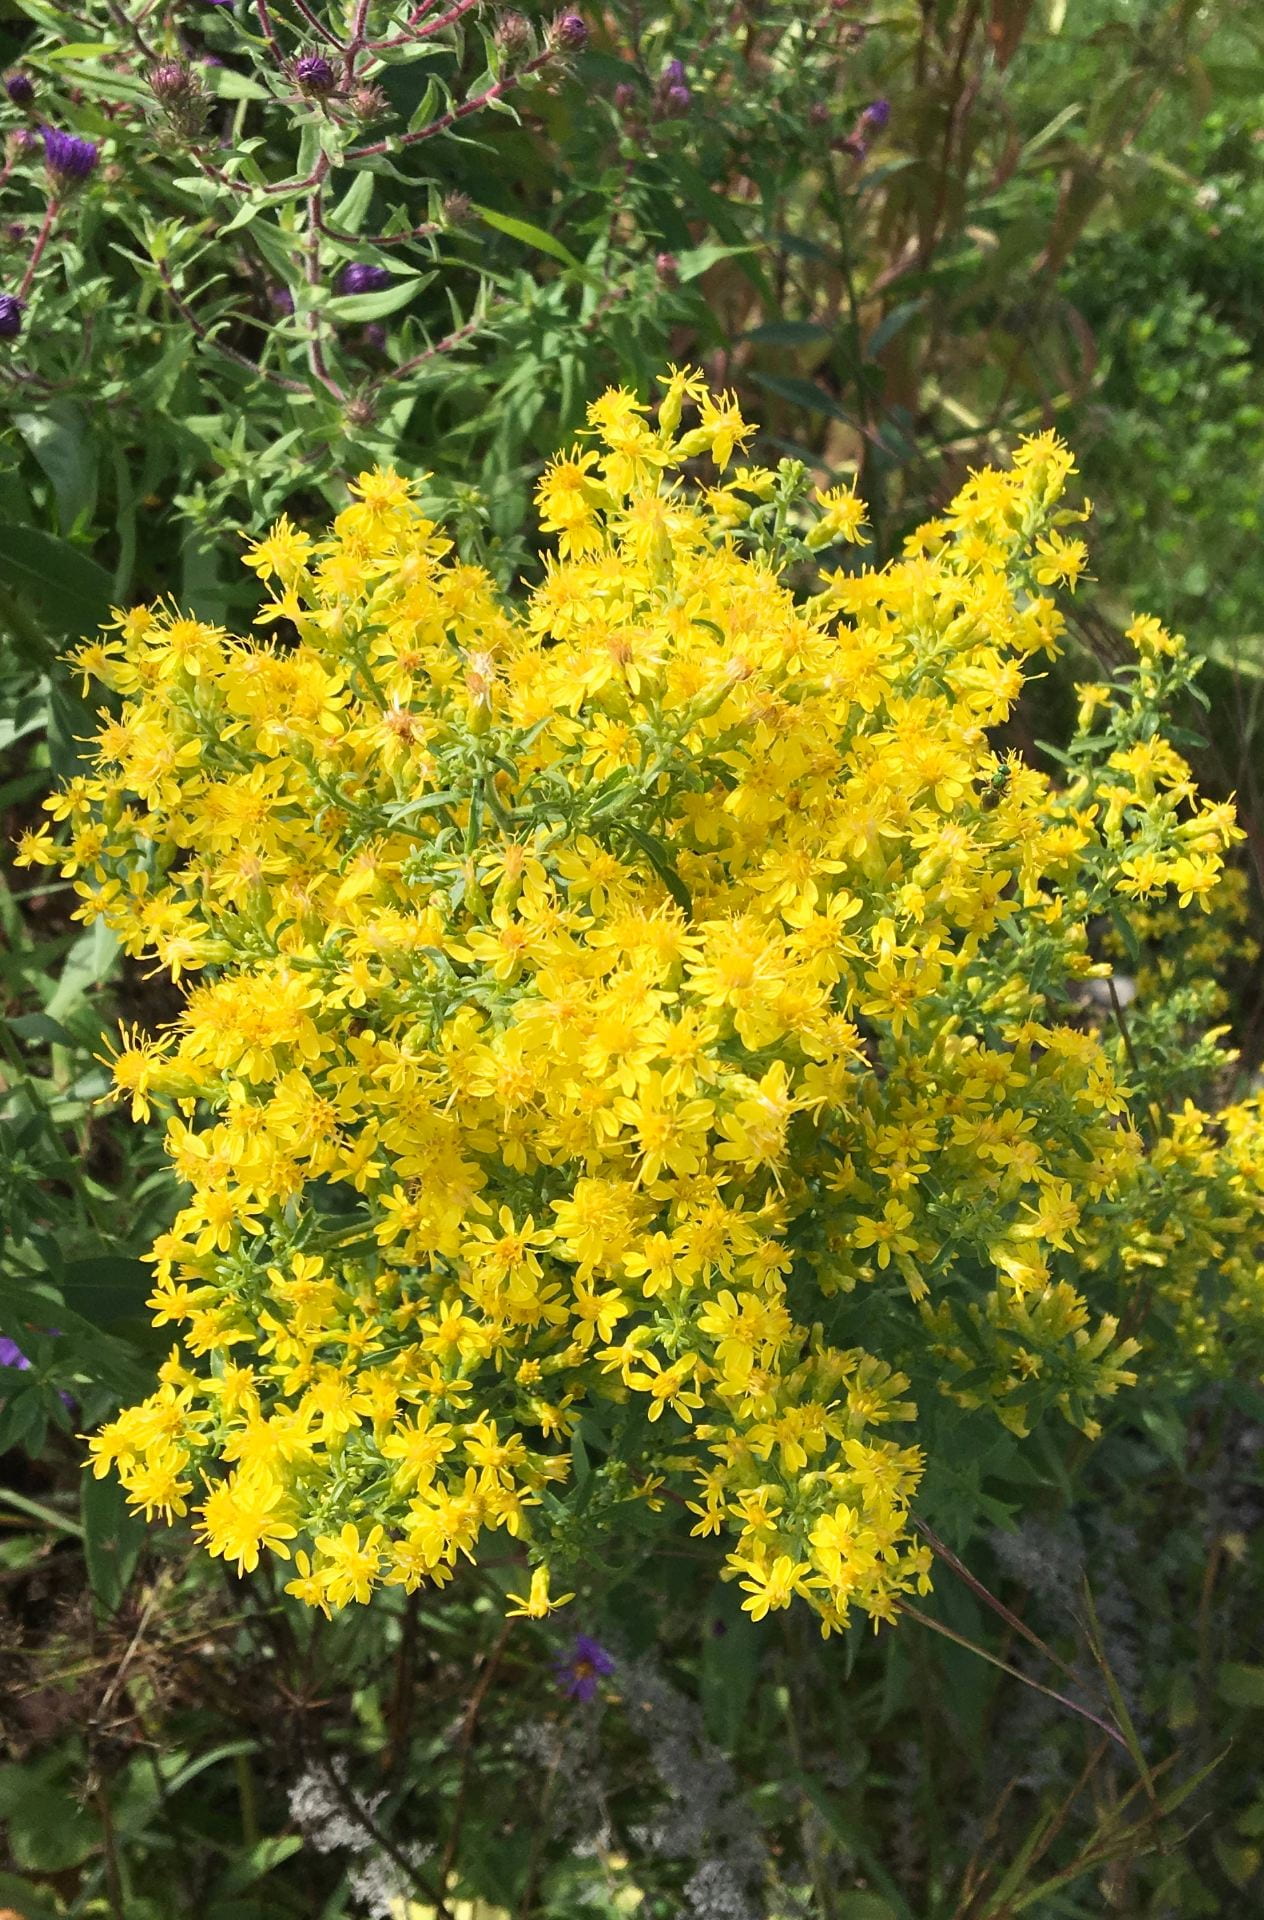
Showy goldenrod
X
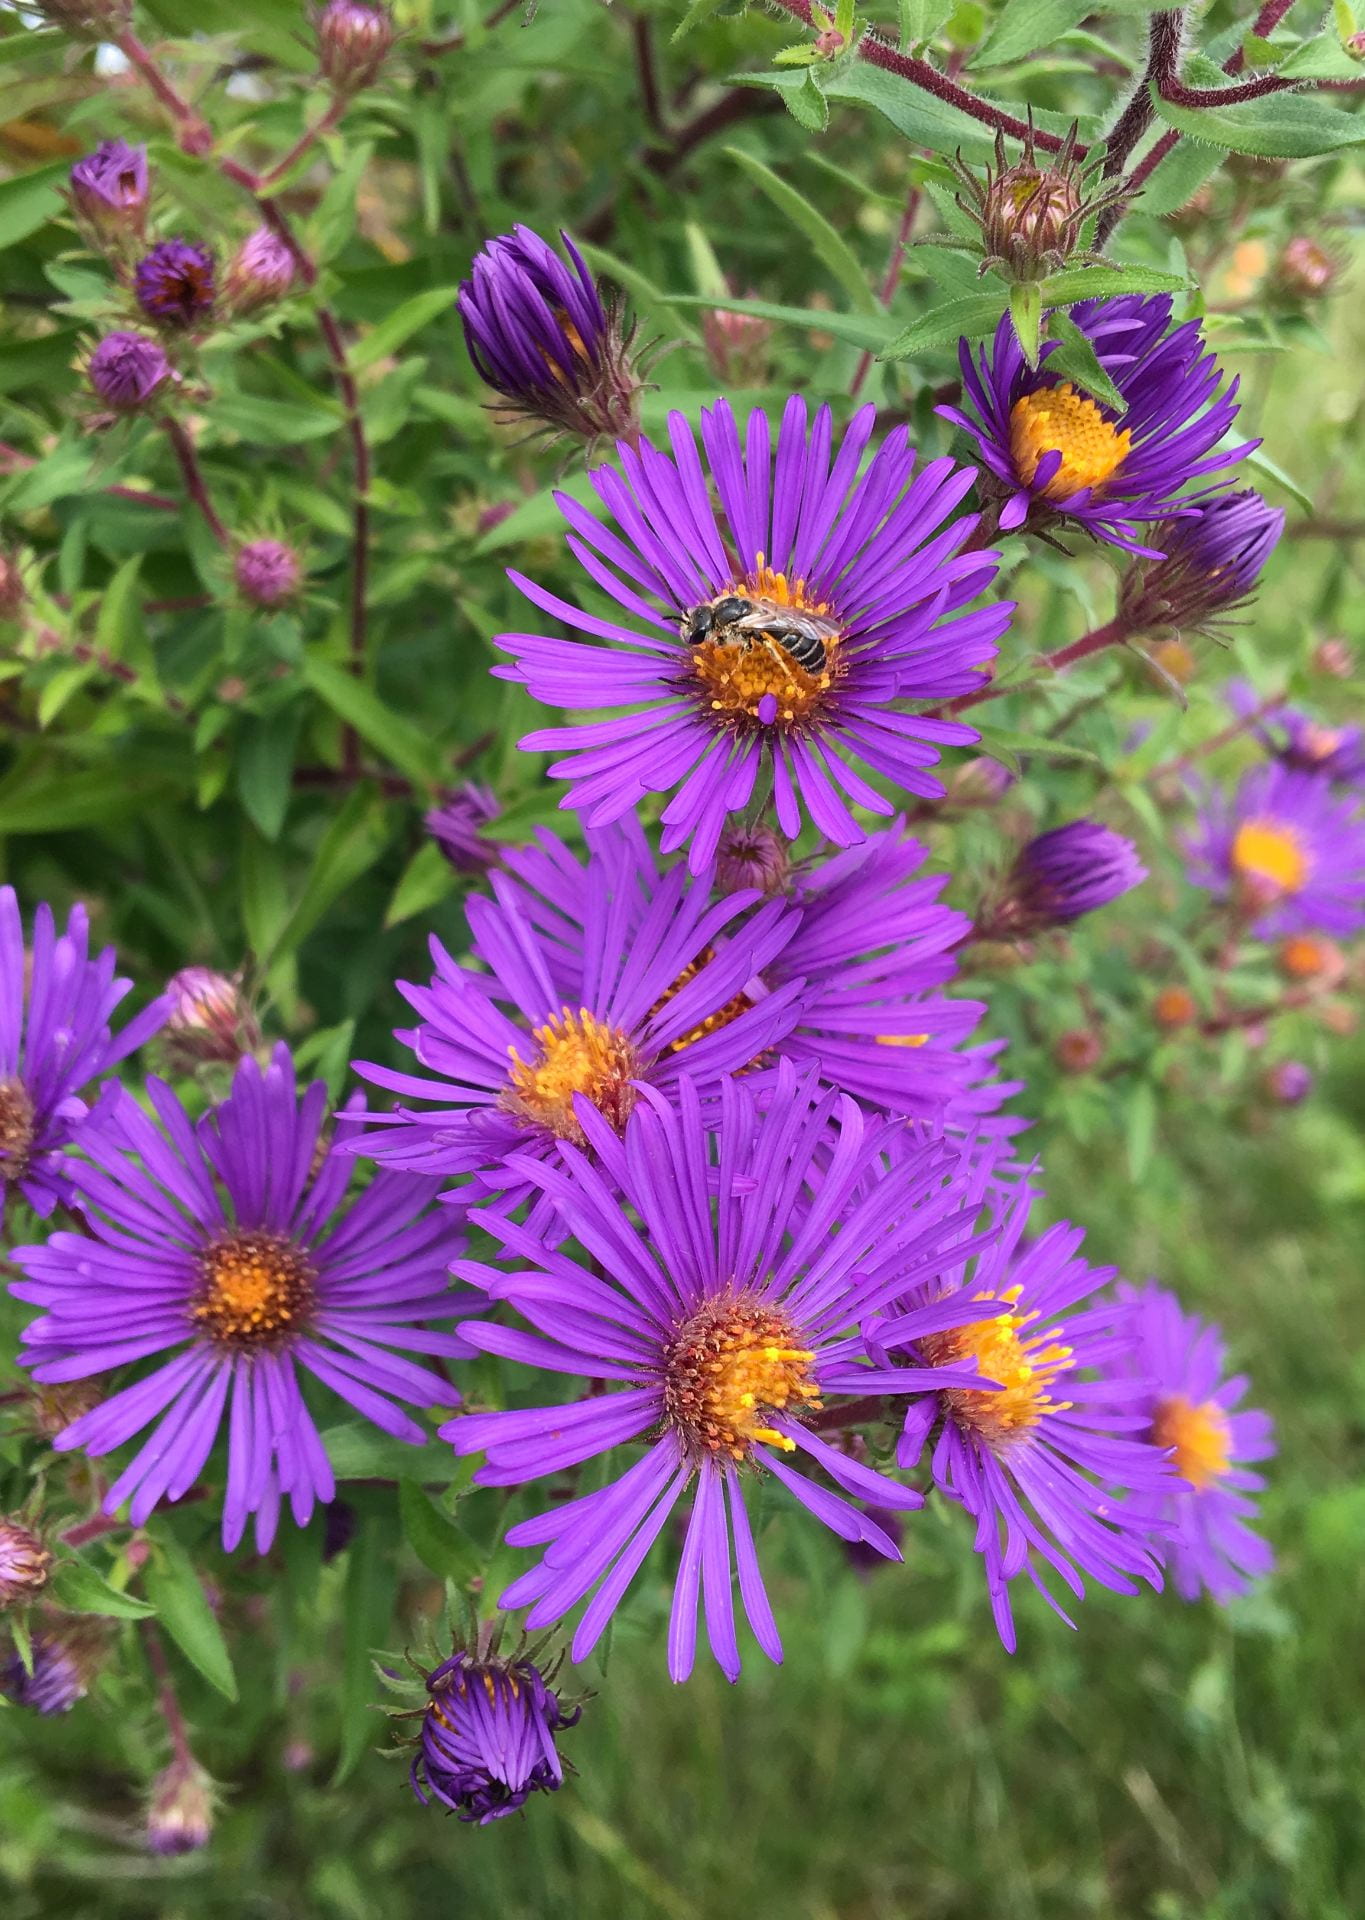
New England aster
X
Blue false indigo
You may notice that the blue false indigo never bloomed in 2019, which was disappointing. Most of these plants are still alive (as you’ll see later in this post). They just didn’t bloom. Maybe next year?
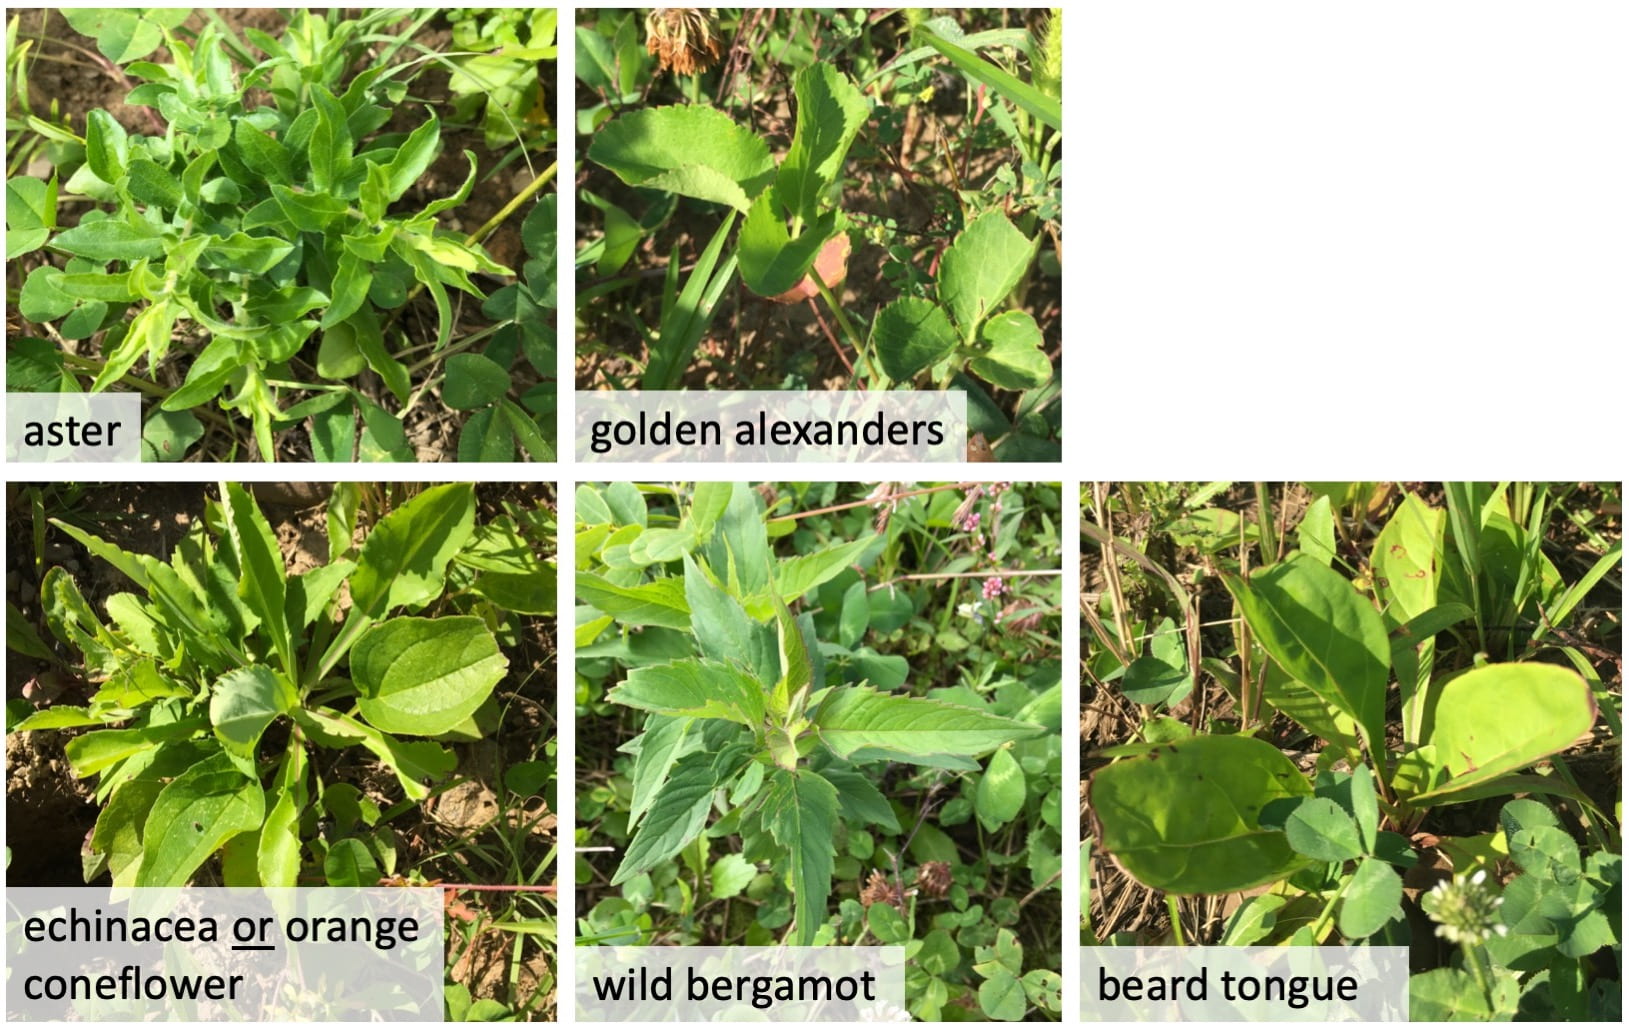
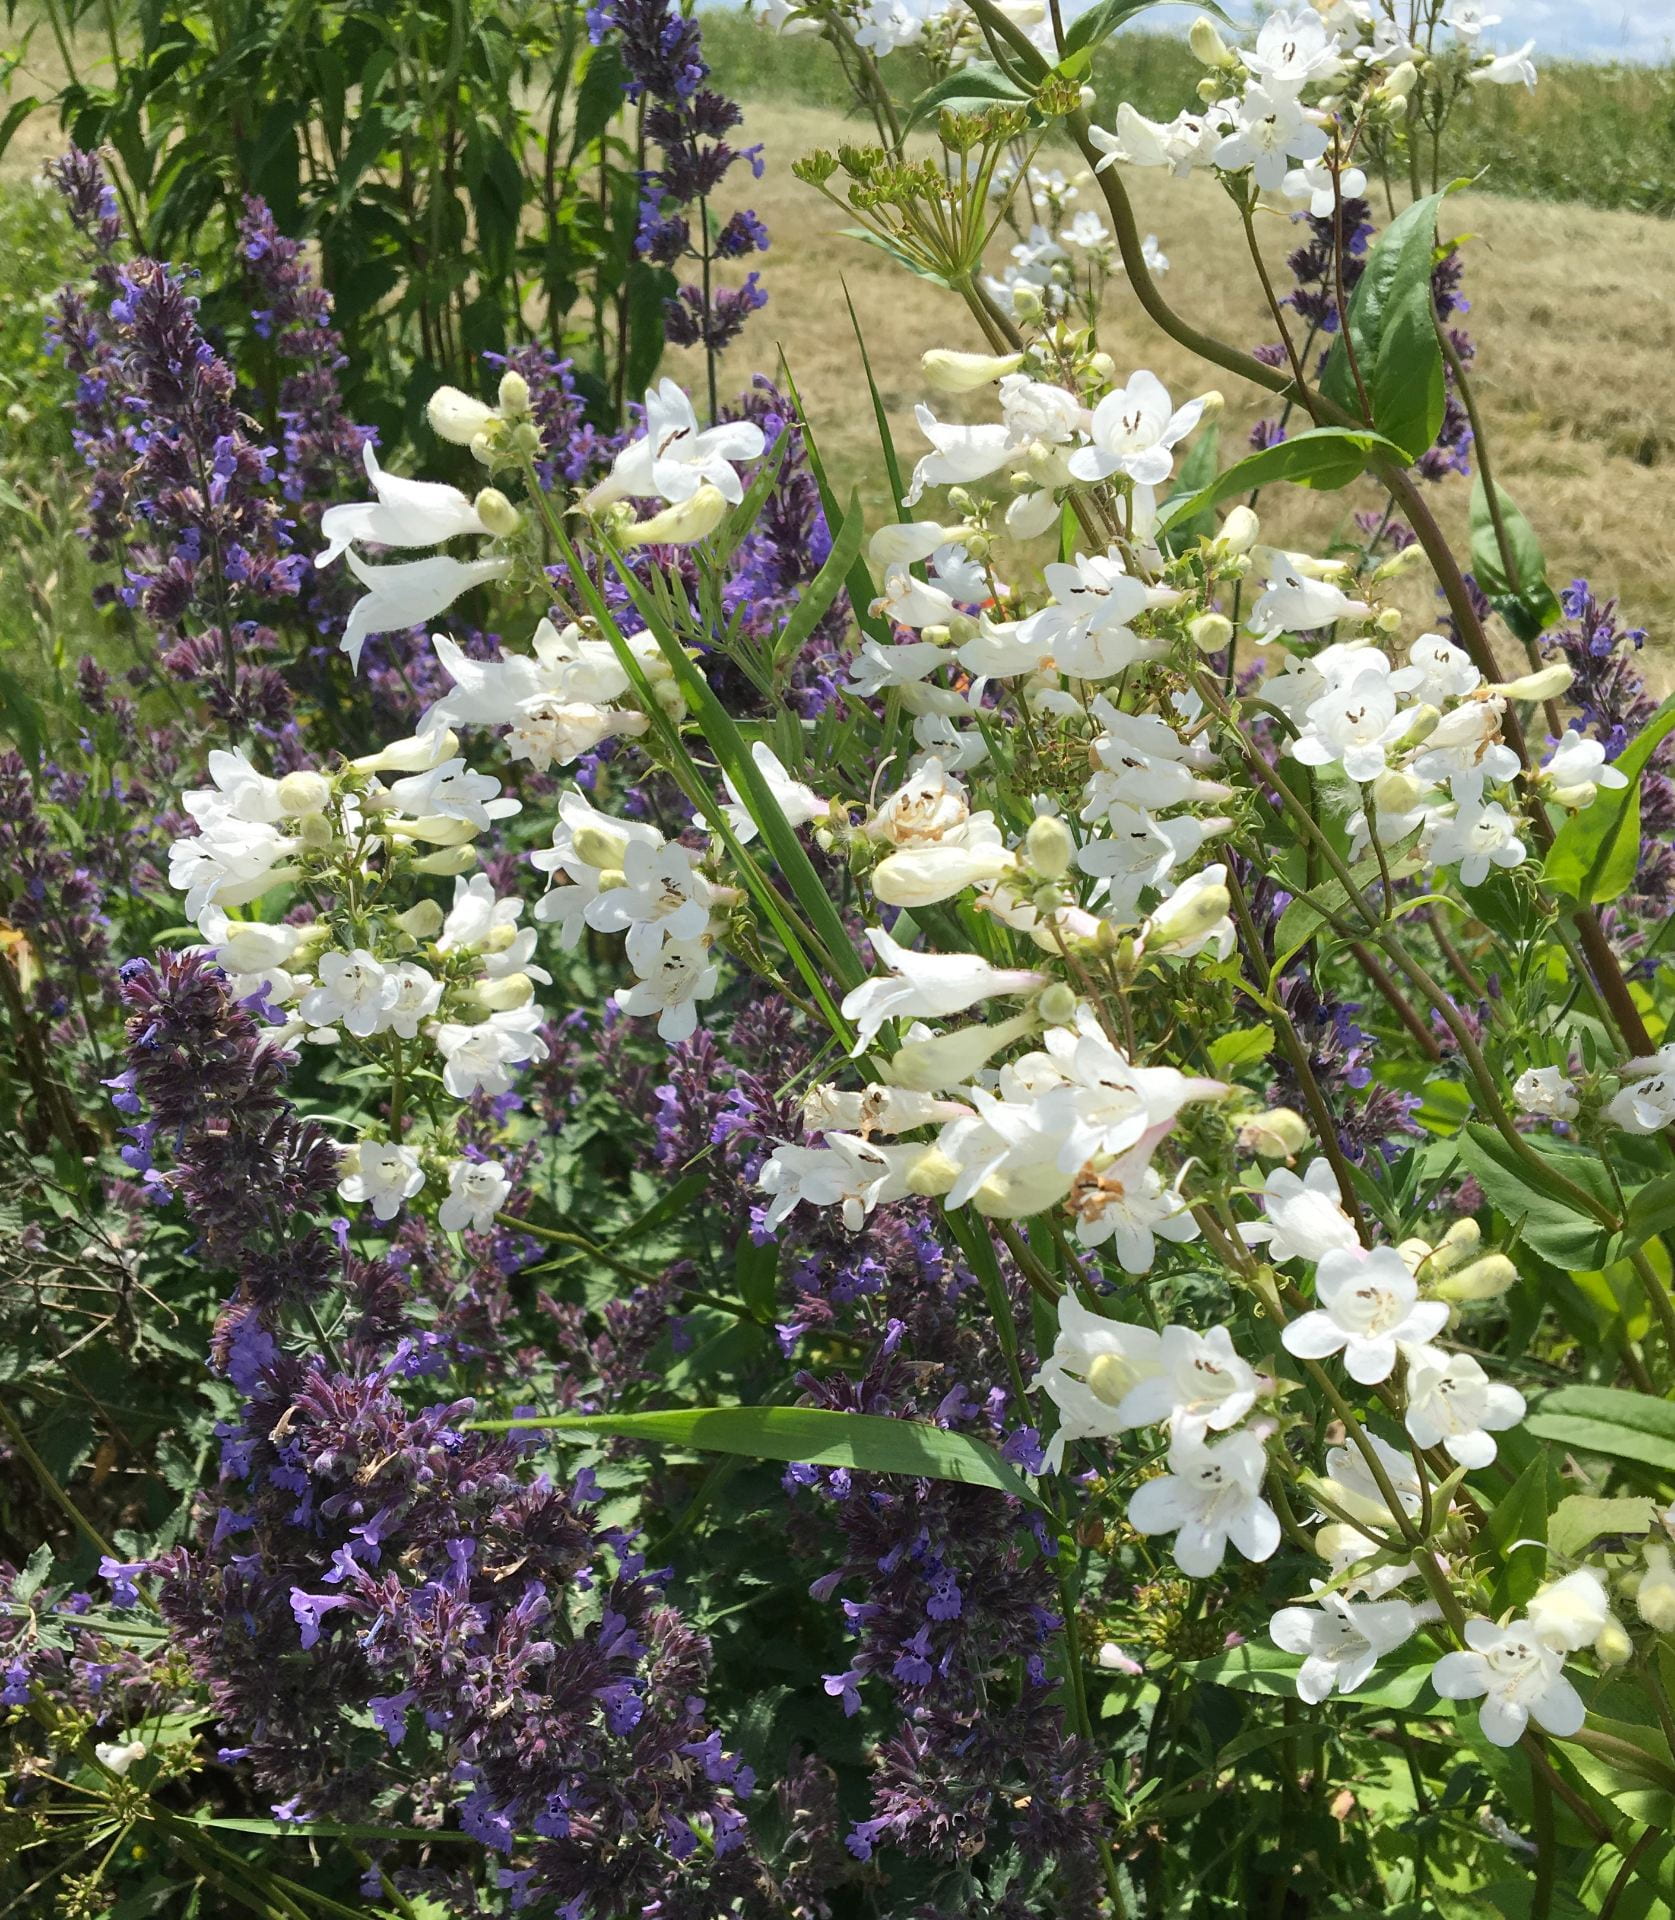
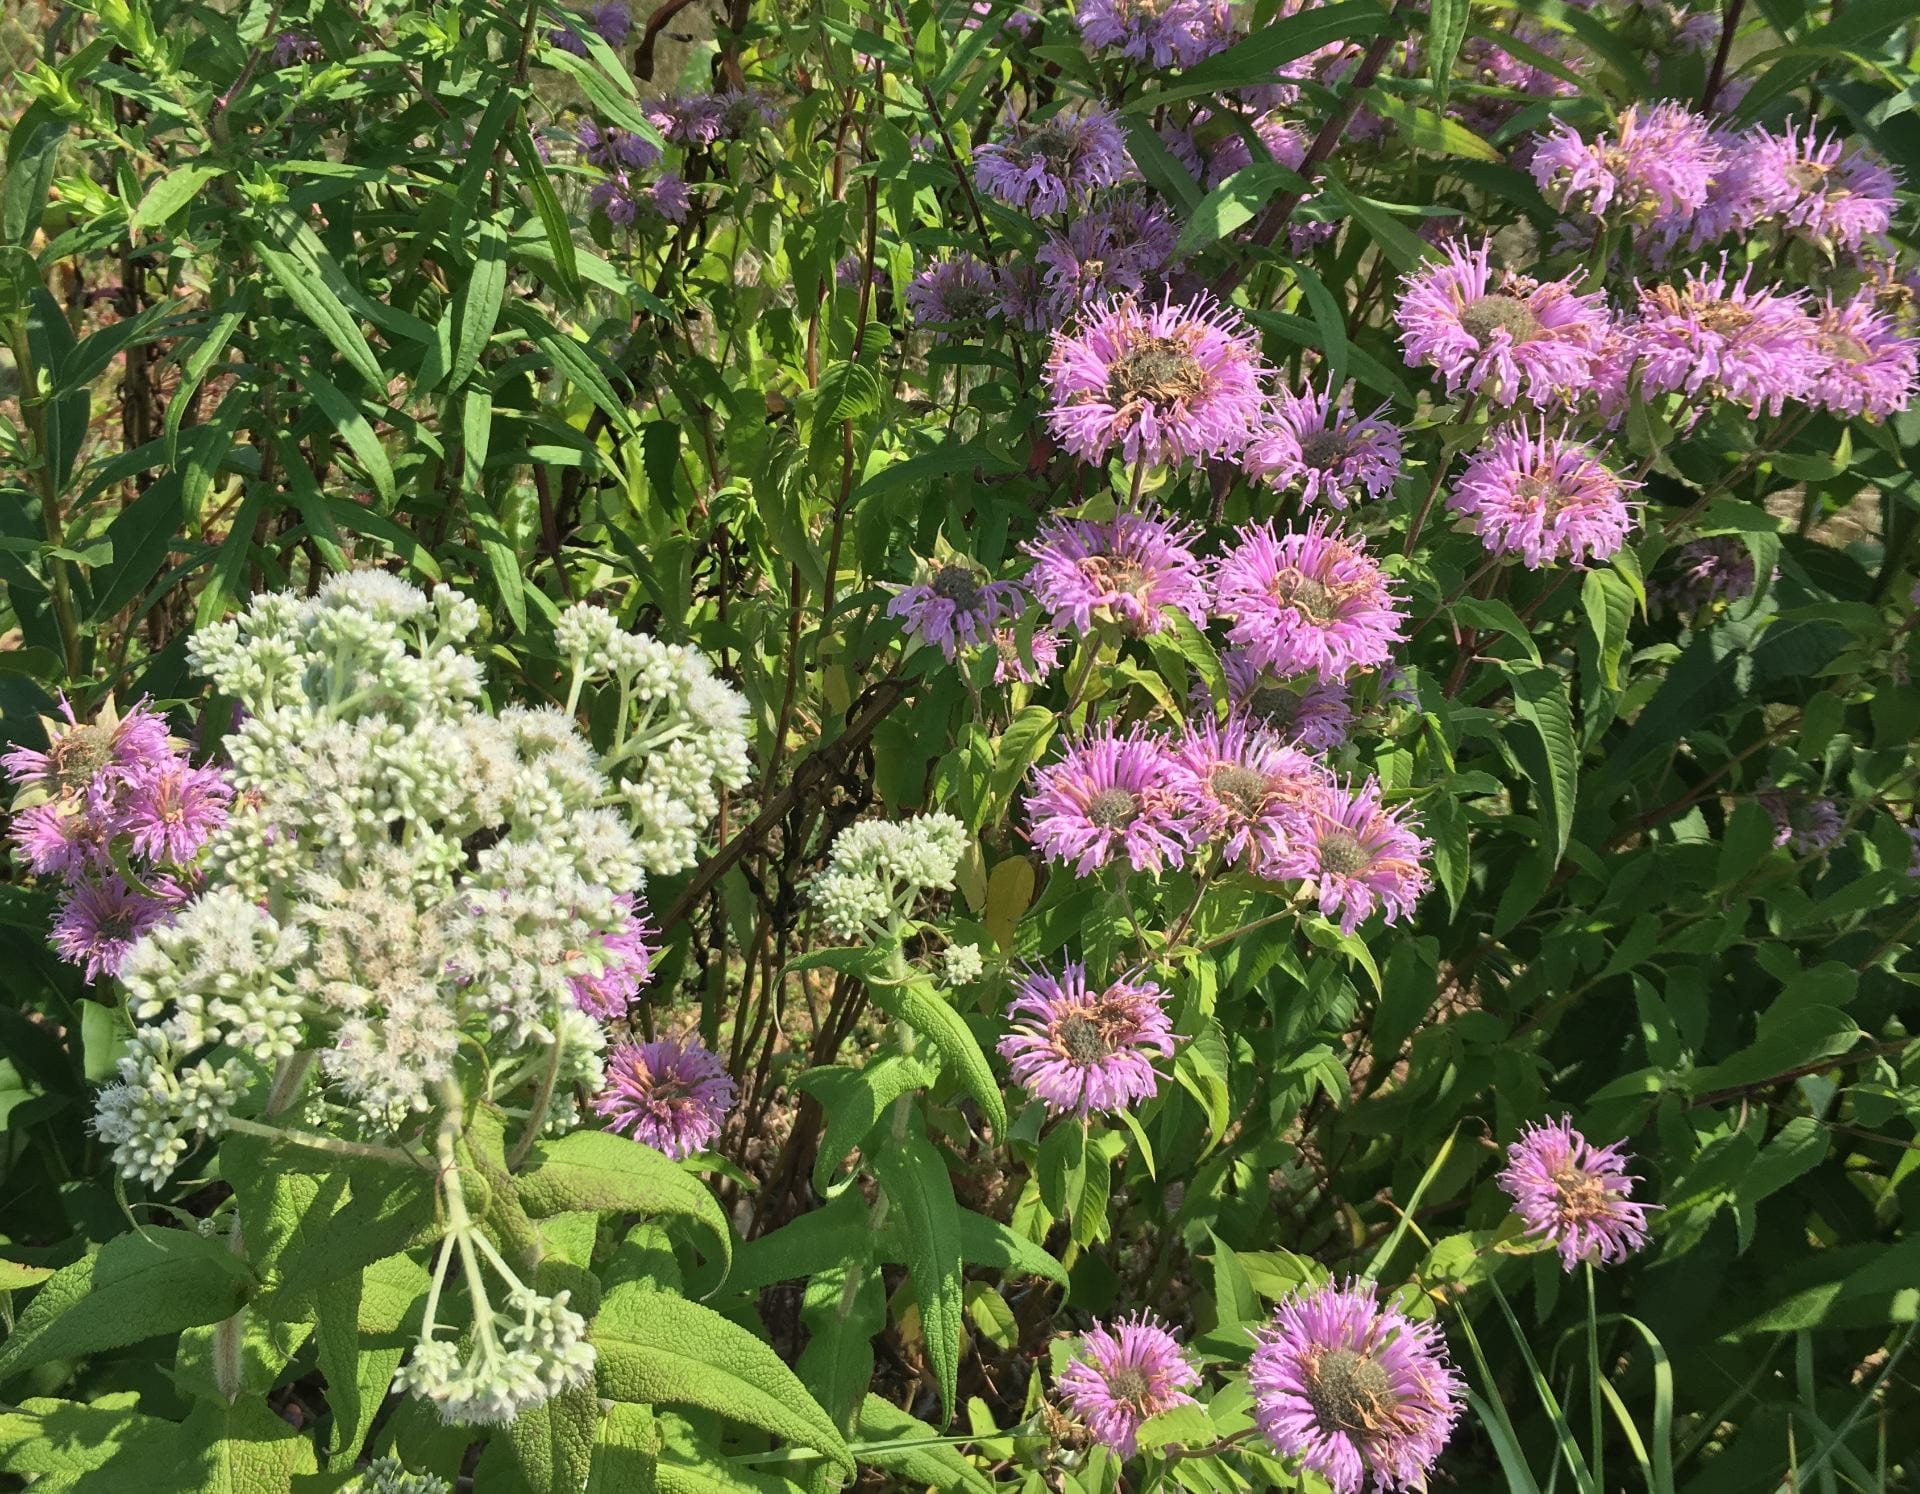
Here’s what each species looks like:
Golden alexanders (Zizia aurea)Catmint (Nepeta faassinii)Coreopsis (Coreopsis lanceolata)Tall white beard tongue (Penstemon digitalis). Obviously not all of these flowers are white!Ohio spiderwort (Tradescantia ohiensis)Anise hyssop (Agastache foeniculum)Echinacea (Echinacea purpurea)Orange coneflower (Rudbeckia fulgida var. fulgida)Boneset (Eupatorium perfoliatum)Wild bergamot (Monarda fistulosa)Common milkweed (Asclepias syriaca)NY Ironweed (Vernonia noveboracensis)Showy goldenrod (Solidago speciosa)New England aster (Symphyotrichum novae-angliae)Blue false indigo (Baptisia australis); hasn’t bloomed yet in our field. Photo credit: Ansel Oommen, Bugwood.org
Transplanted wildflowers
The wildflowers in our transplanted plots are surviving pretty well (>80%). In the plots that were transplanted in the fall after the buckwheat cover crop, the survival is a bit lower. I think this has to do with some weed control issues (more on this in a future post).
How well have the transplanted wildflowers survived so far? Treatment A was transplanted in Spring 2018 and not mulched. Treatment B was transplanted in Spring 2018 and mulched. Treatment D was transplanted in Fall 2018 following a buckwheat cover crop. All have been hand weeded periodically. In both Spring and Fall of 2019 I counted plants to see how well they survived. The black lines on each bar in the graph show one standard error above and below the mean percent survival.
Some species have survived better than others, as the following chart shows. Again, we counted plants both in Spring and Fall 2019.
Do some species of wildflowers survive better when transplanted? There’s a little bit of variability, but overall most are surviving pretty well.
What about the direct-seeded plots?
Only three species of wildflowers planted by seed in Spring or Fall 2018 bloomed during the 2019 season. The table below shows which months these blooms were seen (marked with an ‘X’).
Common name
May
June
July
Aug
Sep
Coreopsis
X
X
X
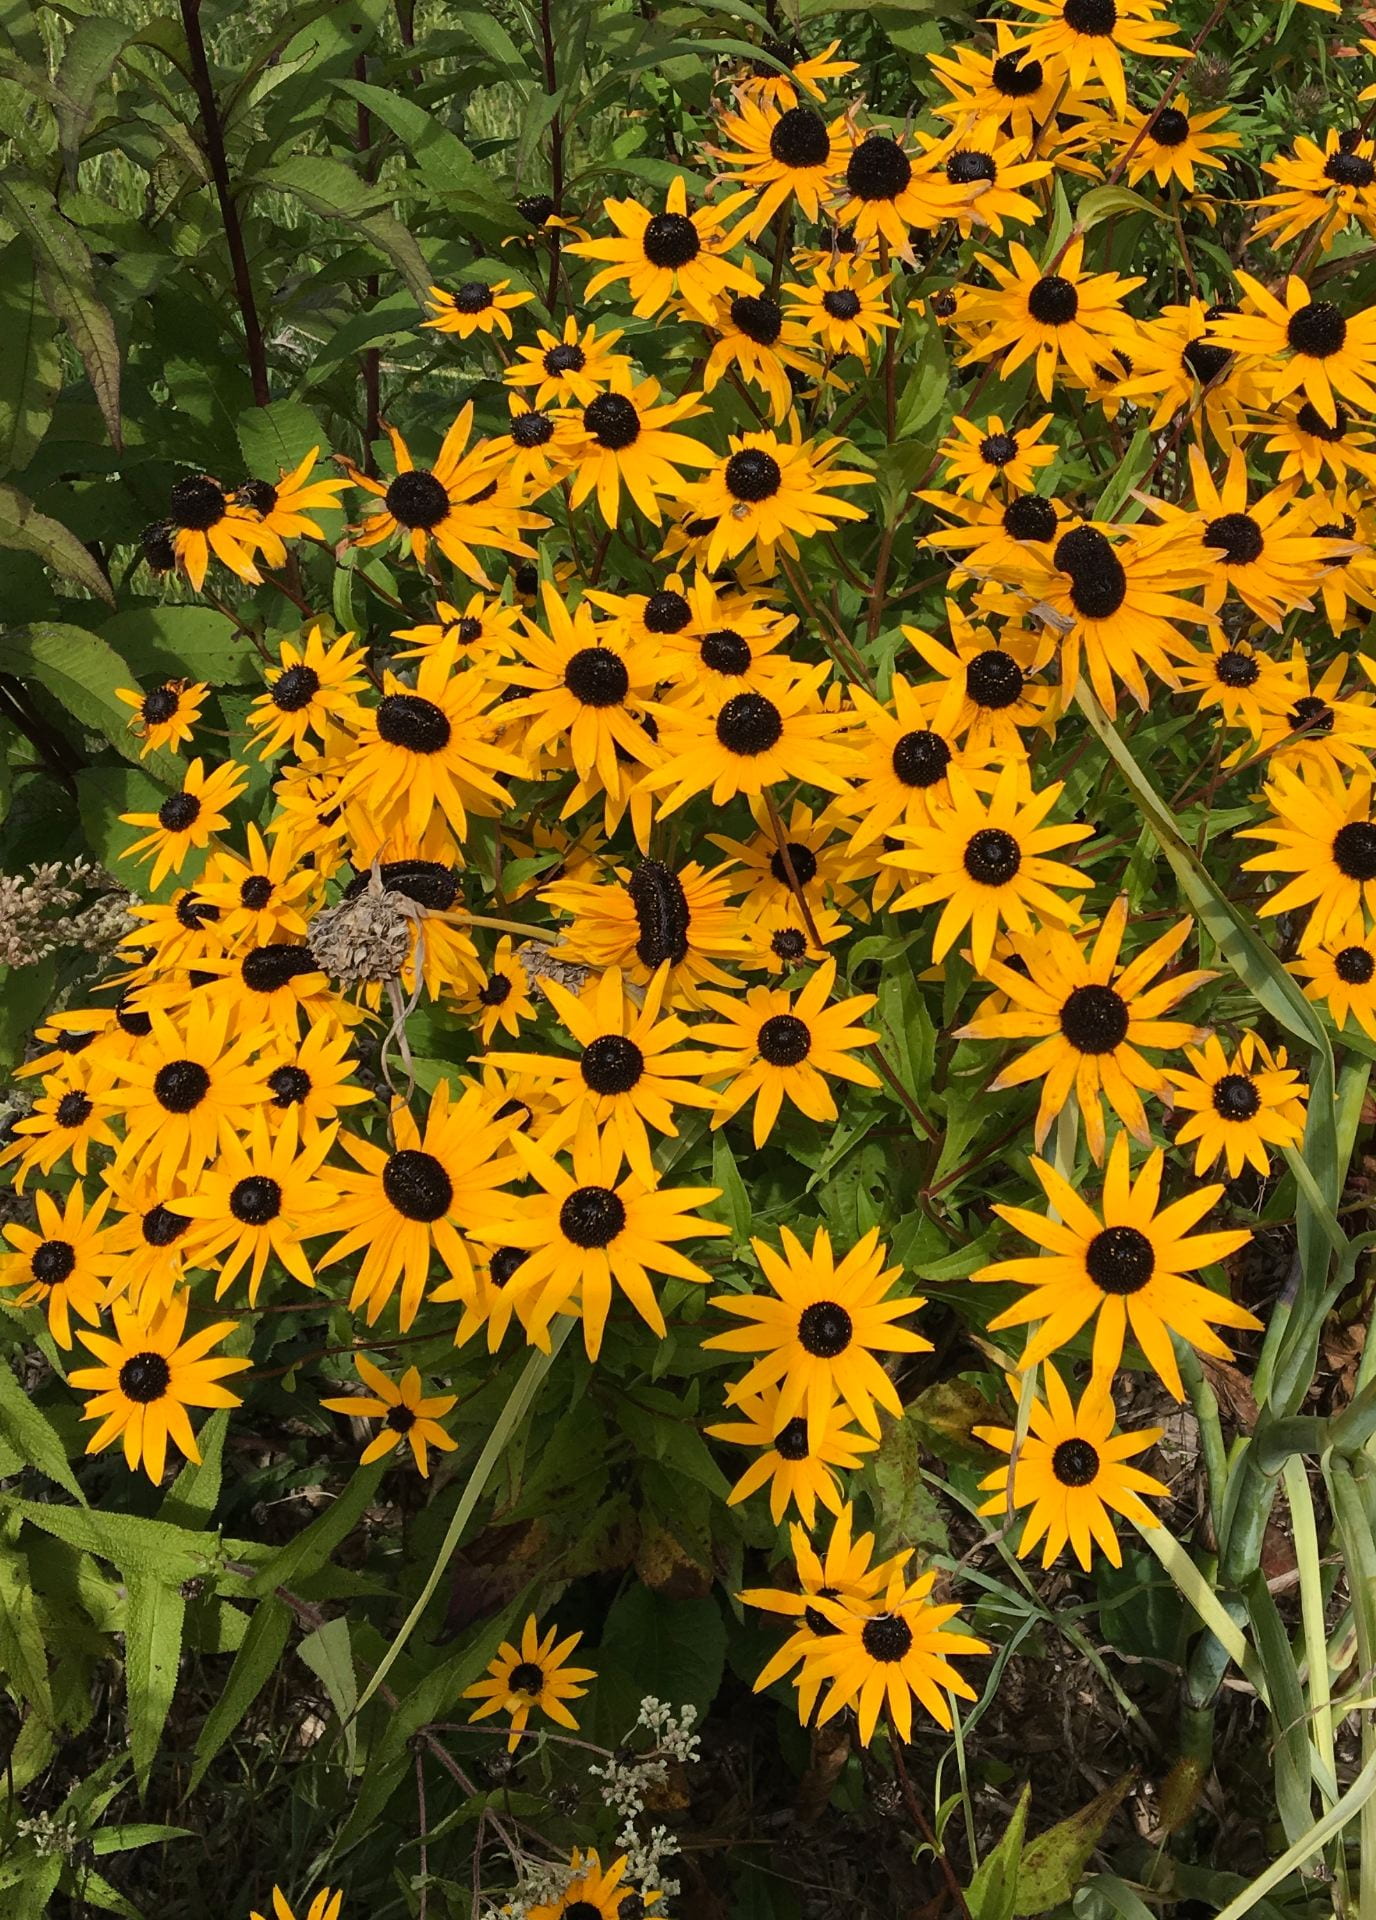
Blackeyed susan
X
X
X
Partridge pea
X
X
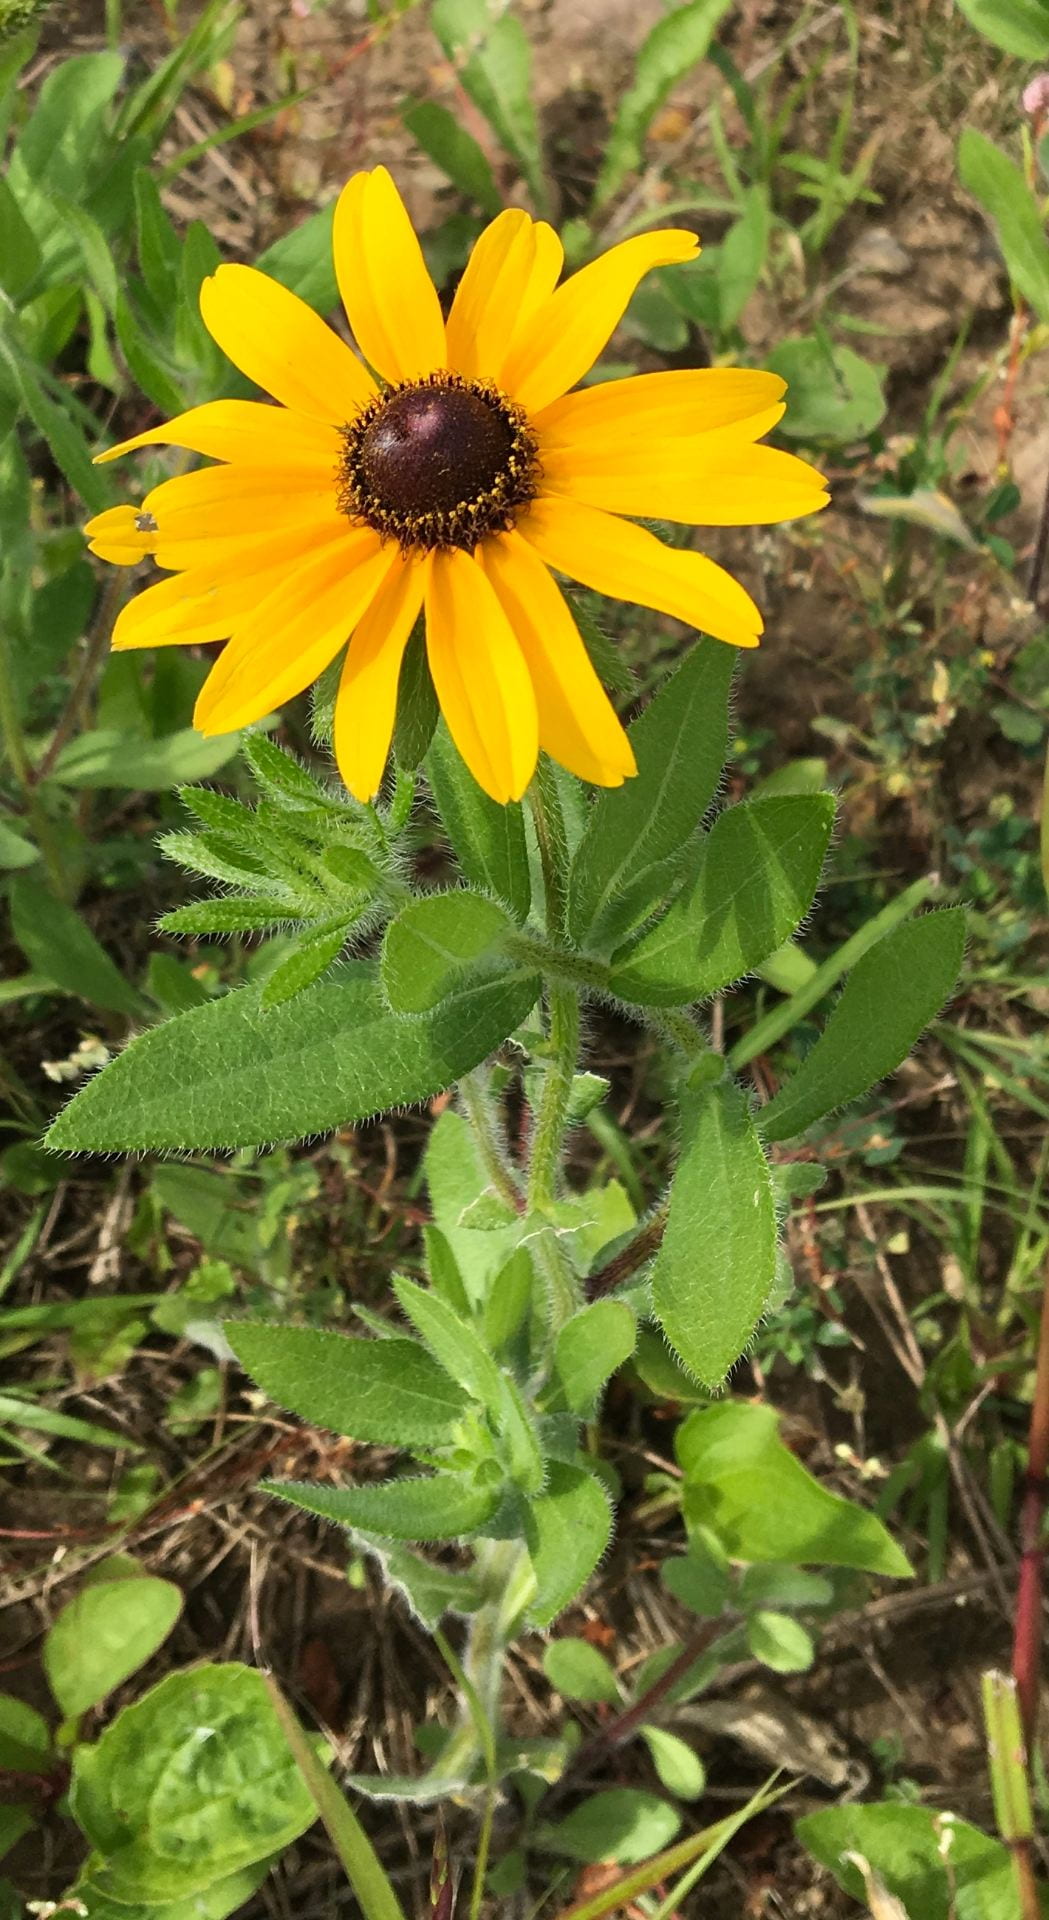
Here’s what the flowers of blackeyed susan look like. The plant has much hairier leaves than the orange coneflower.
Blackeyed susan (Rudbeckia hirta)
And here’s the partridge pea:
Partridge pea (Chamaecrista fasciculata)
But, I also spotted some wild bergamot, tall white beard tongue, asters, golden alexanders, and either echinacea or orange coneflower seedlings. (I haven’t honed my horticultural skills enough yet to distinguish the foliage of these last two wildflowers.)
Seedlings of some wildflowers could be identified in the direct-seeded plots by September 2019.
There were also plenty of weeds blooming throughout the summer, and many of them were providing pollen and nectar for pollinators and natural enemies. Here are just a few examples:
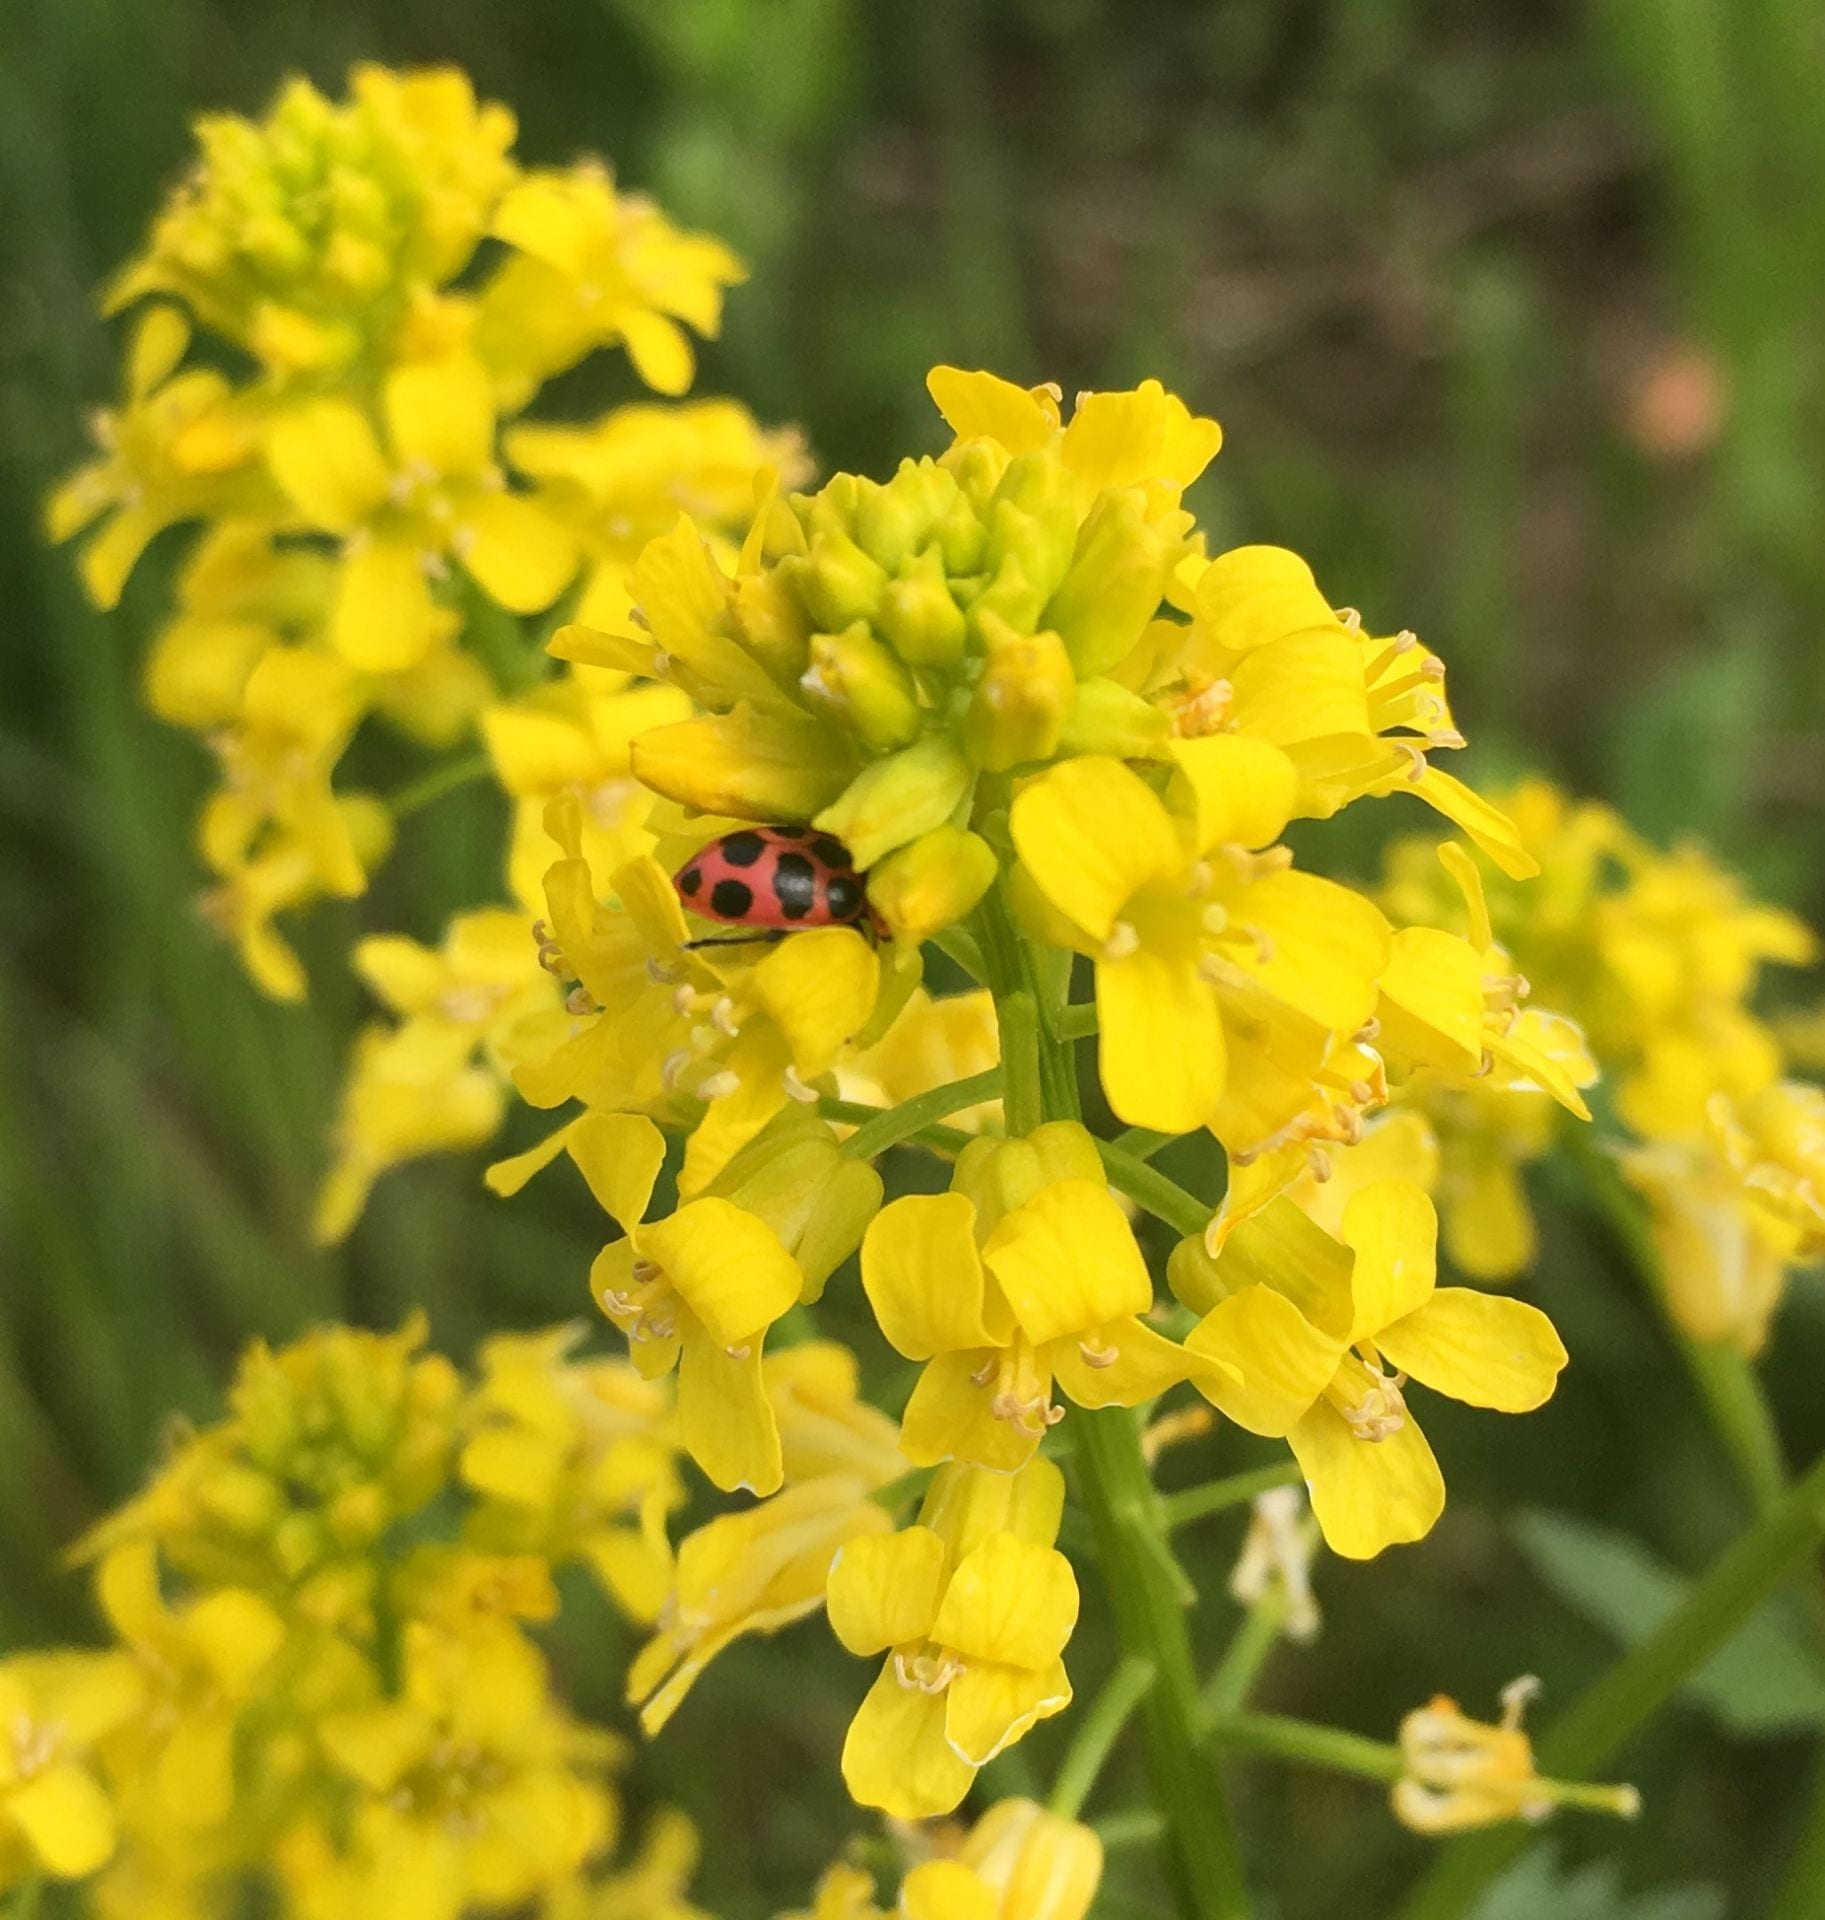
From left to right: A bee feeding on a weed in the aster family, blooming chamomile, a lady beetle on a dandelion, and a bumble bee visiting clover (that wasn’t planted).
This table summarizes when during the season different weeds were in bloom. Again, an ‘X’ indicates the weed was blooming that month.
Weed
May
June
July
Aug
Sep
Campion
X
X
X
X
X
Chamomile
X
X
X
X
X
Clover
X
X
X
X
X
Dandelion
X
X
X
X
X
Vetch
X
X
X
X
X
Viola
X
X
X
X
X
Mustard
X
X
X
X
Deadnettle
X
X
Baby blue eyes
X
Henbit
X
Asters
X
X
X
X
Buckwheat
X
X
X
X
Oxalis
X
X
X
X
Plantain
X
X
X
X
Wild lettuce
X
X
X
X
Cinquefoil
X
X
X
Indian hemp
X
X
X
Redshank
X
X
X
Chickweed
X
X
Galinsoga
X
X
Geraniums
X
Sandwort
X
Grass
X
X
Horse weed
X
X
Lambsquarters
X
X
Ragweed
X
X
Black bindweed
X
Chicory
X
There’s more!
In addition to keeping track of what bloomed from May through September, we were also still tracking costs and time spent on each plot in 2019. And of course we collected a LOT of insects. But those stories will have to wait for another post.
This post was written by Amara Dunn. All pictures were taken by her, unless otherwise credited.
This work is supported by:
Crop Protection and Pest Management -Extension Implementation Program Area grant no. 2017-70006-27142/project accession no. 1014000, from the USDA National Institute of Food and Agriculture.
New York State Department of Agriculture and Markets
A tiny wasp lays its eggs in the larvae of the invasive lily leaf beetle. Releasing these wasps in the northeastern U.S. is a form of classical biocontrol. Photo credit: Dan Gilrein
Last week, some colleagues told me about a cool online database that will help you learn more about how classical biocontrol is helping us fight invasive insects.
Classical biocontrol means introducing a natural enemy of a pest to help manage that pest. The natural enemy establishes a population where you have released it (and maybe even spreads), so that you don’t need to repeatedly release more natural enemies. It is a strategy that can be especially useful against invasive pests.
One thing that makes a pest invasive is the fact that when it arrives in a new place (for example, on a new continent), native organisms don’t eat it because they have not evolved with this new pest as a food source. Sometimes scientists can search the geographic area from which the invasive pest came and find a natural enemy of that pest. Many tests are done over a long period of time in order to assess potential unintended consequences of introducing this natural enemy to a new place. For example, scientists determine whether the new natural enemy is likely to also impact populations of native organisms (especially those that are not pests). Only after extensive study will this new natural enemy be released to help reduce populations of the invasive pest.
When done carefully, classical biocontrol can be a lower-risk solution to managing invasive pests compared to chemical pest management. It is also a long-term solution. The new natural enemy reproduces in its new geographic range and brings the invasive pest population into balance. The invasive species won’t be eliminated, but it will likely do less damage.
A new database from the University of Massachusetts lets you learn more about insects that have been introduced to North America to control invasive insect pests as classical biological control agents. You can Search the Catalog by the scientific name of the target pest, the scientific name of the natural enemy, information about where and when the natural enemy was first released, or other criteria.
The invasive hemlock woolly adelgid on a hemlock branch. Several different classical biocontrol agents have been released in the U.S. to manage this invasive pest. Photo credit: Amara Dunn
You will need to know the scientific name of the pest or natural enemy you are interested in, but a quick Google search can help you with that. For example, Adelges tsugae is the hemlock woolly adelgid, which you may have heard about. If not, you can learn more here. Laricobius nigrinus was released to help manage hemlock woolly adelgid. Other examples include Agrilus planipennis (emerald ash borer) and Lilioceris lilii (lily leaf beetle). NYS IPM is involved in a project to use classical biocontrol to manage this last pest in NY.
As the days start to get shorter and cooler, you might find yourself spending more time indoors. And if that’s the case, why not spend some time learning more about how classical biocontrol is helping to manage pests in the landscapes around you?
You’ve read about all the different methods we are testing for establishing native wildflowers and grasses as habitat for pollinators and natural enemies of pests. You know we learned a lot in our first season. You know we’ve been using several different techniques to collect insects in these plots. And you saw a pictorial summary of our sampling and some of the insects we’ve caught in Summer 2019.
Wouldn’t you like to come see these plots in person, hear about our preliminary results, and learn more about attracting pollinators and other beneficial insects to your farm or yard?
If you live reasonably close to Geneva, NY, you can! We are having two field events this fall:
On Wednesday, September 25, 2019, stop by our field between 3:30 and 6:30 PM for an Open House. There will be no program, just stop by and talk with Betsy Lamb, Brian Eshenaur, and I. All the details can be found here, including the address and a map to help you find our field.
On Thursday, September 26, 2019, we have a Twilight Field Day from 5 to 7 PM. This meeting has been planned with growers in mind (especially Christmas tree and nursery growers). DEC credits (1.5) will be available for categories 1a, 3a, 24, 25, and 10, and dinner is included. The cost for this meeting is $15, and we need you to register so we know how much food to provide. All the details (including the registration link) can be found here.
If you’re coming to either of these events, we’ll have lots of signs up to help you find our field. Look for the following image:
This work is supported by:
Crop Protection and Pest Management -Extension Implementation Program Area grant no. 2017-70006-27142/project accession no. 1014000, from the USDA National Institute of Food and Agriculture.
New York State Department of Agriculture and Markets
Summer isn’t over yet for farmers and extension staff doing field experiments!
Labor Day weekend may be viewed by some as the end of summer, but farmers know that the summer growing (and harvesting!) season is far from over. Similarly, the field projects I’m involved with this summer (read more here and here) are still running. Over the fall and winter I’ll be analyzing data and sharing results (on this blog, and at winter meetings). In the meantime, here’s a pictorial summary of my summer projects (so far).
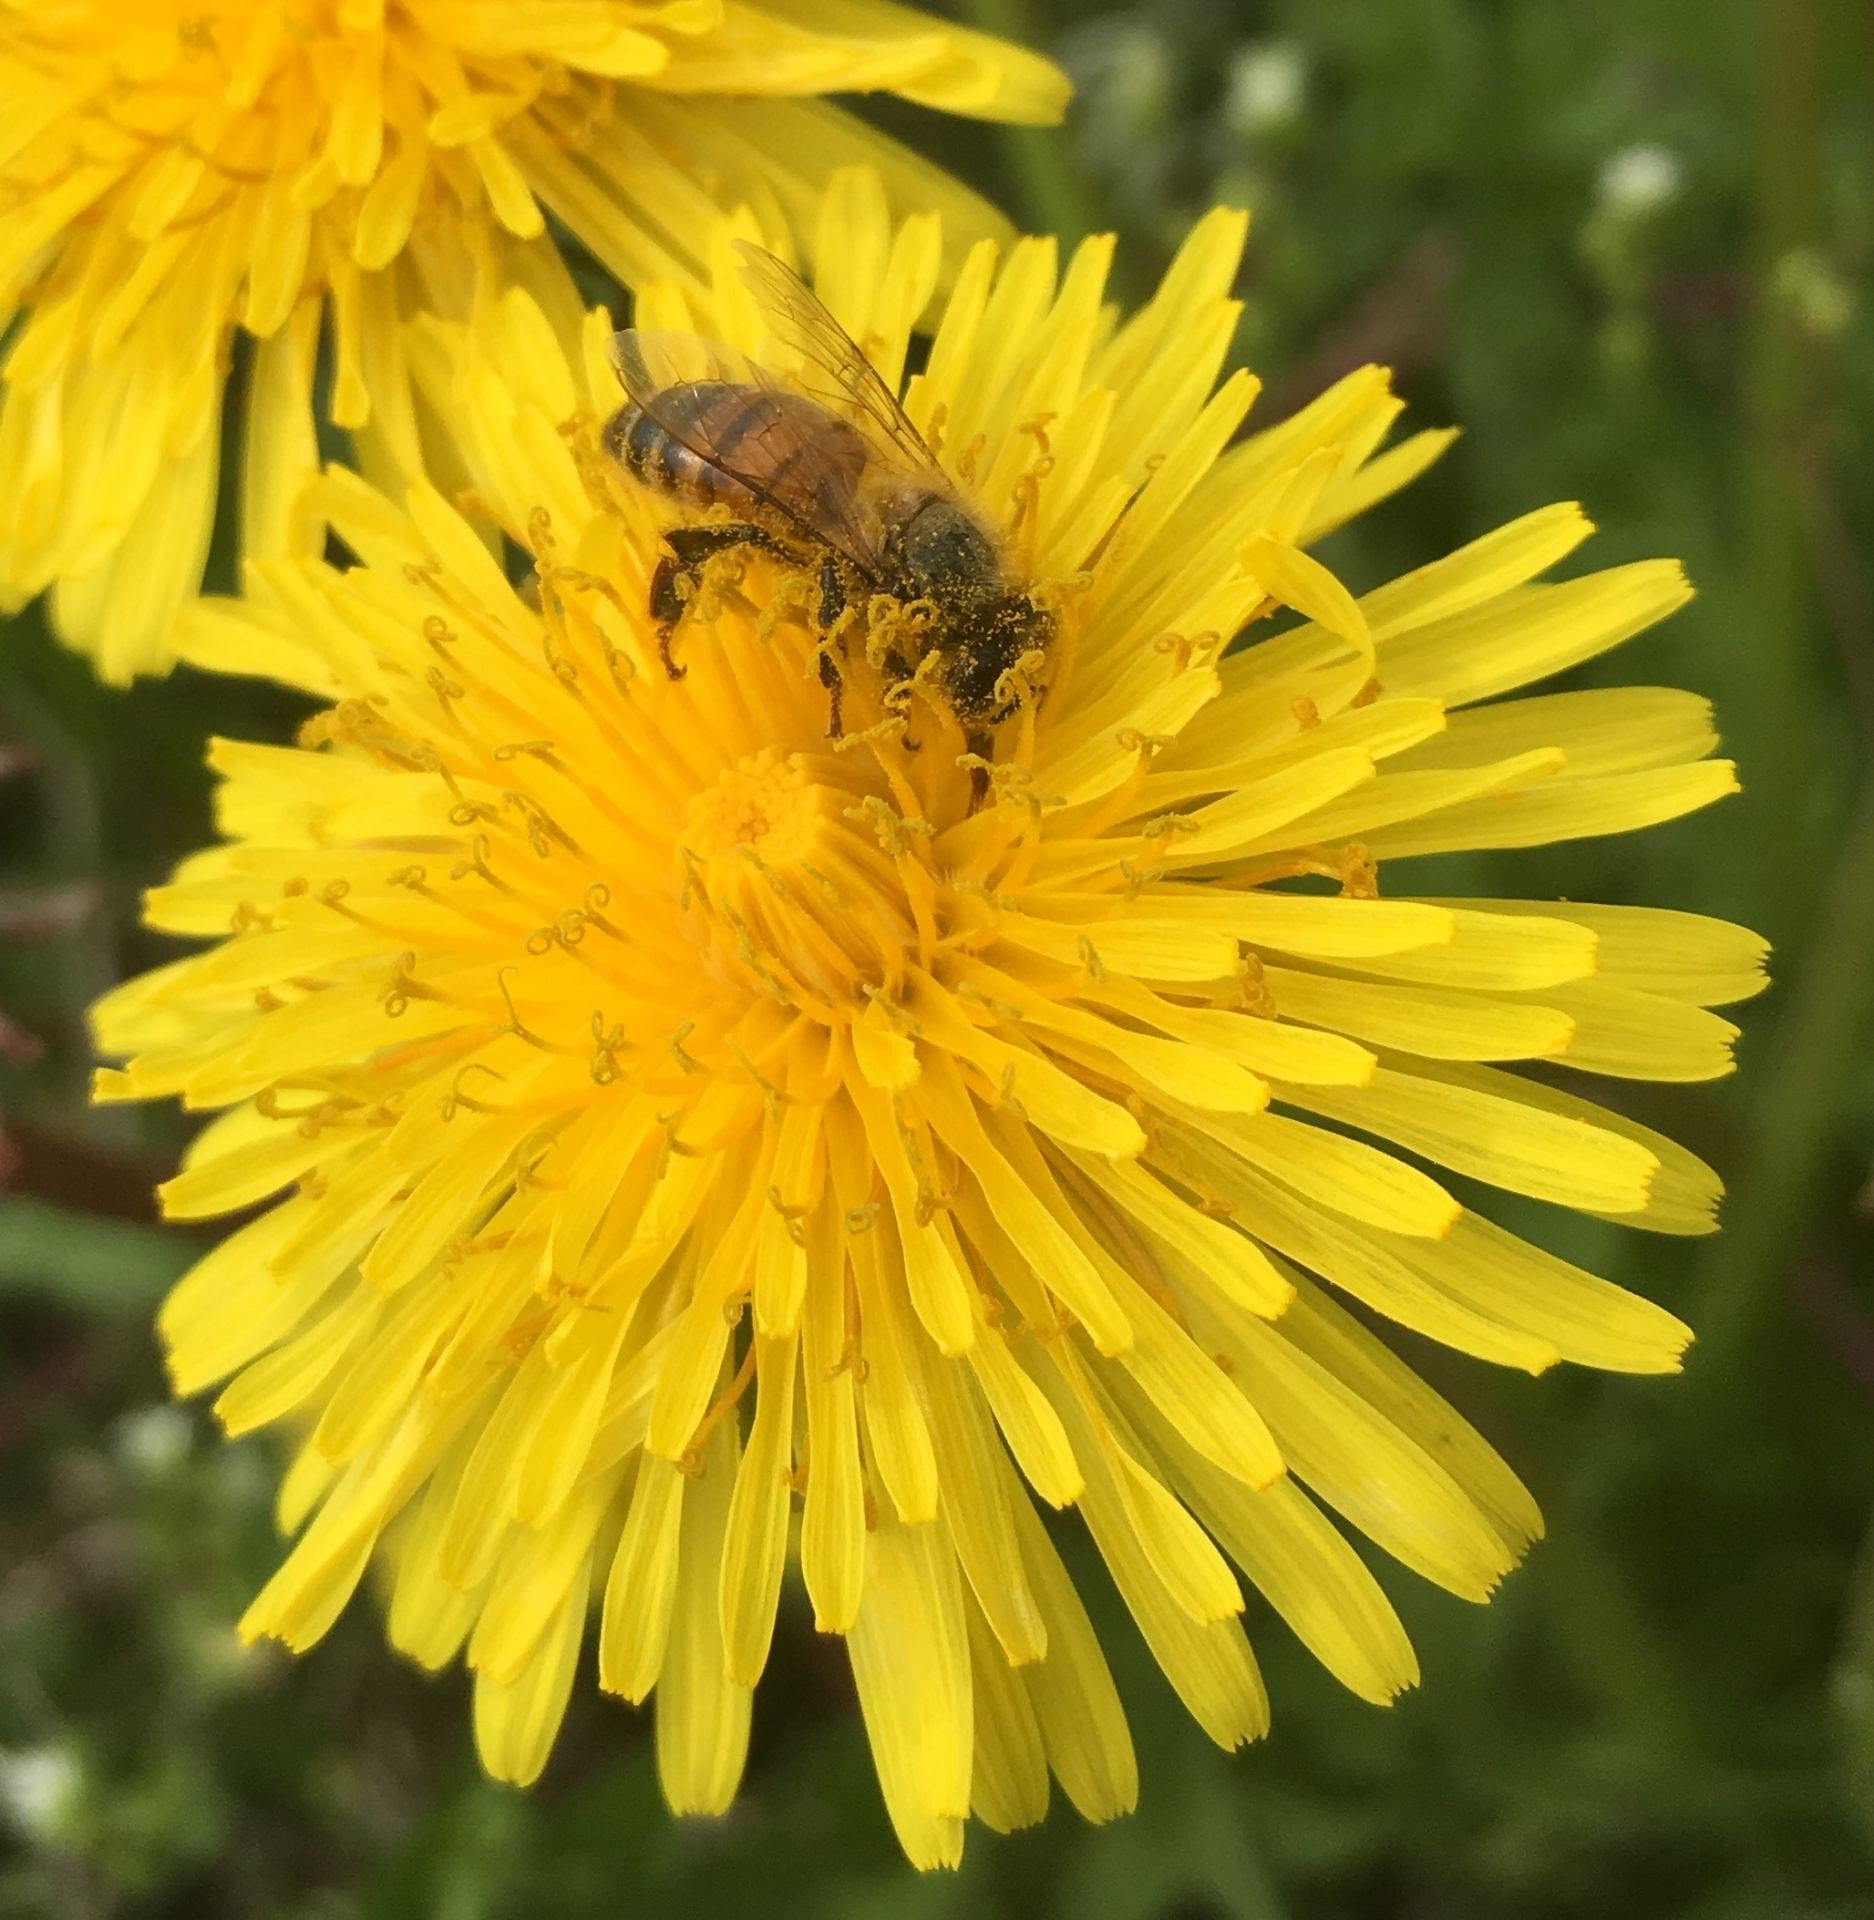
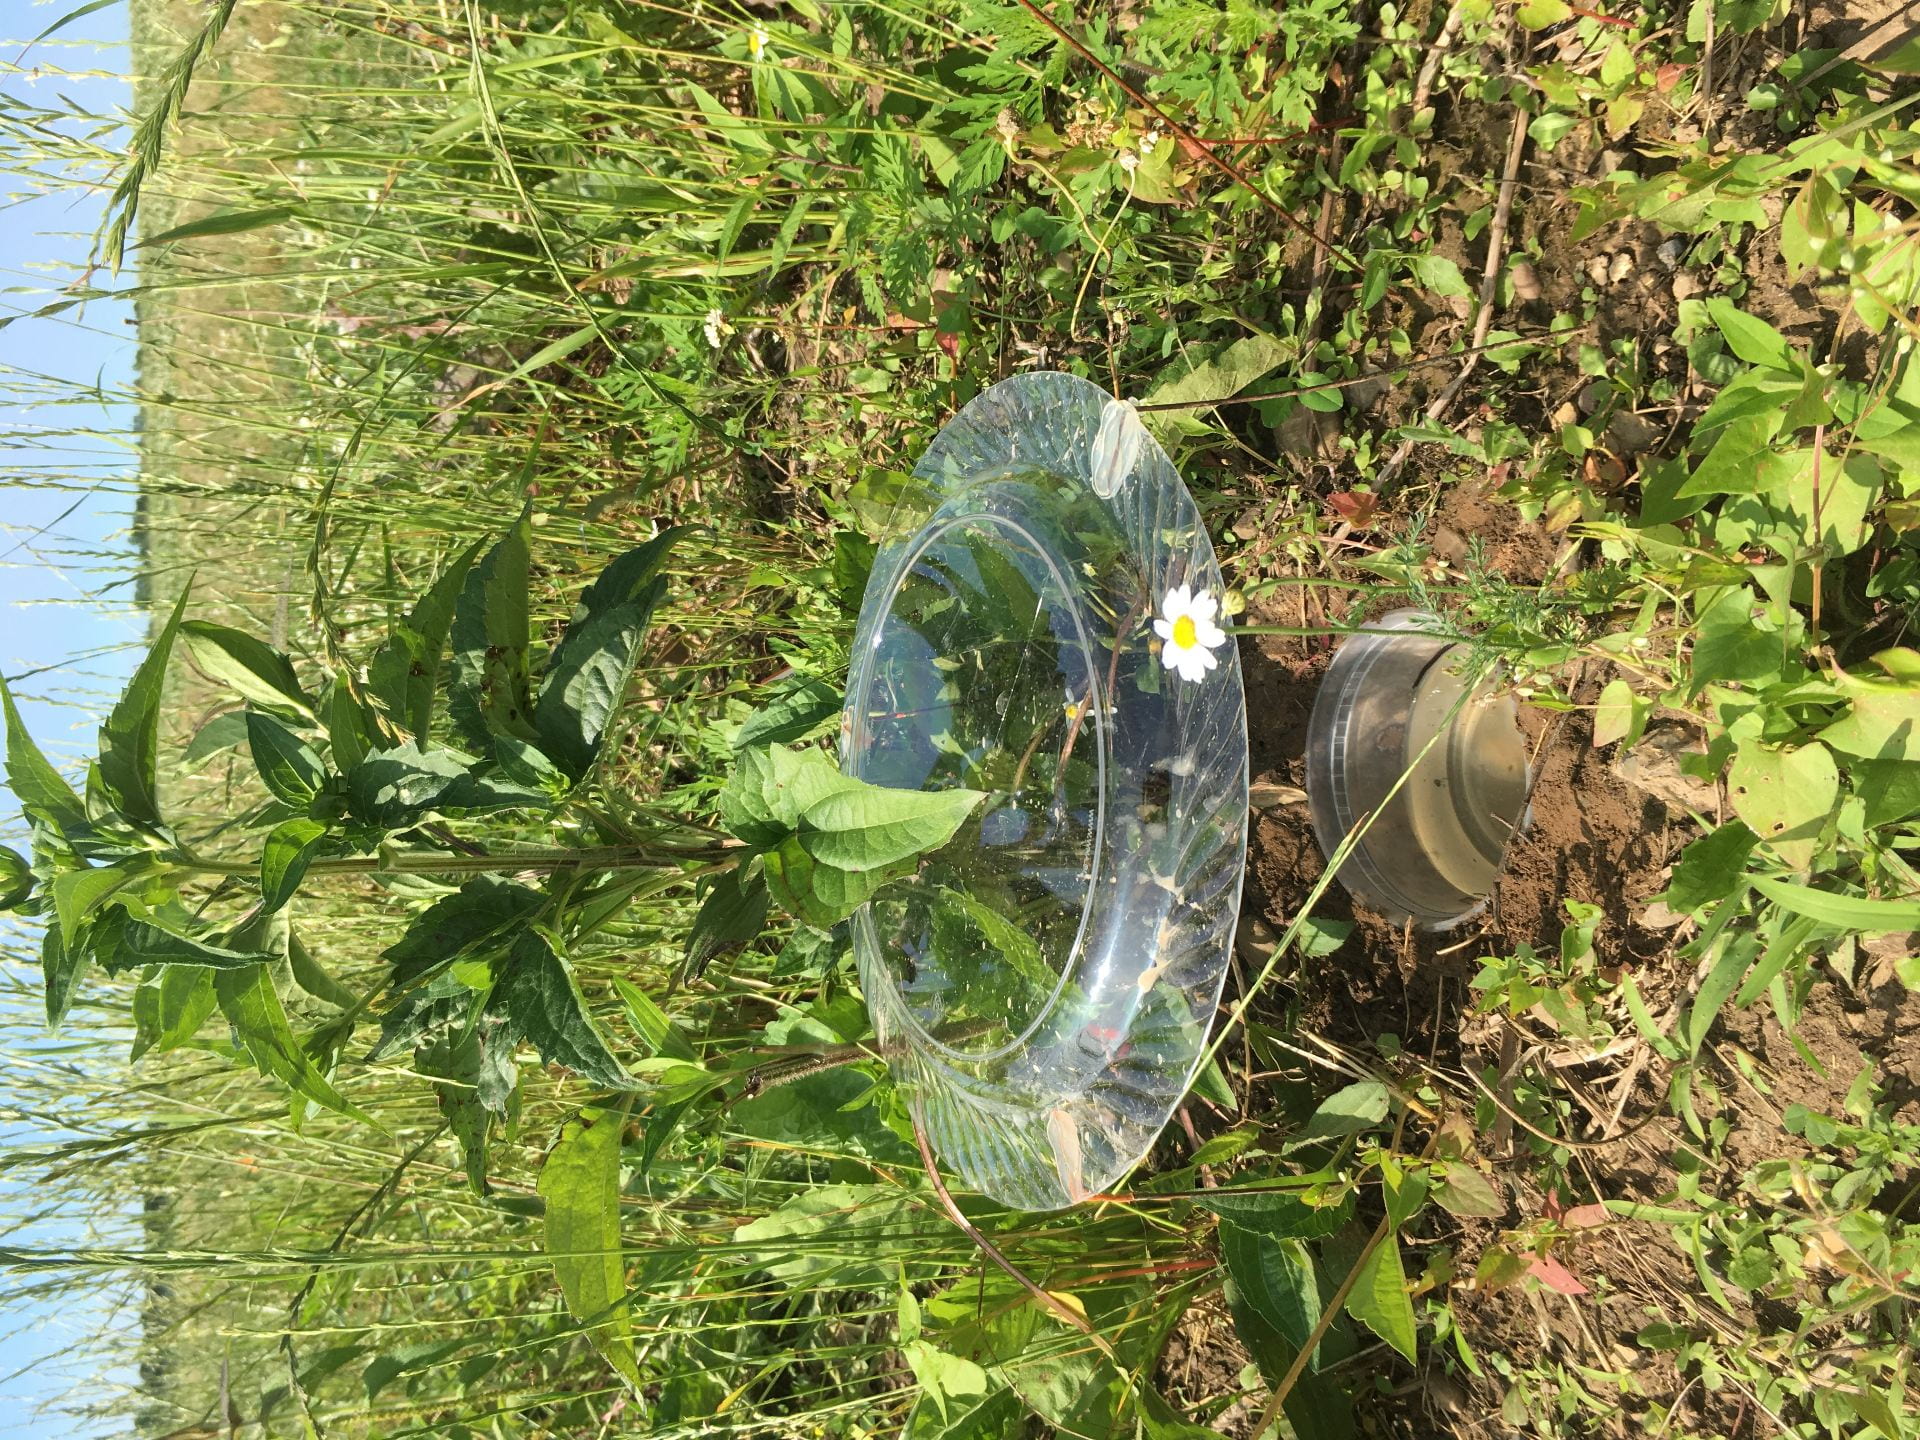
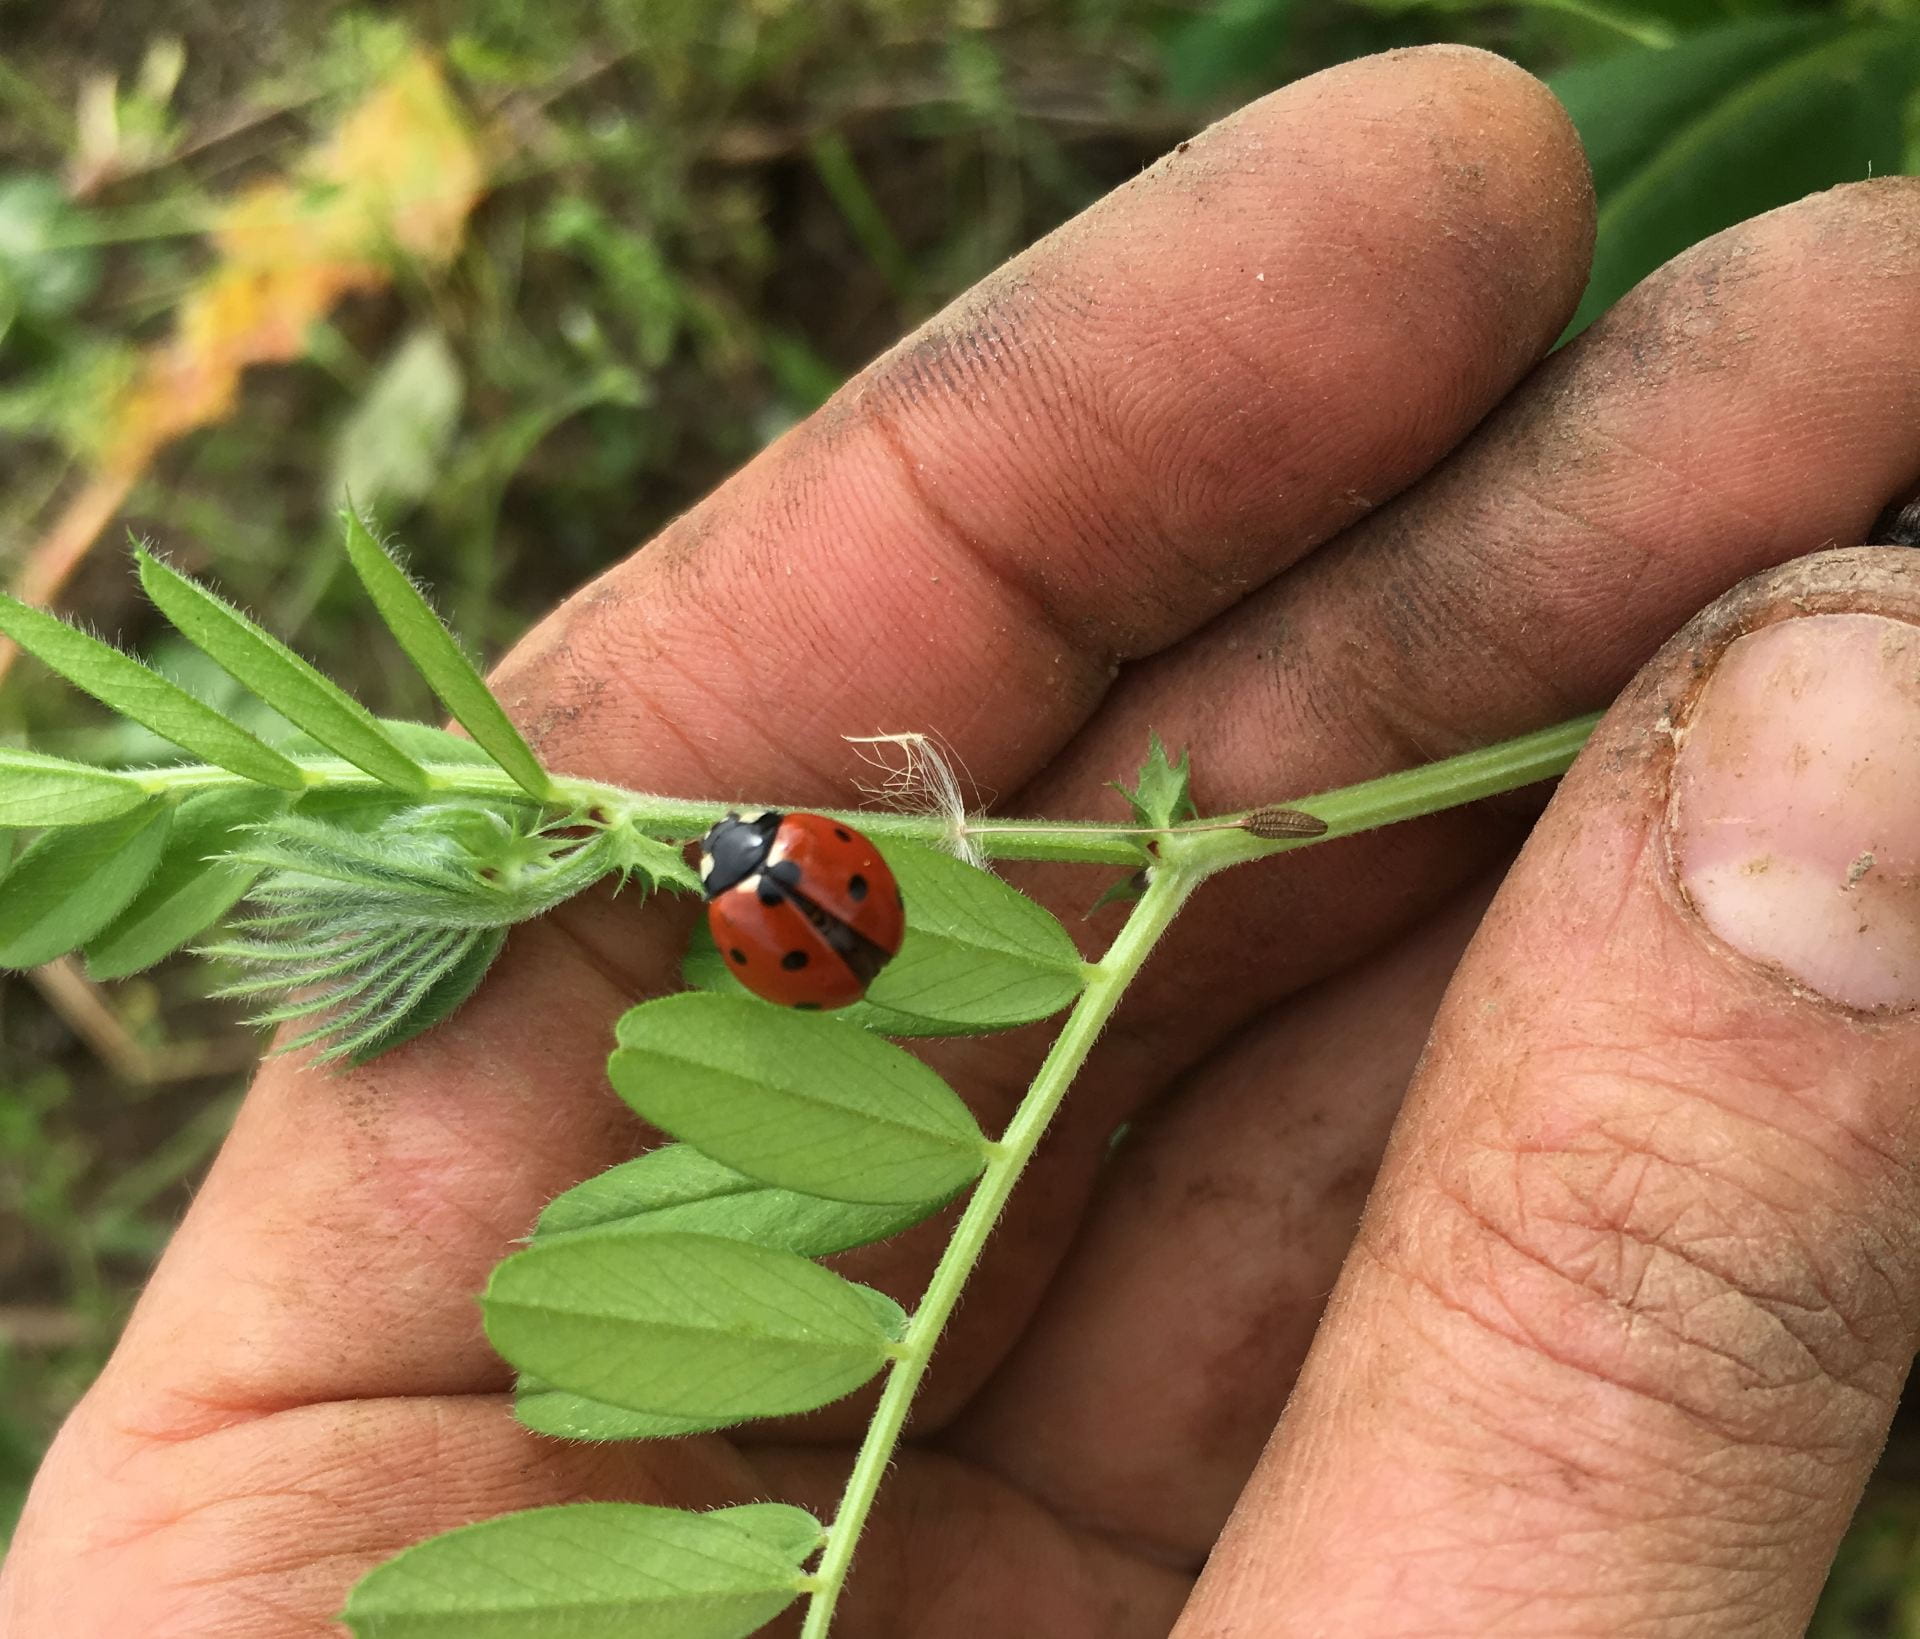
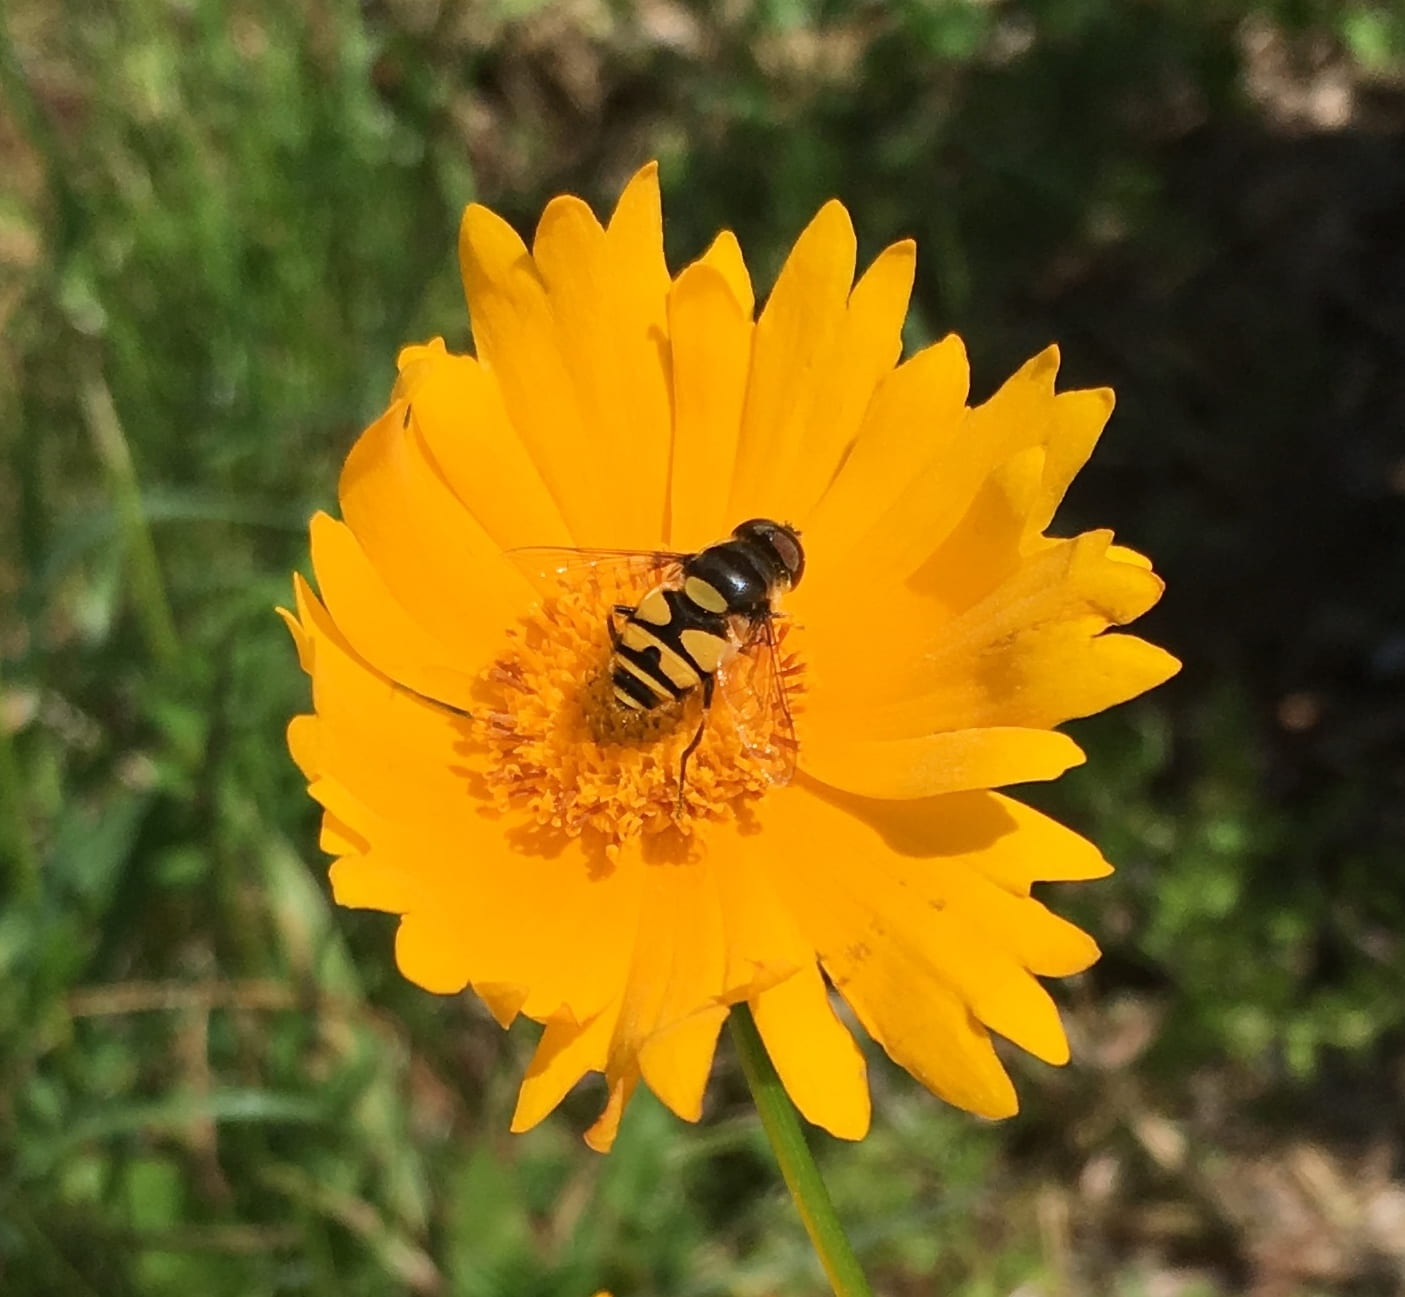
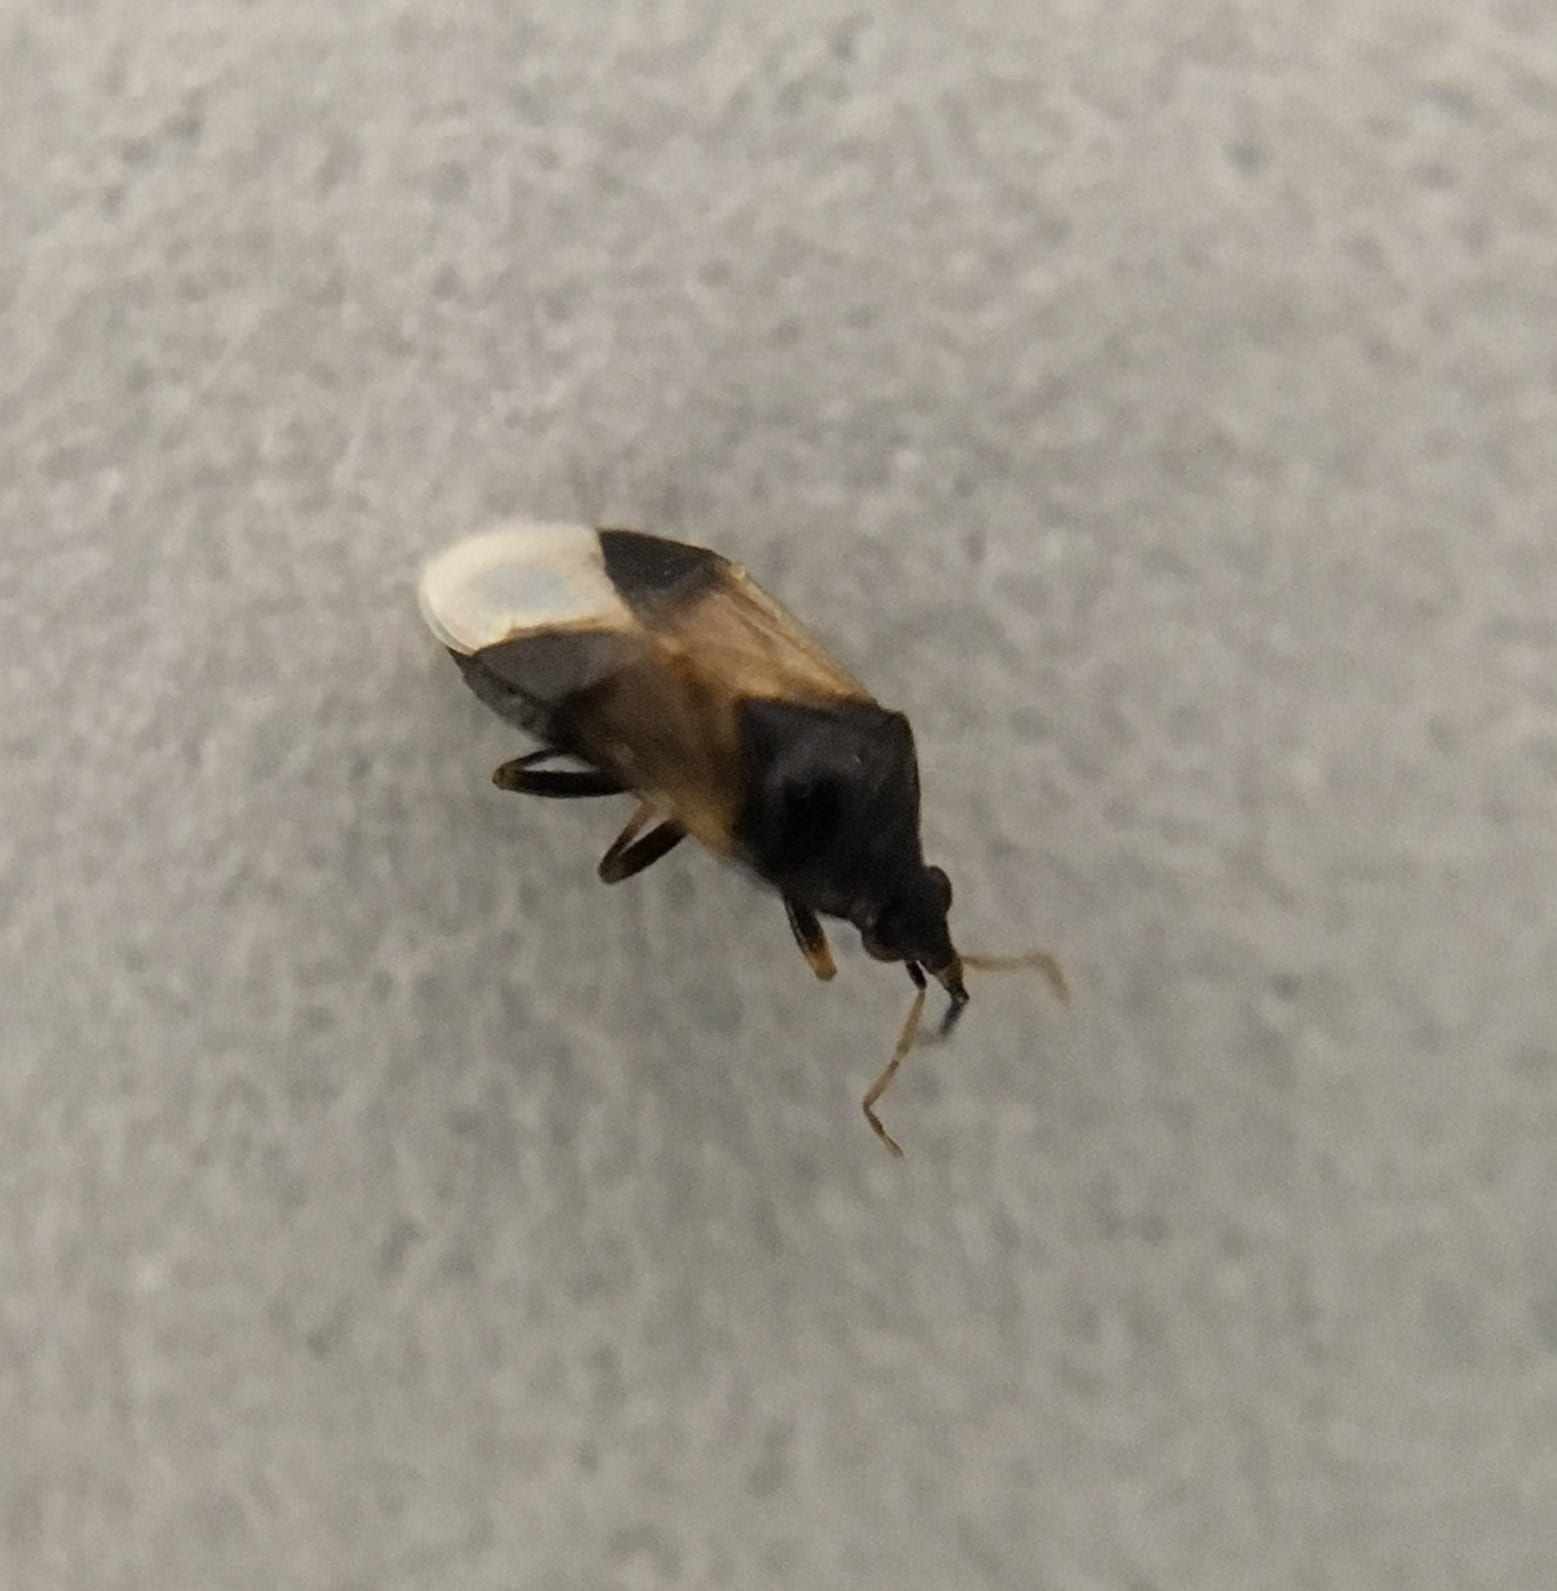
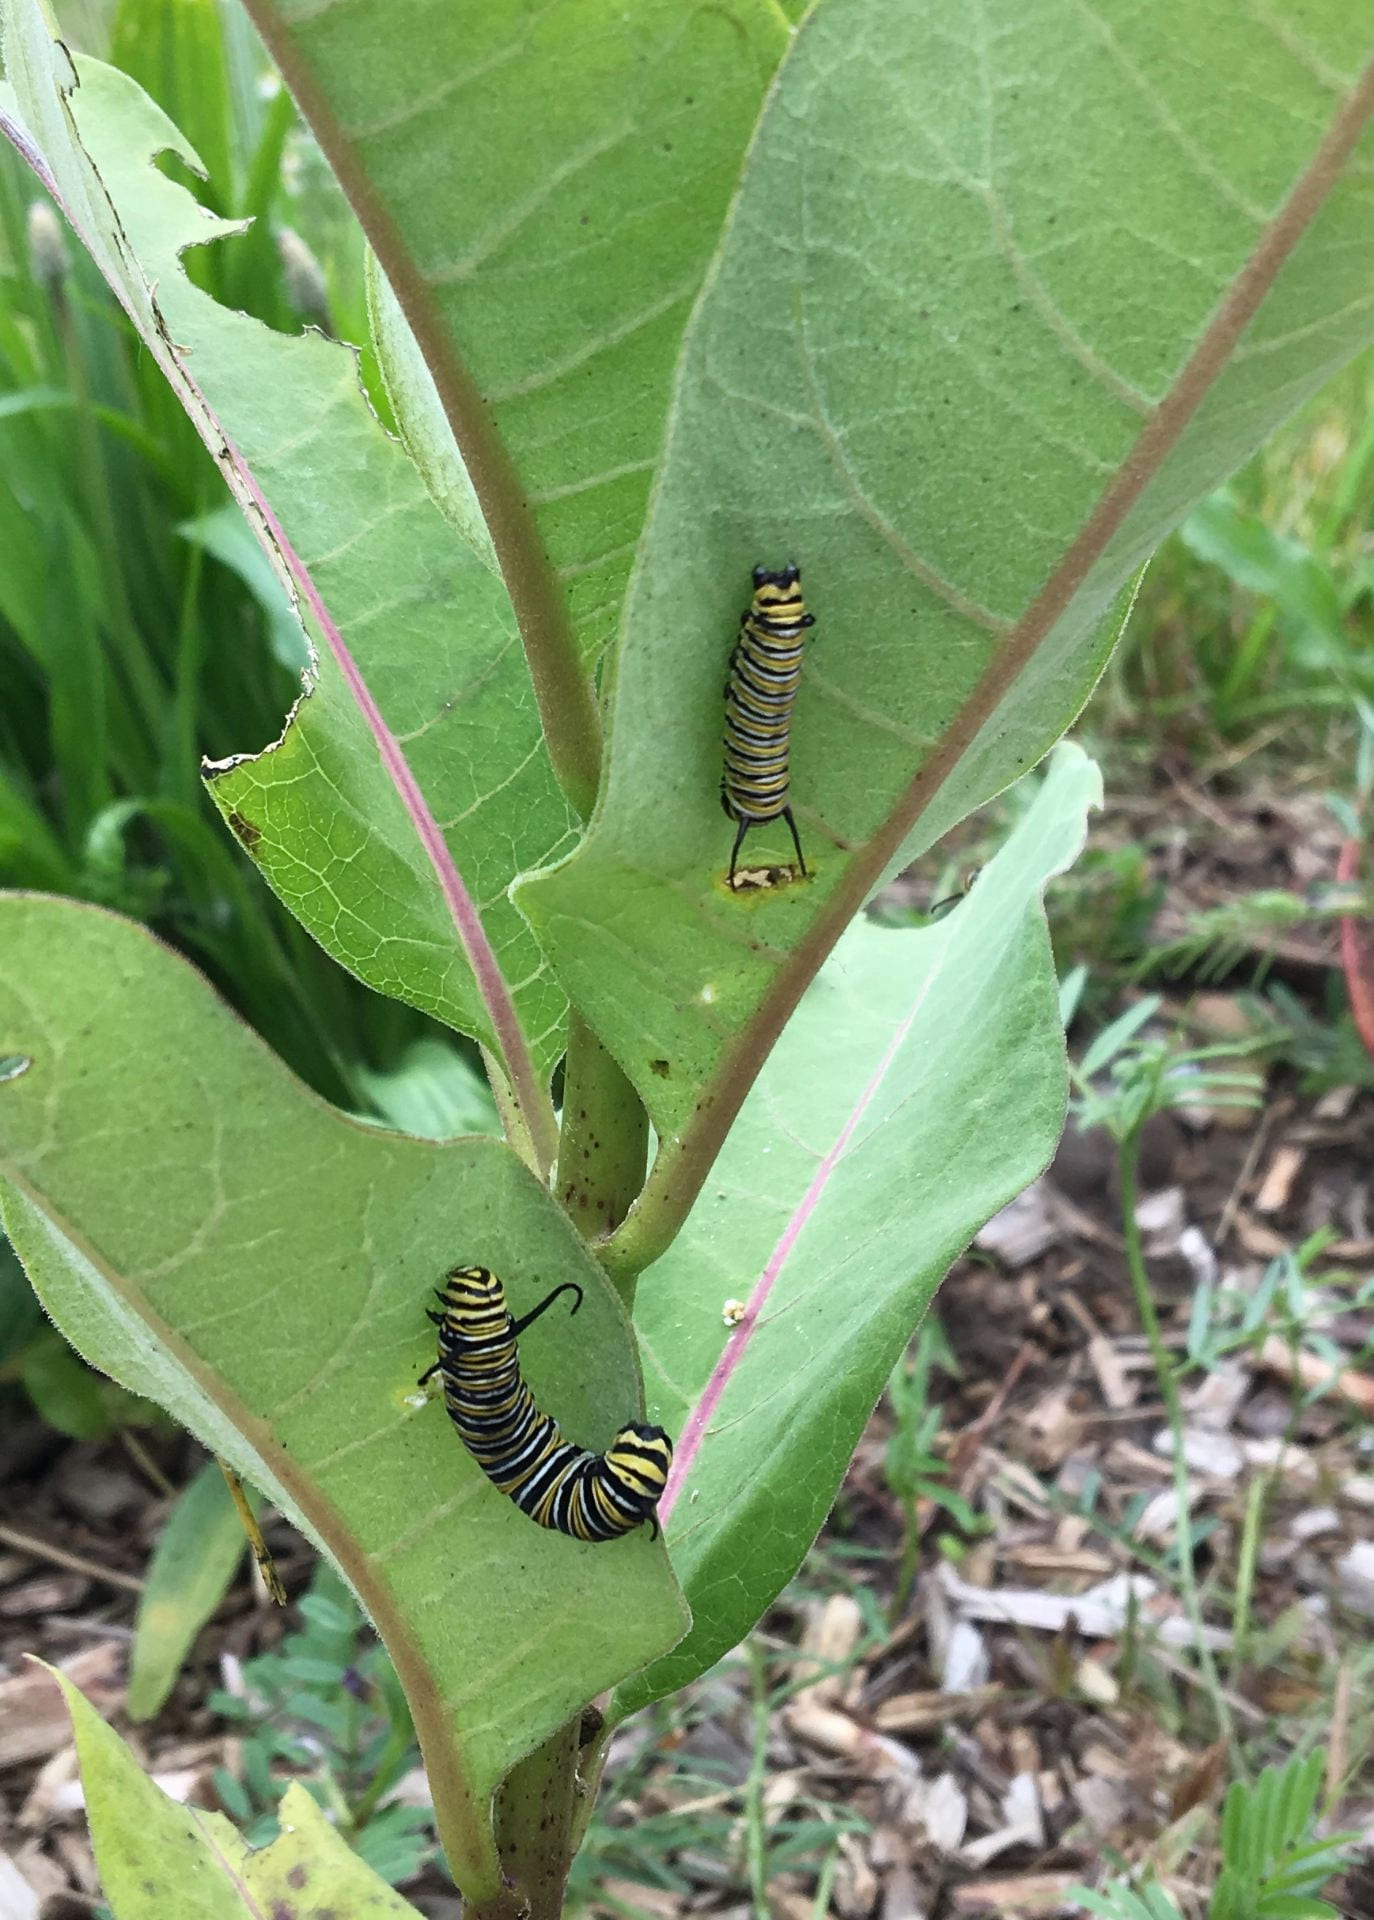
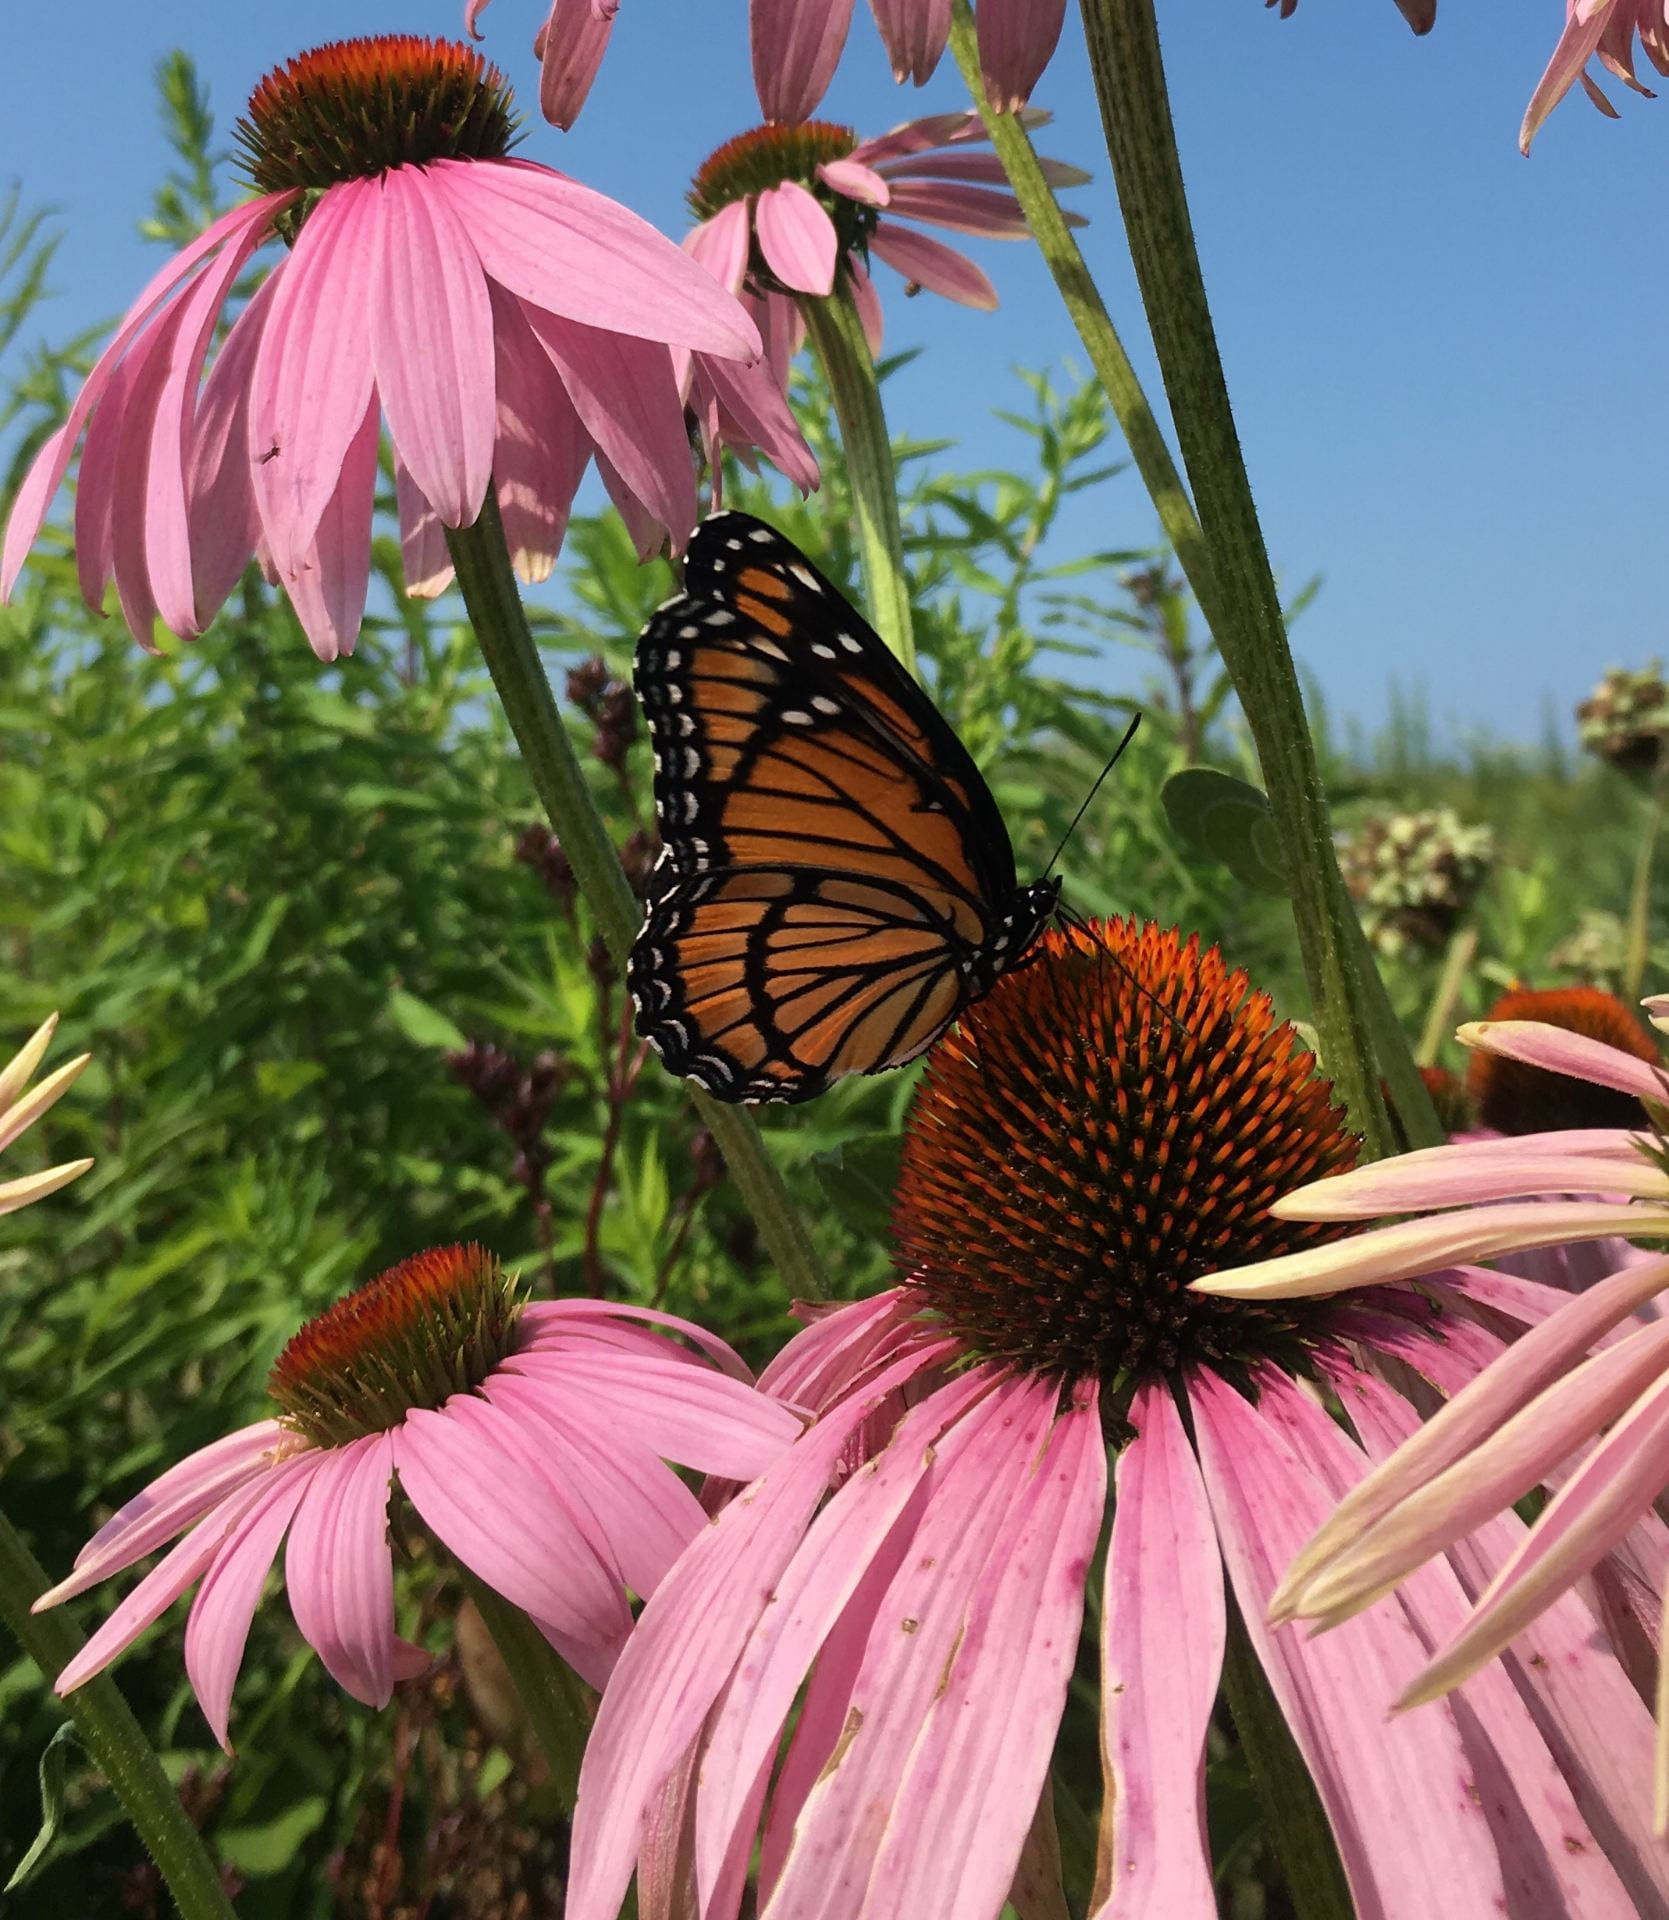
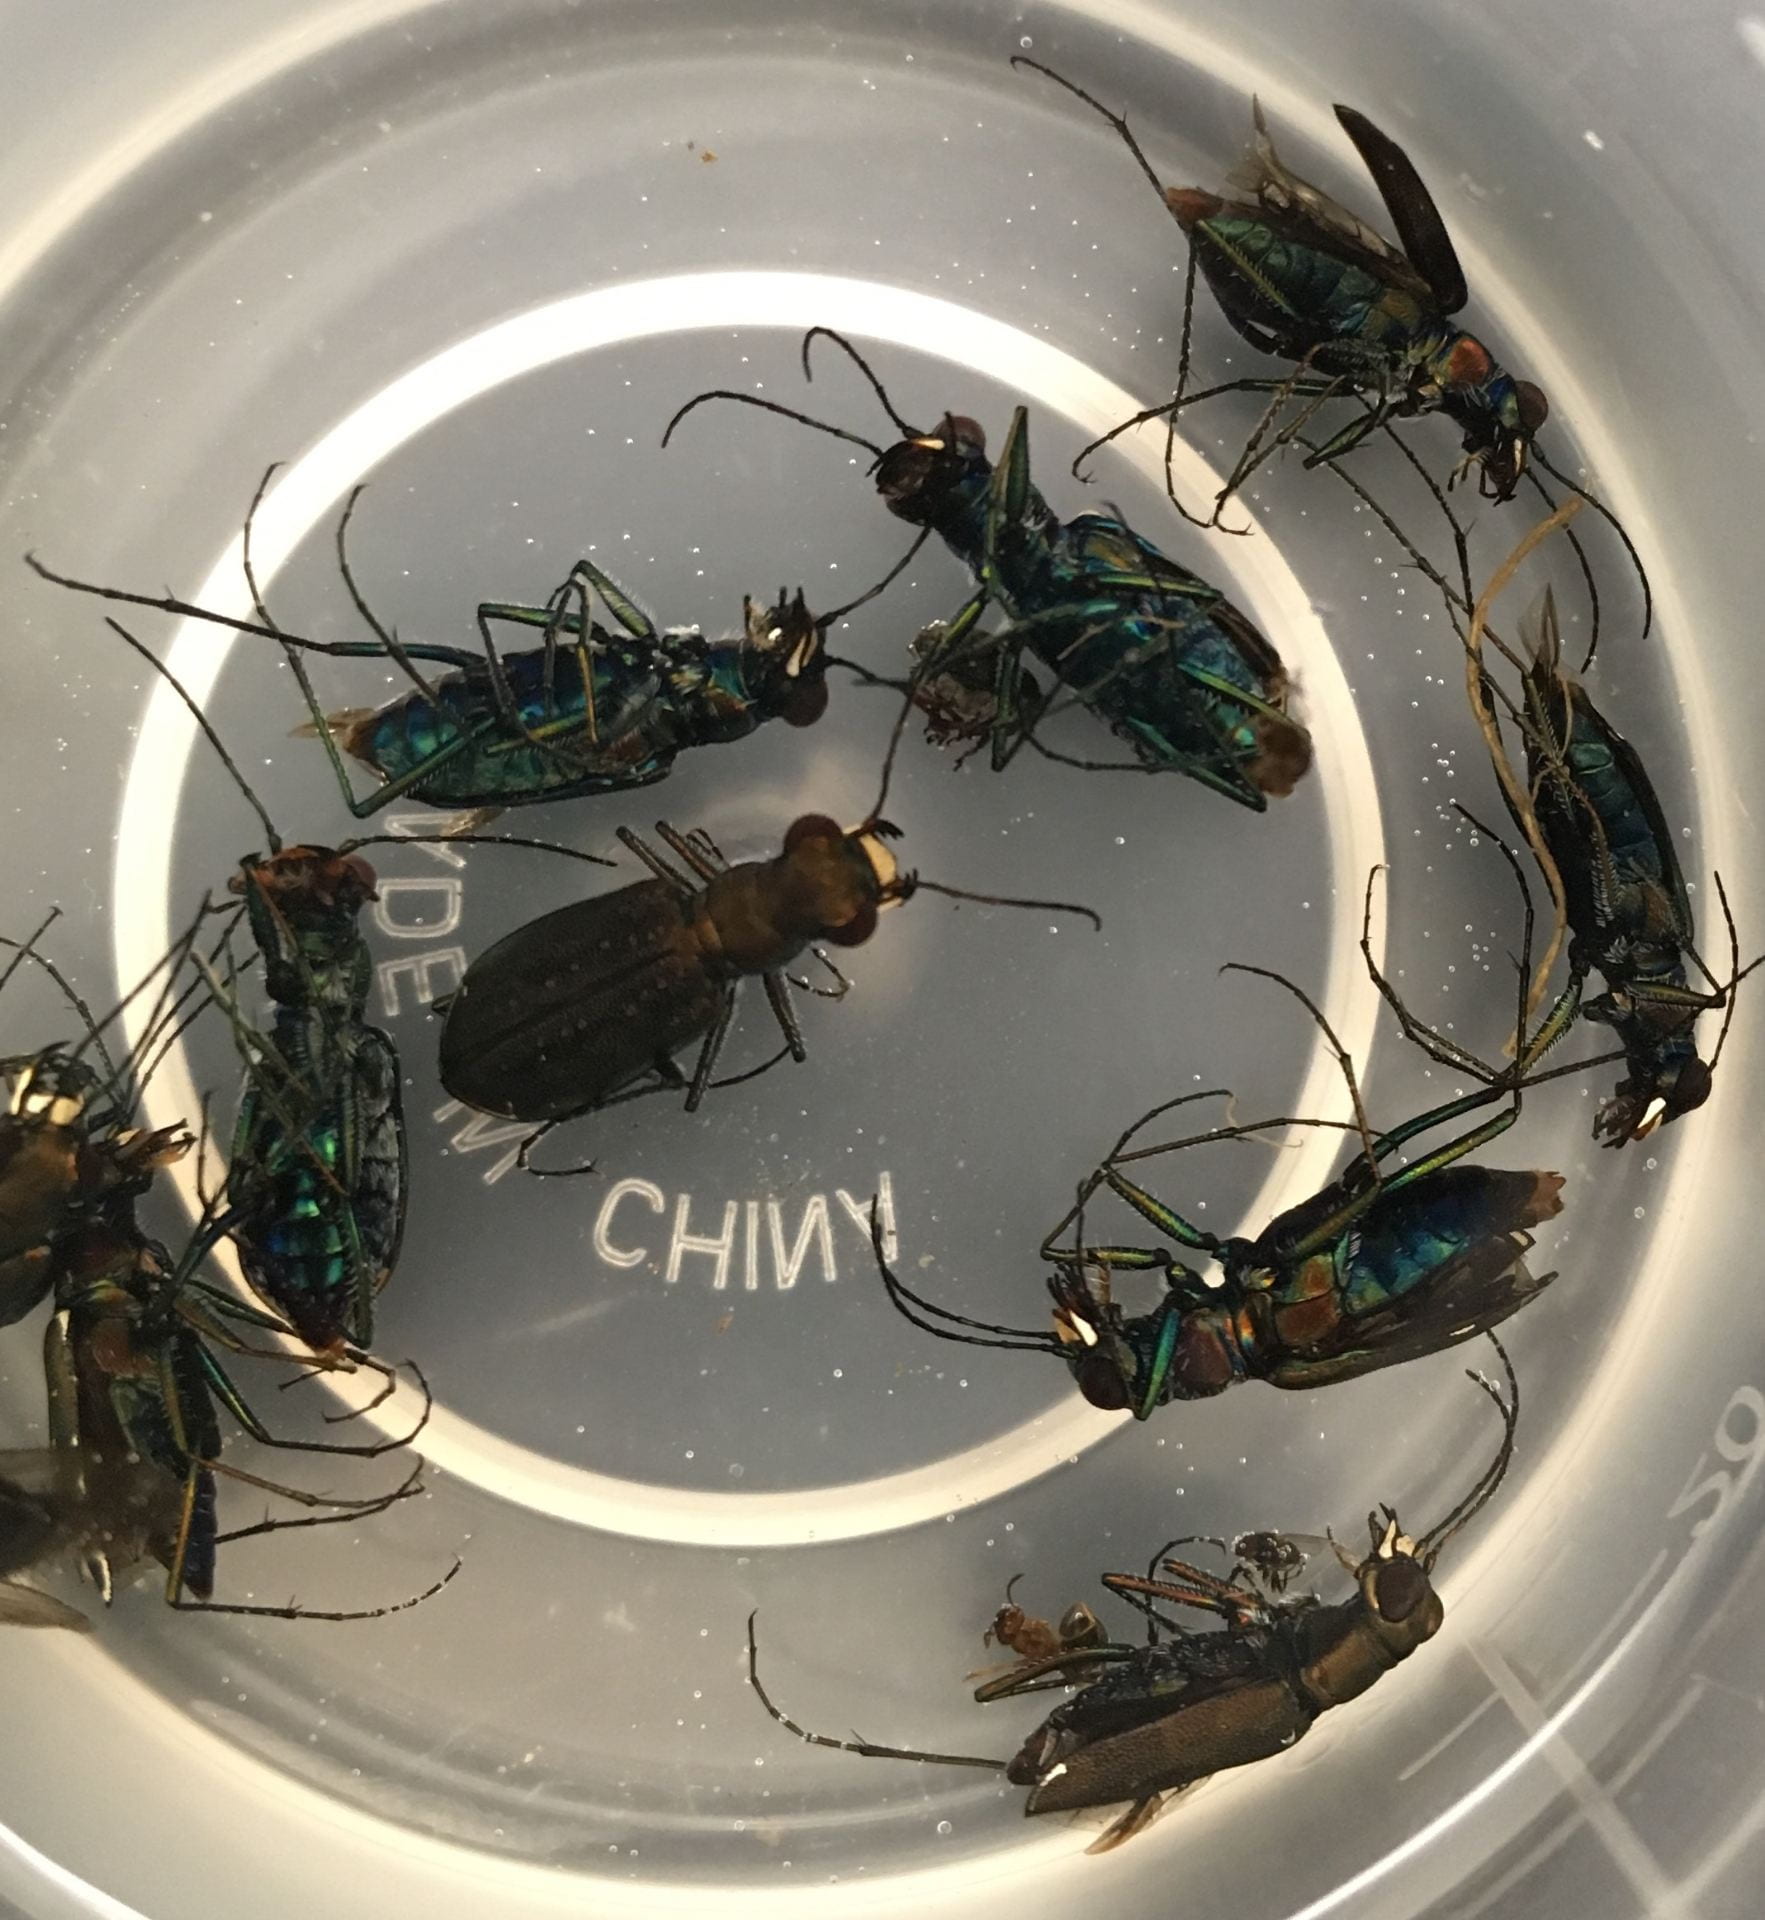
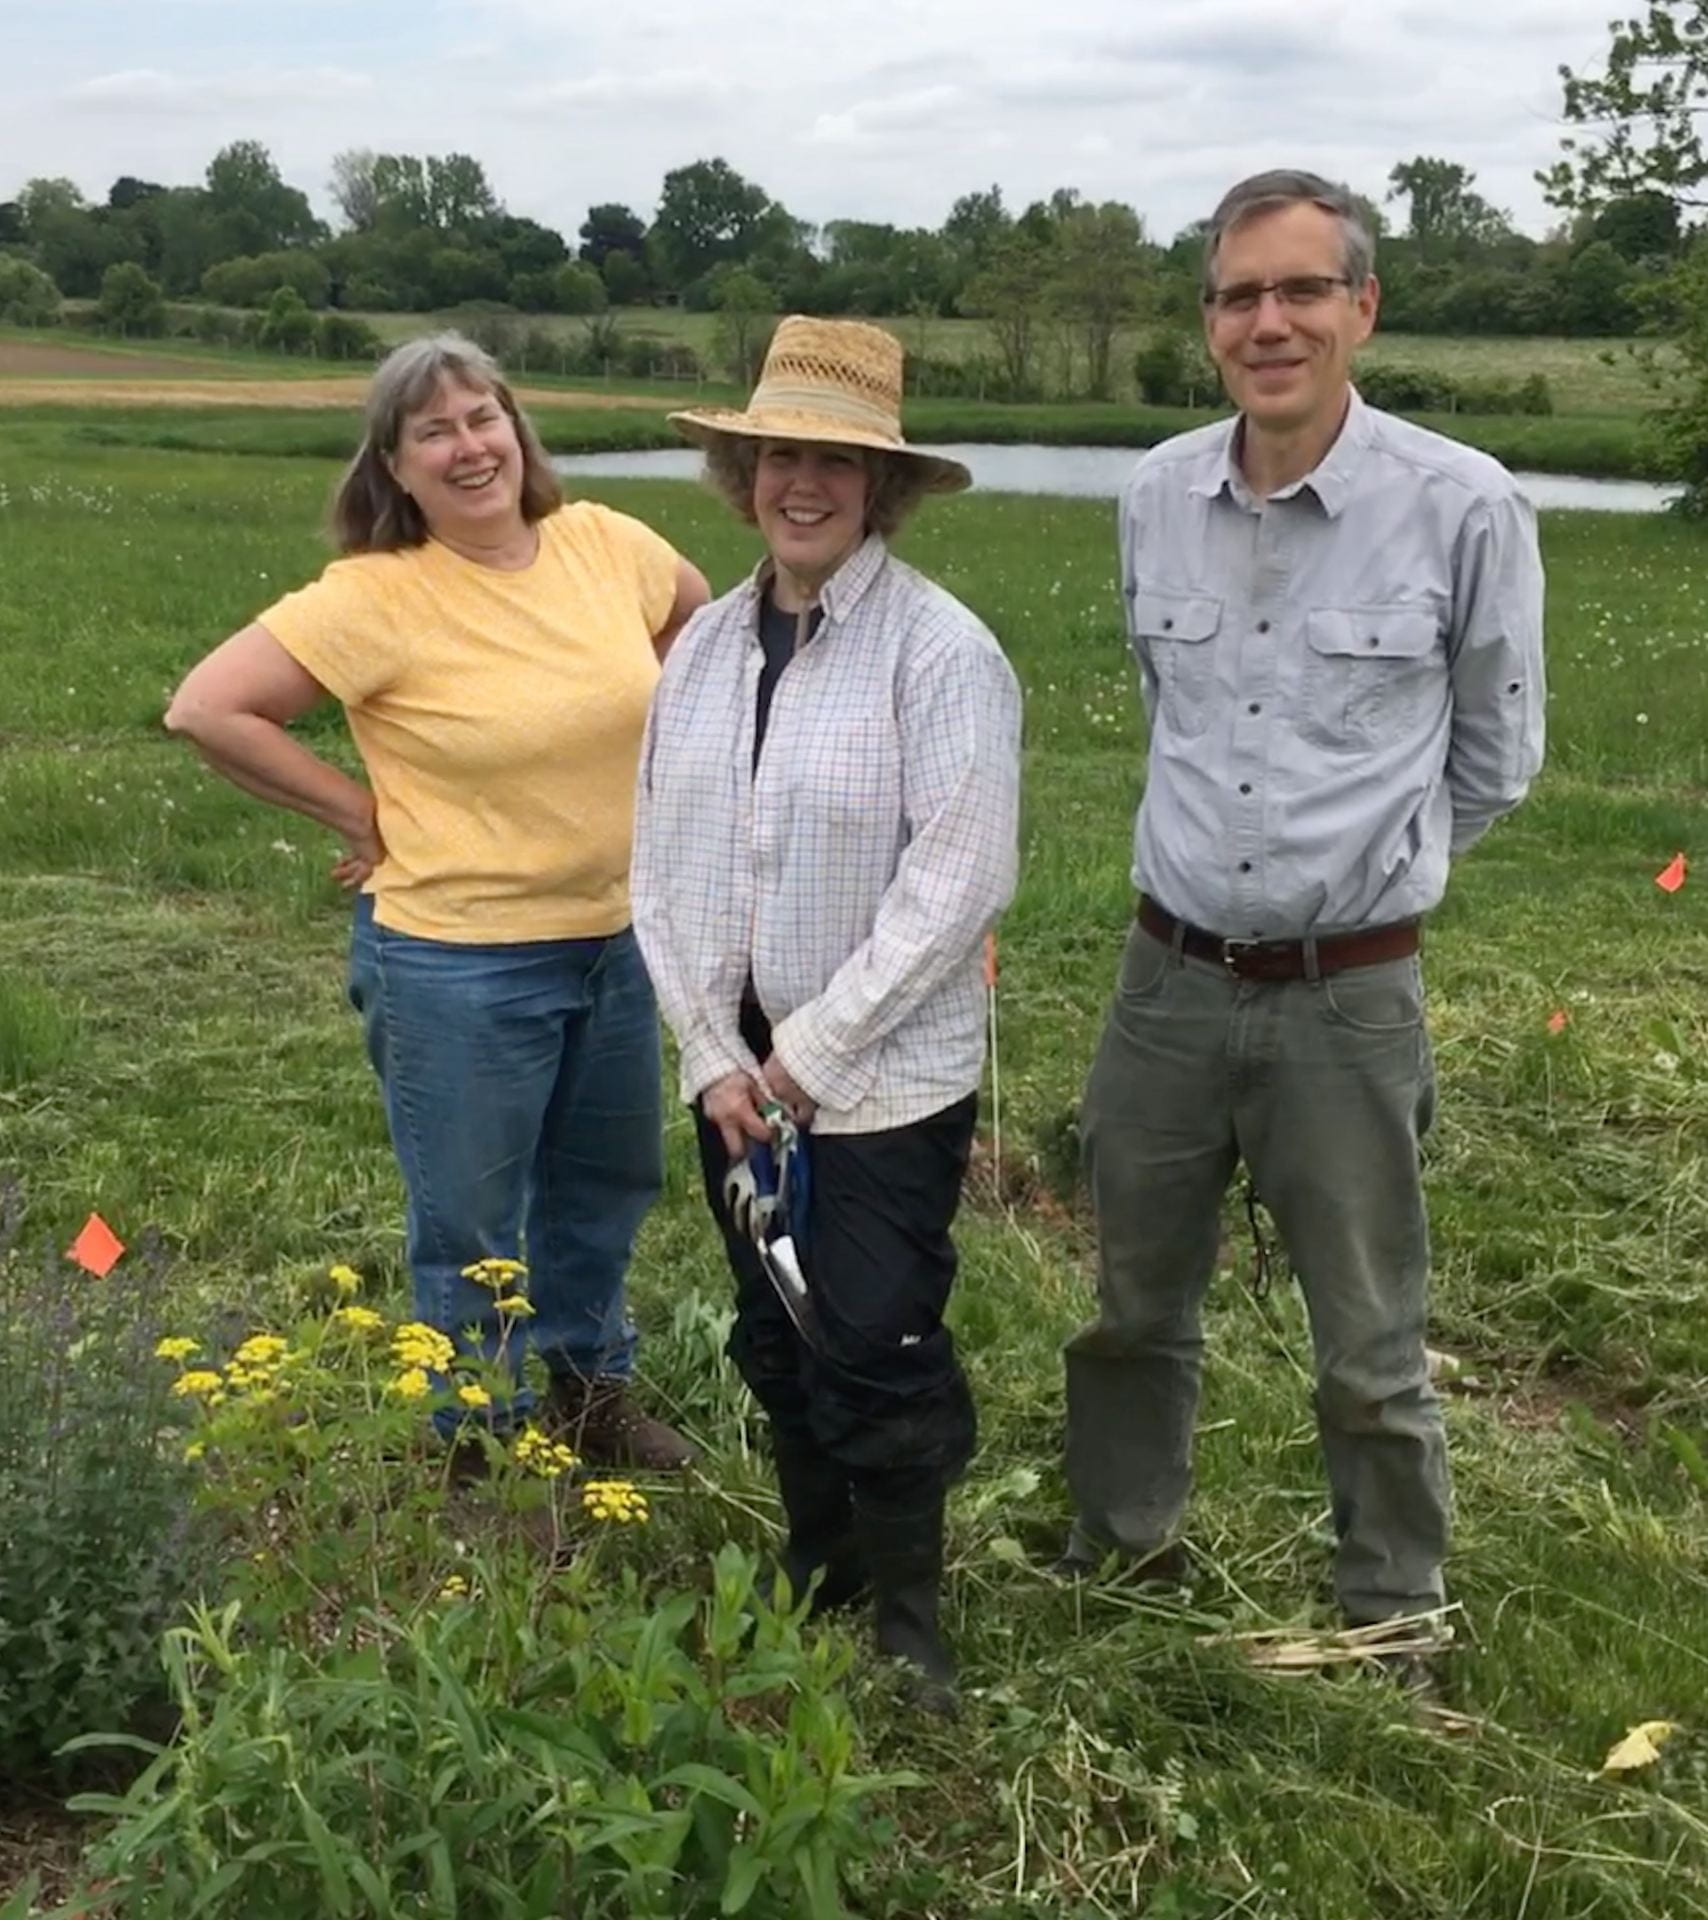
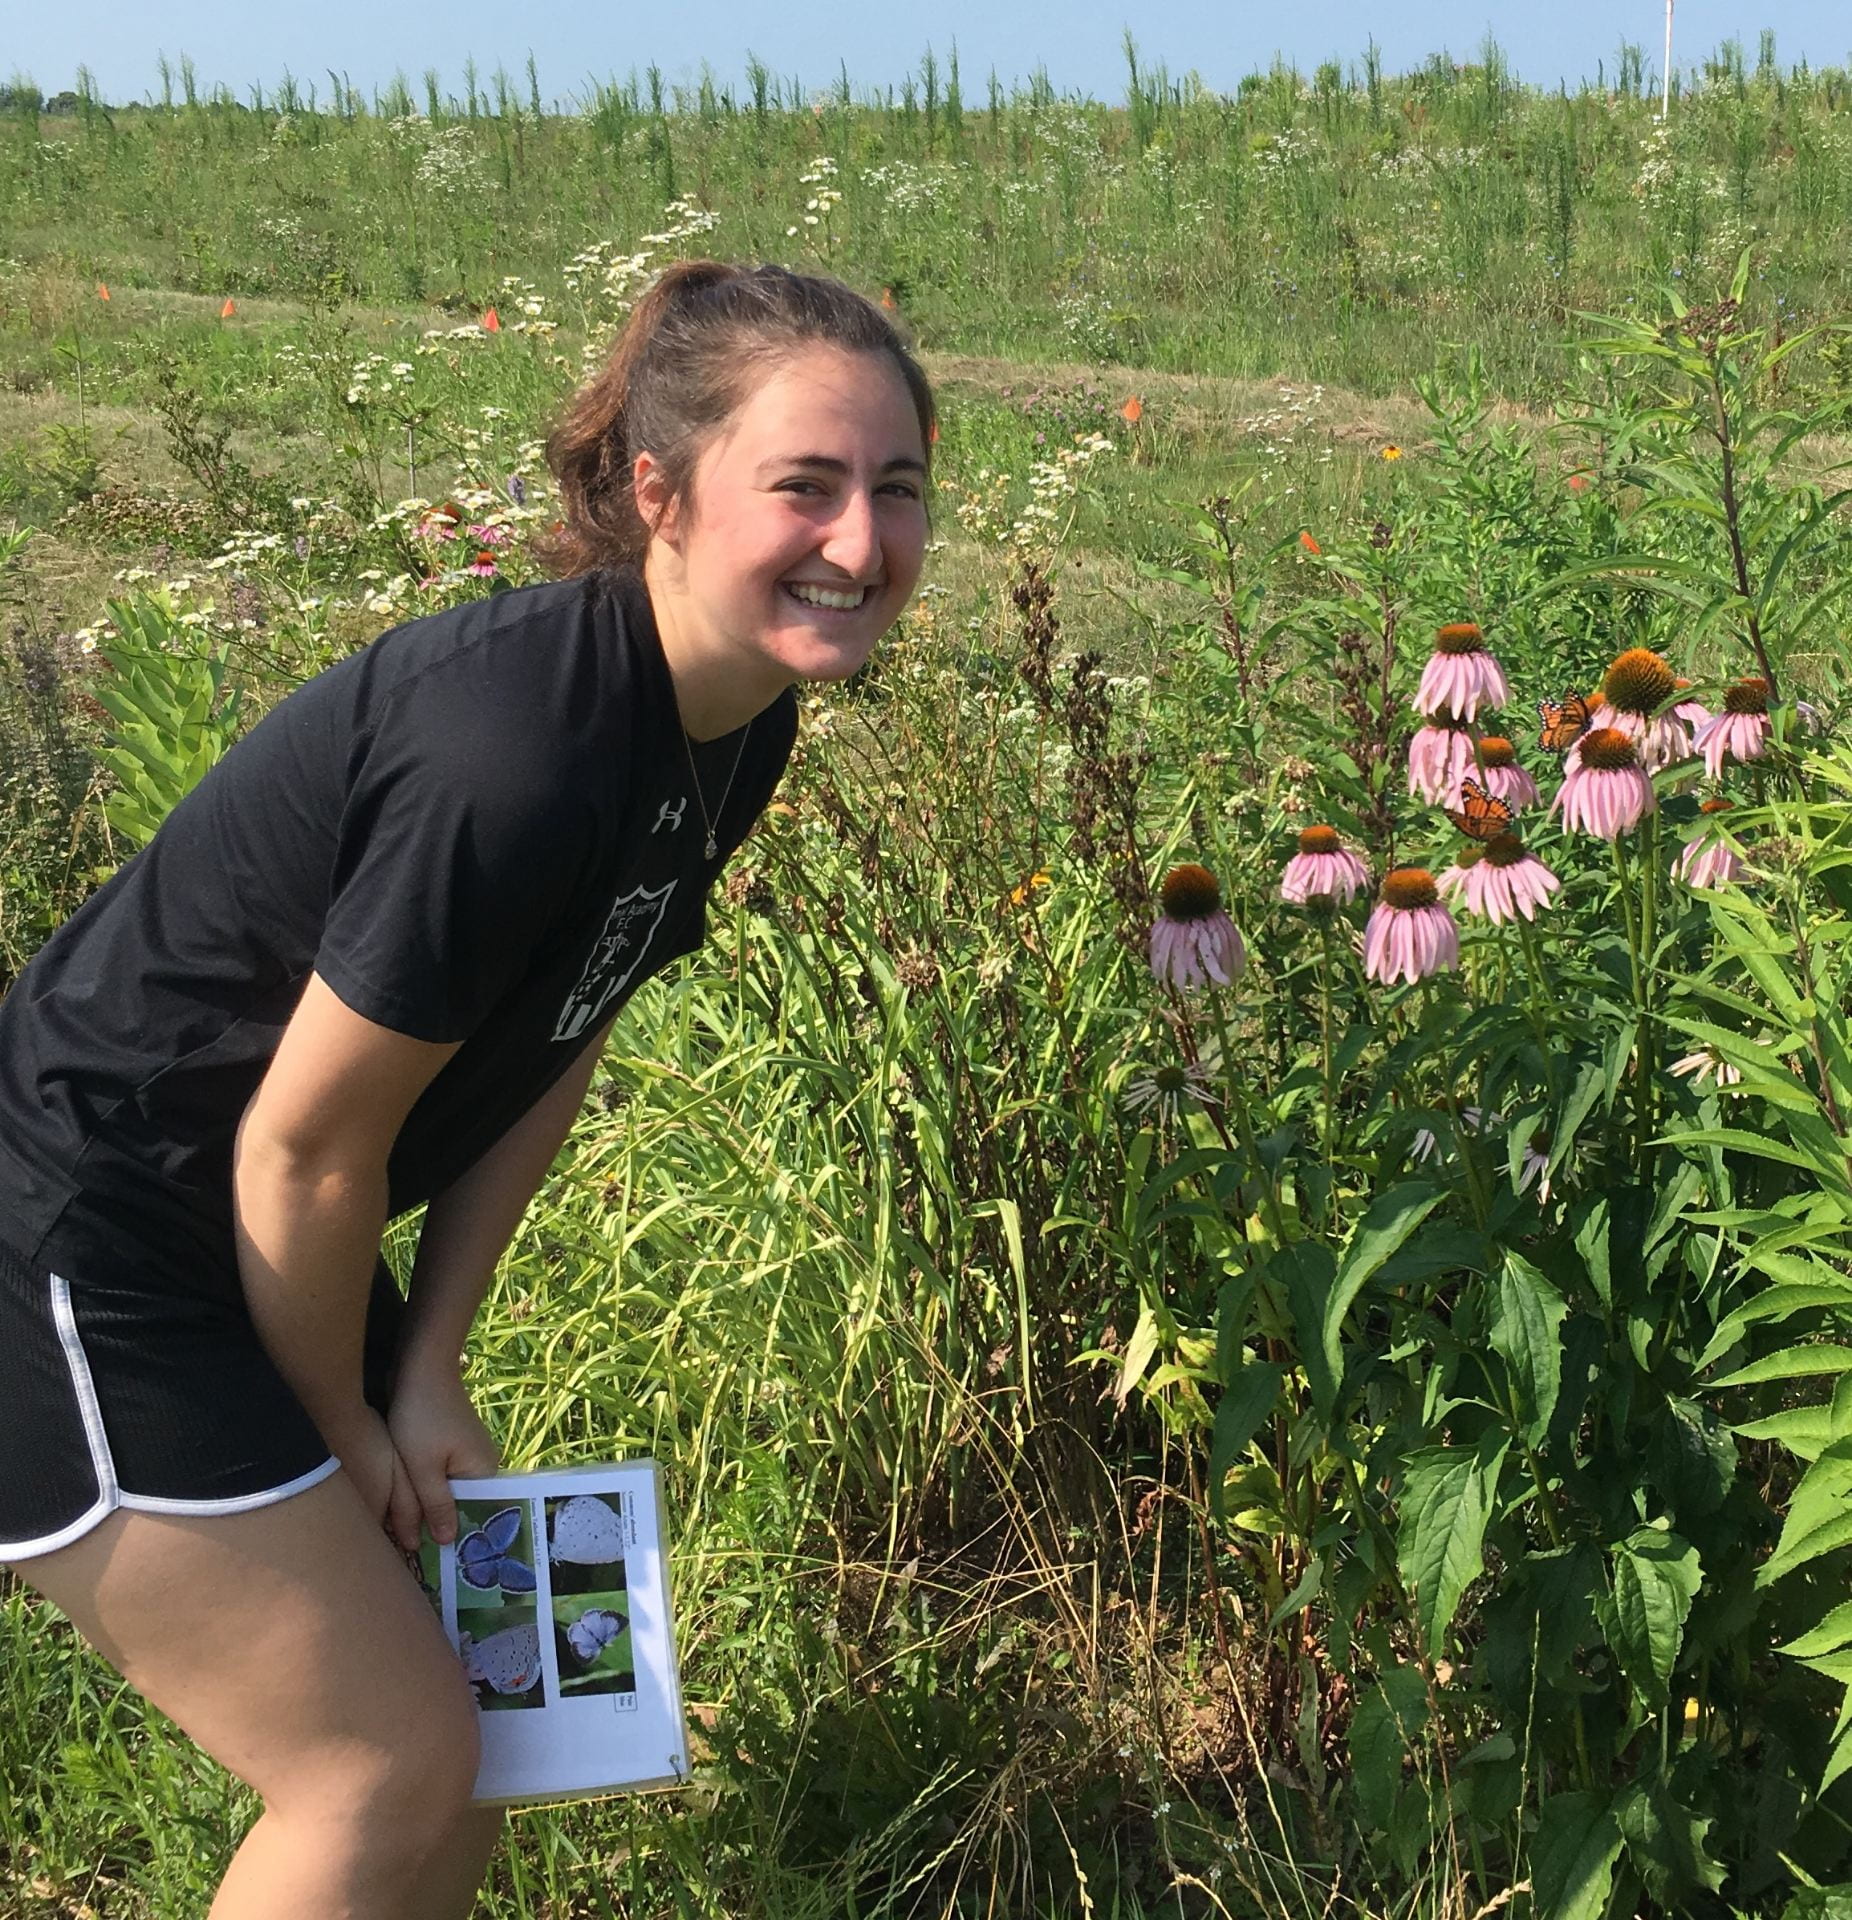
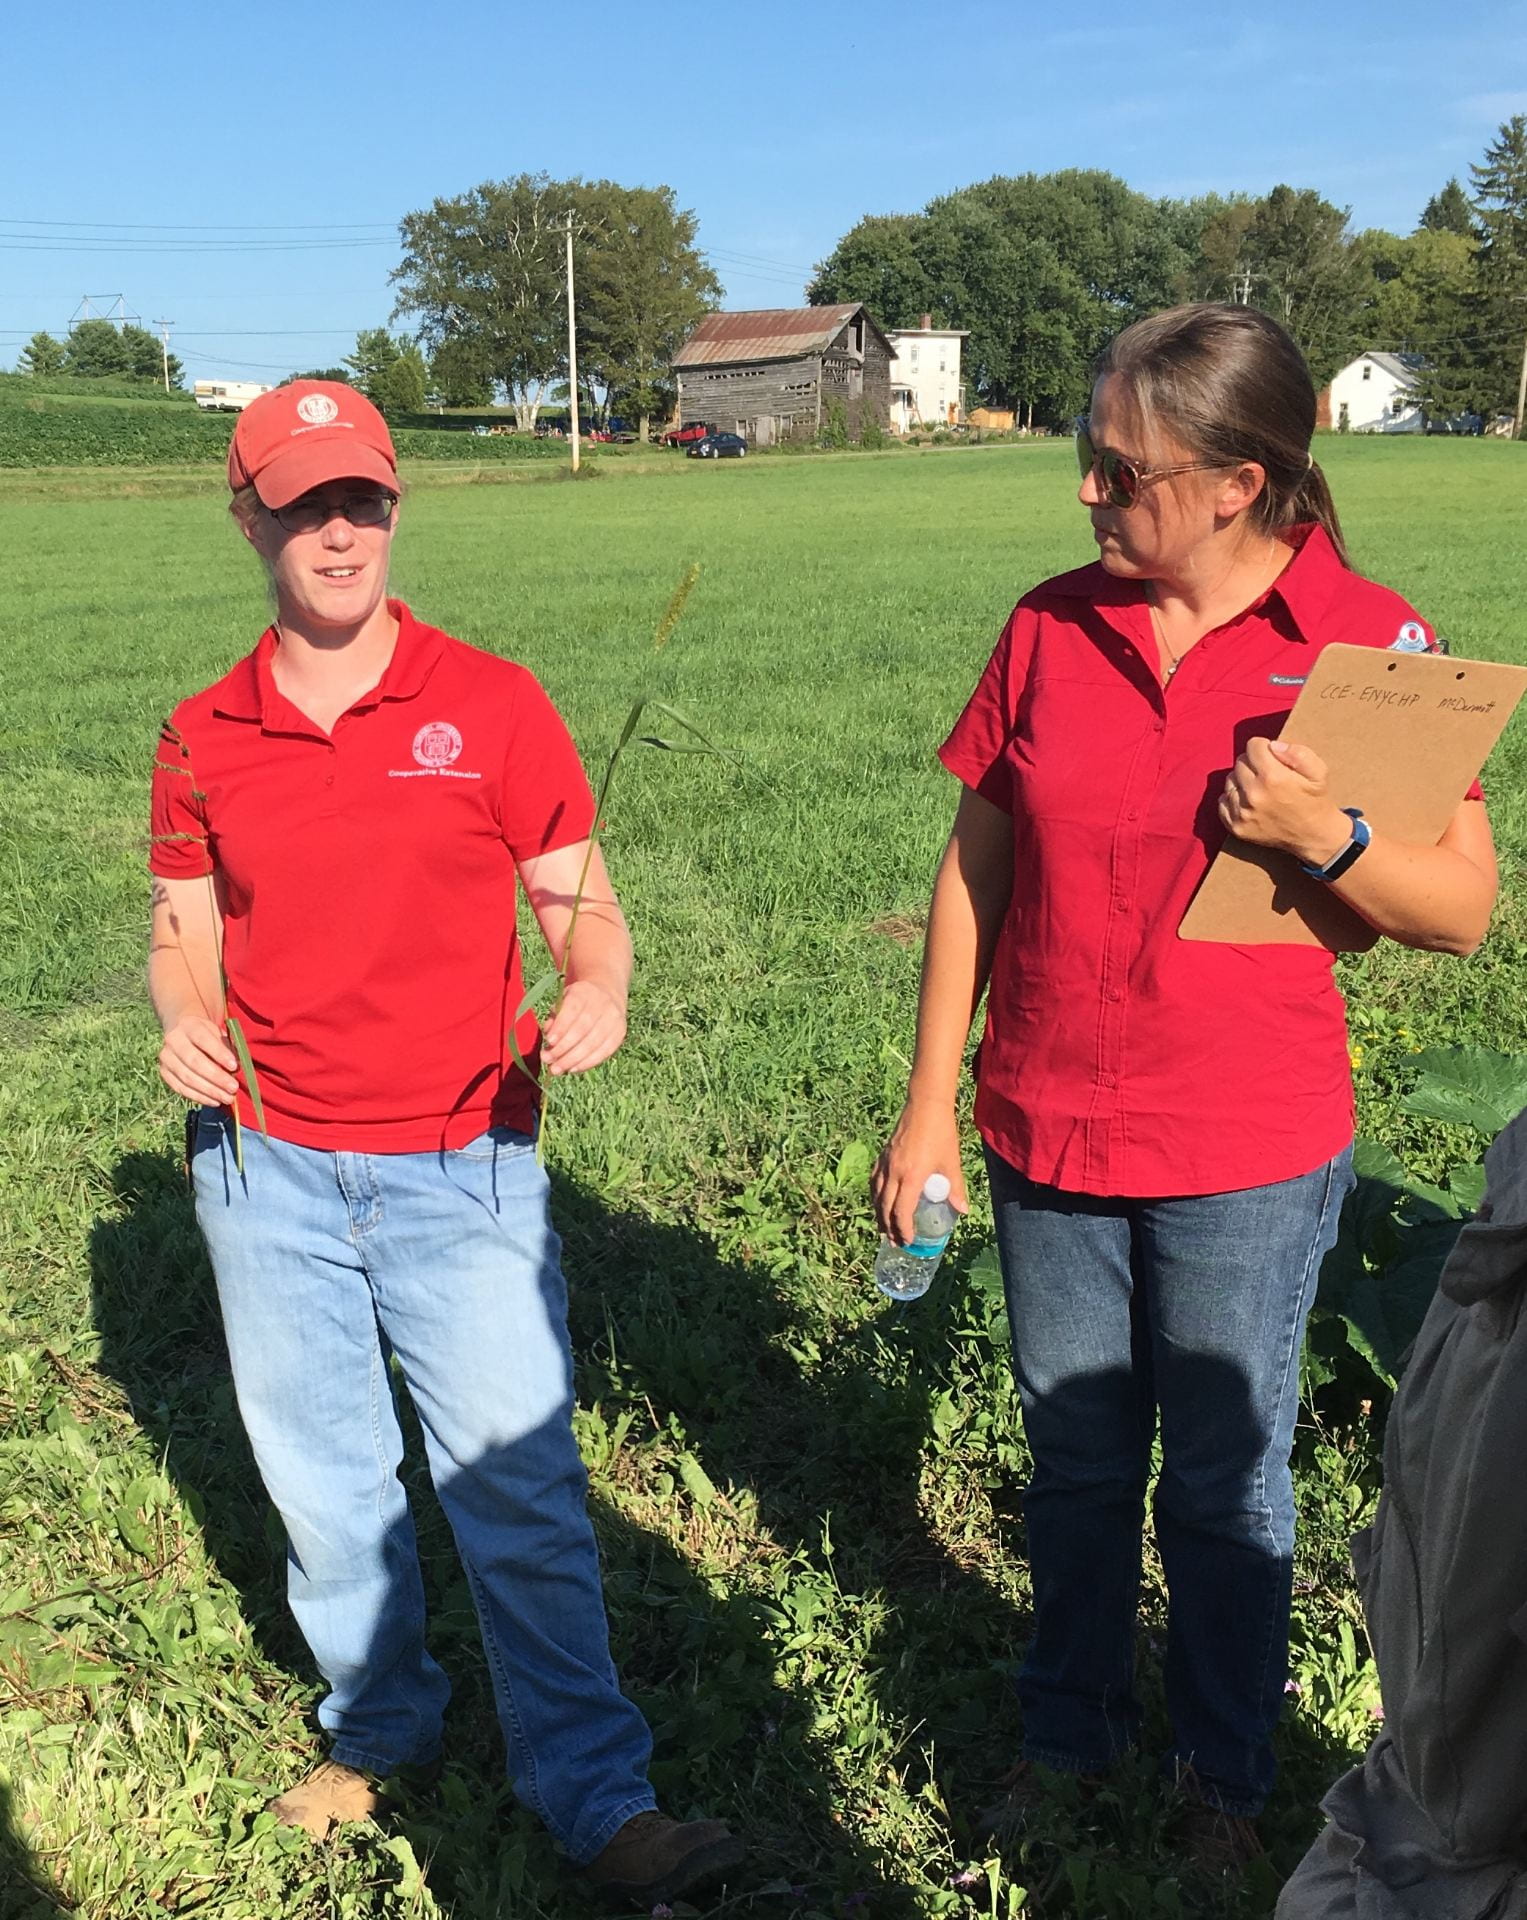
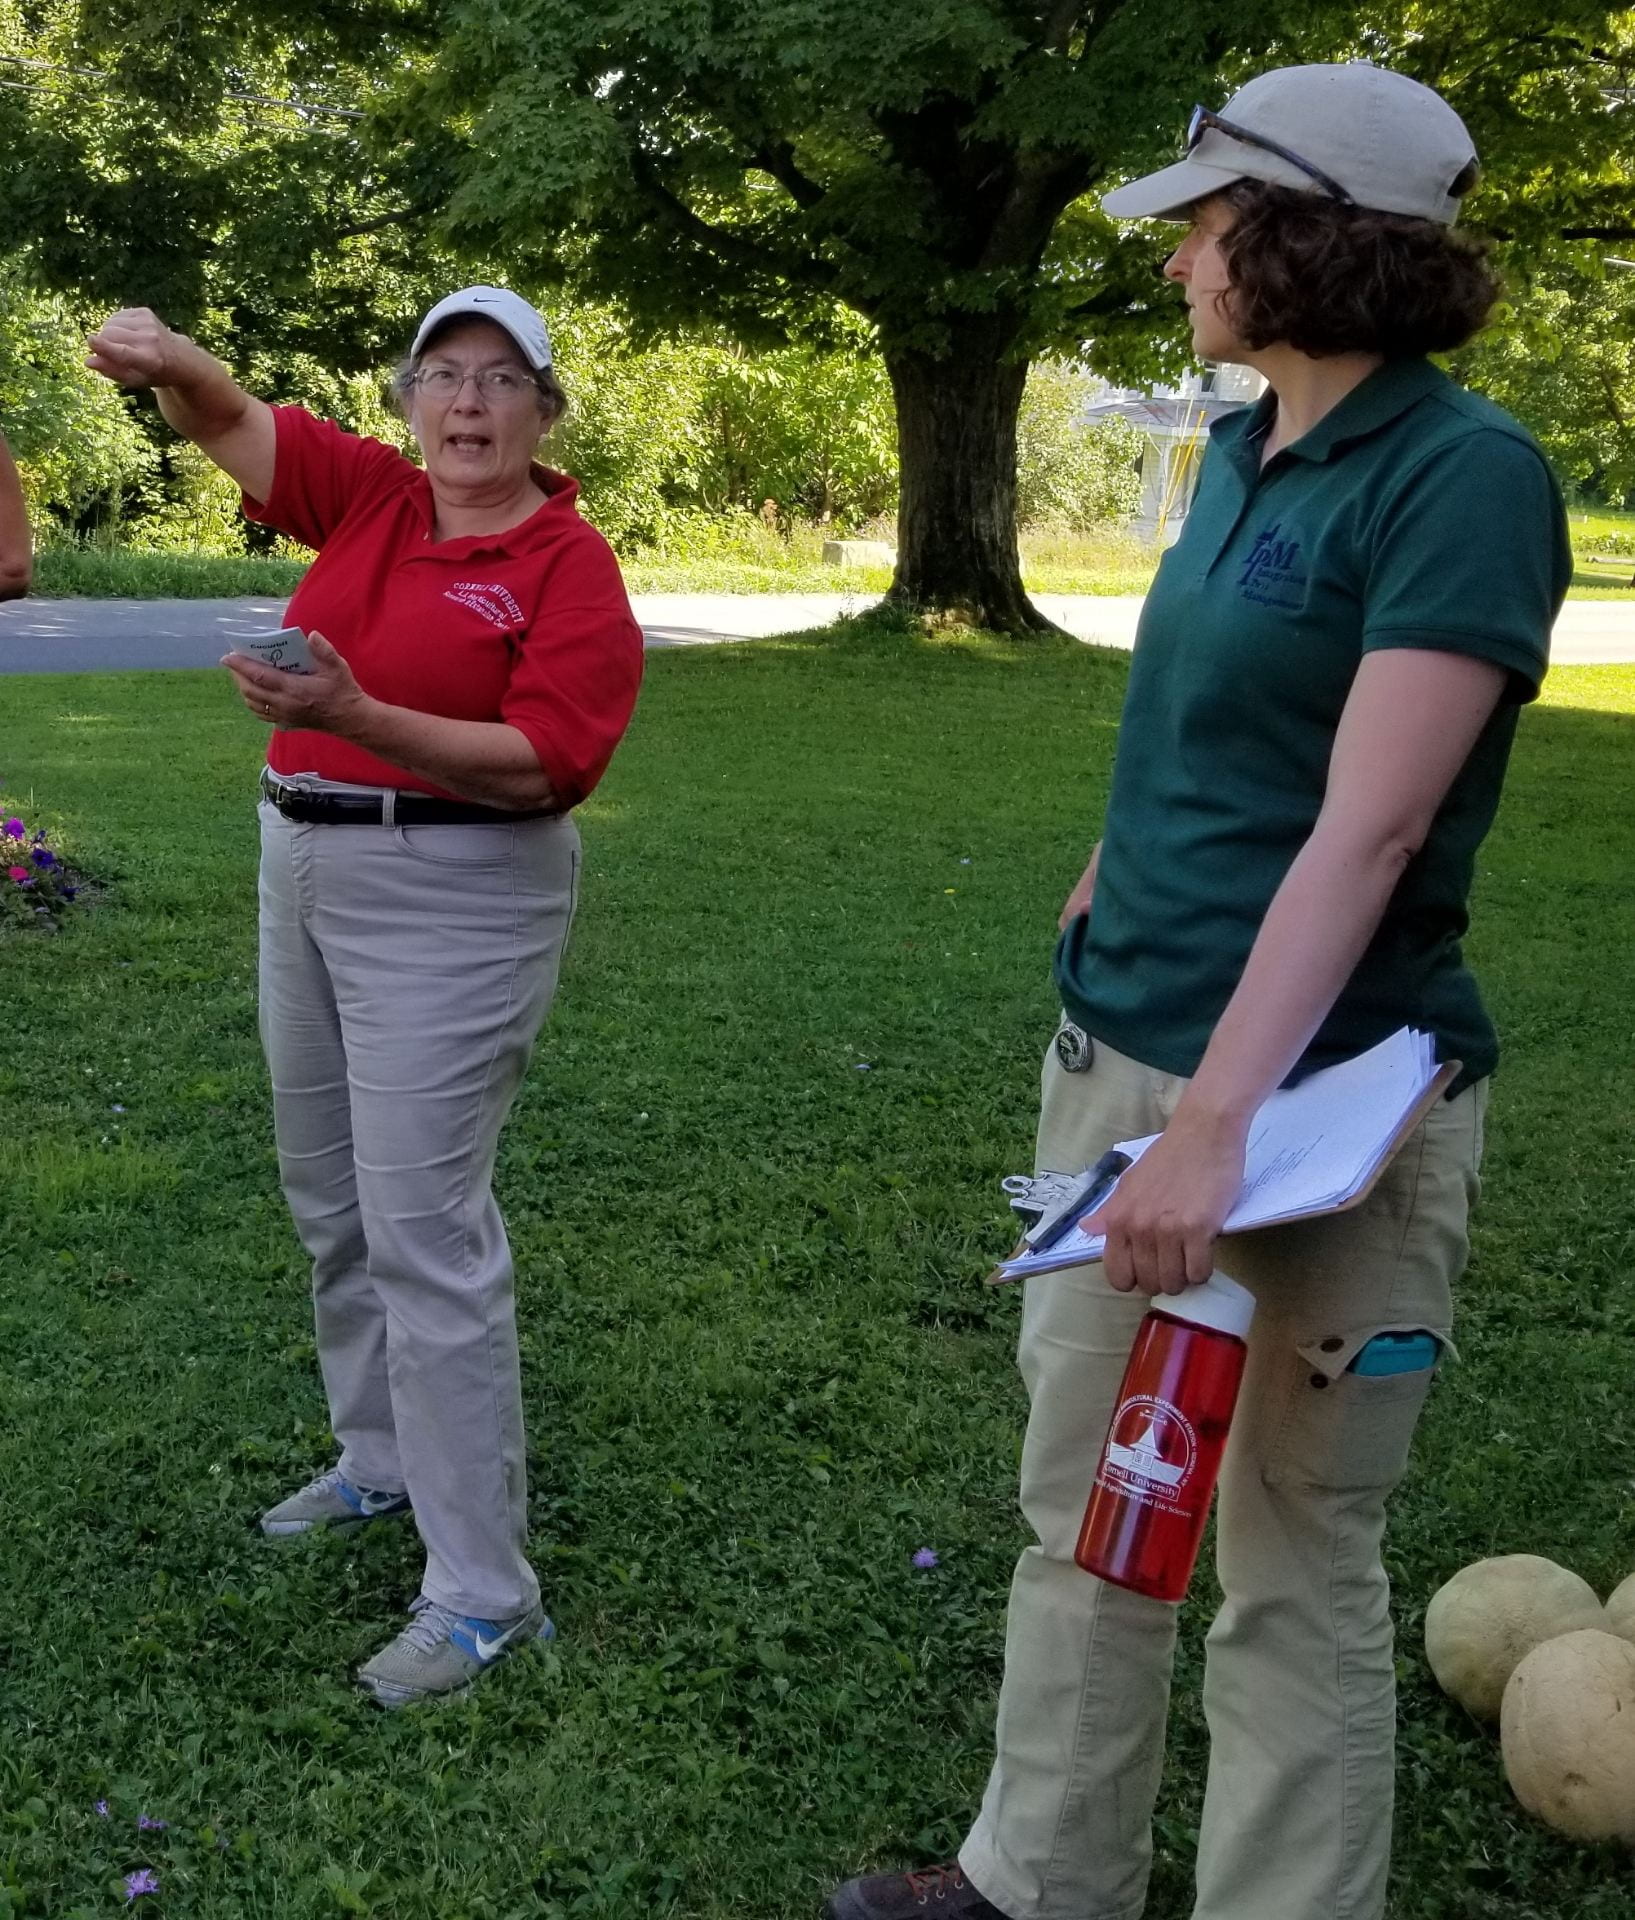
Golden alexanders (Zizia aurea) was our earliest-blooming wildflower in our beneficial insect habitat plots around the Christmas trees. It was blooming on May 16 in Geneva, NY.Some of us may not like them in our lawns, but starting in the first week of May (Geneva, NY) dandelions were providing food for beneficial insects like this bee.This shy lady beetle was finding food in the flowers of this weedy mustard plant in mid-May (Geneva, NY).After expert training from Cornell entomologist Jason Dombroskie (pictured here during our training session in late April), we’ve been using a sweep net to catch insects that fly or perch on the wildflowers in the habitat plots we started last summer. We sampled this way once every month.Starting the week of May 20th, we set out pan traps (blue and yellow plastic bowls filled with soapy water and weighed down with rocks) approximately every other week. These traps catch insects flying through our plots, especially those that are attracted to the colors blue and yellow. This includes many bee species.Also during the week of May 20th, we started setting pitfall traps once each month. Insects walking along the ground fall into these deli cups filled with a drowning solution. We put rain covers over them (made out of clear plastic dinner plates and wire from old flags) to prevent a heavy rain from flooding the deli cups during the 3 days the traps are set.We caught and saw so many insects (and non-insects, like spiders) this summer! This seven-spotted lady beetle was a frequent visitor to our plots.Many flies are important pollinators, like this one that resembles a bee at first glance. Many flies are also important natural enemies of pests (either as adults, or as worm-like larvae).This minute pirate bug may be tiny (it’s magnified 20X), but it is an important natural enemy of pests.We caught so many different kinds of bees and wasps!Plenty of caterpillars (like these monarchs) enjoyed munching on the foliage of our wildflowers.And in late July, we started seeing adult butterflies visiting the flowers like the viceroy butterfly on these purple coneflowers (Echinacea purpurea).I learned that these are tiger beetles. They are fast-moving ground predators, and we caught a lot in our pitfall traps.Different wildflowers bloomed at different times, like these purple catmint (Nepeta faassinii) and tall white beard tongue (Penstemon digitalis) in June.White boneset (Eupatorium perfoliatum) and pale purple wild bergamot (Monarda fistulosa) were blooming in late July.And now the rudbeckia (two different species, but Rudbeckia fulgida var. fulgida is pictured here) and deep magenta NY ironweed (Vernonia noveboracensis) are in full bloom. But the asters and goldenrod haven’t started, yet.And the Christmas trees planted around these beneficial insect habitat plots keep growing!I couldn’t have done this without the help of my great co-workers, Betsy Lamb, Deb Marvin, and Brian Eshenaur! They were still smiling after a morning of weeding the wildflowers by hand!A student from a local college helped me a lot with insect collection!Meanwhile, field trials with biofungicides are ongoing, targeting cucurbit powdery mildew on winter squash and white mold on snap beans and tomatoes (not pictured). This project is funded by the New York Farm Viability Institute.Elizabeth Buck (left) and Crystal Stewart (right) are running the trials in western NY and eastern NY, respectively. This project is funded by the New York Farm Viability Institute.Meg McGrath (left) is running the trial on Long Island, but we all got together at a twilight meeting in eastern NY last week. This project is funded by the New York Farm Viability Institute.So far, it’s been a good summer! I’ve really enjoyed working with great colleagues and learning new things!
The field projects I’ve just described will be wrapping up in September. Check back to learn about the results. Better yet, click the green “Subscribe” button towards the top and right of this page, and you’ll receive an email when a new post is available!
In the meantime, there will still be at least a few more weeks of pictures posted regularly on Twitter (@AmaraDunn) and Instagram (@biocontrol.nysipm).
Creating habitat for beneficial arthropods was supported by:
Crop Protection and Pest Management -Extension Implementation Program Area grant no. 2017-70006-27142/project accession no. 1014000, from the USDA National Institute of Food and Agriculture.
New York State Department of Agriculture and Markets
This isn’t biocontrol, but it’s very important! Have you heard about the invasive spotted lanternfly? Do you want to learn where we are in our efforts to keep it out of New York, and to manage it if (and when) it does show up?
New York State Integrated Pest Management is hosting a meeting in Binghamton, NY on Thursday August 15 where you can get answers to these questions.
This conference has been approved for 7.5 Certified Nursery Landscape Professional credits, and 6 NYS Pesticide Recertification credits in the categories of 1a, 2, 3a, 6a, 9, 10, 22 and 25.
This month’s post is about a project being led by Jaime Cummings, the Field Crops and Livestock IPM Coordinator at NYS IPM. The goal is to improve biological control of the cereal leaf beetle, a pest of small grains. Before we tell you about the biocontrol project, you’ll need some background information on this pest and the other management options available. You can use the following links to navigate to each section of this post:
Cereal leaf beetle damage on the flag leaf of a winter wheat plant. (Photo by J. Cummings, NYS IPM)
Cereal leaf beetles and the damage they cause
The cereal leaf beetle (CLB), Oulema melanopus, can be a significant pest of winter and spring small grains production in NY, especially in parts of western NY. This invasive species was first detected in Michigan in 1962, and has since become established in many grain producing states in the US, despite quarantine and pesticide eradication efforts in the 1960’s and 1970’s.
Figure 1. Cereal leaf beetle adult (A) and larval (B) stages. (Photos by J. Cummings, NYS IPM)
You may be familiar with this pest either in the larval or beetle stage (Fig. 1). CLB has one or two generations per growing season, and the adults overwinter in hedgerows, woods or field margins. We usually start seeing the adults move into small grains fields in April or May to lay eggs which develop into the damaging larvae. The larger the larvae get, the more damage they inflict on the crop. After about two weeks of feeding, the larvae drop to the ground and pupate for about two weeks before the adults emerge again.
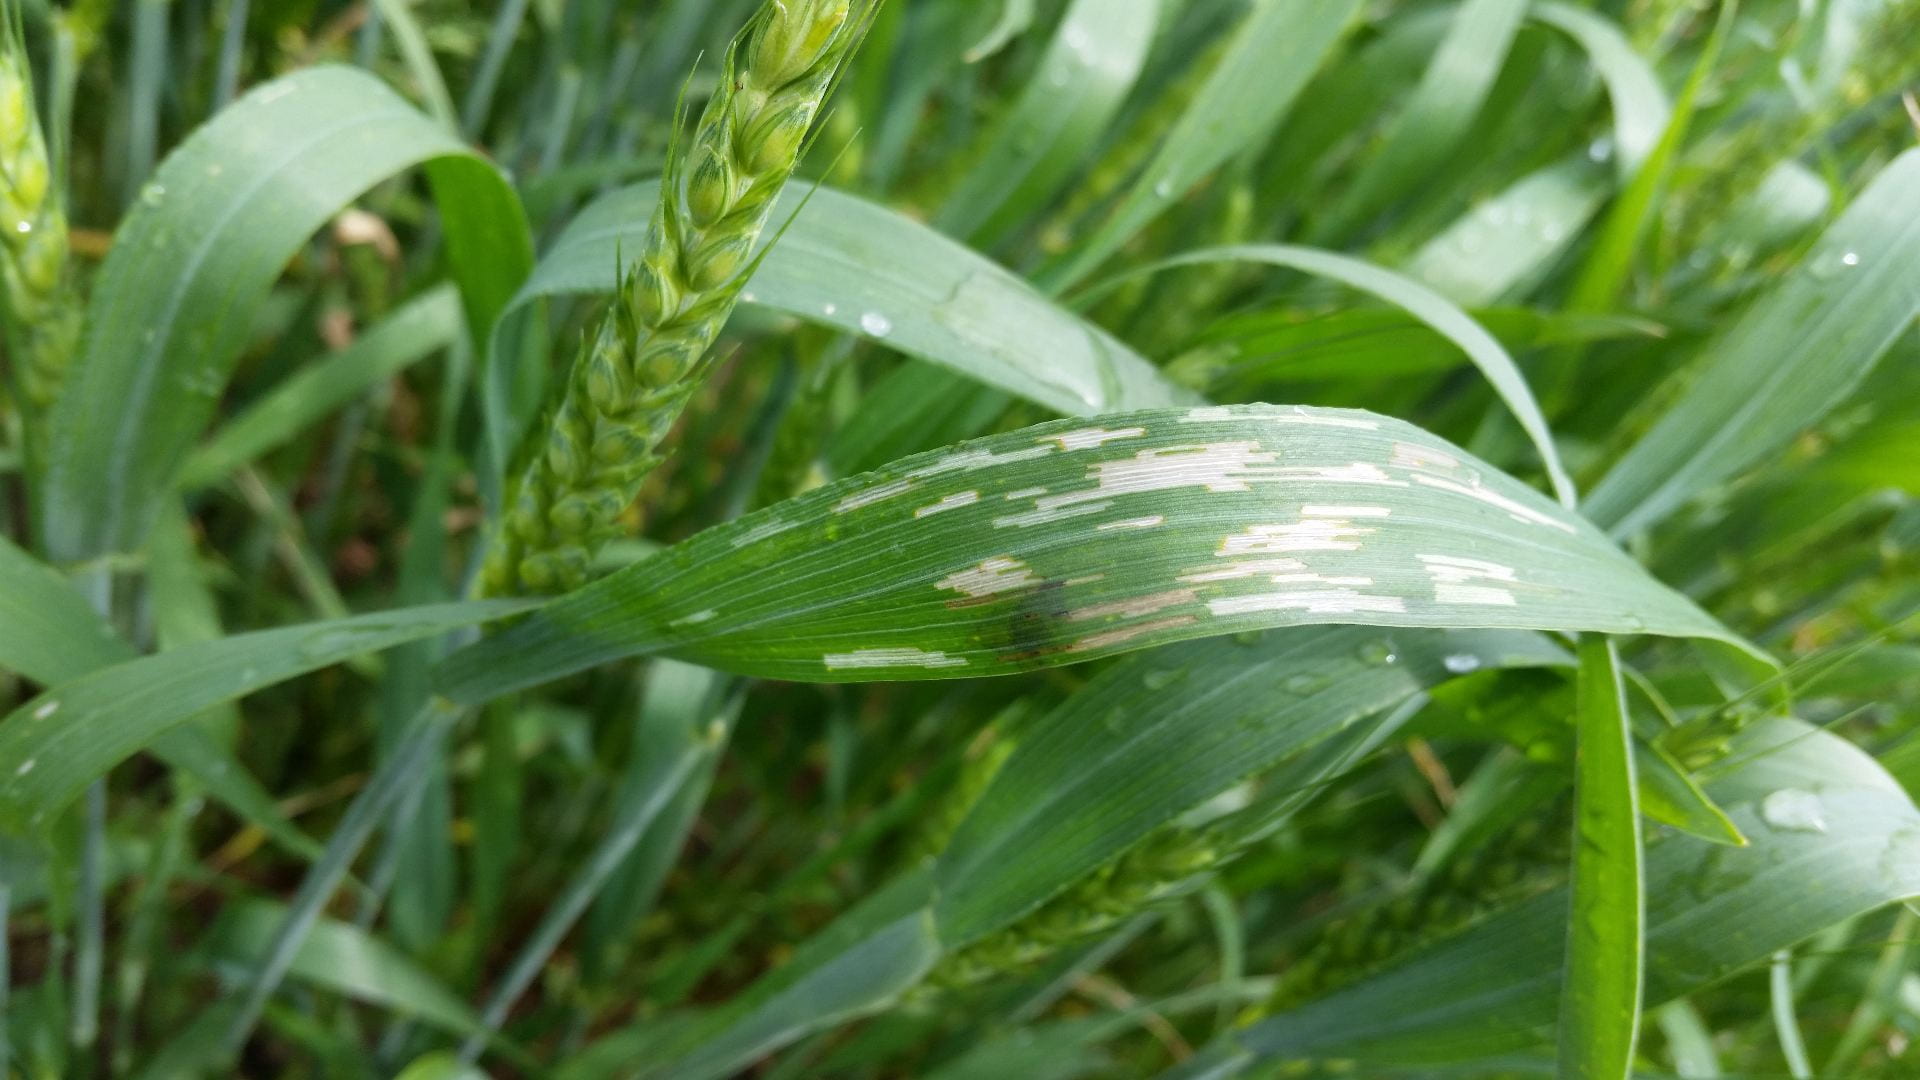
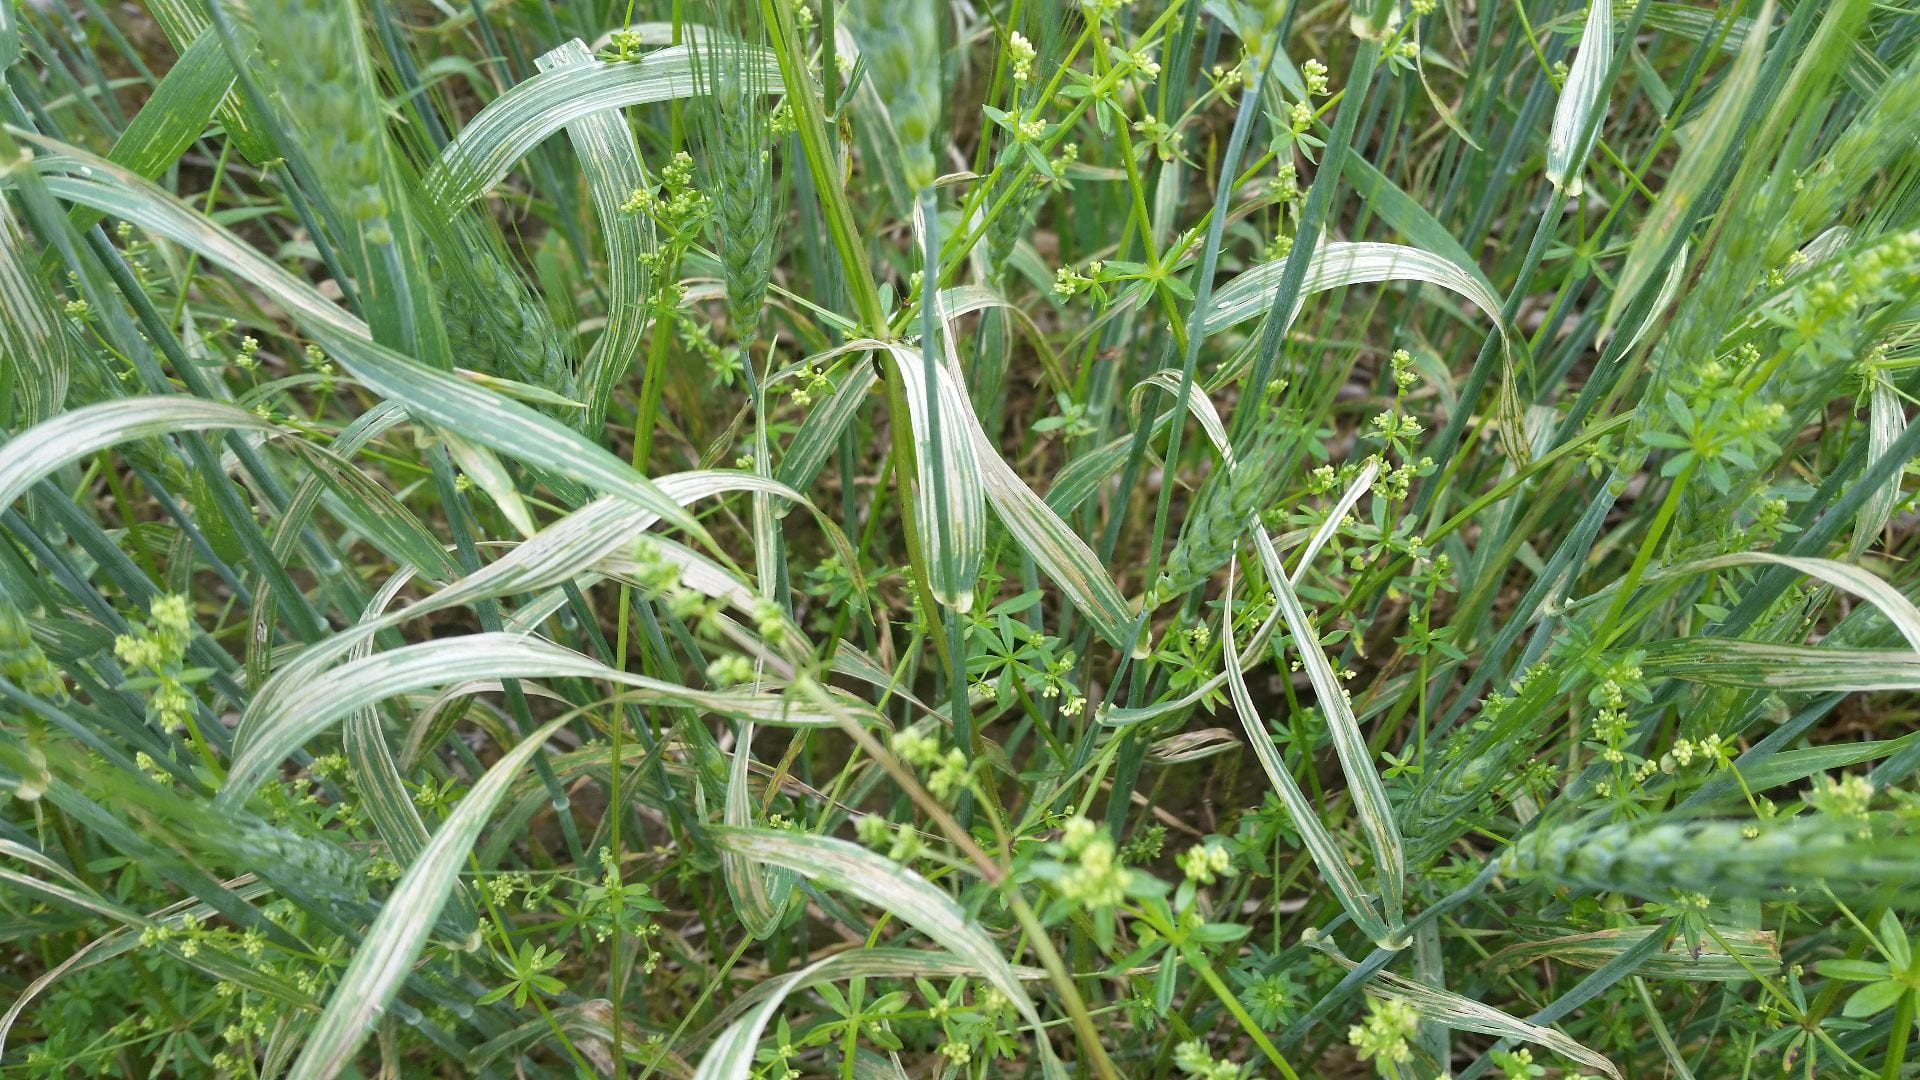
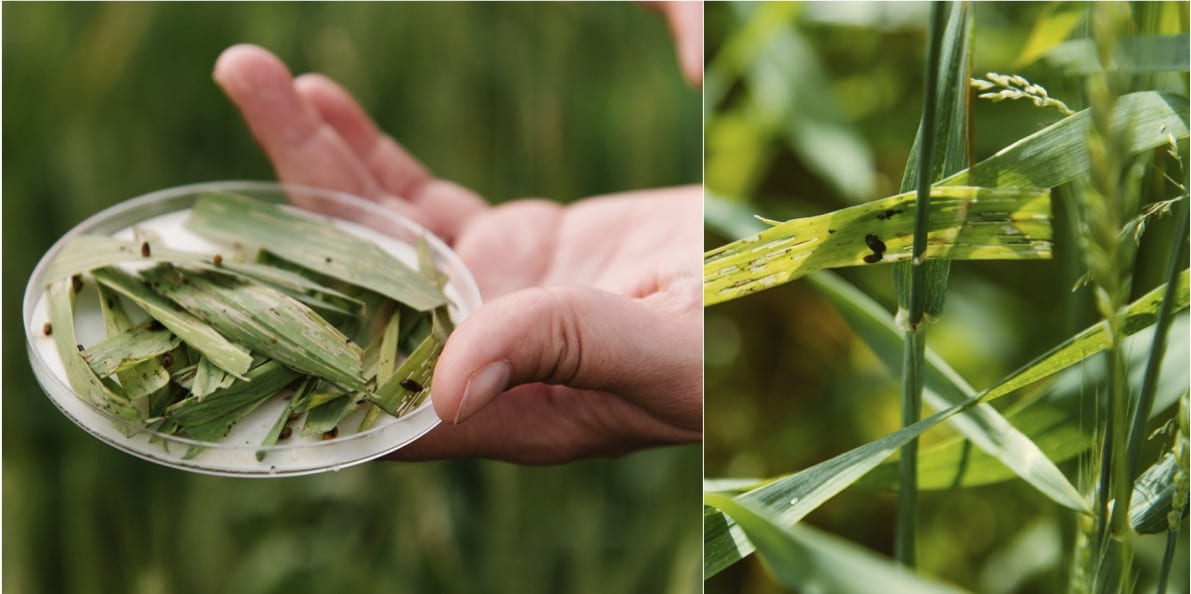
When looking for these pests, keep an eye out for the typical larval feeding damage that looks like strips of green tissue missing between leaf veins. Severely damaged leaves may appear skeletonized, and intense feeding pressure in a field may result in a ‘frosted’ appearance of flag leaves (Fig. 2).
Figure 2. Severe cereal leaf beetle larval feeding on winter wheat. (Photo by J. Cummings, NYS IPM)
Considering that the top two leaves of the wheat/barley/oat crop are what contributes most to grain yield, severe infestations of CLB can significantly impact yield and grain quality. Even in small grain or mixed stand forage crops, this pest can have negative effects on the yield and quality of the forage because they can significantly reduce leaf area and photosynthetic capability of the crop.
Scouting for cereal leaf beetle and deciding when to spray
It’s important to scout for this pest, usually starting in early to mid-June when larvae are first appearing. The economic threshold for insecticide application for CLB is when you count an average of three or more larvae per plant before the boot stage or one or more larvae per flag leaf after the boot stage. Occurrence of this pest can be inconsistent within a field, therefore plan to scout weekly and walk a random pattern throughout each field stopping at 10 random locations to count larvae on 10 plants at each location. Because insecticides labeled for CLB target the larval stages, in order for your pesticide applications to be most effective, make sure that at least 25% of CLB eggs have hatched and that larvae are present and actively feeding when you decided to spray. And, if you’re seeing adults in late June or beyond, it’s probably too late to spray for the larvae. (Always follow label recommendations and restrictions when applying pesticides)
Paying attention to CLB populations in your fields via scouting is an important part of an integrated management approach for minimizing losses to this pest. A growing degree day (GDD) model for CLB developed in Michigan determined that adult CLB begin to emerge around 350-400 GDD (base 48) to begin egg laying.
Biocontrol of cereal leaf beetle
Unfortunately, there is no specific host plant resistance available for CLB, but there are natural predators of the larvae and eggs which can help to keep the pest population in check, and possibly below the economic threshold when well-established in an area. Lady beetles are known to prey on CLB larvae and eggs, and there is at least one egg parasite though it is not widely distributed.
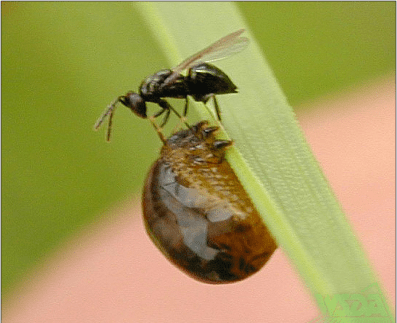
There is also a CLB larval parasitoid wasp, Tetrastichus julis, which was originally introduced from Europe as a biological control agent in Michigan in 1967 (Fig. 3). Subsequent releases into other states, including NY in 1973, have led to a sporadic establishment of this biological control parasitoid throughout small grain production areas of the US.
Figure 3. Tetrastichus julis, a parasitic wasp on a cereal leaf beetle larva. (Photo courtesy of Washington State Department of Agriculture)
Our project: Improving biocontrol of cereal leaf beetle
Given that CLB damage can be widespread and undermanaged in many small grains fields in NYS, and under the advice of Dr. Elson Shields (Cornell University Field Crops Entomologist), the NYS IPM program decided to try to determine the parasitism levels of CLB larvae in various locations around the state and to try to increase populations of the parasitoid in the Aurora area of Cayuga County, where the CLB tends to be a perennial pest. The multiyear project was initiated this year, with CLB larval collections from locations in six counties. However, there were no CLB present to collect at two of the locations, so the data collected in 2019 includes only four locations (Table 1).
Table 1. Cereal leaf beetle collection efforts for determining parasitism levels in 2019.
Location
County
Collection date
Crop
# CLB larvae collected
Seneca Falls
Seneca
6-Jun
winter wheat, rye, barley
96
Aurora/Musgrave
Cayuga
12-Jun
spring barley
92
Ithaca
Tompkins
12-Jun
winter wheat, rye, barley
45
Penn Yan
Yates
13-Jun
spring oats and peas
110
Oriskany
Oneida
11-Jun
winter wheat
0
Homer
Cortland
10-Jun
winter wheat
0
At each location, a target of approximately 100 CLB larvae of all different sizes/growth stages were collected by hand from wheat, barley or oat fields. The larvae were temporarily reared in incubation chambers on host plant leaves until approximately half of the larvae were dissected to determine baseline parasitism levels for each location (Fig. 4).
Figure 4. Cereal leaf beetle rearing chambers (A) and dissection process (B). (Photo by J. Cummings, NYS IPM)
The eggs of the parasitoid are visible when the CLB larvae are cut open under a microscope (Fig. 5).
Figure 5. Dissected CLB larvae, and one with T. julis parasitoid eggs. (Photo by J. Cummings, NYS IPM)
After baseline parasitism levels were determined for each collection location, the other half of the CLB larvae were then released at the Cornell Musgrave research farm near Aurora, NY (Fig. 6). This process will be repeated over the next few years.
Figure 6. Cereal leaf beetle larvae with known level of parasitism being released in Cayuga County (Photos by J. Thomas-Murphy, Cornell University)
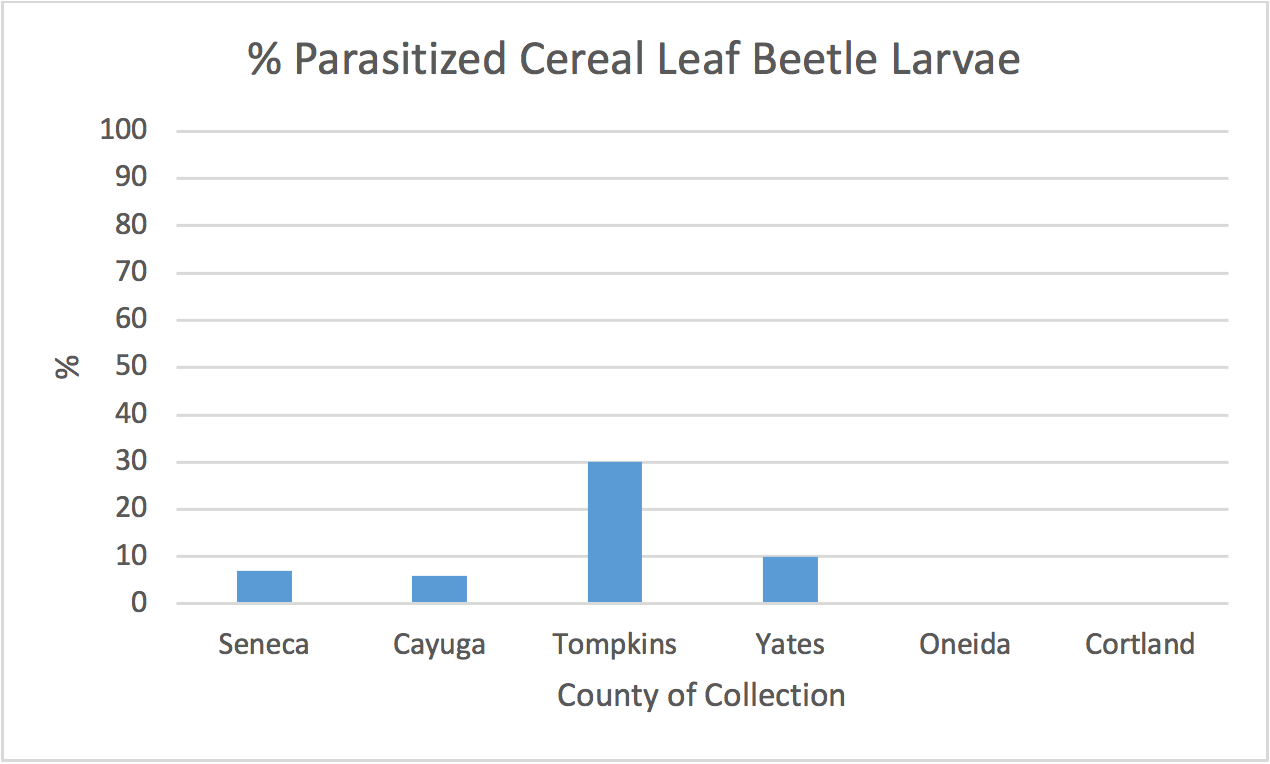
The goals of this project are to determine the established levels of the T. julis parasitoid around the state since the initial release in 1973, and to try to determine if we can increase its population at the research farm through consecutive releases. From this first year of data collection, we know that the parasitoid population is low at the research farm in Cayuga County (6%) and at two of the collection sites (7% and 10%, in Seneca and Yates Counties, respectively), but was at approximately 30% at the Ithaca (Tompkins County) collection site (Fig. 7).
Figure 7. Percent T. julis parasitized cereal leaf beetle larvae collected from various locations.
We also know that although there has been a need to spray insecticides to manage CLB at the research farm in Cayuga County and near the other collection sites, there has been no need to spray for CLB at the Ithaca (Tompkins County) collection sites. It’s likely that the T. julis parasitoid population at the Ithaca site keeps the CLB population below economic threshold levels. We hope that by intentionally distributing this parasitoid into an area with known CLB problems, we can establish a robust parasitoid population that may result in a reduction of necessary insecticide sprays for this pest.
This post was written by Jaime Cummings, Ken Wise, and Amara Dunn, all of the New York State Integrated Pest Management Program.
Caption: Lady beetles will eat any aphid species, but other aphid natural enemies are much more selective. (Photo credit: Amara Dunn)
Practicing good integrated pest management in the greenhouse requires correct identification of the pest. Accurate pest ID is also critical to successful use of biocontrol. Aphids are a good example. Biocontrol of aphids works best when you match the biocontrol agent to the aphid species you have. When I first learned this, I was a bit intimidated, because aphids are pretty small, and I’m not an entomologist. But the four aphid species you are most likely to encounter in your greenhouse are actually pretty easy to differentiate.
Anatomy of an aphid
In order to successfully ID aphids, you need to know (just a little) about aphid anatomy. All aphids are pretty small (between approximately 1/16 and 1/8 inches long). In addition to six legs and a body, aphids have antennae. Antennae attach near their eyes and are angled back over their bodies. They also have two little “spikes” that protrude from their rear end. These are called cornicles. Not so bad, right?
Two features that will help you identify an aphid are the antennae attached to their head, and the two short cornicles attached to the rear end of their abdomen. (Diagram credit: Amara Dunn)
Green peach aphid
Green peach aphids vary in color from green to pink. Between their antennae you’ll see an indentation, and their cornicles are the same color as their body, with dark tips. (Photo credit: John Sanderson)
Green peach aphids come in different colors (from green to, well, peachy pink) and they are one of the smaller species. Their cornicles are the same color as their body (whatever that color is), and have dark tips on the ends. Green peach aphids also have an indentation in their head between the bases of their antennae.
Melon (or cotton) aphid
Melon (also called cotton) aphids can be distinguished from green peach aphids by their dark cornicles. They also lack an indentation between their antennae. (Photo credit: John Sanderson)
Melon aphids (also called cotton aphids) also come in a range of colors that include light yellow, green, dark green, or almost black. Regardless of the body color, the cornicles will always be dark. Also, there’s no indentation in their head between the bases of the antennae. This is another small aphid species.
Foxglove aphid
Foxglove aphids are shiny green with long antennae that look like they have dark spots on them. You’ll also see darker green spots at the base of each cornicle and dark leg joints. (Photo credit: Dan Gilrein)
Foxglove aphids are large (for an aphid). Their bodies are light green, but often shiny. There is an indentation in their head between their antennae. Their antennae are extra-long, extending well beyond the end of their body, and appear to have dark spots on them because the joints of the antennae are dark. The joints of their legs are also dark. Check where the cornicles attach to the body of the aphid. Foxglove aphids have darker green spots on their bodies at the base of the cornicles. These aphids usually like to hang out on the lower leaves of a plant, though they will infest flower petals sometimes.
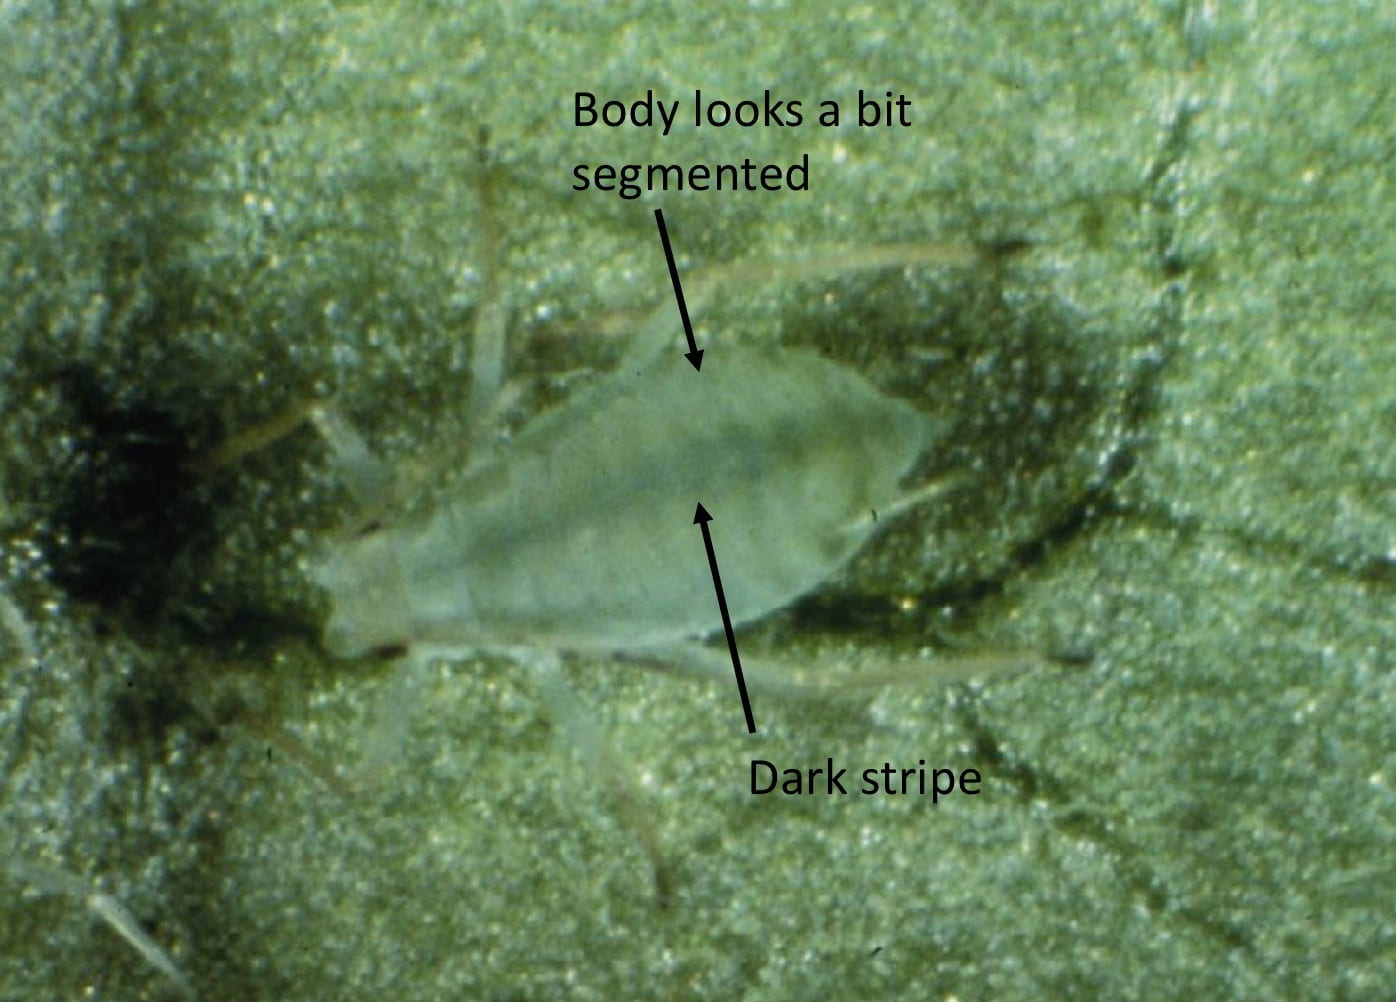
Potato aphid
Potato aphids have a dark stripe running down the length of their body, and they look faintly segmented. (Photo credit: John Sanderson)
Another large aphid, potato aphids come in pink and green. They look like they have a dark stripe running down the middle of their backs, and their body appears faintly segmented. They also have an indentation in their head between the antennae. Of the four species we’re discussing here, only the melon aphids lack this indentation.
To see these features, you will need a little magnification, but you don’t need a fancy microscope. Find a hand lens or a magnifier with 10X magnification. I like to keep one in my backpack so I’m always prepared.
A 10X hand lens will enable you to magnify the features of an aphid that are important for identification.
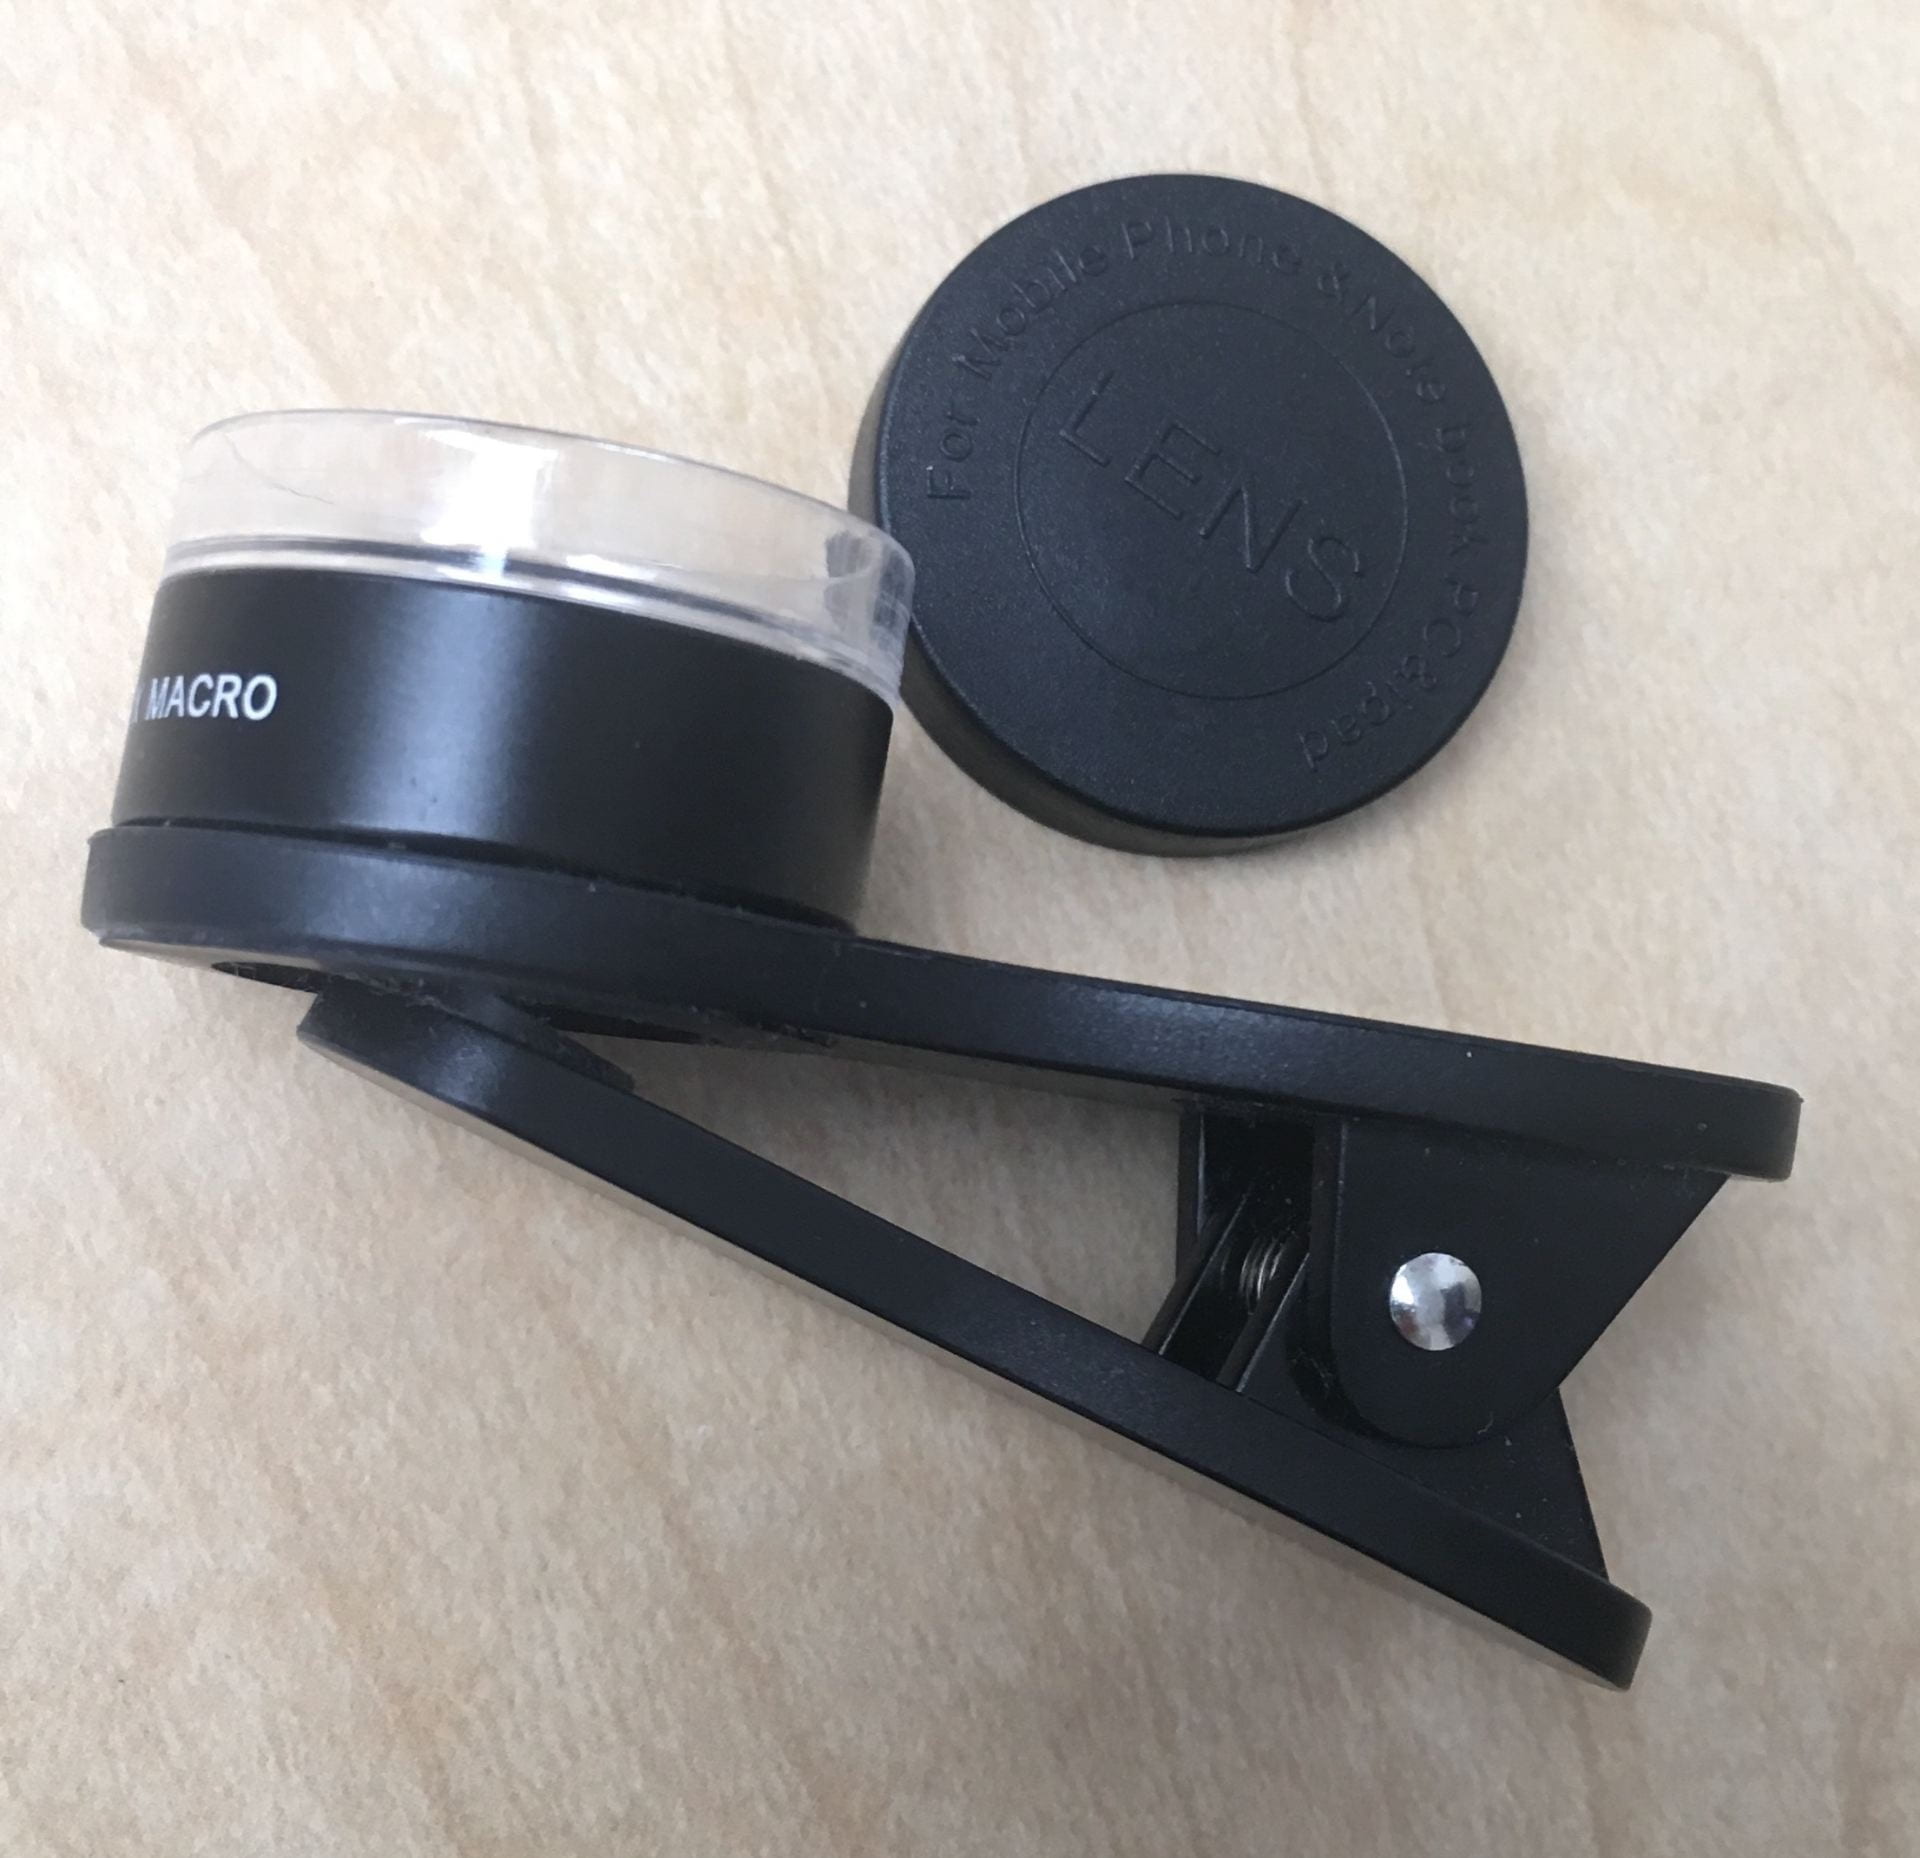
There are even some relatively inexpensive 10X lenses you can snap on to your smartphone or tablet. Not only does this turn your device into a little microscope, but you can take a picture to document what you see (and show to an expert, later).
Magnifying macro lenses can be clipped onto your smart phone or tablet, helping you both magnify and document the aphids you find.
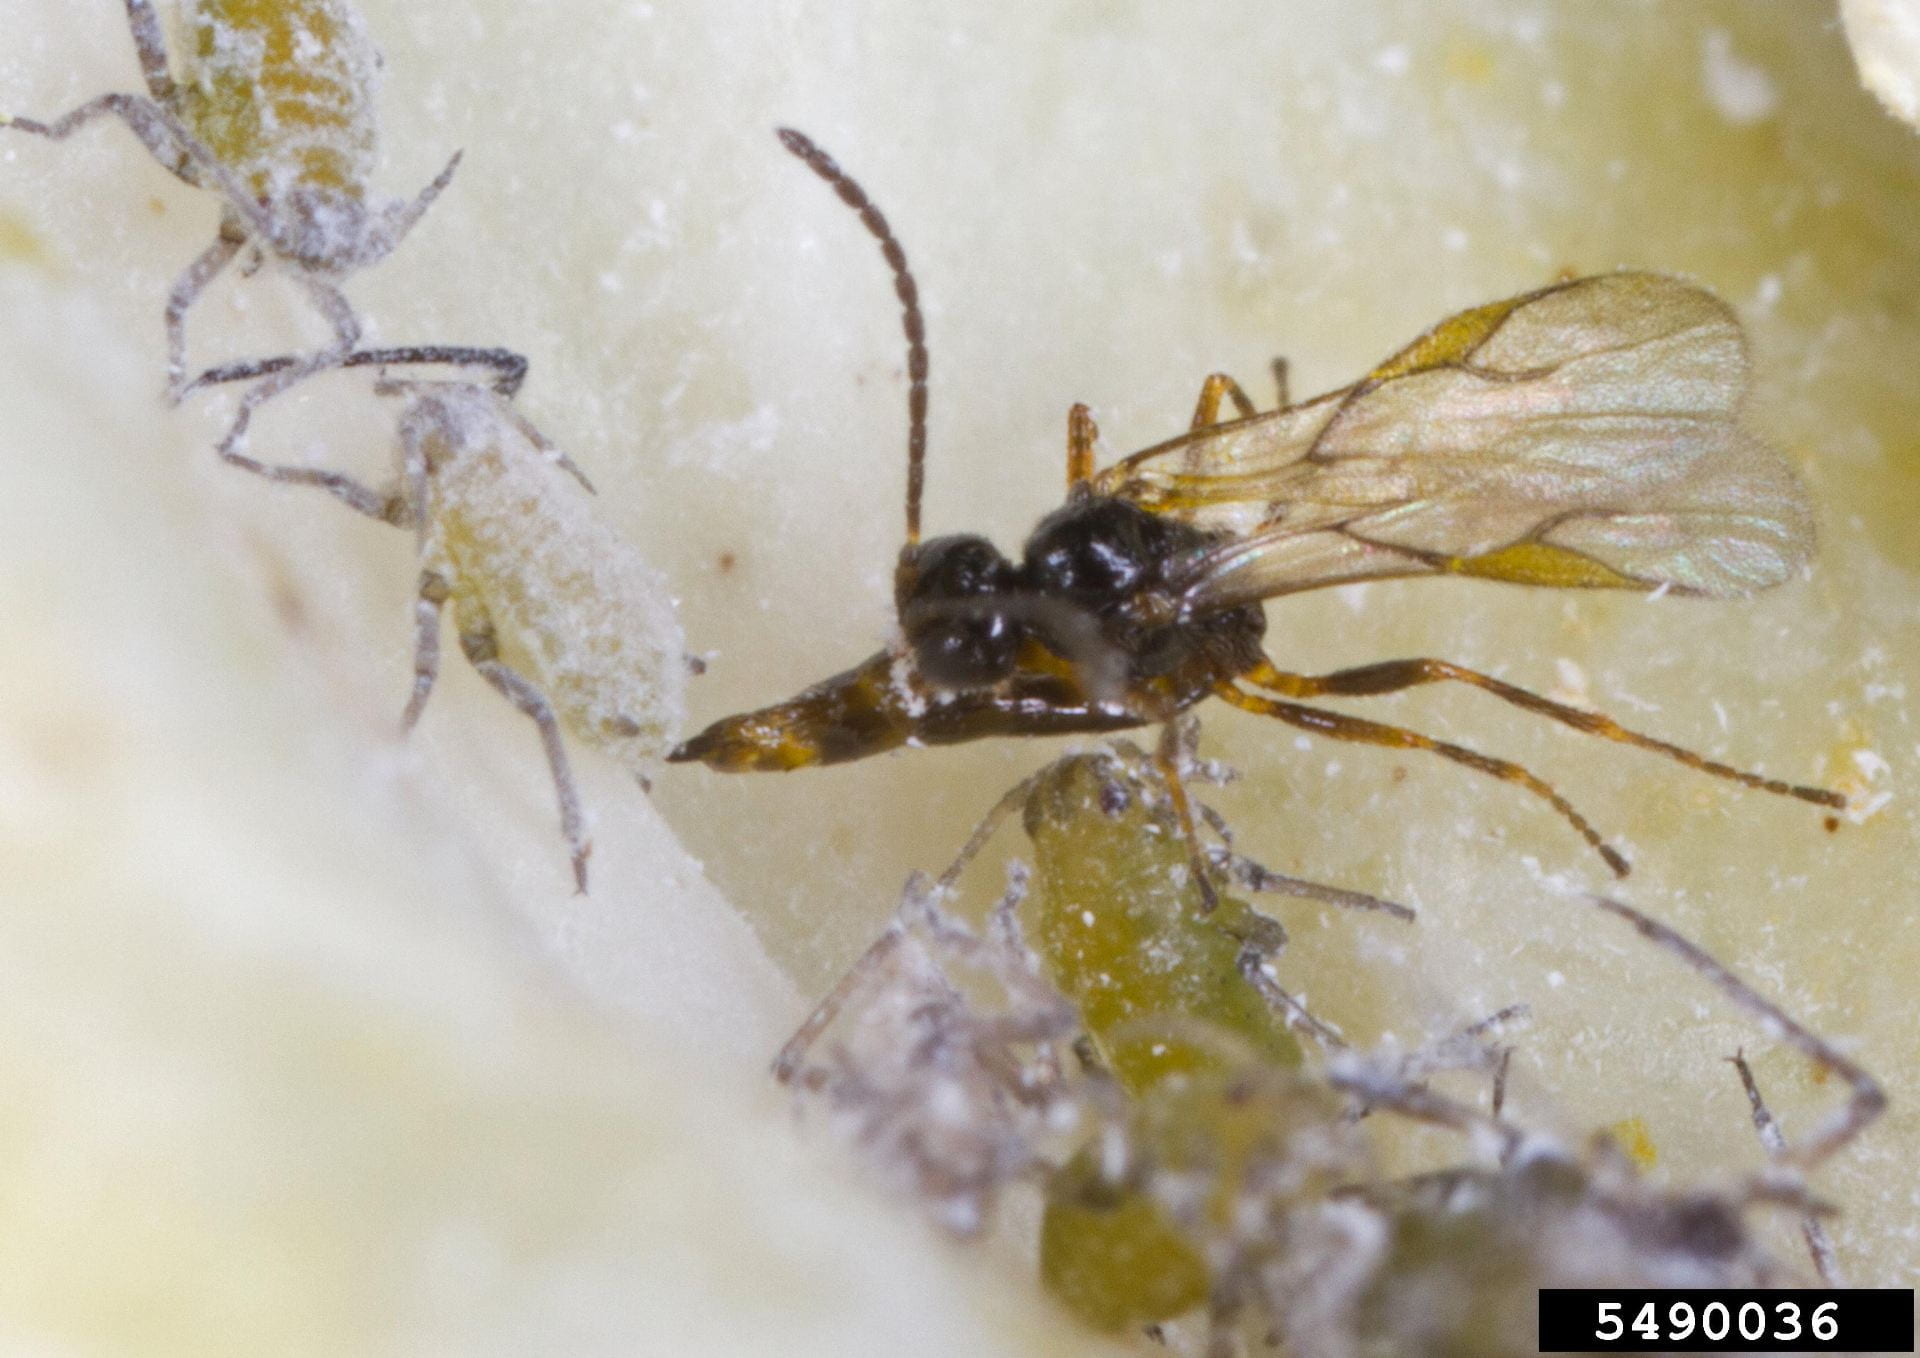
You can also find (at least some of) these four aphid species outside. Last summer I spotted the aphid below on an acorn squash plant in August. Now that you know what to look for, what species do you think it might be?
Use what you’ve learned to identify this aphid! (Photo credit: Amara Dunn)
One minor complication: Each of these four aphid species can either have wings, or be without wings. Usually aphids you find in a greenhouse have no wings, so you can stick with the above descriptions. But winged aphids can appear in the greenhouse, particularly when populations get very high. If you find aphids with wings in your greenhouse, the above descriptions won’t apply; ask for some help from your local extension office.
Both of the aphids in this picture are green peach aphids, but the one on the right has wings, and would be tricky to identify using the criteria described in this post. Get some help from an expert. (Photo credit: Whitney Cranshaw, Colorado State University, Bugwood.org)
Choosing the right natural enemy
An Aphidius parasitoid wasp lays an egg inside its aphid prey. The developing wasp will kill the aphid. These happen to be cabbage aphids. (Photo credit: David Cappaert, Bugwood.org)
A good biocontrol option for aphids is a parasitoid wasp from the genus Aphidius. These tiny wasps are called parasitoids because they lay their eggs inside of aphids. As the young wasp grows, it kills the aphid and turns it into a mummy.
Aphids that are eaten from the inside out turn into dry, brown “mummies”. On this aphid mummy you can see the hole from which the adult wasp emerged. (Photo credit: Ken Wise, NYS IPM)
But if you want to purchase Aphidius wasps to release in your greenhouse (or the banker plants and prey that support them; read more here), you’ll need to know which Aphidius species to use. Aphidius colemani works well against green peach and melon aphids, while Aphidius ervi works well against foxglove and potato aphids. Another natural enemy you can use is Aphidoletes aphidimyza. This is a tiny fly whose larvae are voracious aphid predators. Although it seems to be less effective against foxglove aphid, it may work well in combination with another natural enemy.
The larvae of the tiny fly Aphidoletes aphidomyza crawls around on leaves searching for aphids to eat. (Photo credit: Sarah Jandricic)
Like all biocontrols, Aphidius wasps and Aphidoletes larvae need to be released while your aphid population is very small, before it gets out of hand. Aphid infestations can explode very quickly! Scout your crop regularly, and keep records so you know which aphid species you are likely to have. (Consider the Pocket IPM Greenhouse Scout app to help you with your scouting and pest management.) Then plan your biocontrol releases accordingly. Parasitoids and predators for aphids should be released preventatively on crops that are prone to aphids.
If you’ve inspected your aphids at 10X magnification, and still aren’t sure which species you have, contact your local extension office for help with ID. If you are planning to send a picture, make sure that it is clear and shows the features of the aphid that you now know are important (antennae, body, cornicles).
You can learn more about aphid biocontrol in this factsheet from John Sanderson (Department of Entomology, Cornell University) on managing aphids in a greenhouse. Identification of these four common aphid species and which biocontrols you can use against them are also summarized here. The natural enemies listed in the chart are meant to be a starting place. Maximizing the efficacy of your aphid biocontrol program takes some trial and error and willingness to fine-tune your program to the crop and environmental conditions you’re dealing with. Suppliers of aphid natural enemies also have great information about how to use these biocontrol agents most effectively.