Tag Archives: home biocontrol

Creating habitat for beneficial insects: Project update at the end of the first year

Fair warning, this is going to be a longer post. But partly that’s because there are so many pictures. I will start with the overview, then go a bit deeper into the weeds (literally and figuratively). To help you navigate more quickly, here’s a sort of table of contents that will quickly take you to the information you may be most interested to read:

Overview

Details on weed control

Timing of fall planting

The steps we followed to establish beneficial insect habitat

mixed wildflowers in a field
Some of our beneficial insect habitat plots looked really beautiful this fall! Others are still works in progress.

Overview
Remember back in June when I told you about the different techniques we were comparing for establishing habitat for beneficial insects? Time for an update! Here’s a brief, two-page summary of the first year of this project. For all the juicy details (and lots of pictures), keep reading!

First, remember that when I say “beneficial insects”, I mean both pollinators and natural enemies of pests. (Technically, arthropod would be a better term than insect, because spiders and predatory mites are some of the beneficial creatures we’d like to attract.) Fortunately, the same type of plants provide food and shelter for both pollinators and natural enemies on your farm or in your garden.

We used six different techniques to establish this habitat during Spring, Summer, and Fall of 2018. Treatment E was our control, where we did nothing but mow (after initial herbicide applications).
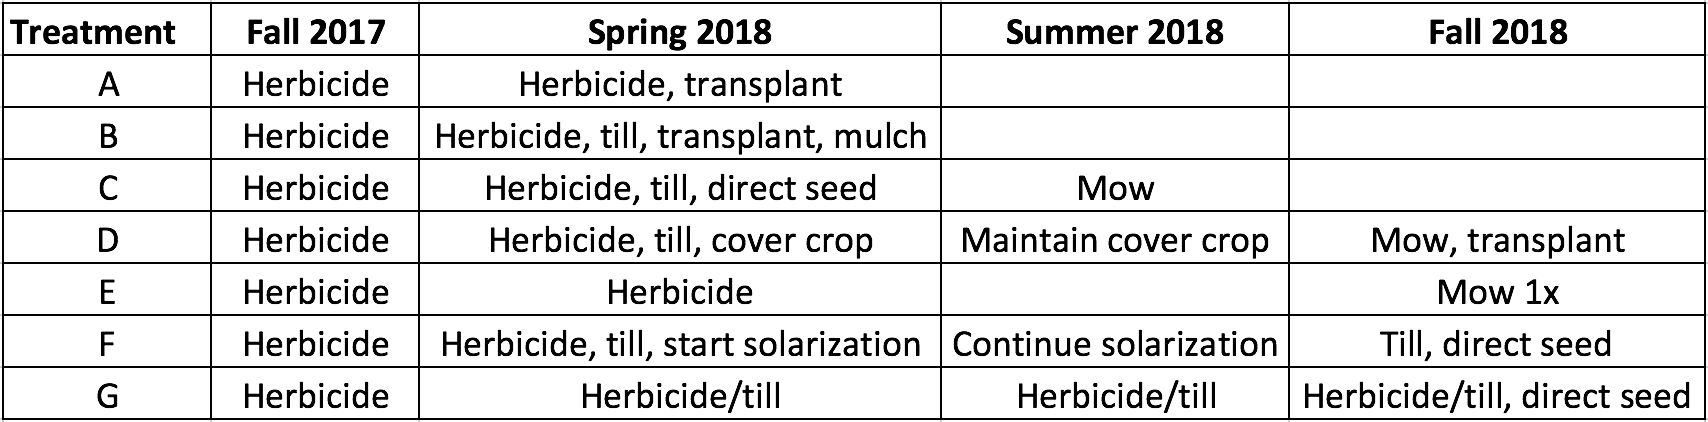
Treatment Fall 2017 Spring 2018 Summer 2018 Fall 2018
A Herbicide Herbicide, transplant  Weed 2x Replace dead plants
B Herbicide Till, transplant, mulch Weed 2x Replace dead plants
C Herbicide Till, direct seed Mow 3x Mow 1x
D Herbicide Till, plant buckwheat Mow 1x, till, plant buckwheat Mow 1x, transplant
E – control Herbicide Herbicide Mow 3x Mow 1x
F Herbicide Till, lay plastic Continue solarization Remove plastic, direct seed
G Herbicide Herbicide/till Herbicide 2x, till 1x Till 1x, direct seed

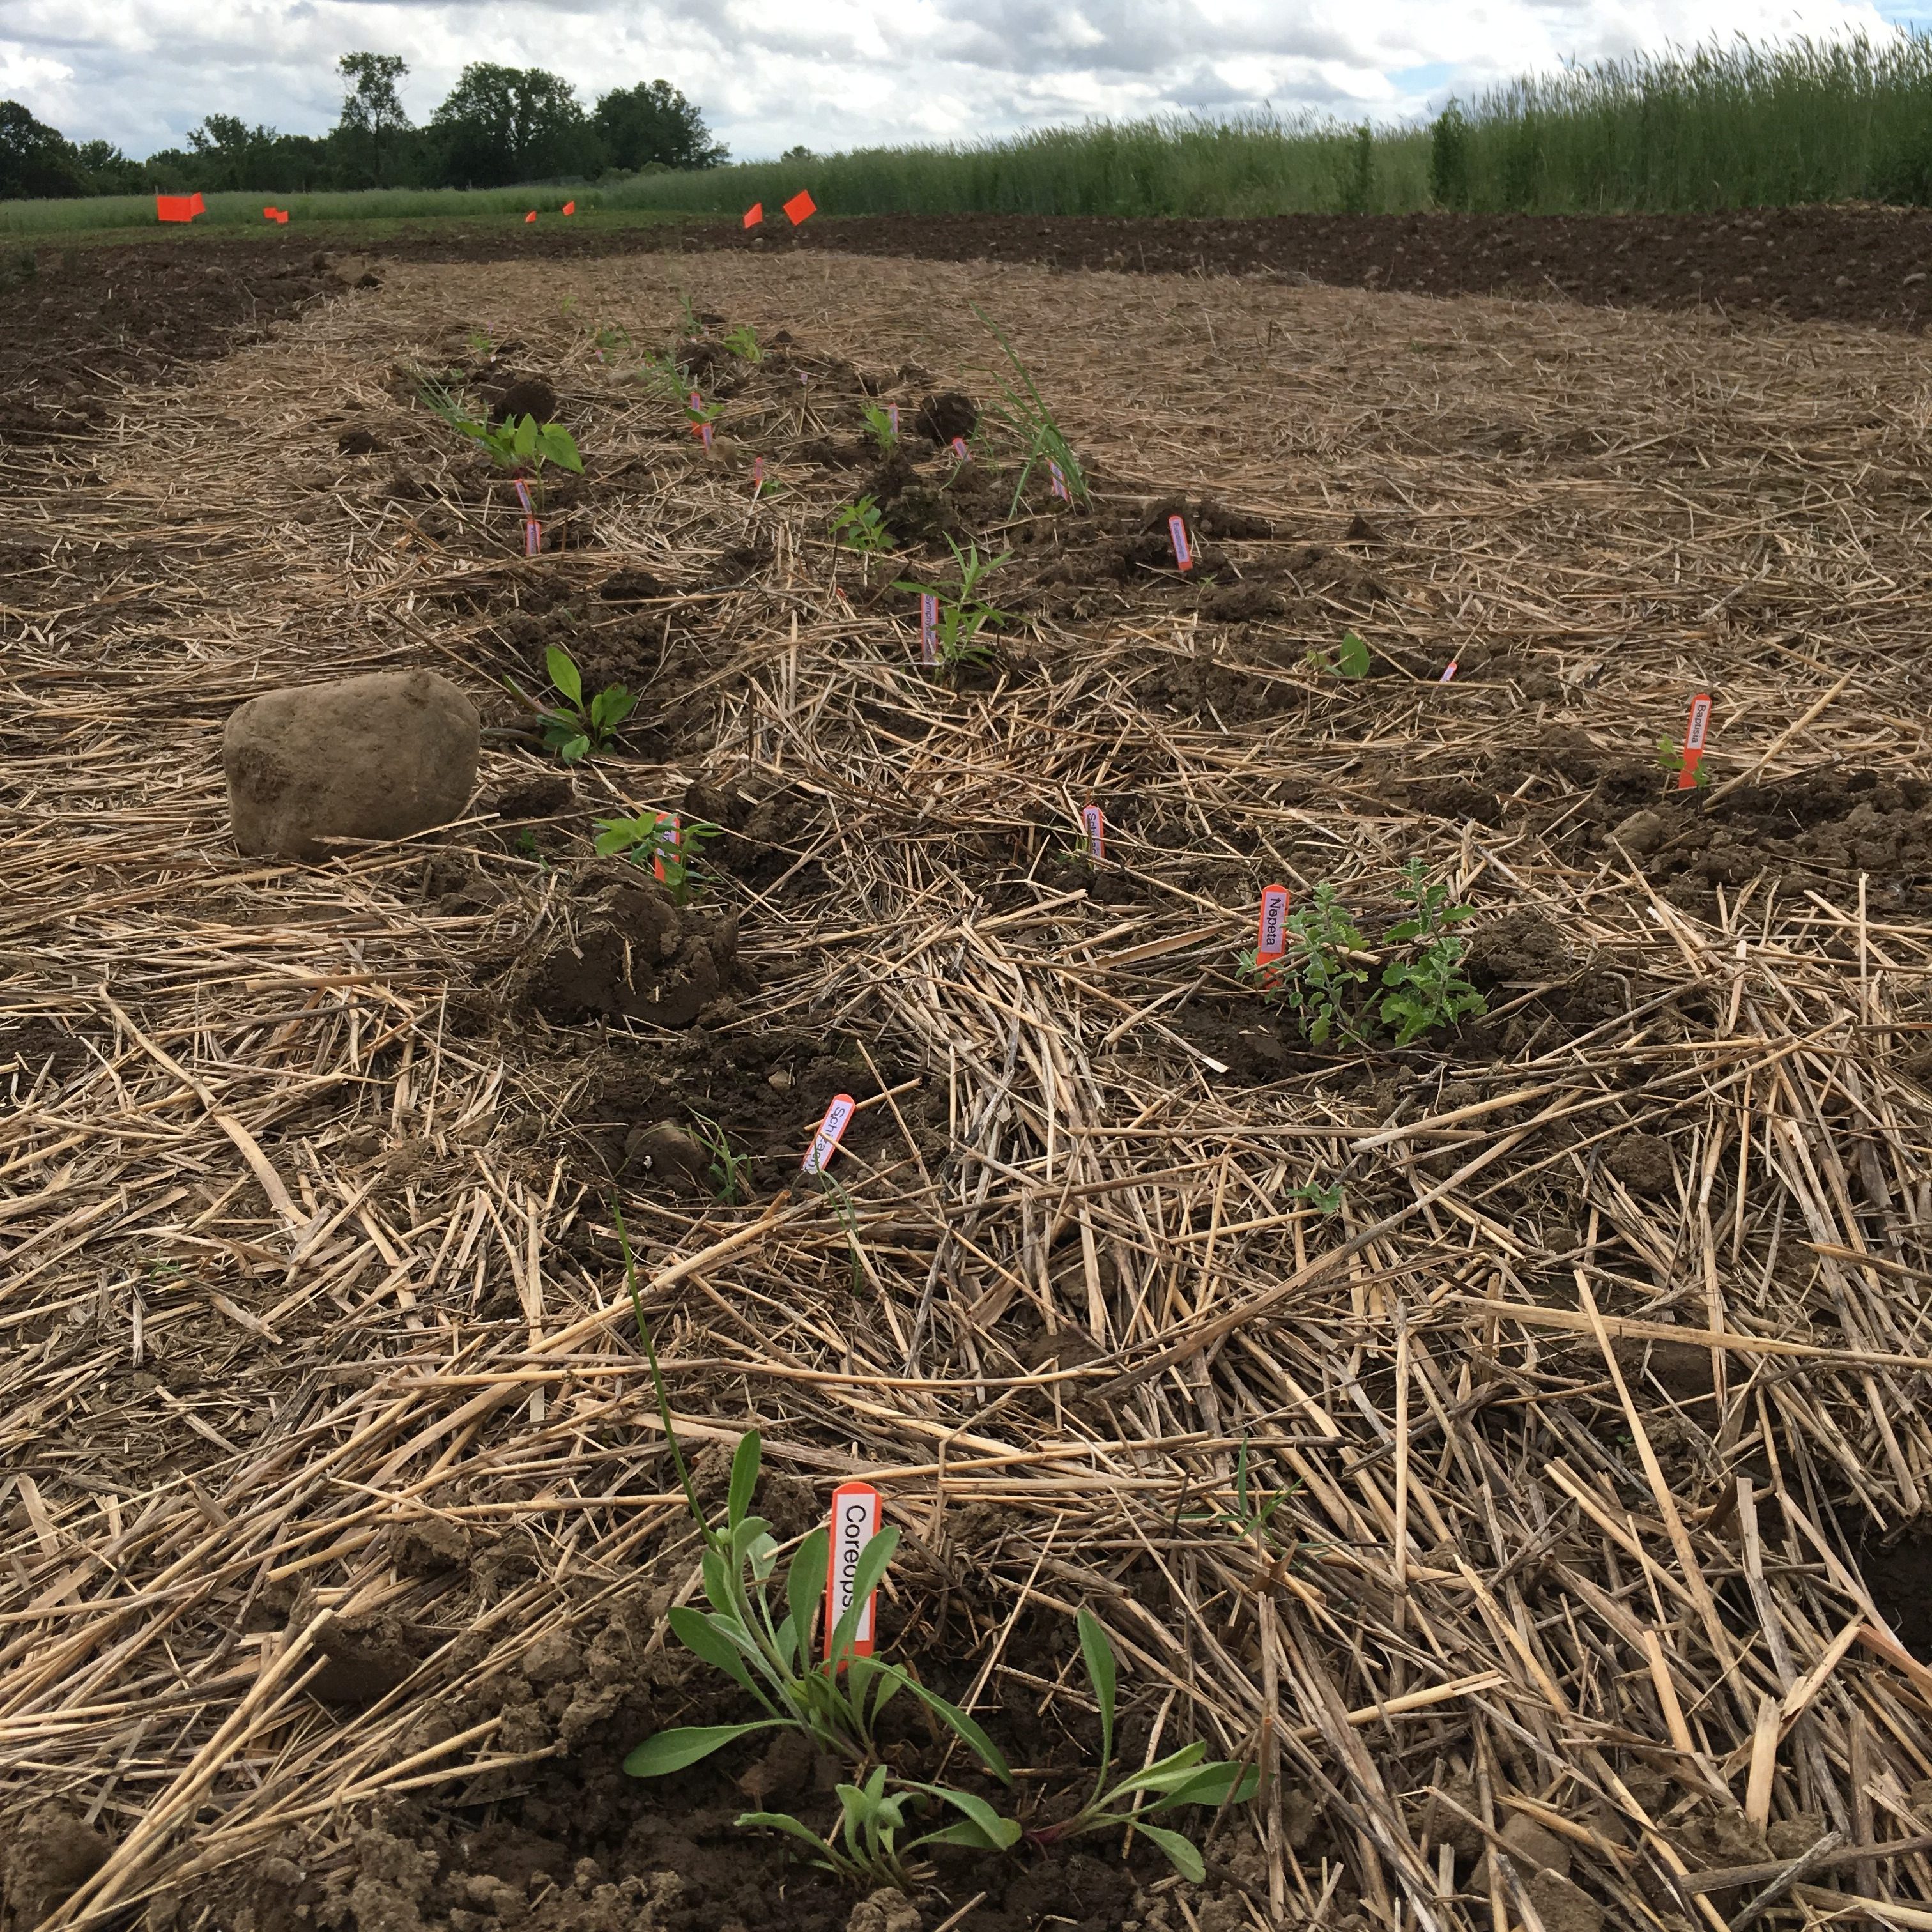
We transplanted the following species in treatments A, B, and D:

Common name Scientific name Number of plants in each 5 x 23 ft plot
Anise hyssop Agastache foeniculum 2
Common milkweed Asclepias syriaca 3
Blue false indigo Baptisia australis 2
Lanced-leaved coreopsis Coreopsis lanceolata 3
Purple coneflower Echinacea purpurea 2
Boneset Eupatorium perfoliatum 3
Wild bergamot Monarda fistulosa 2
Catmint Nepeta faassinii 2
Tall white beard tongue Penstemon digitalis 3
Black-eyed Susan Rudbeckia fulgida va. Fulgida 1
Little bluestem (grass) Schizachyrium scoparium 11
Showy goldenrod Solidago speciosa 1
New England aster Symphyotrichum novae- angliae 3
Ohio spiderwort Tradescantia ohiensis 2
NY ironweed Vernonia noveboracensis 2
Golden alexanders Zizia aurea 3

We planted seeds in treatments C, F, and G. The seed mixture we used was the Showy Northeast Native Wildflower & Grass Mix from Ernst Seeds, which included a more diverse species mix. This mix changes a bit from year to year. If you’re interested, you can learn about the details of the specific mix we used here.

 Labor and costs

Not surprisingly, there were big differences in how much time and money we spent on different treatments this first year. The costs and hours below are for a total area of 460 ft2 (0.01 A) per treatment. Most of the cost differences are due to the huge difference in seed versus transplant expenses. We paid about $2 per plant and needed 180 plants for each treatment. In contrast, we spent about $12.50 on seed for each treatment. You can find itemized lists of cost and time inputs for each treatment here.

Treatment Supply costs Time (person hrs)
A – spring transplant $417.12 13.2
B – spring transplant & mulch $539.29 20.4
C – spring seed $17.75 4.4
D – buckwheat & fall seed $390.55 10.3
E – control $2.32 2.6
F – solarize & fall seed $148.02 10.2
G – herbicide/tillage & fall seed $22.04 6.3

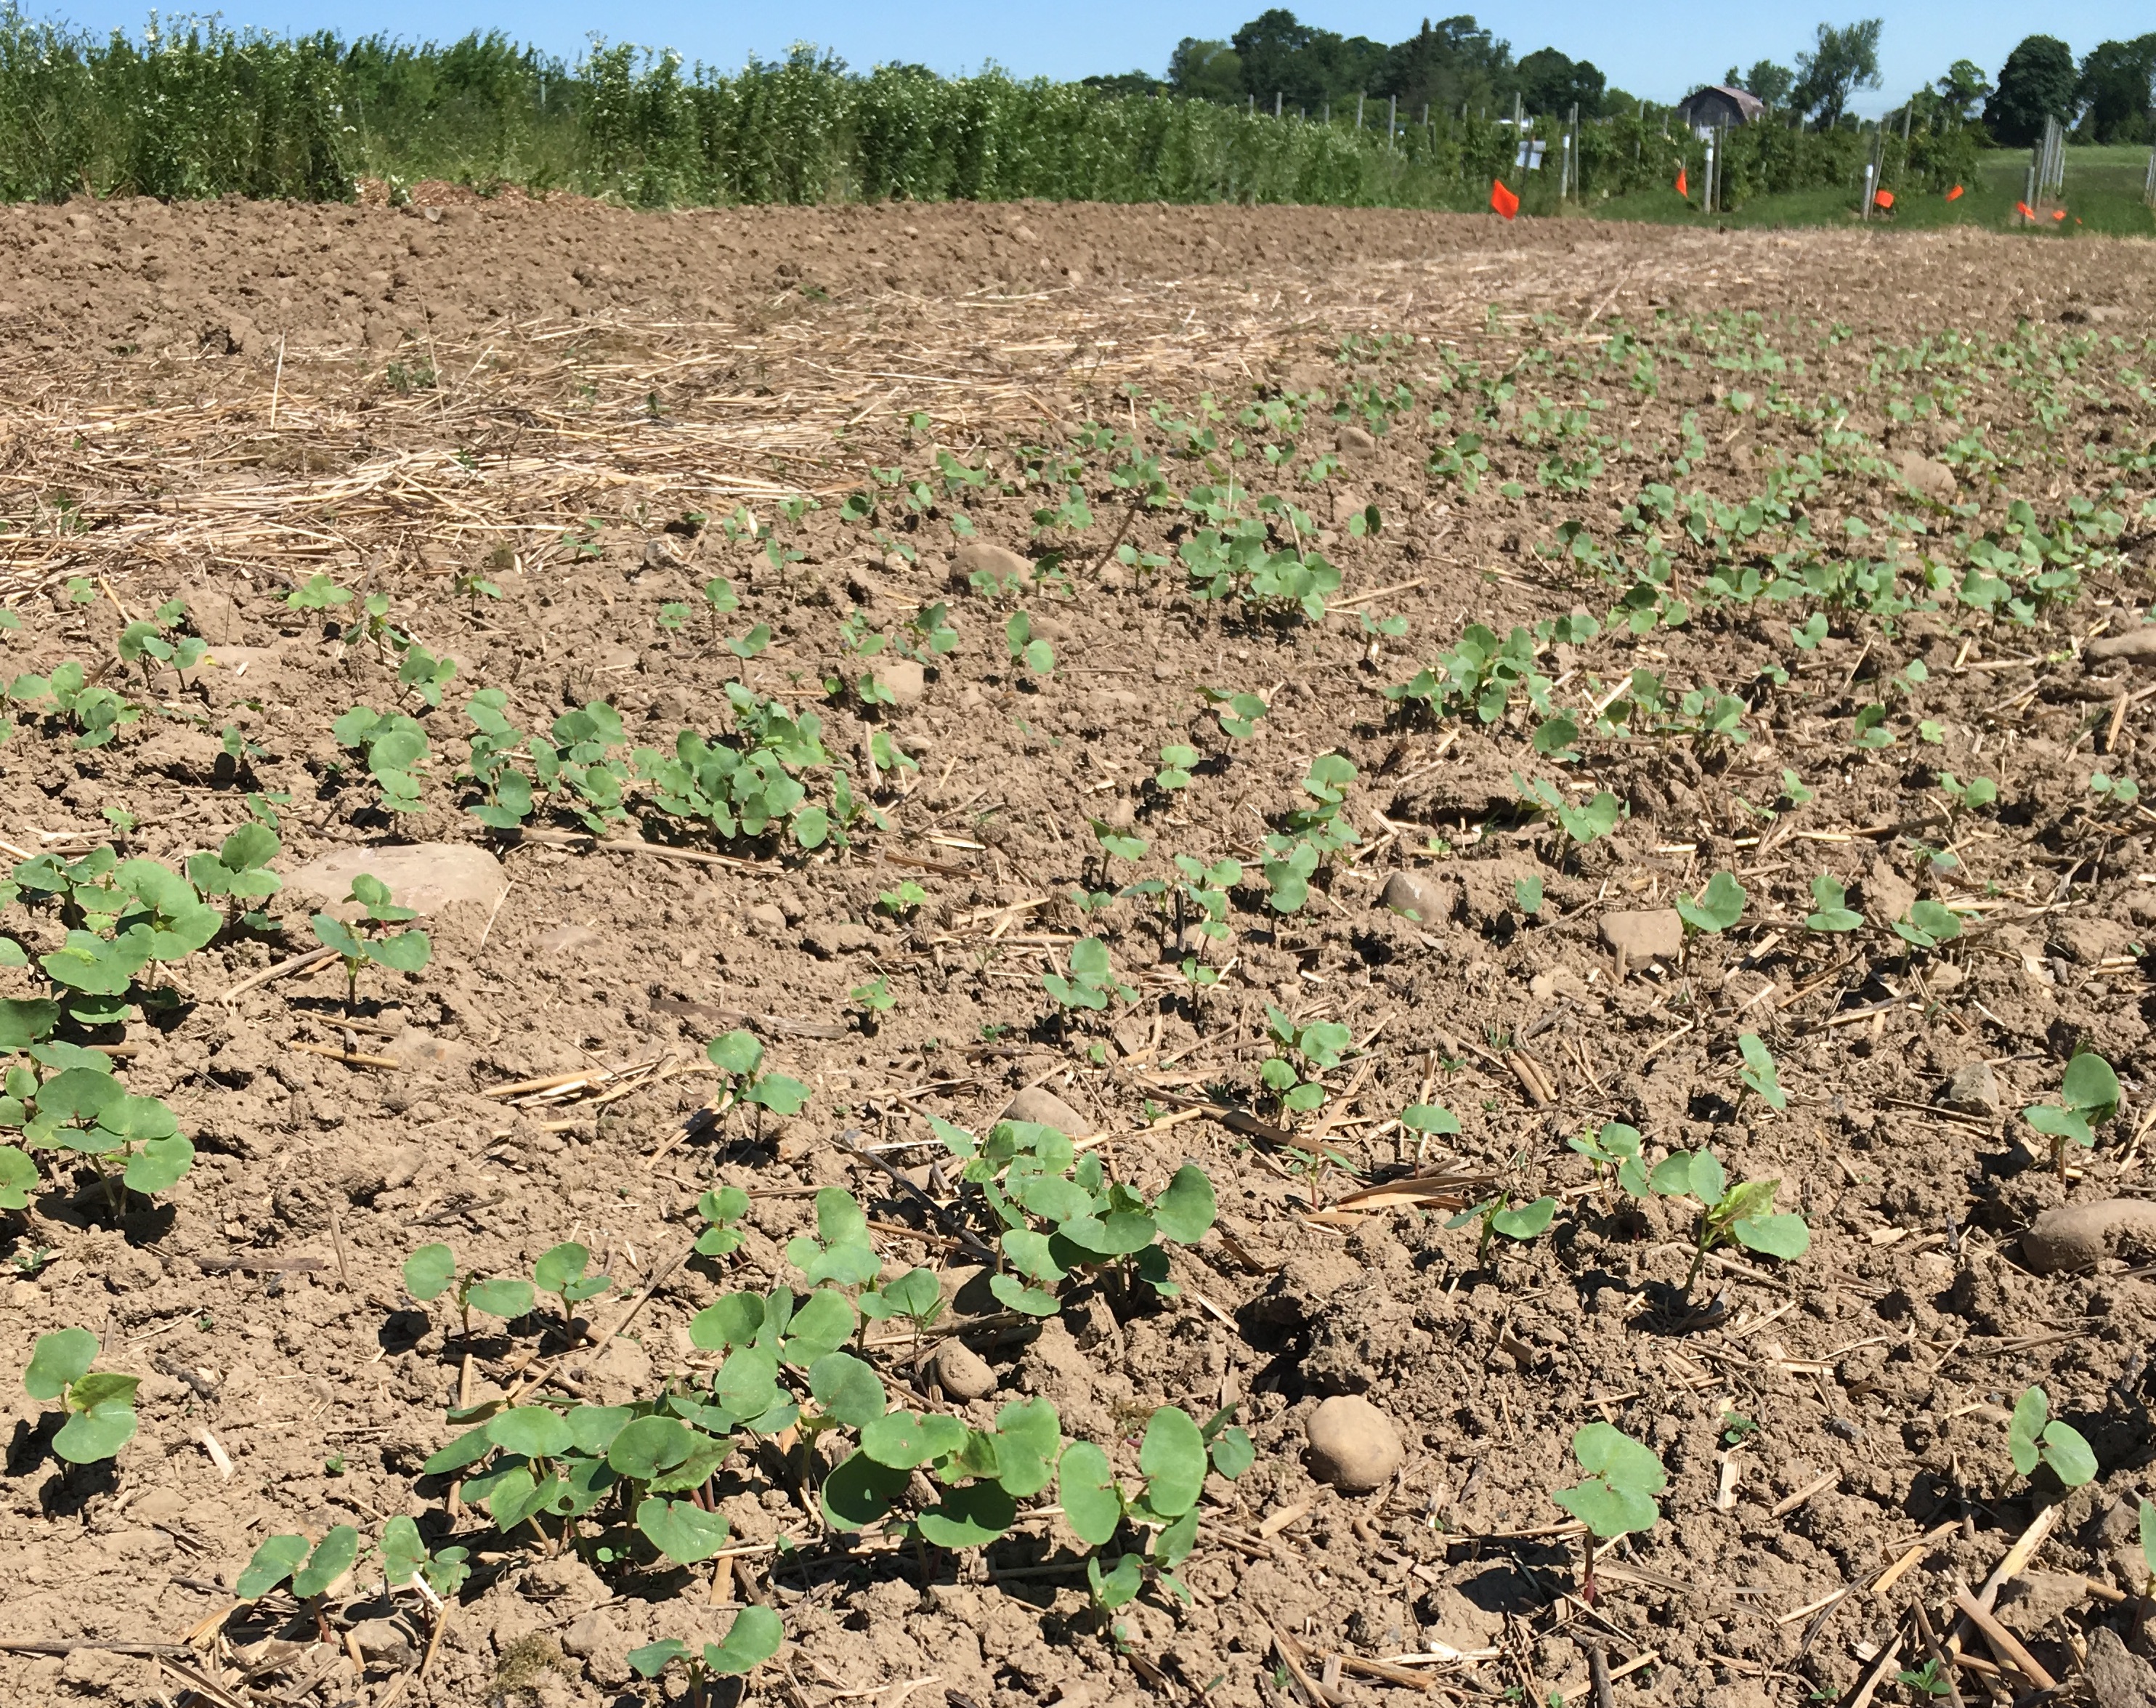
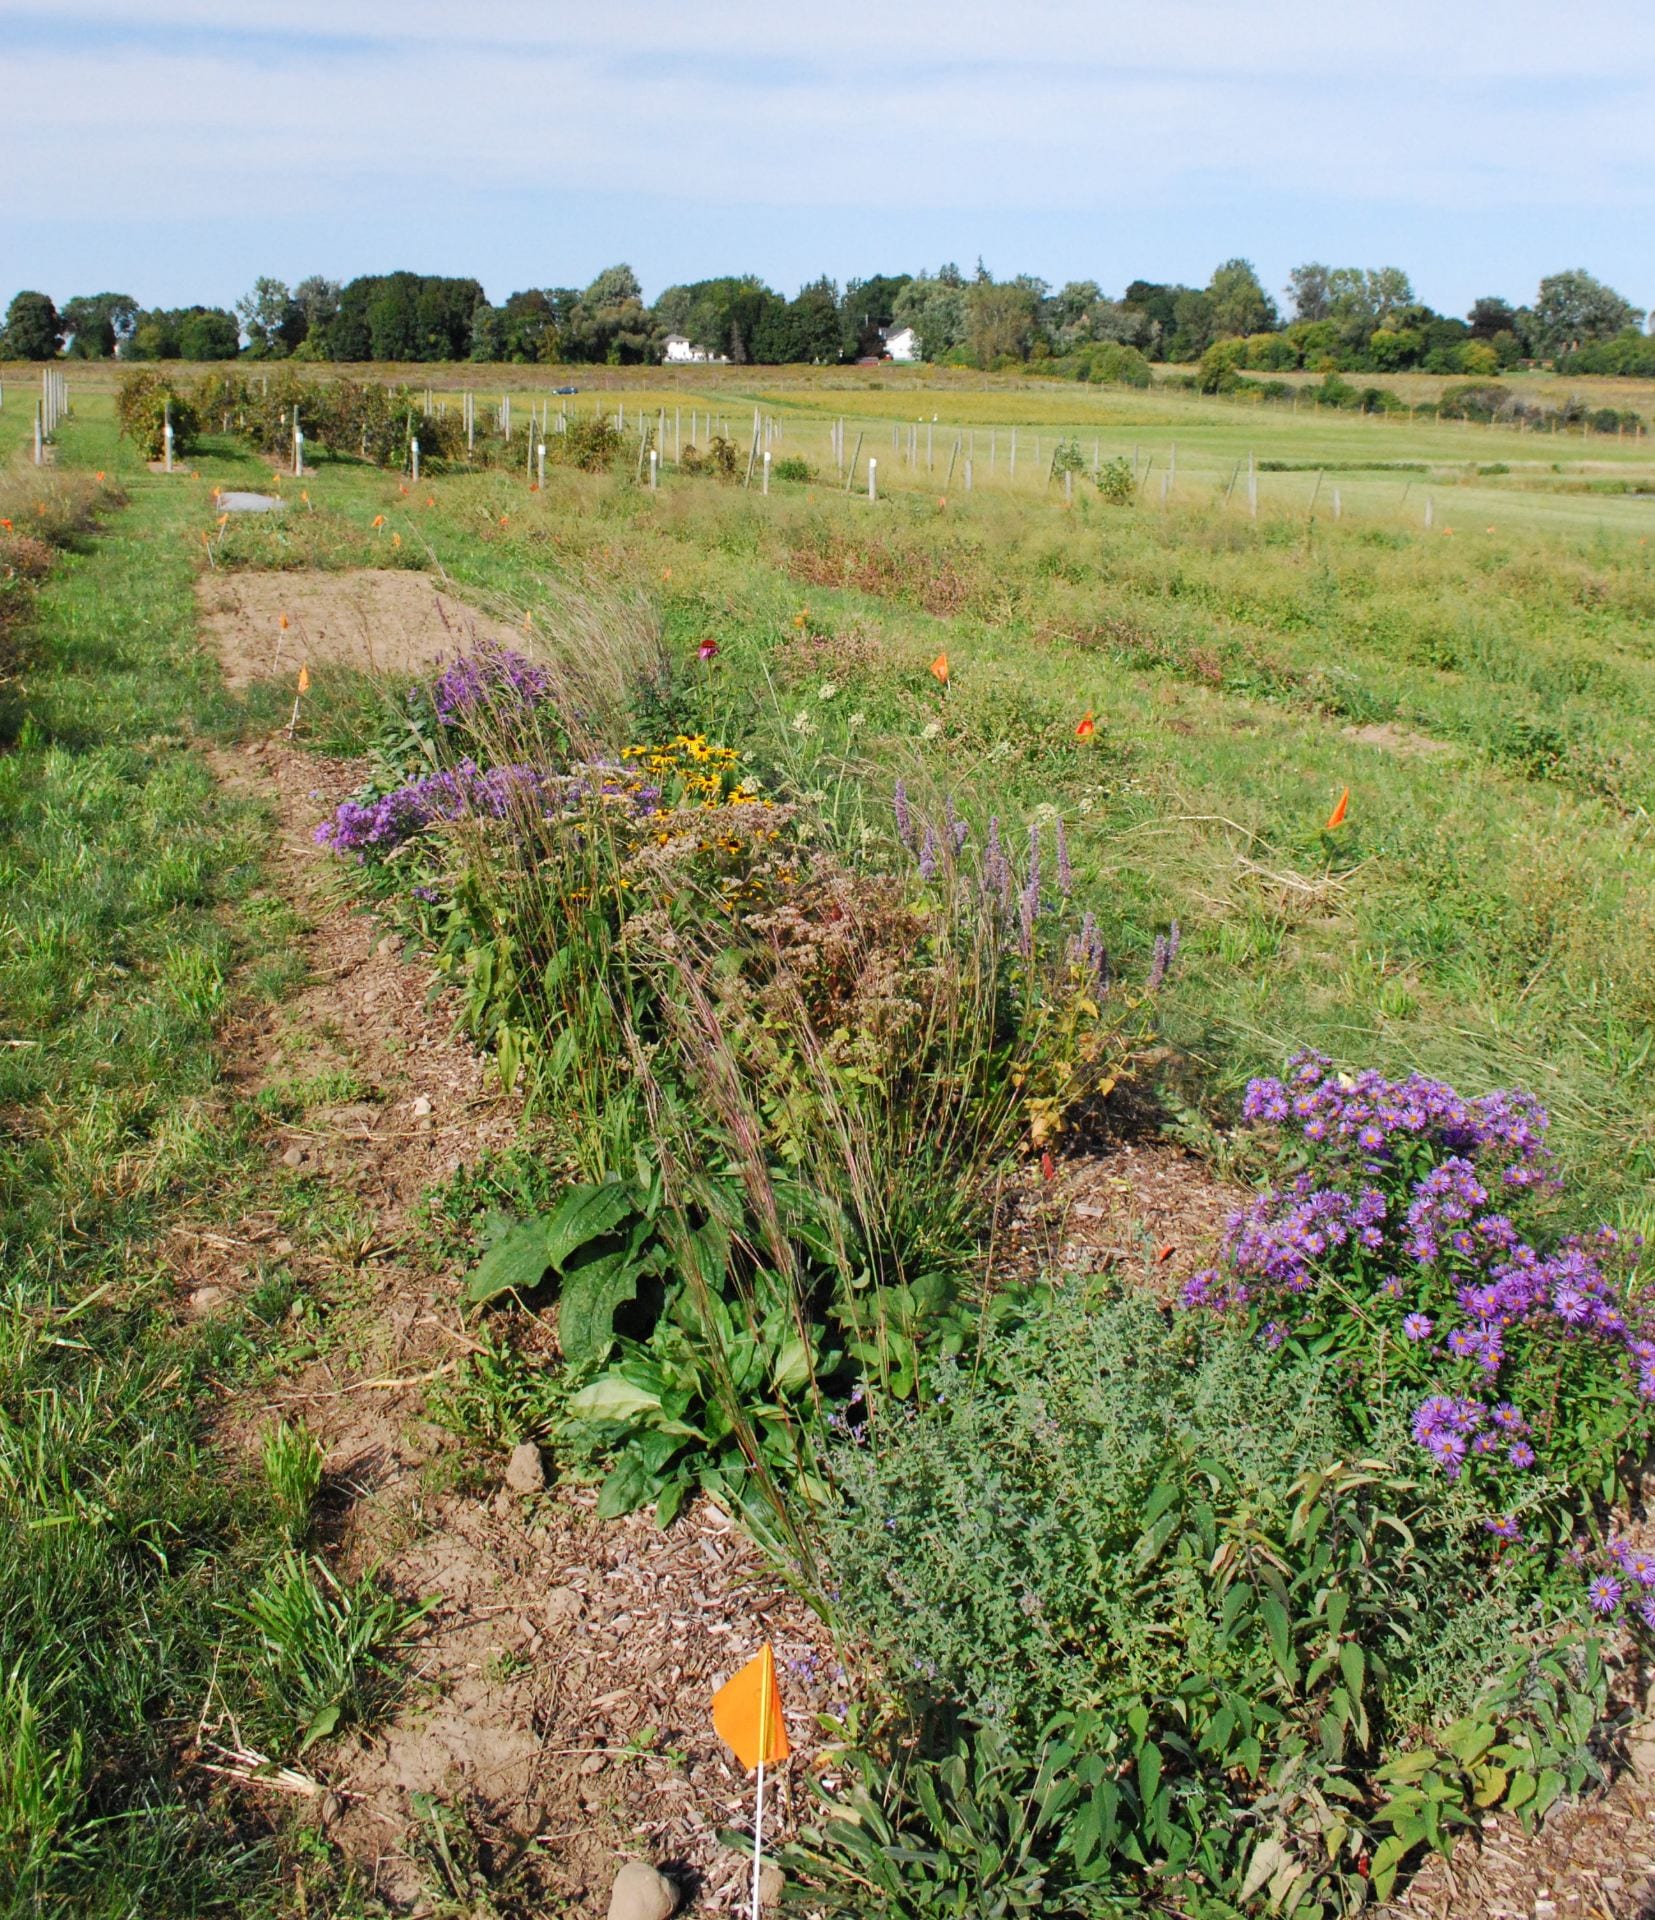
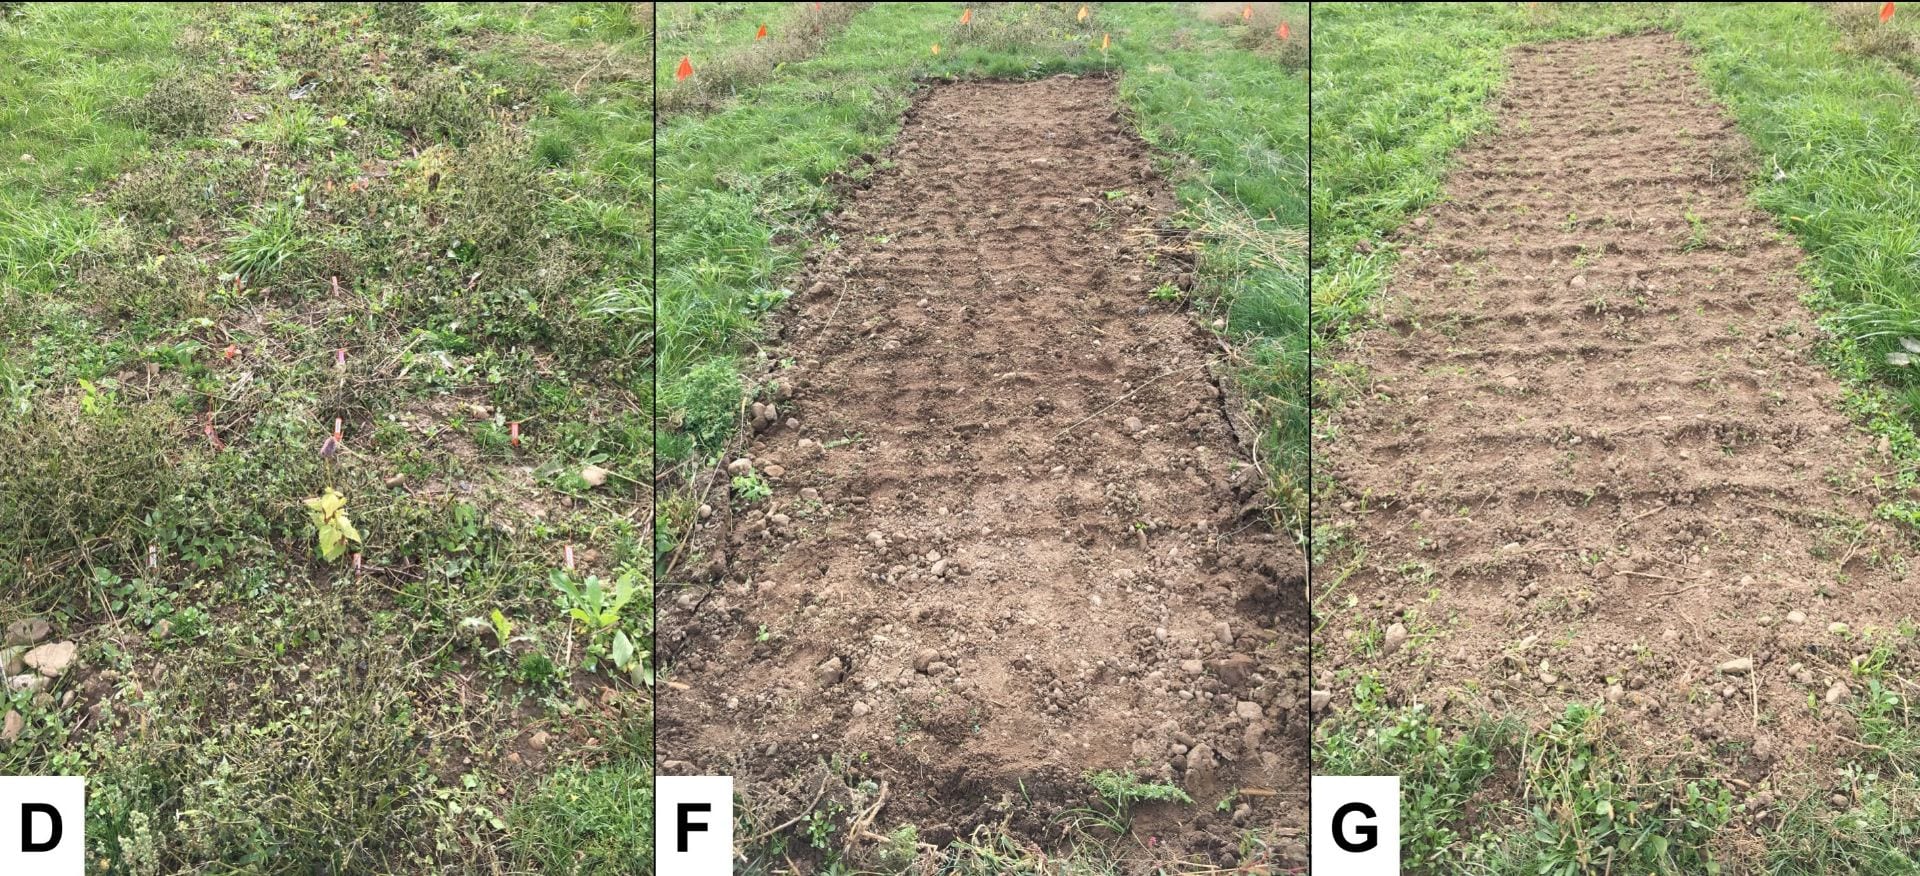
But, there were also big differences in how quickly the plants established. By September, both treatments (A and B) that had been transplanted in the spring looked like well-established gardens, with large, blooming wildflowers.

Transplanted plots with more weeds (left) and fewer weeds (right). Plot on the right had been mulched.
Four and a half months after transplanting, the beneficial habitat plants in treatments A (left) and B (right) were mostly growing well. But there was a big difference in weed control, in spite of similar amounts of time spent weeding each treatment.

We were generally pleased by how well most of the spring transplants survived. Although all the transplants came in 50-cell flats, some were larger than others, and the larger transplants survived better. We were fortunate to be able to plant into nice moist ground, so except for a little water on the day of transplanting, we didn’t irrigate. Survival might not have been as good if we’d had different planting conditions.

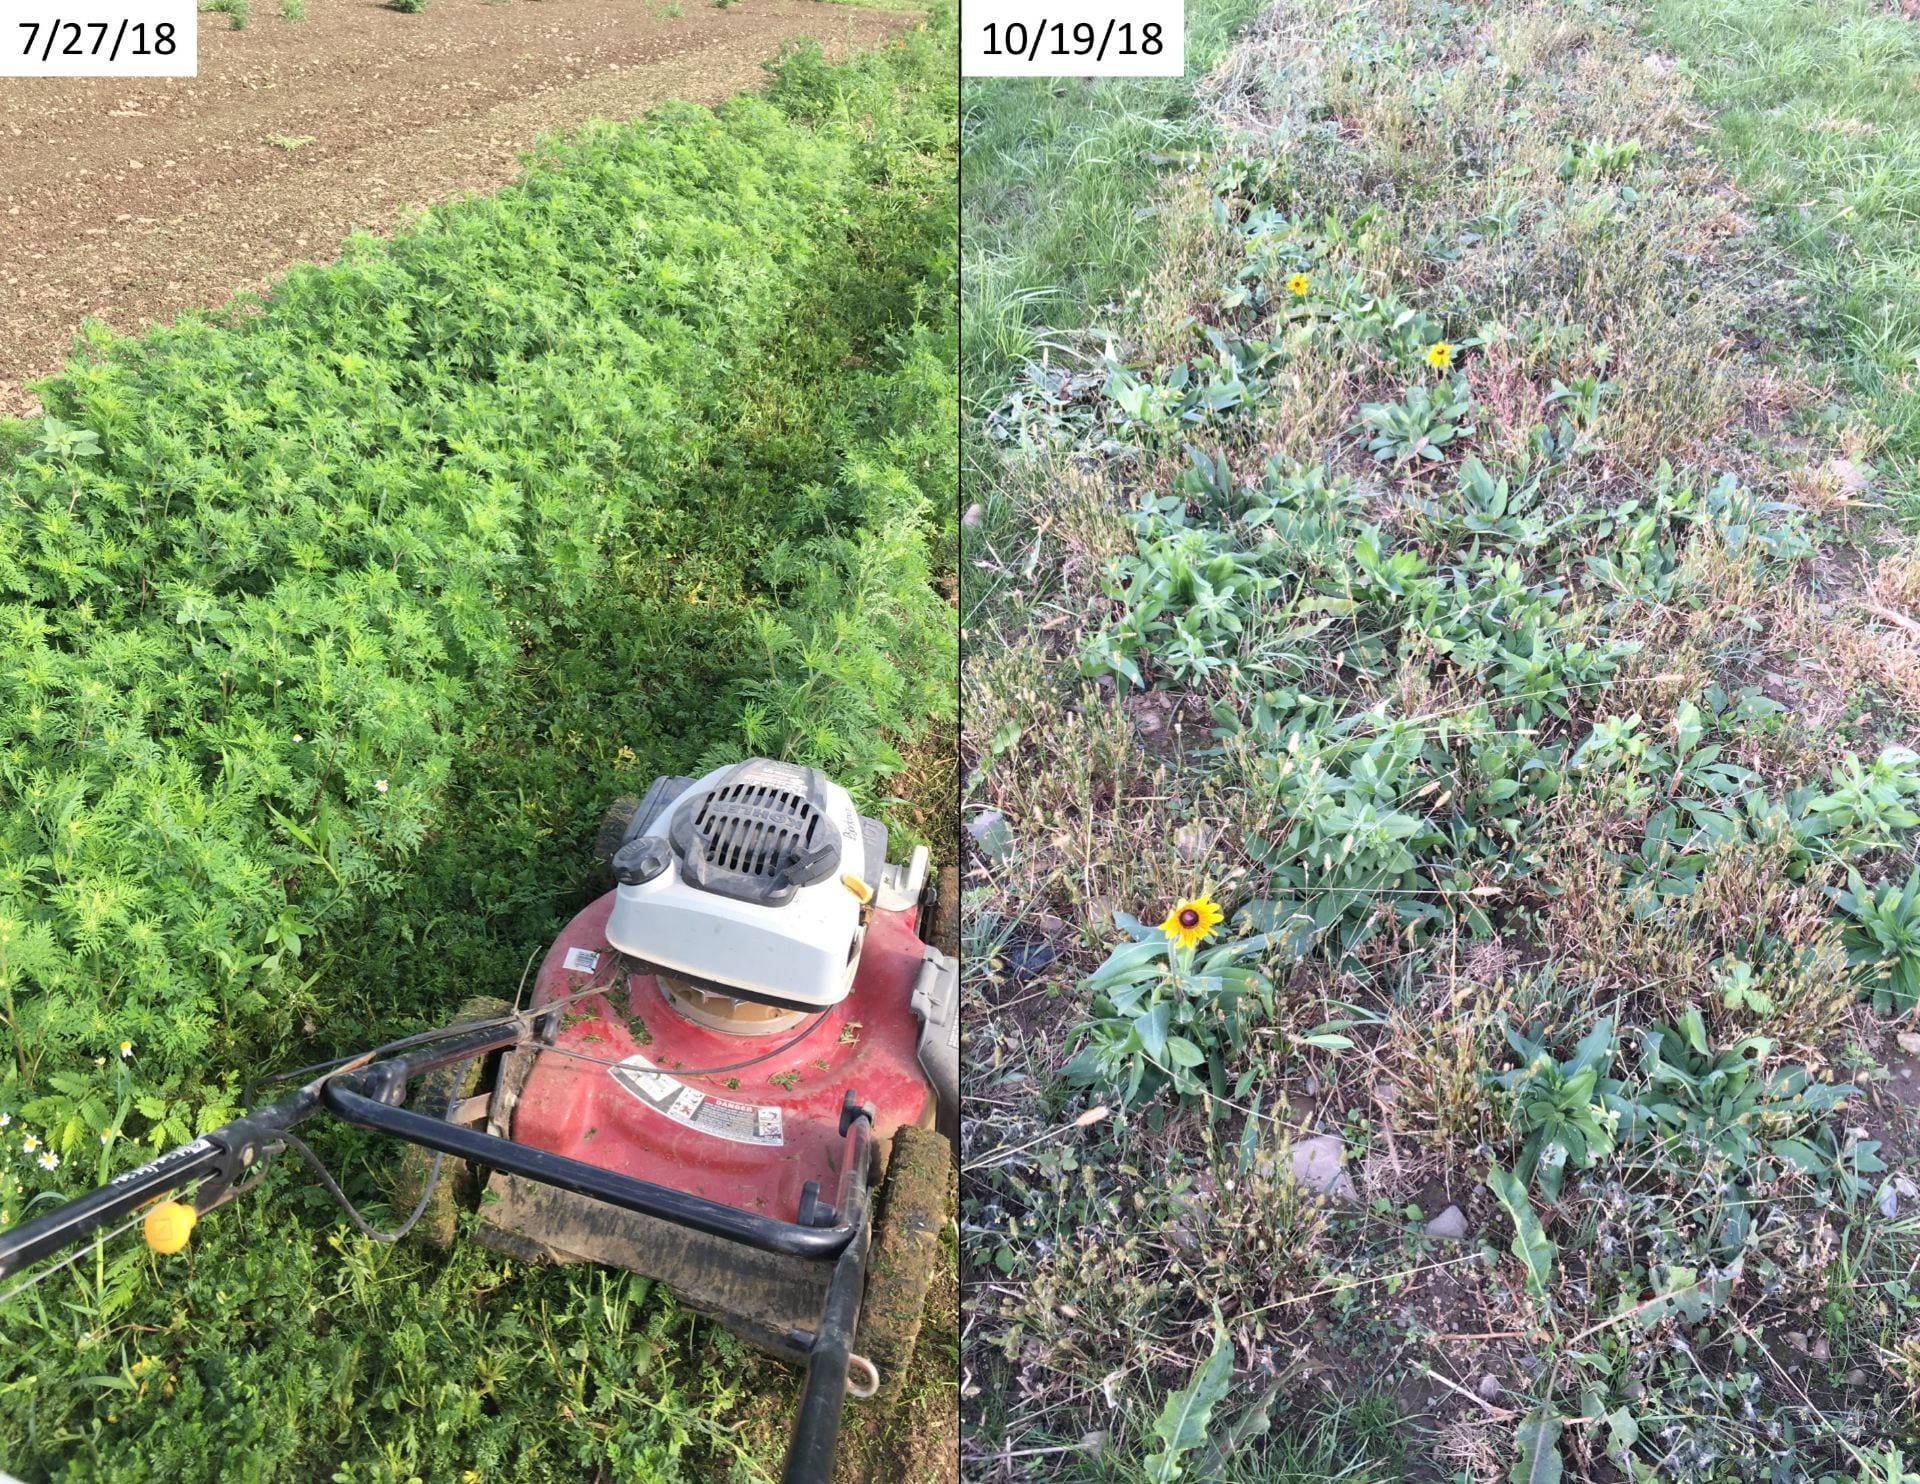
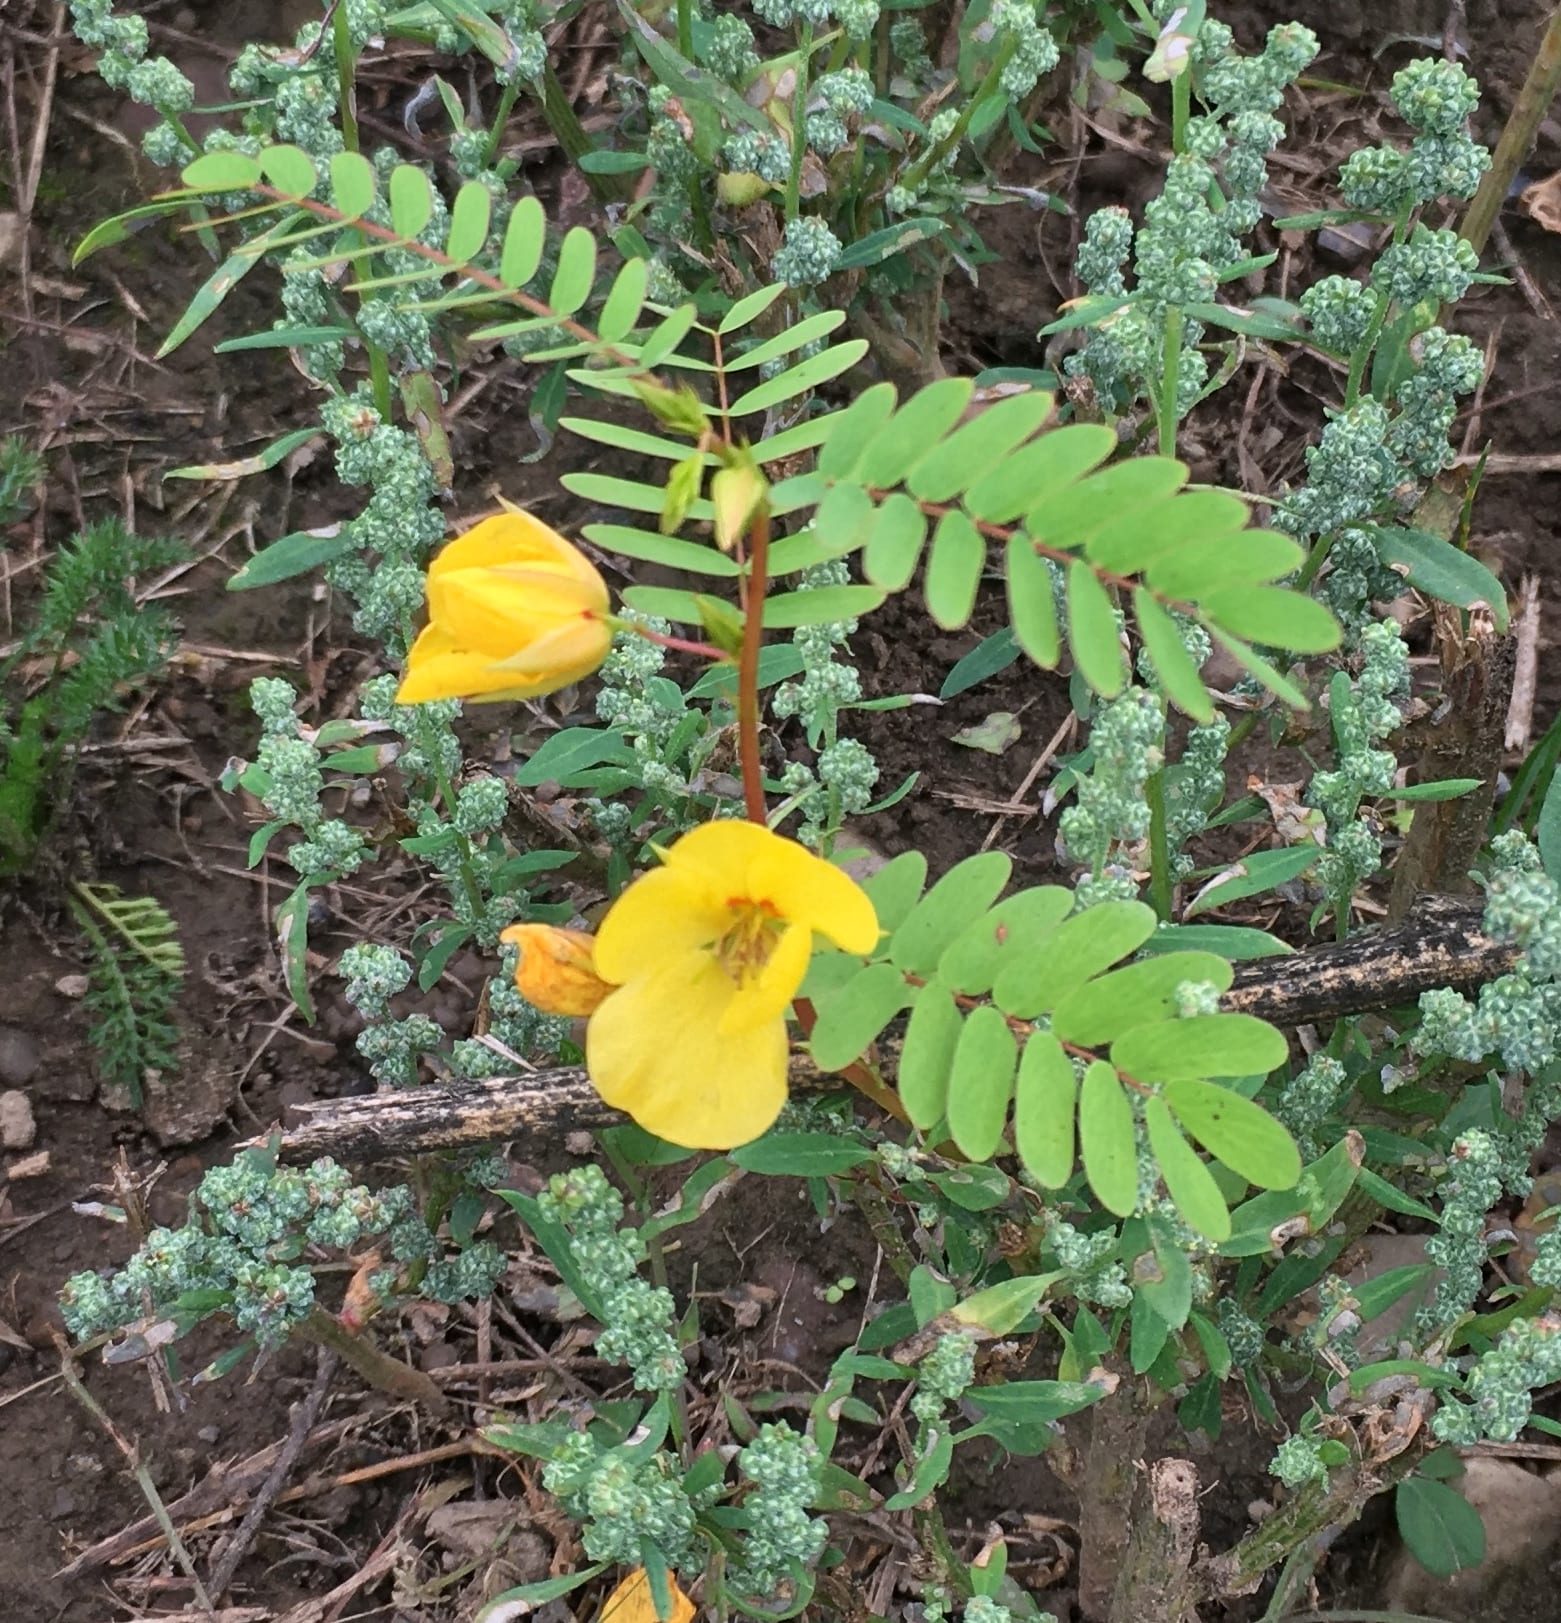
In contrast, the much less expensive treatment C was not looking too impressive even by October. A few partridge peas and blackeyed Susans bloomed this year, but otherwise it didn’t look much different from the control plots. In mid-summer, it looked like we were growing more ragweed than wildflowers.

Mower cutting ragweed (left) and mowed weedy mix with a few yellow flowers blooming.
In late July, it looked like we were growing mostly ragweed in treatment C (left). But after mowing four times during the summer and fall, you could definitely see the blackeyed Susans establishing (right).

Two of the treatments (F and G) were planted with seeds this fall, and one treatment (D) was transplanted this fall. So it’s really too early to tell how successful those treatments were. Stay tuned for more updates!

Mixture of mowed weeds with small plants (left), plot of bare ground (middle and right)
Fall transplanted (D) or direct seeded treatments (F and G) did not look very impressive by October 19, 2018. I’m curious to see what they look like next spring, summer, and fall!

Details on weed control

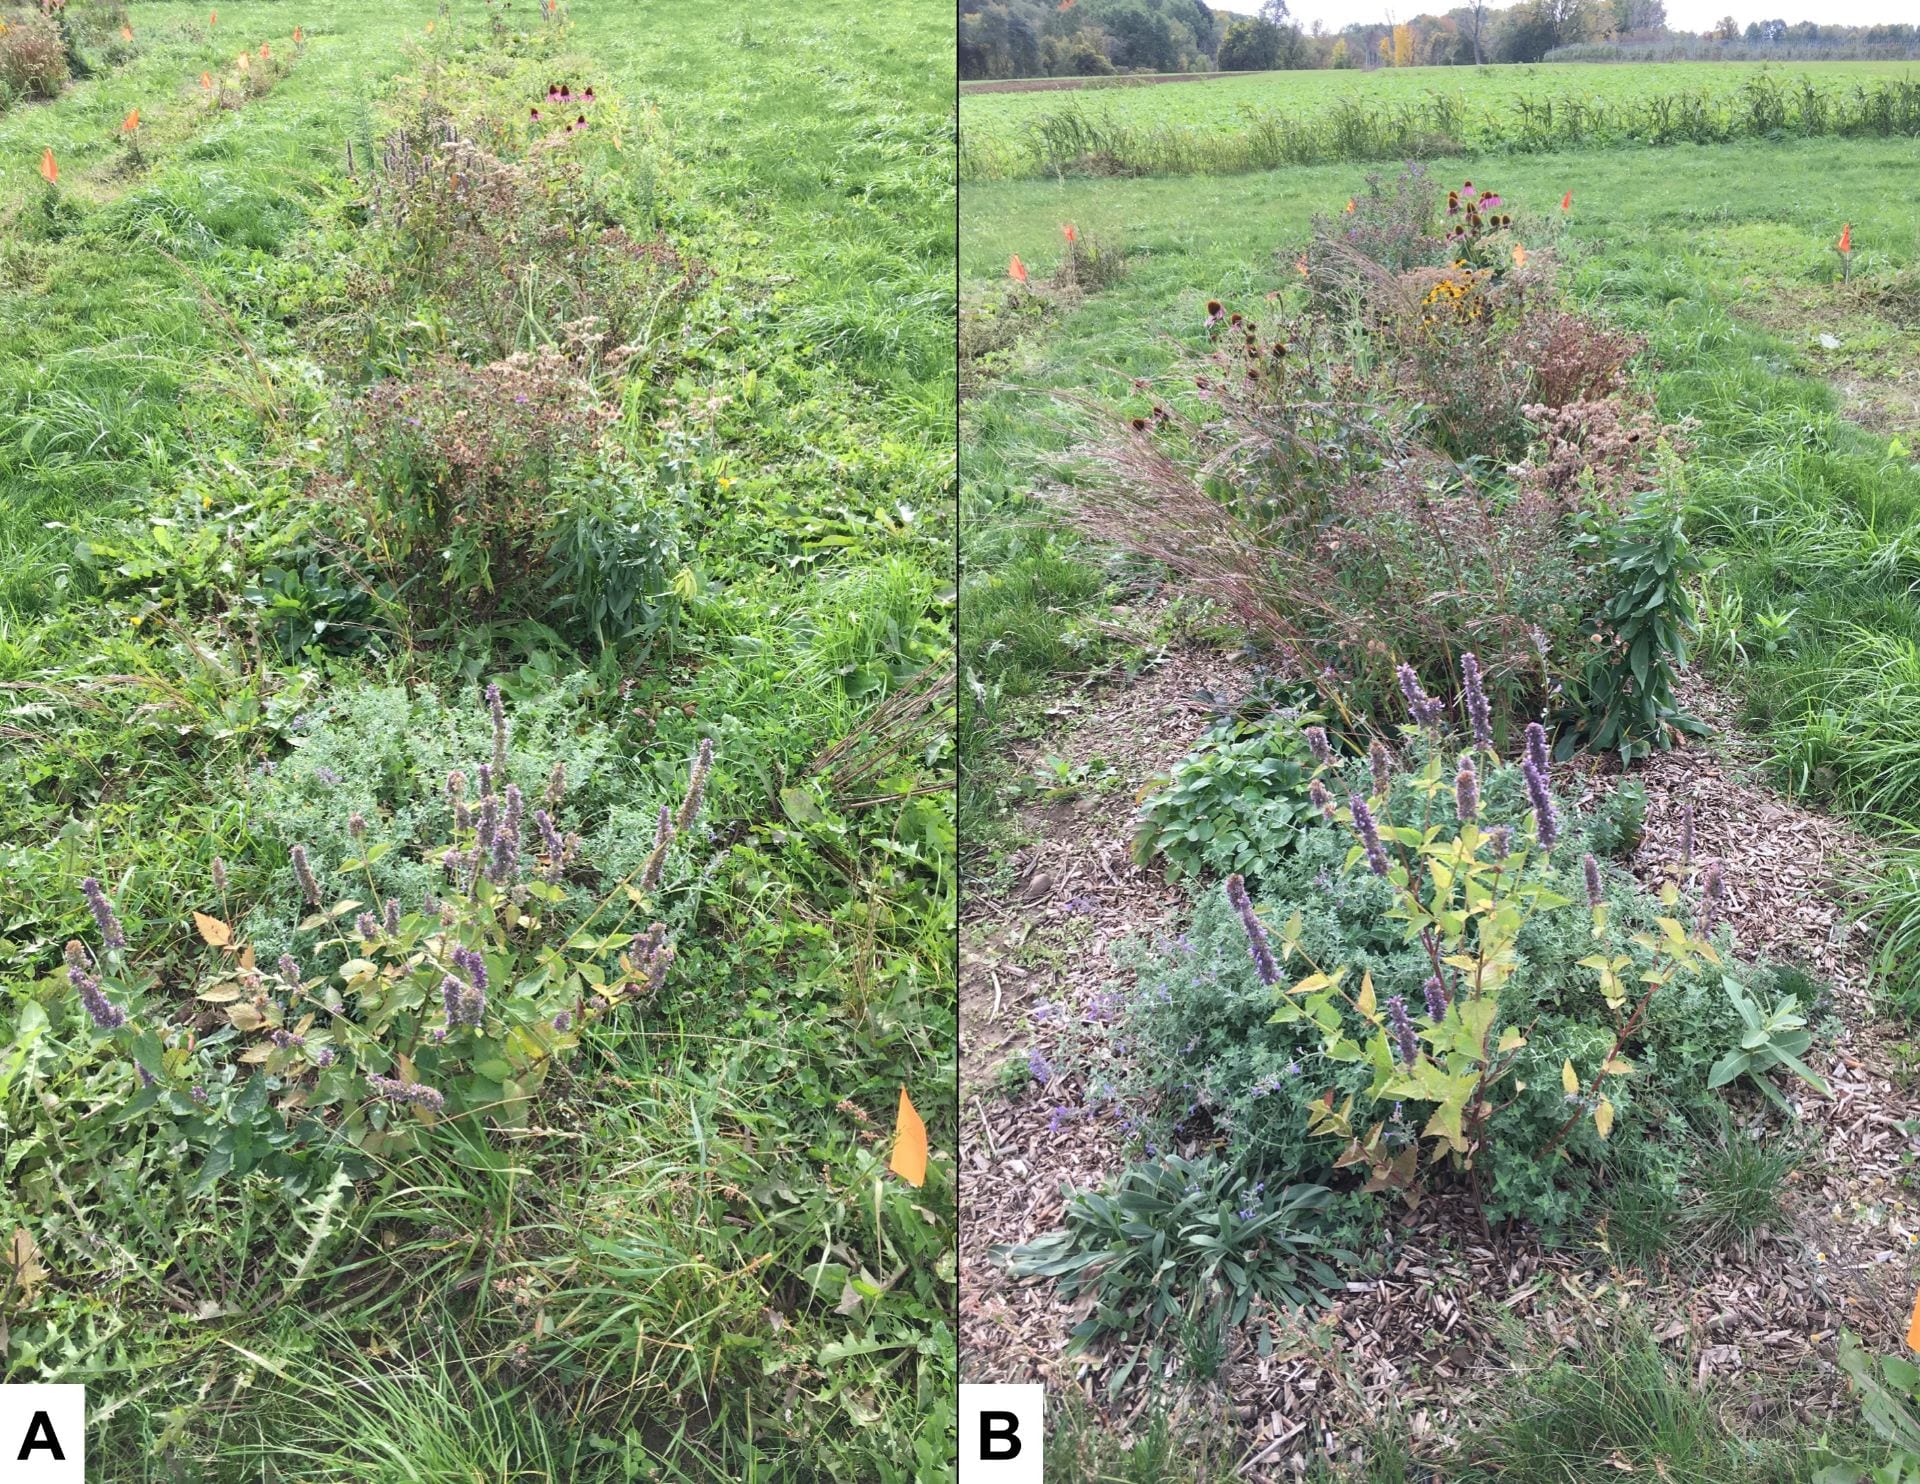
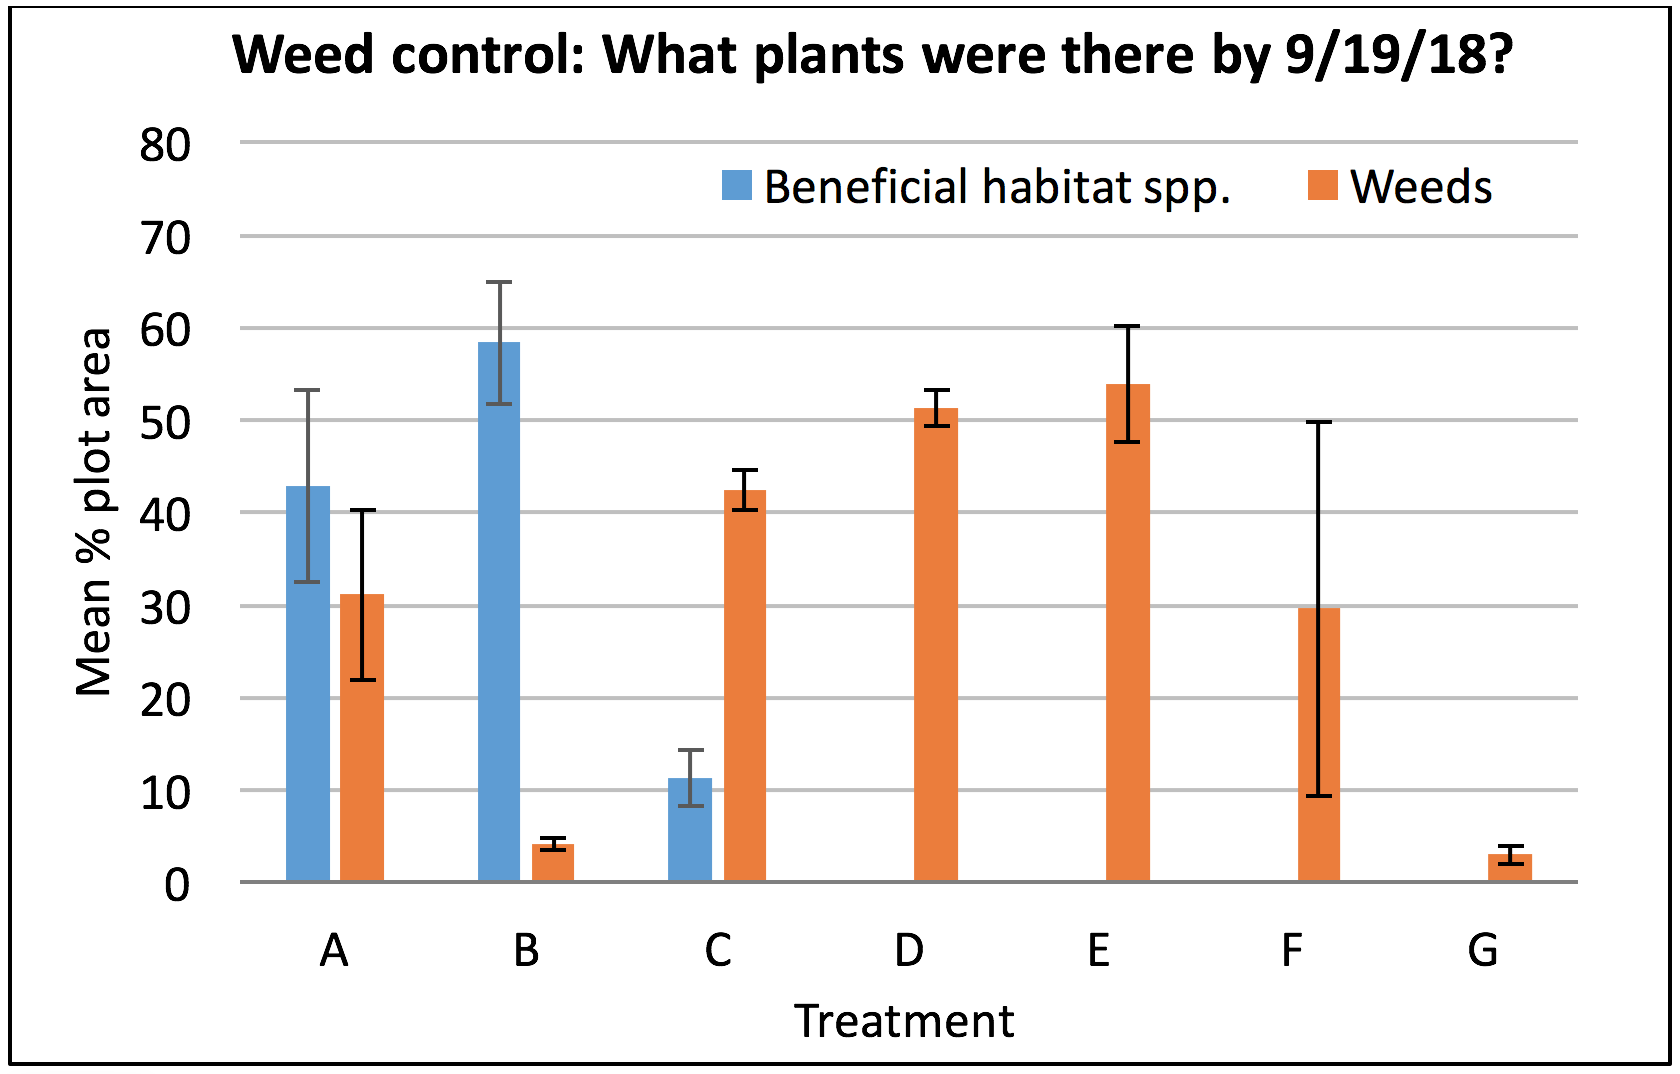
What about weeds? The graph below shows the average percent of the surface area of each plot that was covered with weeds versus planted beneficial habitat species on September 19, 2018. (Thank you, Bryan Brown, NYS IPM Integrated Weed Management Specialist for doing a weed assessment for us!) While we spent about the same amount of time weeding treatments A and B (the time difference is due to the time spent mulching treatment B), we achieved much better weed control with the mulch than without it!

Bar graph showing how much of each plot area was covered by weeds and by beneficial plants for each treatment
Bryan Brown assessed the percent of each plot that was covered with either the beneficial habitat species we had planted (blue) or weeds (orange). Each bar represents the average of four plots for each treatment, and the error bars show the standard error.

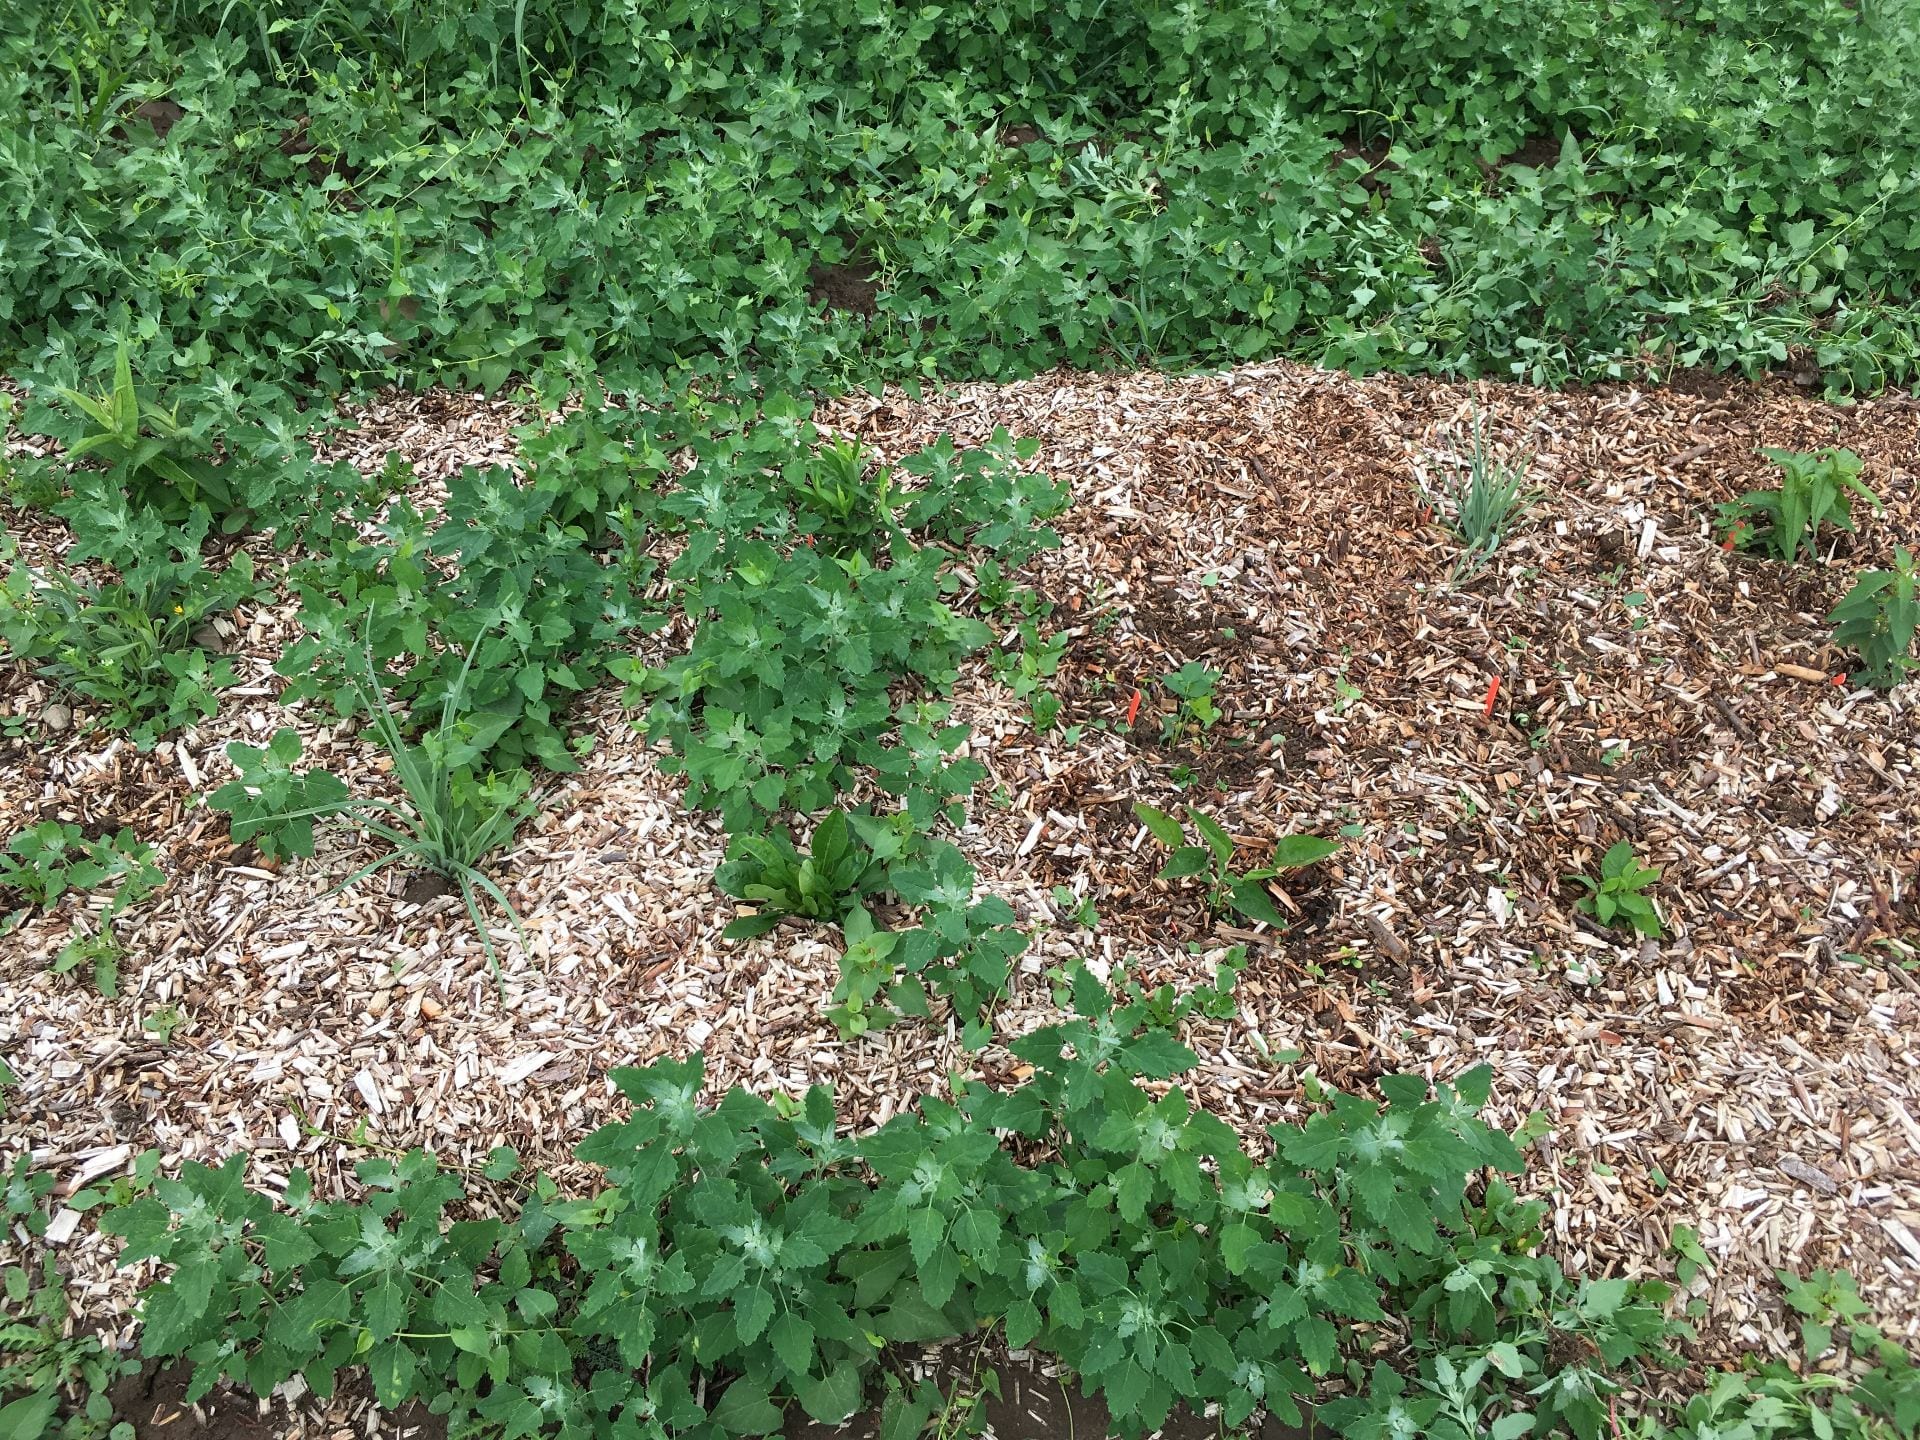
In treatment B, we spread chipped shrub willow mulch about 3 inches deep around the transplants. If I were to do this again, I would spread it thicker. I was disappointed with how many weeds were growing through the mulch just a month after transplanting.

mulched plot with lots of weeds on the left and fewer weeds on the right
The chipped shrub willow mulch we used was not as effective at suppressing weeds as I had hoped. On the left is part of the plot that had not been weeded yet. On the right is the part that was weeded on July 6. You can also see from this picture that there was a lot of lambsquarters in this field, and that we hadn’t been able to seed grass between the plots, yet.

But weeding twice during the season pretty much took care of the weeds in treatment B. Treatment A was also weeded twice, but as you saw in the graph earlier, weed control by the end of the season was not as effective.

Unmulched plot weeded (on the left), and before weeding (on the right)
Treatment A (transplanted in the spring, with no additional weed control) before (right) and after (left) hand weeding on July 6.

I think we’ll have to wait until next year to really understand how weed control is working in treatment C. Remember, the strategy was to slowly deplete the annual weed seedbank by allowing weeds to germinate, but preventing them from producing more seed. This is not supposed to be a quick establishment method, and it wasn’t.

blooming yellow flower (partridge pea)
This is what partridge pea looks like. It was one of the few species from the native wildflower and grass mix seeded in the spring (treatment C) that bloomed during this first growing season.

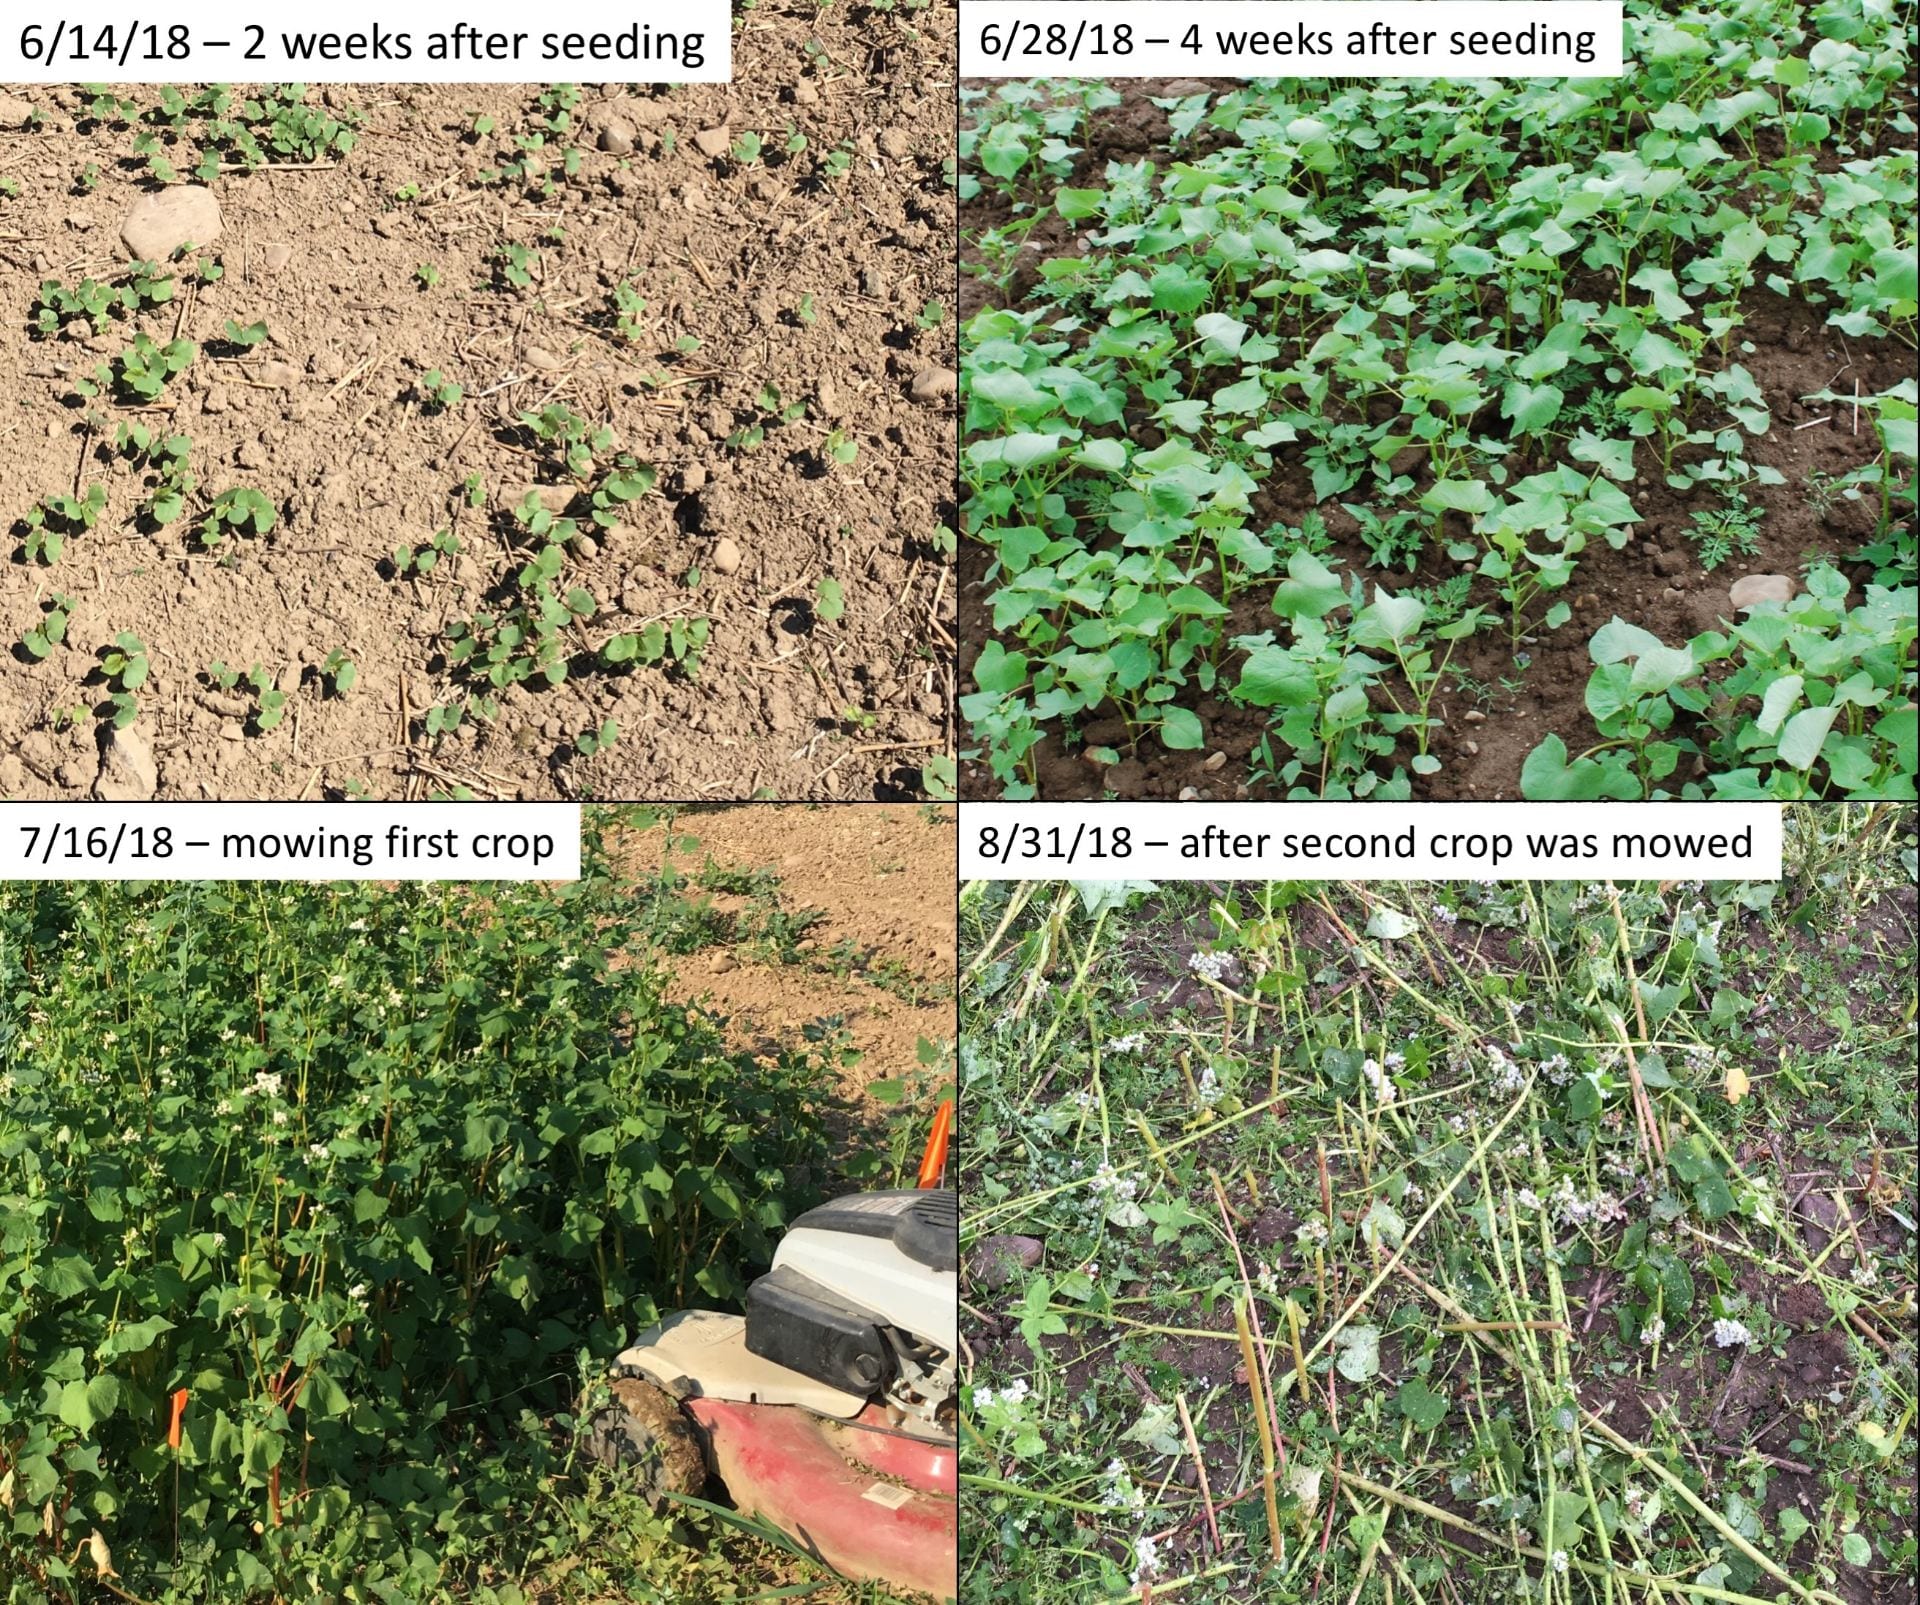
Buckwheat as a weed-smothering cover crop

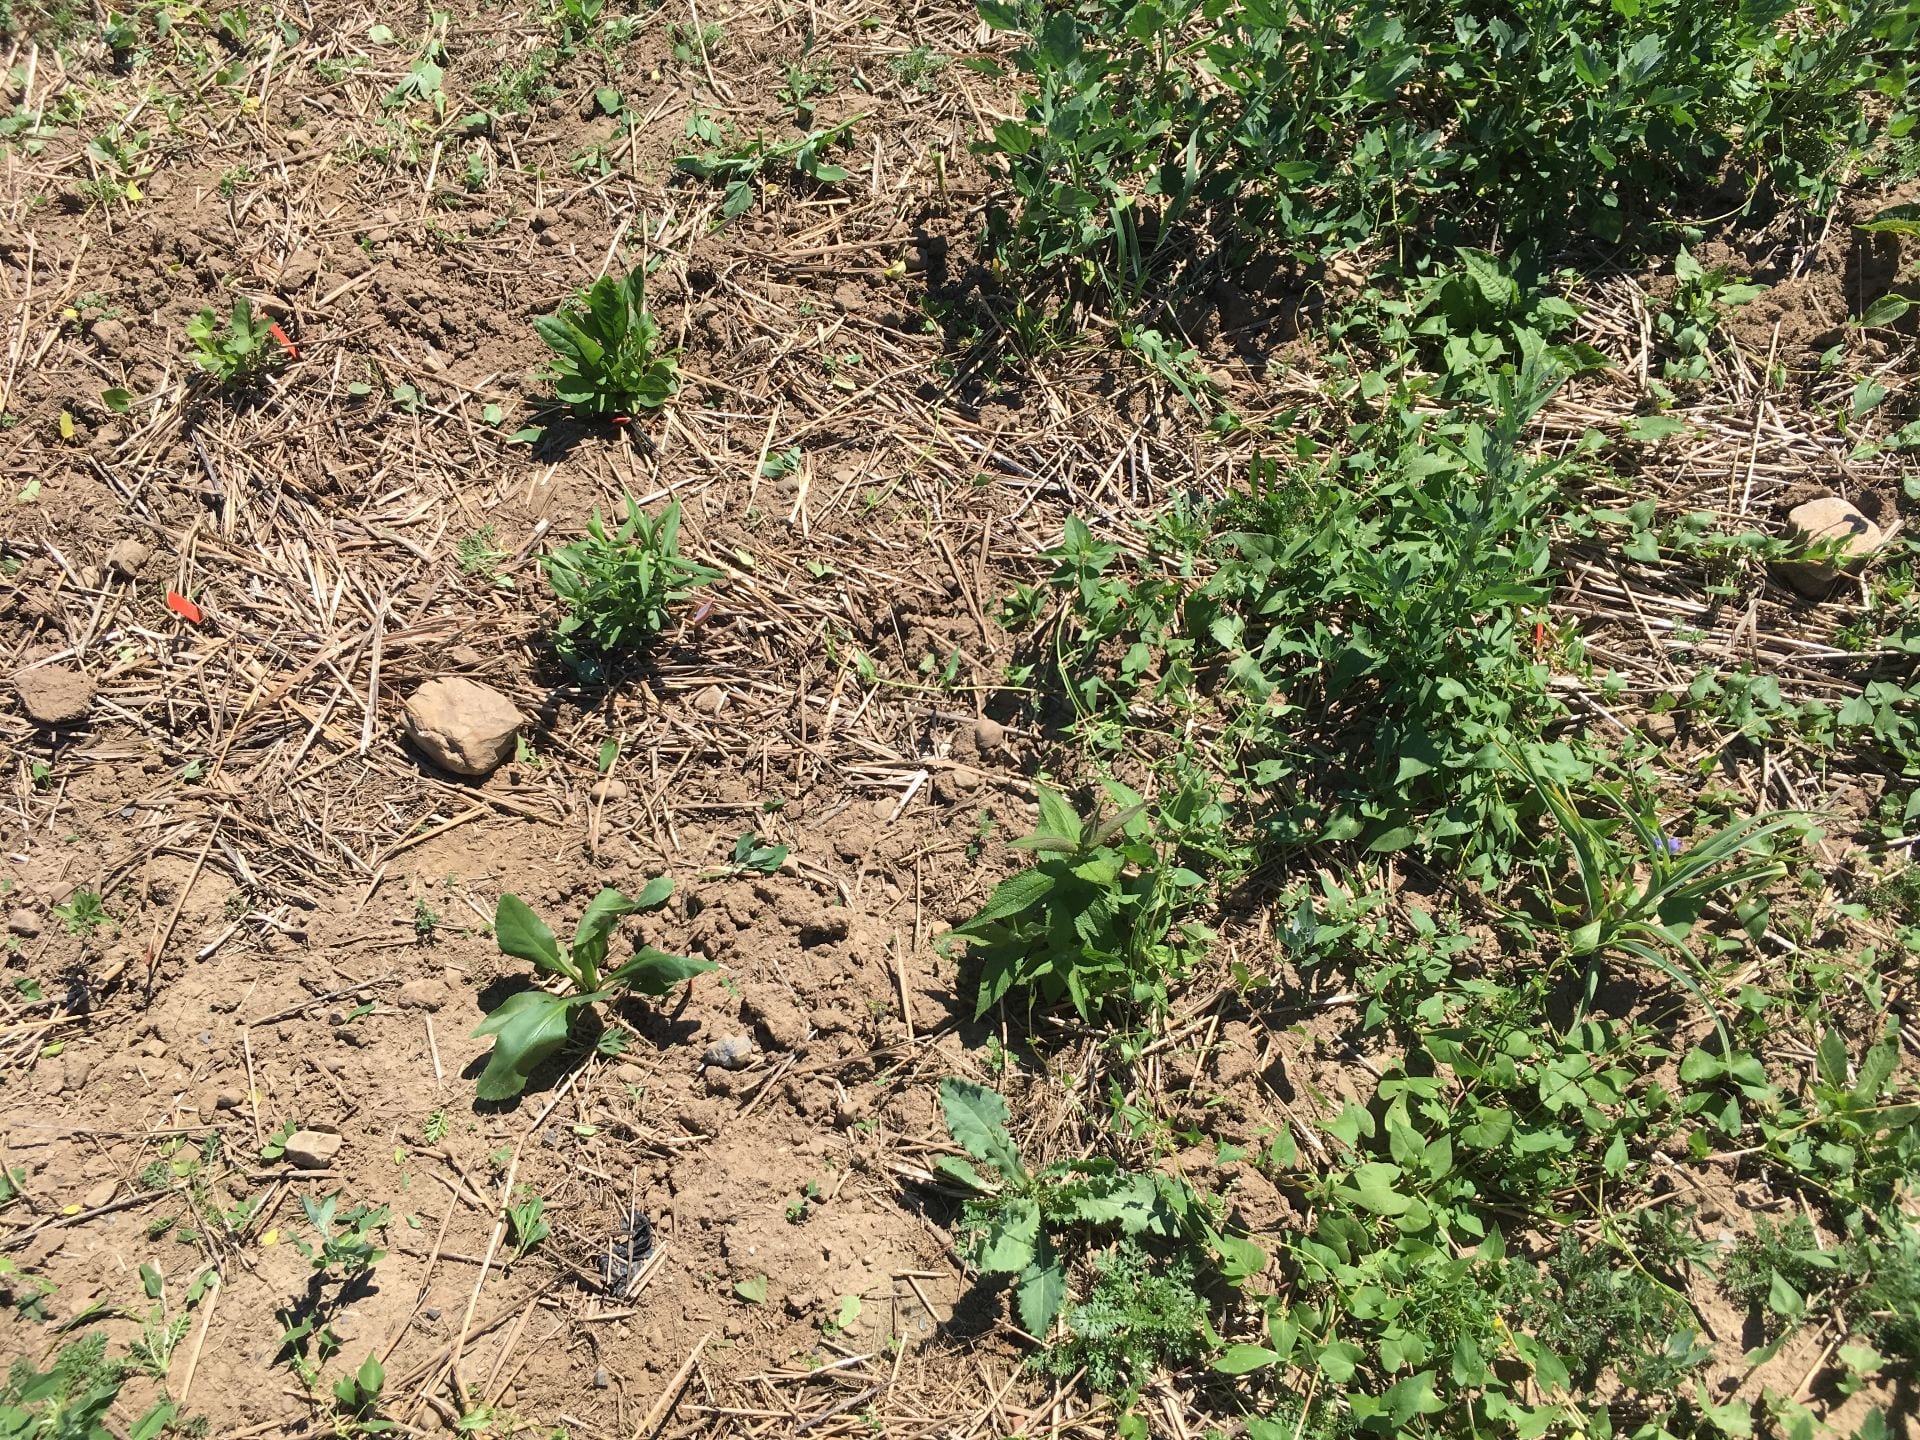
By the time Bryan did our weed assessment, it had been 3 weeks since we mowed the second planting of buckwheat. Ideally, we would have transplanted shortly after mowing the buckwheat. But, the second crop of buckwheat was starting to set seed by the end of August, and our transplants weren’t scheduled to arrive until the end of September. So we mowed the buckwheat early to prevent it from contributing its own seed to the weed seedbank. But this meant that a lot of weeds had time to germinate before we transplanted the habitat plants. The buckwheat certainly suppressed a lot of weeds during the growing season, and I hope that this will help reduce weeds next year.
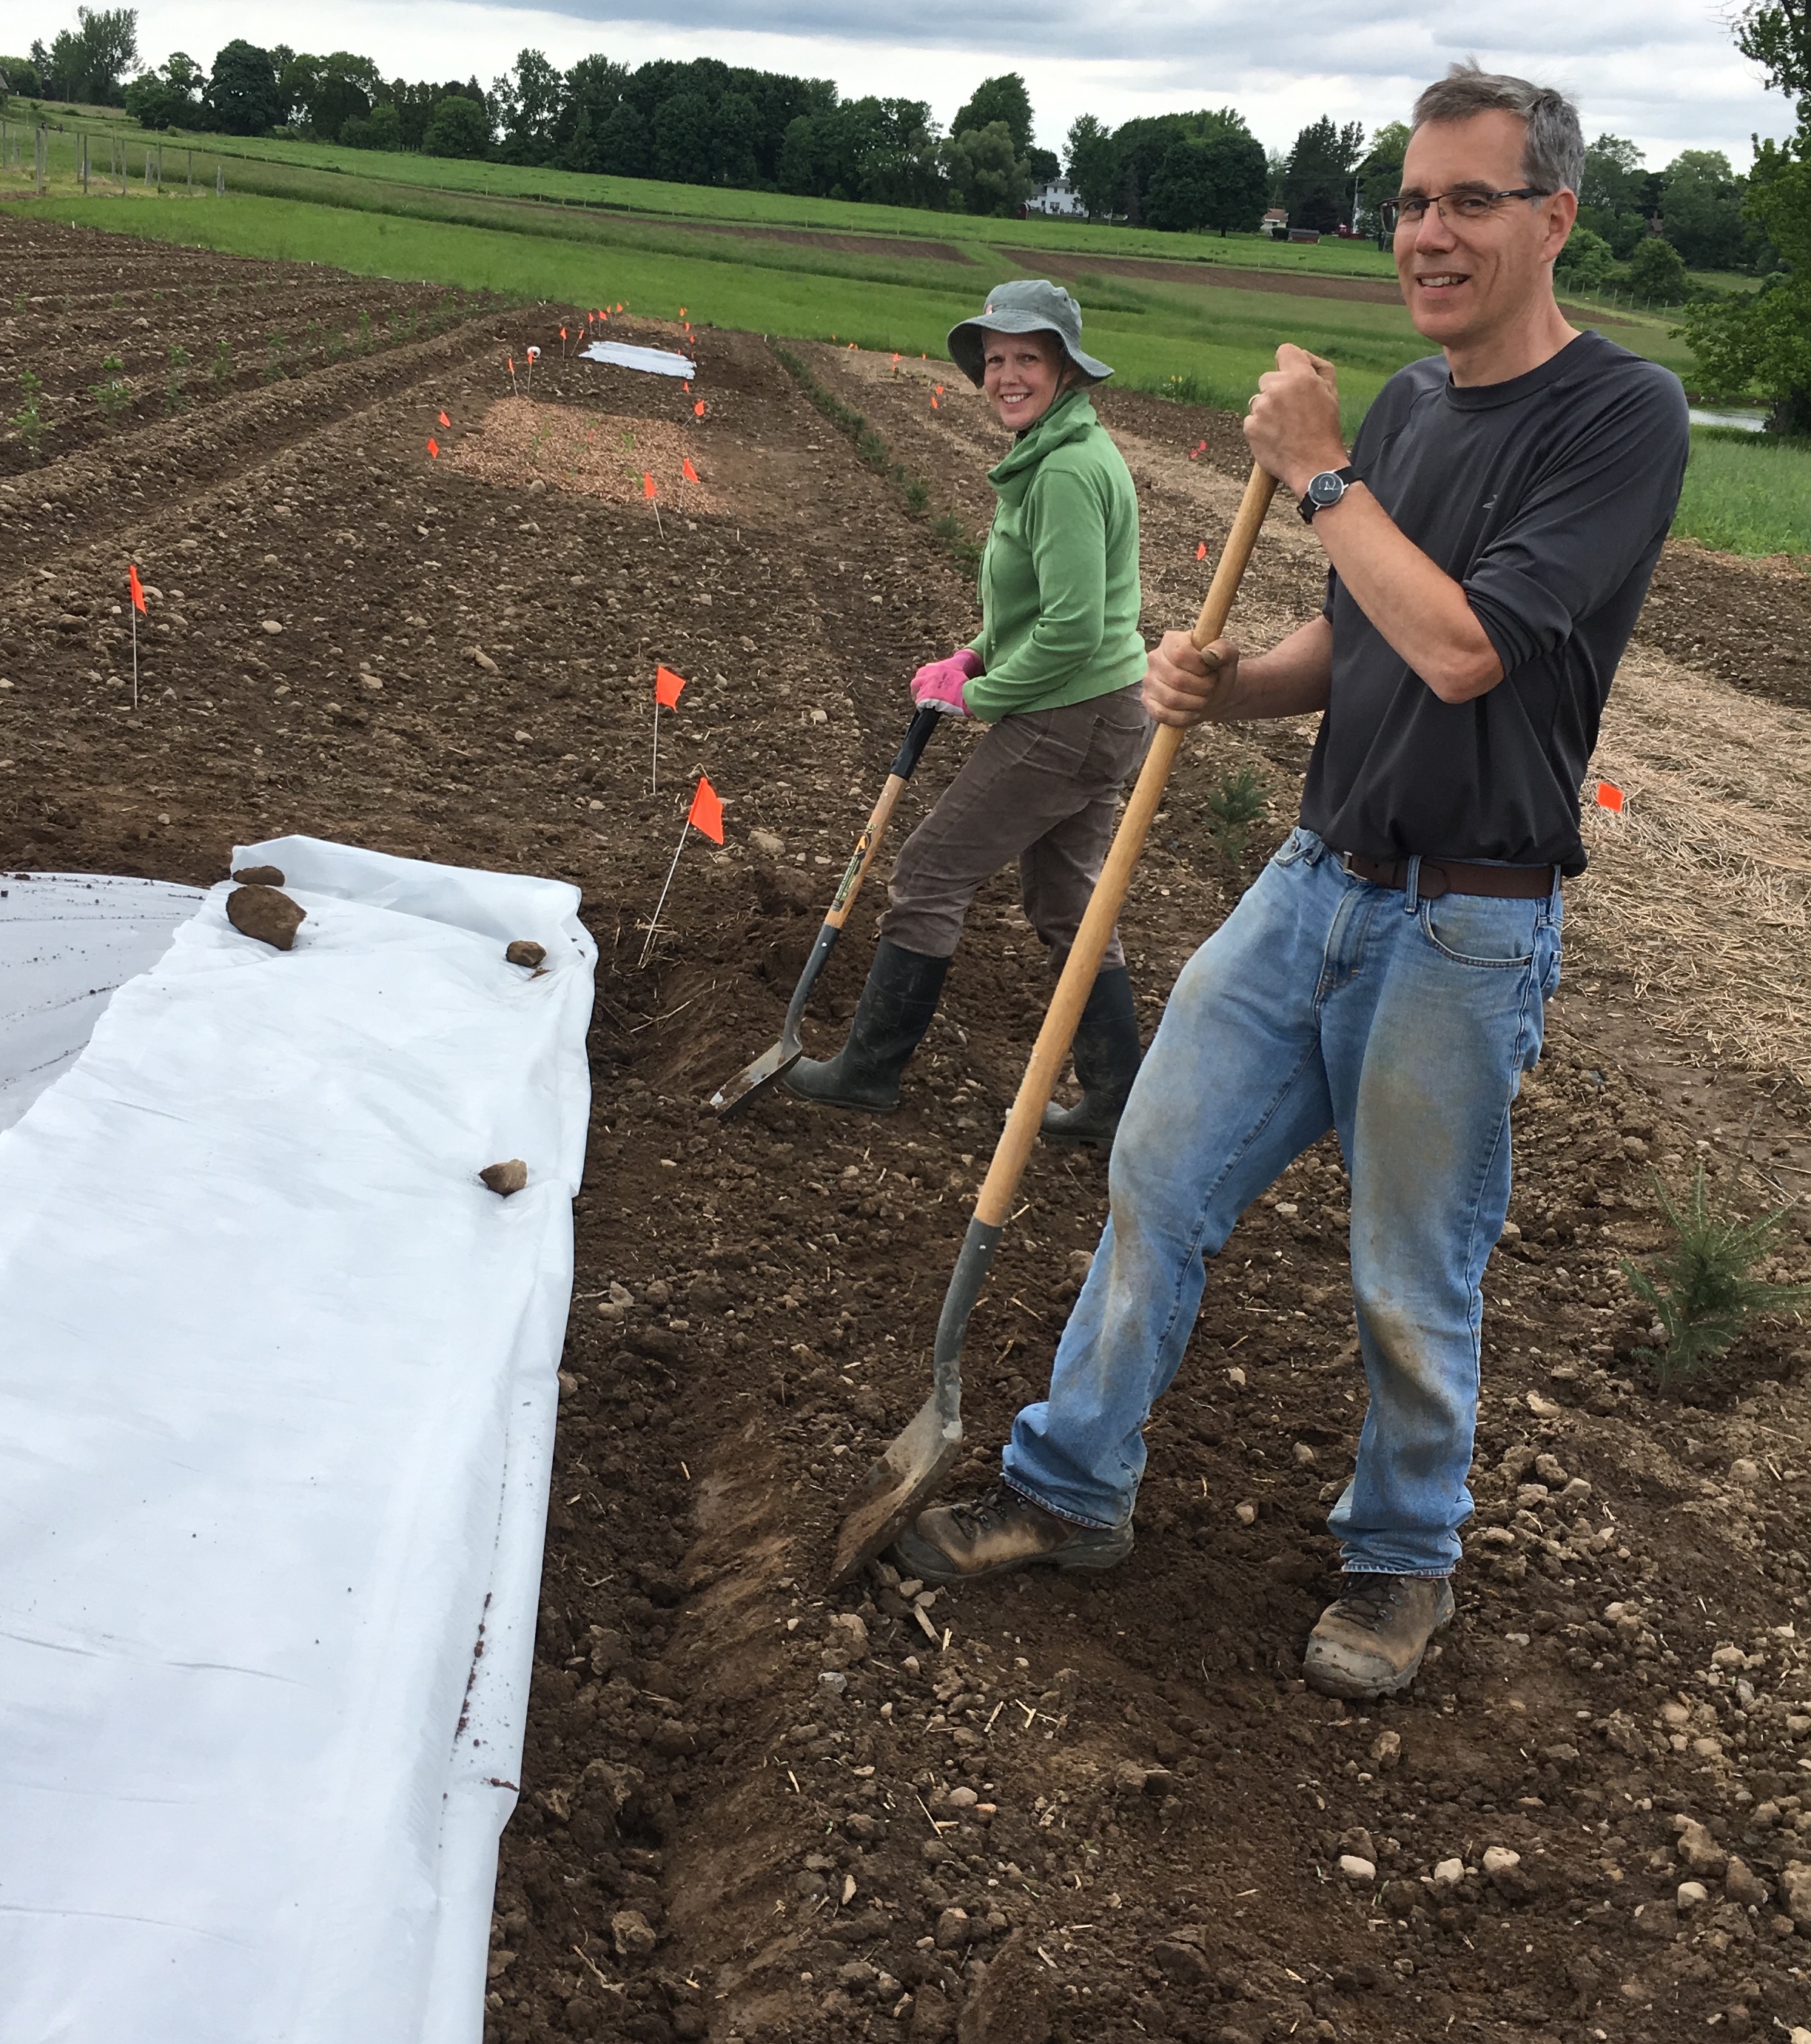
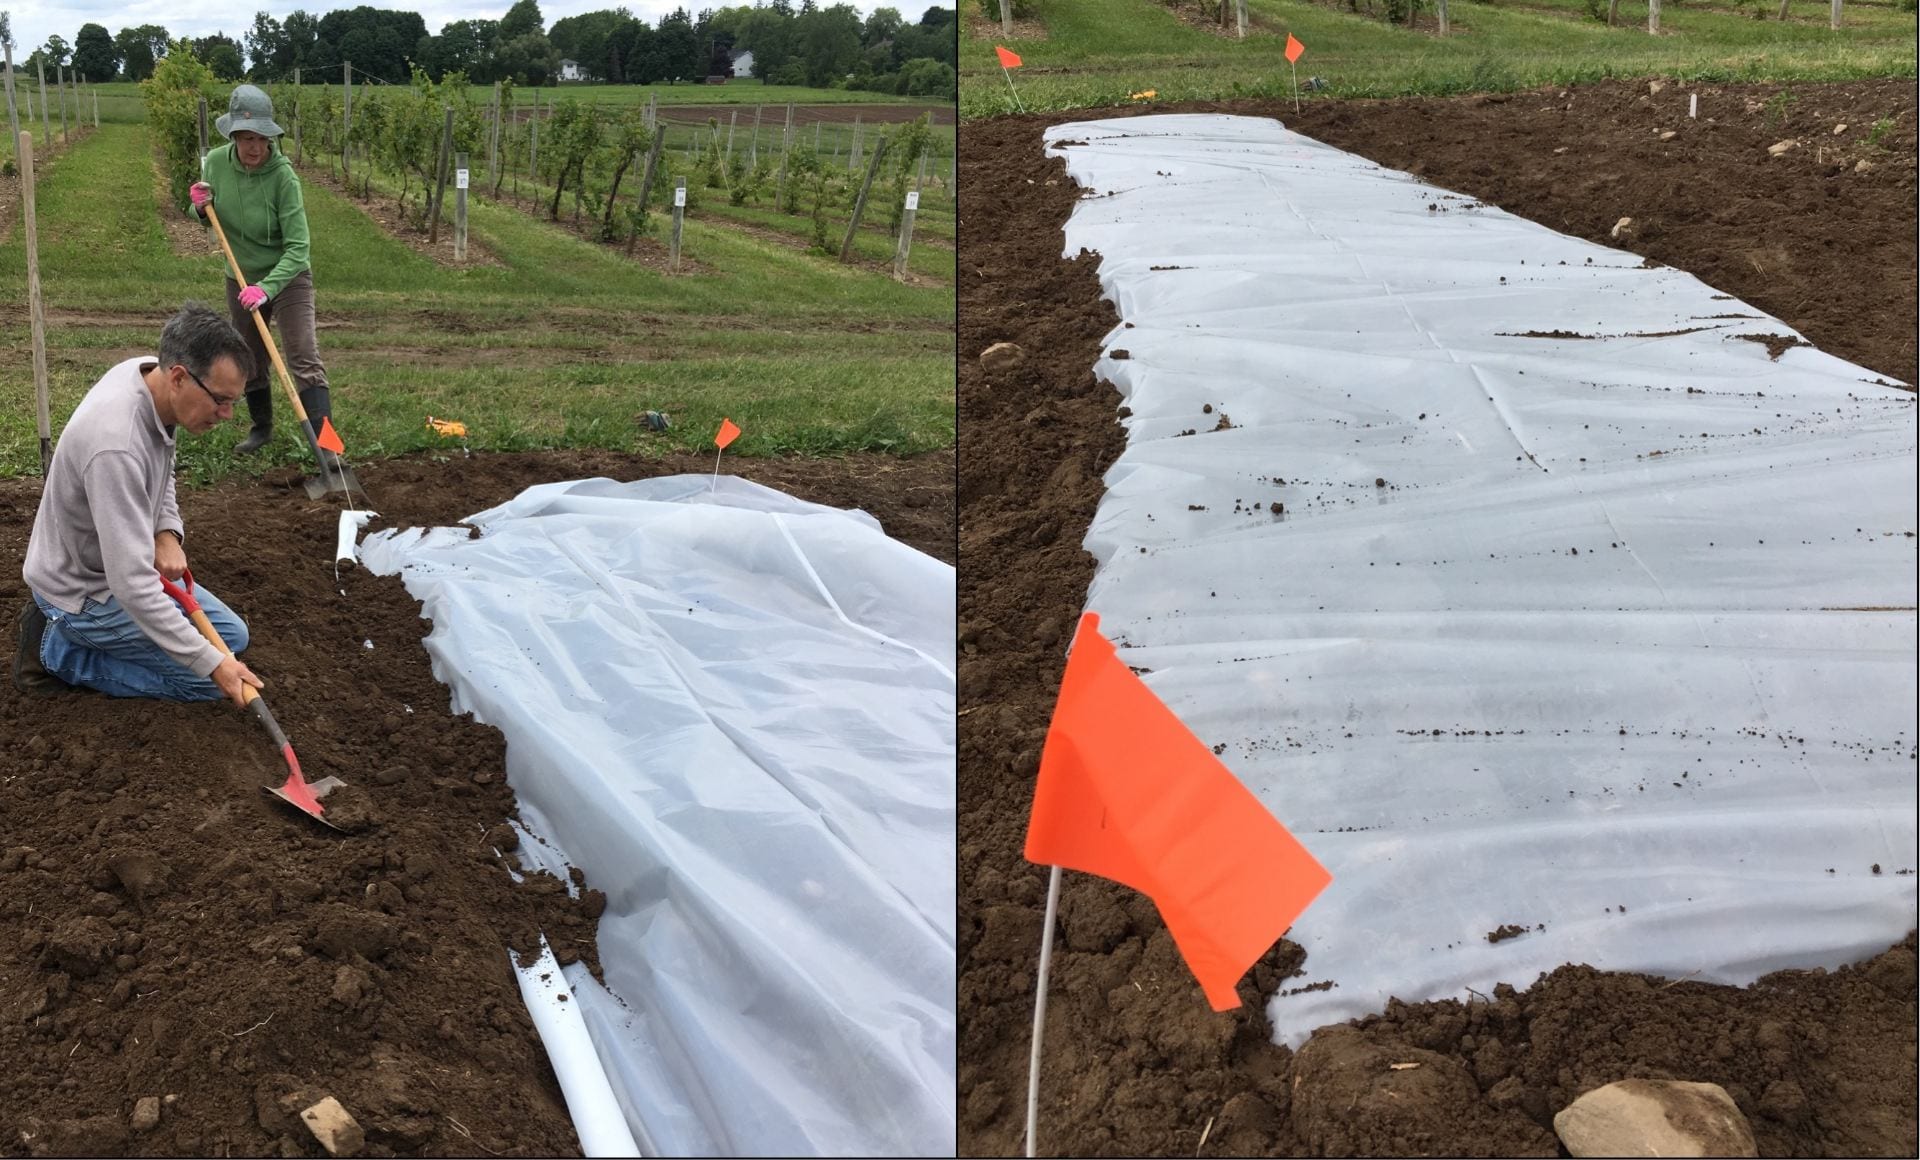
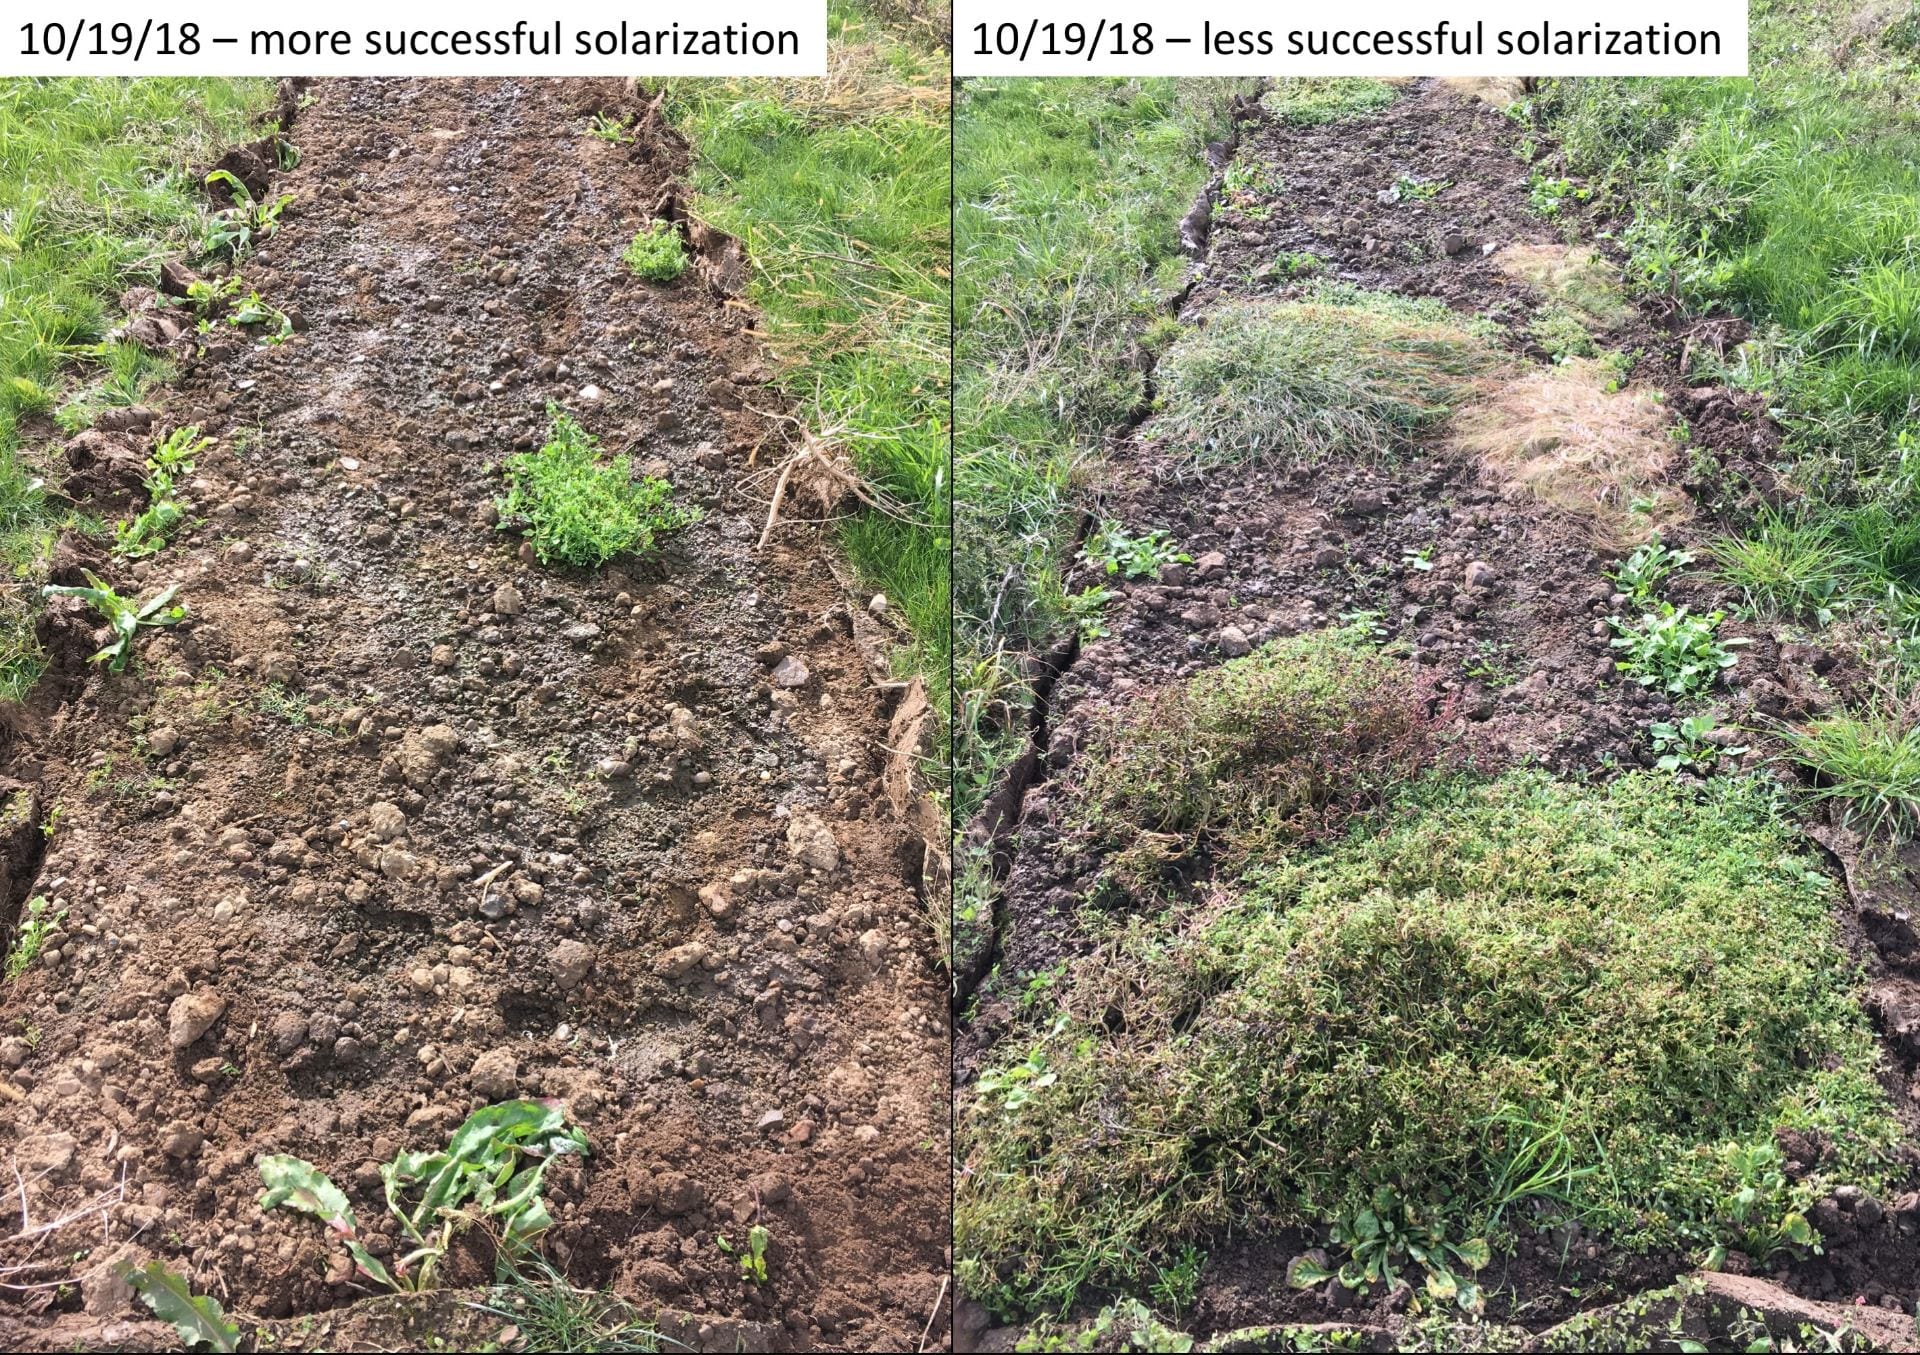
very young buckwheat seedlings in upper left, larger buckwheat seedlings in upper right, mowing mature buckwheat plants in lower left, cut buckwheat stubble in lower right
The buckwheat established quickly and crowded out many weeds. We mowed the first crop in July and re-planted. We had to mow the second crop about 3 weeks before we transplanted habitat plants (not ideal).

Solarization

Overall, we were pleased with how the solarization worked. We laid down 6 mil clear plastic (leftover from a nearby high tunnel) in early June, and did a little weed control around the edges of the plastic just once during the summer to prevent more weed seed production and to prevent shading of the plots.

Two people shovelling soil on top of clear plastic laid on the ground on the left, and on the right, clear plastic cover a small area of soil, with all the edges of the plastic buried
We laid 6 mil clear plastic over some plots on June 5, 2018 to solarize the soil underneath (and kill weeds).

We also learned that solarization will not control purselane. In contrast, the purselane thrived only under our clear plastic, and nowhere else in the field. The plot that had the most purselane also had the most other (mostly grass) weeds. I think the purselane pushed the plastic away from the soil and reduced the temperature a bit, allowing other weeds to grow.

clear plastic covering a small area of soil, but with weeds (purselane) growing underneath it
In some solarized plots, purselane grew happily under the plastic. Purselane was not a common weed anywhere else in the field during the season.

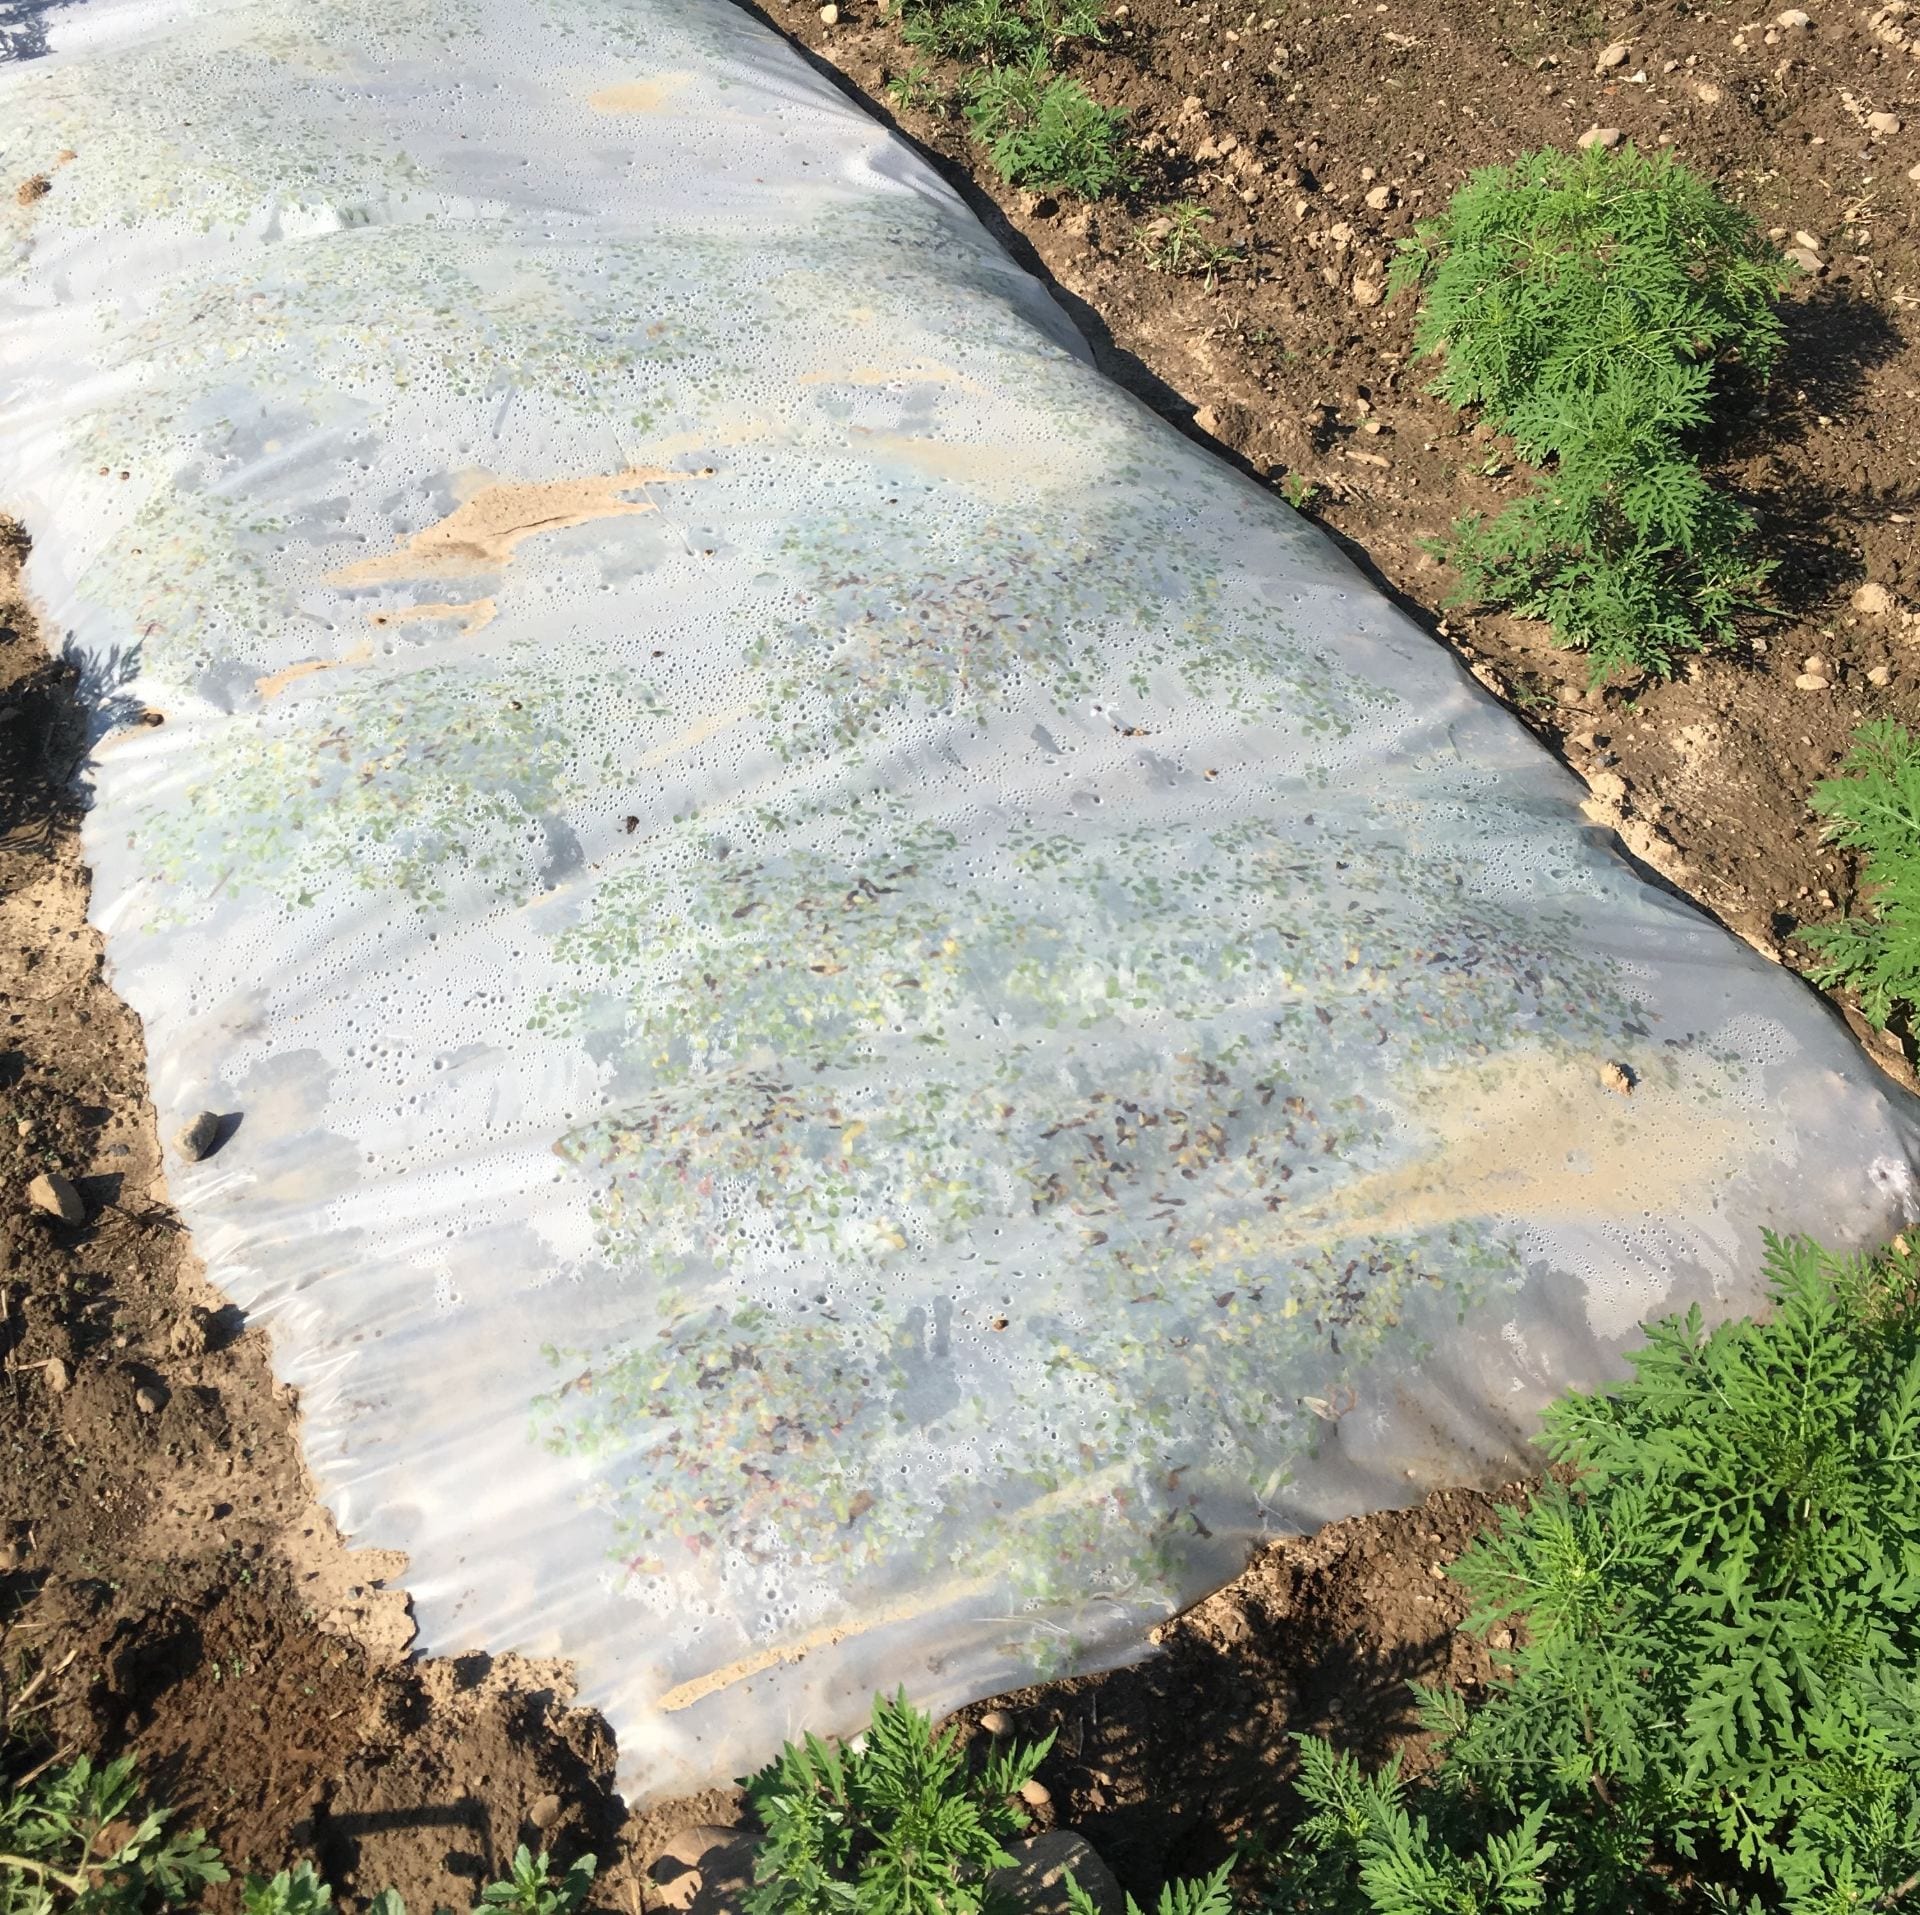
Some other plots were virtually weed-free when we pulled the plastic up in October. (Did you see how large the error bar was for weeds in treatment F in the weed graph above? This means there was a lot of variability between plots in this treatment.) Our soil temperature probe happened to be in the plot with the most purselane, and we still achieved maximum soil temperatures of 120 °F (at a depth of about 3 inches), compared to 90 °F in a nearby control (treatment E) plot.

Plots of ground that had been covered with clear plastic. On the left, very few weeds grew underneath. On the right, more weeds (purselane and some grasses) grew.
Solarization results were pretty variable from plot to plot. In some plots, it worked great (left). In other plots more purselane germinated and it didn’t work as well (right). We cut all the weedy vegetation off at the ground before direct seeding the beneficial habitat plants.

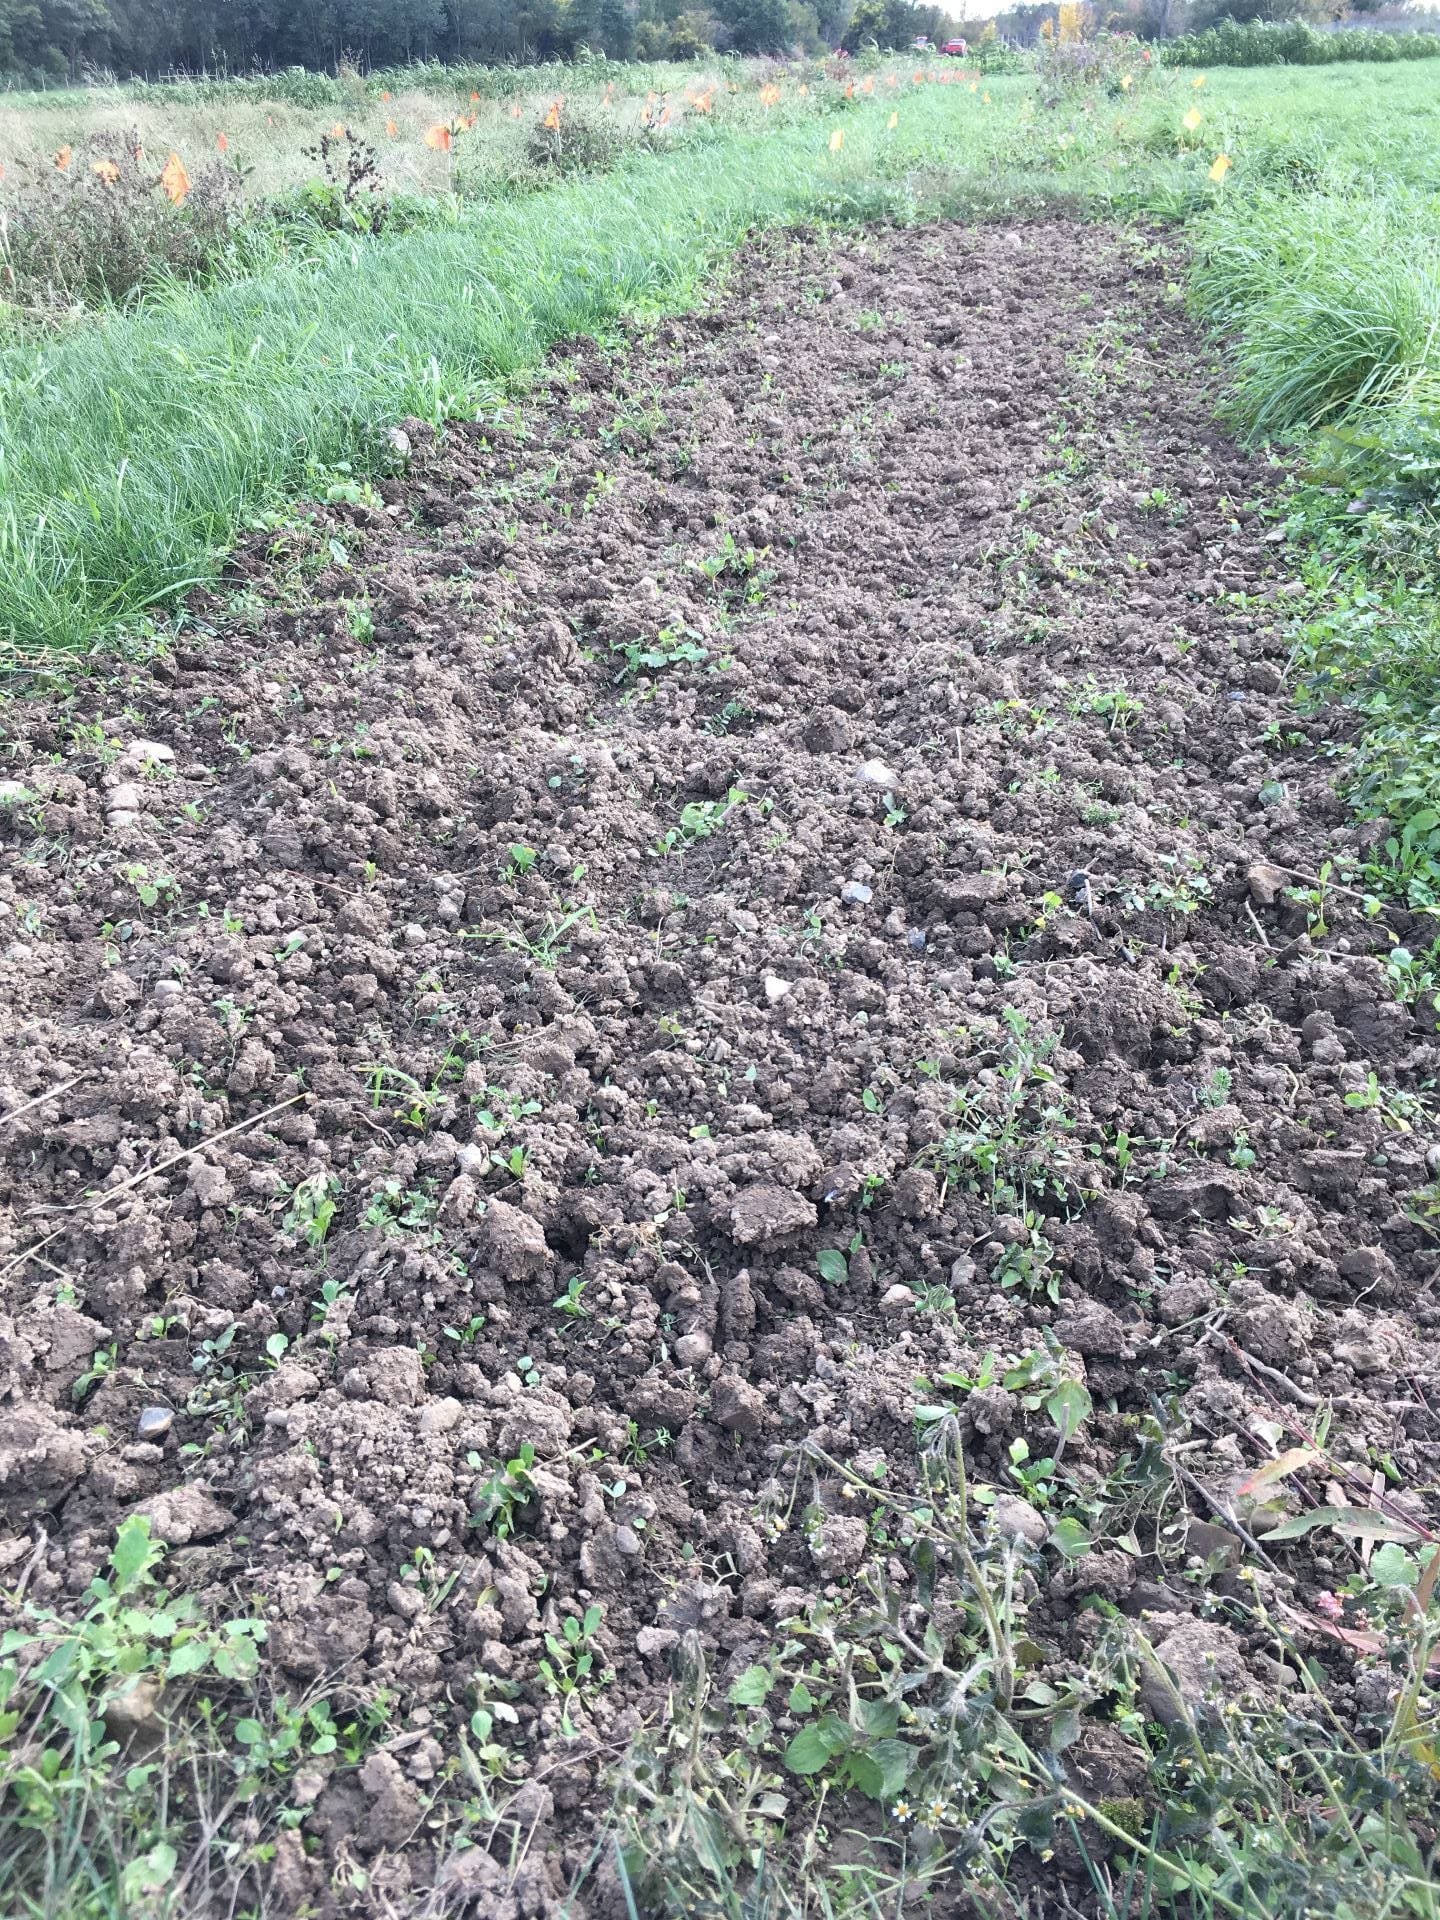
Repeated herbicide and tillage

At the weed assessment in September, the plot that had been alternately treated with herbicide and tilled looked best in terms of weed control. Like treatment C and all the treatments planted (by seed or by transplant) in the fall, I think we’ll get a better idea next year of how effective this method was at suppressing weeds.

A small plot of mostly bare soil with a few small weeds growing through. The plot is surrounded by grass
A few weeds were present a week after the last time the herbicide/tillage treatment (G) was rototilled. We broadcast, raked, and pressed beneficial habitat seed into these plots.

Timing of fall planting

One thing we struggled with this fall was deciding when to plant the wildflower and grass seed mixture. One source recommended the seeds be planted sometime between October and December. We were cautioned that if we planted the seed too early, some species (especially blackeyed Susans) might germinate this fall, and the young seedlings would be killed by an early frost before they established. But we were also afraid of waiting too long and not being able to till the soil (treatment G, only) if it got too wet. And we wanted a nice smooth seedbed. In treatment F, we suspected that leaving the clear plastic on into November would protect the weeds from the cooler weather. But we worried that taking it off too early would only allow more weed seeds to blow onto the bare ground.

person dressed in warm clothes sprinkling seed on bare ground. There is a field and a pond in the background.
We direct seeded October 18, 2018, after the weather cooled down a bit, and before the ground got too wet.

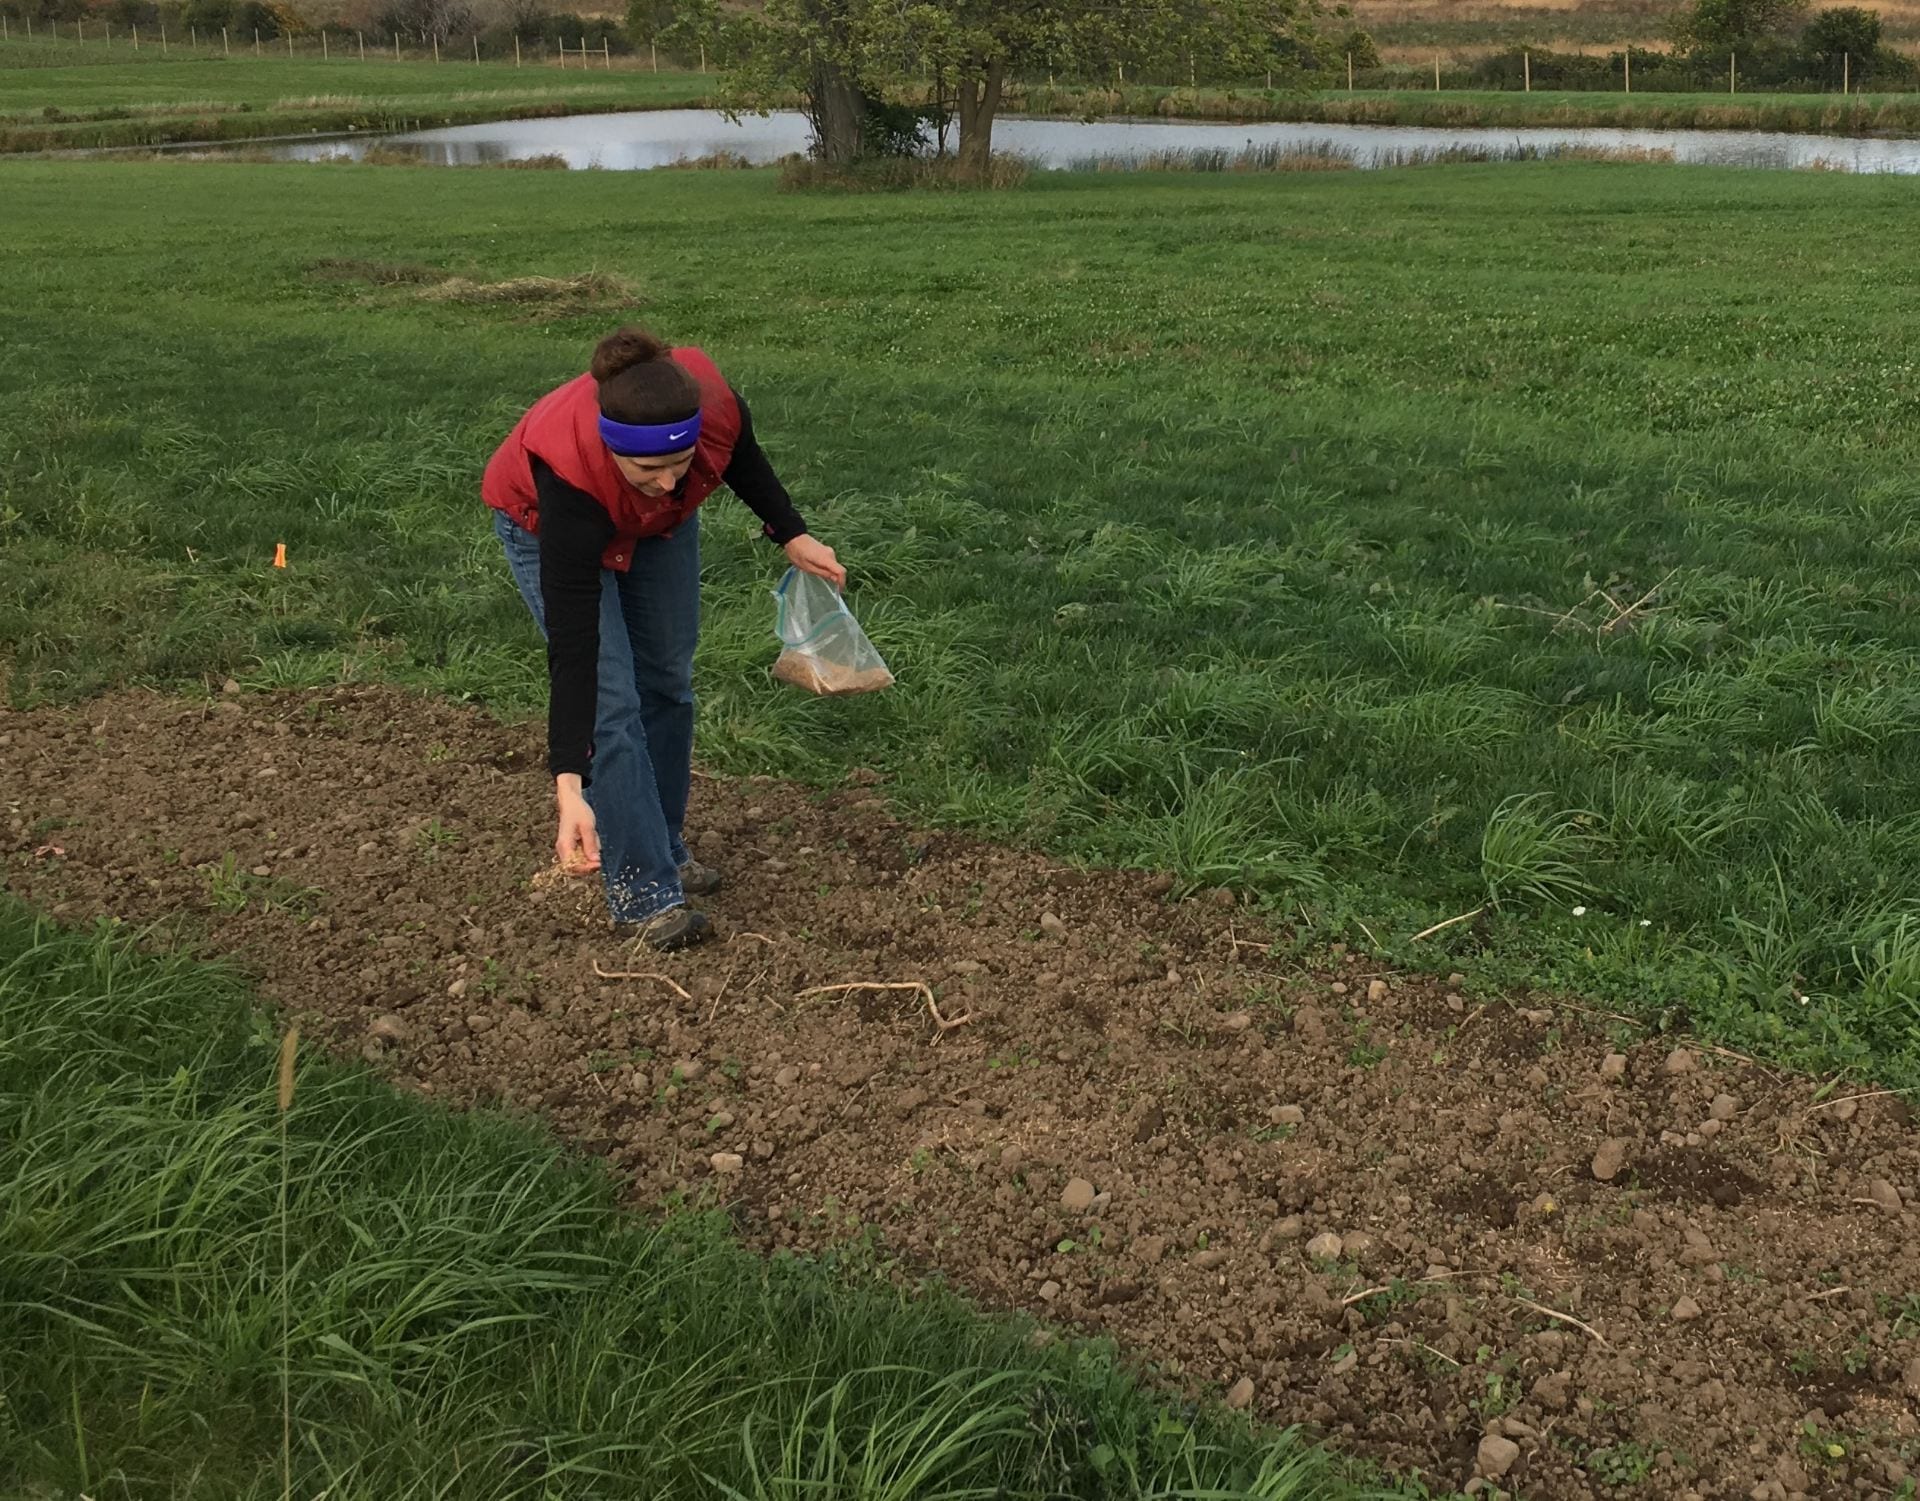
Finally, we compromised and planted the seeds on October 18 and 19, after our first hard frost, and once it looked like the nighttime temperatures would be in the 40’s (or below) for the next 10 days. It was only a week after the last tillage in treatment G, and the soil was still relatively dry. Those who live in the Finger Lakes know that late October and early November were pretty wet this year, so I’m glad we planted when we did. If you are trying to time fall seeding, I would recommend that you keep an eye on the 10 day forecast to see when temperatures are starting to cool. But if you get a dry sunny day to plant and it’s reasonably cool, I wouldn’t delay.

So if I want to plant habitat for pollinators and natural enemies next year, what should I do?

First, think about the time, money, and equipment you have available, as well as the area you’d like to plant. There probably isn’t a single right way to establish this habitat, but there may be a best way for you.

You can find more details on the techniques we used (and some links to other resources) here.

This post was written by Amara Dunn, Brian Eshenaur, and Betsy Lamb.

This work is supported by:

  • Crop Protection and Pest Management -Extension Implementation Program Area grant no. 2017-70006-27142/project accession no. 1014000, from the USDA National Institute of Food and Agriculture.
  • New York State Department of Agriculture and Markets

Could your lawn use some biocontrol? Scout first.

white grubs found in a lawn
These white grubs can damage your lawn…but only if enough of them are present. Don’t waste time and money treating for them if you don’t need to!

For much of this summer, many people in NY had “water” at the top of their lawn care list. White grubs are another concern for home lawns. But finding a grub in your lawn does not automatically mean that you need to treat. Before you think about doing anything to your lawn to kill grubs, you should know how many grubs you have, and which species they are. If you do need to treat, consider using biocontrol.

Good news! It’s the perfect time of year to scout for white grubs. Starting in mid to late August, and continuing into October, grubs that hatched from eggs laid during the summer will be just beneath the surface of your lawn, feeding on the roots of your grass plants. This is the time to look for grubs. You might also notice some damage to your lawn from white grub feeding during this window.

life cycle of a white grub in your lawn
Late August through October is the perfect time of year to look for grubs in your lawn. The grubs will be young and close to the surface.


map of lawn and places you plan to sample for grubs
X marks the spot (to sample for grubs)! Select parts of your lawn where you think there might be grubs, sample in these places, and take notes on what you find.

Take a look at this fact sheet for detailed instructions on sampling your lawn. All you need is a piece of paper, something to write with, and a shovel or trowel. Check 1 foot by 1 foot squares around the lawn. If you have a bulb planter with a diameter of approximately 4.25 inches, or a golf course cup cutter, this works, too. Make notes about where you’ve sampled and how many grubs you found in each spot. Save the grubs from each sampling location separately.

peeling back turf from a 1 foot by 1 foot section and finding a grub
Cut a 1 foot by 1 foot square at each sampling location, and look for grubs in the roots of the grass. (Photo credit: NYS IPM)

If you didn’t find any grubs, please don’t treat your lawn! You are wasting money, and applying unneeded pesticides (or biocontrol nematodes) is never a good idea. If you did find grubs, it’s important that you determine which species they are. Why? Because the white grubs you are likely to find in NY are the immature (larval) stage of many different insect species. And each species causes different amounts of damage to your lawn. This means that the number of grubs your lawn can tolerate before it’s damaged – and therefore the number of grubs you should tolerate before treating for grubs – depends not only on the overall resilience of your turf, but also on the grub species you have. Check out the following table:

Number of grubs of each species before a treatment is justified
White grubs may look very similar, but they are not! Different species cause different amounts of damage to your lawn. If you find more than the number of grubs per square foot (or per 4.25-inch diameter soil core), you might consider treating your lawn for grubs. If not, you don’t need to do anything!

Fortunately, identifying grubs is easy, too! All you need is a penny, a hand lens with at least 15x magnification, and this online Grub ID tool. First, use the green “Learn how to identify grubs” button to find out which part of the grub to look at and how to hold it. Next, follow the instructions to compare each grub you found to the size of a penny.

online grub ID tool
The Grub ID tool explains exactly which part of the white grub to look at when you are identifying it. Just click the green button.
close-up picture of the rear end of a white grub, used in identification
Take a close look at the rear end of a white grub (using a 15x hand lens) to find out which species you have.

Finally, inspect its rear end with a hand lens to determine which species you have. Once you’ve identified the species, click on the species name to find specific management information. Now, look at that table again. For the species you found in your yard, do you have more than the listed number per square foot (or per 4.25-inch diameter soil core)? If not, then don’t waste time or money treating your lawn.

Most likely, only a few spots in your lawn (if any) warrant grub treatment. This is why you took careful notes about where you found grubs. Late August through September is also a good time to use a curative treatment for grubs in NY. The grubs are small and easier to kill. Some chemicals are effective when used at this time (but not the ones that are taken up by the plant!). A preventative pesticide that is taken up by the plant and kills the next generation of grubs when they start feeding in the late summer and fall should be applied in May or June. Before using any pesticide, find out if it is allowed in NY and find the product label using the New York State Pesticide Administration Database (NYSPAD). If a product isn’t listed in this database, you may not use it in NYS (even if you can buy it online). You must follow all instructions on the label.

Screen shot of the NYSPAD database search page
Use the product registration section of the New York State’s Pesticide Administration Database (NYSPAD) to check if a white grub pesticide is allowed in NY. When you get to the website, follow the three simple steps shown here.
Dark reddish brown grub (unlike healthy white grubs) killed by nematodes
Unlike the healthy white grubs you saw earlier in this post, this grub has been killed by nematodes.

But why use a chemical when you could use a biological control? Entomopathogenic nematodes are tiny beneficial worms that don’t harm plants, but kill grubs. See how they do it by watching this short video.  Why wouldn’t you want these nematodes working for you? Beneficial nematodes are a curative white grub treatment, so they should be applied between mid to late August and October. But you still only need to apply them to spots where grub numbers exceeded the thresholds in this table. You can purchase nematodes from garden centers or online garden supply stores. Look for the nematode species Heterorhabditis bacteriophora and Steinernema feltiae.

Dry, powdered form of nematodes used to kill grubs in your lawn
Grub-killing nematodes are sold as what looks like a dry powder. Dissolve them in non-chlorinated water (if available) before applying them to your lawn. Follow all package instructions.

For both species, make sure to follow the instructions on the package for storing and applying them. Nematodes will be harmed by ultraviolet light, so apply them around dawn or dusk, and water them afterwards to wash them into the root zone of the grass (where the grubs are). Any type of sprayer (as long as it doesn’t contain a fine mesh) or even a watering can will work to apply nematodes. If you use a sprayer, keep the pressure below 30 pounds per square inch. When you’re mixing up the nematodes, if non-chlorinated water is available, use that. Chlorinated water is fine for watering them in after you apply them.

Regardless of what treatment you use, scout your lawn again next year to find out how well your IPM strategy worked, and if there are other areas you need to treat (or not).

This post was written by Amara Dunn (NYS IPM) and Kyle Wickings (Department of Entomology, Cornell University).

Managing mosquitoes around your home…there’s a biocontrol for that!

adult mosquito emerging, larvae nearby
An adult mosquito emerges, while other immature mosquitoes (larvae) are still present in this container of standing water. The first step to mosquito management around the home is eliminating standing water wherever possible to prevent mosquito breeding. Photo credit: Matt Frye, NYS IPM

Are mosquitoes bothering you while you enjoy summer in your backyard? An IPM approach is definitely the way to go. Start by checking your yard to see where water might be standing. It could be in toys, flower pots, tarps, wheel barrows, gutters, bottle caps, or so many other places you may not have noticed. Removing standing water from your yard takes away places where mosquitoes breed. Less mosquito breeding, fewer mosquitoes. Always think prevention first when you’re addressing a mosquito problem. Read more about mosquito IPM on the Think IPM Blog and What’s Bugging You?

If there are still some containers you just can’t empty (for example, a lined garden pond), you can find some biopesticides (remember, some biopesticides are biocontrols, too!) in your local garden center to help you with your mosquito IPM. Just make sure you follow all instructions on the label of any product you buy. Read all about mosquito biocontrol on this new fact sheet.

And, if you want to learn so much more about IPM for both mosquitoes and ticks, you still have a little time to register for the 4th Annual NYS IPM Conference on Integrated Management of Ticks and Mosquitoes. But hurry – the conference is August 7th!


Creating habitat for beneficial insects – early summer 2018 project update

Betsy, Deb, and Brian transplanting native wildflowers and grasses that will provide habitat for beneficial insects
Dr. Betsy Lamb, Deb Marvin, and Brian Eshenaur (left to right) transplanting native wildflowers and grasses on the edge of a research Christmas tree planting at Cornell AgriTech in Geneva, NY. These plants will provide food and shelter for pollinators and natural enemies of pests.

As I mentioned in my January post, I am excited to be working with two NYS IPM colleagues (Dr. Betsy Lamb and Brian Eshenaur) to demonstrate the costs, labor, and effectiveness of different methods for establishing habitat plants for pollinators and other beneficial insects. Remember, habitat for pollinators is also habitat for insects and mites that are natural enemies of pests on your farm or in your garden. Thus, planting for pollinators enables you to practice conservation biocontrol. These demonstration plots are located around a new research planting of Christmas trees at Cornell AgriTech at the New York State Agricultural Experiment Station in Geneva, NY. What we learn from this project can help you choose the best way to establish your own beneficial habitat (on your farm, around your home, near your school, etc.)

We are comparing 6 different methods of establishing habitat for beneficial insects, plus a control (Treatment E). Treatment E plots were sprayed with herbicide last fall and this spring, and will be mowed once this year. A summary of the plan for the other treatments is below.

List of treatments in this study. Each treatment is a different method for establishing habitat for beneficial insects
Comparing different methods for establishing plants that provide habitat and food for beneficial insects (pollinators and natural enemies of pests). Treatment E is the control.
seeds for plants that will provide habitat for beneficial insects
Native wildflower and grass seeds (A) were mixed with boiled rice hulls (B) to make them easier to broadcast (C). Much of what you see on the soil surface is just the rice hulls, but there are a few seeds that will hopefully grow into habitat for beneficial insects.

Because of when spring tillage occurred, plots that were scheduled to be tilled in the spring did not need a second herbicide application. About a week after spring tillage, Treatment C plots were direct seeded. I hand-broadcast a mixture of native wildflower and grass seeds at a rate of half a pound per 1,000 square feet. This worked out to be 26 g of seed for each 5-foot by 23-foot plot. To make it easier to broadcast such a small amount of seed, I first mixed the seed for each plot with about 3 cups of boiled rice hulls. After raking the seed in gently with a garden rake, I stomped the seed into the ground to ensure good contact with the soil. In a larger plot, you might use equipment like a cultipacker or lawn roller to achieve the same result.


young buckwheat plants
Two weeks (and three-quarters of an inch of rain) after seeding, buckwheat is establishing. It will hopefully crowd out weeds that would otherwise grow in these plots over the summer.

I broadcast (again, by hand) buckwheat seeds in the Treatment D plots at a rate of 70 pounds per acre (84 g for each of these small plots), and raked them in on May 31st. If the buckwheat establishes well, it will smother weeds during the summer, and we can mow and transplant into these plots in the fall. We plan to mow this crop of buckwheat when it starts flowering and then reseed it, for a total of two buckwheat plantings this summer.


We transplanted by hand 15 species of wildflowers and 1 grass species into plots assigned to Treatments A and B on June 4th. Because we were able to transplant right after it rained, it wasn’t too difficult to plant into the untilled plots (Treatment A). Some of them still had some stubble from the cover crops and weeds that had been growing in this field last year, and were killed by fall and spring herbicide applications.

Young wildflower and grass plants transplanted into untilled soil.
Native wildflowers and grasses transplanted into untilled soil. Some dead weeds and cover crop still remain on the soil surface.

The day after we transplanted into Treatment B plots, we mulched the plants to a depth of about 3 inches to (hopefully) control weeds for the rest of the summer while the habitat plants get established. We used chips from shrub willow because they were available, but other types of mulch would work, too.

wildflower and grass plants surrounded by mulch for weed control
These wildflowers and grasses will have help out-competing weeds from 3 inches of willow chip mulch.

Finally, we laid clear high tunnel plastic over the plots receiving Treatment F. Ongoing research from the University of Maine suggests that soil solarization can be an effective form of weed control, even in the northeast. So we’re giving it a try! To maximize the efficacy of this technique, we laid the plastic when the soil had been tilled relatively recently, and was still very moist. To keep the plastic firmly in place for the whole summer, we rolled the edges and buried them 4-5 inches deep, then stomped the soil down around all the edges. In the fall, we will hand broadcast a mixture of native wildflower and grass seeds over these plots (same mix as Treatment C).

a trench being dug around the edge of a plot to bury the edge of a sheet of clear plastic
Deb Marvin and Brian Eshenaur (left to right) dig a trench to bury the edge of this sheet of clear plastic. The goal is weed control by soil solarization.

We’ll give weed seeds in the Treatment G plots a few more weeks to germinate and grow (depending on the rain). Then we’ll kill them with an herbicide, and till these plots again to induce more weed seeds to germinate. Then we will repeat the herbicide application, till again, and so on. This should reduce the weed seed bank in the soil over the course of the summer. After a final tillage in the fall, we will broadcast seed from the same wildflower and grass mix we used for Treatment C. Fall is the recommended time for direct seeding beneficial insect habitat in the northeast. This treatment will also have the advantage of a full season of weed control prior to planting (also recommended). The downside is that it will take longer to establish the beneficial insect habitat.

As we get these plots established, we’re keeping track of the time spent on each treatment and the costs of materials. In the late summer or fall, Dr. Bryan Brown will assess weeds in each treatment, and I will photo document how well our beneficial insect habitat plants have established in each plot. All of these data will help you choose the method that fits your timeline, budget, and equipment/labor availability. Stay tuned for more updates…including an invitation to a field day (not this year), so that you can come see the results of this project for yourself!


This work is supported by:

  • Crop Protection and Pest Management -Extension Implementation Program Area grant no. 2017-70006-27142/project accession no. 1014000, from the USDA National Institute of Food and Agriculture.
  • New York State Department of Agriculture and Markets

Don’t make a mountain out of an ant hill – why ants in your lawn may not be a problem

Ant hill build in an area with short sparse grass
Ant hill built at the entrance to the nest. Cornfield ants (Lasius neoniger) prefer sunny areas with short and sparse grass. Photo courtesy of Matt Frye, NYS IPM.

Now that the weather is getting warmer and you’re spending more time outside, you might notice ant hills in your lawn. Reaching for a can of something that will kill them should not be your first move! These ants may be cornfield ants (known among scientists as Lasius neoniger). They are yellowish brown to dark brown, and about 1/8 of an inch long (or slightly longer). You are most likely to notice the ant hills they produce at the entrance to their underground nest in a sunny lawn where the grass is short and sparse (since this is their preferred nesting area). While the ant hills could be problematic on parts of a golf course where the grass must be kept very short, they aren’t big enough to be a problem in your backyard (if you’re mowing your grass to the correct height, which should be about 3.5 inches).

In addition to being harmless to humans – they don’t sting or bite – these ants are actually good for your lawn! They eat the eggs of grass pests, including Japanese beetles. One study found that when these ants were present in turf grass, they reduced the numbers of white grubs and other grass pest larvae. Choosing not to apply pesticides to kill these ants will help you practice conservation biocontrol in your own backyard! In other words, by protecting the natural enemies of lawn pests, you will have fewer lawn pests (and less damage) to worry about.

ants entering nest
Ants entering and exiting their nest. Cornfield ants (Lasius neoniger) are about 1/8 inch long, and range from light to dark brown. Consult an expert for correct identification. Photo courtesy of Matt Frye, NYS IPM.

Although these cornfield ants should be a welcome addition to your lawn for the reasons I’ve just described, if the hills they create are bothering you, there are some simple IPM solutions. Water and fertilize your lawn appropriately and use one of the top two height settings on your mower when cutting your grass. These strategies will help you achieve a denser, taller lawn. This type of lawn is less desirable for building new ant nests, and will make remaining ant hills less noticeable. For more information on maintaining healthy lawns, see the Cornell Turfgrass program’s Lawn Care: The Easiest Steps to an Attractive Environmental Asset.

A few final (but important) notes. Cornfield ants in your yard are a good thing. Ants in your home are a different story entirely, and NYS IPM has information on how to avoid in-home ant problems. If you are uncertain about what type of ant you have, consult an expert for proper identification. Your local extension office is a great place to start. Or, you can submit a sample to the Cornell Insect Diagnostic Laboratory.

Learn more about IPM for your lawn at Landscapes, Parks, and Golf Courses and ThinkIPM blog posts.