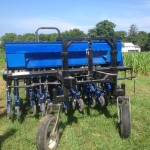
Part One: Business Entities

My final weeks at Hosmer Winery went by swiftly. In these last couple of weeks I worked in the tasting room with my fellow employees. As the days seemed to pass by more quickly, I began to consider the organization from two stand points: the business and the people that made it possible. This blog entry touches on the monetary considerations of Hosmer’s operation and the next entry focuses on the people that seek work within the whole. It is important to consider the businesses and the people who make a living in each to reflect on my coming career goals.

Established vineyards take a surprising amount of time and money to get where they are.

I guess the most appropriate way of starting is in the vineyard. Known legally as Patrician Verona Inc, this was the oldest and, can be considered a foundation for the two other business entities found at Hosmer. The vineyard was created in the late 70s when Tunker had returned home from school. A recent graduate of the Cornell pomology program (unfortunately, the Viticulture program was not around back then), Cameron planted some of the first Cabernet Franc and Riesling vines, on Cayuga Lake. The age that vines grow often determine how healthy and productive they are, the older the better in some sense, leading to increased quality ingredients in the wine and a major marketing advantage over the years.

Back then, as it remains today, this was no easy feat. To start a vineyard, it took tens of thousands of dollars in preparation, construction materials, and a large amount of labor to start with just a few acres. Some of the costs include leveling and prepare the soil, installing tile drainage, purchasing and planting the one-year old vines, and over the next couple of years, building a trellis system and caring for the vines. Gerald White, the Emeritus faculty member at Cornell has a fantastic article about the costs of establishing a vineyard (http://dev.senecacountycce.org/wp-content/uploads/2013/06/Cost-to-Establish-Produce-Vinifera-Grapes.pdf).

The real kicker of it is that, despite investing much time and energy into the newly planted vines, the Hosmers could only expect to have a harvest three years after they had first planted the vines and only turning a profit a couple of years later. According to several estimates on the subject, it will typically take more than 7 years  to get back your investment of a few acres of vineyard with interest. It may have taken many years and many loans to get the vineyard up and running, but Hosmer set himself up perfectly for the next business, a winery. With a decade of establishing a name for great fruit quality and management, building a good line of credit, and having a reliable supply of high quality grapes every year, Hosmer couldn’t have been in a better place to start a winery.

Regardless, opening a winery is not without significant investment in equipment and time. While equipment and ingredients and storage area are just the beginning of the monetary investment before beginning, nearly a year is typically required to create and age many marketable wines. While much initial investment in equipment is required, the issue of cash flow is essential even once a winery is established. The seasonality of wineries means that there are often large purchases of items like grapes, bottles, and additives. Then, there is the issue of selling the wine to make the whole process even worth investment.
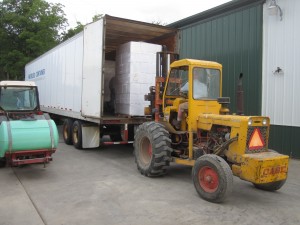
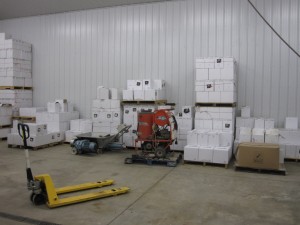
Purchasing wine bottles is quite the cash flow issue to tackle. Each stack of 100 cases costs $5,000.

Space and inventory management are huge considerations for winery operations.


Today the sales, distribution, and overall marketing of Hosmer’s wines are done about half by Southern Wine and Spirits Distributors and half by the Hosmer tasting room. Southern Wine allows Hosmer to sell much more wine and functions to spread Hosmer’s image and reputation further than it might have gone otherwise. Meanwhile, Hosmer’s own tasting room serves to connect customers to the region, the farm, and the family that makes and, essentially is, the Hosmer brand. A tasting room holds a place for loyal customers to come, but works harder to create loyalty within its customer base. While Hosmer sells its finished wine to its distributor, it is at a lower price than at the tasting room, reducing total possible revenue but simultaneously reducing the cost of sales. The tasting room allows for a higher price of wine  but incurs steeper costs, especially for employment which can easily make up more than one third of the costs in tasting rooms around the finger lakes. As a result, the profits per unit of wine may be higher by selling through either the distributor or the tasting room. However, the business as a whole makes up from the “potential lost profits” by diversifying potential sales
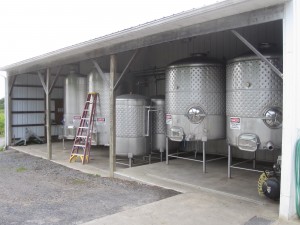
Wine can sit and age for months or years, but if it does not get sold on time at a certain price, all the efforts that went into it are without reward. This is one of the risks distributors minimize for a winery.

avenues and customer touch points.

Having the three business entities (vineyard, winery, and tasting room/distribution) has, in essence decreased the risks of of each separate entity and created a synergy(and I only use this word as it is strictly defines and not to sound like the stereotype of a motivational speaker). It is interesting, however, that many of the benefits of this “more than the sum of its parts” model is created by customer perception. If people truly believed that terrior or any permutation of local favoritism translated to a better experience, then they would pay less for the wine. If the value of the wine and the grapes depended less on locality and reliability, then some of the monetary benefits of Hosmer’s business model would fade and it might be more desirable to have only one of the three business sections.Luckily, there is always more than monetary considerations when running a winery as a business. Luckily, happiness, comfort, and general human considerations are the real reasons why a business such as Hosmer exists as it is.

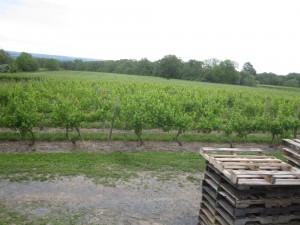
Hydroponic Problems

Although hydroponic lettuce production has its benefits, it is not a care free system. Even if the nutritional and environmental demands of a plant are met, problems will occur without fail. It can be noted that most, if not all, of these issues are preventable with the proper care and management. Here are some of the issues I dealt with throughout my internship:


Responses to Overcrowding (Shade Avoidance)

Right plant shading out adjacent plant. The left plant will not have enough time to catch up developmentally and isn’t worth planting, hence, a loss in profit both for the cost of the wasted seed and the loss of a finished lettuce plant.

Plants are sensitive life forms. They have evolved to elicit responses due to the slightest change in environment. Plants are always reaching for the perfect amount of sunlight. Too little sunlight equates to less energy capture and over a prolonged time, death or delayed life cycles. When the lettuce seeds are planted in a foam tray, it’s a race for the seedlings to germinate and capture light. As the plants begin growing, they send out leaves to capture the sunlight. As the plant enlarges, it becomes aware of surrounding plants due to the difference in light quality (far red to red ratios). The plants will sense other plants are shading them out (a larger far red quantity) and therefore bolt up. Over time, they will begin shading out other plants.


Had the lettuce plugs been planted earlier on before this response was so extreme (possibly two weeks earlier), both plants would develop into gorgeous, phenomenal looking bundles of lettuce. It could be noted that although the second plant isn’t used, it may still be able to be planted into another batch of lettuce with proper planning and management.


“Twinning”

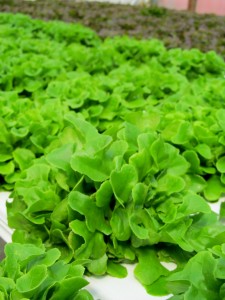
Two green oakleaf lettuce in one plug

Lettuce seeds are quite small, even when covered with different fungicides, chemicals or packaged with nutrients. Be it human error or carelessness, two seeds can be placed, unintentionally, in one foam plug. Both seeds will germinate and immediately begin competing for light, nutrients and water. Many times, one plant will survive, yet, that is not always the case. If the person planting the lettuce does not notice two plants in one plug during planting (or any time before extreme physical changes occur due to the second plant), a “twinning” effect will take place.

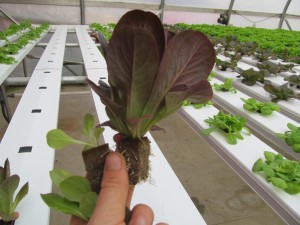
Twinning red oakleaf lettuce plants. From this view (looking at one plant), it’s easy to see the dramatic height difference between that and the single plants per plug.


Although it may seem ideal to grow two plants in one plug as a customer, it creates havoc as a grower. This plug will break uniformity in the crop. Although many customers may see this as a plus (two plants for the price of one!), it also may create an unappetizing look for the rest of the crop. Thirdly, these two plants will  shade out other plants as the day progresses. Fourthly and finally, this plug will need twice the nutrients and water to grow, which means a slightly elevated cost.


Tip Burn

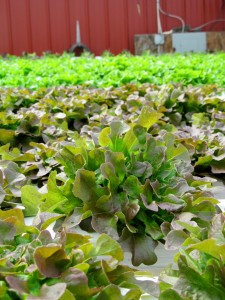
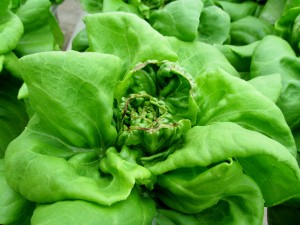
Green Bibb lettuce showing signs of tip burn

Greenhouse growing allows more control over environmental conditions. For example, torrential rain was a huge problem during my internship this summer. With silty fields, one heavy rain could equal a loss of thousands of dollars, time and wasted labor. This isn’t a problem in a greenhouse, of course. Yet, a grower can’t have everything: tip burn occurs.  The plant will get too much light and oxidize, hence the brown colored burn. Although the burned areas can be pinched off, the uniformity of the crop will be lost.


To prevent this problem, a partial shade can be used to reduce the sunlight. Or, more light tolerable varieties could be utilized.


Root Burn

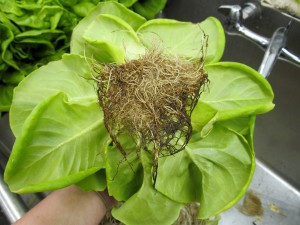
Root burn on Green Bibb lettuce. Notice the black roots around the edge, the brown roots and the beige roots located close to the center of the plant.

A nice way to determine the last possible moment to harvest a crop completely is to look for root burn. Healthy hydroponic roots will be a white, ivory color. The roots of dying plants (or stressed plants) will be a beige, brown or black color. If there is a deficit of water, which would indicate that the plant is too large to be maintained by the current amount of nutrients and water, the roots will begin to brown before the plant’s leaves show any signs of damage. So, by pulling up a few random plants (one closer to the tube, one in the middle of the channel, one closer to the end of the channel), it can be determined when to pull the rest of the plants.


When we processed lettuce, we would snip off the main portion of roots and leave a roughly 1/2 inch of roots still on the plug. Consumers would not see the root burn and would buy the plants. Had we left the root burn on, it is possible that the consumer would not purchase the plant because it did not look “perfect,” although they do not consume the roots anyways. The 1/2 inch of roots allow the plant to take up water. Given the delicate nature of lettuce, an hour of heat can create a wilting plant.

Okra

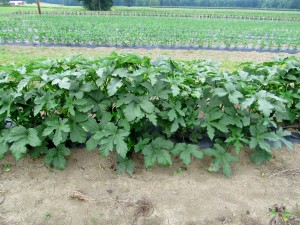
A portion of the okra row.

Towards the end of my internship, I began working with Okra. Having no prior experience with okra, both eating or growing, I was quite excited to “meet” a new plant! I was lucky enough to have about sixty plants to work with. Twice a week, I harvested okra in the mornings right after all the dew evaporated.


Okra, Abelmoschus esculentus, is a heat loving southern staple crop. Okra is also synonymous with Ladies Fingers and gumbo. This plant does not tolerate frost or cold weather and must be planted after the last frost. Plants should have a roughly fifteen inch spacing and should not be transplanted.


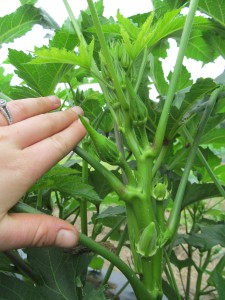
Maturing seed pods

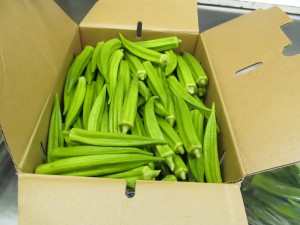
Okra seed pods are actually what gets harvested. The plant will grow to a mature size and begin flowering. The flowers are actually in the hibiscus or mallow family. The flower themselves were a light yellow color with a striking burgundy bulls eye. After the flower is fertilized, the seed pod begins forming. We harvested seed pods roughly two inches or longer. Many times, we would get seed pods that were the size of bananas as opposed to the size of Jalapeno peppers.

Okra seed pods harvested and placed in a 1/2 bushel box


Initially, I would daintily move the leaves of okra to find the seed pods. Yet, I found this to be inefficient because the green pods blend in with the green stems and foliage quite well. So, I would move the leaves and stems around with more gusto. I could harvest anywhere from a half peck of okra to two bushels of okra depending on the environmental conditions.


Another challenge with okra was dealing with the “hairs” on it. As I would move around the leaves, the trichomes would irritate my skin. If any okra breeder reads this blog, I would encourage breeding a variety with less trichomes or even better, a smooth plant! My final challenge with this southern beauty was keeping hold of the pods. Okra has a slimy texture when cooked and a slick texture when picked. By the tenth plant, my hands would be quite slick themselves!


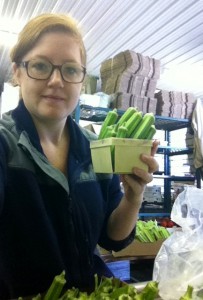
Posing with a pint of okra.

I did try some raw, uncooked okra. Its texture was unique compared to all other plants, but reminded me of eating sea weed. I can understand why many people say the taste is acquired! Some customers couldn’t get enough okra while others were curious, but not adventurous with their taste buds. A fellow employee mentioned that in Mexico, okra is ground up and used like a coffee. This plant was memorable.

Flower Selection & Arrangments

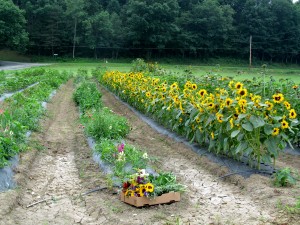
Cutting flowers row

To many people, flowers are fickle, useless, short lived and much too expensive. They view flower picking as a quick, thoughtless, mindless process. Arranging flowers is “easy” because “you just make it look pretty.” Yet, there’s so much more to flowers than meets the eye. Gomphrena, sunflowers, cornflower, strawflower, Scabiosa, snapdragons, and zinnias (including the Zowie hybrid, Senora and Exquisite cultivars) were some of the flowers in the cutting garden.


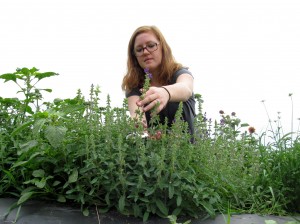
Cutting Clary sage ‘Salvia viridis’

Flowers are usually picked in the morning. This is because the plant will not have a huge water deficit (as compared to afternoon or high sun) and are not wilting. As I went through the rows of flowers, I would remove any flowers that were dead, losing petals or in the seeding stage. By deadheading flowers, the plant will continue to send up blooms. Hence, one zinnia plant can be trained to flower all summer long.


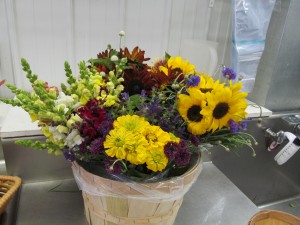
Generally, I made a few yellow sunflower bouquets, a mixed sunflower bouquet, a pink or red zinnia bouquet, a snapdragon bouquet and a multicolored (yellow, green, red, orange, pink, yellow or mixed) zinnia bouquet. After that, I would mix together flowers to create different types of arrangements.


Bouquets placed in a half bushel basket. The snapdragon bouquet was usually sold within the hour

I made bouquets that used flowers with petal colors that would be opposite on the color wheel or having a contrasting scheme. For example, I would pair a yellow flower with a purple one, a white with a black or a red flower with a green one. This enhances each color. I would also do analogous scheme colored bouquets with nice cool blues and purples or pinks, reds and oranges. This creates a more uniform appearance, but allows each flower to be unique. The mixed color zinnia bouquet would be considered a polychromatic bouquet. Some bouquets were made to be viewed as a centerpiece while others were meant to be viewed facing a certain direction.


After cutting flowers and tying the bouquets, the flowers were placed in water and then re-cut. This keeps the arrangement lasting longer because the water will conduct up the stem. Had the flowers only been cut in air and not in water, the stem would have sucked up an air bubble, preventing the uptake of water. If water cannot be transported, the flower will begin dying sooner. The bouquets were then bagged, filled with water, tied and set in a half bushel basket for sale.


Many studies indicate the benefit of plants, nature and flowers. In particular, hospital patients with a view of trees, grass or flowers recovered faster than patients with views of concrete or brick walls. In World War II, there are letters in which soldiers asked family members to send a favorite flower or vegetable to grow in their fox holes. Secondly, flowers have dominated history. There’s the War of the Roses, the Tulip Craze, the poppies  of In Flanders Fields, or the inclusion of flowers in art.  Thirdly, flowers have been associated with health and death, sadness and happiness. Flowers are bursting in weddings, proms, homecomings and funerals. Many religious traditions include flowers. Flowers, although feeble, flimsy or whimsical have a place and purpose in history.

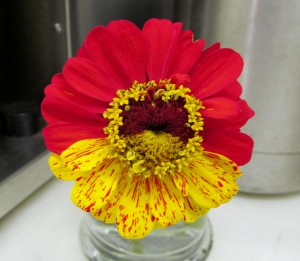
Zinnia flower


Even if one doesn’t care about flowers, they still can appreciate them. To eat that delicious orange, make that strawberry jam, or slice up that pepper, a flower needed fertilized. For that plant to flower, the leaves needed a signal from the day length. For those leaves to be present, a stem needed constructed. The stem couldn’t be constructed if it wasn’t anchored by roots. The roots would not occur if a small seedling didn’t germinate. Furthermore, that seedling came from a fertilized flower. The point merely is that to look at one specific area or aspect of the plant, the entire plant needs scrutinized and appreciated.


Spreading beneficial mites

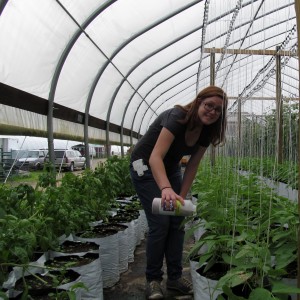
Spreading beneficial mites on young bean plants

Pest control is always on the mind of the grower and farmer. Pests, from the frolicking deer to the smallest of mites, create financial, ethical and ecological concerns.  There’s a balance between managing an ecologically sensitive farm to minimizing financial loss. On top of that, farmers need to demonstrate an ethical concern about safety for them, their employees, the environment and most vitally, the consumer. Taking all of this into consideration, the utilization of beneficial insects (or bio-control) seems ideal.


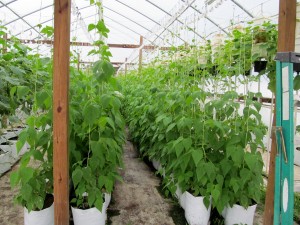
Thrip infestations on beans: Look at the splotchy leaves in the row near the pole

Prior to spreading beneficials, there are a few steps. Firstly, identifying a problem or a lack of one is essential. With new varieties of plants comes different appearances at different ages. Imagine spending hundreds (or more) of dollars only to find out that a slight difference in appearance is occurring, not a detrimental problem. Secondly, the problem needs identified as being due to pests, diseases, the environment or nutrition. Thirdly, a treatment plan should be utilized. Fourthly, a prevention plan needs set into place. Although the initial goal is to save the crop, the long term goal is to prevent this problem from reoccurring.


On cucumbers and beans, a white splotchy pattern will occur with thrip infestations. It will look like jeans when bleach is splattered on them. Thrips are slender insects with fringed, toothy wings. These pesky bugs will pierce a plant and suck the contents out of the cell. Basically, imagine slurping a smoothie (the cell contents) out of a cup (the cell of the plant). Although thrips have a hard time flying, the will migrate around the greenhouse quite well due to the fan. We spread predatory mites (the beneficials) to control a variety of  thrip larva and hatching eggs. Luckily for us, a few days after the infestation was spotted, we had a cloudy, rainy day with 55-65 degree temperatures to spread the mites.


To spread the mites, I would walk down the rows sprinkling a teaspoon of what looked like sawdust on the leaves of the plants. It was important to spread on lower leaves and leaves higher up on the stem to get a nice coverage of the plants. It was also quite tricky to reach some of the taller leaves on cucumber plants. After I finished spreading the mites, I left the empty bottles in the middle of the rows in case any mites were still inside.


Green (alive) aphid and two mummified aphids

To help prevent huge infestations, companion planting was utilized (intentionally or not). Basically, instead of having a greenhouse monoculture, most greenhouses had a mix of plant species and families. In one house, lettuce, tomatoes and herbs were placed together while radishes, beans, cucumbers and basil were placed together in another. This creates a more diverse ecosystem that will attract a variety of pollinators, including many beneficial parasitic wasps.


Let me hop picking begin!

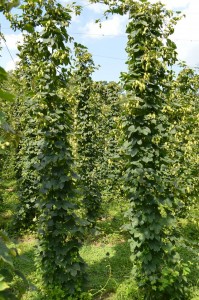
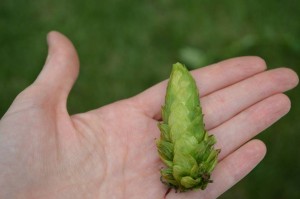
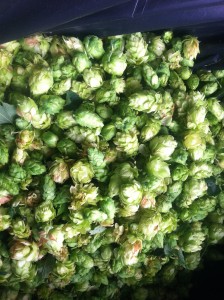
At the beginning of August most of the hop plants are finished and ready to be harvested. Hops start forming on the plant in July after the plants “bur-out”. Hops are cones bright green cones that hang from the vines. If you break one open you can see a yellow powder called lupin. Once the hop cones have matured and dried out a little they are ready to be picked and harvested.

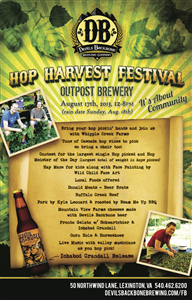
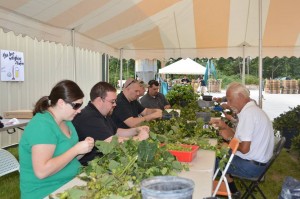
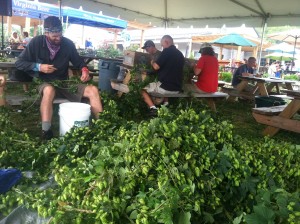
This is and can be a very time consuming process. For this reason, most hopyards host hop harvest events to help attract volunteers. Two of the hop farms I worked on, Whipple Creek Farms and Blue Mountain Brewery had these types of events. Marketing is crucial in getting the word out about these festivities and attracting volunteers. Social Media sites like Facebook are vital through this process. Posters, newspaper articles, and radio announcements are also useful and used. One way to attract potential volunteers while helping support other local artists and businesses is by adding additional activities and events. Whipple Creek Farms hop harvest was sponsored and supported by Devil’s Backbone. During this harvest festival they also included face painting, live music, local food and a new beer release.

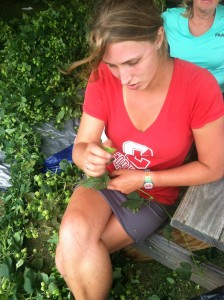
Due to timing and a previous commitment I had to leave Virginia before the hop harvest at Whipple Creek Farms. However, I was able to attend and work at Blue Mountain Brewery’s. We arrived to Blue Mountain at around 9:30 am to start cutting down the hop plants. We did this using a ladder and the cart we used for stringing. We would then either bring the plants to tents where volunteers would be sitting at picking from 11am- closing, or cut the vines into 4 foot sections to be fed into the hop picking machine. At Blue Mountain Brewery’s festival the volunteers were promised a free lunch if they picked for 2 or more hours. This helped ensure that people were picking and encouraged them to stay for a couple hours. Volunteers sat and picked under tents while eating food, drinking beer and listening to local and live music.

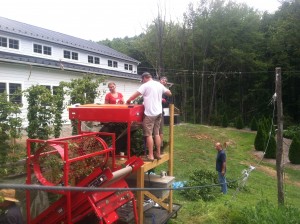
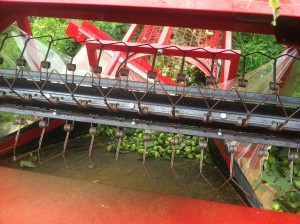
The hop specialist, Stan Driver, purchased the hop picker last year. It is a fairly new piece of machinery and unfortunately has a lot of kinks that still need to be worked out. You insert the hop plants and twirl it around as these teeth strip leaves and the cones. These then tumble down into this cylinder and come down on a conveyer belt. Harvesting hops is an extremely labor intensive process. Hand picking takes hours, days and weeks. The hop harvester greatly reduces this and is extremely beneficial.

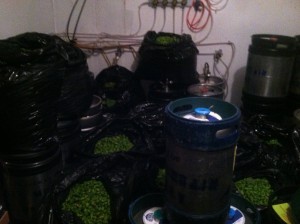
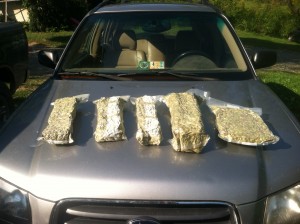
Although I sadly had to miss the Whipple Creek Farm and Devils Backbone hop harvest, I was fortunate enough to participate in another. Blue Mountain Brewery harvested about 25 trash bags full of hops and Whipple Creek Farms harvested about 800 pounds. Some of the hops from each hopyard will be dried and stored. Others will be used to make a “wet” hops beer.

I got to see how important marketing is and how many hop farms wouldn’t be able to harvest their yields without the help of volunteers. It was a great experience to work with the hop harvester, pick by hand and I got to meet a lot of great people.

Scouting Corn

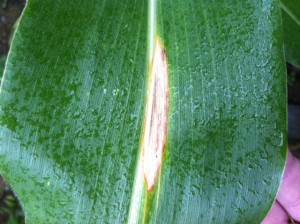
Northern Corn Leaf Blight

For the last couple weeks I have been doing a lot of scouting in Western NY. Mainly I have been looking at corn but I have also seen alfalfa and soybeans. When scouting, we are usually looking for the presence of diseases, insect damage, and anything else that could be causing stress to the crop including nutrient deficiencies, weeds, or injury from earlier sprays.

Since I have been spending a lot of time scouting corn I have been able to scout for weed pressure, present diseases, and insect damage. Weed pressure was the first thing we began scouting for once the corn had emerged because it is very important to take out the weeds before they can compete with the crop for things such as water, nutrients, light, and space. The procedure for scouting weed pressure in corn is fairly straight forward with weather permitting we are usually able to ride the ATV’s at least around the perimeter to get an understanding of the field and see if there are any problem areas. While riding the perimeter I will step off the ATV in a couple areas to walk into the field and see what other weeds are present away from the edge and towards the center. At first I found it a little difficult to determine what was moderate or heavy pressure for the weeds present in the field but once I got my first couple fields under my belt I was able to get the hang of it. Some of the weeds that I found consistently in the corn fields included, chickweed, ragweed, lambs quarters, crabgrass, milkweed, and wild mustard. Once I am done scouting for the day I send my reports to the service manager that is working with said farm and they will make recommendations from the data I collected.

Scouting for diseases and insects in corn was also another main priority in the recent couple weeks. Some of the diseases that are important to scout for include Northern Corn Leaf Blight, Grey Leaf Spot, Anthracnose, and Eyespot. In the fields that I have scouted there hasn’t been much

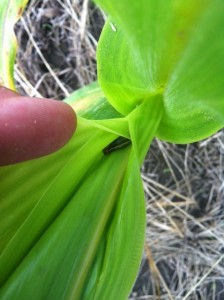
Armyworm larvae found in the whirl of corn while scouting.

disease pressure. I have found these diseases out in the field; however they were only in trace amounts nothing that was of concern and needed action to be taken. While walking through the corn searching for disease pressure I also try to keep an eye out for any insect damage. So far I have been able to see some damage from armyworm and also found a few larvae, but nowhere near the kind of pressure we were seeing last season.

Cleaning Hydroponic Channels

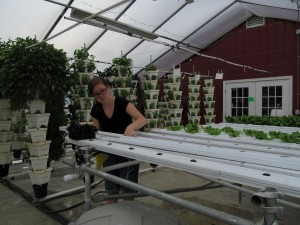
Scrubbing the channels with warm water and a dishrag.

In spite of the gorgeous rosette of green leaves adorning each plant are a forgotten, bulky portion of roots. These hardworking organs uptake nutrients, excrete chemicals and provide support for the plant, yet, often go unnoticed to most people. One great aspect of hydroponic growing is noticing every aspect of the plant. For me, it was quite surprising to see thick root masses underneath the eye catching leaves.  Lettuce pulled from soil never gives justice to really the density and amount of roots the plant creates for a successful life.


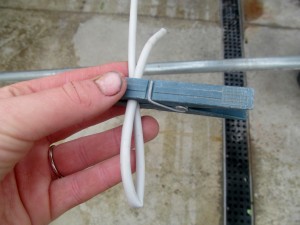
The cleaning begins with each channel’s tube being kinked. This small, two inch piece of plastic is responsible for getting the water from the pipes to the plants. The tube is kinked with an inexpensive clothes line pin. Each channel is pulled out from the main pipe that cycles the nutrient water back into the tank.


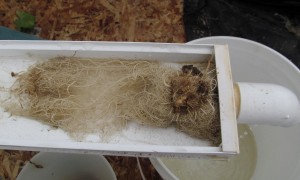
After each channel is pulled from the main pipe,the top of the channels are pulled off. The root mass is removed from the channels. Many times, the root masses of multiple plants are intertwined, allowing the entire six foot channel to be rolled into one massive ball. After harvesting eighteen Kale plants, I opened the channels to find a six foot long, two inch thick root mass almost busting out of the channel. Other times, I’ve found each plant’s roots isolated. Each channel and top of the channel is thoroughly scrubbed with warm water and a rag.

A root mass with some stem portion at the end of one channel. This plant’s roots were actually inside the main pipe.


No cleaning chemicals (such as bleach or soap) are added to the water. This is to prevent the possibility of any contamination of the nutrient water.  After the channels have been thoroughly scrubbed, the tops are replaced and water is squirted down the channel to remove any roots or plant pieces prior to reconnecting to the main pipe.


The channel is then inserted into the main pipe and the tube is un-kinked. Before the channel is replanted, water is confirmed to be running throughout the channel. It may seem idiotic to emphasize water running in a hydroponic channel, but many times, the tube is merely trickling with barely enough water to feed and hydrate one plant. By determining this before planting, we save time, money and patience.


One issue in hydroponics is attempting to control the growth of the roots. Roots are constantly shed from the plant. Given the flowing of the water, this allows the entire system to be shut down literally by a small portion of the plant. It’s a delicate balance between harvesting as large a plant as possible without allowing the roots to completely fill the channel and beyond. Remember, the more roots a plant has, the more nutrients it needs. Huge root masses can really drain the water tank.

Kinking the line. A 10 cent piece of plastic saves the day!


It is important to note that many times, roots are not the only thing in the channels. Algae, leaves and bugs also adorn the inside of the channels. Algae, of course, uses up nutrients in the water and competes with the profitable lettuce. Leaves can clop up the filter, tubes or pipes, devastating rows of plants. While bugs may also clog the system, they devour lettuce and create an unappetizing, “unhealthy” look.


To many people, hydroponics is a monotonous system. Yet, I’ve found passion working with hydroponic lettuce and kale. Harvesting lettuce I planted fills me with more pride than I previously would have thought. Many times, customers have stopped me to learn more about the hydroponic system and are shocked to see the transformation of a two leafed “infant” plant into a robust “adult” beauty.

Embolsando…Grape Bagging

Here in this region of Alicante there is a special tradition with the table grapes.  It’s called ‘embolsando’ or the bagging of the clusters.  At Casa Sicilia we primarily have wine grapes but also about 25 hectares of table grapes.  The farms in this region cultivate a variety of table grape called Aledo, which is only grown here in Novelda and its surrounding towns.  This variety is special because it is harvested in November and December and there is a tradition with this specific grape at the end of the year.  Each person has toe at 12 grapes in the last 12 seconds of the year in order to have good luck the following year. Almost all of Spain eats the grapes from here in Alicante on this night.

Aledo Table Grapes

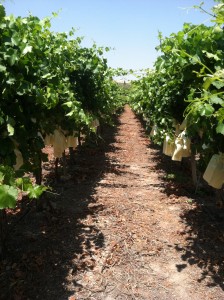
Why do we have to but bags on all of the grapes? We put them on each cluster to make sure they are protected and look absolutely perfect by the time they are harvested in December.  I have never seen anything like the embolsano.  The rows and rows of grapes are full of White bags tied with string, it looks pretty weird if you don’t know what it’s for. The bags protect the grapes from bird damage, insects, and the sun.  When the clusters are big, but not ye tripe, they put one bag on each cluster.  It is a job but a lot of people from the town help in the farms during the weeks of embolsando.  This week I helped and woke up each day at 6 to start with the team at 7.  We work until 10 for a break and then continue until 2 in the afternoon.

The farm pays per thousand bags you put, so everyone Works very quickly in order to use as many bags as possible in a day.  It is very impressive to watch how fast some of the workers go.  The best ones can put 2 thousand in one day.

Embolsando Contest

This Sunday was the embolsando contest of Novelda here in the farm that I work at.  All of the fasted “bag-tyers” came and competed.  It was a really fun event with music and tapas.  There were 20 contestents and a lot of people to cheer them on.  They had to put 200 bags and the winner did it in 26 minutes. Which is actually crazy fast, I put 1000 in a total of 7 hours.  It was really cool to see how the whole town comes together to help with the grape bagging.

That’s all for now, Hasta Luego!

———-

(Español).

Aquí en esta zona hay una tradición muy especial en la uva de mesa.  La ocurra cada año durante el mes de julio.  Se llama el embolsado, y nunca he visto nada como este antes. Las filas de la uva son llenas de bolsos con hilo.  Las fincas en este región cultivan una variedad de uva de mesa que se llama Aledo y está solo aquí en Novelda y los alrededores.  La uva es especial porque la vendimia es en noviembre y diciembre y hay una tradición con esta uva particular en el fin del año. Hay que comer 12 uvas en los 12 últimos segundos del año a dar suerte.  Casi todo España come la uva de aquí en esta noche.

Porque tenemos que poner los bolsos? Porque quieren que en diciembre la uva estará perfecta y los bolso protegen de todo, los insectos, los pájaros, y el daño del sol.  Ponen un bolso cada racimo cuando están grandes pero no maduras. Es un trabajo muy pesado pero mucha gente del pueblo ayuda en las fincas.  Esta semana he participado en el embolsado de la uva.  Me desperté a las seis a empezar con el equipo al las siete.  Trabajamos hasta diez a almorzarnos y después continuamos hasta las dos.

La finca te paga cada mil bolso que pones y por eso los trabajadores van muy rápido. Es muy impresionante a ver que rápido mueven las manos.  Ponen un saco en cada racimo y hacen un nudo con hilo.  Los mejores pueden poner dos mil en un día.

Este domingo fue el concurso de embolsado aquí en la finca donde trabajo yo.  Había 20 concursantes y mucha gente a aclamarlos. Tuvieron que poner dos cientos bolsos y el hombre que acabó primero puso los dos cientos sacos en 27 minutos.  Fue un evento muy divertido con bebida, tapas, y música.   Fue muy chulo a ver como todo el pueblo ayuda con la uva durante este mes.

Summer Field Days

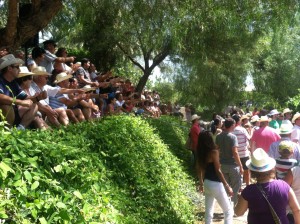
Over the course of my internship thus far I have been to several field days covering a wide range of subjects. Field days are usually put on by a Cornell program located here on campus or through the Cornell extension service. The purpose of field days is to share information regarding different research that is currently going on through Cornell. Generally the audience consists of farmers, extension agents, consulting firms, and other Cornell researchers. Presentations are given about each of the projects at the given location usually in addition to a tour of the facilities.

One of the first field days I attended was the small grain grower’s field day. This field day was almost entirely focused around the recently passed farm brewer’s bill. Due to the lack of barley and other small grain crops being grown for malting, these researchers were quite busy this year testing a wide range of varieties to determine which grow best in New York’s climate. In addition to being able to grow well, they must also be of high malting quality. This narrows the options down quite a bit since the quality needs to be top notch in order for the crop to be used for malting. Growers are extremely interested in the results of this research as many of them are likely going to be growing crops that will be used for malting as a result of the farm brewer’s bill.


The next field day I attended was the forage yield monitor field day. This field day was hosted by Gary Swede Farms, Agrinetix, and the Cornell Nutrient Management Spear Program (NMSP). This was mainly put on to provide information about forage yield monitors such as the importance of  forage yield monitors, how they work, calibrating the monitors, and constructing yield maps from the collected data. The NMSP’s project looking at the accuracy of the yield monitors was also presented showing some preliminary results.

The most recent field day I attended was the Aurora Farm Field Day. It took place at the Aurora research farm, where there are numerous research projects including several which belong to the Nutrient Management Spear Program. One of the projects presented was looking at planting date and planting depth of corn and soybeans. Several other studies were variety testing of corn and other forage crops. One study that I found to be of particular interest was a fairly new piece of equipment which is used as an inter crop seeder.  The purpose of the machine is to go over corn when it is about waist high and plant the cover crop which is to follow the corn once it is harvested. This helps the cover crop by having it establish earlier to increase the benefits it provides. Another presentation that covered a fairly new piece of equipment was one by the NMSP. The piece of equipment was a small scale manure injector that just arrived from Penn state. This will be used in the future for a study comparing different injection rates and application methods. Unfortunately, this presentation had to be done indoors due to some unexpected afternoon showers!

Skip to toolbar