Laura Hlusko

Hydroponic Problems

Although hydroponic lettuce production has its benefits, it is not a care free system. Even if the nutritional and environmental demands of a plant are met, problems will occur without fail. It can be noted that most, if not all, of these issues are preventable with the proper care and management. Here are some of the issues I dealt with throughout my internship:


Responses to Overcrowding (Shade Avoidance)
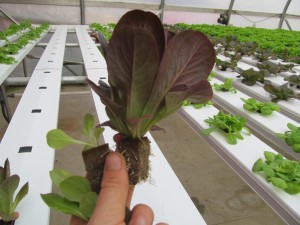
Right plant shading out adjacent plant. The left plant will not have enough time to catch up developmentally and isn’t worth planting, hence, a loss in profit both for the cost of the wasted seed and the loss of a finished lettuce plant.

Plants are sensitive life forms. They have evolved to elicit responses due to the slightest change in environment. Plants are always reaching for the perfect amount of sunlight. Too little sunlight equates to less energy capture and over a prolonged time, death or delayed life cycles. When the lettuce seeds are planted in a foam tray, it’s a race for the seedlings to germinate and capture light. As the plants begin growing, they send out leaves to capture the sunlight. As the plant enlarges, it becomes aware of surrounding plants due to the difference in light quality (far red to red ratios). The plants will sense other plants are shading them out (a larger far red quantity) and therefore bolt up. Over time, they will begin shading out other plants.


Had the lettuce plugs been planted earlier on before this response was so extreme (possibly two weeks earlier), both plants would develop into gorgeous, phenomenal looking bundles of lettuce. It could be noted that although the second plant isn’t used, it may still be able to be planted into another batch of lettuce with proper planning and management.


“Twinning”

Two green oakleaf lettuce in one plug

Lettuce seeds are quite small, even when covered with different fungicides, chemicals or packaged with nutrients. Be it human error or carelessness, two seeds can be placed, unintentionally, in one foam plug. Both seeds will germinate and immediately begin competing for light, nutrients and water. Many times, one plant will survive, yet, that is not always the case. If the person planting the lettuce does not notice two plants in one plug during planting (or any time before extreme physical changes occur due to the second plant), a “twinning” effect will take place.
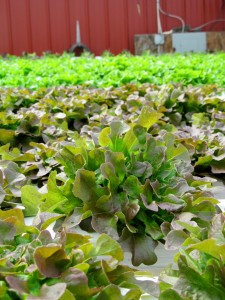
Twinning red oakleaf lettuce plants. From this view (looking at one plant), it’s easy to see the dramatic height difference between that and the single plants per plug.


Although it may seem ideal to grow two plants in one plug as a customer, it creates havoc as a grower. This plug will break uniformity in the crop. Although many customers may see this as a plus (two plants for the price of one!), it also may create an unappetizing look for the rest of the crop. Thirdly, these two plants will  shade out other plants as the day progresses. Fourthly and finally, this plug will need twice the nutrients and water to grow, which means a slightly elevated cost.


Tip Burn

Green Bibb lettuce showing signs of tip burn

Greenhouse growing allows more control over environmental conditions. For example, torrential rain was a huge problem during my internship this summer. With silty fields, one heavy rain could equal a loss of thousands of dollars, time and wasted labor. This isn’t a problem in a greenhouse, of course. Yet, a grower can’t have everything: tip burn occurs.  The plant will get too much light and oxidize, hence the brown colored burn. Although the burned areas can be pinched off, the uniformity of the crop will be lost.


To prevent this problem, a partial shade can be used to reduce the sunlight. Or, more light tolerable varieties could be utilized.


Root Burn
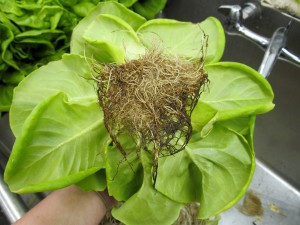
Root burn on Green Bibb lettuce. Notice the black roots around the edge, the brown roots and the beige roots located close to the center of the plant.

A nice way to determine the last possible moment to harvest a crop completely is to look for root burn. Healthy hydroponic roots will be a white, ivory color. The roots of dying plants (or stressed plants) will be a beige, brown or black color. If there is a deficit of water, which would indicate that the plant is too large to be maintained by the current amount of nutrients and water, the roots will begin to brown before the plant’s leaves show any signs of damage. So, by pulling up a few random plants (one closer to the tube, one in the middle of the channel, one closer to the end of the channel), it can be determined when to pull the rest of the plants.


When we processed lettuce, we would snip off the main portion of roots and leave a roughly 1/2 inch of roots still on the plug. Consumers would not see the root burn and would buy the plants. Had we left the root burn on, it is possible that the consumer would not purchase the plant because it did not look “perfect,” although they do not consume the roots anyways. The 1/2 inch of roots allow the plant to take up water. Given the delicate nature of lettuce, an hour of heat can create a wilting plant.

Okra

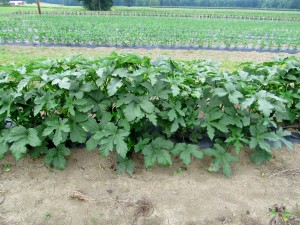
A portion of the okra row.

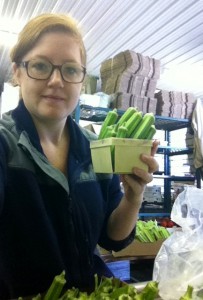
Towards the end of my internship, I began working with Okra. Having no prior experience with okra, both eating or growing, I was quite excited to “meet” a new plant! I was lucky enough to have about sixty plants to work with. Twice a week, I harvested okra in the mornings right after all the dew evaporated.


Okra, Abelmoschus esculentus, is a heat loving southern staple crop. Okra is also synonymous with Ladies Fingers and gumbo. This plant does not tolerate frost or cold weather and must be planted after the last frost. Plants should have a roughly fifteen inch spacing and should not be transplanted.


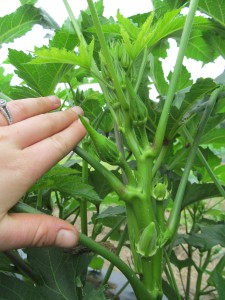
Maturing seed pods

Okra seed pods are actually what gets harvested. The plant will grow to a mature size and begin flowering. The flowers are actually in the hibiscus or mallow family. The flower themselves were a light yellow color with a striking burgundy bulls eye. After the flower is fertilized, the seed pod begins forming. We harvested seed pods roughly two inches or longer. Many times, we would get seed pods that were the size of bananas as opposed to the size of Jalapeno peppers.

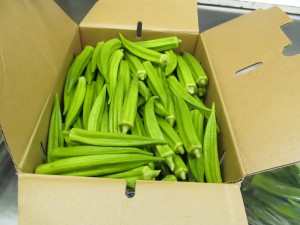
Okra seed pods harvested and placed in a 1/2 bushel box


Initially, I would daintily move the leaves of okra to find the seed pods. Yet, I found this to be inefficient because the green pods blend in with the green stems and foliage quite well. So, I would move the leaves and stems around with more gusto. I could harvest anywhere from a half peck of okra to two bushels of okra depending on the environmental conditions.


Another challenge with okra was dealing with the “hairs” on it. As I would move around the leaves, the trichomes would irritate my skin. If any okra breeder reads this blog, I would encourage breeding a variety with less trichomes or even better, a smooth plant! My final challenge with this southern beauty was keeping hold of the pods. Okra has a slimy texture when cooked and a slick texture when picked. By the tenth plant, my hands would be quite slick themselves!


Posing with a pint of okra.

I did try some raw, uncooked okra. Its texture was unique compared to all other plants, but reminded me of eating sea weed. I can understand why many people say the taste is acquired! Some customers couldn’t get enough okra while others were curious, but not adventurous with their taste buds. A fellow employee mentioned that in Mexico, okra is ground up and used like a coffee. This plant was memorable.

Flower Selection & Arrangments

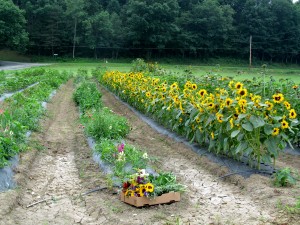
Cutting flowers row

To many people, flowers are fickle, useless, short lived and much too expensive. They view flower picking as a quick, thoughtless, mindless process. Arranging flowers is “easy” because “you just make it look pretty.” Yet, there’s so much more to flowers than meets the eye. Gomphrena, sunflowers, cornflower, strawflower, Scabiosa, snapdragons, and zinnias (including the Zowie hybrid, Senora and Exquisite cultivars) were some of the flowers in the cutting garden.


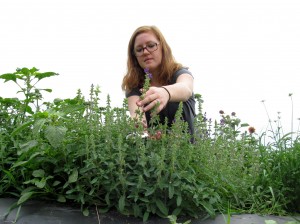
Cutting Clary sage ‘Salvia viridis’

Flowers are usually picked in the morning. This is because the plant will not have a huge water deficit (as compared to afternoon or high sun) and are not wilting. As I went through the rows of flowers, I would remove any flowers that were dead, losing petals or in the seeding stage. By deadheading flowers, the plant will continue to send up blooms. Hence, one zinnia plant can be trained to flower all summer long.


Generally, I made a few yellow sunflower bouquets, a mixed sunflower bouquet, a pink or red zinnia bouquet, a snapdragon bouquet and a multicolored (yellow, green, red, orange, pink, yellow or mixed) zinnia bouquet. After that, I would mix together flowers to create different types of arrangements.


Bouquets placed in a half bushel basket. The snapdragon bouquet was usually sold within the hour

I made bouquets that used flowers with petal colors that would be opposite on the color wheel or having a contrasting scheme. For example, I would pair a yellow flower with a purple one, a white with a black or a red flower with a green one. This enhances each color. I would also do analogous scheme colored bouquets with nice cool blues and purples or pinks, reds and oranges. This creates a more uniform appearance, but allows each flower to be unique. The mixed color zinnia bouquet would be considered a polychromatic bouquet. Some bouquets were made to be viewed as a centerpiece while others were meant to be viewed facing a certain direction.


After cutting flowers and tying the bouquets, the flowers were placed in water and then re-cut. This keeps the arrangement lasting longer because the water will conduct up the stem. Had the flowers only been cut in air and not in water, the stem would have sucked up an air bubble, preventing the uptake of water. If water cannot be transported, the flower will begin dying sooner. The bouquets were then bagged, filled with water, tied and set in a half bushel basket for sale.


Many studies indicate the benefit of plants, nature and flowers. In particular, hospital patients with a view of trees, grass or flowers recovered faster than patients with views of concrete or brick walls. In World War II, there are letters in which soldiers asked family members to send a favorite flower or vegetable to grow in their fox holes. Secondly, flowers have dominated history. There’s the War of the Roses, the Tulip Craze, the poppies  of In Flanders Fields, or the inclusion of flowers in art.  Thirdly, flowers have been associated with health and death, sadness and happiness. Flowers are bursting in weddings, proms, homecomings and funerals. Many religious traditions include flowers. Flowers, although feeble, flimsy or whimsical have a place and purpose in history.

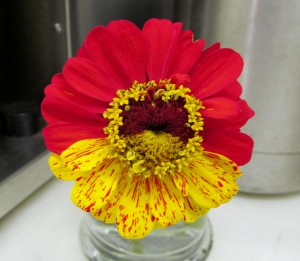
Zinnia flower


Even if one doesn’t care about flowers, they still can appreciate them. To eat that delicious orange, make that strawberry jam, or slice up that pepper, a flower needed fertilized. For that plant to flower, the leaves needed a signal from the day length. For those leaves to be present, a stem needed constructed. The stem couldn’t be constructed if it wasn’t anchored by roots. The roots would not occur if a small seedling didn’t germinate. Furthermore, that seedling came from a fertilized flower. The point merely is that to look at one specific area or aspect of the plant, the entire plant needs scrutinized and appreciated.


Spreading beneficial mites

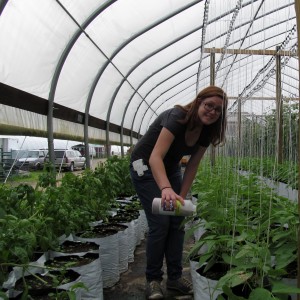
Spreading beneficial mites on young bean plants

Pest control is always on the mind of the grower and farmer. Pests, from the frolicking deer to the smallest of mites, create financial, ethical and ecological concerns.  There’s a balance between managing an ecologically sensitive farm to minimizing financial loss. On top of that, farmers need to demonstrate an ethical concern about safety for them, their employees, the environment and most vitally, the consumer. Taking all of this into consideration, the utilization of beneficial insects (or bio-control) seems ideal.


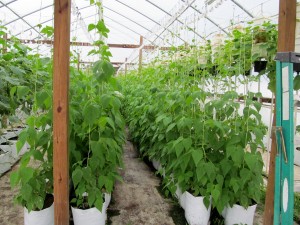
Thrip infestations on beans: Look at the splotchy leaves in the row near the pole

Prior to spreading beneficials, there are a few steps. Firstly, identifying a problem or a lack of one is essential. With new varieties of plants comes different appearances at different ages. Imagine spending hundreds (or more) of dollars only to find out that a slight difference in appearance is occurring, not a detrimental problem. Secondly, the problem needs identified as being due to pests, diseases, the environment or nutrition. Thirdly, a treatment plan should be utilized. Fourthly, a prevention plan needs set into place. Although the initial goal is to save the crop, the long term goal is to prevent this problem from reoccurring.


On cucumbers and beans, a white splotchy pattern will occur with thrip infestations. It will look like jeans when bleach is splattered on them. Thrips are slender insects with fringed, toothy wings. These pesky bugs will pierce a plant and suck the contents out of the cell. Basically, imagine slurping a smoothie (the cell contents) out of a cup (the cell of the plant). Although thrips have a hard time flying, the will migrate around the greenhouse quite well due to the fan. We spread predatory mites (the beneficials) to control a variety of  thrip larva and hatching eggs. Luckily for us, a few days after the infestation was spotted, we had a cloudy, rainy day with 55-65 degree temperatures to spread the mites.


To spread the mites, I would walk down the rows sprinkling a teaspoon of what looked like sawdust on the leaves of the plants. It was important to spread on lower leaves and leaves higher up on the stem to get a nice coverage of the plants. It was also quite tricky to reach some of the taller leaves on cucumber plants. After I finished spreading the mites, I left the empty bottles in the middle of the rows in case any mites were still inside.


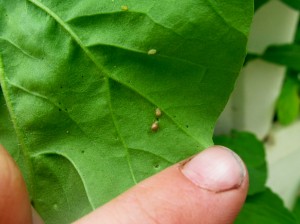
Green (alive) aphid and two mummified aphids

To help prevent huge infestations, companion planting was utilized (intentionally or not). Basically, instead of having a greenhouse monoculture, most greenhouses had a mix of plant species and families. In one house, lettuce, tomatoes and herbs were placed together while radishes, beans, cucumbers and basil were placed together in another. This creates a more diverse ecosystem that will attract a variety of pollinators, including many beneficial parasitic wasps.


Cleaning Hydroponic Channels

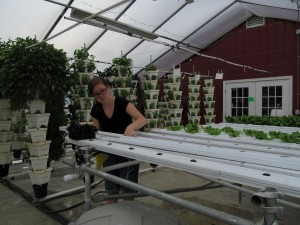
Scrubbing the channels with warm water and a dishrag.

In spite of the gorgeous rosette of green leaves adorning each plant are a forgotten, bulky portion of roots. These hardworking organs uptake nutrients, excrete chemicals and provide support for the plant, yet, often go unnoticed to most people. One great aspect of hydroponic growing is noticing every aspect of the plant. For me, it was quite surprising to see thick root masses underneath the eye catching leaves.  Lettuce pulled from soil never gives justice to really the density and amount of roots the plant creates for a successful life.


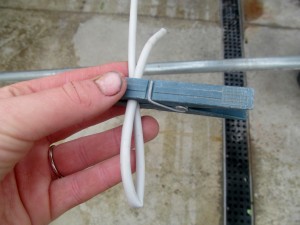
The cleaning begins with each channel’s tube being kinked. This small, two inch piece of plastic is responsible for getting the water from the pipes to the plants. The tube is kinked with an inexpensive clothes line pin. Each channel is pulled out from the main pipe that cycles the nutrient water back into the tank.


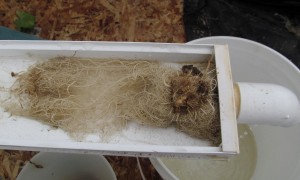
After each channel is pulled from the main pipe,the top of the channels are pulled off. The root mass is removed from the channels. Many times, the root masses of multiple plants are intertwined, allowing the entire six foot channel to be rolled into one massive ball. After harvesting eighteen Kale plants, I opened the channels to find a six foot long, two inch thick root mass almost busting out of the channel. Other times, I’ve found each plant’s roots isolated. Each channel and top of the channel is thoroughly scrubbed with warm water and a rag.

A root mass with some stem portion at the end of one channel. This plant’s roots were actually inside the main pipe.


No cleaning chemicals (such as bleach or soap) are added to the water. This is to prevent the possibility of any contamination of the nutrient water.  After the channels have been thoroughly scrubbed, the tops are replaced and water is squirted down the channel to remove any roots or plant pieces prior to reconnecting to the main pipe.


The channel is then inserted into the main pipe and the tube is un-kinked. Before the channel is replanted, water is confirmed to be running throughout the channel. It may seem idiotic to emphasize water running in a hydroponic channel, but many times, the tube is merely trickling with barely enough water to feed and hydrate one plant. By determining this before planting, we save time, money and patience.


One issue in hydroponics is attempting to control the growth of the roots. Roots are constantly shed from the plant. Given the flowing of the water, this allows the entire system to be shut down literally by a small portion of the plant. It’s a delicate balance between harvesting as large a plant as possible without allowing the roots to completely fill the channel and beyond. Remember, the more roots a plant has, the more nutrients it needs. Huge root masses can really drain the water tank.

Kinking the line. A 10 cent piece of plastic saves the day!


It is important to note that many times, roots are not the only thing in the channels. Algae, leaves and bugs also adorn the inside of the channels. Algae, of course, uses up nutrients in the water and competes with the profitable lettuce. Leaves can clop up the filter, tubes or pipes, devastating rows of plants. While bugs may also clog the system, they devour lettuce and create an unappetizing, “unhealthy” look.


To many people, hydroponics is a monotonous system. Yet, I’ve found passion working with hydroponic lettuce and kale. Harvesting lettuce I planted fills me with more pride than I previously would have thought. Many times, customers have stopped me to learn more about the hydroponic system and are shocked to see the transformation of a two leafed “infant” plant into a robust “adult” beauty.

Planting Hydroponic Lettuce

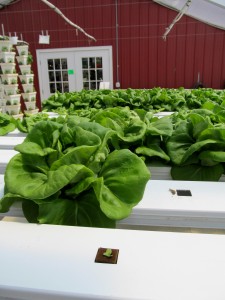
Hydroponic lettuce at four weeks and one week.

Greetings from western Pennsylvania! I have been learning hydroponics throughout my summer internship at Yarnick’s Farm. I have found great interest and opportunity learning about the entire system from seedling to sale.


Green and Red Bibb lettuce, kale and Red Oakleaf lettuce are all grown hydroponically in the greenhouses. Plants grown without soil are considered to be hydroponically grown. Confusing as it may be, hydroponics encompasses plants grown in foam, gel, perlite, or water. On Yarnick’s farm, the lettuce is grown hydroponically in foam and water.


The process begins with a foam tray. One lettuce seed is placed in each hole in the foam tray. This tray is then watered as any normal sprouting seedling would be. The sprouting seeds must be kept in moist conditions. The trays must constantly be monitored; a dried tray equals a loss of seeds, foam, money and most importantly, time.


After the first two true leaves erupt from the young seedling, each foam square containing this delicate seedling can be planted. Due to timing issues, the plants may have two true leaves or five beautifully developed, upright leaves. The foam squares are carefully separated. If the seedlings are damaged, have abnormal growth (sideways) or look inferior (yellow leaves, small, signs of oxidation), they are discarded or left to grow a little longer.

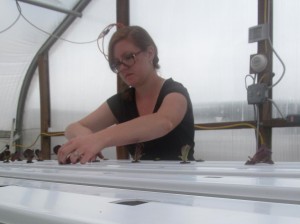
Planting Red Bibb lettuce in the hydroponic channels.


Each foam square will be planted into one channel. The foam is slightly smaller than the square hole and must be level. If the foam is slightly tilted, the plant will grow in a tilted manner. This disrupts the uniformity that the greenhouse gives a grower. It also interferes with the surrounding plant’s growth habits, causing greater uniformity problems. To many consumers, an abnormal looking plant is unappetizing, even if its nutritional value is not affected.


A fertilizer is mixed into the water that is pumped throughout the system. A filter will capture roots, dirt, bugs or unwanted items that can plug the entire system. The lettuce must routinely checked to make sure it’s nutritional and environmental needs are met. If the system was to get plugged or turned off for any reason, the plants will immediately begin wilting, dying and crop loss will become inevitable.


Caring for Basil

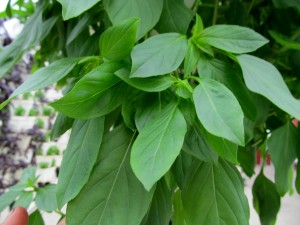
Thai basil at a perfect harvesting state- green, disease or pest free leaves, flowerless.

Hello from Indiana, Pennsylvania! I am interning at Yarnick’s vegetable farm until August. I’ve been busy planting hydroponic lettuce, harvesting vegetables, processing vegetables, working with herbs, and caring for flowers. Over the course of summer, I will be learning about large scale vegetable production literally from seed to sale.


Basil is an herb used primarily for culinary purposes. The leaves are harvested and used in a variety of dishes including salads and sauces. Thai, purple, lemon and common basil are grown in the greenhouses at Yarnick’s. These annual plants require at least six hours of sun a day, moist soil, and will not tolerate frost conditions. Basil will, however, tolerate high heat conditions that will wilt other plants.

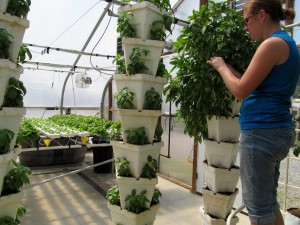
All the basil plants begin as seeds planted in potting soil. Once the true leaves emerge, they are planted in the corners of the herb towers. In other words, four plants will be in each level of the tower.  The herbs are set on a watering timer which keeps the soil moist. Fertilizer is mixed with the water so that all nutrient requirements are met.  Essentially, basil is kept under optimal growing conditions in the herb house.

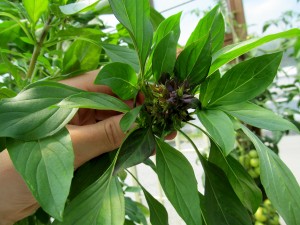
Pinching back Thai Basil’s purple flowers

Basil needs pinched back after six weeks to promote a bushy growth as opposed to tall or elongated growth. Auxin is a plant hormone located in apical tips responsible for tallness (apical bud growth) while cytokinin is a plant hormone located in the roots responsible for bushy growth (axillary bud growth). When the tips of a plant are removed, auxin is removed. This lowers the concentration of auxin in the plant and therefore raises the cytokinin concentration in the plant. This spurs axillary bud growth or bushiness.

Basil will be harvested after six sets of leaves adorn the stem.  The plant may be dug up and sold as fresh basil or it may be cut to half an inch above the soil level. The fresh basil, which will have most of its roots, will be placed in a clear bag filled with water.  This allows the basil to survive longer than rootless (cut) basil. The cut basil can grow back, which eliminates the need to replant.

Thai basil’s purple foliage prior to flower development.

One of the greatest ways to keep basil’s lifespan longer is pinching back the flowers. Normally, plants grow to a mature size and then reproduce when environmental conditions are favorable. When harvesting an herb specifically for the leaves, not the seeds or fruits, reproduction is a negative aspect. Hence, the basil flowers are pinched back and removed to keep the plant from using energy on reproduction. For example, Thai basil will create purple foliage and flowers that will be removed when spotted. This extends the life of the plant and keeps it in a continual harvest state.

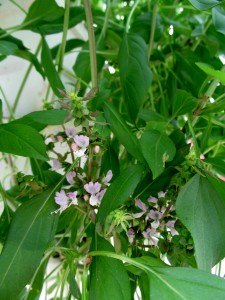
Fully flowering Thai basil.

Skip to toolbar