By Joe Gregoire, Warwick Senior Master Gardener Volunteer
This article appeared in the June 2021 Issue of Gardening in Orange County.
I love to garden. I wouldn’t have become a Master Gardener Volunteer if I weren’t passionate about getting my hands dirty and growing food for my family and friends. My favorite time of year is the growing season, and I sure don’t like winter much. If not for the fact that I was born in the Northeast and all my family and friends are here, I’d probably move to another part of the country with a more favorable, Mediterranean climate for year-round growing, like Southern California—or even my dream retirement, to a home in Tuscany! Who knows, maybe someday I will.
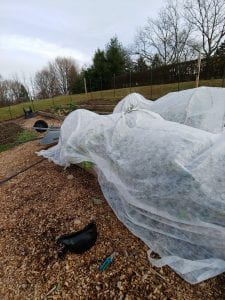 Until then, though, I have to enjoy the four seasons we’re blessed with in Orange County, New York. I’ve tried a number of strategies over the years to extend my growing season. Using row covers in the garden gives my cold-weather crops an earlier start in spring and extends my late harvest until the deep freeze sets in. I start my seedlings each February inside, under grow lights, and I grow sprouts and microgreens in the kitchen to add to salads in December and January. And I always do have houseplants to tend year-round. But I’ll admit I’ve found all these off-season activities underwhelming as they provide only the faintest scratch for my gardening itch.
 One of my favorite winter road trips is a visit to the New York Botanical Garden. No matter what cold winds blow or rain or snow falls during my wintertime visits, a walk through the conservatory instantly transports me to a tropical paradise. I’ve always dreamt of building my own conservatory onto my home, but as our tall house casts a deep shadow over the back where we could build a conservatory, it just doesn’t make sense where we are (not to mention the high cost of such an addition).
During my last winter visit to my favorite local nursery, a different idea came to mind. Walking into their hoop house to look at poinsettias, that same tropical paradise feeling covered me like a blanket fresh from the dryer. Nice! “What if we build a hoop house in our backyard?” I asked my wife. And since she understands me well enough to know what makes me happy, she encouraged me to pursue the idea and call it my Christmas present. Yes, I also have a habit of giving myself big projects as my “gifts”. The pizza oven I built for my last birthday is proof of that.
So, online I went to learn as much about hoop house construction as possible to understand what’s involved and how much it would cost. There are many, many videos on the topic on YouTube, and some of them are very useful. My research taught me what the pros and cons are for various shapes and sizes, and if a single poly layer would work for me or if I should use a double layer with an air space blown in between the layers. And many of these YouTube videos contained useful links to suppliers of hoop house construction materials, from complete kits that ship to your home with assembly instructions to more DIY solutions. I was willing to spend some money to achieve my goal, but not too much. As this is a passion and not a profession, I’m not looking to make a return on my investment and, as I was born in Connecticut, my Yankee frugality also tends to restrain my spending.
 I settled on a solution offered by a company called “Bootstrap Farmer,” which, as their name implies, promised to equip me with a smart solution worthy of a farmer without emptying my bank account. (I have to state here that this is not an endorsement or a paid advertisement. I am sharing my personal experience so you can see what is involved in building a hoop house, regardless of the company you choose.) Since I’m a DIYer, the options they provided allowed me to source some materials from them and the rest from local retailers, saving money on shipping costs. Their website has useful tools that helped me plan my hoop house build and budget my project before I was committed to placing an order. Their instructional videos and manual made what I imagined would be a complex process very doable.
In late December I placed the order for my own Christmas present (my wife is great!), and within a week our friendly UPS driver dropped off a few large boxes. One box was filled with nuts, bolts, screws, metal joints used to connect the hoops, and the gear boxes for the roll-up side kit I chose. The next box contained the tool I’d need to bend the 10-foot metal poles that I’d use to make the hoops, and the third and heaviest box contained the polyethylene cover I’d stretch over the erected hoops. And with that delivery, I was ready to order the rest of my supplies from my local retailer. As those consisted of large and heavy poles and lumber, I chose to have them delivered as well.
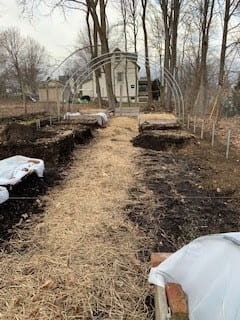 Now that I had all the materials, it was time to start my build. In hindsight, I probably should have timed the project differently. As you can imagine, building an outdoor structure in January is not what you’d call great planning. But passionate as I am, I didn’t let darkness and subfreezing temperatures prevent my dream from coming to life. So outside I worked, using a pickaxe to break through the frozen topsoil, leveling the perimeter where I’d be pounding in the 4-foot-long ground posts—22 in all for the 20’ × 40’ hoop house. Spaced every 4 feet, the ground posts are pounded 2 feet into the ground to leave 2-foot lengths sticking up above the surface. These 1-5/8” steel ground posts are the same as those used for the posts of chain-link fences, and they enable the steel hoops to slide into the 2-foot portion rising above the surface, which are each then secured with a through bolt.
Once the perimeter was leveled, a very good workout for my winter-softened muscles, I spent another day pounding in the 22 ground posts using a level to maintain perpendicularity and a string to ensure all posts were the same 2-foot height aboveground. Then it was time to bend my hoops. Using the hoop bender I ordered, which I mounted to my woodshed, I was able to bend all of the hoops within a hour. Each of the 11 hoops consist of 10-foot-long 1-3/8” steel poles, normally used as the top rail of a chain-link fence. The end of one 10-foot bent pole fits into the other end to create a 20-foot arc that matches the 20-foot width of my hoop house. A self-drilling screw holds them together.
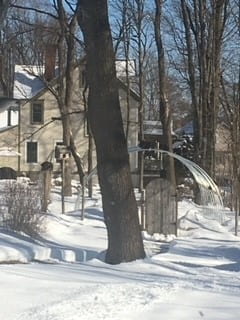 After the hoops were bent and assembled, the magnitude of the structure I was building dawned on me. With the placement of each hoop, I began to see clearly the bones of the “house” I was building over my garden. 20 feet wide by 40 feet long, with a ceiling height of 10 feet, made for a very spacious indoor growing area indeed. I was really getting excited now. And then it came: the dreaded snowstorm I had been racing against. I had hoped to get the poly covering on before the snow, but I was unfortunately not able to beat Mother Nature on that one. My progress slowed for about a month until the deep snow melted, with my activity limited to framing the end walls and building the door in my workshop.
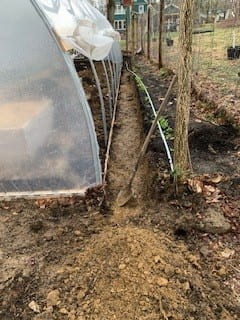 Once the snow finally cleared in March, I was back at it, bolting in place the base boards and hip boards that serve as a solid frame around the base of the structure and provide a surface on which to attach the poly. Now, there are a variety of ways to attach the poly, as the many YouTube videos I watched demonstrated, but I didn’t have to puzzle out my choice, because the Bootstrap Farmer kit I purchased included Wiggle Wire that is “wiggled” into a metal channel to set the poly in place. I screwed the Wiggle Wire along the hip boards and end wall frame boards, and arched it over the hoops at both ends of the structure. Once the poly is pulled over the hoops, the Wiggle Wire sandwiches the poly into the channels and holds the poly taut without puncturing it like staples or nails would. This is how the professional farmers do it, so it seemed like the best option for me.
Then came the hardest part of all, stretching the poly over the hoops and securing it with the Wiggle Wire. Sometimes I wish I was not a DIYer, as doing it yourself is literally impossible if your objective is to lift 100+ pounds of polyethylene film over a 10-foot-tall, 20-foot-wide, and 40-foot-long hoop house. At times like that I wish I had 3 or 4 clones of myself. So back I went to my sainted wife again for advice and assistance. And sure enough, she had a great idea: we could use the winch on our ATV to pull the poly sheeting over the length of the structure and then unfurl it down both sides. Genius! I built a large “spool” contraption at one end, tied a long rope to the end of the spooled poly, and—with my wife as the winch operator and me on a ladder to prevent the poly from snagging on anything—we pulled the poly, stretched it, and secured it with Wiggle Wire in just a couple of hours. (And all, I might add, before the wind had a chance to blow it off.)
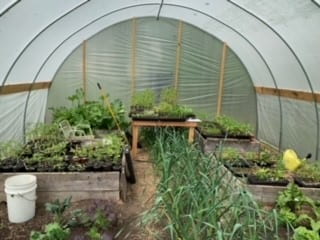
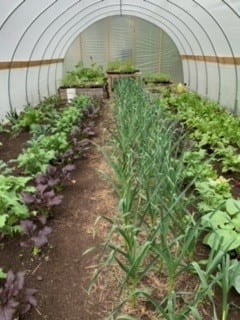 After a few additional hours of trimming the end wall poly and installing the door, our new hoop house was complete. And the next day, with temperatures in the 30’s, my tropical paradise was a reality, with temperatures inside in the upper 60’s. The soil went from being frozen solid to holding steady temperatures above 50° within a week, and my first seedlings were in the ground as of early March. A variety of lettuce, kale, mustard greens, Swiss chard, beets, and Chinese broccoli started filling our kitchen in mid-April. And as my plans are to succession plant this space through the summer and grow my heat-loving tomatoes, peppers, eggplant, and zucchini, I’m hoping to have a banner year. My ultimate goal is to follow the lessons learned in Eliot Coleman’s excellent book Four-Season Harvest and to continue gardening right through the winter. Wish me luck!
Resources for those interested in Extending the Season
If you’re interested in extending the gardening season and making the most of your limited space for as much of the year as possible, here are a few great websites to explore:
Four Season Farm Book List – A list of excellent books to read
about year-round growing in hoop houses.
Bootstrap Farmer – Learn all about hoop house design
options and watch useful instructional videos.
Charles Dowding – Learn about succession planting and inter-cropping growing techniques from a leading practitioner of no-dig gardening:
You’ll find plenty of other material on the web and YouTube to fill hours of your time, but these are just a few recommended places to start.


 Until then, though, I have to enjoy the four seasons we’re blessed with in Orange County, New York. I’ve tried a number of strategies over the years to extend my growing season. Using
 One of my favorite winter road trips is a visit to the
  I settled on a solution offered by a company called “
 Now that I had all the materials, it was time to start my build. In hindsight, I probably should have timed the project differently. As you can imagine, building an outdoor structure in January is not what you’d call great planning. But passionate as I am, I didn’t let darkness and subfreezing temperatures prevent my dream from coming to life. So outside I worked, using a pickaxe to break through the frozen topsoil, leveling the perimeter where I’d be pounding in the 4-foot-long ground posts—22 in all for the 20’ × 40’ hoop house. Spaced every 4 feet, the ground posts are pounded 2 feet into the ground to leave 2-foot lengths sticking up above the surface. These 1-5/8” steel ground posts are the same as those used for the posts of chain-link fences, and they enable the steel hoops to slide into the 2-foot portion rising above the surface, which are each then secured with a through bolt.
 After the hoops were bent and assembled, the magnitude of the structure I was building dawned on me. With the placement of each hoop, I began to see clearly the bones of the “house” I was building over my garden. 20 feet wide by 40 feet long, with a ceiling height of 10 feet, made for a very spacious indoor growing area indeed. I was really getting excited now. And then it came: the dreaded snowstorm I had been racing against. I had hoped to get the poly covering on before the snow, but I was unfortunately not able to beat Mother Nature on that one. My progress slowed for about a month until the deep snow melted, with my activity limited to framing the end walls and building the door in my workshop.
 Once the snow finally cleared in March, I was back at it, bolting in place the base boards and hip boards that serve as a solid frame around the base of the structure and provide a surface on which to attach the poly. Now, there are a variety of ways to attach the poly, as the many YouTube videos I watched demonstrated, but I didn’t have to puzzle out my choice, because the Bootstrap Farmer kit I purchased included Wiggle Wire that is “wiggled” into a metal channel to set the poly in place. I screwed the Wiggle Wire along the hip boards and end wall frame boards, and arched it over the hoops at both ends of the structure. Once the poly is pulled over the hoops, the Wiggle Wire sandwiches the poly into the channels and holds the poly taut without puncturing it like staples or nails would. This is how the professional farmers do it, so it seemed like the best option for me.
 After a few additional hours of trimming the end wall poly and installing the door, our new hoop house was complete. And the next day, with temperatures in the 30’s, my tropical paradise was a reality, with temperatures inside in the upper 60’s. The soil went from being frozen solid to holding steady temperatures above 50° within a week, and my first seedlings were in the ground as of early March. A variety of lettuce, kale, mustard greens, Swiss chard, beets, and Chinese broccoli started filling our kitchen in mid-April. And as my plans are to succession plant this space through the summer and grow my heat-loving tomatoes, peppers, eggplant, and zucchini, I’m hoping to have a banner year. My ultimate goal is to follow the lessons learned in Eliot Coleman’s excellent book Four-Season Harvest and to continue gardening right through the winter. Wish me luck!
 By Kimberly Marshall, Washingtonville Master Gardener Volunteer
 How to identify the squash vine borer and the damage that it does:
 How to minimize damage if borers have found your garden anyway:
 Do a daily
 Dump out any standing water from containers in your yard to prevent mosquito breeding.
 Most vegetable plants need about


