by Mary Carol Presutti, New Windsor Master Gardener Volunteer
Between now and mum season there are a few things you can do to get a head start for spring cleanup with minimum fuss.
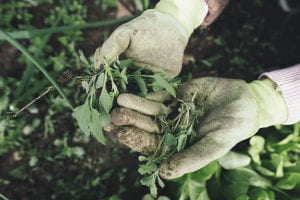
Weed
This is a perfect time to get a start on weed management for the spring. Shorter days and colder weather in the months ahead will reduce the activity of plant growth. You want to keep the process as natural as possible. Pull weeds to your hearts content without overly disturbing the soil. Don’t use hoes or rakes, and don’t turn the soil over unless you must. When you disturb the soil too much seeds resting on top of soil get planted in the loose soil, and seeds deep in the soil are brought closer to the surface where they will be able to sprout. Every time you move soil around without a purpose, the roots and seeds of unwanted plants are given the go ahead to sprout away.
Bare soil is an invitation for weeds to… well, put down roots! Cover weeds that you want gone by the spring with a layer of weighted cardboard. Sometimes I think I shop online more for the cardboard shipping boxes then for what’s inside. I also love using sheets of bark from my fireplace wood in and around my garden plants. Tree bark adds nutrients, cuts down on weed growth, and is a good insulator for tender plants. Grass clippings or shredded leaves make a nice winter mulch, but cut up leaves soon after they fall to the ground before insects and small animals take shelter. Rake only the leaves you need to, leaving a goodly amount for insects to find winter cover.
There are so many plants that seed themselves if you leave them be, although you must be patient as they will need a year or two to establish themselves from seed. Here are a few of my favorites
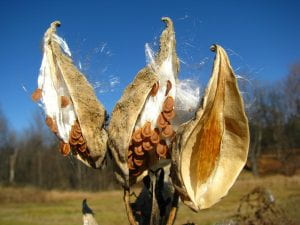
I love collecting seeds and seed heads as they mature throughout the year. I either give them to friends or propagate them in other areas of my own garden. Make sure you collect seeds from plants that produce viable seeds. Some cultivars are bred to be sterile, and hybrids may produce seed, but the offspring will not necessarily resemble the parent plant. It is best to stick with uncultivated species and their varieties. Seeds and seed pods vary greatly. Milkweed produces seed pods which open to disperse seeds, while catmint, verbena, and blazing star produce seed heads after the plants flower. Research gathering techniques, proper storage, and how to plant different kinds of seeds in your garden.
If you grow native milkweeds, consider cutting back the plants this month to discourage next year’s growth from harboring any diseases that may have been left by this year’s monarchs. The most prevalent is Ophryocystis elektroscirrha, a parasitic protozoan that affects caterpillars. An infected monarch butterfly can host thousands of these parasites on their wings. Dispose of the cuttings with your regular trash instead of composting.
Powdery mildew on wild bergamont
The stems and leaves of diseased plants should also be cut and disposed of in the trash as well. A good example is wild bergamot (Monarda fistulosa), which is very susceptible to powdery mildew. If left alone the mildew will overwinter on the old stems and may transfer to new growth in springtime.
One way to help local native bee populations is to encourage nesting in your garden. Cut back some of the hollow-stemmed plants like Joe-Pye weed (Eutrochium spp.) and milkweed leaving them about a foot tall as to create a space for cavity nesting bees to nest. For the ground nesting bees, avoid heavy wood mulches which are impossible for these small insects to burrow into.
Help keep spotted lanternfly from spreading! This invasive insect can lay its eggs in any surface, so make sure you check your car and any items that have been outside when traveling, especially in areas of know infestation like NJ and PA.
This article appeared in the July 2021 Issue of Gardening in Orange County.
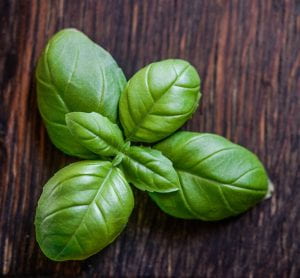
Basil downy mildew has been a persistent deadly disease of greenhouse and garden basil crops in the US for over 10 years. It is caused by the pathogen Peronospora belbaharii. This fungus-like oomycete can infect the plant during its whole lifecycle from seed to full maturity. Pesto lovers beware since sweet basil (Ocimum basilicum) is the most susceptible.
Signs and Symptoms
Chlorosis of a basil leaf
Usually the first symptom is a non-specific chlorosis or yellowing of the top portion of the lower leaves of the basil plant that then travels up the plant. The discoloration is contained within the borders of the major veins of the leaf. The affected leaves will eventually wilt or curl, die and turn brown. A distinguishing feature of basil downy mildew is the fluffy purplish gray spores that grow on the undersides of the leaves. Unfortunately, infected plants and seeds may not show any signs or symptoms especially if in cool, dry conditions.
Transmission
Downy mildew spores on the bottom of basil leaf
Peronospora belbaharii is primarily spread via wind-borne spores called sporangia. Contaminated seeds, other basil plants, garden tools and gloves are other forms of transmission. The spores thrive in warm, humid and wet conditions but can still infect plants and reproduce in temperatures as low as 59° F.
Basil downy mildew does NOT overwinter here in New York. It can NOT survive in the soil or on dead plant tissue (like many pathogens). Each year spores are carried up from the southern United States by the wind.
Management
Basil downy mildew is difficult to treat once the disease has been established. High temperature steam treatments have shown promise in eradicating the pathogen on basil seeds. There has also been some success in developing disease resistant cultivars for less susceptible varieties of basil such as red leaf, lemon, and spicy basil, but developing disease resistant cultivars of sweet basil has proven more challenging. According to research at Cornell University evaluations the sweet basil cultivars ‘Eleonora’,, ‘Prospera’ and ‘Pesto Besto’ may be some good options.
Since basil downy mildew is an oomyete and not a true fungus, fungicides have limited value and are not recommended for the home gardener. Because basil downy mildew does NOT overwinter in New York, removing crop debris at the end of the season and crop rotation are not helpful for management of basil downy mildew.
Monitoring and cultural practices have been most successful especially in the home garden and greenhouse settings. Monitoring all seedlings and plants for yellowing leaves and gray downy growth is imperative. Once you determine your plant is infected, immediately harvest the unaffected leaves for culinary purposes, and then remove the plant and dispose of it in the garbage.
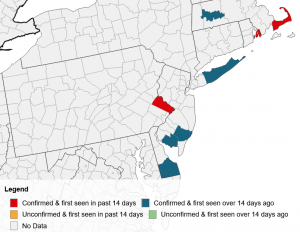
Basil Downy Mildew Map (July 27, 2021)
The annual spread of basil downy mildew is monitored and confirmed cases are tracked. To have a better idea as to when your plants are likely to become infected, you can follow the spread of basil downy mildew on the ‘Basil – Ag Pest Monitor‘ website and sign-up for alerts.
Reducing leaf wetness can be helpful in preventing infection. Always water basil plants at the base either by hand or using a drip irrigation system. Plant basil in full sun and maximize your spacing between plants to provide good air movement. These practices allow the leaves to dry quickly after rain or dew. If you are growing basil indoors or in a greenhouse, an effective way to increase air circulation and reduce leaf wetness is by directing a fan towards the plants.
If you accidentally eat a piece of basil with downy mildew, don’t worry. Pathogens that cause diseases in plants are different than the pathogens that cause disease in humans. It’s not poisonous to humans and should not cause you any symptoms.
By Kimberly Marshall, Washingtonville Master Gardener Volunteer
This article appeared in the June 2021 Issue of Gardening in Orange County.
As more of us try to incorporate native plants into our landscapes and home-gardening plans, it’s easy to overlook the benefits of planting native trees. Just like the flowers and shrubs we tend to think about as being great food for pollinators, birds, and other native animals, trees native to our area provide all these benefits too (and more).
Sweet crabapple tree
Take, for example, the native sweet crabapple tree, or Malus coronaria (which is part of the Rosaceae family). Other than providing food and nesting areas for native birds, this small- to medium-sized tree (usually around twenty to thirty feet tall, with a broad top) also attracts a number of native bees and feeds other creatures, like turkeys, rabbits, and deer. The tree tends to flower about two weeks later than the domestic apple—generally from March to June—and it holds onto its fruit long after it sheds its leaves, providing food for local critters long into the autumnal season.
The sweet crabapple can be typically identified by its grey- to reddish-brown bark, separated on the surface into scale-like fissures. When fully mature, it’s a bushy shrub with contorted branches that some people say resembles the bonsai tree because of the way the branches tangle and jut out at strange angles.
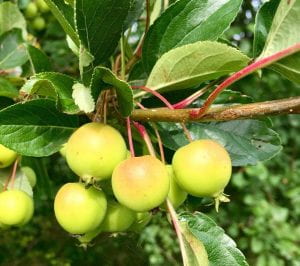
Crabapples
In the spring, the tree puts forth cheerful, rosy-white blooms that can sometimes be more white or pink, depending on the tree. Its fruit, small (about two inches in diameter) and bitter, contains high amounts of malic acid. These crabapples are not usually eaten straight off of the tree, but are cooked and used to make preserves (as they’re naturally full of pectin), apple cider, pies, and vinegar. They can also be buried underground to neutralize their acidity over the winter, or you can sweeten them with sugar. Some people dry the apples over a fire or in the sun, and store them for later use.
Since they are native to our area, it should come as no surprise that these trees were greatly utilized by Native Americans and early English settlers. Since the tree is on the smaller side, the wood—which is heavy and dense, but also close-grained and flexible—was mainly used to craft into handles for tools, for woodcarving, or to burn as fuel for fires. The bark could be used to make a yellow dye, but it was also prized for its medicinal properties. It was used to treat gallstones, sore mouths, malaria, and tuberculosis, among other common ailments.
When these trees grow in the area naturally, they tend to stick to the edges of our forests, open pastures, old fields, and streambanks. And while the tree’s main region is centered in and around the Great Lakes, Malus coronaria also grows in other areas, mainly along the Ohio River Valley, southern Ontario, and several adjacent states.
Cedar-apple rust on apple leafCedar-apple rust gall on cedar
Since these trees are extremely susceptible to rust, it’s recommended that you plant them at least 500 feet from any cedars you might have on your property (especially the Eastern red cedar, Juniperus virginiana), as the proximity of these trees can cause cedar-apple rust to wreak havoc on your crabapples. This is a fungus that needs two hosts—both the apple and the cedar—to grow. On the crabapple, the cedar-apple rust tends to manifest as small, rust-colored spots on the leaves, while the fungus takes an entirely different form on the cedar, growing large, round, and orange, gummy-looking structures that almost look like they’re growing gooey orange tentacles.
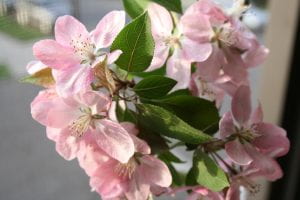
Pink sweet crabapple blossoms
Although the Malus coronaria is a beautiful tree, especially when its fragrant flowers bloom in the spring, many people tend to shy away from this crabapple because of its susceptibility to pests and diseases. But gardeners who do want to grow these trees can do so from seed, which can produce some different-colored flowers. The tree can also be used as rootstock for grafting cultivated apples and is revered for its hardiness.
If you’re interested in growing this ornamental tree, plant it in an area of your yard that has well-drained, loamy soil. It does best in a sunny to partially shaded location. Again, make sure there are no cedars close by, and remember to check often for any signs of disease, such as small rust-colored spots on the leaves or a blackish canker on the bark, stem, or branches. If you find any of these symptoms, you will have to prune the affected areas before the disease spreads to save the tree and treat it appropriately before the disease gets out of control. However, if you’ve given your crabapple tree the proper growing conditions, it should remain relatively pest- and disease-free and bring you many years of enjoyment.
This article appeared in the April 2021 Issue of Gardening in Orange County.
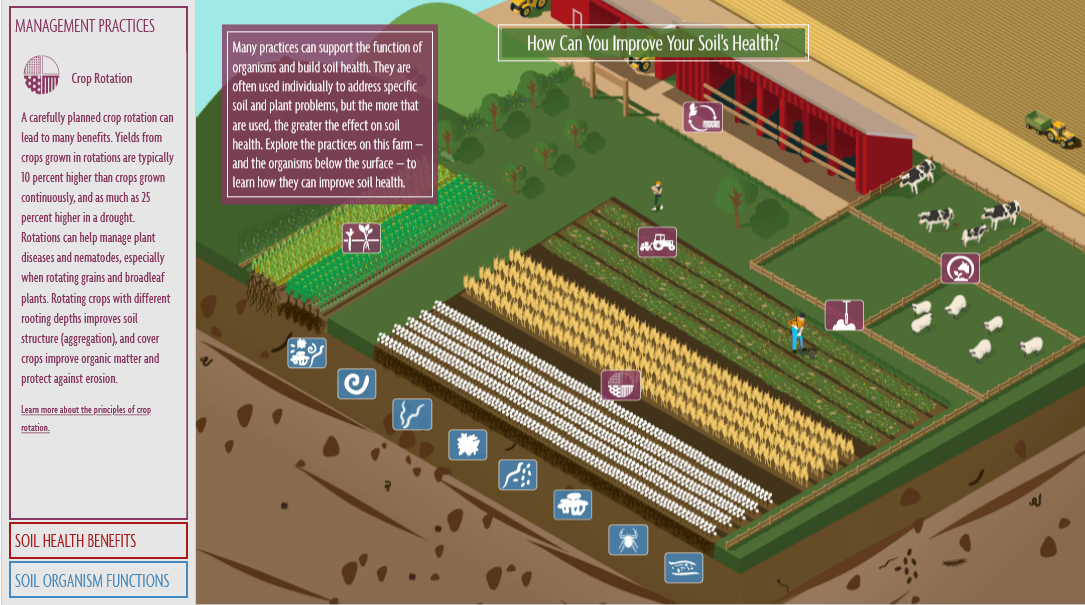
Crop rotation is the planned, successive cultivation of different crops in a specified order on the same land over time. Regardless of whether you have acres of farmland, grow vegetables in containers, or anything in between, crop rotation is an important concept to integrate into your growing strategies. It is a system of cycling a parcel of land through various crops in order to reduce the reliance on chemical fertilizers, pesticides, and herbicides. It is vitally important to optimal soil health and can increase yields.
The history of crop rotation dates back thousands of years. The ancient Romans spread their farming practices throughout the Roman Empire. European farmers followed a Roman cropping system called “food, feed, and fallow.” Farmers divided their land into three sections. Each year they planted a food grain such as wheat on one section, feed for livestock such as barley or oats on second section and let the third section lie fallow. By following this schedule on a rotating basis, when each section lay fallow it recovered some of its nutrients and organic matter.
Today’s crop rotation systems are science based and range from simple to complex. The succession of crops to be grown is carefully designed to ensure soil nutrients are sustained, pest populations are controlled, weeds are suppressed, and soil health is built. Each crop uses different types and amounts of minerals from the soil. If the same crop is planted each year, over time the soil is depleted of the minerals essential for plant growth and health. In reverse, a different crop will sometimes return missing minerals to the soil as the plant dies and composts or is turned into the soil.
Benefits of Crop Rotation
Enhanced soil structure: Rotation preserves and improves soil structure. Grow crops with different root structures that grow to various depths. By rotating, the soil is not submitted to just shallow depth crops, but deep-rooted plants that will slowly deepen the topsoil, enhance water absorption and minimize runoff.
Reduced fertilizer needs: Nitrogen-fixing legumes in crop rotations or used as cover crops fix atmospheric nitrogen into the soil through root nodules. This nitrogen is then available for subsequent crops. Deep-rooted cover crops can draw up nutrients such as potassium and phosphorus from deep in the soil profile, making these nutrients available for subsequent shallow rooted crops. These and other strategies reduce the need for fertilizer and can reduce the production of greenhouse gases.
Reduced pesticide needs: Insects can over winter in your soil. They enter the leaves and vines of your plants ready to reawaken in the spring to find their favorite meal. When you utilize crop rotation, these insects are faced with a plant they don’t feed on.
Disease prevention: Crops that are from the same family tend to have similar disease and insect problems. Just like insects, plant diseases can over winter in plant leaves, roots and vines under your soil. Rotating crops helps to guard against these diseases returning the following year.
Weed control: Including cover crops into crop rotation systems provides greater competitions to the weeds for their basic needs such as nutrients, space and light. Cover crops ultimately crowd out the weeds, slowing down weed growth and proliferation for a reduced weed population in subsequent crops.
Erosion control: Improved soil structure and reduced exposure to water and wind. Cover crops are effective in reducing raindrop impact, reducing sediment detachment and transport, slowing surface runoff, and so reducing soil loss.
Improved soil biodiversity: Crop rotation changes crop residues and rooting patterns. Different crops benefit different species, and so a range of crops will lead to a more diverse and healthy soil microbial community.
How to Rotate Crops
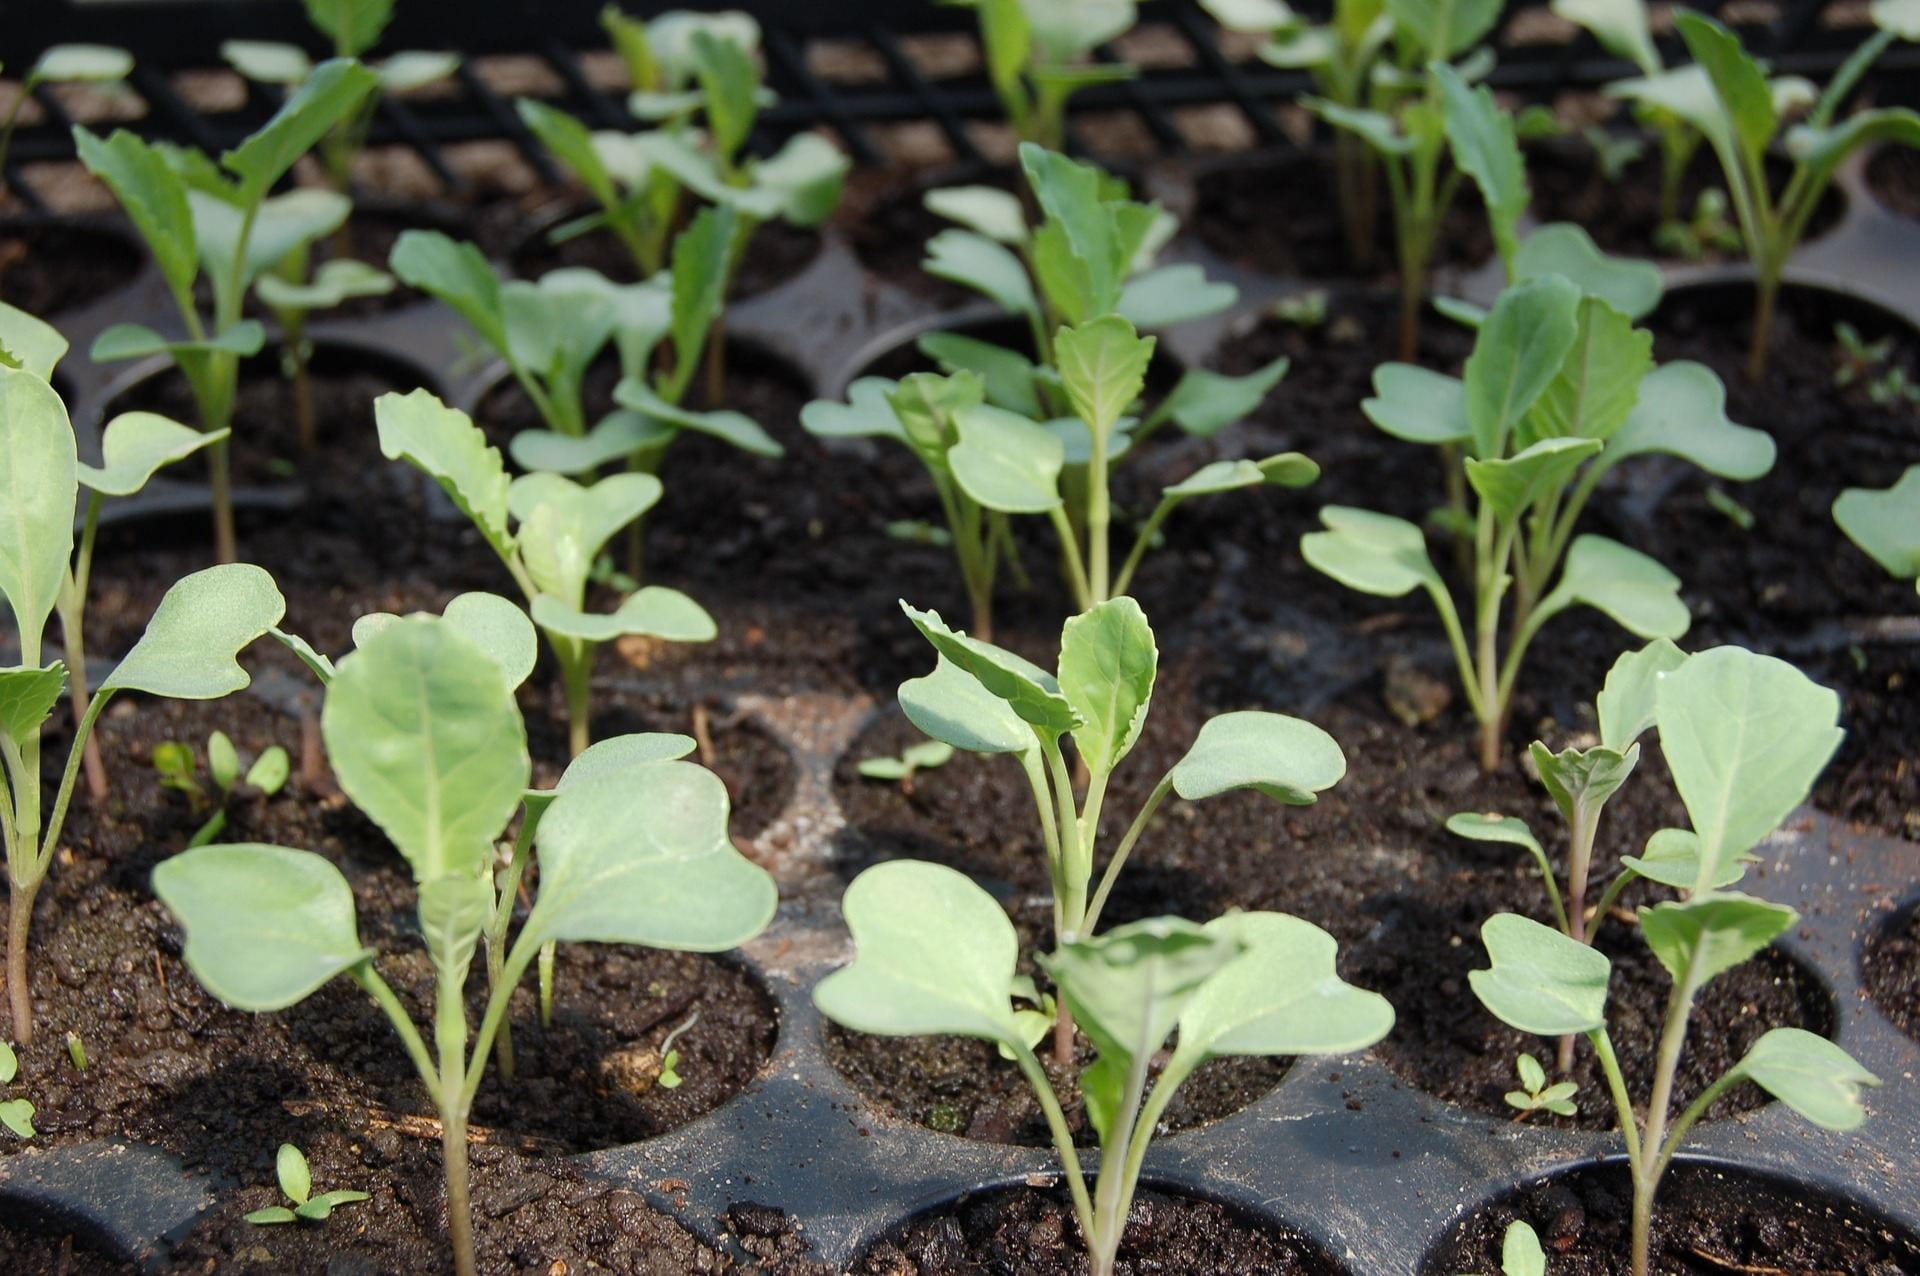
Crop rotation plans range from simple to complex. Ideally crops should be rotated on a three or four year cycle in a planned sequence. Many rotation schemes involve keeping plants of the same family together throughout the rotation. Plant your solanaceous crops (i.e. tomatoes, peppers, potatoes, eggplant) in one area, cucurbits (i.e. cucumbers, melon, squash) in another, and brassicas (i.e. cabbage, broccoli, etc.) in another. The following year you keep the groups the same, but move their location in the garden.
As you explore crop rotation there are lots of tricks to learn. You can add cover crops to your rotation, which are grown between crops and can be used to protect soil, break-up hard pan, increase organic matter, add nitrogen and/or improve soil aggregation. Consider planting nitrogen-fixing legumes (i.e. peas, beans) before heavy feeding crops (i.e. corn). Potatoes yield best after corn, brassicas do well following onions. Some preceding crops (i.e. peas, oats, barley) increase the incidence of scab on potatoes. Beans are not greatly influenced by the preceding crop. Start by keeping a list or diagram of plant locations in this year’s garden and use it to help you plan how to incorporate crop rotation into your vegetable gardening strategy.
Learn more about the importance of crop rotation and see examples of three, four and five year crop rotation plans specifically developed for gardeners.
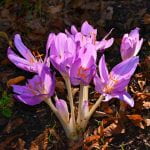
Even though most of the trees are still bare and must of us awoke to snow on the ground this weekend, spring has arrived and with it are some of the most beautiful blooms of the year.
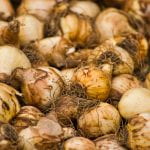
Spring Flowering Bulbs
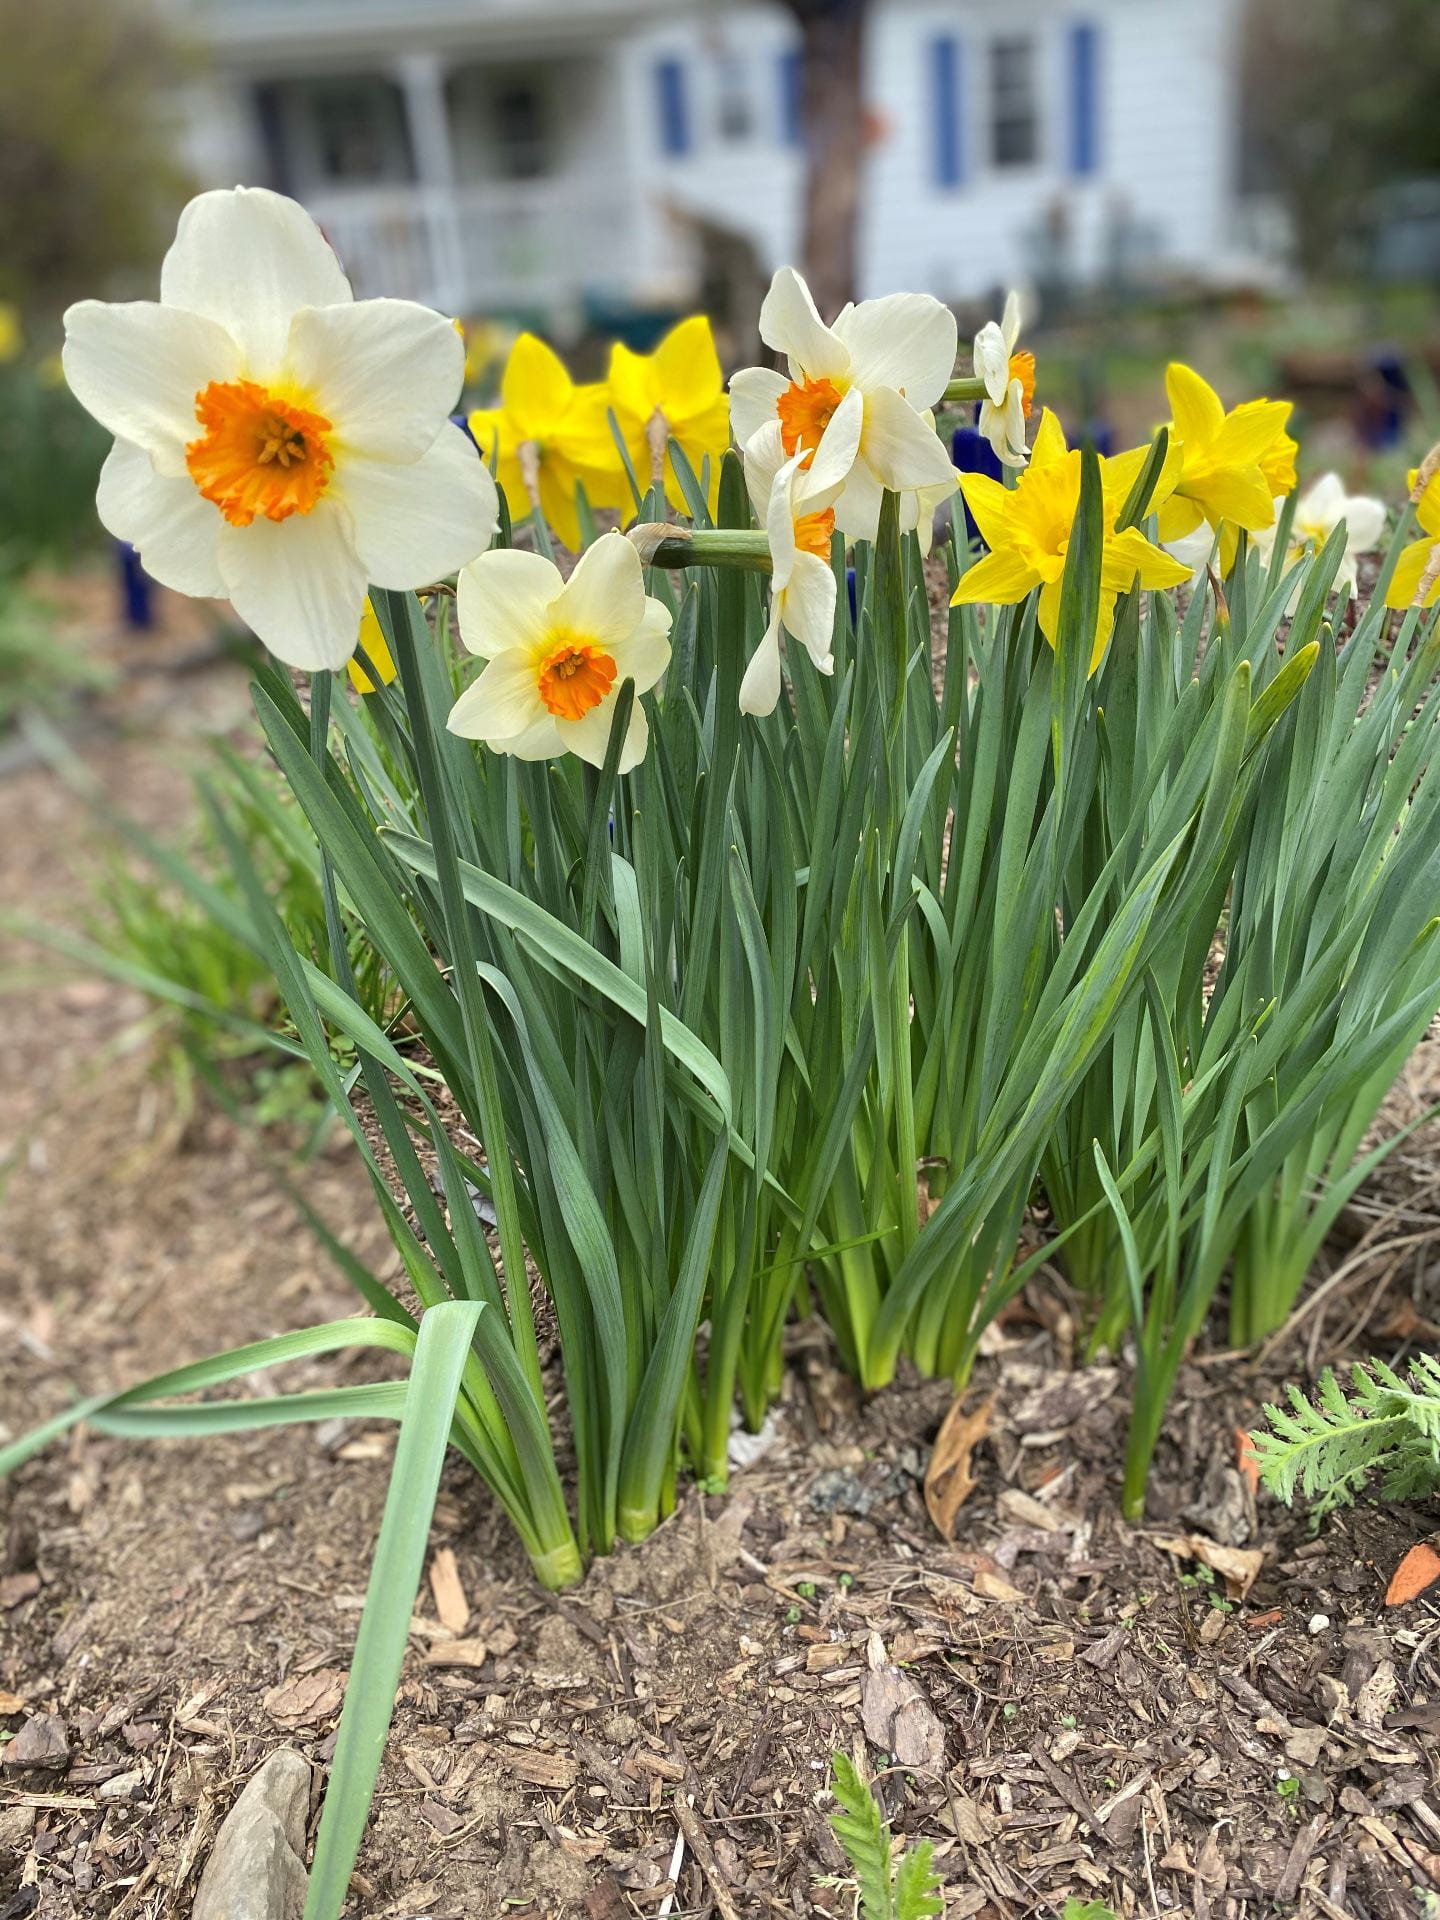
Hyacinthus orientalisDaffodils (Narcissus spp.)
The crocuses have all but faded, but the daffodils continue to bloom, brightening up the drab landscape with their cheery yellows and oranges. They have recently been joined by the hyacinths. With their overpowering fragrance, these flowers add to springs color palette with their cool colors of pink and purple.
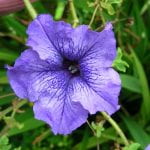
You may have noticed some small purple flowers known as grape hyacinths. Not a true hyacinth, the inflorescence of this flower is a cone of small purple flowers that almost looks like a miniature clump of grapes.
Daffodil ‘Ice Follies‘
If you want to bring some spring cheer inside (highly recommended), it is best to give daffodils their own vase as their stems secrete a substance that is harmful to other flowers.
A mixture of the white spring ephemeral bloodroot (Sanguinaria canadensis) and the purple spring bulb green anemone (Anemone blanda).Hepatica nobilis
One of the great joys of spring is the appearance of spring ephemerals. These native plants grow in wooded areas and only have a short time to flower before the trees above them leaf out and block their sunlight. When you are walking through wooded areas in the spring, make sure you watch your feet or might step on the delicate flowers of the bloodroot or the hepatica.
Many spring flowering plants are considered weeds. You may think that dandelion in your lawn is unsightly, but the bees beg to differ. Dandelions are an important source of pollen and nectar for bees in the early spring as are other spring flowering ‘weeds’ like purple deadnettle and henbit.
What about Fungus?
Cedar-Apple Rust Gall (Gymnosporangium juniperi-virginianae)
Now fungi aren’t plants, so they don’t have flowers, but they can add color to the landscape. In the spring cedar-apple rust galls that overwintered on juniper become more noticeable as they produce gelatinous tendrils that release spores into the air. Some of these spores will find their way to apple trees where they can cause problems by infecting the leaves and the fruit of the tree.
Happy Spring!
Thanks to all of the Master Gardener Volunteers who provided their thoughts and photos for this post!
This article appeared in the July 2019 Issue of Gardening in Orange County. Click here to subscribe!
Insects can cause a lot of damage to your plants. Determining what insect is causing damage to your plant is key to developing an effective management strategy. The first step is to examine the damage.
Biting/Chewing Insects
Chewing damage
Biting/chewing insects create holes in plant leaves. The size and shape of these holes varies by insect. The three most common types of insects with biting/chewing mouthparts you may find in your garden are: grasshoppers, butterfly/moth larvae, and beetles (adults and larvae).
Grasshoppers are a sporadic pest and rarely cause substantial damage to garden plants. During dry years when other plants dry out, grasshoppers may seek refuge and food in your lush green garden. Unfortunately, because grasshoppers are highly mobile they are difficult to manage. If you have an ongoing problem with grasshoppers, you can reduce populations, by fall tillage as grasshoppers overwinter as eggs laid in the soil.
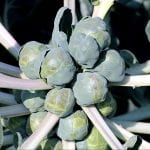
Those beautiful white butterflies you see fluttering around your garden, may seem innocuous, but their larvae, the imported cabbageworm, can cause extensive damage to plants in the brassica family also known as cole crops. These plants include broccoli, cabbage, Brussel sprouts, collards, kale, radishes, and turnips. The caterpillar is bright green with a yellow stripe down the center of its back. They start out chewing little holes in the leaves of the plants, but eventually consume the entire leaf leaving only the midrib behind.
Imported cabbageworm damage on cabbage
To monitor for these pests, look for dark green frass or poop near feeding areas. Once you discover a population of imported cabbageworm, depending on how numerous they are you can hand pick them off your plant. The use of Bt (Bacillus thuringensis), a microbial insecticide is also highly effective on younger caterpillars. This particular pest spends the winter in the pupal stage, so to prevent future infestations you can eliminate overwintering sites in your garden by removing plant debris.
Stripped and Spotted CucumberBeetles (Acalymma vittatum and Diabrotica undecimpunctata howardi)
Stripped cucumber beetle
Although they are called cucumber beetles, these insects feed on much more than cucumbers. The stripped cucumber beetle prefers plants in the cucurbit family (squash, pumpkins, melons, etc.) feeding on leaves, flowers, stems and fruits. They can be especially detrimental to young seedlings.
Spotted cucumber beetle / Southern corn rootworm
The spotted cucumber beetle is more of a generalist and feeds on cucurbits as well as beans, tomatoes, and ornamentals. The larvae of this beetle can do substantial damage on the roots of corn plants hence its other name, the southern corn rootworm.
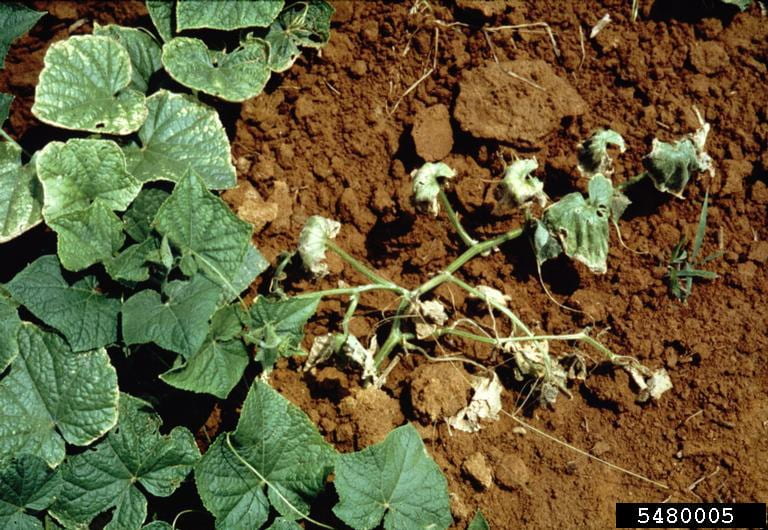
Bacterial wilt of a cucumber plant
Cucumber beetles vector or transmit bacterial wilt (Erwinia tracheiphila), a common disease in cucurbits in which bacteria clog up the vascular system of the plant preventing the flow of water and causing the plant to wilt and eventually die.
One way to protect your plants from cucumber beetles is by using row cover. This can be put on at planting and kept on until female flowers appear, then it must be removed to allow for pollination.
Sucking/Piercing Insects
Squash bug damage on a squash plant
Sucking/piercing insects can cause of variety of symptoms including leaf malformation and leaf discoloration. The most common types of insects with sucking/piercing mouthparts are from the Order Hemiptera, also known as the “true bugs”. This order of insects contains, stink bugs, squash bugs, cicadas, leaf hoppers, scale, aphids and many more.
Brown marmorated stink bug (Halyomorpha halys)
Brown marmorated stink bug adult
Many people are familiar with this invasive species because the adults invade their home every fall looking for a nice warm place to spend the winter. Although it can be an unwelcome house guest it also can cause major damage on fruits and vegetables. Some of the brown marmorated stink bug’s favorite snacks include apples, peppers, beans, tomatoes, and sweet corn.
Brown marmorated stink bug 1st instar nymphs clustered around an egg mass
Controlling the brown marmorated stink bug can be quite difficult because they are highly mobile, feed on a large variety of plants, and adults are highly resistant to insecticides. Monitoring for these pests is the best way to start. Bunches of about 28 eggs are laid on the underside of leaves and should be removed and destroyed if found. When the eggs hatch the 1st instar nymphs cluster around the egg mass making them an easy target for removal. The bugs usually drop down when startled, so for hand removal, you can knock them into a container of soapy water.
Lots of research is being done to develop effective management strategies for brown marmorated stink bug. One of the most promising avenues of research is on biological control. A stingerless wasp known as the Samurai Wasp (Trissolcus japonicas) destroys 60-90% of brown marmorated stink bug egg masses in its native range in Asia. This tiny wasp has found its way to the United States and as of 2018 has been found in twelve states, including New York. Research is now being done to determine the effectiveness of rearing and releasing this tiny parasitoid. Check out this video about brown marmorated stink bug and the samurai wasp.
Potato Leafhopper (Empoasca fabae)
Potato leaf hopper adultPotato leaf hopper nymph
Despite their name, potato leaf hoppers feed on over 200 hundred different kinds of plants including potatoes, snap beans, cucumbers, pumpkins, egg plants, rhubarb, squash and sweet potatoes. The nymphs are neon green and are usually found crawling around on the underside of leaves. The adults only reach ⅛ inch in length. They are pale green and wedge shaped and fly away when disturbed.
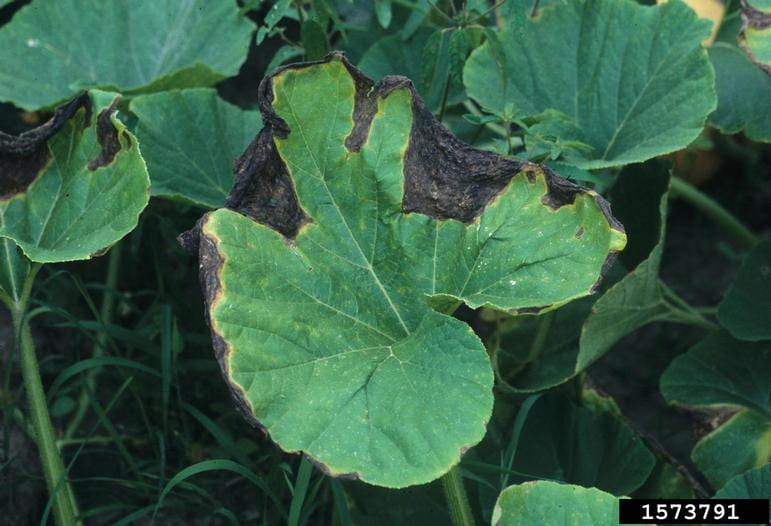
Hopper burn on bean leaves
These little pests do not overwinter in our area, but instead overwinter down south and the adults are brought up each year by the winds arriving in late-May / early-June. Although small, a few individuals can cause hopper burn on your plants. Hopper burn reduces yield and is characterized by chlorosis, or yellowing, of the leaf edges. Eventually these leaves begin to curl and turn brown.
It is easiest to combat these pest as flightless nymphs using insecticidal soaps or horticultural oils on the undersides of leaves. Dusting plants with diatomaceous earth can also help deter these pesky bugs.
Squash Bug (Anasa tristis)
Squash bug nymphs
Squash bugs are pests of all cucurbits, but prefer squash (summer and winter varieties) and pumpkins. Adults are a little over a ½ inch long and are dark brownish while nymphs are black, pale green or gray with black legs. These insects feed mainly on the leaves and the stems of squash plants, but can also feed on the fruits. Initially they cause a stippling on the leaves, but after heavy feeding the leaves begin to look tattered.
Squash bug adult laying eggs
Squash bugs overwinter as adults, so at the end of the season cleaning up plant debris and mulch will remove overwintering sites. Eggs are bronze colored and usually laid in clumps on the underside of leaves. Removing and destroying egg masses can help keep squash bug numbers down. Adults and nymphs are known to hide in mulch around the base of the plants, laying down a board or piece of cardboard will provide a hiding place for these bugs. You can then remove the shelter and destroy all the bugs underneath it. There are also some cultivars of both summer and winter squash that are resistant to squash bugs.
Of course there are lots of non-insect pests that can wreak havoc on your garden as well and whose damage can sometimes be confused with insect damage. Snails and slugs have rasping mouth parts that create holes in plant leaves much like insects that have biting/chewing mouth parts. Spider mites having piercing/sucking mouth parts that cause stippling on plant leaves like the “true bugs”.
So as you try to determine what is causing damage to your plants keep in mind that different kinds of insects cause different kinds of damage and that determining the cause is essential to developing a solution.
Note: Pesticide recommendations are not a substitute for pesticide labeling. Remember to read the label before applying any pesticide. The label is the law!
 This is a perfect time to get a start on weed management for the spring. Shorter days and colder weather in the months ahead will reduce the activity of plant growth. You want to keep the process as natural as possible. Pull weeds to your hearts content without overly disturbing the soil. Don’t use hoes or rakes, and don’t turn the soil over unless you must. When you disturb the soil too much seeds resting on top of soil get planted in the loose soil, and seeds deep in the soil are brought closer to the surface where they will be able to sprout. Every time you move soil around without a purpose, the roots and seeds of unwanted plants are given the go ahead to sprout away.
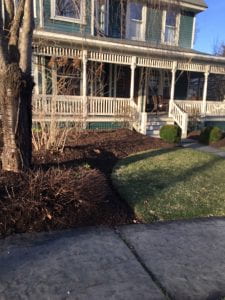 Bare soil is an invitation for weeds to… well, put down roots! Cover weeds that you want gone by the spring with a layer of weighted cardboard. Sometimes I think I shop online more for the cardboard shipping boxes then for what’s inside. I also love using sheets of bark from my fireplace wood in and around my garden plants. Tree bark adds nutrients, cuts down on weed growth, and is a good insulator for tender plants. Grass clippings or shredded leaves make a nice winter mulch, but cut up leaves soon after they fall to the ground before insects and small animals take shelter. Rake only the leaves you need to, leaving a goodly amount for insects to find winter cover.
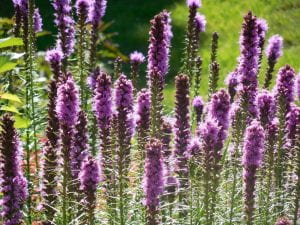


 Keep weeding and mulching.
 Check your garden for