The black-legged tick, also known as the deer tick, is a very common in Orange County and is the only species of tick found in our area known to transmit Lyme Disease.
In the spring months you are most likely to find black-legged tick nymphs. These poppy seed sized immature ticks can easily go undetected if the proper precautions are not taken. This results in a the highest number of Lyme disease cases being confirmed in June and July.
Confirmed Cases of Lyme Disease by Month of Disease Onset in the United States 2001-2017
In the fall adult deer ticks are more abundant. Even though these blood suckers are about twice as likely to carry Lyme disease then the nymphs, they are much larger and therefore more easily detected and less likely to feed long enough to transmit Lyme disease.
The presence of ticks should not prevent you from enjoying the out-of-doors. By avoiding tick habitat whenever possible and doing a daily tick check, you can minimize your risk of being bitten and contracting a tick borne pathogen . Ticks usually hang out on shrubs and tall grasses, no higher than knee height. Black-legged ticks prefer cool humid place like the woods, but can also survive in tall grasses and even on lawns.
Even if a tick gets on you, it usually doesn’t latch on immediately. It first searches for a nice warm place such as behind your ears, in your armpits, or even in your belly button. Conducting a daily tick check can help prevent tick bites. Make sure you do daily tick checks on children as they are not likely to check themselves, which contributes to higher incident rates of Lyme disease among children than adults.
How to safely remove a tick
If you find an embedded tick, it should be removed promptly. To properly remove a tick, use a very pointy pair of tweezers to grasp the tick as close to the skin as possible. Avoid squeezing the abdomen (large back part of the tick) as that can cause the contents of the tick be pushed into your body. Although it is commonly thought that if not removed properly the head of the tick will remain lodged in your skin, this is false. A tick uses its barbed mouth parts to puncture your skin and latch on. The head is never embedded. If you leave the mouth parts behind when removing a tick, it is similar to having a splinter and does not increase your risk of contracting a tick borne pathogen.
Neither Cornell Cooperative Extension or the Orange County Department of Health test ticks for disease. For more information on where you can get ticks tested for disease visit the Tick Encounter Resource Center. (Tests cost about $50.)
This article appeared in the May 2019 Issue of Gardening in Orange County. Click here to subscribe!
The Alpine Garden
The Alpine Garden at the Orange County Arboretum
Explore the Alpine Garden and its varieties of succulents, spruces, perennials and grasses, surrounded by rock formations and waterways. If you take time to look around at all the different colors and textures, you will notice a very delicate plant known as the crown anemone or Spanish marigold (Anemone coronaria).
Crown anemone (Anemone coronaria)
The crown anemone’s dark-centered flowers can be found in an array of colors from purple-blue, red, pink or white. They are a perfect addition to rock gardens, flower bed, and containers. They do well in full sun, but will tolerate light shade in very hot areas. Soil preference is sandy loam. Crown anemones are propagated by underground storage structures called corms, which are similar to a bulbs and tubers. Corms can be planted after the danger of frost, which is usually early May here in Orange County New York. For continuous bloom throughout the summer, they should be planted every two or three weeks. (Note: The small corms should be soaked for several hours before planting). For those people who garden in containers, you can create a stunning display by combining crown anemones with tulips and grape hyacinths.
The Asian Maple Garden
Peony ‘Morning Lilac’
One of the numerous attractions in the Asian Maple Garden is the intersectional Itoh Peony ‘Morning Lilac’. This stunning flower was created by crossing a tree peony with the more common herbaceous peony. Intersectional peonies have strong, short woody stems and large flowers like a tree peony, but die down to the ground in winter like an herbaceous peony. These plants prefers a neutral to alkaline soil pH, and need good drainage. Autumn is the best time for planting peonies.
The Nellie Mazur Perennial Garden is a lovely mix of shrubs and herbaceous perennials. Recently added is to this garden is a magnificent piece of Agrisculpture made by collaging (welding) found vintage and antique metal with new steel to create an entirely new form. The piece is entitled “REMEMBER Agrisculpture: Seed Plates – Lovingly Rethought” is a 40 square-foot steel piece made from antique seed planter plates and gears. It was commissioned by the arboretum to honor the late Farmer Mazur and his passion for seed distribution.
The Remembrance Walkway and Garden
The Remembrance Garden
The Remembrance Walkway and Garden “honor[s] those who lost their lives and those whose lives have been altered by the tragic events of the September 11 attack on America”. The September 11th Memorial features a stunning rotating granite sculpture of the earth surrounded by bronze plaques with the names of the 44 Orange County residents who perished that day. A ceremony is held every year on September 11 to honor those that we lost.
The Raised Garden Beds
The Raised Garden Beds developed in 2002 are situated throughout the Arboretum and are home to a spectacular seasonal display of annual and perennial companion plantings. Every year visitors anticipate the arrival of the colorful spring display of numerous tulip varieties found throughout the grounds. The plants for the raised beds are grown in the arboretum’s Kosuga Greenhouse. This greenhouse houses 28,000 plants which includes plants for the raised beds as well as plants for the Arboretum’s annual plant sale. The purchase of new plants is made possible through the generosity of the Friends of the Arboretum and the patrons of the arboretum’s annual events.
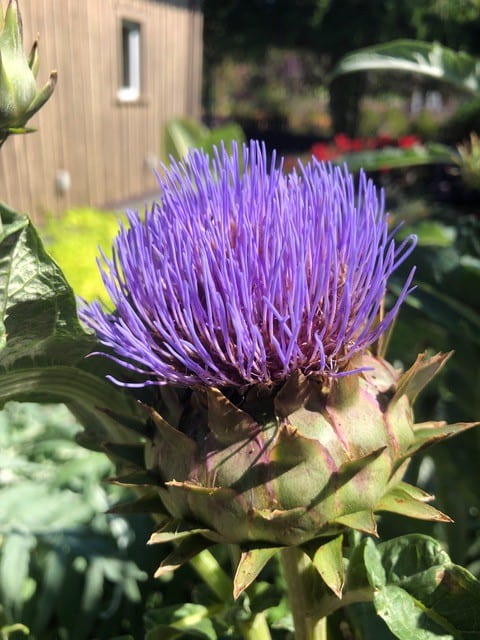
Cardoon (Cynara cardunculus)
Two of the plants that are highlighted in the raised garden bed for their uniqueness are cardoon and cotton. Cardoon (Cynara cardunculus), also known as the artichoke thistle or globe artichoke, is an herbaceous perennial in the aster family and is hardy in zones 7-10. Unfortunately, Orange County New York is found in zones 5 and 6, so here it usually can only be grown as an annual. This plant requires full sun in a sheltered location with fertile, well-drained soil. The plant reaches 5 feet tall and 4 feet wide and is an architectural splendor. Its large, thistle-like flowers are quite ornamental. The violet-purple flowers are produced in a heavily spined capitulum (head). Choose companion plants that contrast with the blue to silver color of the foliage such as annuals with blue, purple or burgundy flowers.
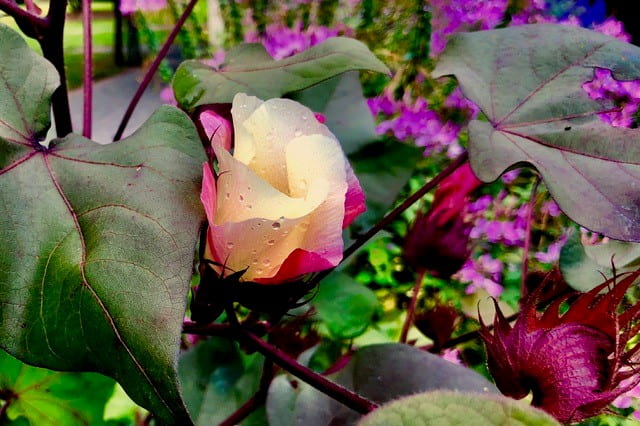
Cotton (Gossypium hirsutum)
The second plant highlighted in the raised garden beds is the cotton plant (Gossypiumhirsutum). The hibisicus-like bloom is initially white in color and later turns pink. The flowers stay on the plant for a few weeks, before they wither and fall leaving behind seedpods known as bolls. Fibers inside the boll continue to develop until the boll bursts open exposing white fluffy cotton. This annual grows three to five feet tall and prefers full sun and moist soil.
The Rill
Pan – the god of woods, fields and flocks
During the warmer months, a bronze statue of Pan, the god of woods, fields and flocks is surrounded by running water. The Rill was a developed by John and Connie Vanderberg in 2005 and the Pan sculpture was donated by Ruth Ottaway.
The Al Durland Memorial Pond
Surrounded by grass and woodlands, the Al Durland Memorial Pond, is a peaceful aquatic sanctuary. One can enjoy its beauty and serenity on the large deck that runs along one of its sides.
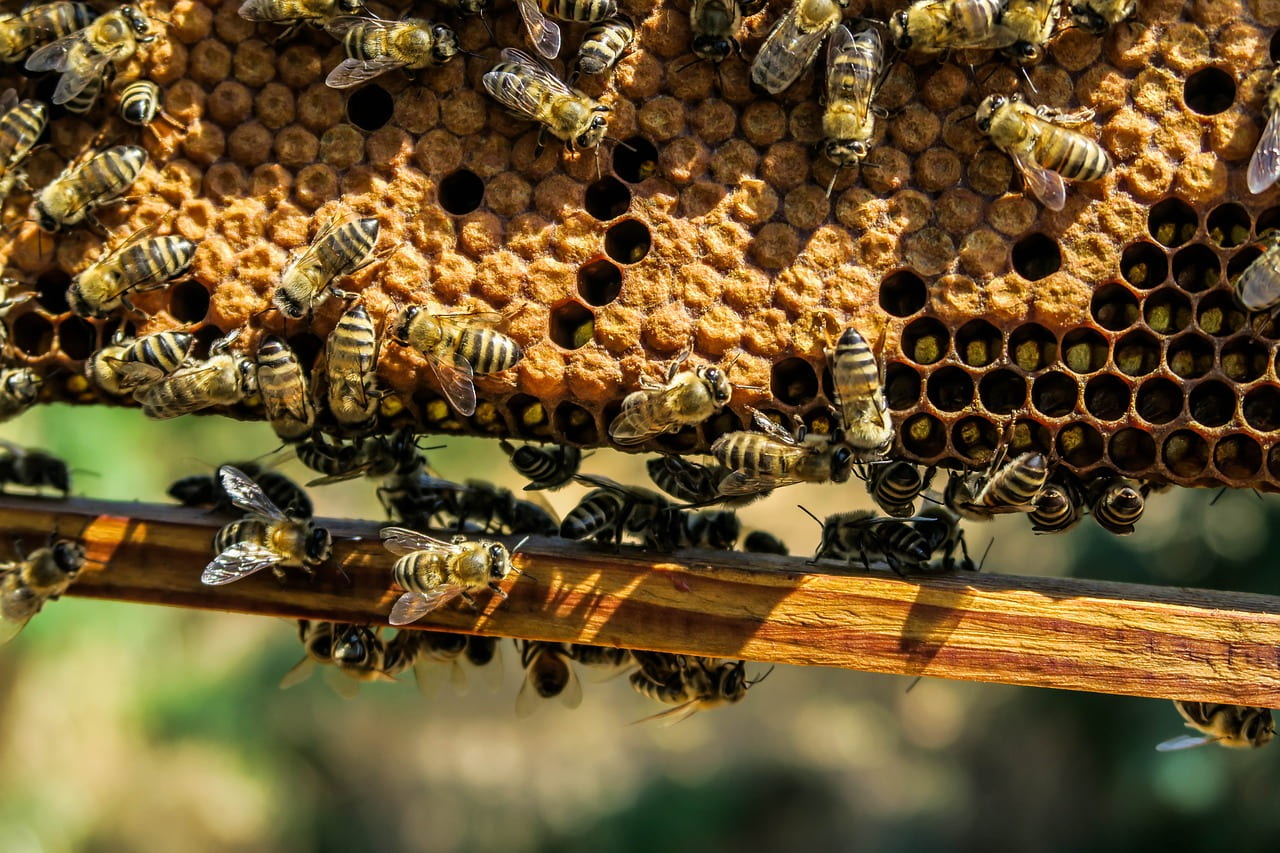
The Apiary
Honey bees tending their hive
The Apiary is buzzing with bee activity this time of year. Our new beekeeper is starting classes for beginner beekeepers.
The Apiary is also a favorite site for the elementary school students visiting the arboretum with their classes to participate in the Garden Exploration with Master Garden (GEM) program. During the bee portion of this program, the students learn about the three different types of bees found within a hive – queen, worker and drone bees. They also learn all about honey production and the important role bees play in our environment. The arboretum sells its honey at their Holiday Boutique that is open from the end of November until the end of December.
The Veteran’s Garden
Honoring our Veterans
The Veteran’s Garden at the Arboretum is dedicated to our Veterans of the past, present and future and hosts a yearly ceremony to honor our Veterans.
The Ceremony Garden
The Ceremony Garden is a large open field surrounded by a beautiful rose garden, raised garden beds, and towering trees. This popular venue is available for rental through the Orange County Parks Department.
The Children’s Garden
The Children’s Garden was designed to get children outside and give them an opportunity to connect with nature. The Children’s Garden is both beautiful and educational. It hosts a myriad of children’s events throughout the year from backyard bird feeding to a its annual Fairy Festival.
This article first appeared in The Times-Herald Record on Saturday, March 30, 2019 in the Home & Garden section.
By Joe Gregoire, Orange County Master Gardener, Cornell Cooperative Extension Orange County
I love mushrooms and heard that Shiitake mushrooms can be grown on logs in my backyard. Do you know anything about that? – Phil from Campbell Hall
Happy Spring, Phil. Yes, I do know something about growing mushrooms on logs. In fact, Cornell offers a weekend course they call “Camp Mushroom” that is a great way to learn a lot on this subject. I attended the course a few years ago and have been enjoying fresh picked shiitake mushrooms ever since. A warning to you though, this is something that requires a lot of patience, so if you don’t mind developing something over a 12-month period, then read on.
Shiitake mushrooms growing on a log
Shiitake mushrooms gathered off fallen logs have been the most popular mushroom in Asia for centuries. The origins of shiitake cultivation have been traced back thousands of years to China and Japan. People often found these mushrooms growing on downed “shii” trees (this is where the mushroom got its name). They would take the mushroom-clad logs, place them next to logs without mushrooms and simply wait for the wind to disperse the spores. Thankfully, since then, a lot of research in Japan and China has gone into shiitake-growing techniques, and we don’t have to wait for the wind anymore. Shiitake is the second most produced mushroom in the world, following the common button mushroom and contribute about 25% of total yearly production of mushrooms. Commercially, shiitake mushrooms are typically grown in conditions like their natural environment on either artificial substrate or hardwood logs, such as oak.
There are several steps to growing shiitake mushrooms on logs. The first step is purchasing an inoculum which contains the mushroom cells (called mycelium) that will produce the mushrooms. It most commonly comes in 2 forms – inoculated sawdust, and small wooden dowels that have been inoculated with mycelium.
The next step is obtaining logs for inoculation. There are many ways to obtain logs. You can cut your own as you maintain your forest and landscape by thinning trees or pruning large branches. Or you can contact a local arborist or tree service to see if they can sell you some logs instead of feeding them into a chipper. Existing commercial shiitake growers in the area may also be able to sell you logs from their own supply.
Leaves of a sugar maple (Acer saccharum)
Shiitake grow best in Oak or Maple trees. White Oak and Sugar Maple are the proven best producers, with Red Oak a close second. Red Maple is also considered good. These dense hardwoods provide the shiitake mycelium a long-lasting food source, which can enable the log to continue fruiting for 3-4 years. Also, the thick bark layer and durability of the bark on Oak and Maple helps maintain moisture levels in the log and the health of the mycelium.
Leaves and acorn of a white oak (Quercus alba)
Logs are best harvested while dormant. The bark is tightest during this time of year and timing allows for colonization to be complete in time for the earliest fruiting 12 months later. Avoid harvesting during spring bud break as bark can slip off during this growth phase of the year. Select logs that are 4 to 6 inches in diameter about 3 feet long. Thinner than this will have a shorter useful lifespan and larger than this will be very heavy. Use only healthy living trees. This is important in order to ensure that your shiitake spawn is the only species growing in the log. Let logs season for about 2 weeks after harvest. It’s conventional wisdom that this seasoning time allows the natural fungal inhibitors in the living tree to dissipate. Complete the inoculation process within 2 months to ensure logs don’t over dry – 35% moisture content is the ideal – and to avoid competing fungi colonization.
A quick word on safety.
It is never safe to pick and eat just any random mushroom you find. Some can make you sick and some can kill you. It is important to understand a few safety tips to ensure the mushrooms you grow and harvest are safe.
By inoculating only logs from healthy living trees, you give your shiitake spawn a big head start in colonizing the log. Shiitake are primary decomposers, so they only will grow in freshly cut wood, not already decomposing wood where other mushroom strains may have already colonized. If you’re not sure if a mushroom on your log is a shiitake, consult a mycologist or other specialist. Two good local sources are Mid-Hudson Mycological Association and Catskill Fungi.
So now you have your logs – time to inoculate them with shiitake spawn. Inoculation is a 3-step process:
Step 1 is drilling holes into the logs in a diamond pattern in 6” intervals in rows 2” apart. The drill bit you use needs to be sized to fit the dowel or the sawdust spawn inoculation tool you’ll be using. 5/16” for dowel and 7/16” for sawdust. For beginners, I recommend using dowels as only a hammer is needed to pound them into the holes and you avoid buying an expensive inoculation tool.
Step 2 is filling holes with spawn, which is simple with dowels that are pre-inoculated with shiitake mycelium and just need to be tapped into the holes.
Step 3 is to dab melted cheese wax over the filled holes. Cheese wax is best as it stays pliable for the several years you’ll be harvesting from the log. The wax replaces the bark and helps maintain moisture in the log. No need to apply wax to the end of the logs.
Shiitake Mushrooms
Once the logs are filled and waxed, its just a matter of letting the logs sit for 12 months in a shaded damp space to mature. The mycelium you placed in the logs will grow during that year and when the weather warms above 60 degrees next spring, shiitake mushrooms will begin to fruit from the log. And the great thing about shiitake is that you can force them to fruit by soaking the mature log in cold water for 24 hours, which will cause fruiting within about 5 days. With practice, one can average ¼ to ½ pound of fresh shiitake per log and, after a resting period of 7 weeks, that same log can be forced continue with the same log for 3-4 years until the mushroom has completed the primary decomposition of the log.
Cornell provides a wealth of additional information and tips on this subject, so if you’re interested in learning more, visit http://blogs.cornell.edu/mushrooms/
This article appeared in the April 2019 Issue of Gardening in Orange County. Click here to subscribe!
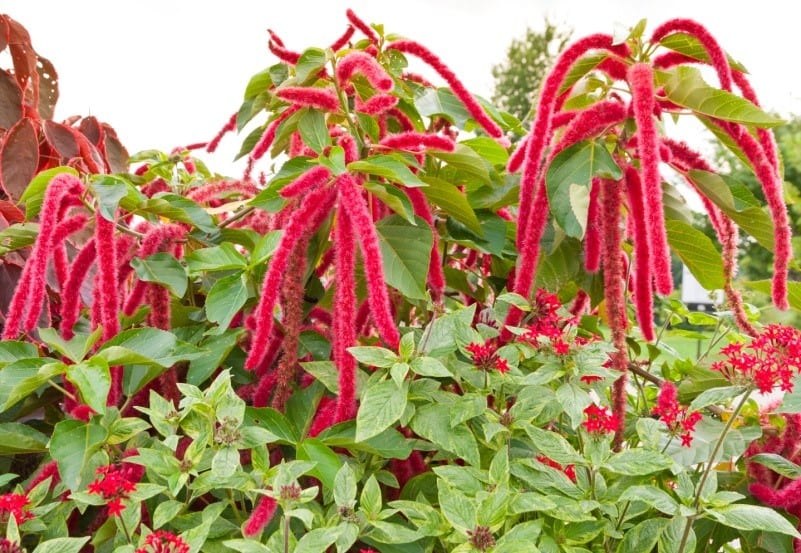
Love Lies Bleeding
When looking forward and making plans for showcasing summer’s wild and lively colors, consider adding the versatile annual showstopper Celosia. A member of the Amaranthaceae family, the flower is reminiscent of its cousin, the Amaranth plant, and its more common ornamental variety, “Love Lies Bleeding.”
Celosia comes in assorted colors, shapes, and sizes. There are three common types: plume, cockscomb, and wheat. Their names well describe the shape of each flower.
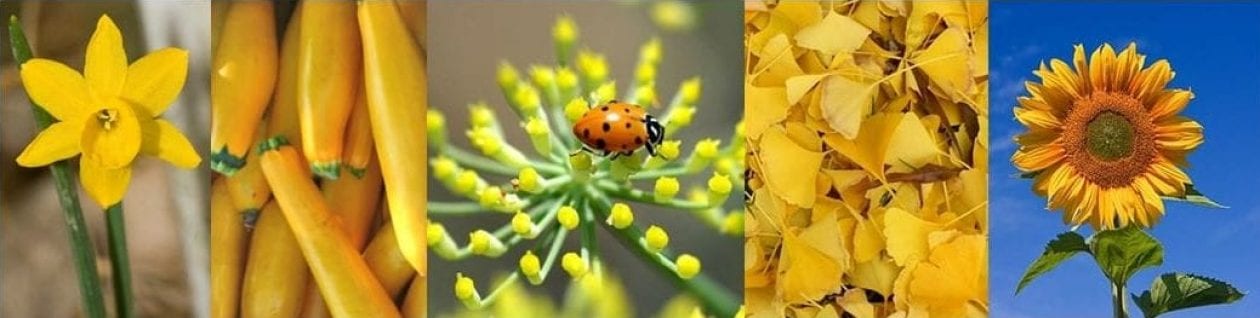
Yellow Plume
The plume celosia’s flowers top off the plant with large poofs of color which resemble a flame. The name ‘celosia’ is actually derived from the Greek word ‘kelos,’ which means ‘burned.’ Like a flame, they come in reds, yellows, and oranges. You can plant a border garden in one favorite color, or add all the colors together in a mix guaranteed to make you smile. The plant will continue to flower from June through to the first frost, and simple deadheading will suffice to keep the rainbow aglow.
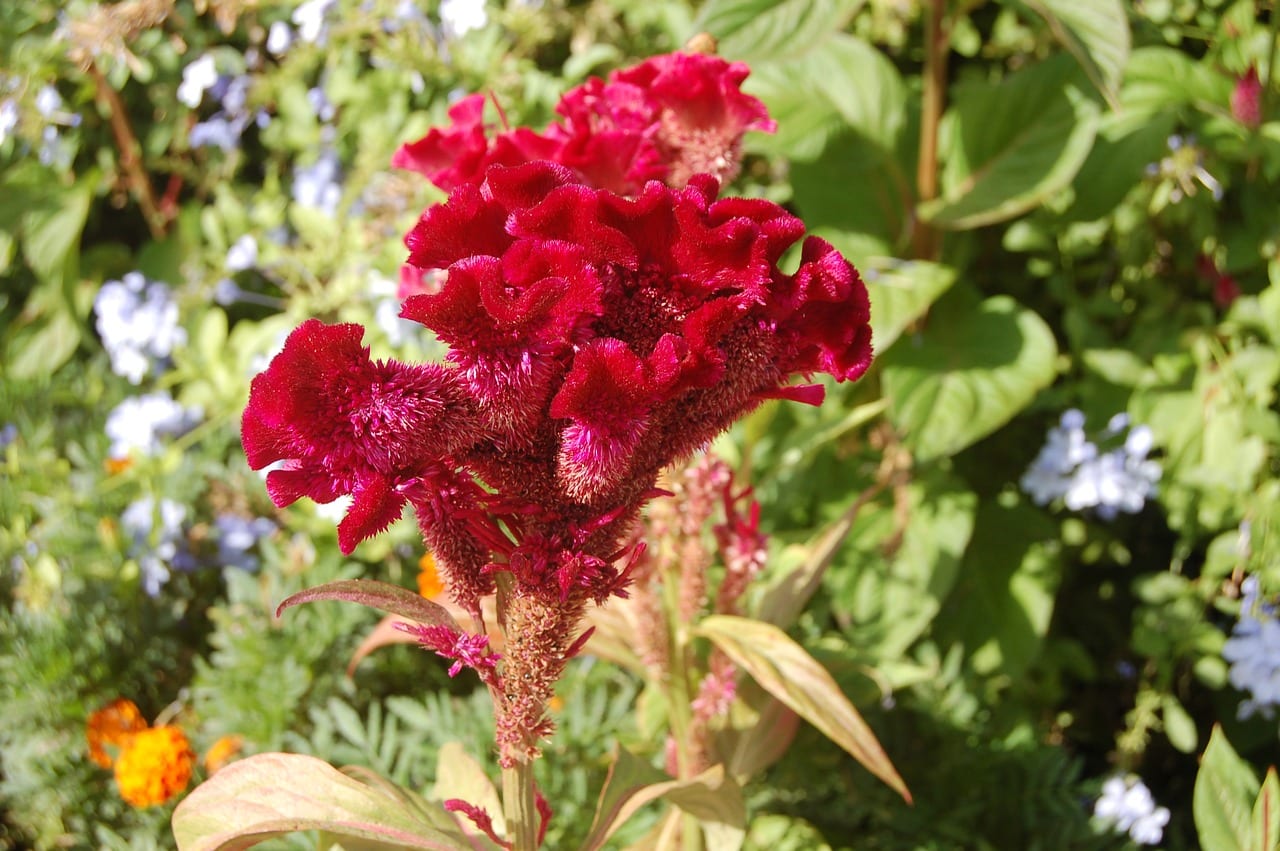
Red Cockscomb Celosia
The cockscomb celosia has a dome shape with curving lines which, not surprisingly, look like the red crest on the head of a rooster. The traditional red-colored flower is used throughout Mexico with the Mexican marigold (Tagetes erecta) in Day of the Dead celebrations. Cockscomb celosias can also be bright yellow. As with the plume celosia, flowering can be extended for months by regular deadheading.
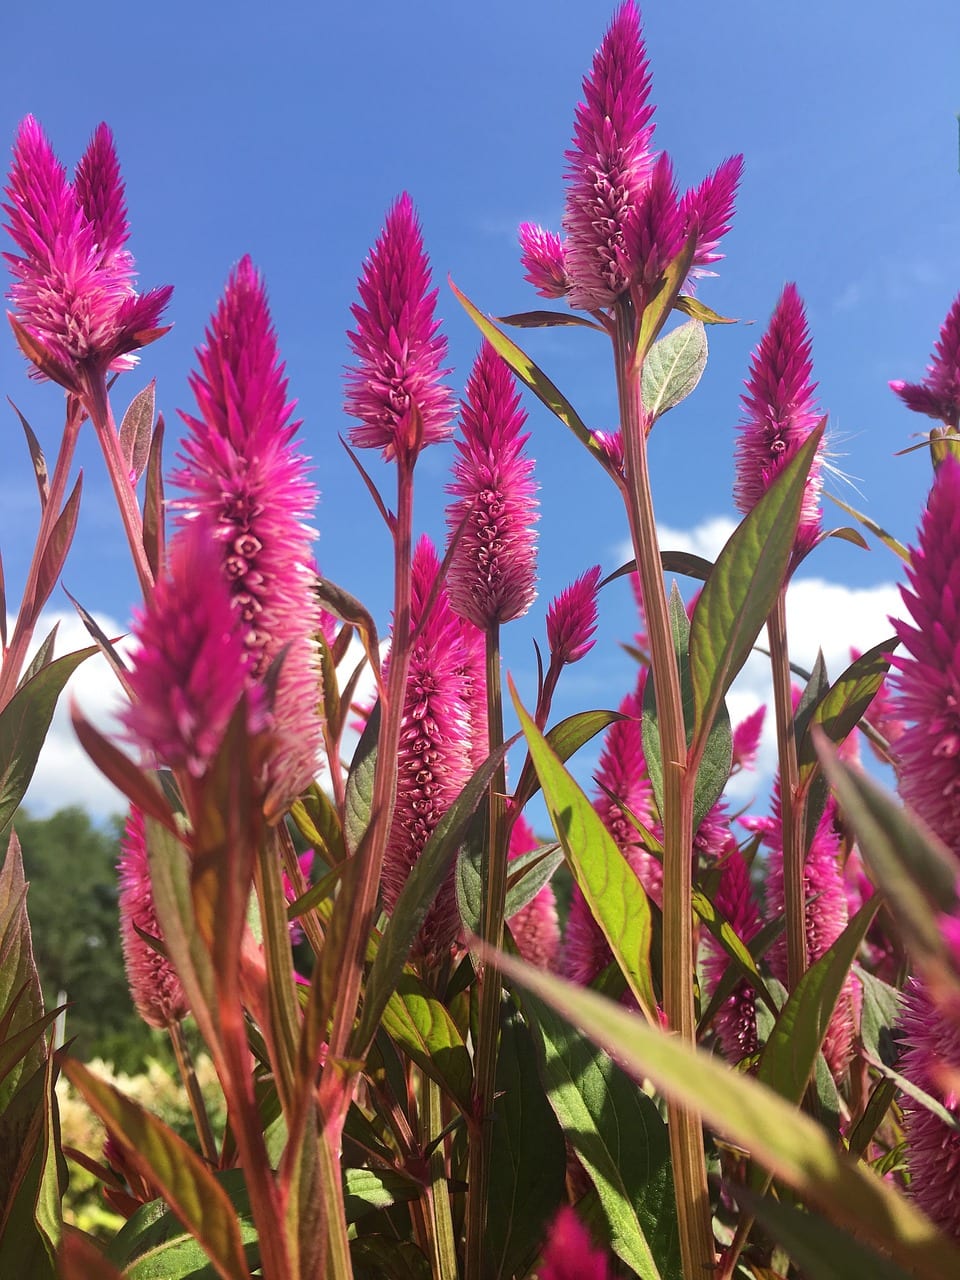
Wheat celosia
Wheat celosia is slightly more subdued in color than the other two types. The flower is shaped like a spike of wheat, and tends toward shades of pink or white, although there are now some varieties in darker red-purple shades. As an ornamental, its straight, erect height, between 3 and 5 feet tall, makes the wheat celosia a striking addition to any flower garden.
Here are a few more reasons to consider celosias for your summer 2019 garden:
They make good container flowers, especially in an alkaline soil mix. If you are looking for a new “thrill” for your containers’ “fill, thrill, and spill” mix, consider adding some celosias for color or height.
Celosias are an easy-care flower. For best results, plant them in full sun; they do like heat. As a tropical plant, they are known to tolerate drought, but keeping them moist (not wet) is best. Usually watering 3 or 4 times per week in well-drained soil is ideal.
Monarch Butterfly on Celosia FLower
All of the celosias will attract bees and other pollinators. Consider planting some near, or mixed in with, your vegetable garden or orchard to help with pollination.
The leaves, stems, and little flowers are all edible! In parts of Africa, Indonesia, and India, the leaves (especially the tender new leaves) are a green staple. They are a source of protein, Vitamins A and C, iron, calcium, and phosphorus. They are said to have a flavor much like spinach, and a texture like basil. Before the plant flowers, the tender leaves would be a healthy addition for any recipe that includes spinach as an ingredient. It is best to boil the leaves first and toss out the resulting blackish water, as it reportedly contains nitrates and oxalates; then you can use the still-green leaves in your scrambled eggs, soups, or stews. Most recipes add onions, garlic, hot peppers, or even peanut butter to perk up the flavor of the mild celosia leaves.
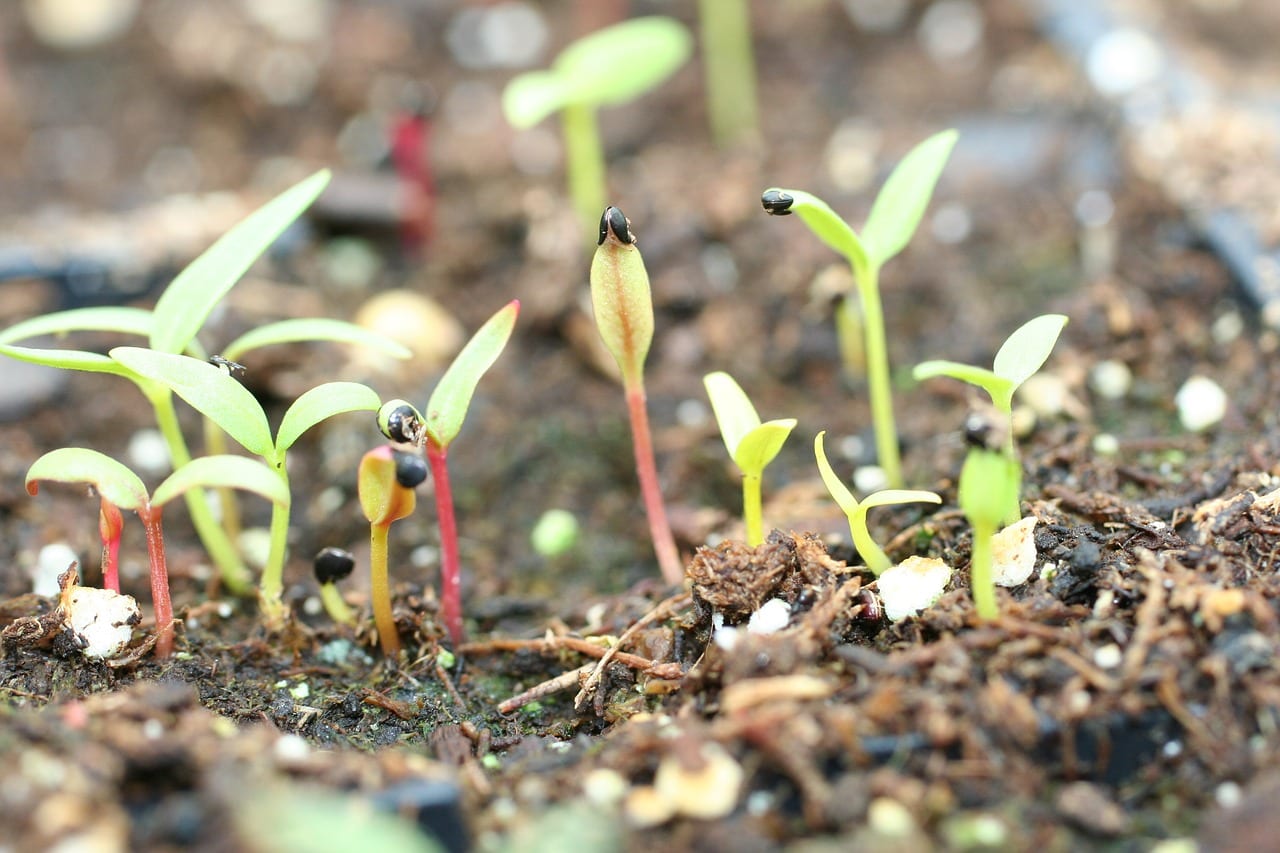
Celosia Seedlings
Since the celosia leaves are best used when tender before flowering, and most store-bought celosias already have flowers, you may want to start your own plants from seeds. If starting indoors, plant 6 to 8 weeks before the last frost date. Cover the tiny seeds lightly (with only 1/8 inch of soil). Keep moist and warm. Germination takes 10 to 15 days. Transplant to your prepared garden bed when the soil is warm. When plants are 4 to 6 inches tall, thin them. You can throw the pulled plants into the cooking pot. Alternatively, you can plant seed directly into the garden when the garden soil is warm. Cover the newly planted seeds with straw to keep moist and prevent washing away in case of heavy rains. Remove the straw once plants emerge.
Drying FLowers
All types of celosia make beautiful cut flowers and colorful long-lasting dried flowers. To dry, cut flowers when at their peak, remove side leaves to prevent mildew, and hang the flowers upside down in a dark, dry place for several weeks.
Remember to place newspaper underneath the drying plants to catch the seeds that will fall from the flowers once they are dry. Save these seeds for your 2020 celosia garden and be sure to share with your friends!
adapted from an article by Jen Lerner – Senior Resource Educator, Cornell Cooperative Extension of Putnam County
Updated September 7, 2021
Spotter lanternfly adult with spread wings
Here in the Hudson Valley, we have weathered waves of invasion . . . Insect invasion that is. Think of the multicolored Asian lady beetle buzzing around your house, soon replaced by the brown marmorated stinkbug dive-bombing your reading light at night. The emerald ash borer followed, and we see our native ash trees, their bark chipped away by woodpeckers foraging for larvae, standing as reminders that our actions have far-reaching impacts. Enter the newest invader. . .
Spotted lanternfly adult
The spotted lanternfly (Lycorma delicatula) is a colorful insect in the planthopper family that congregates in large numbers to feed on the sap of trees. As it feeds, it excretes “honeydew” a nice name for what is essentially a sticky excrement. That honeydew sometimes alerts people to the presence of the pest.
While the honeydew is a nuisance, the strain placed on the trees’ resources by the insects feeding weakening the tree. The spotted lanternfly’s preferred host, the Tree-of-Heaven (Ailanthus altissima), is also an unwanted invader despite its heavenly moniker. Great, you say? Maybe the lanternfly will polish off the Tree of Heaven? Well these gregarious insects have a few more tricks up their spotted sleeves.
Why are we worried?
Spotted lanternfly adults are know to aggregate on host trees
Like the brown marmorated stinkbug, spotted lanternflies are a pest of some important agricultural crops. They feed on and harm many fruit producing plants, including apples, peaches, plums, blueberries and grapes, as well as approximately 70 other plants. Besides the far-reaching economic impacts, there are ecological considerations too. Many of these trees and shrubs have relatives in our native ecosystem. For example, our native Shadblow or Serviceberry (Amelanchier sp.) is a close relative of the apple. It provides important forage for migratory birds who return to their nesting sites expecting to find its nutritious early fruits. Imagine the hole their loss would make in our ecosystem. We simply do not know yet how many host plants this insect can survive on or how wide their impact will be.
How can You Help?
Keep on the lookout and report your observations. Learn to recognize the insects themselves as well as the signs of the spotted lanternfly. While the insect may be easy to spot because of its bright spots, the egg clusters are harder to spy. They are tan to light grey, laid in row and sometimes covered with a mud-like protective layer. If you see the insects or spot the egg clusters, please report the sighting to the NYS DEC using their online reporting form.
Don’t help them spread!
Though spotted lanternflies may hitch a ride on a boat, trailer, or vehicle, their egg clusters pose the most insidious risk because the female will lay them on just about anything!
Hitchhiking egg masses can be found on pallets of stone, firewood shipments, Christmas trees, and outdoor furniture. Remember . . . never take firewood from your home to a favorite campground or weekend retreat. Similarly don’t pick up wood from far away and bring it home: you may be bringing a hidden invader with you. Observe the “Don’t Move Firewood” rule. Inspect boats and trailers for hitchhiking egg masses. If purchasing used outdoor furniture, or items frequently stored outside like garden tools and wheelbarrows, check all surfaces for egg masses. Yes, the adult insects can fly, but they spread much more quickly when humans help them along.
How did they get here? And how far have they spread?
Spotted lanternfly is native to China, India, and Vietnam. This insect was introduced into South Korea and spread throughout the country (approximately the size of Pennsylvania) in 3 years. On this side of the world, an initial infestation was found in Berks County, Pennsylvania, in 2014. This first infestation is thought to have arrived on a shipment of stone in 2012. This highly invasive insect has spread from Pennsylvania into the surrounding states including New York where in 2020 populations were found on Staten Island as well as in Orange, Rockland and Tompkins counties.
By Deborah C. – Highland Mills Master Gardener Volunteer
This article appeared in the March Issue of the Gardening in Orange County Newsletter. Click here to subscribe!
Currently, there are 70 active Master Gardener Volunteers in Orange County. These volunteers help Cornell Cooperative Extension of Orange County disseminates research-based information to the community. Volunteers go through an intensive training to increase their knowledge of gardening and landscaping. Once they complete the training, they are required to volunteer 30 hours a year, which includes six hours of continuing education.
Master Gardener Volunteers write for the Gardening in Orange County newsletter, answer gardening questions on the “Garden Helpline”, participate in community and school gardens, read to school children, and we provide workshops to the community on a wide range of topics.
Master Gardener Volunteers come from different backgrounds and careers. Here are just a few stories of their stories.
Brooke M., New Windsor Master Gardener Volunteer
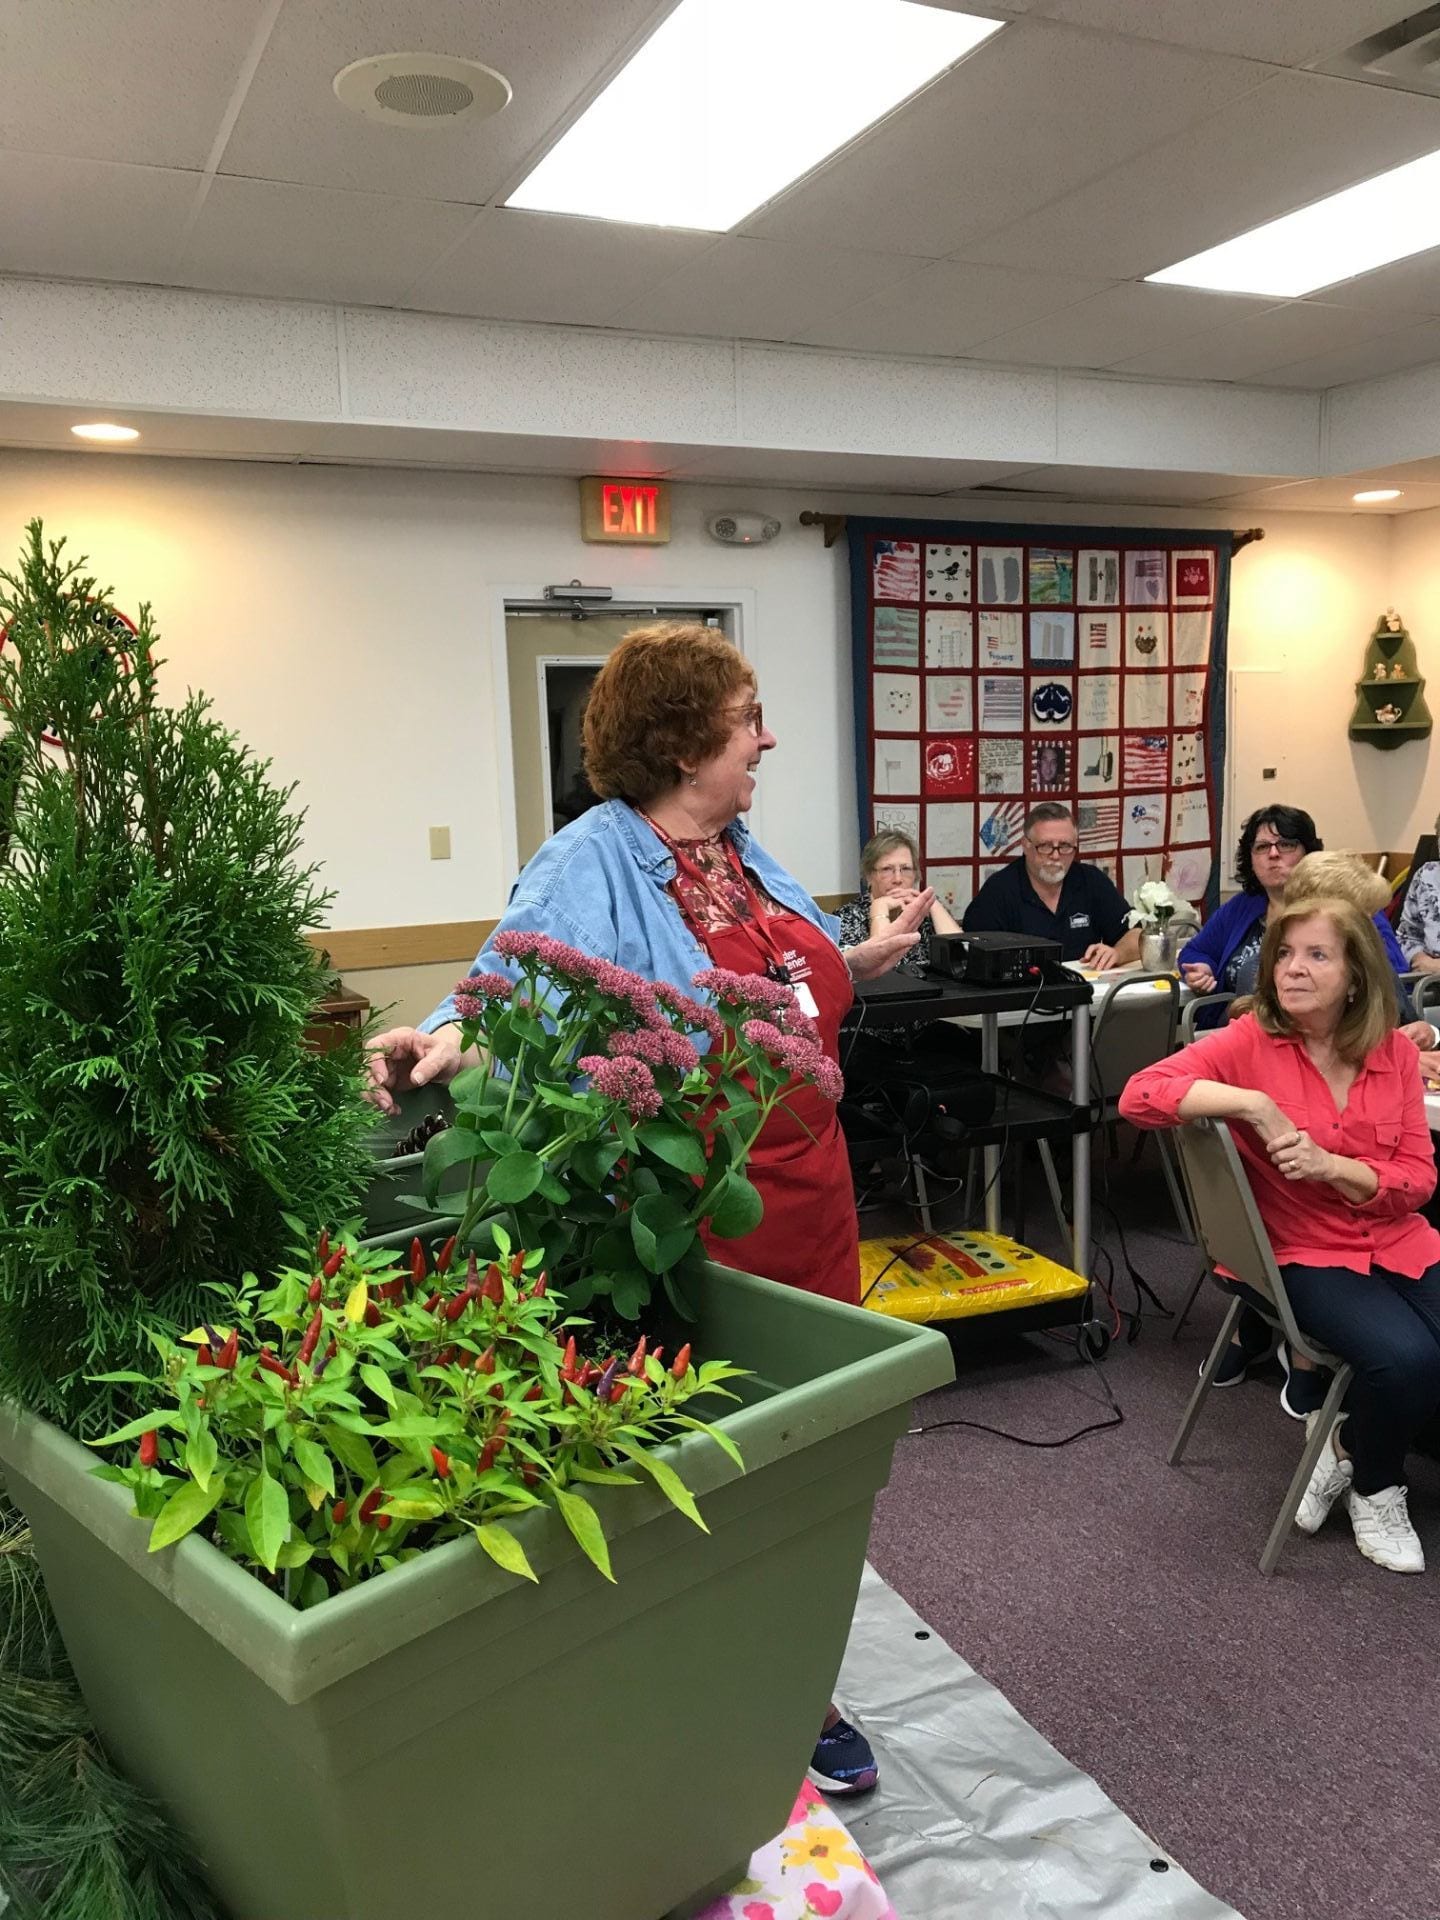
Brooke teaches a class on container gardening
Becoming a Master Gardener six years ago was the fulfillment of a longtime dream! I was introduced to gardening by my maternal grandmother who grew wild abundant perennial borders. She changed her color scheme regularly and encouraged me to see gardening like painting, providing joy in every glance. Being a Master Gardner lets me combine my skills from being a teacher, Museum Educator, and photographer with my absolute passion for plants. Going out to schools, garden clubs, and other public gatherings to share knowledge is one of my favorite things. Contributing to GOC by writing and editing is another. This year, helping to start a new school garden was the highlight. Nothing is more fun than hearing the laughter of children in the garden and seeing the wonder on their faces when they taste a fresh carrot. I have found new friends and opportunities in this program and it enriches my life.
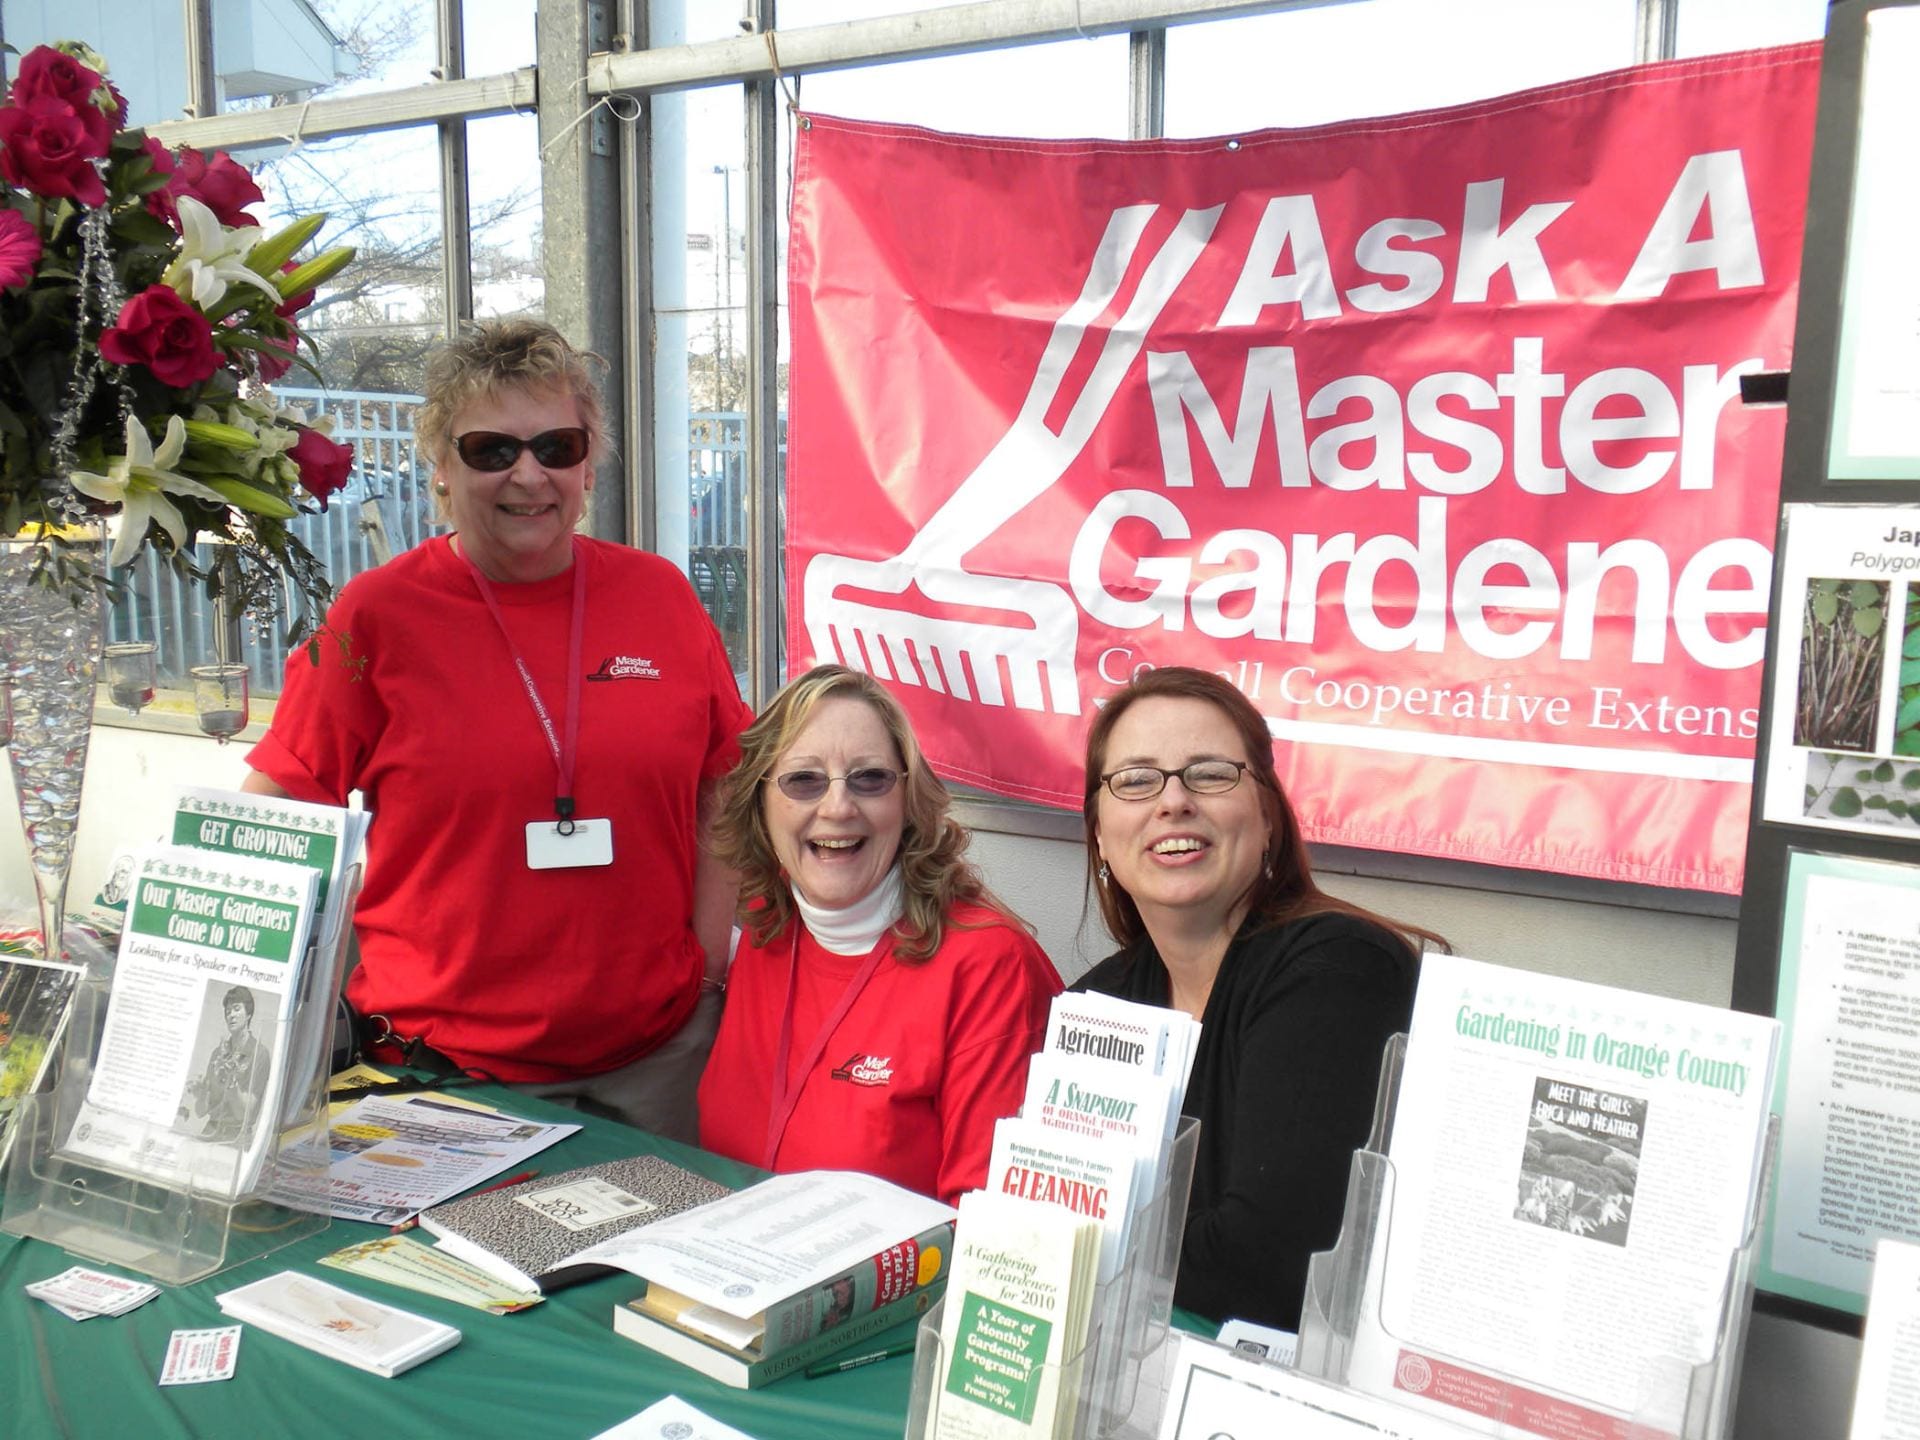
Deborah and two fellow Master Gardener Volunteers help disseminate information to the public at a “Ask a Master Gardener” Table
When I was a child, my dad grew zinnias from seed and I know my love of gardening was cultivated by the beautiful gardens he created in our yard. I asked a thousand questions; he did not always know the answers, but he let me keep asking! I think he grew delphiniums for their beautiful (and rare) periwinkle color.
I bought my house in 1992, and shortly thereafter I attended the Garden Days sponsored by the Master Gardeners. I soaked up all the material and tried to apply it in my own yard. I subscribed to “Gardening in Orange County”. Now my gardens are filled with Milkweed and plants that the deer do not eat. My andromeda (Pieris japonica) is about 35 years old.
I became a Master Gardener because of all the wonderful people who answered all my questions on the “helpline” at the Cornell Cooperative Extension in Middletown.
I have been a Master Gardener for 11 years now. I enjoy being in the company of other volunteers who love plants, trees, shrubs and flowers. Go ahead and ask questions. I am happy to help others cultivate their love of nature!
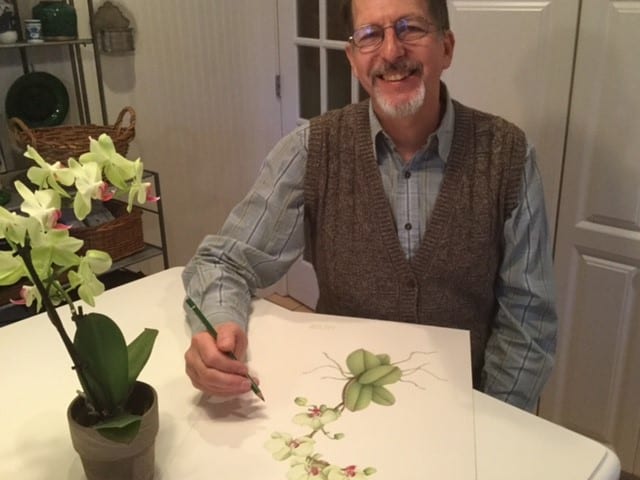
Doug M., Middletown Master Gardener
Doug shows off his passion for botanical drawing
Although I have lived in Orange County all my life, the experience of purchasing and renovating a neglected property in Middletown ignited a love for gardening which changed my life.
My gardening obsession led me away from a career in interior design to attaining a Certificate of Horticulture from the New York Botanical Garden where I also discovered my passion for creating botanical artwork. With that change in place, my life was now consumed by horticulture.
I was drawn to the Master Gardener program because it is a stimulating and satisfying educational process where members are continually receiving and sharing information.
I am especially drawn to the design and artistry of gardening and have led programs on container gardening and botanical drawing. I also enjoy projects where I can get my hands dirty.
My four years as a Master Gardener have been rewarding, especially the shared experiences with other volunteers.
Jim H., Monroe Master Gardener
Jim and two fellow Master Gardeners working in one of the school gardens
I have lived in Orange County for 21 years but I am a native of Texas. I grew up in the fruit orchards of Dallas County, Texas and every home of mine has had a garden. A career in High Tech Communication took me around the globe six times. I have experienced a lot of things in my life, but I am pulled to the challenge of gardens.
I love vegetable gardening and I want to pass on my passion to elementary children. I am involved with two school gardens in Monroe. The North Main Garden is located in a 100-year-old church courtyard next to the school. It is a pollination garden with six raised beds and the vegetables are donated to a local food bank. We work with the Ecology Club and teach classes on recycling and composting.
The Pine Tree Elementary garden was built with donations from the Girl Scout cookie sales. This garden is totally managed by 3rd grade students and it is a learning garden from the soil up! The students plant seeds, learn correct watering techniques, transplant material, weed and mulch. It is a hands-on endeavor with no smartphones or computers.
The Master Gardening Program has given me the opportunity to give back to my community. What keeps the gardens running is the look in the children’s eyes when they pick a ripe vegetable!
Joe G., Warwick Master Gardener
Joe out in his hop yard
I’m the son of a passionate gardener and grew up in a small Connecticut town in the 1970’s. Dad had a huge vegetable garden and I spent many hours with him there, tending his plants and growing an area of my own starting at age 7. Giant pumpkins were my favorite.
My gardening passion grew and I worked for a landscaper through high school and college. My adult career is in packaging, so my gardening passion had to be limited to a hobby, but I became a Master Gardener in 2013 to deepen my knowledge and spread my passion to others.
My retirement goal is to operate a farm, which I decided to start in my 40’s rather than wait. I farm part time, growing Hops and Shiitake Mushrooms and benefit from the education and access to information the Cooperative Extension network has provided through the Master Gardening program. I enjoy creating and presenting educational workshops through the MG program and writing articles for Gardening in Orange County and the Time Herald Record.
Kate H., Cuddebackville Master Gardener Volunteer
Kate talks on the phone answer inquires that come into the Garden Helpline
I have lived in Orange County for over 40 years, but I am originally from California. What brought me to the East Coast was a position as an instructor, and clinic coordinator, in SUNY Orange’s dental hygiene department.
When I learned of the Cornell Cooperative Extension’s Master Gardener program, I was intrigued. I have always loved gardening, and I love teaching, so being part of a volunteer program where I could teach horticulture topics sounded perfect to me. I knew I would learn a lot when I started the MG training, but how much I learned, and have continued to learn for the past 11 years, is astounding!
I have also come to understand more about Cornell Cooperative Extension – what an incredible resource it is for the people of Orange County. Its scope of programs and outreach is amazing and inspiring.
I have been involved in community gardens, children’s programs, lectures, and workshops. They have been fun, interesting and satisfying. But what really amazes and delights me is the group of Master Gardeners themselves. They have a great variety of interests and specialties; they are talented, generous, and wonderful company! I feel lucky to be part of this group of volunteers.
Nancy F., Cornwall Master Gardener Volunteer
Nancy
I graduated from the Orange County Master Gardener Program in March of 2016 following my retirement in 2015 as a Family Nurse Practitioner for Newburgh Enlarged City School District. My love for flower gardening expanded to vegetable gardening and a variety of gardening and health-related school programs. As a result of collaborations with the Orange County Department of Health Healthy Orange Team, the Newburgh Enlarged City School District’s Wellness Team and the Fuel Up to Play 60 grant, my journey lead me to my lifelong passion to be a Master Gardener with Cornell Cooperative Extension’s Master Gardener Program.
The Master Gardener Program has provided me with opportunities for continued professional development in areas that require research-based gardening knowledge and has afforded me the opportunity to continue collaborations with other gardeners and associations.
A Master Gardener has many volunteer opportunities. I personally enjoy the Garden Help Line, writing for the Gardening in Orange County Newsletter, assisting student learning about bees, composting, flowers, vegetables, and bugs at the Orange County Arboretum.
Samantha G., Harriman Master Gardener Volunteer
My Master Gardener story is very simple. I have been a gardener ever since my mom said she would pay me a penny for every dandelion I dug up. I made ten dollars. Now I forbid dandelion removal in my yard! I came to Orange County in 2004, and promptly got a job in the Walmart lawn and garden department. I quickly realized that I was going to have to dig a little deeper to meet fellow gardeners and new friends. Lucky for me I noticed a small article in the local paper advertising the registration for the 2007-08 Master Gardener class. Although this really stretched my comfort zone, I knew that this program was what I needed to really become part of my new community. As a gardener I have very simple needs – a beautiful habitat in the middle of suburbia and a small garden to feed my family. As a Master Gardener it fills me with joy to show people how to find the answers for gardening success. I love to put the light back in their gardening shade.
This article first appeared in The Times-Herald Record on Saturday, February 16, 2019 in the Home & Garden section.
By Joe Gregoire, Orange County Master Gardener, Cornell Cooperative Extension Orange County
What made you decide to become a Master Gardener Volunteer and how do I know if the program is right for me? – Jackie from Port Jervis
I love this question and I’m asked often why I became a Master Gardener. As I’m a mid-career professional with a full-time job that occupies much of my time, people I work with are often curious how I have time and energy during the week to devote to volunteering as a Master Gardener. The training program took time to complete and in exchange for the education, all participants in the program give back more time through volunteer work throughout the year. So, instead of using my limited free time doing whatever I want, I make time to give back to the community. For me, its about passion. I’m passionate about gardening and have been from a very young age. And I have my Dad to thank for that.
One Saturday morning when I was seven, I came home from little league baseball to find the backyard and woods behind our house bull dozed into a large cleared field. Dad apparently had plans to start a vegetable garden and I wasn’t in the loop. Not that Dad needed my input, I was a little kid after all. But had I known what was coming, I could have removed my Matchbox cars from the sandbox the day before. I didn’t, and the bulldozer turned them into little treasures that would pop up in random parts of the backyard for years to come. And since I no longer had a sandbox to play in, playing in the dirt became the next best thing. And Dad made good use of me playing there, putting me to work weeding and watering, while quietly planting seeds in me that would grow into the deep passion I have for gardening today. The miracle of watching a tiny seed sprout and transform into a growing plant in a matter of days still gives me that sense of awe that is so rare in this busy world.
I find that carving out some of my free time to help share this passion and plant seeds in others like my Dad did for me, is rewarding beyond measure. While it takes my time, it gives me back energy, joy and relationships within my community I would not have otherwise. Sure, training for the program also expanded my gardening knowledge, but more importantly, it connected me to resources within the Cornell Extension office. I’ve used the training and resources to help expand my gardening hobby into a small farm business. And I’ve found opportunities to volunteer my time that help me hone skills I use in my full-time career, such as creating new presentations, public speaking, and writing articles (like this one).
Master Gardener Volunteers answer questions and provide information to the public about a wide range of topics varying from composting to bed bugs.
So, what exactly is a Master Gardener Volunteer? The Master Gardener Volunteer Program is a national program of trained volunteers who work in partnership with their county Cooperative Extension office to provide home and community gardeners with research-based information and skills. In Orange County, Master Gardener Volunteers assist with gardening projects in the community, teach classes and workshops, work in school and community gardens, provide information at public events, and answer gardening questions through the Garden Helpline.
Who Becomes a Master Gardener Volunteer? Master Gardener Volunteers are adults of all ages, abilities, and backgrounds. They range from having no professional gardening or landscaping experience, to very experienced gardeners. They all share a genuine interest in making the world more vibrant and livable through gardening. Master Gardener Volunteers are students, teachers, moms, dads, grandparents, working folks, retired people, and anything else you can imagine. All you need is a love for gardening, some time to volunteer, and a willingness to complete the training.
Master Gardener Training is completed locally in Middletown. Cornell Cooperative Extension Orange County will hold its next training class for Master Gardeners starting in September 2019 and running through March 2020. The training will be held on Thursdays from 9:00 am until 4:00 pm. Applications will be sent out to interested individuals in the beginning of March 2019 and will be due back on April 19th, 2019. After applications are reviewed, interviews will be conducted in early May and final selections will be made. All applicants will be contacted by early August and notified of their standing. The training cost is $300. Scholarships are available.
If you are interested in becoming a Master Gardener Volunteer or want to learn more about the program, please contact:Susan Ndiaye, Master Gardener Volunteer Coordinator,sgn32@cornell.edu, (845) 344-1234
This article appeared in the February Issue of the Gardening in Orange County Newsletter. Click here to subscribe!
Aeonium arboreum ‘Zwartkopf’I am a self-proclaimed succulent lover always in search of the most exotic, colorful, and unique plants. My cousin Denise lives in California where succulents thrive in the sunny dry climate. She is a member of the Contra Costa Garden Club and has been my go-to person when I need to find out about a particular succulent variety or care. My visits with my cousin in California consist of visiting succulent gardens and many mind-blowing greenhouses that grow only succulents. I have been known to buy dozens of plants, shake off all the soil and transport back in shoe boxes in my luggage to replant once I get home. (Check rules for your own state for transporting plants.)
Haworthia cooperi ‘Pilifera’Cacti (members of the family Cactaceae) and succulents (members of many different families) all have one thing in common – they all are adapted to conserving water. All cacti are succulents but not all succulents are cacti. The name “succulent” is derived from “succulentus”, a Latin word which means sap or juice. Succulent plants are found in about 60 plant families and thousands of hybrid cultivars that differ in color, texture and size. Most people are familiar with succulents such as Jade, Kalanchoe and the popular Aloe. Not only do succulents come in many varieties and colors, they have the added benefit of blooming if they are happy in their space.
Snow White Panda Plant (Kalanchoe eriophylla)Succulents are known for their low maintenance and long lifespans, which makes them perfect for people who work all day, are on-the-go or just aren’t great at taking care of plants. Another distinction is that succulents are native to most parts of the world and love hot, dry weather. Because they store water in their leaves, they can withstand quite a bit of neglect. These plants are great for adding structure and vibrance to container gardens outdoors. However, even though these drought-resistant plants are simple to maintain, they still have preferences when it comes to location.
I am frequently asked how to keep succulents alive since there are thousands of different succulent cultivars, all growing with different care requirements and sizes.
Jade (Crassula bonsai)Here are a few simple steps and tips so you can enjoy your succulent garden for years to come:
Treat your succulent garden as living art. Don’t be afraid to pull out a plant that has overgrown the planter or has died. Just replace with another succulent. Succulents are a great gift for a non-gardener. Decorate with flowers, berries, shells, or pinecones to theme up your succulent containers or vertical gardens. You can just pull out flowers once they have wilted or brown out and still have a beautiful creative piece.
OUTDOOR DO’S AND DON’TS
Containers
The best pot/container for a succulent is a shallow terra cotta or clay pot with a large drainage hole. The deeper the container, the more susceptible the plant is to rotting from wet soil. A 13-inch or smaller shallow garden dish is the perfect container and can hold a nice selection of succulents. This type of container is shallow enough that it won’t become waterlogged if left outside in the rain all summer. If you have created a vertical garden (one that hangs on the wall), keep it flat for at least one month until the roots have established themselves. Once the succulents have rooted you can hang it on wall.
Sempervivum globiferum
Some of my many favorite succulents are Echeveria, Sempervivum, Sedums, Haworthia and Kalanchoe. Move outdoors early to mid-June. Most succulents can tolerate night temps of 50 degrees. Some varieties of Sempervivum and Sedums are cold-hardy and can survive our harsh winters.
Sedum ruspestre ‘Angelina’Rock Garden walls, crevices or slopes
Winter/cold hardy Sedums are best for this type of planting as they have shallow root systems and spread easily. My favorite is a sedum called Angelina which has beautiful yellow flowers, and some varieties change leaf colors from green to gold in the fall.
Water
Overwatering is the main reason succulents die. The key to watering is restraint! Remember they are filled with water. They are the camels of the plant world. If the leaves are plump, don’t water. If they look slightly shriveled or puckered it is time to water. Rain water is preferable to tap water. Water-softened tap is not recommended because of excessive salt content.
Echeveria leucotrichaLight
Succulents like bright light, but most cannot tolerate intense, direct sunlight outdoors all day. Morning or late afternoon sun is ideal. Most succulents need only 3 to 4 hours of sun a day. Never place in a southern exposure outdoors. The intensity of the light that a plant prefers depends on the species. Keep in mind that succulents have very different growing habits, some grow very slowly and others will double in size in a season.
While optimal lighting conditions depend on species, there are some general signs that indicate your plant is getting either too much or too little light:
Too much light: appears “off color,” “bleached out”, or turning yellow. Your plant can scorch on a dark wall in full sun and will likely not recover.
Too little light: stretches out and appears leggy and will weaken plant.
INDOORS – YEAR ROUND OR OVER WINTERING
Light
If your succulents were outside, place them in the sunniest location in your home in winter. Best indoor location is an east, west or south windowsill. I also have a number of my succulents indoors under lights. I have 2 types of lights – the typical white grow- lights are fine, but I prefer the red and blue spectrum grow-lights specifically for succulents.
Water
When your succulent garden is very dry, water it thoroughly. Every one or two weeks should be sufficient indoors depending on time of year. Succulents should be given just enough water so that they show no sign of shriveling.
PESTS
Mealybugs
Mealybugs
These soft oval insects shroud themselves in a cottony covering. The presence of these cotton masses indicates infestation. Mealybugs dine on plant sap reducing plant vigor, distorting growth, and causing premature leaf shed. Minor infestations can be handled by dabbing the offending individuals with an alcohol soaked cotton swab. The alcohol dissolves their waxy protective coating leaving them susceptible to desiccation and other environmental stressors.
Twospotted spider mites (Tetranychus urticae)
Spider Mites
Spider mites are all but invisible to the unaided eye. These pests are often found on the underside of leaves shrouded in their whitish webs. Spider mites also dine on plant sap and cause a distinctive stippling pattern on infested leaves. Copious amounts of webbing indicate a large infestation, which means drastic measures must be taken such as removing all infested leaves. If the infestation is minor a strong burst of overhead watering can help eliminate the mites. Mites are not insects, so insecticides are ineffective.
Scale
Brown soft scale (Coccus hesperidum)
These pinhead-sized insects appear as raised brown spots resembling marine shells. Like many other pests, they dine on the plant’s sap. Outbreaks of scale can be treated similarly to mealybug infestations.
FERTILIZER
During the growing season, a balanced fertilizer (10-10-10), which has been diluted to 1/4 strength, can be added to the water for each watering; or use specific fertilizer (foam) for succulents. Only use fertilizers on soil and not on the plant itself. My favorite is worm castings which will not burn the succulents and seem to cut down on pest infestations as well.
PROPAGATION
Mother of Thousands (Kalanchoe daigremontiana)
Sometimes it is very easy to identify the best way to propagate your succulents and other times it is not as obvious. However, before you start, the first thing to ask yourself is: What kind of plant do I have? If you don’t know, the easiest way to learn is to organize the information you know about your plant into categories. How is it shaped? Is it tall and thin, short and round? How does it grow? Does it grow all by itself, or are there similar tiny plants that poke up out of the soil near it?
Questions like these are the first ones to ask yourself when considering propagation. Some species can be propagated by separating pups from around the base of the plant. With others you can start a new plant by just placing one of the leaves on top of soil. If succulents start stretching and getting leggy, try pinching off the top, let dry out for a few days to callus over the end and then replant.
Moncarpic succulent (Sempervivum kindingeri)Ever wonder why some die after blooming? Some succulents may be monocarpic. “Mono” means “once”, and “carpic” means “fruit”. Therefore, once the single flower has come and gone, fruit or seeds are set and the parent plant can die. A monocarpic succulent flowers only once and then dies.
Monocarpic is, in fact, a strategy of many plants to produce progeny. Most monocarpic succulents produce many new plants before they bloom. So by the time they are ready for the bloom, they’ve already created enough plants to replace themselves.
My name is Susan Ndiaye and I am the Community Horticulture Educator at Cornell Cooperative Extension in Orange County New York. I am launching this blog to help keep residents of Orange County and the surrounding areas apprised of the goings on in the gardening world. I will be posting information about garden pests, invasive species, upcoming gardening events, educational opportunities, as well as articles from ‘Gardening in Orange County‘, a newsletter put out by the Orange County Master Gardener Volunteers.
I look forward to providing you, the gardeners of Orange County, information that will help you in your gardening efforts as you continue to beautify our county and add to the quality of life for all.


, Bugwood.org")


 2006 Derek Ramsey (Ram-Man). Co-attribution - Chanticleer Garden. [CC BY-SA 3.0 (http://creativecommons.org/licenses/by-sa/3.0/)], from Wikimedia Commons")
, from Wikimedia Commons")
 or CC-BY-SA-3.0 (http://creativecommons.org/licenses/by-sa/3.0/)], from Wikimedia Commons")
]")


, CC-BY-SA-3.0 (http://creativecommons.org/licenses/by-sa/3.0/), from Wikimedia Commons")


, from Wikimedia Commons")