Category Archives: Vegetable Gardening

Seven Crops to Plant in August for a Fall Harvest

By Cecille Jones, Monroe Master Gardener Volunteer

This article appeared in the August 2021 Issue of Gardening in Orange County.

If you have been enjoying your summer vegetable harvest, there is no reason why you can’t extend your growing season through the fall and winter.

Those of us who live in Orange County, NY, are in planting USDA Hardiness Zone 6A/6B and can expect the first frost to arrive on or around October 15.  Since planting for a good fall harvest starts six to eight weeks before the first anticipated frost date, the dog days of August are a good time to start.

Here are seven crops good for Zones 5 – 7 that you can plant this month for nutritious edibles on your dinner table.

Brassica or Cole Crops
Head of broccoli growing on a broccoli plant
Broccoli

What could be more delicious than garden fresh broccoli, cabbage, cauliflower and Brussels sprouts?  This family of plants are perfect crops to harvest come fall.  Plant them as seedlings or starters from your local nursery, not as seeds.  Put the starters in the ground six weeks before the first frost and plan on protecting them late in the season with a fabric row cover or a hoop house.  If you want to plant from seeds, June of next year is the time to start.

Kale
Picture looking down at the rosette of a curly kale plant
Kale

All types of kale also belong to the Brassica family, but kale can be planted by seed or seedling all through August.  If you are short on time by a couple of weeks, you can always harvest baby kale, something the supermarket sells at a premium.  As this plant matures, frost and even freezing temperatures sweeten them.  To overwinter kale, protect them with a piece of heavy row cover.

Lettuce
Sevearl heads of red and green lettuce growing in a garden
Lettuce

Summer heat can burn lettuce leaf tips and cause it to get bitter, but not so for lettuce planted through August and harvested in the fall and early winter.  Despite its appearance, lettuce leaves are hardy and can easily tolerate cold night temperatures and moderate frost.  You can plant seeds 8 weeks before the first frost.  If you want to harvest baby greens, you can plant as late as two weeks before Jack Frost makes his entrance.  To get a good start on early spring lettuce next year, you can overwinter lettuce in a cold frame.

Asian Greens
Pile of heads of pak choi
Pak Choi

Also, part of the Brassica family, Chinese greens like pak choi and tatsoi are quite hardy and grow well in the fall.  You can plant these from seed eight weeks before October 15.  If you want an earlier harvest, start them indoors and then tuck them in your garden as spots start to clear out in August.

Spinach
Pile of loose leaf spinach
Spinach

For a long harvest, plant the amazing spinach.  If you start in August, you will be enjoying this vegetable by mid-October.  Use protection from a hoop house or cold frame and you can continue harvesting small amounts all winter long.  When spring arrives, this plant will take off again and yield a great harvest until May.

Beets
A bundle of freshly washed beets and their greens
Beets

You cannot go wrong with planting beets.  To harvest the root crop, you need to plant eight weeks before the first frost, but do not let the calendar stop you.  Anything planted after six weeks before the frost will yield tasty tops, which you can add to your fall salads.  Sadly, beets are not hardy enough to survive the winter.

Carrots
Carrots grwoing in soil with the top of the orange part sticking out of the soil
Carrots

Carrots make a great fall and winter treat.  With colder temperatures, the starches turn to sugars, making carrots sweet and delicious.  Give your carrot seeds a good, healthy start by watering the seedbed once or even twice daily.  When the weather starts to get colder in December, use a hoop house, cold frame or straw cover.  You might also want to pick a variety that has a short maturity date so they can get ready by winter.

There are many other crops you can plant in August.  Think arugula, radish, and leeks.  Whatever you decide to plant, here is to a bountiful fall harvest and bon appetit.

(Special thanks to Master Gardener Sabrina Conti for sharing information on fall harvesting.)

Building a Hoop House

By Joe Gregoire, Warwick Senior Master Gardener Volunteer

This article appeared in the June 2021 Issue of Gardening in Orange County.

I love to garden. I wouldn’t have become a Master Gardener Volunteer if I weren’t passionate about getting my hands dirty and growing food for my family and friends. My favorite time of year is the growing season, and I sure don’t like winter much. If not for the fact that I was born in the Northeast and all my family and friends are here, I’d probably move to another part of the country with a more favorable, Mediterranean climate for year-round growing, like Southern California—or even my dream retirement, to a home in Tuscany! Who knows, maybe someday I will.

Garden covered with row coverUntil then, though, I have to enjoy the four seasons we’re blessed with in Orange County, New York. I’ve tried a number of strategies over the years to extend my growing season. Using row covers in the garden gives my cold-weather crops an earlier start in spring and extends my late harvest until the deep freeze sets in. I start my seedlings each February inside, under grow lights, and I grow sprouts and microgreens in the kitchen to add to salads in December and January. And I always do have houseplants to tend year-round. But I’ll admit I’ve found all these off-season activities underwhelming as they provide only the faintest scratch for my gardening itch.

The reflecting pool in the Palms of the World Gallery of the Enid A. Haupt Conservatory at the New York Botanical GardenOne of my favorite winter road trips is a visit to the New York Botanical Garden. No matter what cold winds blow or rain or snow falls during my wintertime visits, a walk through the conservatory instantly transports me to a tropical paradise. I’ve always dreamt of building my own conservatory onto my home, but as our tall house casts a deep shadow over the back where we could build a conservatory, it just doesn’t make sense where we are (not to mention the high cost of such an addition).

During my last winter visit to my favorite local nursery, a different idea came to mind. Walking into their hoop house to look at poinsettias, that same tropical paradise feeling covered me like a blanket fresh from the dryer. Nice! “What if we build a hoop house in our backyard?” I asked my wife. And since she understands me well enough to know what makes me happy, she encouraged me to pursue the idea and call it my Christmas present. Yes, I also have a habit of giving myself big projects as my “gifts”. The pizza oven I built for my last birthday is proof of that.

So, online I went to learn as much about hoop house construction as possible to understand what’s involved and how much it would cost. There are many, many videos on the topic on YouTube, and some of them are very useful. My research taught me what the pros and cons are for various shapes and sizes, and if a single poly layer would work for me or if I should use a double layer with an air space blown in between the layers. And many of these YouTube videos contained useful links to suppliers of hoop house construction materials, from complete kits that ship to your home with assembly instructions to more DIY solutions. I was willing to spend some money to achieve my goal, but not too much. As this is a passion and not a profession, I’m not looking to make a return on my investment and, as I was born in Connecticut, my Yankee frugality also tends to restrain my spending.

Bootstrap Farmer LogoI settled on a solution offered by a company called “Bootstrap Farmer,” which, as their name implies, promised to equip me with a smart solution worthy of a farmer without emptying my bank account. (I have to state here that this is not an endorsement or a paid advertisement. I am sharing my personal experience so you can see what is involved in building a hoop house, regardless of the company you choose.) Since I’m a DIYer, the options they provided allowed me to source some materials from them and the rest from local retailers, saving money on shipping costs. Their website has useful tools that helped me plan my hoop house build and budget my project before I was committed to placing an order. Their instructional videos and manual made what I imagined would be a complex process very doable.

In late December I placed the order for my own Christmas present (my wife is great!), and within a week our friendly UPS driver dropped off a few large boxes. One box was filled with nuts, bolts, screws, metal joints used to connect the hoops, and the gear boxes for the roll-up side kit I chose. The next box contained the tool I’d need to bend the 10-foot metal poles that I’d use to make the hoops, and the third and heaviest box contained the polyethylene cover I’d stretch over the erected hoops. And with that delivery, I was ready to order the rest of my supplies from my local retailer. As those consisted of large and heavy poles and lumber, I chose to have them delivered as well.

Hoop house under construction
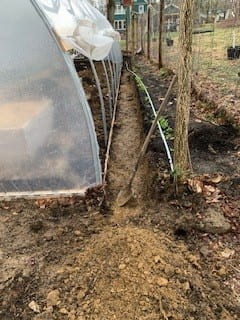
Now that I had all the materials, it was time to start my build. In hindsight, I probably should have timed the project differently. As you can imagine, building an outdoor structure in January is not what you’d call great planning. But passionate as I am, I didn’t let darkness and subfreezing temperatures prevent my dream from coming to life. So outside I worked, using a pickaxe to break through the frozen topsoil, leveling the perimeter where I’d be pounding in the 4-foot-long ground posts—22 in all for the 20’ × 40’ hoop house. Spaced every 4 feet, the ground posts are pounded 2 feet into the ground to leave 2-foot lengths sticking up above the surface. These 1-5/8” steel ground posts are the same as those used for the posts of chain-link fences, and they enable the steel hoops to slide into the 2-foot portion rising above the surface, which are each then secured with a through bolt.

Once the perimeter was leveled, a very good workout for my winter-softened muscles, I spent another day pounding in the 22 ground posts using a level to maintain perpendicularity and a string to ensure all posts were the same 2-foot height aboveground. Then it was time to bend my hoops. Using the hoop bender I ordered, which I mounted to my woodshed, I was able to bend all of the hoops within a hour. Each of the 11 hoops consist of 10-foot-long 1-3/8” steel poles, normally used as the top rail of a chain-link fence. The end of one 10-foot bent pole fits into the other end to create a 20-foot arc that matches the 20-foot width of my hoop house. A self-drilling screw holds them together.

The frame of ahoop house in the snow
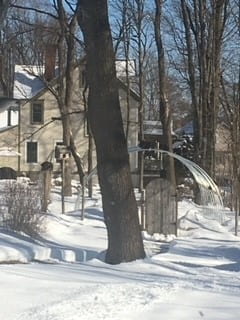
After the hoops were bent and assembled, the magnitude of the structure I was building dawned on me. With the placement of each hoop, I began to see clearly the bones of the “house” I was building over my garden. 20 feet wide by 40 feet long, with a ceiling height of 10 feet, made for a very spacious indoor growing area indeed. I was really getting excited now. And then it came: the dreaded snowstorm I had been racing against. I had hoped to get the poly covering on before the snow, but I was unfortunately not able to beat Mother Nature on that one. My progress slowed for about a month until the deep snow melted, with my activity limited to framing the end walls and building the door in my workshop.

Putting the plastic on the hoop house frame
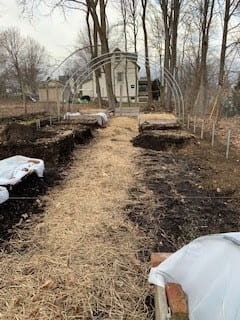
Once the snow finally cleared in March, I was back at it, bolting in place the base boards and hip boards that serve as a solid frame around the base of the structure and provide a surface on which to attach the poly. Now, there are a variety of ways to attach the poly, as the many YouTube videos I watched demonstrated, but I didn’t have to puzzle out my choice, because the Bootstrap Farmer kit I purchased included Wiggle Wire that is “wiggled” into a metal channel to set the poly in place. I screwed the Wiggle Wire along the hip boards and end wall frame boards, and arched it over the hoops at both ends of the structure. Once the poly is pulled over the hoops, the Wiggle Wire sandwiches the poly into the channels and holds the poly taut without puncturing it like staples or nails would. This is how the professional farmers do it, so it seemed like the best option for me.

Then came the hardest part of all, stretching the poly over the hoops and securing it with the Wiggle Wire. Sometimes I wish I was not a DIYer, as doing it yourself is literally impossible if your objective is to lift 100+ pounds of polyethylene film over a 10-foot-tall, 20-foot-wide, and 40-foot-long hoop house. At times like that I wish I had 3 or 4 clones of myself. So back I went to my sainted wife again for advice and assistance. And sure enough, she had a great idea: we could use the winch on our ATV to pull the poly sheeting over the length of the structure and then unfurl it down both sides. Genius! I built a large “spool” contraption at one end, tied a long rope to the end of the spooled poly, and—with my wife as the winch operator and me on a ladder to prevent the poly from snagging on anything—we pulled the poly, stretched it, and secured it with Wiggle Wire in just a couple of hours. (And all, I might add, before the wind had a chance to blow it off.)

Inside of hoop house full of growing crops
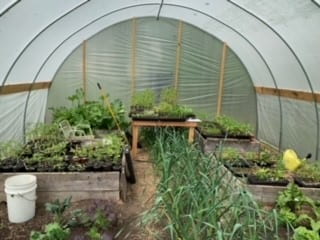
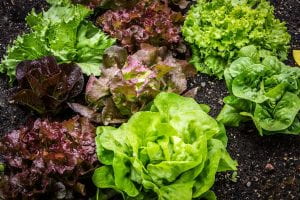
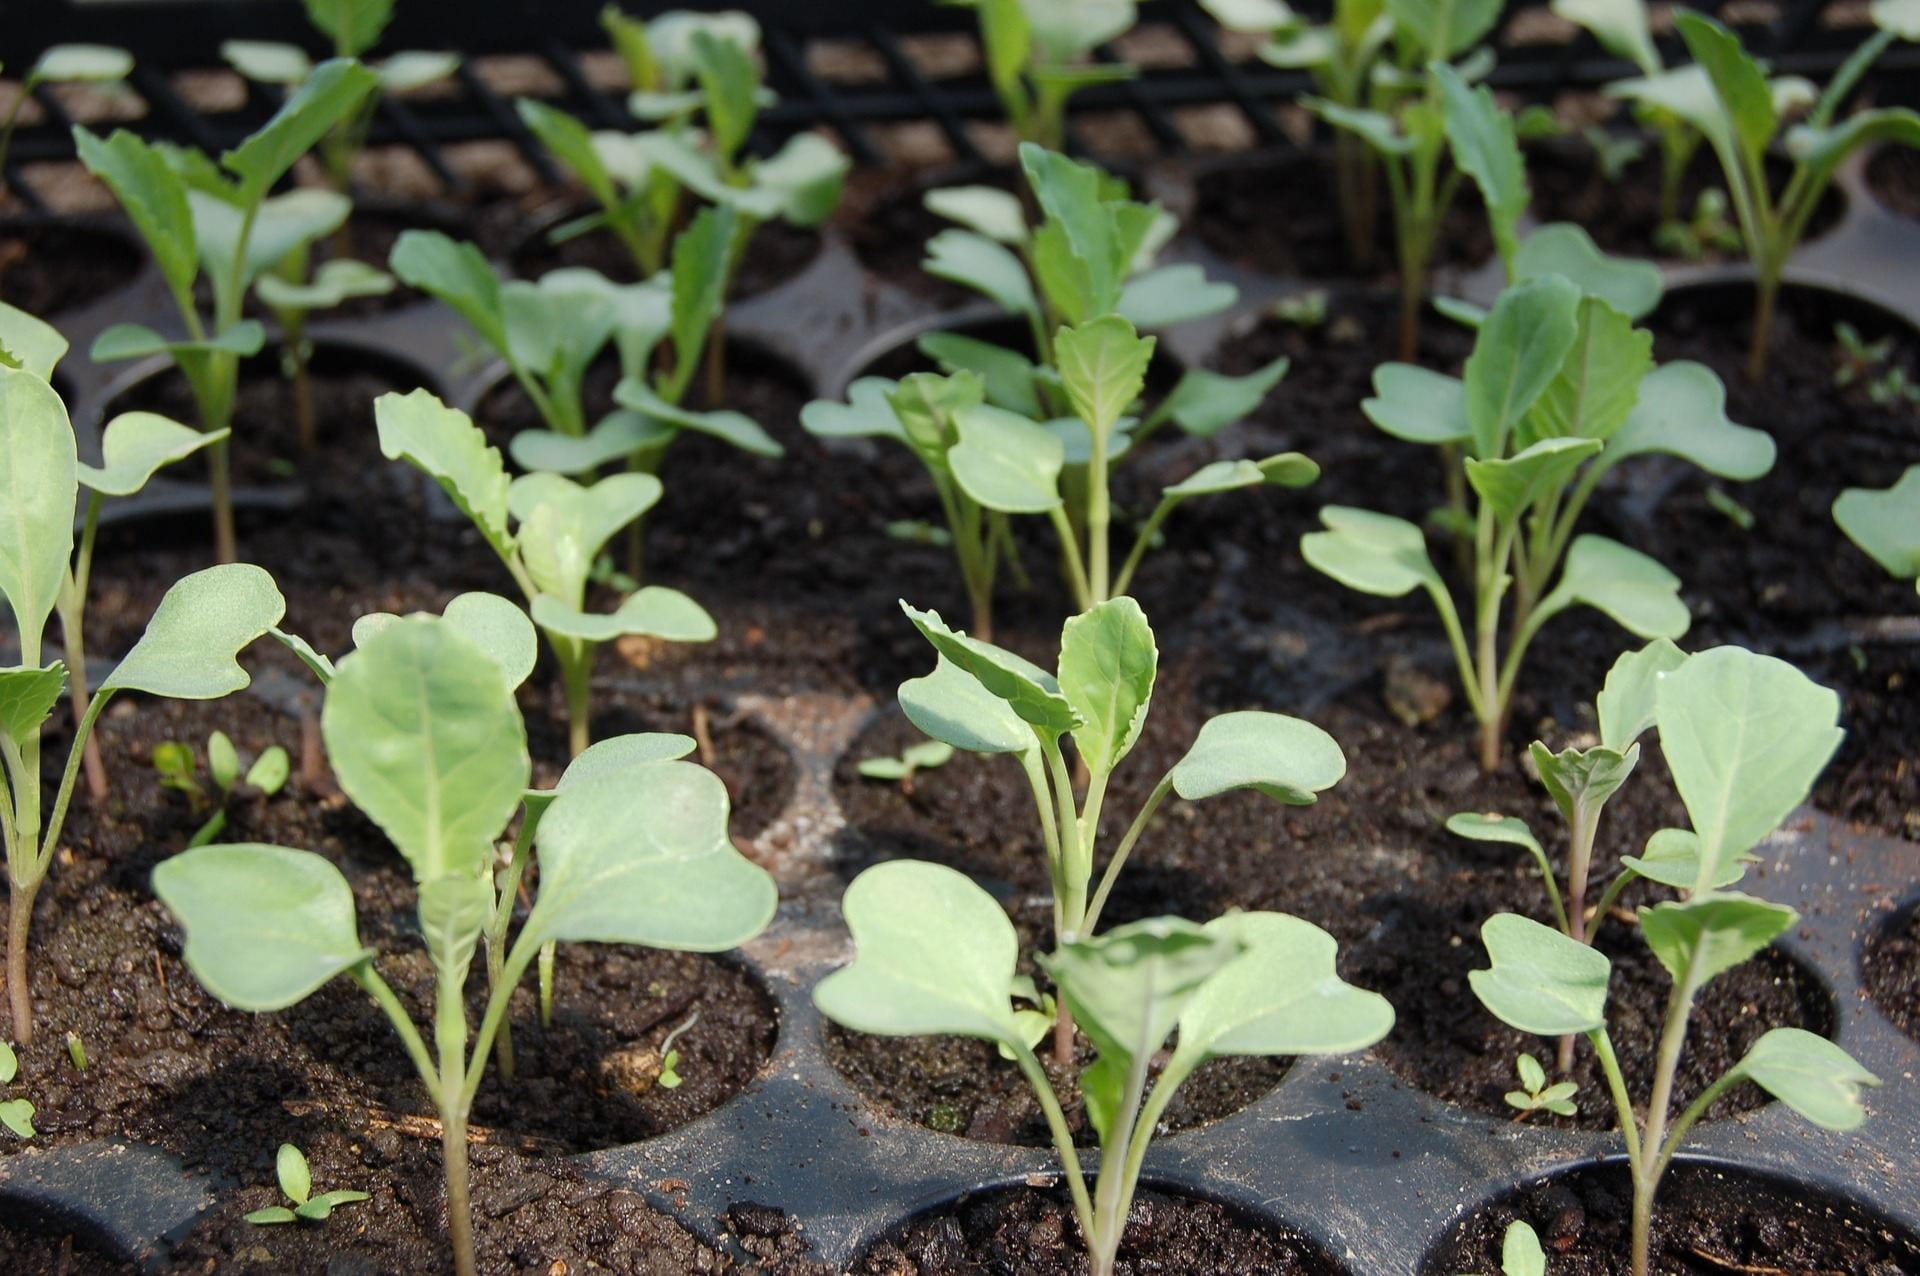
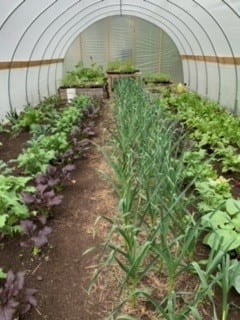
After a few additional hours of trimming the end wall poly and installing the door, our new hoop house was complete. And the next day, with temperatures in the 30’s, my tropical paradise was a reality, with temperatures inside in the upper 60’s. The soil went from being frozen solid to holding steady temperatures above 50° within a week, and my first seedlings were in the ground as of early March. A variety of lettuce, kale, mustard greens, Swiss chard, beets, and Chinese broccoli started filling our kitchen in mid-April. And as my plans are to succession plant this space through the summer and grow my heat-loving tomatoes, peppers, eggplant, and zucchini, I’m hoping to have a banner year. My ultimate goal is to follow the lessons learned in Eliot Coleman’s excellent book Four-Season Harvest and to continue gardening right through the winter. Wish me luck!

Resources for those interested in Extending the Season

If you’re interested in extending the gardening season and making the most of your limited space for as much of the year as possible, here are a few great websites to explore:

Four Season Farm Book List – A list of excellent books to read
about year-round growing in hoop houses.

Bootstrap Farmer – Learn all about hoop house design
options and watch useful instructional videos.

Charles Dowding – Learn about succession planting and inter-cropping growing techniques from a leading practitioner of no-dig gardening:

You’ll find plenty of other material on the web and YouTube to fill hours of your time, but these are just a few recommended places to start.

Inside of a hoop house full of green growing crops

Patience is a Virtue in Planting Outdoors

by Joyce Tomaselli, Community Horticulture Educator, Cornell Cooperative Extension Dutchess County

A version of this article appeared in the Times Herald-Record in May of 2017.

Tray of cabbage seedlingsMany sources provide great advice on sowing seeds.  Key factors include sufficient light and temperature for growing the seeds.  But the question inevitably arises when to transplant them outdoors. Don’t rush.  Cold soil and air temperatures can stress plants.  Wait at least a week or two after the last frost.

The latest map from the National  Oceanic and Atmospheric Administration (NOAA) shows the last spring frost date for the Hudson Valley to be between New York, which indicates April 16th and May 15th. But of course these dates are only guides.  In 2020 we had a hard frost on May 15th that severely damaged many plants.  There is no guarantee that frost will not occur after the last date shown.  This map does not tell you the best time to plant tomatoes or other frost-sensitive crops. That date is usually several weeks after the last frost, after the soil has warmed and nighttime temperatures are reliably well above freezing.

  • Map of the showing soil temperature in the nOrtheastern US on May 10, 2021Nighttime temperatures should be consistently above 45°F, and the soil should be warm, about 70°F.  You can use black plastic mulch to warm soil and/or row covers, hot caps or other protection to keep plants warm early in the season. Remove covers whenever temperatures exceed 85°F.
  • Harden off plants before transplanting by reducing water and fertilizer, not by exposing to cold temperatures, which can stress them and stunt growth.
  • Remember that microclimates have a tremendous effect. Some valleys and low-lying areas can be plagued by late frosts on clear, cold nights when there is radiational cooling.  Large bodies of water (such as the Hudson) may moderate air temperatures at some sites, reducing the chances of frost.

Since plant development is temperature-dependent, rather than depending on specific calendar dates we can make decisions based on Growing Degree Days, a measure of accumulated heat or by observing phenological events of plants.

A branch of forsythia in full blloom - yellow flowersPhenology is a branch of science that studies the relationships such as the life cycles of plants and animals and environmental changes. Seasonal changes such as weather or temperature can be correlated with natural events such as bird migration, plant budding, flowering or fruiting and insect activities.  For example, in the Hudson Valley migrating hummingbirds usually arrive when forsythia bloom. Centuries ago, Native Americans began planting corn when oak leaves are the size of a Snowdrop (Galanthus nivalis).

University of Wisconsin Extension has provided some examples of phenological correlations:

  • Dandelion with a bright yellow flower growing in the crack between two paversPlant peas when forsythia blooms.
  • Plant potatoes when the first dandelion blooms.
  • Plant beets, carrots, cole crops, lettuce and spinach when lilac is in first leaf.
  • Plant corn when oak leaves are the size of a squirrel’s ear.
  • Light purple lilac bloomsPlant bean, cucumber, and squash seeds when lilac is in full bloom.
  • Plant tomatoes when lily-of-the-valley plants are in full bloom.
  • Transplant eggplant, melons, and peppers when irises bloom.

So watch the calendar, but also watch for other clues from nature when you’re making decisions about planting and transplanting outdoors.

Crop Rotation

by Joan Kean, Pine Bush Master Gardener Volunteer

This article appeared in the April 2021 Issue of Gardening in Orange County.

Backyard vegetable garden with raised bedsCrop rotation is the planned, successive cultivation of different crops in a specified order on the same land over time.   Regardless of whether you have acres of farmland, grow vegetables in containers, or anything in between, crop rotation is an important concept to integrate into your growing strategies.  It is a system of cycling a parcel of land through various crops in order to reduce the reliance on chemical fertilizers, pesticides, and herbicides.  It is vitally important to optimal soil health and can increase yields.

The history of crop rotation dates back thousands of years.  The ancient Romans spread their farming practices throughout the Roman Empire.  European farmers followed a Roman cropping system called “food, feed, and fallow.”  Farmers divided their land into three sections.  Each year they planted a food grain such as wheat on one section, feed for livestock such as barley or oats on second section and let the third section lie fallow.  By following this schedule on a rotating basis, when each section lay fallow it recovered some of its nutrients and organic matter.

Today’s crop rotation systems are science based and range from simple to complex.  The succession of crops to be grown is carefully designed to ensure soil nutrients are sustained, pest populations are controlled, weeds are suppressed, and soil health is built.  Each crop uses different types and amounts of minerals from the soil.  If the same crop is planted each year, over time the soil is depleted of the minerals essential for plant growth and health.  In reverse, a different crop will sometimes return missing minerals to the soil as the plant dies and composts or is turned into the soil.

Benefits of Crop Rotation

      • Enhanced soil structure: Rotation preserves and improves soil structure.  Grow crops with different root structures that grow to various depths.  By rotating, the soil is not submitted to just shallow depth crops, but deep-rooted plants that will slowly deepen the topsoil, enhance water absorption and minimize runoff.


      • Reduced fertilizer needs: Nitrogen-fixing legumes in crop rotations or used as cover crops fix atmospheric nitrogen into the soil through root nodules.  This nitrogen is then available for subsequent crops.  Deep-rooted cover crops can draw up nutrients such as potassium and phosphorus from deep in the soil profile, making these nutrients available for subsequent shallow rooted crops.  These and other strategies reduce the need for fertilizer and can reduce the production of greenhouse gases.


      • Reduced pesticide needs:  Insects can over winter in your soil.  They enter the leaves and vines of your plants ready to reawaken in the spring to find their favorite meal.  When you utilize crop rotation, these insects are faced with a plant they don’t feed on.


      • Disease prevention:  Crops that are from the same family tend to have similar disease and insect problems.  Just like insects, plant diseases can over winter in plant leaves, roots and vines under your soil.  Rotating crops helps to guard against these diseases returning the following year.


      • Weed control: Including cover crops into crop rotation systems provides greater competitions to the weeds for their basic needs such as nutrients, space and light.  Cover crops ultimately crowd out the weeds, slowing down weed growth and proliferation for a reduced weed population in subsequent crops.


      • Erosion control: Improved soil structure and reduced exposure to water and wind.  Cover crops are effective in reducing raindrop impact, reducing sediment detachment and transport, slowing surface runoff, and so reducing soil loss.


      • Improved soil biodiversity: Crop rotation changes crop residues and rooting patterns.  Different crops benefit different species, and so a range of crops will lead to a more diverse and healthy soil microbial community.


    • What is Soil Health - Link to Interactive Graphic

How to Rotate Crops

Crop rotation plans range from simple to complex. Ideally crops should be rotated on a three or four year cycle in a planned sequence. Many rotation schemes involve keeping plants of the same family together throughout the rotation. Plant your solanaceous crops (i.e. tomatoes, peppers, potatoes, eggplant) in one area, cucurbits (i.e. cucumbers, melon, squash) in another, and brassicas (i.e. cabbage, broccoli, etc.) in another. The following year you keep the groups the same, but move their location in the garden.

As you explore crop rotation there are lots of tricks to learn. You can add cover crops to your rotation, which are grown between crops and can be used to protect soil, break-up hard pan, increase organic matter, add nitrogen and/or improve soil aggregation. Consider planting nitrogen-fixing legumes (i.e. peas, beans) before heavy feeding crops (i.e. corn). Potatoes yield best after corn, brassicas do well following onions. Some preceding crops (i.e. peas, oats, barley) increase the incidence of scab on potatoes. Beans are not greatly influenced by the preceding crop. Start by keeping a list or diagram of plant locations in this year’s garden and use it to help you plan how to incorporate crop rotation into your vegetable gardening strategy.

Resources

History & Principles of Crop Rotation – Allotment Garden

Learn more about the importance of crop rotation and see examples of three, four and five year crop rotation plans specifically developed for gardeners.

Cover Crops for Home Gardeners – Oregon State University

Crop Rotation on Organic Farms – Sustainable Agriculture
Research and Education – USDA

Although written for farmers, this manual has a plethora of information relevant to gardeners including sample crop rotation sequences.

What is Soil Health? – Sustainable Agriculture
Research and Education – USDA

An interactive exploration of soil health and how to improve it.

Need a Spot to Garden? Join a Community Garden!

by Keith Riddick, Middletown Master Gardener Volunteer

Just Plant It, NY! Food Gardeing for all. Boost Morale & Food Supply with a Garden! gardening.cals.cornell.edu / Cornell Garden Based Learning Logo / Master Gardener Cornell Cooperative Extesnion LogoWith all the uncertainty in the world right now, many people have turned to gardening as a  way of growing their own food as  well as a way to cope with stress and anxiety.   This isn’t the first time that people have turned to gardening during a time of societal upheaval.  Most of us weren’t around, but many families started their own gardens during World War II.  Back then, they were called Victory Gardens.  Food and money were short during the war years, and fresh fruits and vegetables were sometimes hard to come by.   Victory gardens gave people more control over their access to fresh produce and allowed more food to be sent to the troops that were keeping our country free.

A garden trowel stuck in the the soil of a raised garden bedWait! Isn’t gardening a lot of work? It can be, but doesn’t have to be. If you are starting a garden from scratch, it will involve work to prepare the soil (removing sod, large rocks and testing the soil for fertility).  However, if you want a garden bed already prepared for you, consider renting a garden bed at a local community garden.  There are several community gardens located throughout the Orange County with raised beds full of soil and ready for planting.  Chances are there is one not too far from where you live!  There is a short list of community gardens at the end of this article, but there are many more located throughout the county.

During this time, community gardens are taking precautions that allow members to safely grow food.   Although community gardens usually have communal garden tools, at the moment, you should bring your own tools.  Other considerations include limiting the number of people in the garden at one time and finding safe ways to water your garden plot with the communal water source.  When you join a community garden, make sure you are aware of and follow all the rules set in place to keep you and your fellow gardeners safe.

Another perk of community gardens are community plots, like an herb garden, for all to share.  Many also have compost bins for recycling organic material like vines, stems and leaves leftover after you have harvested the edible part of a plant.  This debris decomposes and is then returned to the garden beds as a type of fertilizer.

Pile of cucumbers, a red, yellow and green pepper, green onions, tomatoes, a bunch of parsley and a sprig of rosemaryMaybe a community garden isn’t right for you at this time and you don’t have any space in your yard either.  In that case, you can grow vegetables in containers.  Whether you put them on your patio, your deck, or even your balcony, as long as the plants get enough sun and water you should have a bountiful harvest.  You just can’t beat the terrific taste of fresh produce picked straight from the garden, so grow a garden this summer!

Community Gardens in Orange County New York

Blooming Grove Community Garden

Location: 6 Old Dominion Road
Blooming Grove, NY 10914

Cost: $25 per plot

Contact: Joseph Sciortino
(845) 774-9993
jsciortino49@gmail.com

Middletown Community Garden

Location: David Moore Heights Apartment Complex (off of Genung Street)

Cost: $20 for 4 ft x 16 ft plot
$10 for residents of David More Heights or Summitfield)

Contact: Jackie Hale
(845) 343-1168
jackie@middletownhousing.org

Montgomery CAC Community Garden

Location: Benedict Park
Rte 17K
(one mile west of the village of Montgomery, NY)

Cost: $25 for 20 ft x 20 ft plot

Contact: Richard Phelps
rlphelps@frontiernet.net

Newburgh Armory Unity Center Community Garden

Location: Newburgh Armory Unity Center
321 South William Street
Newburgh, NY 12550

Cost: $20 for 4 ft x 10 ft plot
$40 for 4 ft x 40 ft plot

Contact: Lisa Rittweger
(845) 978-8845
lrittweger@newburgharmory.org

Warwick Community Garden and Orchard

Location: Warwick Valley Community Center
11 Hamilton Avenue
Warwick, NY 10990

Cost: $35 per year (includes garden and orchard)
There are no individual plots.  All members work together to plant, maintain, and harvest the entire garden.

Contact: Kelly Collins
(845) 978-8845
colli642@gmail.com


Out in the Garden

As the days get warmer and the sun sets later and later, I hope you all have the opportunity to spend more and more time outside.  Sunshine and fresh air are good for the soul!

If you happen to have a garden or have decided that this is the year to start one there are lots of things to keep you busy at this time of year!

Perennial Beds

A mantis egg mass, straw colored foam like mass the size of a golf ball, on the branch of a forsythia bush covered with yellow flower buds
Mantis ootheca on forsythia

Hopefully you waited until spring to clean up your garden to allow beneficial insects and other arthropods such as bees and butterflies to overwinter.  Now that spring has sprung you should leave debris as long as you can to give these creatures a chance to emerge from their winter hiding places.  You should start carefully removing debris from around blossoming plants.  If you must cut back hollow stems, bundle them so any pollinators overwintering inside have a chance to emerge.   As you are cleaning up be on the look out for praying mantis egg cases know as ootheca.   This is one time when you should leave things till tomorrow!

Freshly mulched garden bed in front of a house
Freshly mulched garden beds

Mulching is another spring time activity.  There are many different types of organic mulch that will not only suppress weeds, but also add organic material to the soil as they break down.  You don’t have to mulch everything, in fact many ground nesting bees such as bumble bees need a bit of bare earth to make their nests.  And if you are mulching your trees make sure to keep the mulch at least 3 inches away from the base of the tree so that it is not touching the bark.

And it is never to early to start weeding!  Lots of winter annual weeds such as common chickweed and prickly lettuce have already sprouted!

Vegetable and Herb Gardening

Starting Seeds Indoors

It is not to late to seed one more round of cool season crop such as cabbage, kale,  and lettuce, but it is also time to start seeding warm season crops such as eggplant, peppers, and tomatoes.

To start seeds you will need:

      • seeds
Several flats of seedlings
Flats of seedlings

There are lots of places online where you can purchase seeds. If you still have seeds left over from last year and don’t know if they are still good, don’t throw them out, try this simple home germination test.

      • sterile potting mix

It is important to use sterile potting mix to avoid disease issues like damping off.  Do not reuse potting mix and do not use garden compost.

      • container
20 or 30 chard seelings sprouting in a small plastic container filled with soil
Rainbow chard seedlings in a supermarket salad container

You don’t need to buy a fancy container to start seeds.  Just make sure the container has been sterilized and has drainage holes.

      • water

You want to keep the soil moist, but be careful not to over water or you may have a problem with damping off.

      • light source
A bookcase converted into a light frame for seedlings -grow lights above seed trays placed on the shelves
Bookcase converted into a grow frame

Some seeds need  light to germinate, but all seeds need light after they germinate. Once your seeds sprout  a light source will help prevent them from becoming leggy.  You can purchase grow lights or just use a soft white fluorescent bulb.  Here are directions on how to build a Low-Cost Grow-Light Frame.

      • heat
Mini greenhouse made from areused plastic container covering a small tray with 8 small cups of soilEight small cups of soil
Mini greenhouse

Most seeds will germinate between the temperatures of 55°F and 75°F,  but the optimal temperature for each type of seed varies.  You can create a mini-green house to trap heat and moisture.  You can also buy heating mats to warm the soil.  Click here to see  Soil Temperature Conditions for Vegetable Seed Germination.

Out in the Garden

A small child in a jean shirt, teal skirt and bright yellow rain boots put seeds in the ground
Planting peas

Gardening is an activity for the whole family!  Children love helping plant seeds!  Right now you can be direct seeding cool season crops in your garden such as beets, carrots, lettuce, peas, radishes, spinach, and turnips.  If you want to have a continual harvest, consider succession planting or  seeding several smaller plantings of the same crop at timed intervals, rather than all at once.

Chive plant in a raised garden bed
Chives

While most people are busy seeding, some perennial plants are already coming up or even ready to harvest!  Chives are a great example of a perennial that allows you add something fresh and green to your meals in the early spring.  If you planted chives in your garden last year, they are probably already making their way to your table.  This perennial of the onion family begins growing in early March and is able to be snipped with scissors and eaten soon after and throughout the growing season right up until the fall frost.

Crinkly green and dark purple leaves with bright pink stems sticking out ogf the soil
Rhubarb

Another perennial making an appearance is rhubarb!  Rhubarb is a great addition to any vegetable garden and as it is deer resistant and highly attractive it can also be used as part of your edible landscape.  Although the leaves of rhubarb are considered poisonous, the stems of this spring crop that can be used to make the classic strawberry rhubarb pie as well as many other delicious snacks.

Click here for vegetable gardening resources! 

And as always, if you are having any issues in your garden, need help identifying the cause of a problem or figuring out a management strategy give us a call.  Our Garden Helpline phones are staffed April – November, Monday, Wednesday, and Friday, from 9:30 am – 12:30 pm.  But you can always leave us a message or send us an e-mail.

Call (845) 343-0664 or e-mail your questions to mghelpline@cornell.edu.


Whatever kind of garden you have, spend some time enjoying its beauty!

A hanging ball of greens and fuzzy pussy wilow branches
December’s Kissing Ball transformed into a ‘Kitty Ball’ by the addition of Pussy Willow branches

Thanks to all of the Master Gardener Volunteers who provided their thoughts and photos for this post!

Vegetable Gardening Resources

Although it seems like no one really knows what is going on right now or how long this situation is going to last, one thing that I am sure of is that there is no time like the present to start your own vegetable garden!

Whether you’ve been growing vegetables for 30+ years or this will be you first year, here is a list of resources that should help you along the way.


Vegetable Gardening Resources – Getting Started!A cucurbit seedling showing the two cotelydons and the first true leaf just starting to unfold.

  • Beginning a Vegetable Garden This resource takes you through choosing a location for you garden to dealing garden pests.
  • Vegetable Growing Guides From artichoke to zucchini, find information about site characteristics and plant traits as well as growing information and special considerations.
  • Vegetable Planting Guide This resource includes a chart that shows when you should seed things inside, when you should seed things outside and when it is time to transplant. (Note: Although written for Rockland County, it works Orange County as well.)
  • Average Last Frost Date Although the last frost date is important, keep in mind that even after the last frost, cool temperatures will stress warm season crops like peppers and tomatoes.  These crops like nighttime temperatures consistently above 45°F and soil temperatures at about 70°F.
  • Soil Amendments and Fertilizers This guide includes fertilizer guidelines by plant group as well as information about pH adjusters, growth stimulants and potting mixes

Soil Samples

A trowel stuck in a raised garden bedBefore starting a garden, it is always a good idea to get a soil test.  As our office is closed, we are no longer accepting soil samples at this time.  Fortunately, if you need your soil tested, you can mail it directly to the soil testing lab, Dairy One.

Once you have your results, we would be more than happy to answer any questions you may have.

Vegetable Garden Problems

  • Vegetable Pests Colorado potato beetle on a potato stemFrom cucumber beetles and aphids to spider mites and slugs, this guide will help you identify your pest and give you tips on how to manage it.
  • Vegetable Diseases Choose your vegetable and then look through Fact Sheets and Information Bulletins to help identify the disease and learn the best way to manage it. 
  • Vegetable Cultural and Environmental Problems Sometimes you might think your plant has a disease when in fact the problem is not caused by a pathogen but environmental conditions or a cultural practice.  This resource will help you diagnose your problem and teach you what you can do about it.

Garden Helpline!

Garden Helpline Card (Information in text below image.)If you need help identifying the cause of a problem or figuring out a management strategy give us a call.  Our Garden Helpline phones are staffed April – November, Monday, Wednesday, and Friday, from 9:30 am – 12:30 pm.  But you can always leave us a message or send us an e-mail.

Call (845) 343-0664 or e-mail your questions to mghelpline@cornell.edu.


So in the time of uncertainty, I encourage you to grow some food.

Stay home!  Stay safe!  Be well!  Happy Gardening!