Upping your compost game

Few gardeners would say that they have all the compost they would like for their gardens. The good news is that you can increase the amount of compost you produce with a method developed by Helen and Scott Nearing that is described in their books, “Living the Good Life” and “Continuing the Good Life.” I’ve been composting for the last 44 years. What follows is a description of the Nearing methods that I have modified over time for the North Country.

Most home compost piles are approximately three feet by three feet which is small enough to allow oxygen in on all sides. In the metho I use, a “chimney” brings air to the center of the pile, allowing an increase in pile size and the production of far more compost.

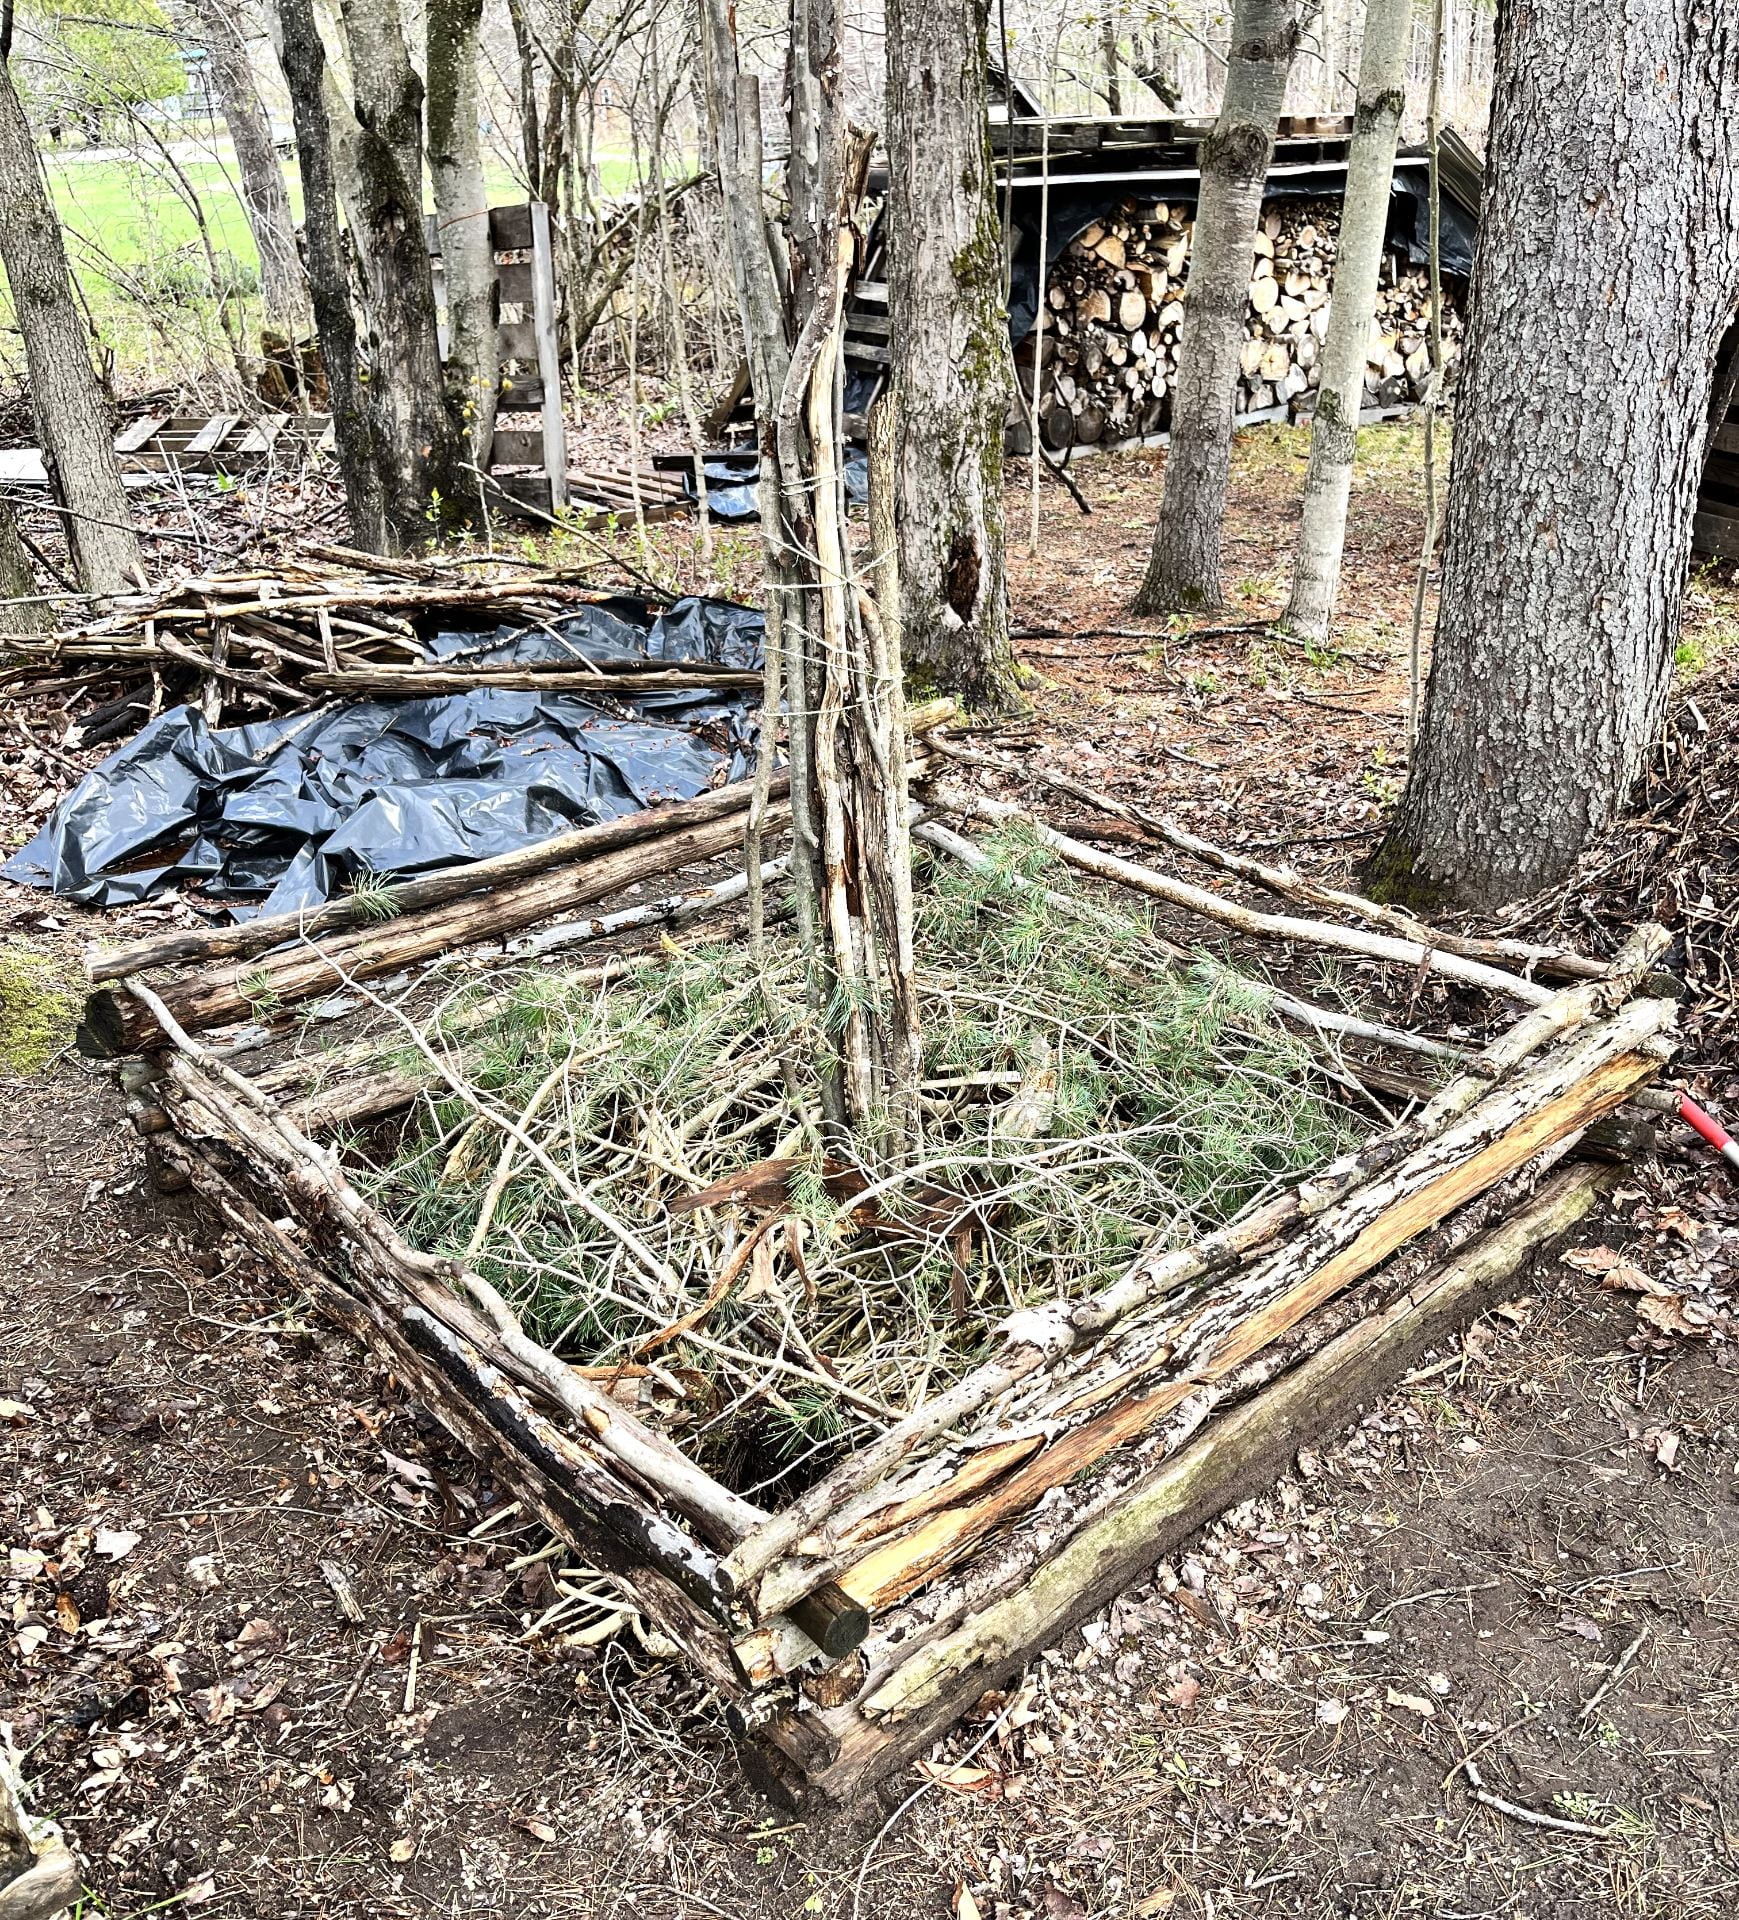
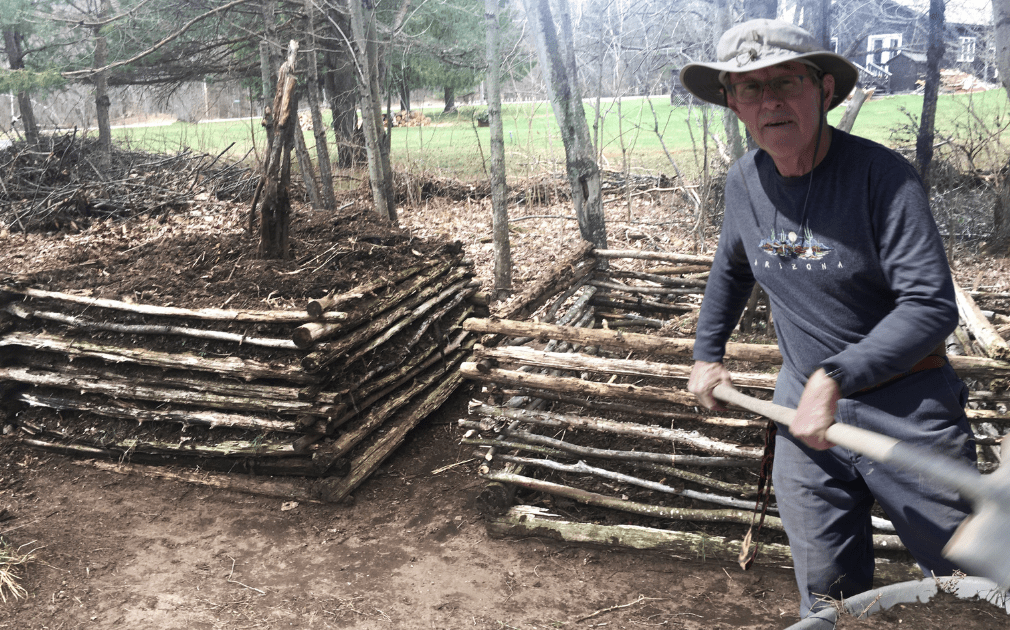
The process starts with picking a location. It should be well drained and shaded. To contain the pile, use six foot long poles ranging from one to three inches in diameter. It’s good if they are straight, but they can be slightly crooked. I cut mine from my woods, but if you don’t have your own, you may have friends that will allow you to cut understory trees or trees on the margins of their woods. Don’t use pressure treated wood. 

Start the pile by placing two poles on the ground, parallel to each other, about six feet apart. Then add two more parallel to each other and perpendicular to the first two with the ends overlapping, making a square slightly less than six feet by six feet. Remove the sod and topsoil from within the square and set aside for later use in the pile. Use a fork to loosen the soil under the pile. Make a central chimney by bundling multiple poles approximately one inch in diameter and at least six feet long. They can be tied together with bailing twine and do not have to be perfectly straight. Make a hole in the center of the square with a digging bar and  or insert or pound the poles in to create a vertical bundle. These poles will create a chimney to supply oxygen into the center of the pile.

Shows the start of the compost frame with the chimney in the center
See how the poles are stacked with the chimney bundle in the center.

Read more Upping your compost game

Getting Started Growing Tomatoes

For those new to gardening it can be hard to know where to begin. You may see a picture of a beautiful garden with all the different vegetables and wonder how you’ll learn to grow them all when they have different nutrient needs, spacing, diseases, etc. My recommendation is to focus your energy on growing one or two staple crops – a more achievable goal – and adding more once you feel more confident. This fact sheet will cover how to grow tomatoes, a popular and versatile crop you can enjoy fresh, processed into salsa or sauce, or canned for winter use. Here’s what you’ll need to know to successfully grow tomatoes in the North Country, starting with site prep and ending with frost protection.

 Site and layout

First consider the garden site and whether it is suitable for growing tomatoes.

  • Does it receive enough light? Tomato plants need at least six to eight hours of direct sunlight each day – the more the better.
  • Is the pH of the soil in the ideal range of 6.0-6.8? Contact CCE about soil testing services and interpretation of test results and recommendations at SLCGrowline@gmail.com.
  • Is there water at the site? Adequate water is essential, particularly when seedlings are young, and when the plant is fruiting.

A rule of thumb for estimating the number of plants needed is three to five tomato plants per family member. For a family of four, two dozen tomato plants would provide some extra tomatoes for canning and making sauce.  When planning the layout of a tomato planting, allow two to three feet between each plant within the row and three to four feet between rows. For example, two rows of twelve tomato plants spaced two feet apart with three feet between rows would be about eight feet by twenty-six feet, or 208 square feet. This includes a two-foot perimeter on all sides of the tomato plants for paths. Drawing up a sketch of the tomato patch will be helpful.

Tomatoes benefit from ample space for air circulation and sun penetration.

Culture

Timing: Tomatoes are in the “very tender” category of vegetables, which means they like warm weather and can be damaged or killed by frost. For this reason, tomatoes are generally planted in late May here in Northern New York, as transplants which were started from seed five to eight weeks earlier. 

Transplants: Ideal for the beginner, transplants are readily available from greenhouses or farm and garden supply outlets. Buying plants that are local is a good idea since plants from outside of the region have on occasion introduced plant diseases from other parts of the country. When selecting transplants, look for healthy, stocky plants with dark green leaves, healthy roots, and thick stems. Be sure to check the plants carefully for insects. Ideally, plants will be six to eight inches tall. Bigger is not necessarily better in tomato plants; tall, spindly tomato seedlings may be set back when transplanted.

tomato transplants before and after planting
Tomato seedlings give us a head start on a short growing season and on weed competition.

Varieties: While there are hundreds of tomato varieties, most retailers will have a far more limited selection divided into three categories: standard (or “slicers”), paste, or cherry. Standard varieties are meant for eating and canning; paste tomato varieties such as Roma or Amish paste are best for making tomato sauce; cherry tomatoes have small bite-size fruits that are great to eat fresh, enjoy in salads or dehydrate as halves. Ask the sales staff for assistance if it is not clear which varieties they have.

Note: The term “indeterminate” refers to tomatoes that continue to grow and produce fruit until they are killed by frost, whereas “determinate” tomatoes are varieties that reach a more modest height (though they still benefit from trellising) and have a much smaller harvest window.

Read more Getting Started Growing Tomatoes

Festivities at the Learning Farm

On Saturday May 6th, Extension’s Harvest Kitchen and high tunnel were filled with families and friends enjoying the beautiful sunny day during the Grow and Preserve Open House. Visitors learned about numerous food preservation and gardening resources available at Extension through an assortment of activities. We shot some photos of all the happenings, check them out below!

MFP
As a result of our many years of teaching food preservation classes, the Harvest Kitchen has a well-stocked kitchen. For the Open House, we assembled a Preservation Equipment Showcase so community members could wander through the shelves to compare tools. In 2022, after 50 years of putting up food for her own household, Mary Robinson went through the training to become a Master Food Preserver volunteer. She’s pictured here, sharing information about food preservation with a visitor. Other volunteers sharing their experiences in preserving the harvest include Kathryn Farr, Sasha Kocho-Williams, and John Youngblood.
MFP
One thing our Master Food Preserver volunteers love is how canned foods pack a lot of flavor while simplifying future meals. Danielle Barse and Jan DeWaters gave out free samples of chili and corn relish in the Harvest Kitchen, along with the recipes to make these water bath canned and pressure canned recipes at home.

Read more Festivities at the Learning Farm