Beneficial Nematodes: Holy Grail of Organic Pest Control?

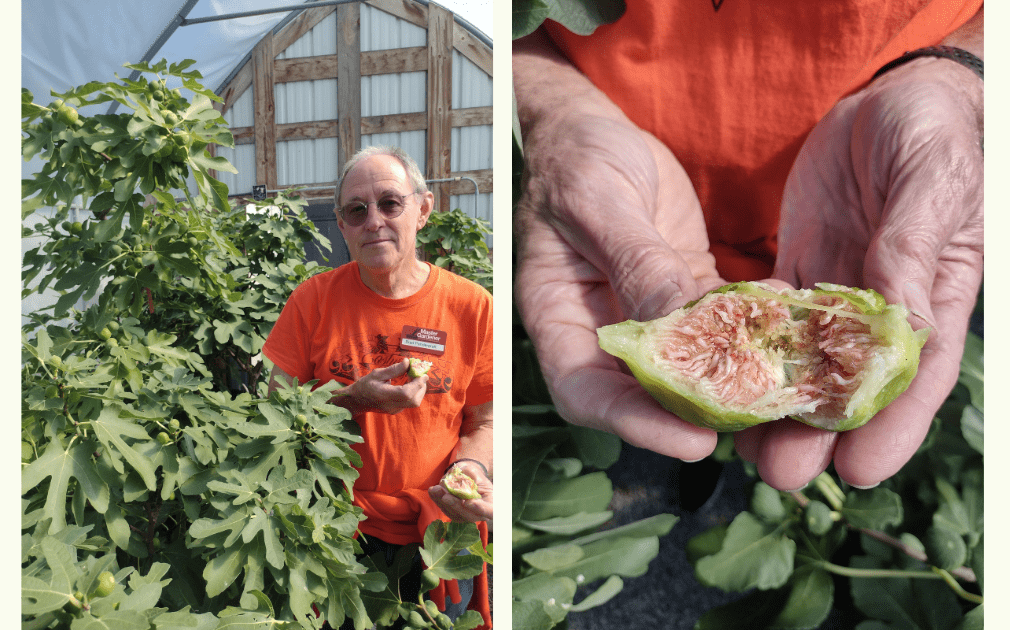
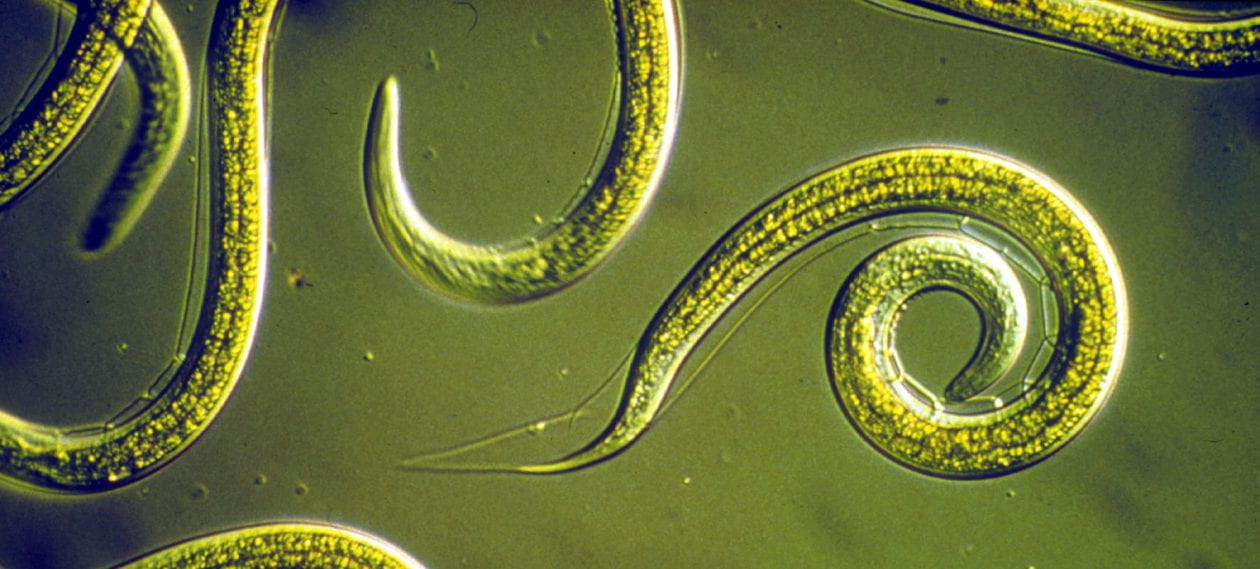
One of the most difficult things for me to deal with as an organic gardener is how to control insect pests in my garden and small orchard. There are times that none of the organic controls that I implement do a very good job in controlling insect damage. The two insect culprits I find the most difficult to control are striped cucumber beetles and squash vine borers, both of which feed on plants in the curcurbit family which includes squash, melons, pumpkins, and zucchini. I’d like to share a bit more about these insects and then about how I’m using beneficial nematodes to control their population in my garden.

Cucumber beetles have evolved to perfectly time their emergence from the soil to coincide with the time cucumber seeds germinate and pop out of the ground. The first generation of beetles overwinter in the soil, undergo pupation, and then emerge as adults. Their first order of business is to attack the new cucumber plant’s first two leaves (called cotyledons) and then any new leaves and stems that have grown. Adult feeding can set back plant growth and may at times even kill the plant altogether. Adult beetles will then breed and females lay their eggs on the soil at the base of the plant. Eggs hatch in a few weeks and larvae burrow into the soil to begin feeding on roots and parts of the plant stem underground.

Striped cucumber beetle causing damage

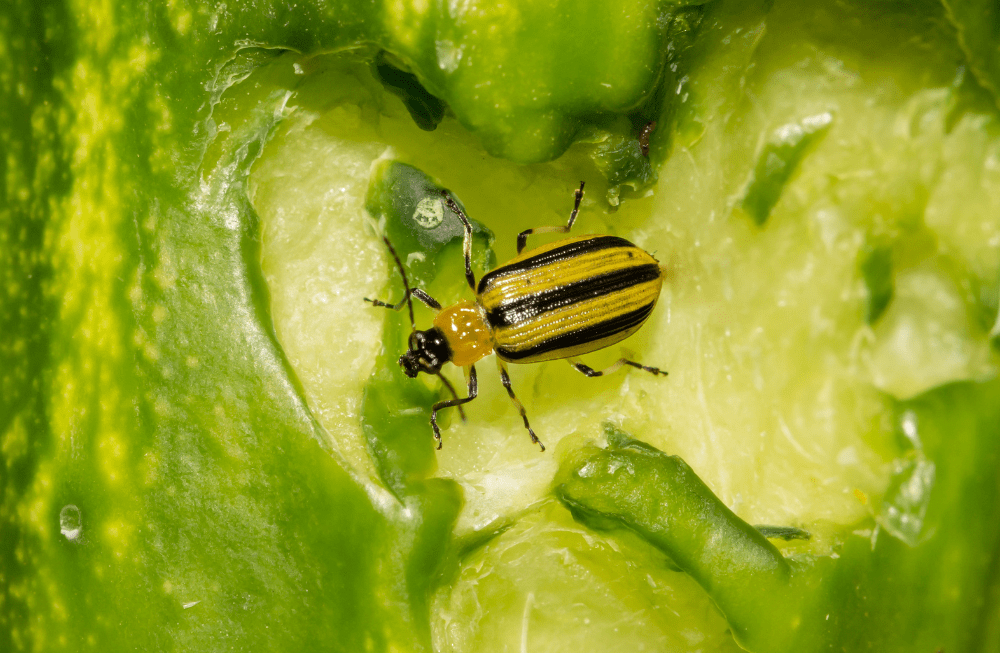
And that’s just the first generation of beetles! If you’re lucky enough that your plants survive the initial round of attack and are thriving under the June sun, a second generation of beetle larvae are busily consuming roots and maturing in the soil. About 40 days after hatching, the new brood of adult beetles will emerge to feed heavily on the flowers, leaves, and vines of your plants. This second generation of beetles will not only set back plant growth and fruiting, but may also introduce bacterial wilt into the plants. Bacterial wilt closes off the transport of water up the stems and to the developing fruit, causing the plant to wilt and die over just a few days. Eggs are again laid on the soil surface, they hatch, and larvae dig into the soil looking for roots to feed on. These larvae will overwinter in the soil to emerge the following spring as adults. Read more Beneficial Nematodes: Holy Grail of Organic Pest Control?

Meet Brad Pendergraft, Master Gardener Volunteer

Can you remember the moment you decided to become a gardener, or when you realized you had become one? 

When I was a young kid in the Texas panhandle my parents bought an extra strip of land beside the house we built for a garden. My Mom was the gardener and my dad did the rototilling; pretty traditional, but it was the 1950’s. Later we moved to Gunnison, Colorado where there had been a frost recorded on every day of the year, so as you can imagine gardening was difficult there, but my Mom did it. Seeing her perseverance over the years even in unpredictable conditions was motivating. I later decided I wanted to become a homesteader. 

What tool can’t you do without in the garden / what is a garden invention or plant variety you wish would be developed?  

When I first started gardening I bought tools from a company called “Smith and Hawkens”.  They imported forged tools from England. I love them. I fork my entire 40’ by 60’ garden using the four-tine digging fork and their long-handle shovel is my favorite shovel.

What plant do you wish you’d never planted in your garden?

Tomatillos are a mixed bag as much of life is a mix of good and bad. I love serrano tomatillo salsa, but if you compost the fruits of the tomatillos you end up with baby tomatillo plants everywhere, coming up like a carpet covering the garden beds. On the plus side, the plants add organic matter to the compost. 

I tie my tomatillos with bailing wire and stay vigilant about where the seeds end up.

Read more Meet Brad Pendergraft, Master Gardener Volunteer

Soil Testing Primer

On the Growline we get a lot of questions about how to take or submit soil samples, so we’ve put together some frequently asked questions and answers to make it easier. After the why, where, when, what and how of this process, read on to find out who can help you interpret the test results.

Why should I test my soil?

The health of your soil will determine the health of the plants you grow, whether it be a lawn, a field of flowers, vegetables, berries or trees. A thoughtful approach considering the physical, chemical and biological factors that play a role in the total health of your soil will help you get the best results.

So where do you start?

Have a clear idea of what you want to know about your soil and what you want to learn from getting your soil tested. What will you plant? Where is it located? What was planted there before? What are the “neighbors” – plants or trees surrounding the area? Do you know your soil type – sandy, clay, loamy? Each unique area will need to be sampled separately.

  • Web Soil Survey use to get description and identify type of soil (sandy, clay, loamy)

When should I test my soil?

Fall is generally considered to be the best time to collect a sample for testing, especially when considering the pH of your soil, however it can be done in the spring or anytime during the growing season. 

What do I need?

Gather a few clean tools without rust. Avoid brass or galvanized tools or containers as they will skew your results. A stainless steel probe or soil auger is ideal, but a clean plastic bucket and a rust free trowel or shovel will work for any home gardener. You will also need to double bag your sample in 2 quart-sized sealed zip-lock baggies for each sample area.

How do I take a soil sample?

Walk across and around your garden area in a random, zigzag manner and make about 10 different 4-6 inch deep holes. From each hole, carefully slice a thin vertical section that represents all depths of the soil. Put each slice in your bucket and mix thoroughly. Remove large roots and stones, crush any large lumps or clods, and place about 2 cups of the well mixed soil in a double zip-lock bag. Avoid sampling in wet conditions and in areas where lime or fertilizer has been recently applied. 

Read more Soil Testing Primer