Few gardeners would say that they have all the compost they would like for their gardens. The good news is that you can increase the amount of compost you produce with a method developed by Helen and Scott Nearing that is described in their books, “Living the Good Life” and “Continuing the Good Life.” I’ve been composting for the last 44 years. What follows is a description of the Nearing methods that I have modified over time for the North Country.
Most home compost piles are approximately three feet by three feet which is small enough to allow oxygen in on all sides. In the metho I use, a “chimney” brings air to the center of the pile, allowing an increase in pile size and the production of far more compost.
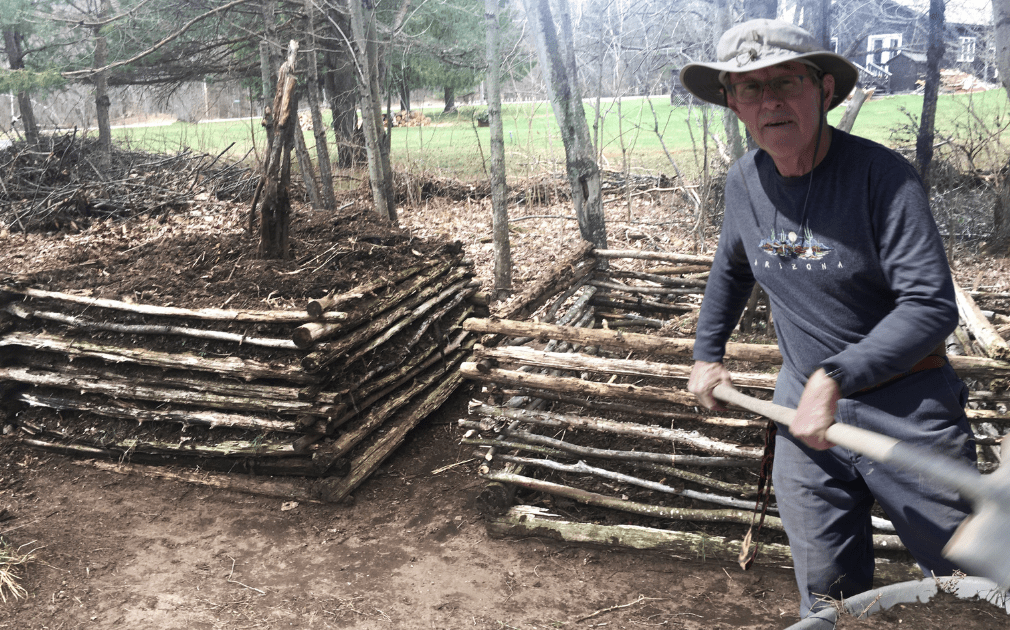
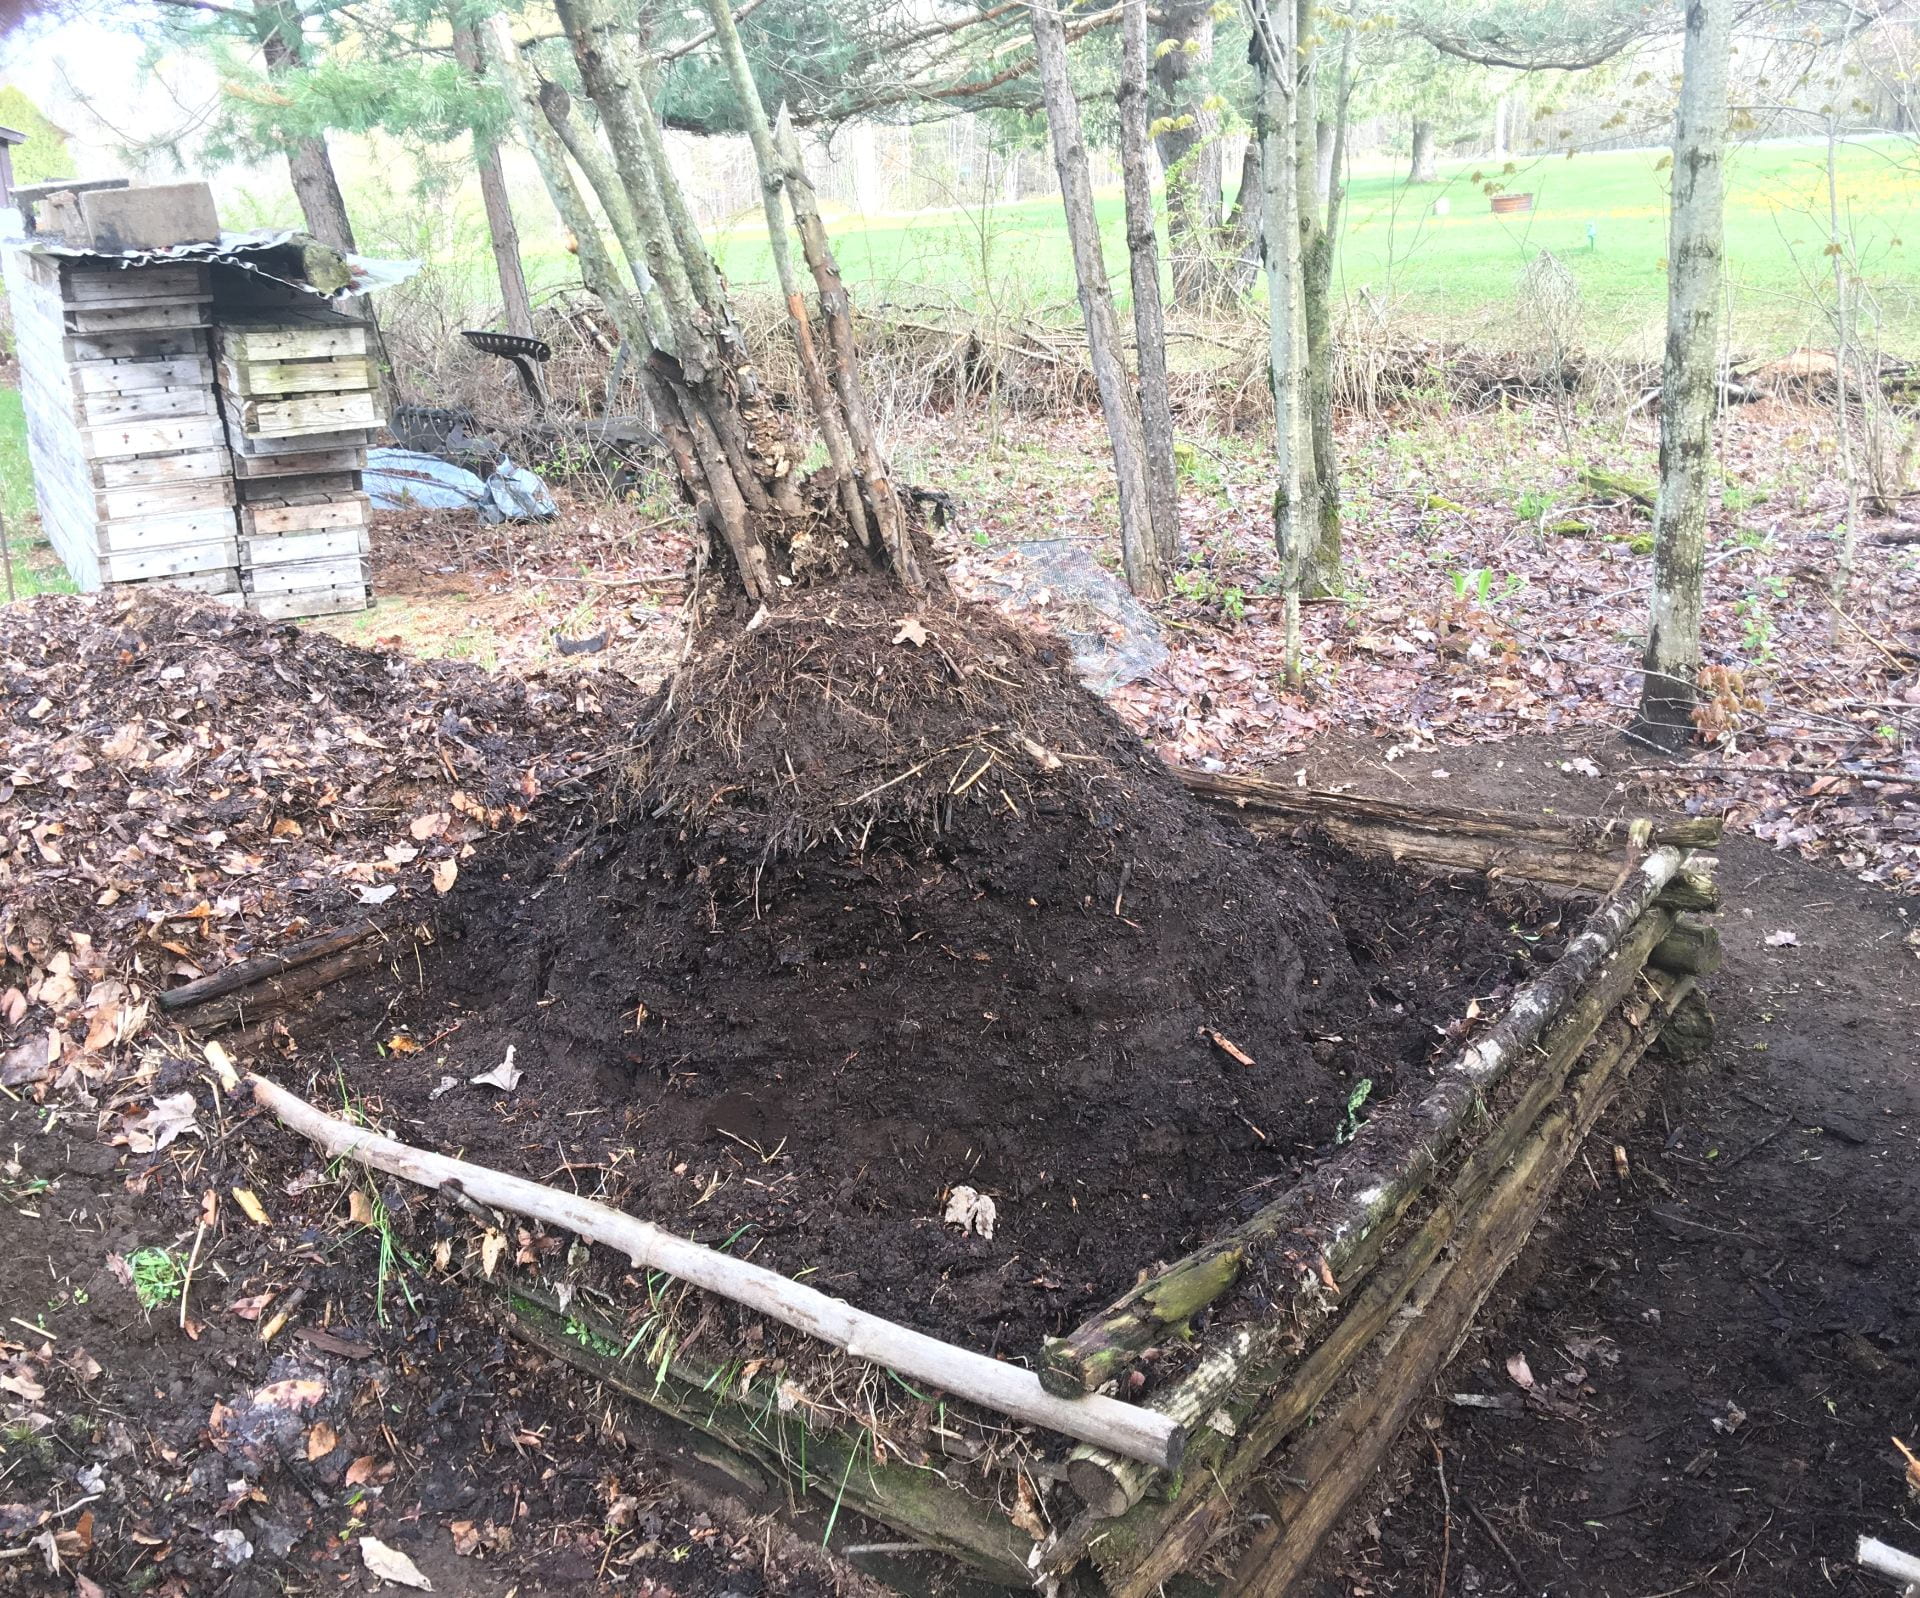
The process starts with picking a location. It should be well drained and shaded. To contain the pile, use six foot long poles ranging from one to three inches in diameter. It’s good if they are straight, but they can be slightly crooked. I cut mine from my woods, but if you don’t have your own, you may have friends that will allow you to cut understory trees or trees on the margins of their woods. Don’t use pressure treated wood.
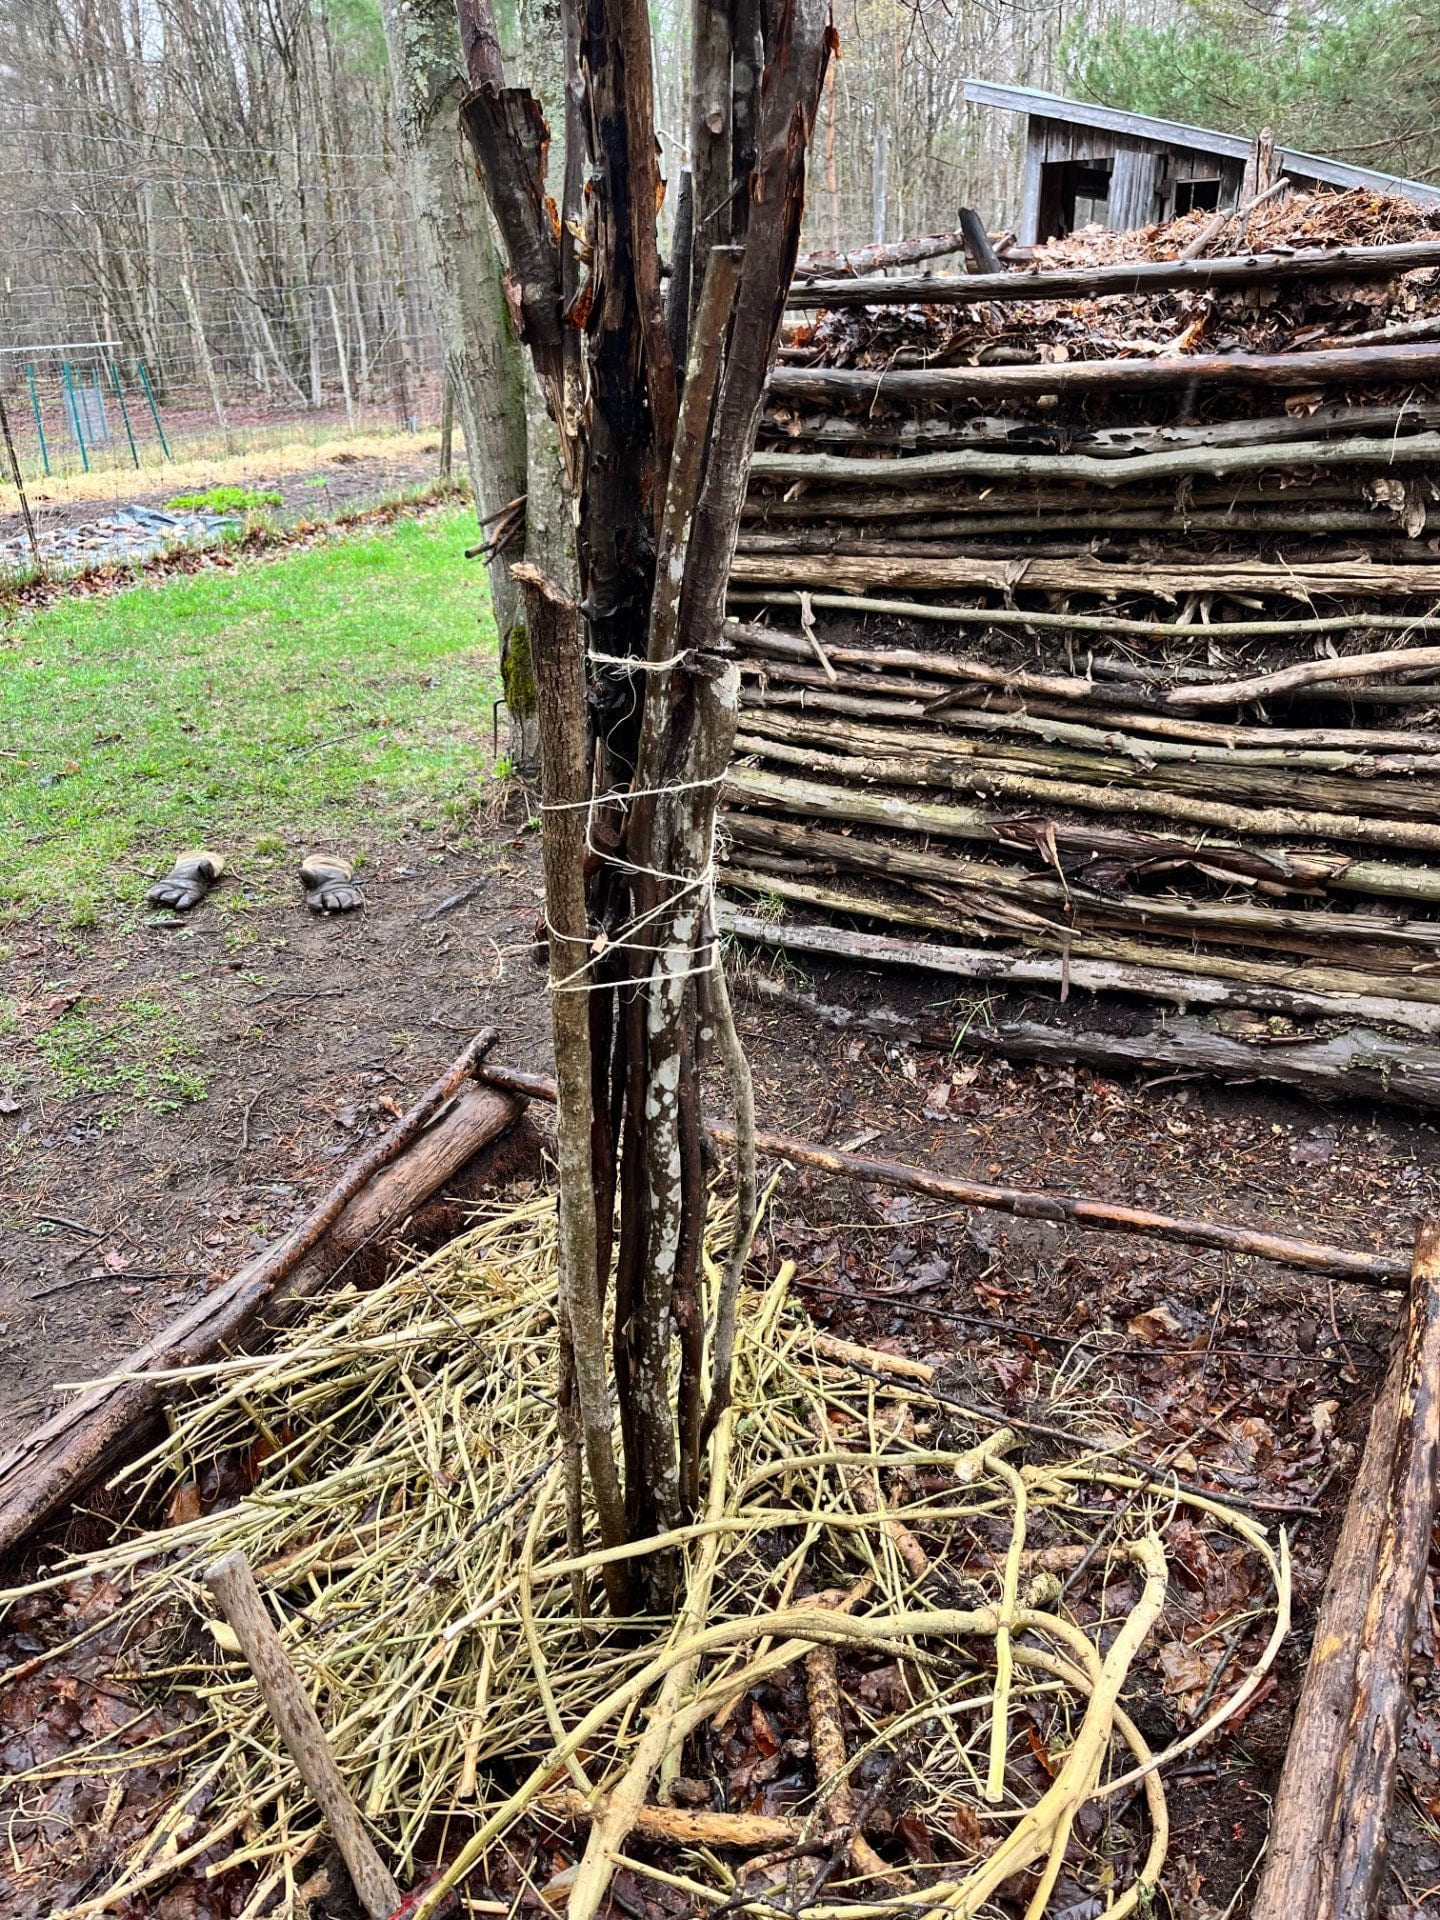
Start the pile by placing two poles on the ground, parallel to each other, about six feet apart. Then add two more parallel to each other and perpendicular to the first two with the ends overlapping, making a square slightly less than six feet by six feet. Remove the sod and topsoil from within the square and set aside for later use in the pile. Use a fork to loosen the soil under the pile. Make a central chimney by bundling multiple poles approximately one inch in diameter and at least six feet long. They can be tied together with bailing twine and do not have to be perfectly straight. Make a hole in the center of the square with a digging bar and or insert or pound the poles in to create a vertical bundle. These poles will create a chimney to supply oxygen into the center of the pile.
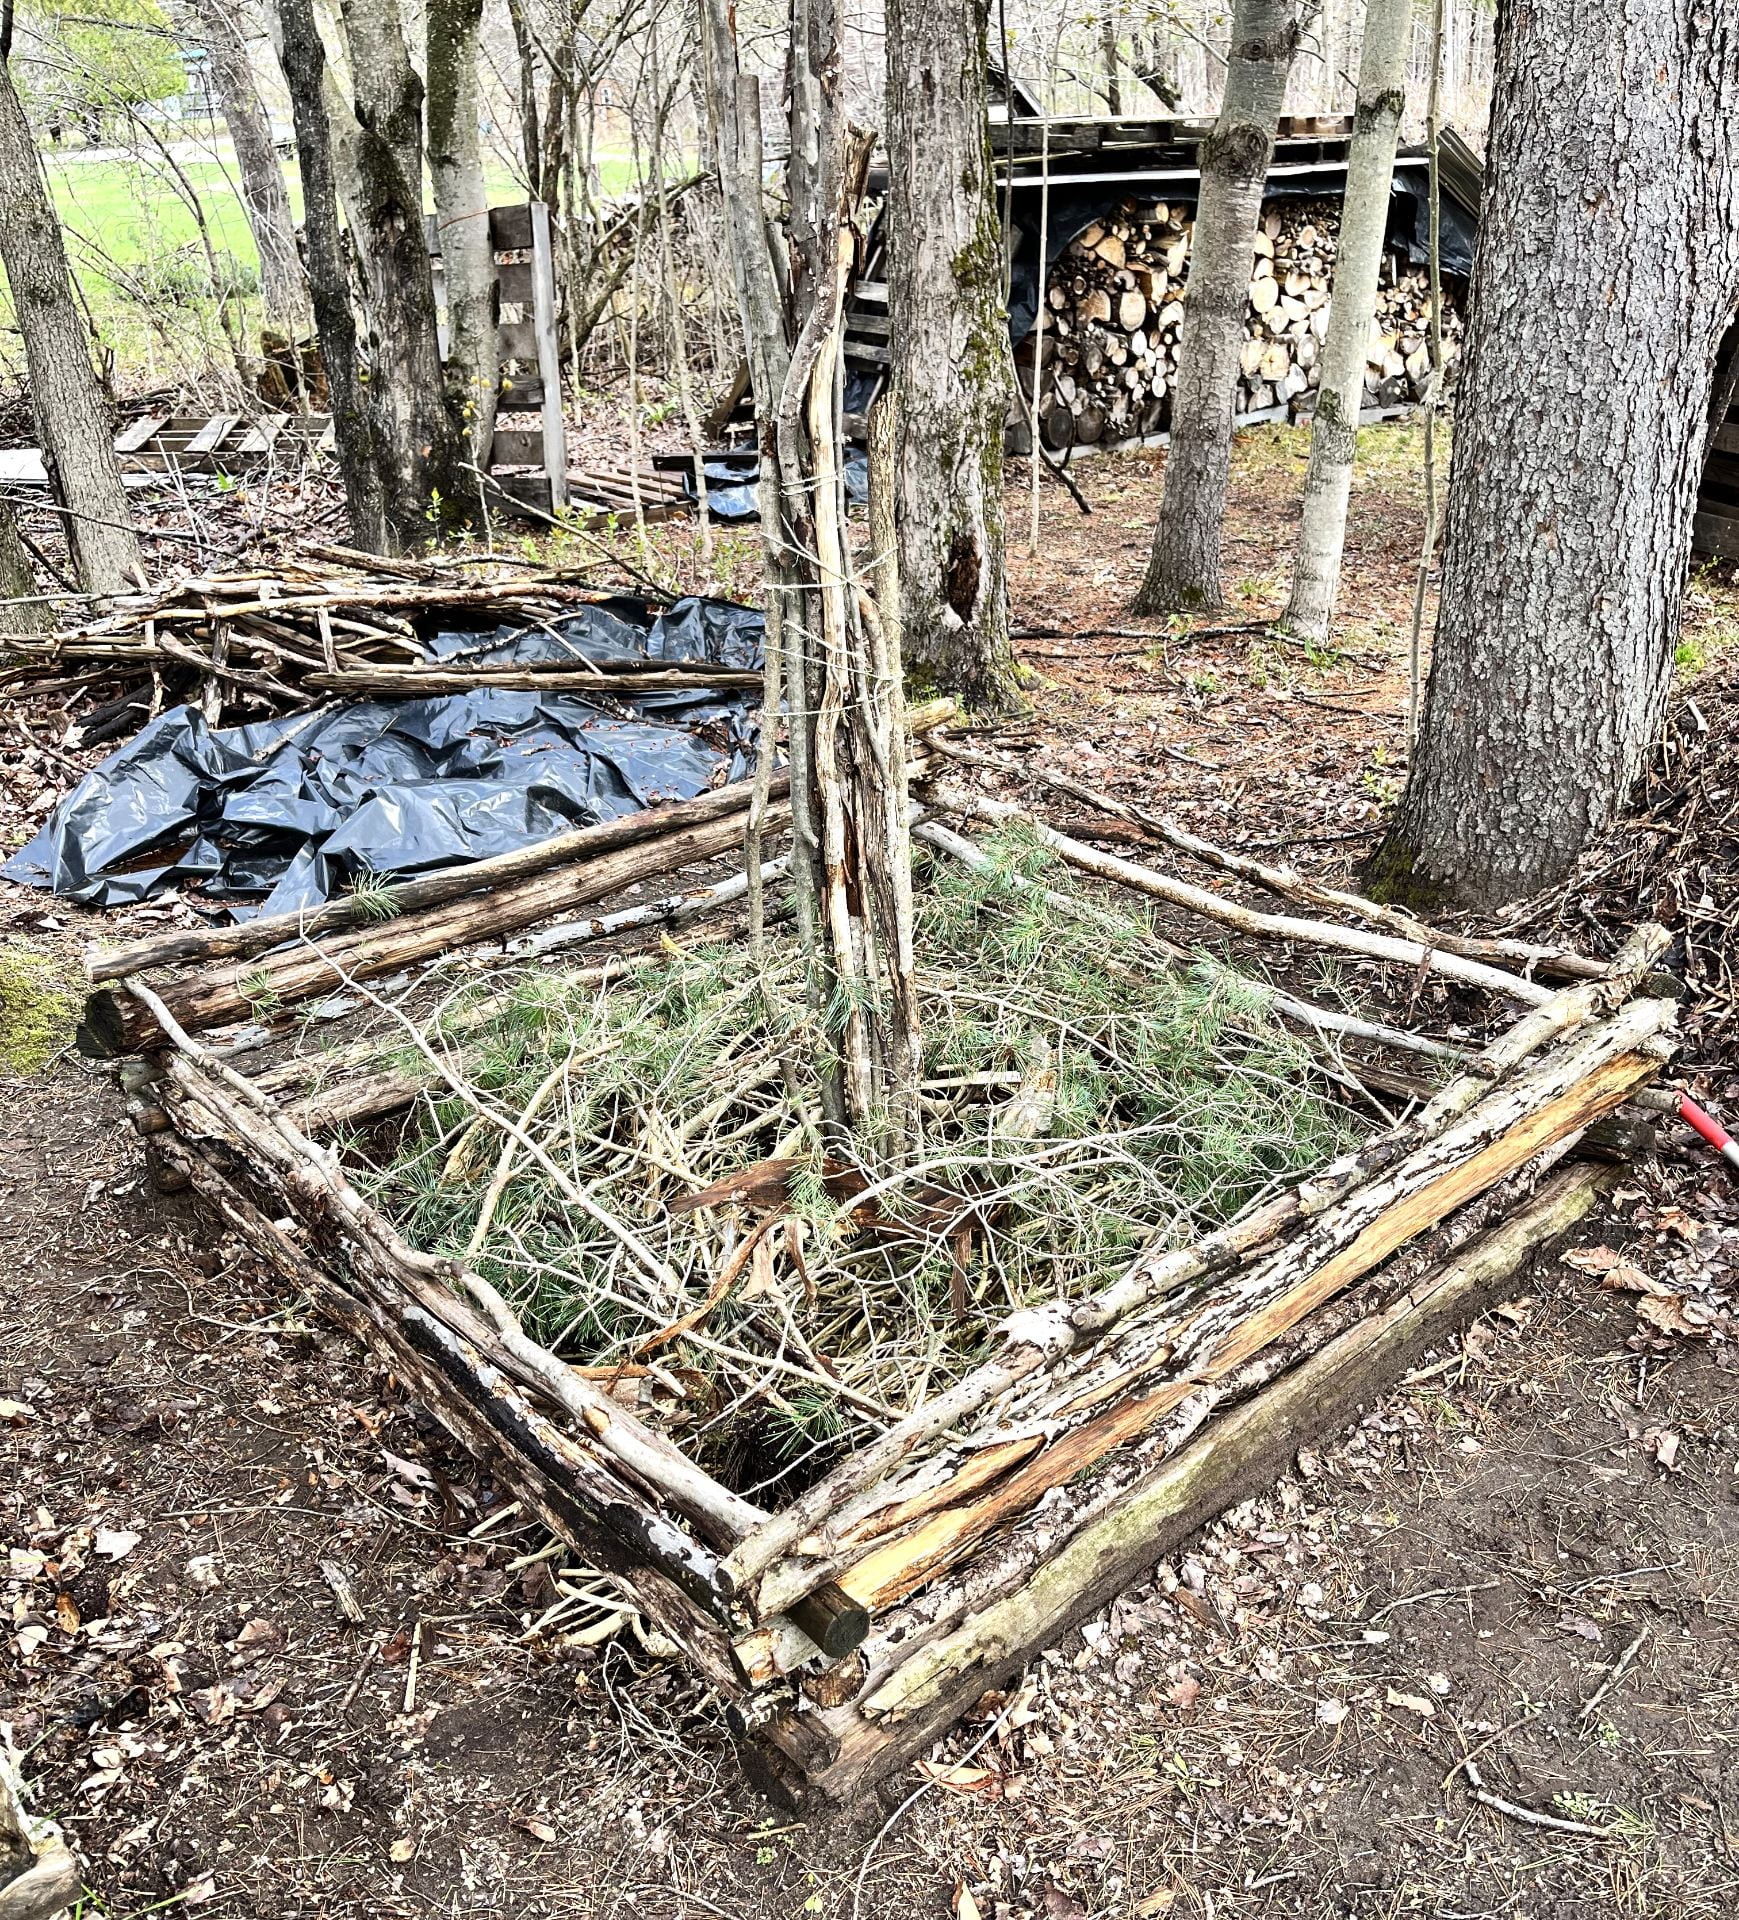
For the bottom layer of the pile place coarser dry material such corn stocks, small branches, Brussels sprout stocks, weeds (without seeds), and straw. These rough materials allow oxygen to enter the bottom of the pile.
The next layer is should be high in carbon (such as leaves, straw, woodchips or cardboard), followed with food scraps or fresh weeds, which are higher in nitrogen. Leaving soil on the weeds inoculates the pile with organisms that help break down the coarse organic matter. Continue to add poles, log cabin style, adding layers of dry brown materials (high carbon) and green ones (high nitrogen). Always finish off with dry material to hold in the moisture. The racoons stir my pile, saving me the trouble and tempering my rage when they steal my corn. 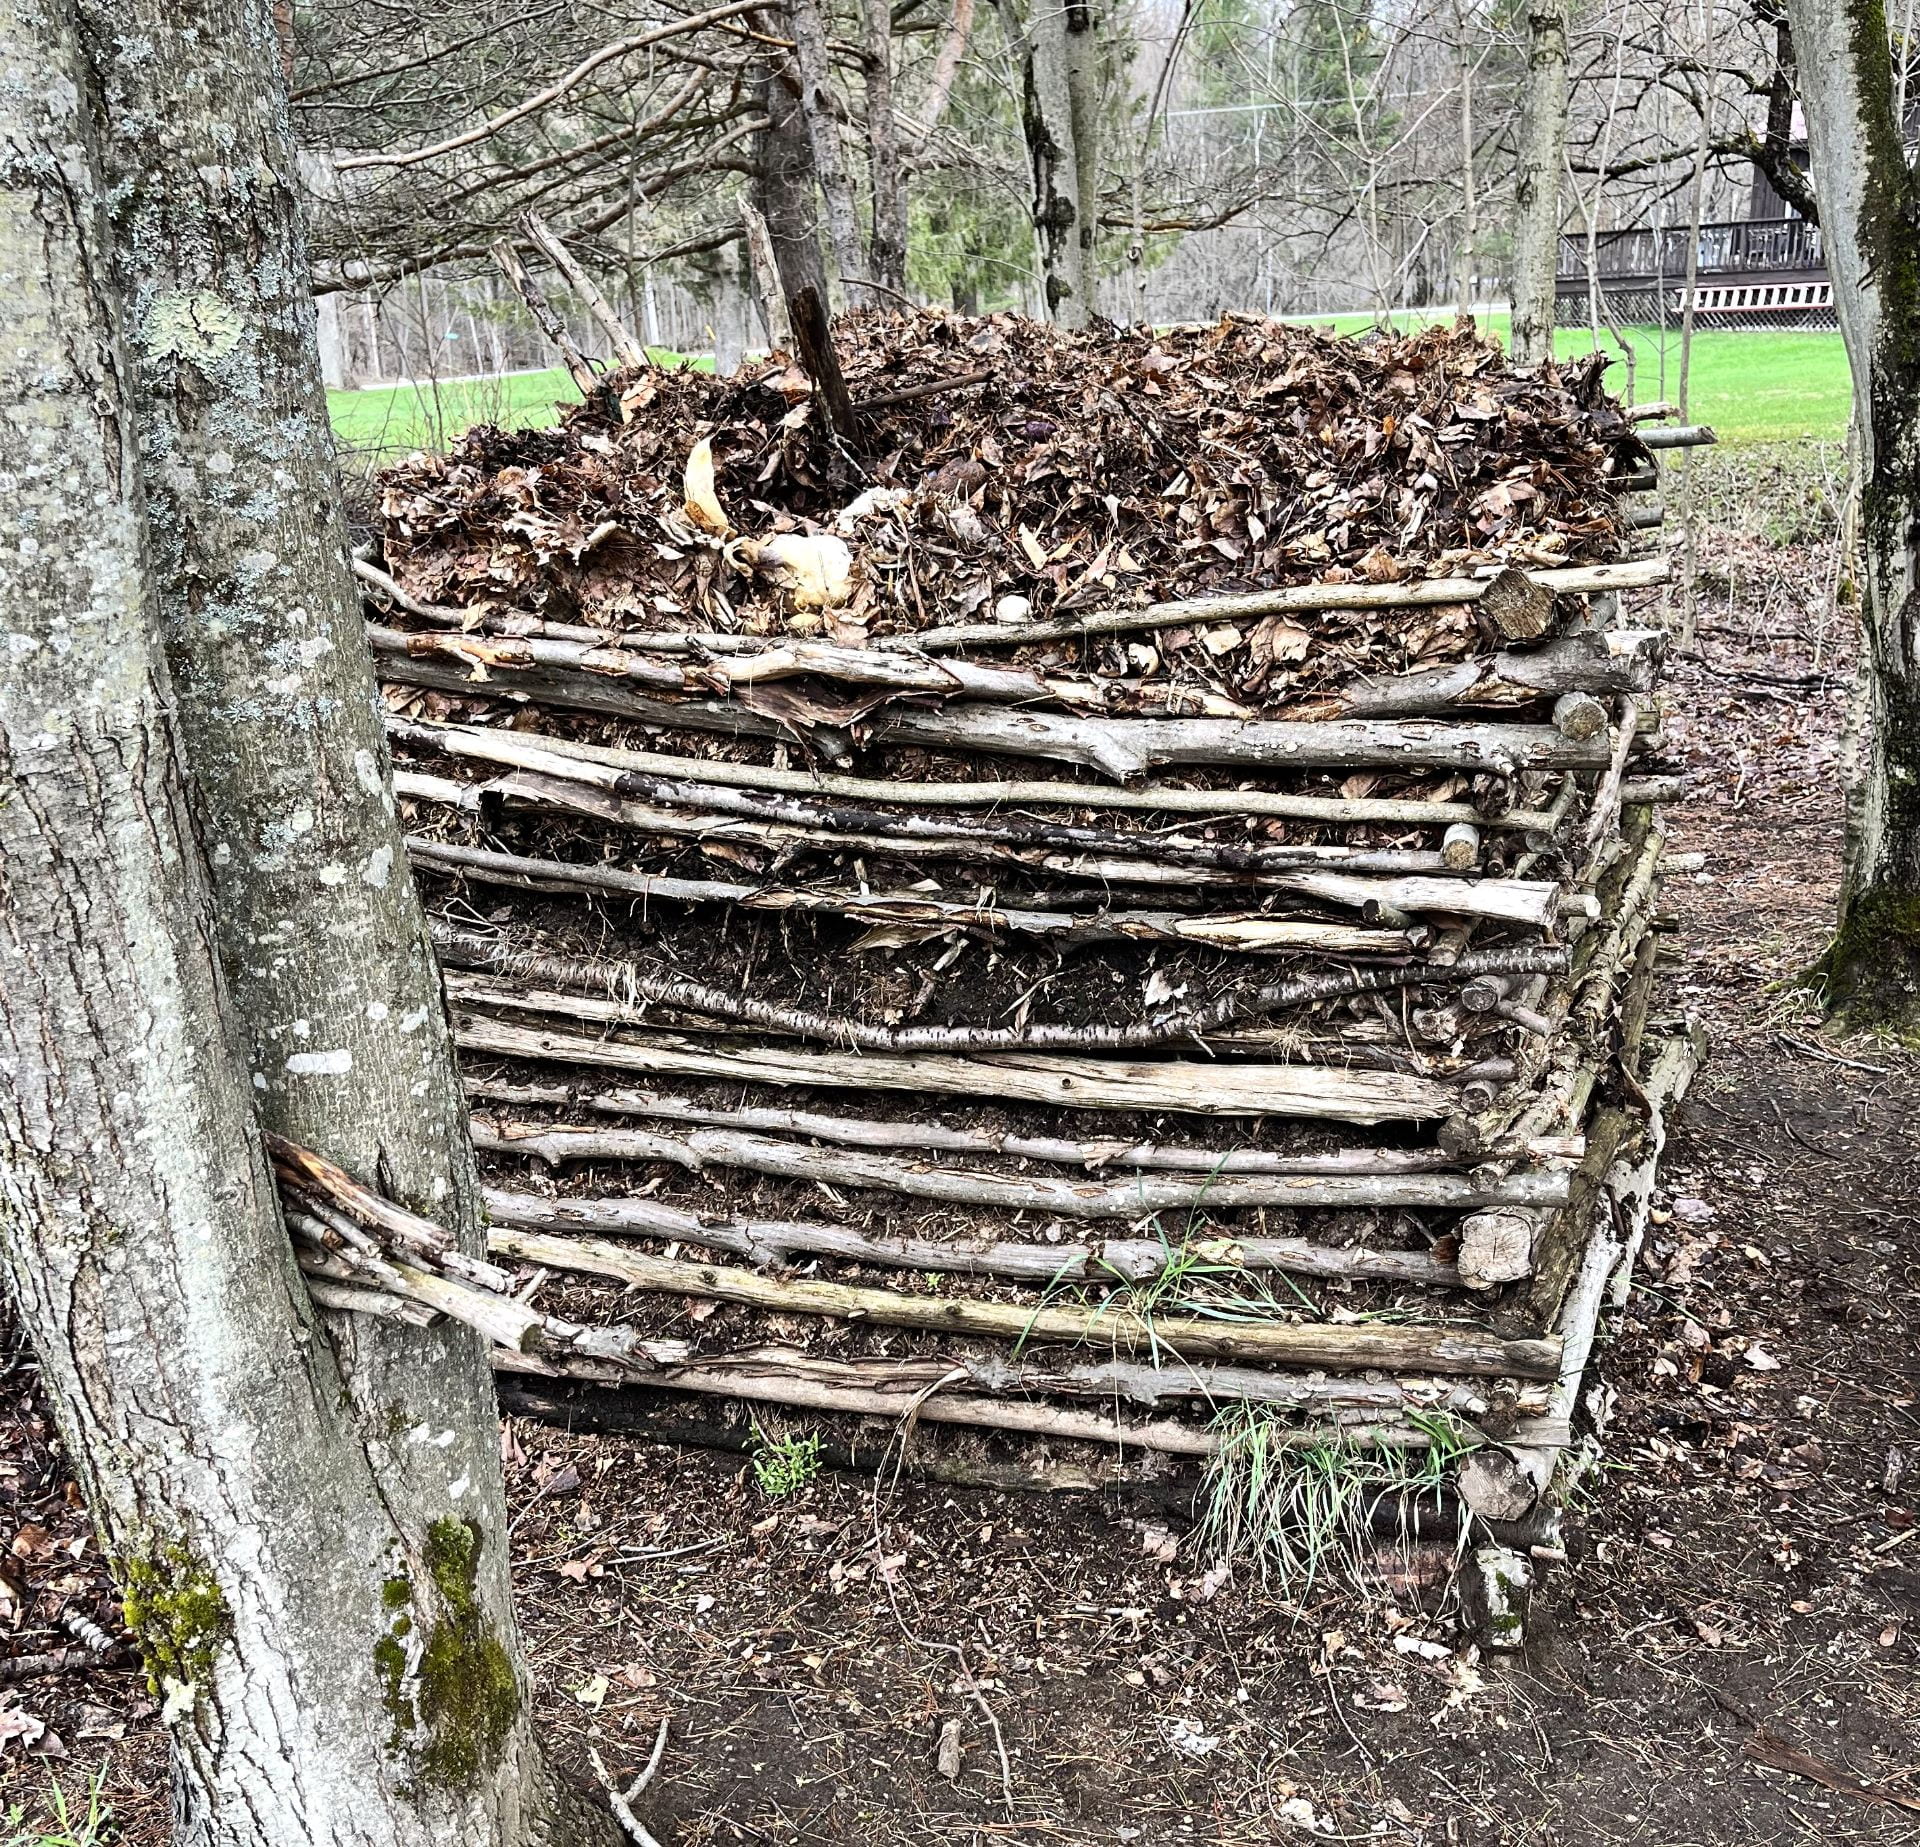
In dry weather water your compost pile like you water your garden; it’s a living thing too. I never worry about the temperature of the pile, I have other more pressing things to do and nature takes care of breaking down everything.
Start the pile in the spring and continue to add to it during the summer until fall when the temperature falls to freezing. At this time, add poles and make the pile taller – up to six feet – filling the top with loose leaves. As the winter begins, dig holes in the leaves to add your food scraps, working around the chimney. When snow comes, dig through the snow to add scraps to the top, using snow to cover it.
When the pile thaws in the spring, prepare a new pile next to the first pile with a pathway between the two. Start the new pile just like the first, laying coarse material at the bottom, and start to turn the first pile into the second pile with a digging fork.
Move the top material of mostly leaves and food scraps into the center of the new pile around the chimney poles. Continue turning until you have turned it all. My pile usually freezes to the center and I turn a little each day until it thaws.
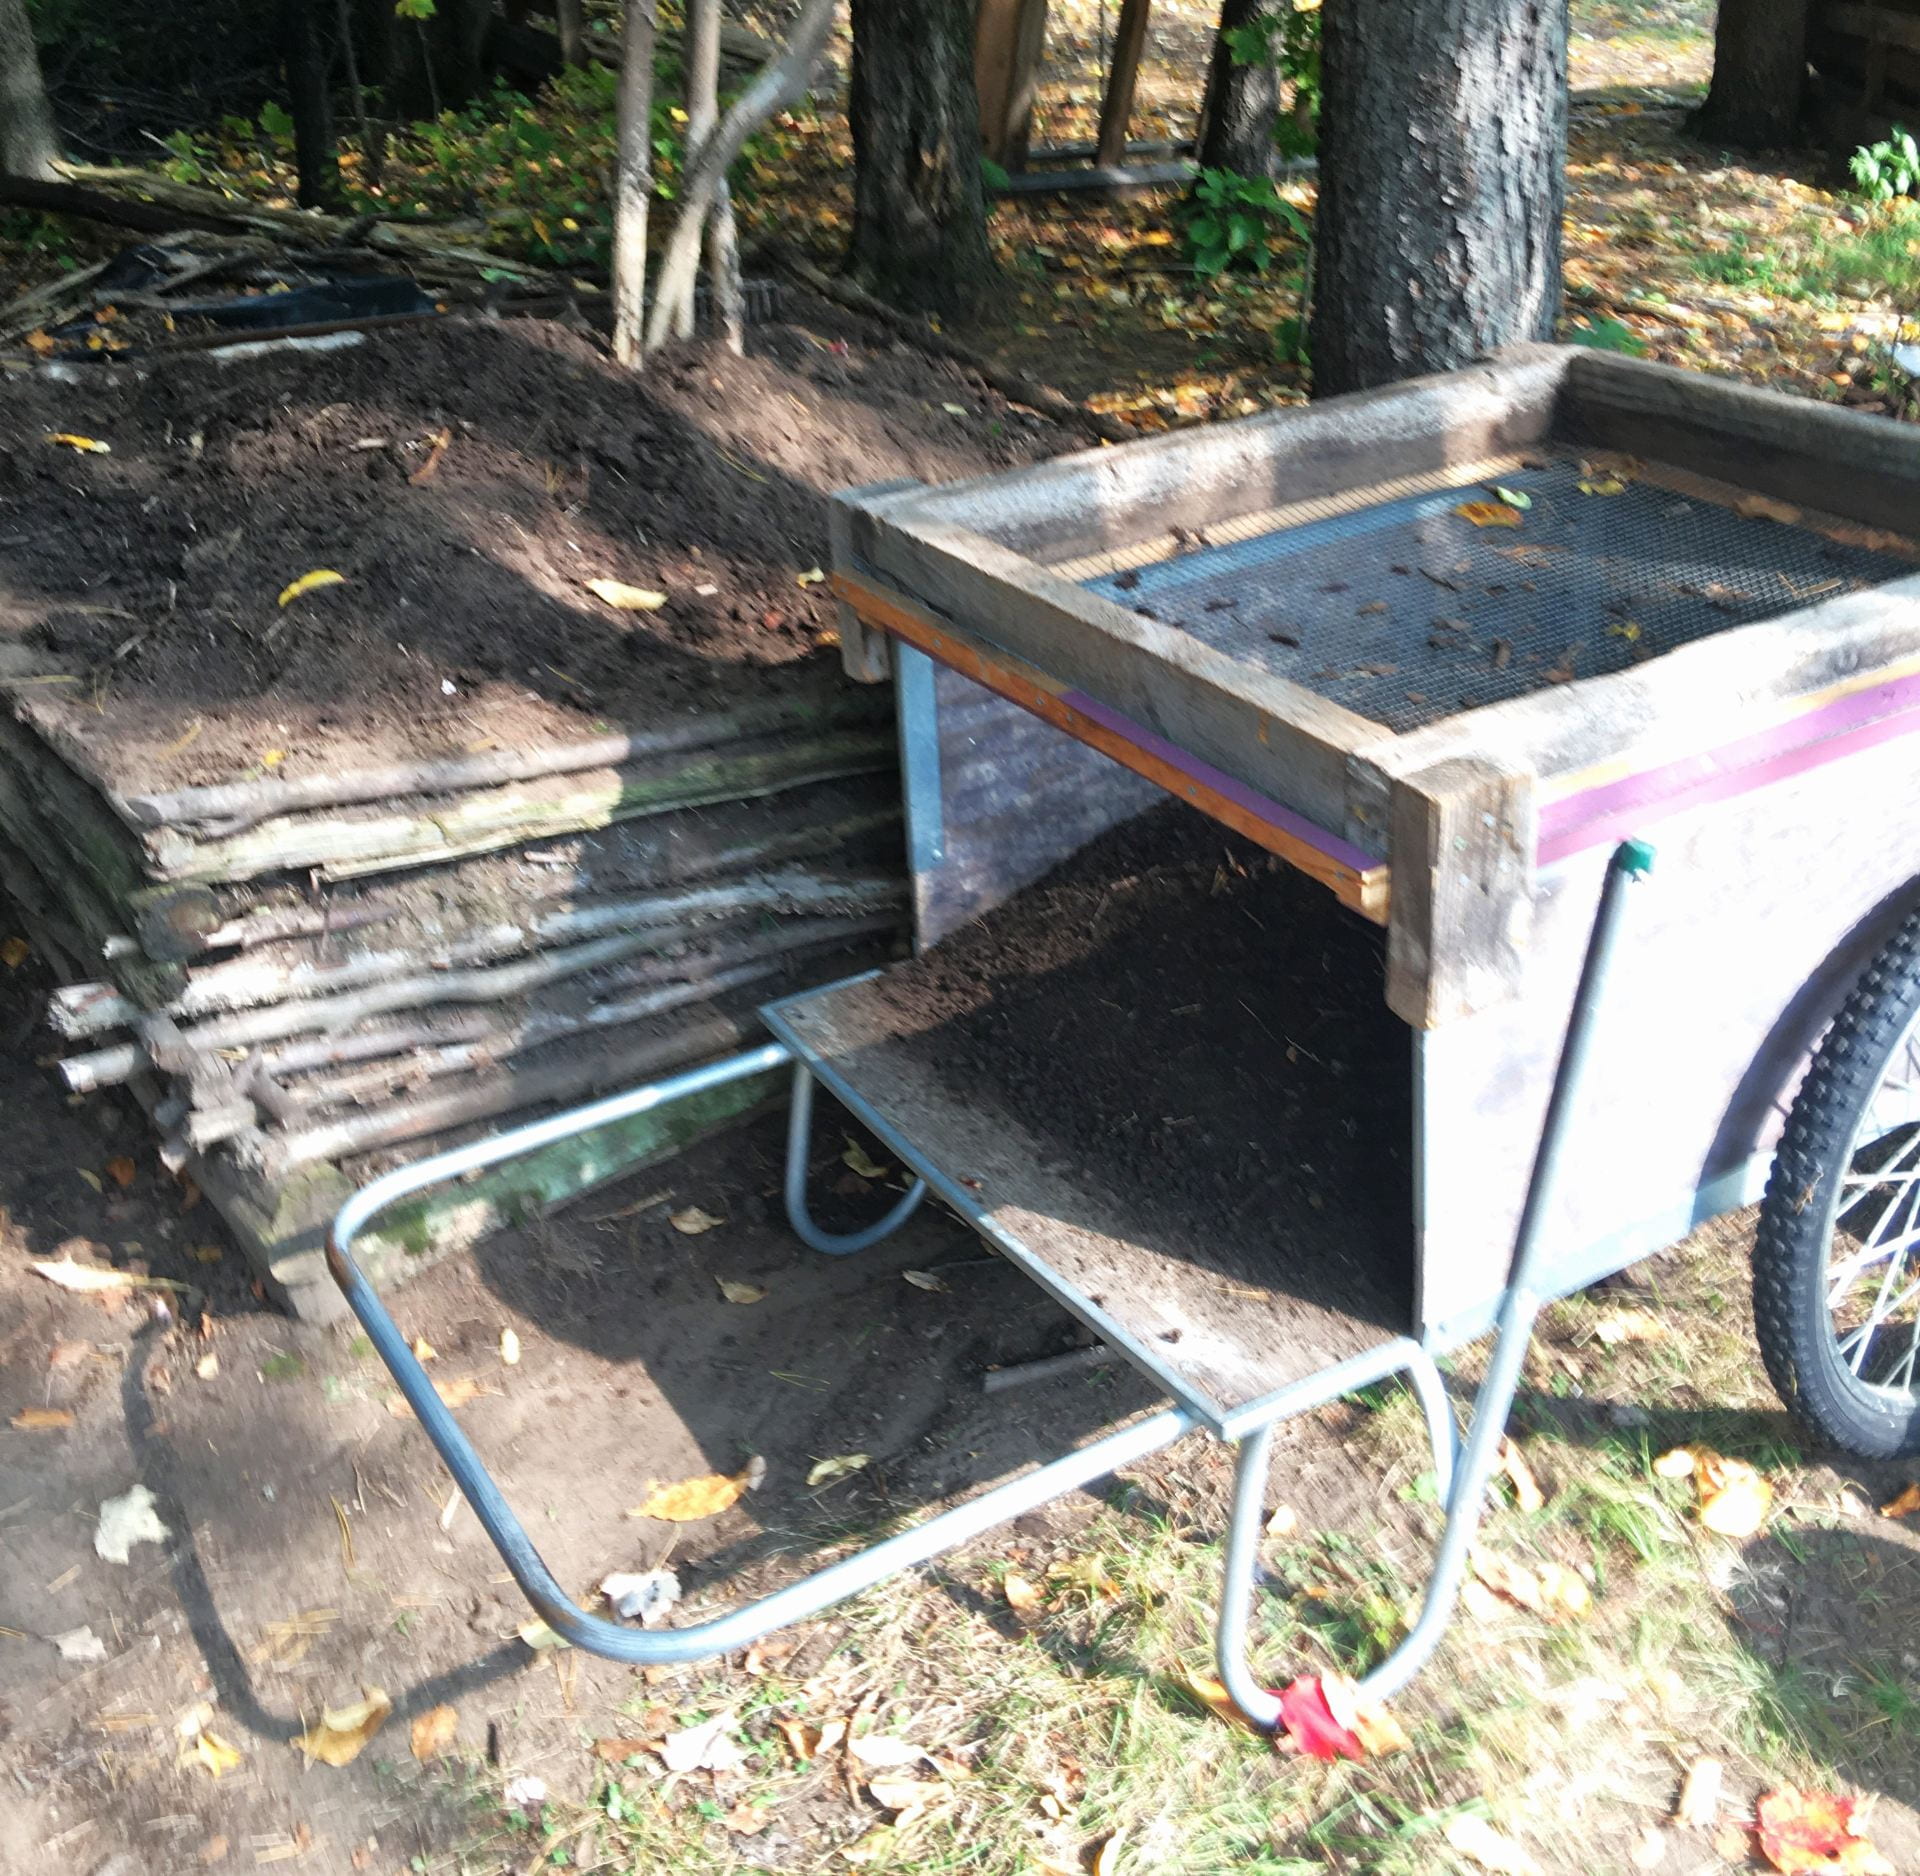
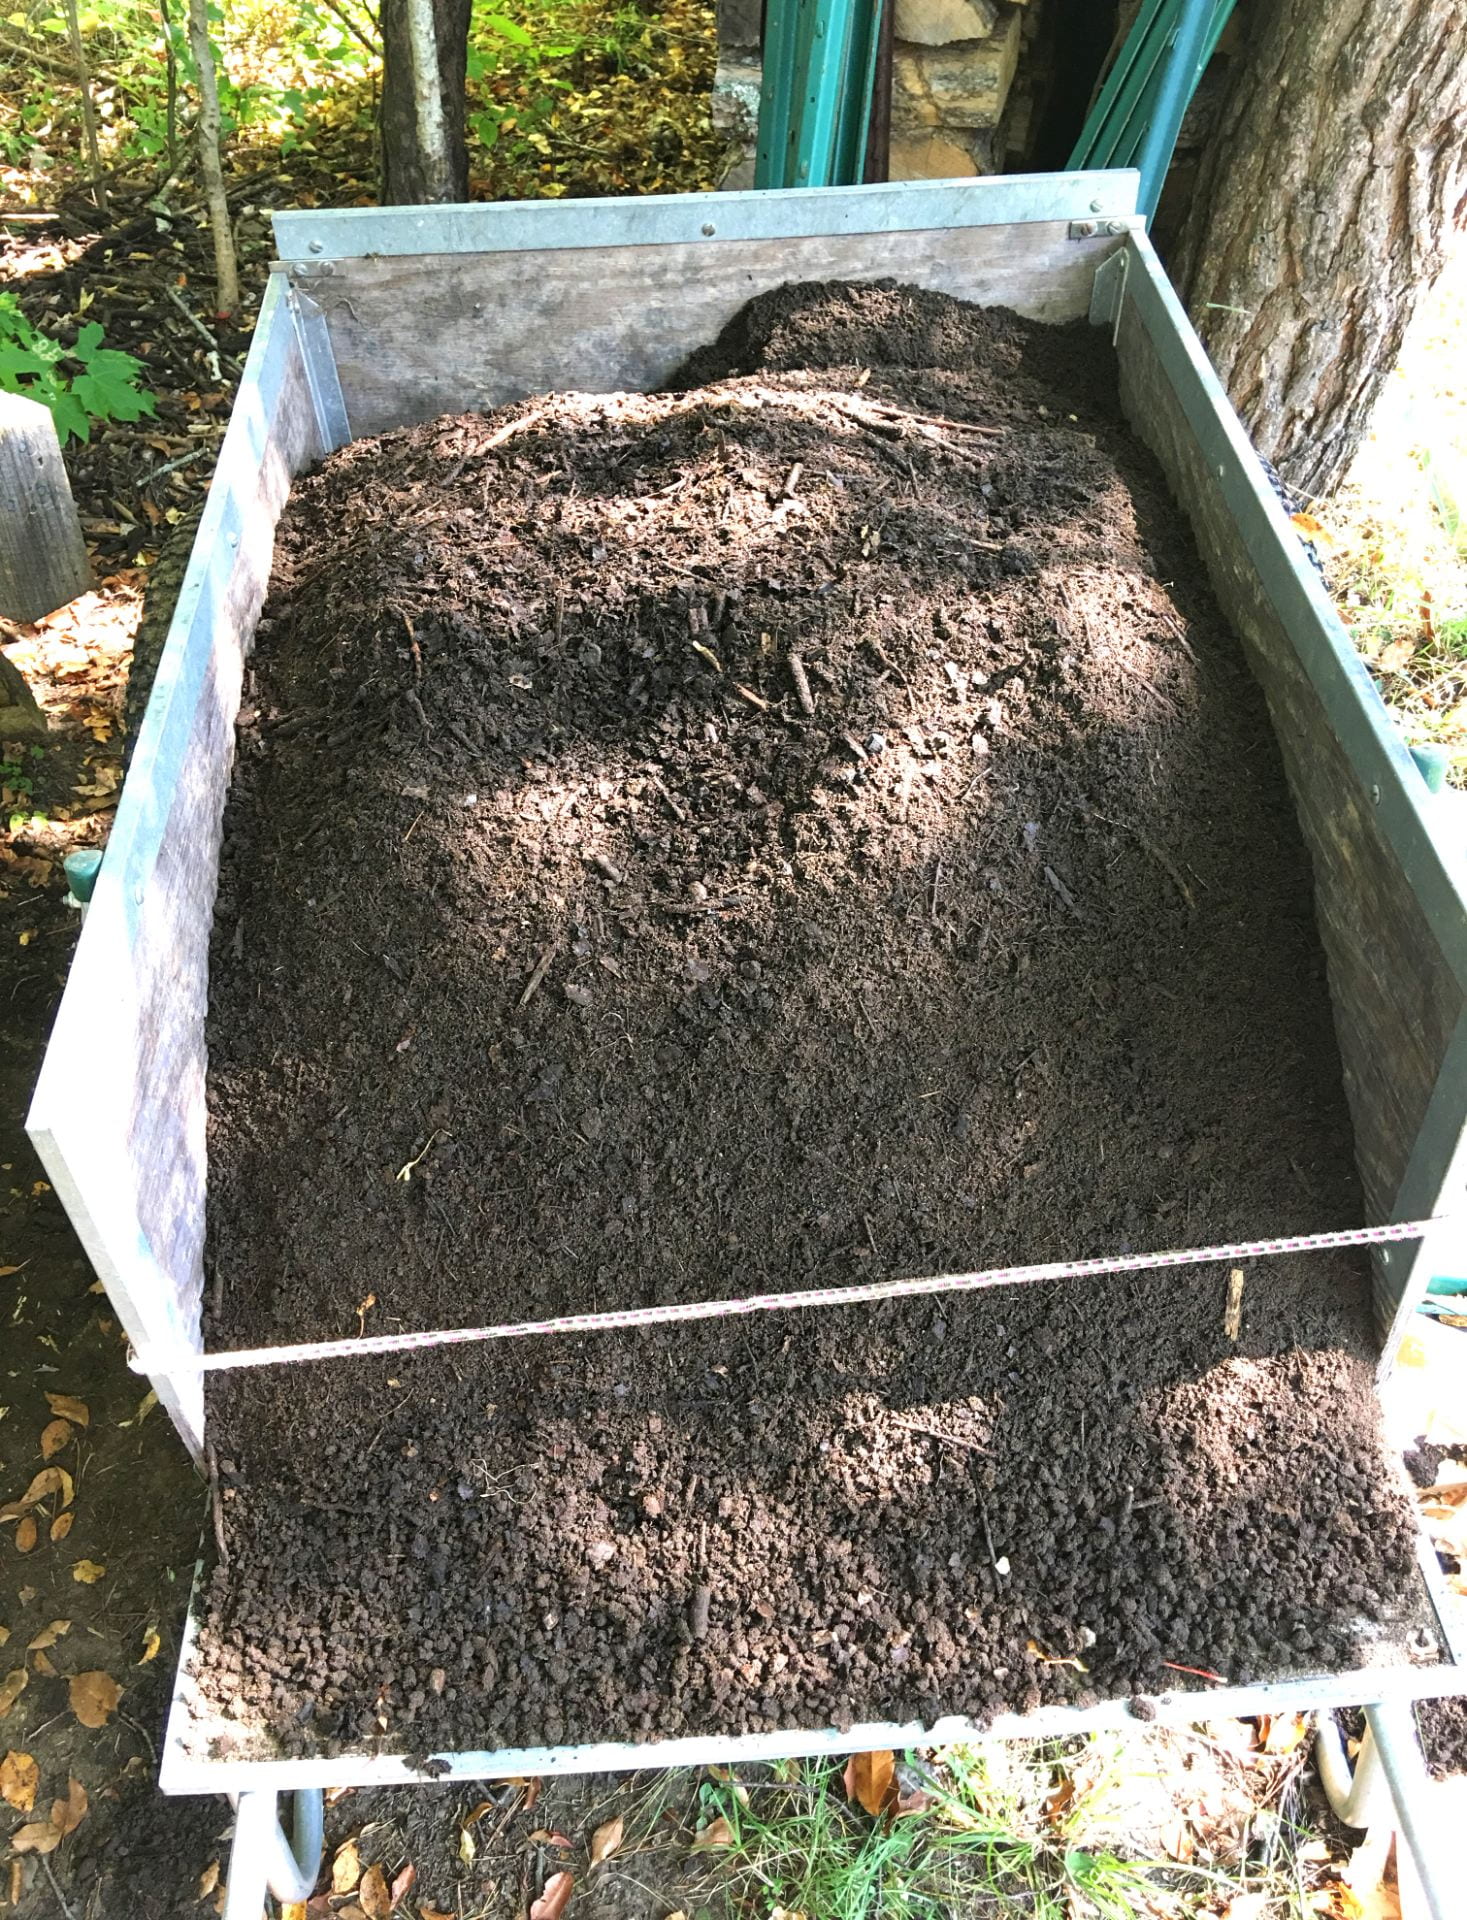
In the fall, sift the compost. I have built a wooden frame that fits over my garden cart made with one half inch hardware cloth. I shovel compost on the screen, then take the back of a rake and push it back and forth until most of the fine material has passed through the screen. I then use a short two by four or my hands to push and rub the remainder through the screen. With two buckets ready, I sort out rocks and trash I find in the compost. I separate the sticks and other coarse organics to start the next pile.
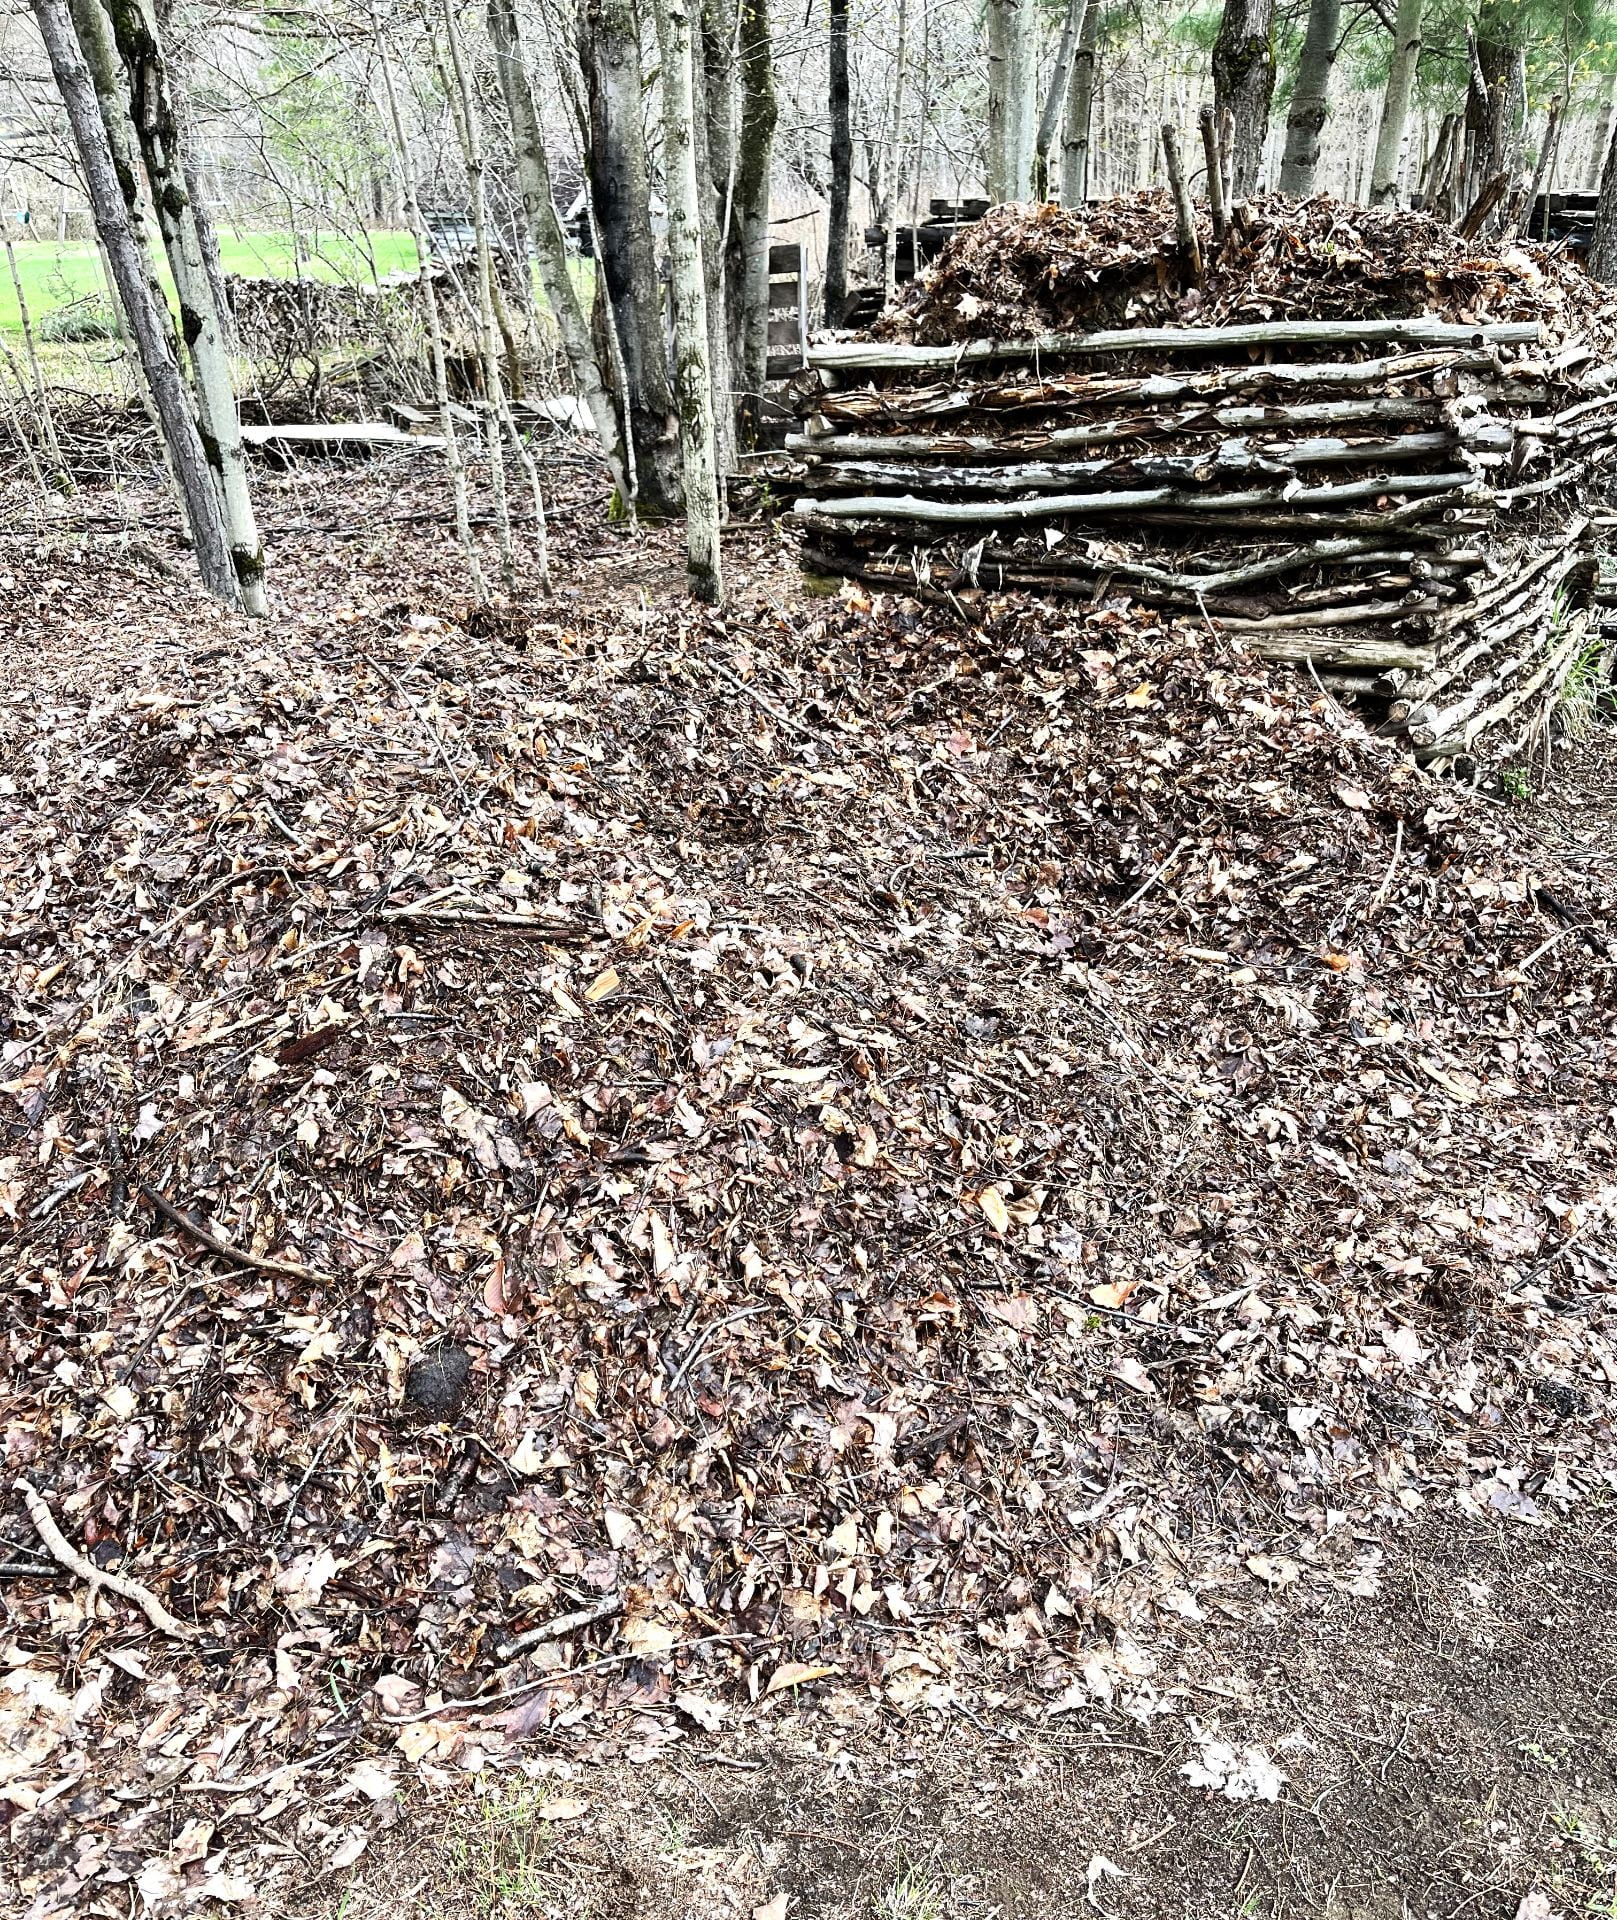
Stockpile leaves in the fall, from any source possible and run the mower over them if possible to increase the surface area and the rate of decomposition. Source soil from cutting sod at the edges of your garden. Pile these ingredients beside your compost area for next time you start a pile.
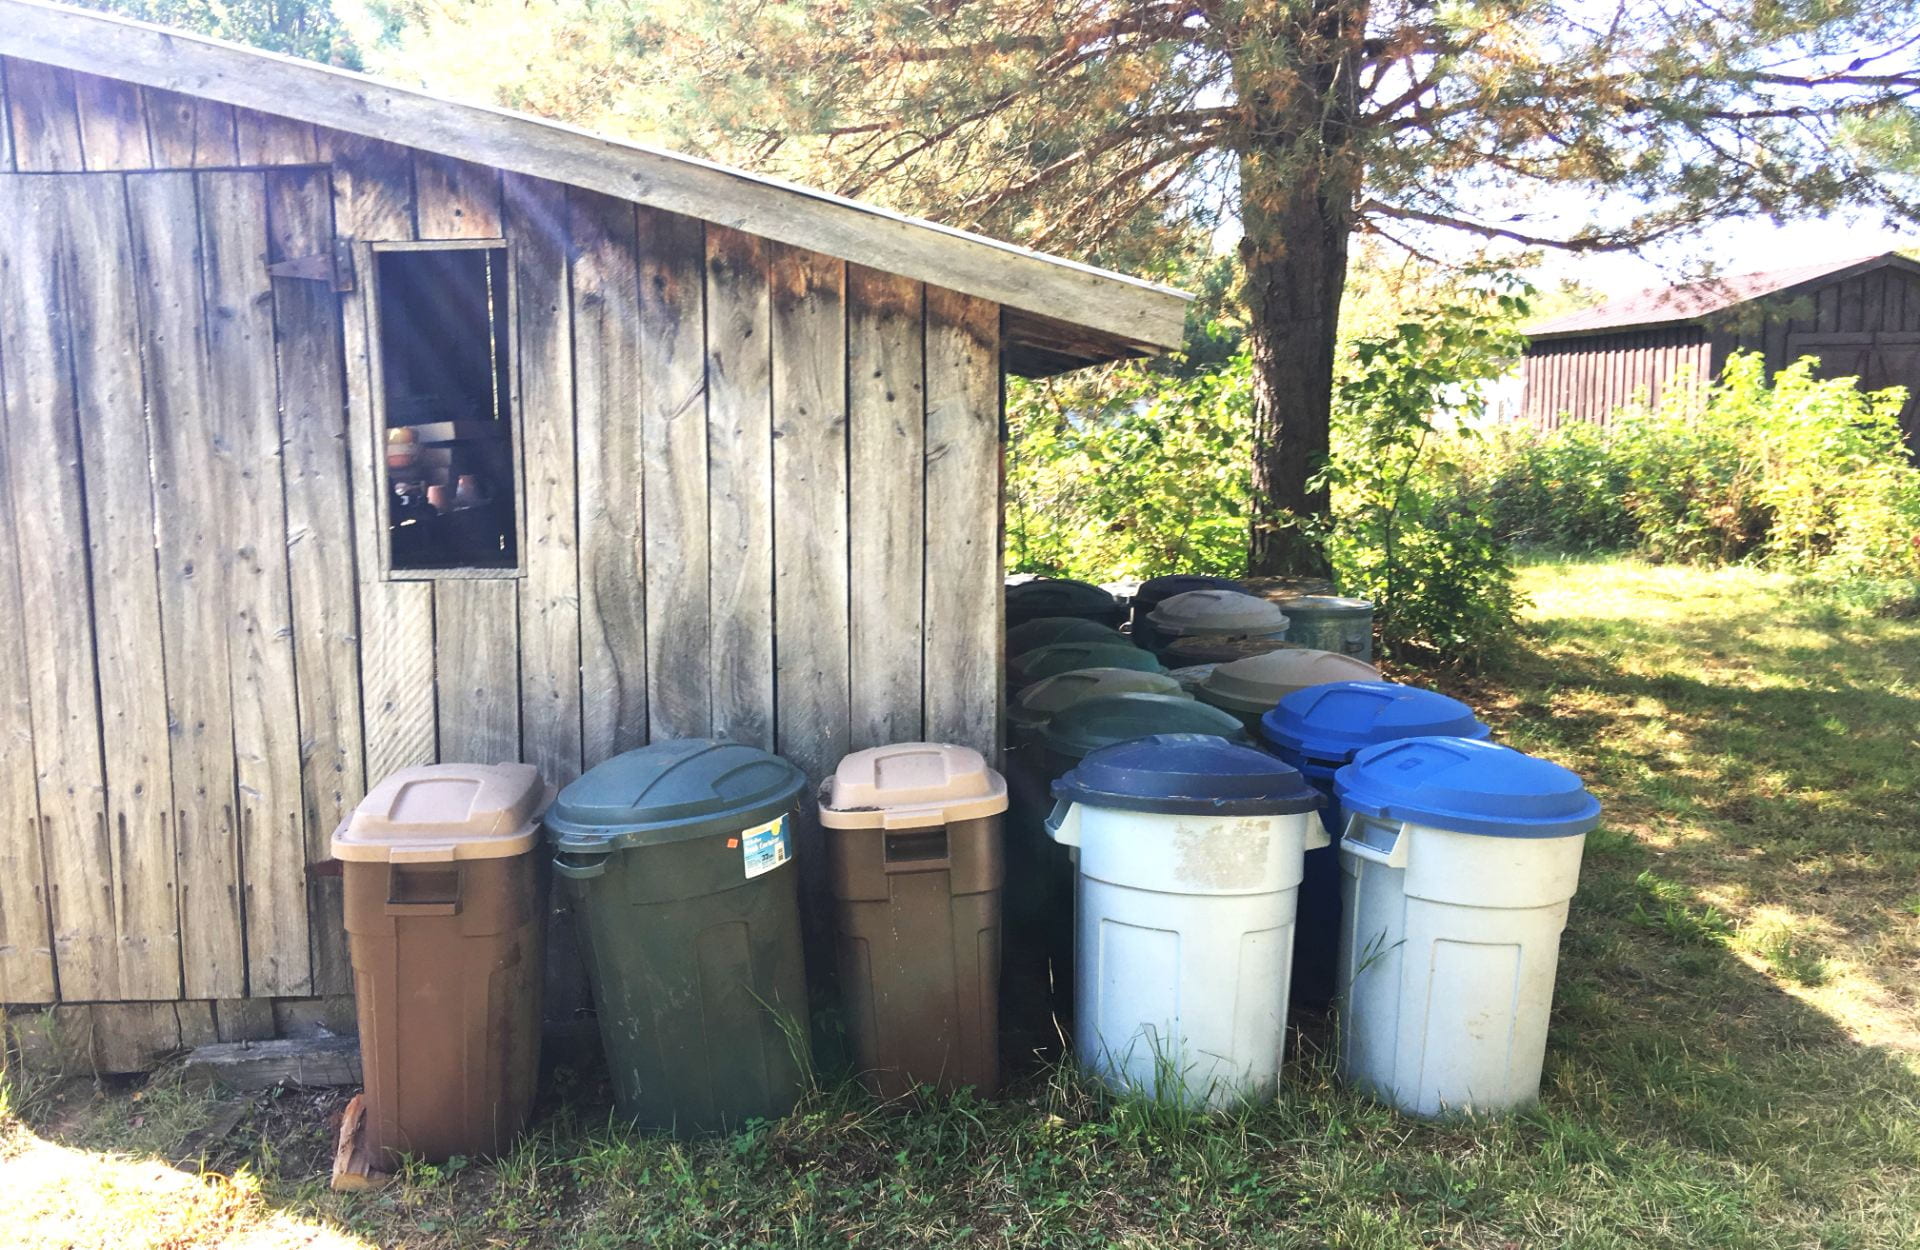
I store my finished compost over the winter in 30 gallon plastic trash cans.
Last year I produced 780 gallons of compost. Making use of the valuable organic matter from in and around our houses enables us to produce a great garden harvest. The Nearings encourage us with this simple advice: “Utilize any and all available organic materials.” We know now that these same materials, if they end up in a landfill, produce damaging greenhouse gasses that we are better off without. Add that to the reasons for upping your compost game!
Brad Pendergraft is a retired teacher of geology and earth science. He loves maintaining an organic garden and has done so in the North Country for 41 years, 27 of those on sandy soils! Large batch composting is one of his specialties, along with growing hot peppers for sauce.