A version of this article appeared in the Times Herald-Record in May of 2017.
Many sources provide great advice on sowing seeds. Key factors include sufficient light and temperature for growing the seeds. But the question inevitably arises when to transplant them outdoors. Don’t rush. Cold soil and air temperatures can stress plants. Wait at least a week or two after the last frost.
The latest map from the National Oceanic and Atmospheric Administration (NOAA) shows the last spring frost date for the Hudson Valley to be between New York, which indicates April 16th and May 15th. But of course these dates are only guides. In 2020 we had a hard frost on May 15th that severely damaged many plants. There is no guarantee that frost will not occur after the last date shown. This map does not tell you the best time to plant tomatoes or other frost-sensitive crops. That date is usually several weeks after the last frost, after the soil has warmed and nighttime temperatures are reliably well above freezing.
Nighttime temperatures should be consistently above 45°F, and the soil should be warm, about 70°F. You can use black plastic mulch to warm soil and/or row covers, hot caps or other protection to keep plants warm early in the season. Remove covers whenever temperatures exceed 85°F.
Harden off plants before transplanting by reducing water and fertilizer, not by exposing to cold temperatures, which can stress them and stunt growth.
Remember that microclimates have a tremendous effect. Some valleys and low-lying areas can be plagued by late frosts on clear, cold nights when there is radiational cooling. Large bodies of water (such as the Hudson) may moderate air temperatures at some sites, reducing the chances of frost.
Since plant development is temperature-dependent, rather than depending on specific calendar dates we can make decisions based on Growing Degree Days, a measure of accumulated heat or by observing phenological events of plants.
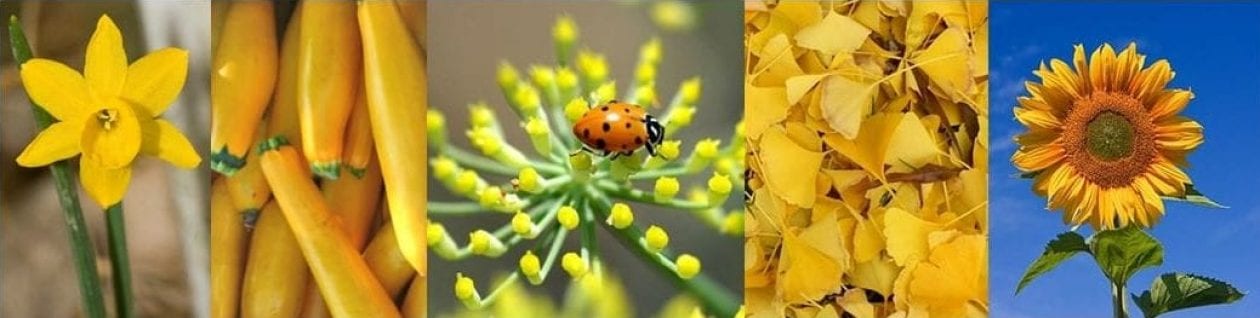
Phenology is a branch of science that studies the relationships such as the life cycles of plants and animals and environmental changes. Seasonal changes such as weather or temperature can be correlated with natural events such as bird migration, plant budding, flowering or fruiting and insect activities. For example, in the Hudson Valley migrating hummingbirds usually arrive when forsythia bloom. Centuries ago, Native Americans began planting corn when oak leaves are the size of a Snowdrop (Galanthus nivalis).
By Gerda Krogslund, Middletown Senior Master Gardener Volunteer
This article appeared in the April 2021 Issue of Gardening in Orange County.
It is spring and everyone wants to go outside and apply fertilizer to their plants, because that’s what you do in the spring. However, overfertilizering your plants is not only a waste of time and money, but it can also damage your plants and harm the environment. If you already incorporated lots of compost and other organic material into your soil every year, your soil is probably doing well. So before you add fertilizer or any other soil amendments to your garden, I encourage you to get a soil test.
Once you’ve gotten your soil tested, confirmed that you need fertilizer, and are ready to add some fertilizer, there are many things to consider, so lets take a look at a few of them.
Soil amendments are substances added to the soil to improve plant growth. Fertilizers the most common type of soil amendment and their main purpose is to supply nutrients to plants. Soil conditioners are soil amendments that are mixed into the topsoil to improve soil structure. Improving the structure of your soil will allow water and air movement in the soil and help with plant root growth. Compost is considered a soil conditioner as it improves the soil structure with the added benefits of slowly releasing nutrients to the plants and increasing bacterial and fungal activity. Other soil amendments include biostimulants and pH adjusters.
Fertilizers contain the primary macronutrients needed by plants: nitrogen(N), phosphorus (P), and potassium (K) . The three numbers on a bag of fertilizer represent the percentage (by weight) of NPK found in that bag. For example, the numbers on a 50-lb. bag of 10-6-4 fertilizer contains 10% N (5 lbs.), 6% P (3 lbs.), and 4% K (2 lbs.) The remaining 80% (40 lbs.) of the mixture is made up of secondary nutrients like calcium, magnesium and sulfur, trace elements, and fillers that make it easier to spread.
Each macronutrient is essential to healthy plant growth. Nitrogen (N) is used for to promote foliar growth. Phosphorus (P) supports the plant’s roots and reproductive system including flower and fruit development. Potassium (K) is important in root development and for overall plant health, including disease and stress resistance.
Knowing what each number represents can help you decide which fertilizer is best for your specific situation. If you are looking for a fertilizer to enhance flower production for your annual and perennial flowers, you would choose a fertilizer with more phosphorous like a 5-10-5. If you are looking to encourage foliar growth for leafy green vegetables, evergreens, or shrubs, you would look for a fertilizer with more nitrogen or a higher first number such as 10-6-4. Understanding the number will help you avoid applying the wrong kind of fertilizer. If you add too much nitrogen to a tomato plant, you might have a lush green leafy plant with very few flowers. The same holds true for root crops such as carrots; too much nitrogen will produce beautiful leaves, but smaller roots.
Fertilizer burn
Remember chemical fertilizers contain salts. Apply too much, and the plant cells will begin to dehydrate and collapse. Too much fertilizer will burn plant leaves and roots, and sometimes even kill the plant. This is called fertilizer burn. If you suspect fertilizer burn, use plenty of water to flush out excess fertilizer and prune out any burned leaves.
Whether you use solid or liquid fertilizer, you should always water your plants before application. This will help the roots absorb nutrients better and mitigate the risk of root burn.
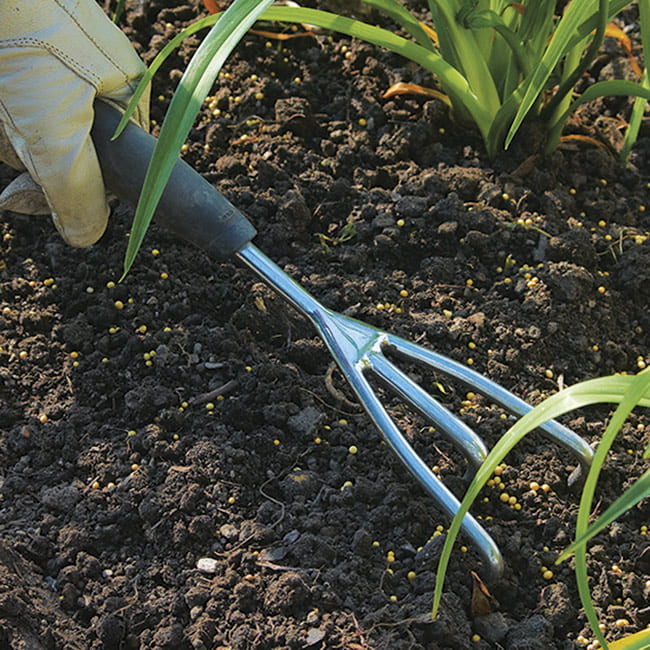
A common type of solid fertilizer is granular fertilizer. Granular fertilizers can be broadcast by hand and then scratched into the top 4-6 inches of soil. For large areas like lawns, a mechanical spreader can be used. Moisture is needed to break down solid fertilizers and make nutrients available to plants. After application, carefully wash any fertilizer granules off of the foliage of your plants and water to release the nutrients.
Many solid fertilizers are quick release meaning that the nutrients are available immediately after application. There are also slow-release fertilizers that come in capsule forms and dissolve as they get wet. Since the capsules are made to break down at different rates, a single application can last over several months.
Water soluble fertilizers are sold as liquids or powders which you dissolve in watering before applying. These are great for fast-growing plants because the fertilizer is applied directly to the leaves and plants take up nutrients more efficiently through the leaves than through roots. Nutrients are absorbed quickly and rarely burn the plants. For large areas you can use hose-end sprayer fertilizers which come in containers that connect to the end of your hose and can be easily sprayed over your plants. A drawback to liquid fertilizers is that they must be applied more frequently as they can move quickly through the soil especially if it rains after an application.
Organic fertilizers are derived from plant and animal sources or a mined mineral such as rock phosphate. Liquid organic fertilizers include compost tea, fish emulsion, and seaweed. Dry organic fertilizers include manure, blood meal, bone meal, and cottonseed meal. Organic fertilizers usually contain low concentration of nutrients that are slowly released into the environment as they are broken down by soil microbes. Because of this, they are much less likely to cause fertilizer burn, and do not harm beneficial microbes in the soil.
Inorganic fertilizers or synthetic fertilizers are usually less expensive than organic ones and give quick results. However there are draw backs. They can cause fertilizer burn and if application rate or timing is off, there is a high chance of fertilizer runoff which can have detrimental effects on the environment. Many synthetic fertilizers also contain high concentrations of salts, which can cause fertilizer burn and can harm soil microbes.
Home gardeners have a tendency to overfertilize, that is why soil tests are so important. Remember if your beds are rich in organic material you may not need any fertilizer, that holds true for annuals, herbaceous perennials, and vegetables. New gardens low in organic matter may need to be fertilized in early spring, usually a 5-10-10 will suffice, but make sure to test your soil to see what your soil needs.
Herbs are a special case. Many herbs such as basil, thyme, rosemary, oregano, and lavender, grow best on sunny dry sites in sandy soil. Heavy applications of fertilizers or organic matter may lower the plant’s essential oil content and encourage root and stem rot diseases.
Healthy mature trees usually do not need fertilizer as they benefit from turf fertilization as well as the decomposition of grass clippings and fallen leaves. Shrubs that are surrounded by turf usually do not require additional fertilizer either. For those shrubs whose growth is slow, top-dress their beds with compost or apply a balanced fertilizer like 5-10-5 in early spring or in late fall. Don’t fertilize your perennials, trees and shrubs in late summer or early fall or you may encourage a flush of new growth that will not have time to harden off before the winter.
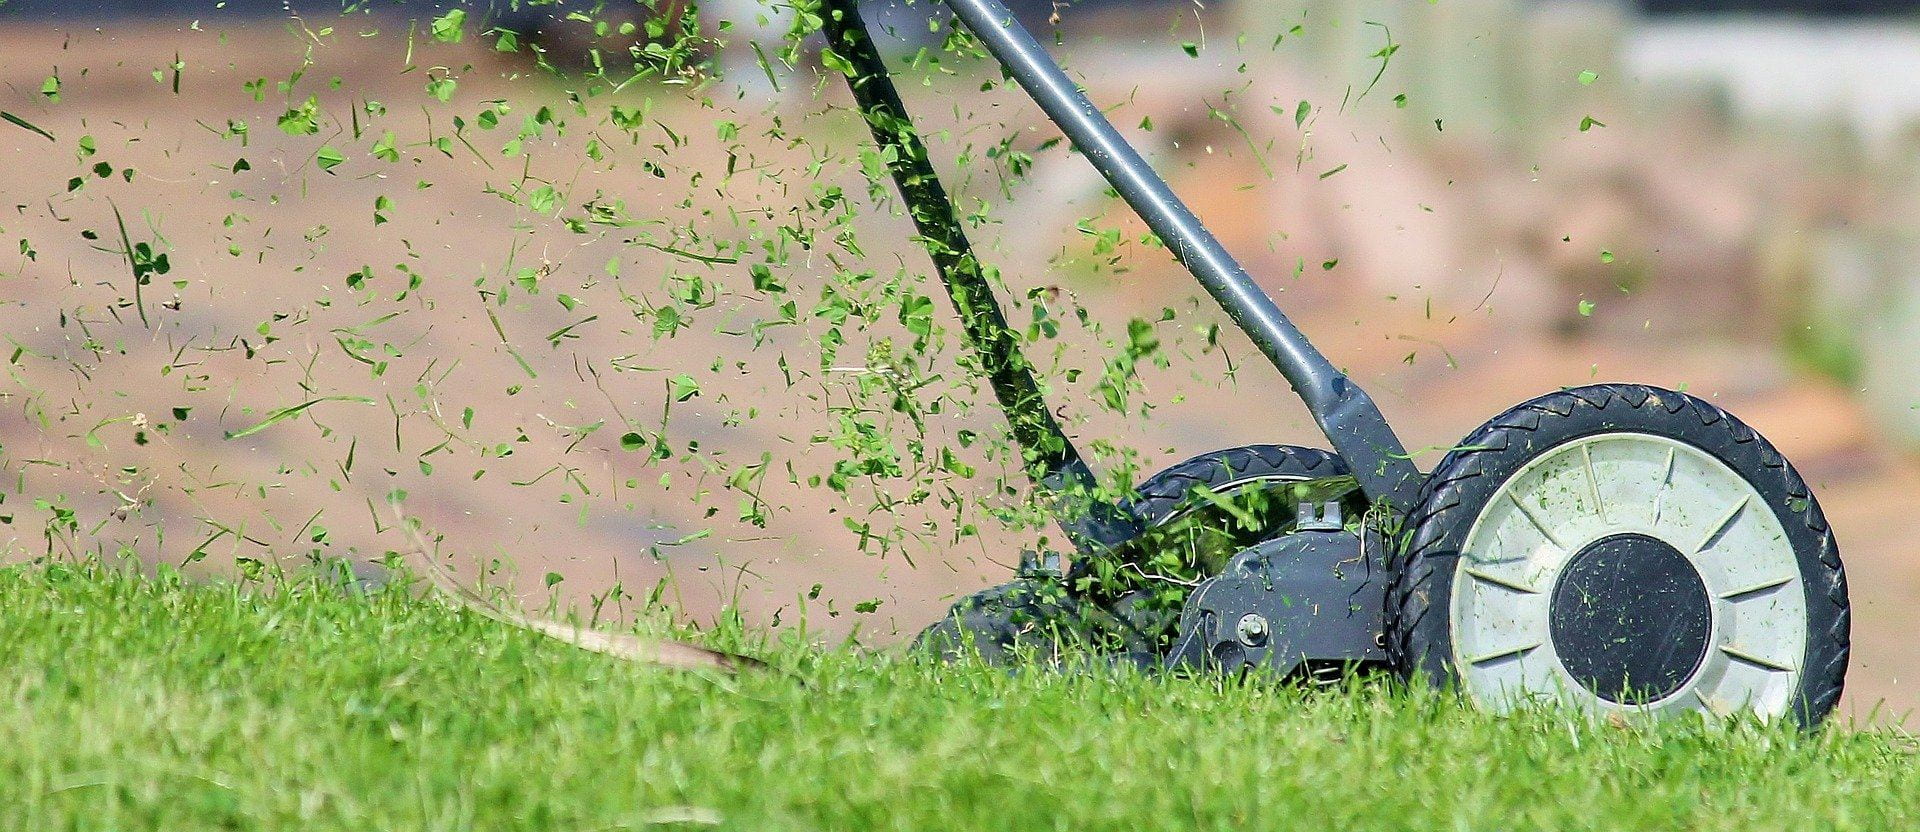
When it comes to lawns, the best time to apply fertilizer is in September. If you have a high use lawn it may need a second fertilizer application in May. Returning grass clipping to your lawn can reduce the need for nitrogen fertilizer by 25 – 50 %. Note that New York State Runoff Law restricts the use of fertilizer containing phosphorous unless you are establishing a new lawn or have the results of a soil test that indicate your lawn does not have enough phosphorous. Check out Cornell’s turf website for more information about how and when to feed your lawn.
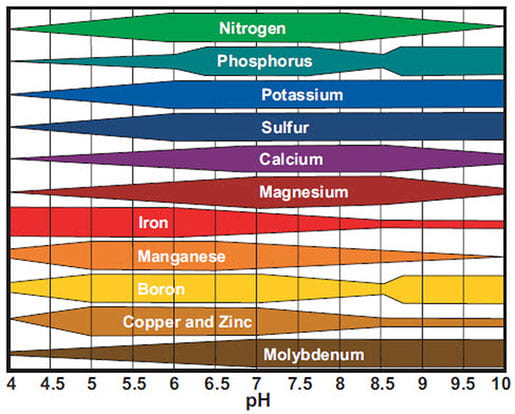
Soil pH is a measure of the hydrogen ion activity in the soil. The scale of measuring acidity or alkalinity contains 14 divisions known as pH units. The pH value of 7 is neutral with values below 7 are acidic and values above 7 are basic or alkaline. With some exceptions most plants do best when the soil pH is in the 6.0 – 7.0 range. pH affects the availability of nutrients in the soil. As a result, plants in soil with very high or very low soil pH will show symptoms of nutrient deficiency.
Of course some plants prefer acidic or alkaline soil. Azaleas like an acidic soil and may develop yellow leaves if the pH is over 7.0. Blueberries do best in an acidic soil in the 4.5 – 5 range.
You can change the pH of the soil, but it is usually a slow process and may require repeat treatments. Adding lime to the soil will increase the pH and adding ammonium sulfate, iron sulfate or elemental sulfur will lower the pH. Liming is best done in the fall to allow time for it to change the pH. Instead of trying to change the pH of your soil, it is easier to choose plants that are adapted to the existing conditions. This is the principle of selecting the right plant for the right site. Changes to pH are short term and annual pH tests are recommended to determine what needs to be done to maintain desired soil pH.
Remember that the best way to improve plant growth is the regular incorporation of organic matter or compost in the soil for good soil structure. If you do decide to buy soil amendments, always read the label, apply the recommended amounts and use proper personal protective equipment like gloves and masks. Happy gardening!
This article appeared in the March 2021 Issue of Gardening in Orange County.
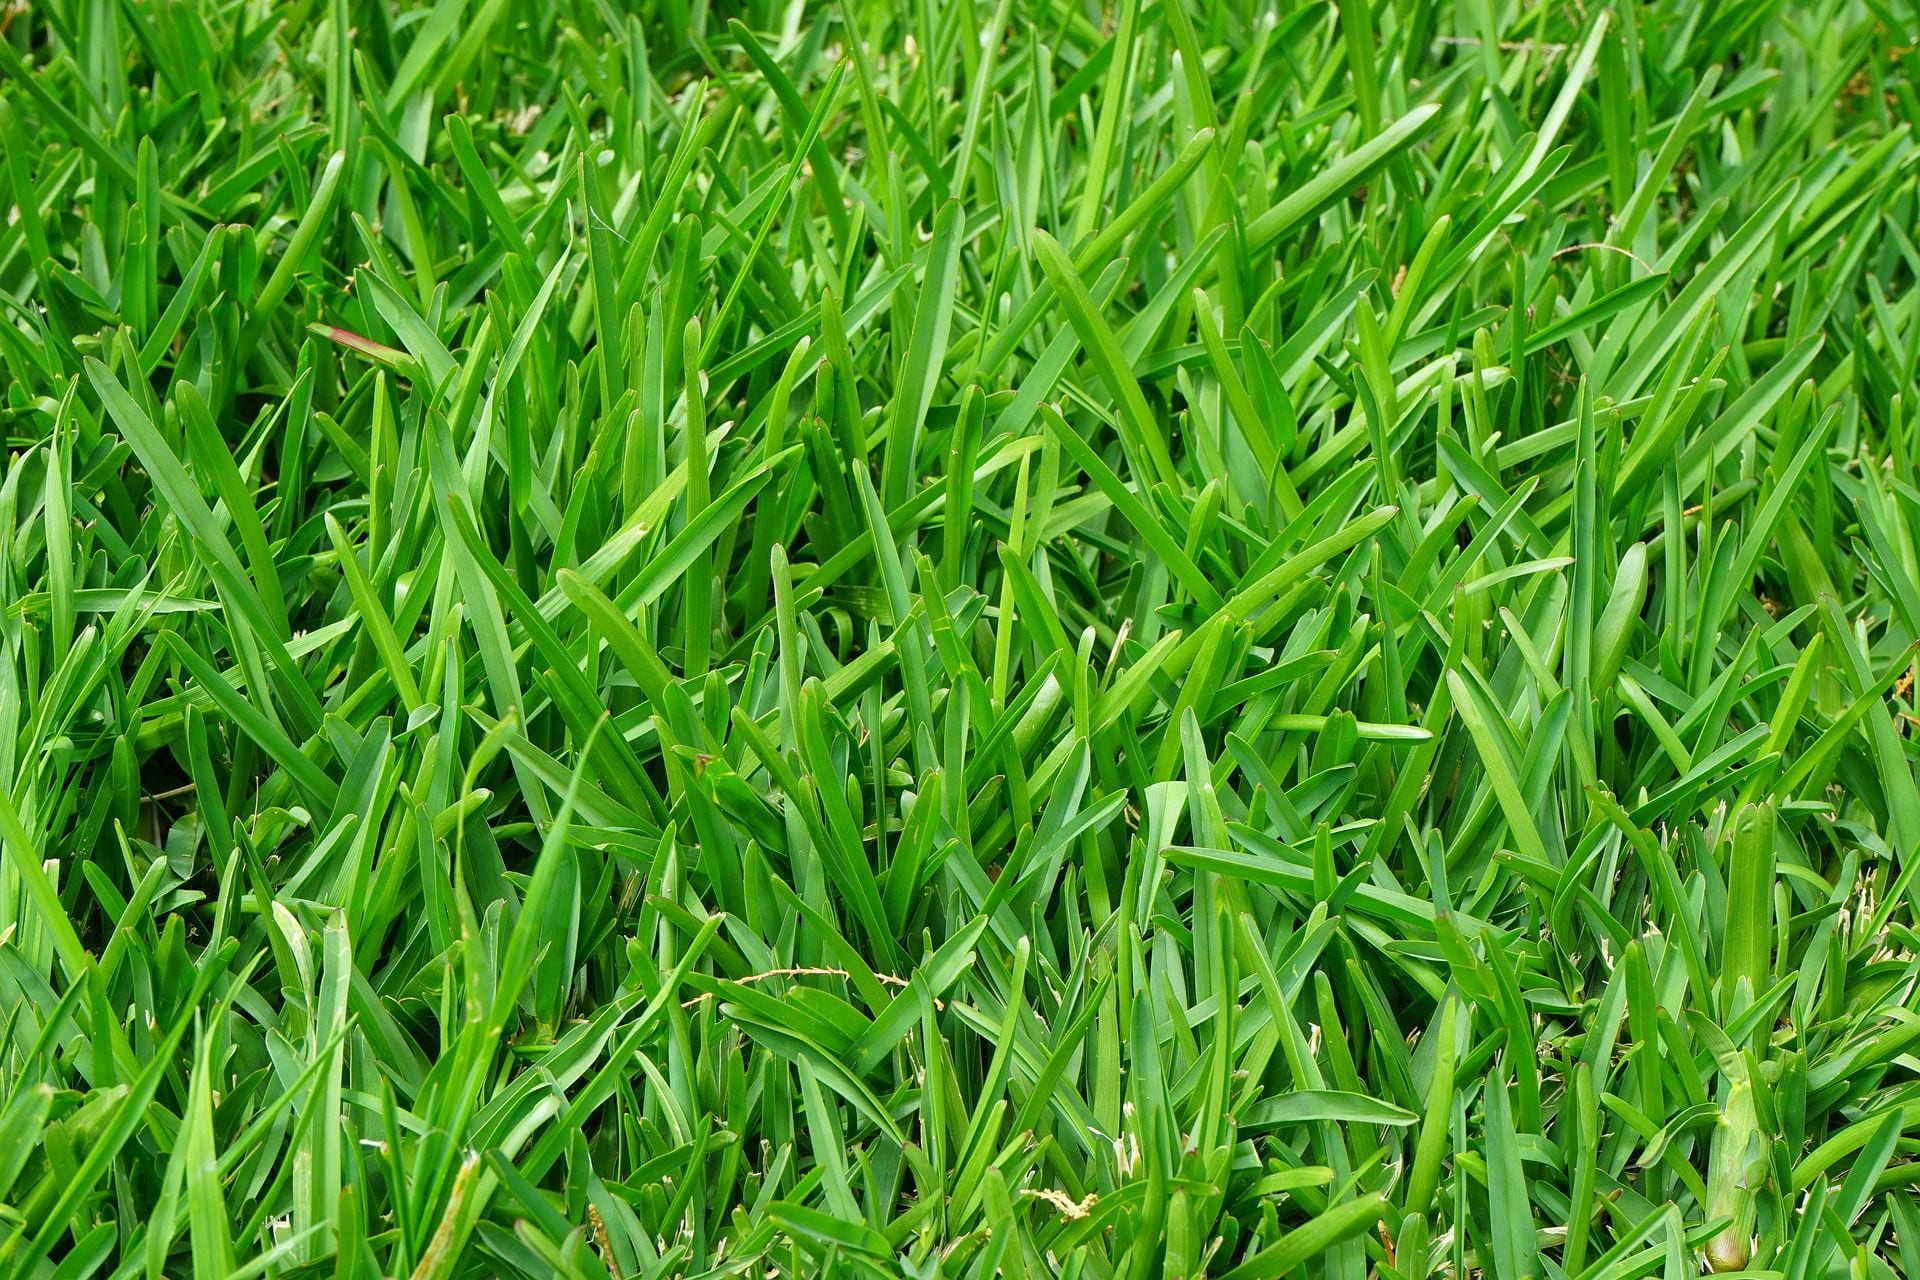
Are your tired of mowing and weeding your lawn? Are you suffering from suburban guilt because your yard isn’t as lush a fairway as your neighbor’s? It’s time to let go of that nagging sense of failure.
This has nothing to do with laziness and everything to do with loving – and taking care of – yourself and the environment. With a little knowledge and common sense, you can have a beautiful yard without applying harmful and expensive herbicides and pesticides that could seep into our ground water, without using gas- or electric-powered lawn mowers that pollute our atmosphere, and without spending precious weekend hours toiling under the sun when you could be relaxing and enjoying your surroundings.
Forget the wide variety of grasses readily available at big box stores. Think perennial evergreen groundcovers instead. These plants serve more useful purposes than you can count.
If you have a large plot of grass, don’t fret. Start with a problem patch that’s about 10 ft X 12 ft and keep expanding your grid over the years. Beautiful gardens don’t grow overnight. Besides, what would you rather have? A garden you don’t enjoy – and maybe even resent – because you’re too busy mowing, weeding and watering or a practically maintenance-free yard that’s rich in color, form, and texture?
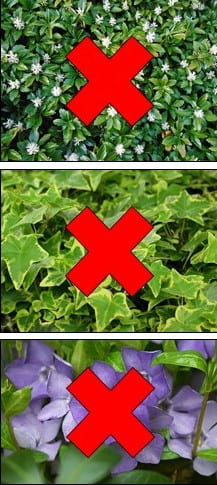
Pachysandra, English ivy and perwinkle
But wait. Don’t rush off and default to planting pachysandra, English ivy or myrtle/periwinkle to replace your grass. Let’s think this through.
Did you know that this trio of groundcovers is old hat – and worse, invasive? They out-compete many plants, threaten biodiversity and are destructive to the ecosystem. Plus, these plants blanket almost every other yard in suburban communities so much so that they deserve to be called the vinyl siding of groundcover plants. (If I knew the name of the clever mind that coined this phrase, I’d give full attribution.) Wouldn’t you rather have gorgeous evergreen groundcovers that aren’t invasive, aren’t common and are almost completely self-sustaining?
There are other reasons why perennial groundcovers are a good choice for your landscape.
First, unlike lawns, they don’t have to be mowed. This fact alone is a strong selling point.
Second, many of them won’t die during the cold winter months. That means they won’t leave the ground exposed and open to weed seeds germinating. When other plants are completely dormant during the cold months, it’s always refreshing and hopeful to see the green foliage of perennial groundcovers.
Third, many evergreen groundcovers have fibrous roots that help limit soil erosion.
Fourth, they act as living mulch because they cover the soil and are exceptional in out-competing many weeds.
Finally, there are enough hard-working and beautiful varieties to choose from that unlike a monotonous expanse of sod, evergreen perennial groundcovers add texture, color, and interest to your yard.
An added bonus is that some of these groundcovers produce flowers that are delightful to humans and beneficial to many species of pollinators.
Depending on your needs, there are three main categories of perennial evergreen groundcovers: flowering, sun-loving and shade-loving.
Flowering Evergreen Groundcovers
Lilyturf(Liriope muscari): This tough, relatively fast-growing plant has a grass-like appearance, grows from 6 – 12” tall and spreads 12 – 18” wide. It is hardy down to -30 degrees F and prefers partial or full shade, but will grow in a sunny location. It’s great for sloped sides of the garden or areas under large trees with extensive root systems. Varieties with solid green or variegated leaves produce violet-blue flower spires in the spring. As long as it’s planted in moist, well-drained soil, it will endure heat, drought and salt spray.
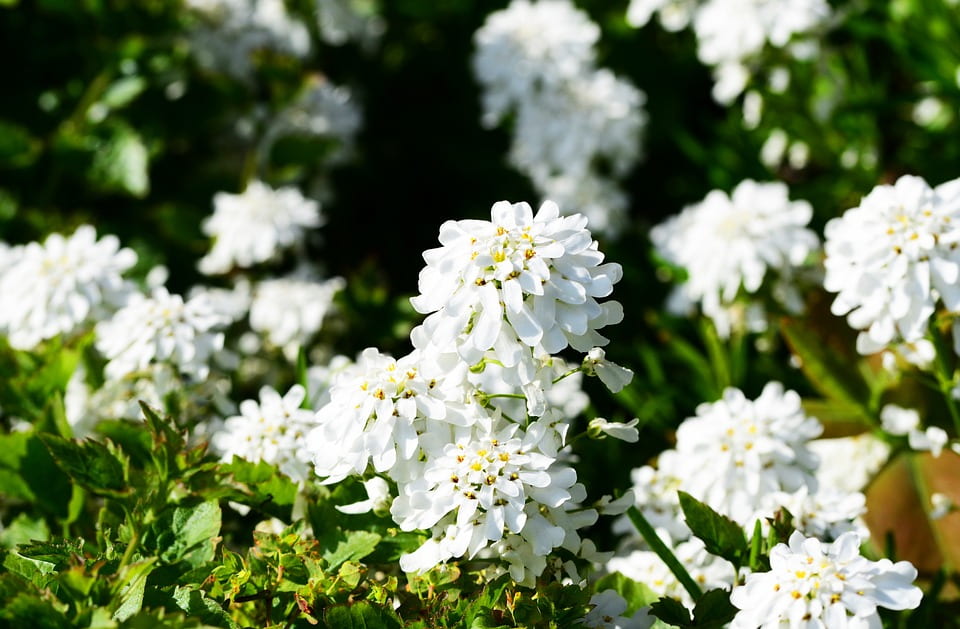
Candytuft(Iberis sempervirens): If you want a ground-hugging flowering perennial as pathway edging where there’s full sun or partial shade, look for candytuft. Best planted in the early fall, candytuft will brighten your garden in April and May with masses of white flowers against dark green foliage. It’s great for drawing bees and butterflies to your landscape while keeping deer and rabbits away. Not everyone likes its floral scent, but it’s a good groundcover suitable in Zones 4 to 8. These plants crave well-drained soil.
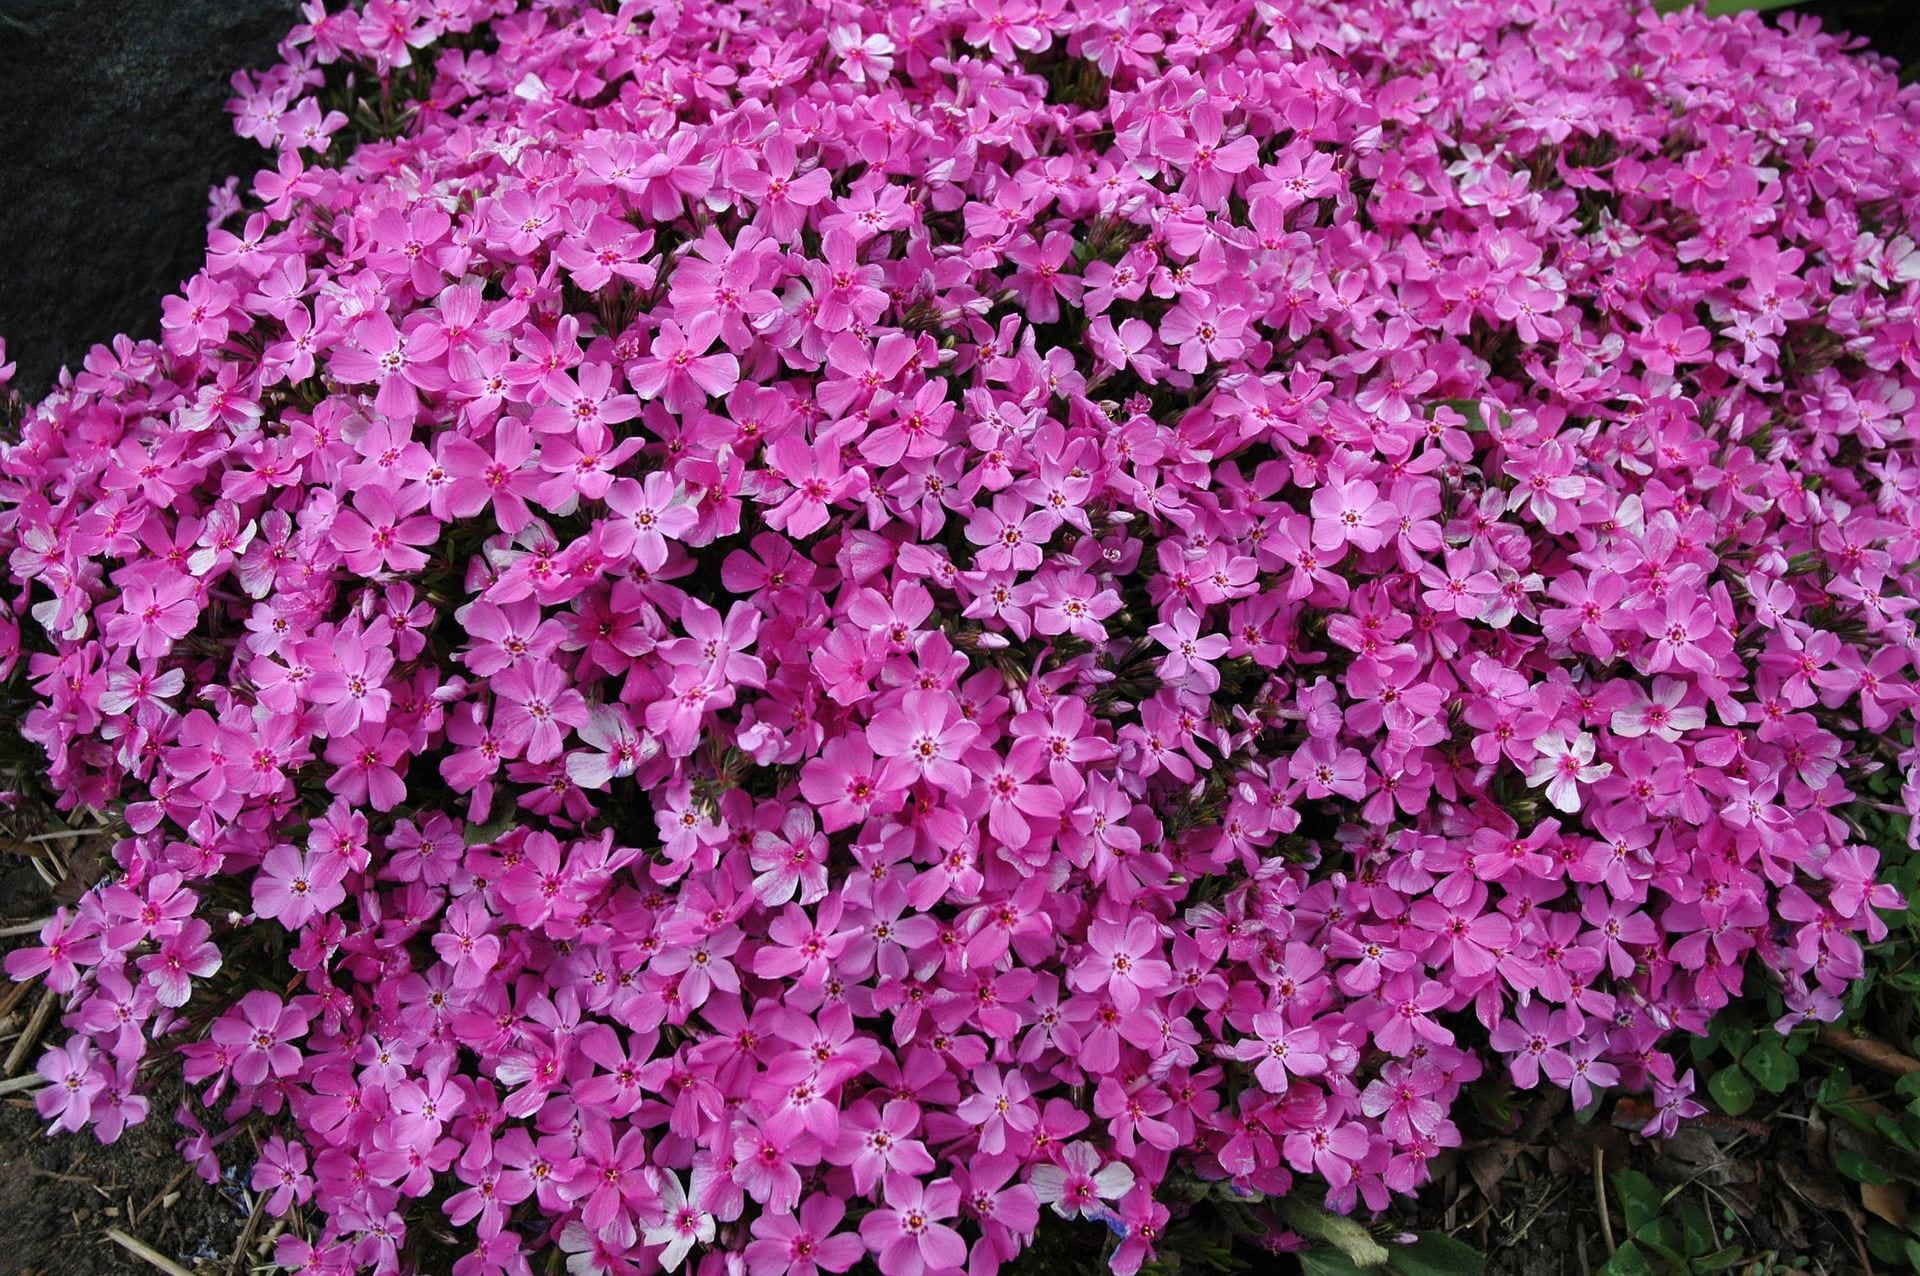
Creeping phlox(Phlox subulata): Considered one of the most colorful of groundcovers, these plants bloom profusely with magenta, purple-blue or white flowers in mid to late spring. They have dark green, needle-like foliage which are covered when in bloom for 3 – 4 weeks. This eastern North America native is deer resistant, trouble-free and extremely tolerant of the cold down to -40°F. You’ll love the hummingbirds and butterflies it draws to your yard. It thrives in full sun but tolerates dappled shade. It grows well in sandy or gravely soils and is drought tolerant once established. This plant is commonly used in rock gardens and sloped areas.
Here are other flowering groundcovers to consider. Thick, succulent, drought- and deer-resistant, sedums(Sedum spp.) are among the best-known evergreen groundcovers. Look for Dragon’s Blood, Blue Spruce and Lime Twister because of their interesting foliage and flower colors. If you need a plant with height, there’s wall germander(Teucrium chamaedrys), a shrubby perennial that’s hardy, drought-tolerant, pollinator-friendly and deer resistant. On the other end of the spectrum, there’s flowering thyme(Thymus spp.) which grows only between 1 – 3” tall depending on the variety. If you want this plant to serve a dual purpose, you can choose the culinary variety of fragrant thyme to flavor your dishes.
Sun-loving Evergreen Groundcovers
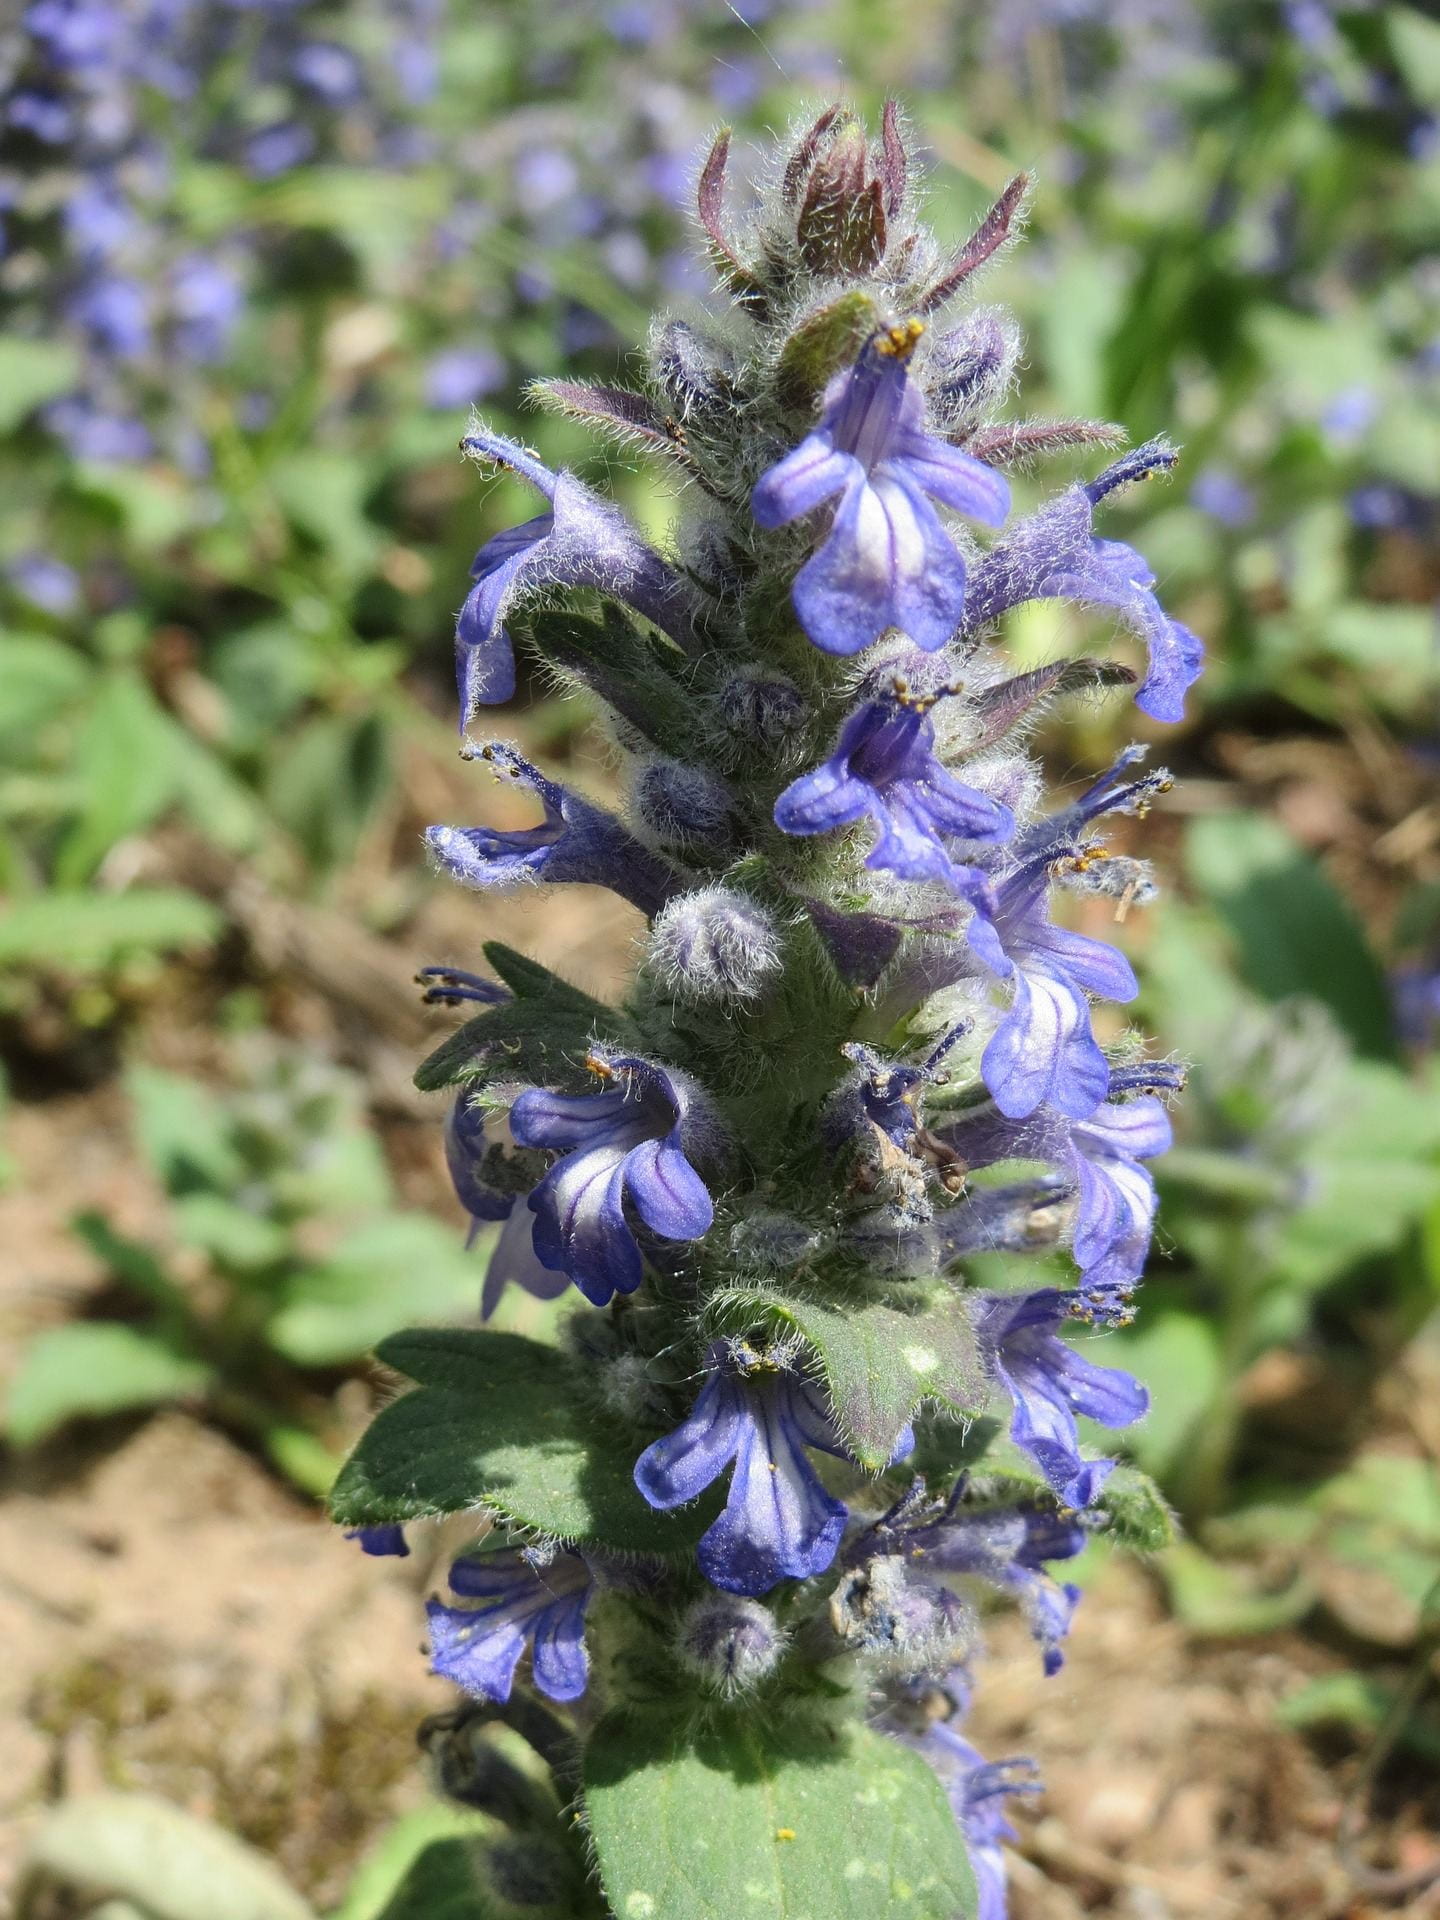
Bugleweed(Ajuga reptans): From green-leaved to bronze, purple or even variegated, there are literally dozens of varieties of bugleweed. There are also cultivars with crinkled leaves. With their spikes of purple-blue flowers, this groundcover is showy and colorful even when it’s not in bloom. Loved by bees when in flower, these hardy creepers survive -40°F weather. Of course, no mowing is required for this stalwart perennial that can spread to form a satisfyingly thick mat.
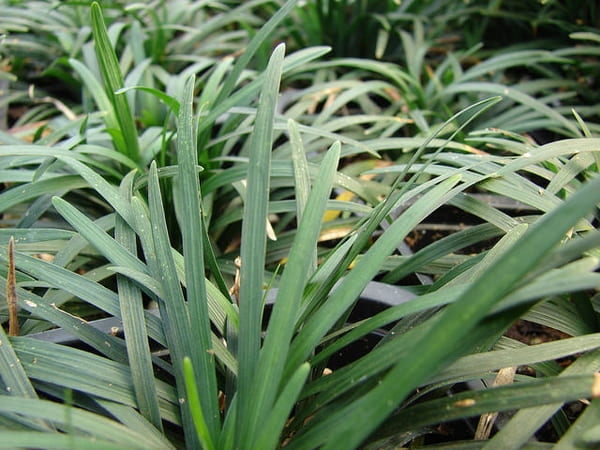
Mini mondo grass(Ophipogon japonicus ‘Nana’): If you can’t quite forego the look of turf and patience is not one of your virtues, try this petite evergreen groundcover that’s the smallest of the small. It’s only hardy down to -10°F, but the green tufts of mini mondo could look spectacular in any garden. It grows to only 4” tall and creates quick cover under full sun. It’s also recommended for use between stepping stones and around the base of trees. When used in this way, the mini mondo grass is a more lasting, less expensive alternative to gravel, shredded bark or other mulches. Just know that this is a clumping evergreen, meaning it won’t form a continuous, undifferentiated carpet of leaves like the bugleweed.
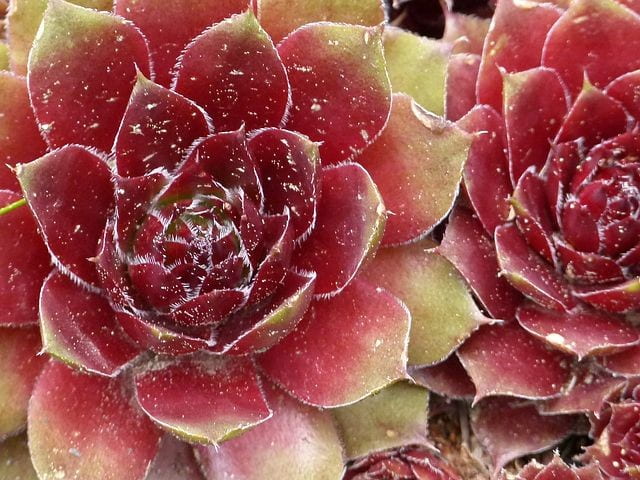
Hens and Chicks(Sempervivum tectorum): We don’t normally think of succulents as being cold hardy, but most hens and chicks are hardy down to -30°F. If you hate watering plants, you’ll appreciate these drought-tolerant perennials. They’re not normally grown for their flowers, but they do occasionally produce spires of colorful blooms in summer. There are many cultivars that come in a wide variety of colors and forms. If you want color, lean toward the eye-catching red or blue hens and chicks. If you want form, there are cobweb- and green wheel-shaped hens and chicks. None grows taller than 8 – 10” in height. You can readily spread them by digging up the offsets and planting them elsewhere in your garden.
Other sun-loving evergreen groundcovers include the rock cotoneaster(Cotoneaster horizontalis) which have soft sprays of green leaves. All cultivars of this plant reach 2 – 3’ in height, so if you have a sloped area, consider it covered. Just know that If the weather dips below -20°F, this plant may only be semi-evergreen. For a shorter groundcover that’s only about 6 -12” tall, you can plant bearberry(Arctostaphylos uva-rusi). It has dark, glossy green leaves. Fully hardy down to -40°F, this plant spreads out its low, arching branches and attracts birds and other wild creatures when it produces dark, red cherries.
Evergreen Groundcovers for Shade
Few gardens are without shady areas, but that doesn’t mean your only options are gravel or mulch. There are enough perennial evergreen plants that thrive in full to part shade to get you covered.
Allegheny spurge(Pachysandra procumbens): I know what you’re thinking. Earlier I cautioned you against the pachysandra. But even though the Allegheny spurge is in the genus Pachysandra, it is far different from the traditional one that blankets many suburban yards. This Allegheny spurge is a native of the U.S. It thrives in heavy to partial shade. In fact, if you plant it in a sunny location, you’ll bleach its dense carpet of matte blue-green leaves and you’ll miss the fragrant white and frothy blooms. Being a native plant, it’s drought tolerant. It’s also hardy down to -20°F. Plant your starters 6 – 12” apart, then enjoy watching this herbaceous perennial spread. Just plan to trim dead leaves in the spring to make way for new growth.
European ginger(Asarum europaeum): Yes, you can have thick, glossy, rounded heart-shaped leaves in the shadiest spot in your garden. Thanks to the European ginger, even the shadiest of spots can feature luscious, low-growing foliage. Their blooms are nothing to brag about, but European ginger has several other attributes. It’s shade- and drought-tolerant. It’s also deer resistant. European ginger reaches 6” tall and is hardy down to -30°F.
Christmas fern(Polystichum acrostichoides): Christmas fern got its name because it stays green through the holiday season. Like most ferns, this one is easy to establish and grow, provided you plant it in the right conditions. Christmas ferns require full or part shade and cool, moist, well-drained soil. It will not tolerate clay soils. When you plant Christmas fern in acidic, humus-rich soil, this robust fern will reward you with glossy-green fronds that grow up to 24” tall. Super healthy ones can grow as high as 36”. Silvery fiddleheads emerge in early spring. In the right place, Christmas ferns are a good border or accent plant that grow in clusters, rather creep in a continuous carpet. They also make a visual impact when planted in a thick mass. If you can envision evergreen fronds dusted with white snow, you’ll be hard pressed to write off this perennial evergreen.
When it comes to gardening, it pays to keep an open mind and think beyond the norm. Green lawns aren’t the most environmentally friendly way to beautify your property. Gardens don’t have to adhere to rigid standards where sod plays the dominant role while perennials and annuals are supporting cast members. By using a variety of perennial evergreen groundcovers, you can achieve a beautiful landscape that you and your family can enjoy for years.
This article appeared in the March 2021 Issue of Gardening in Orange County.
Rose milkweed (Asclepias incarnata) with monarch
Many native seeds require 60, 90 or 120 days of cold, moist conditions (stratification) to break dormancy and germinate. These seeds should be planted in the fall and will germinate when the conditions are right for them. If you didn’t plant native seeds last fall, do not be discouraged, there are a number of native species that only require 30 days of cold, moist stratification. If you plant these seeds by mid-March they will still germinate. In addition, there are native seeds that do not require any special conditioning at all to germinate.
Outdoor / Garden planting: Outdoor planting is the easiest, let Mother Nature do the work!
1) Whether you are planting seed in the ground in March or later, be sure to have an area that is prepared and weed free, weeds will out-compete your native seedlings. Planting seeds in pots or trays and leaving them in a protected area outside also works very well.
2) Plant native seeds only as deep as the width of the seed. Very tiny seeds should be sown on the soil surface with only a light dusting of soil over them. Most of the tiny seeds require exposure to sunlight to germinate.
3) Cover the ground or pots you planted with a piece of window screen or an old cotton sheet. Covering helps to keep the seeds moist, prevents them from being blown away by the wind and protects them from being eaten by birds. Remove the cover once you see the seeds have germinated.
4) Do not let seeds and seedlings dry out. You will need to water if the weather is dry.
5) Always label where your seeds are planted – it is amazing how fast you can forget.
Indoor Cold / Moist stratification:
Wild bergamot (Monarda fistulosa) with hummingbird moth
1) Another way to provide 30 days of cold/moist stratification is to sprinkle the seeds on a damp paper towel or coffee filter, fold in half and seal them in a plastic bag. Place bag in the refrigerator for 30 days. If seeds germinate before the 30 days, remove them from the paper towel and carefully plant in pots.
2) You could also place the seeds in pots or trays of moist potting mix, seal them in a plastic bag and refrigerate. After 30 days, remove pots from their bag and place outside in a protected area.
Check out these links that have helpful directions on native seed germination. They also sell native seeds and provide plant descriptions. Have fun!
by Keith Riddick, Middletown Master Gardener Volunteer
With all the uncertainty in the world right now, many people have turned to gardening as a way of growing their own food as well as a way to cope with stress and anxiety. This isn’t the first time that people have turned to gardening during a time of societal upheaval. Most of us weren’t around, but many families started their own gardens during World War II. Back then, they were called Victory Gardens. Food and money were short during the war years, and fresh fruits and vegetables were sometimes hard to come by. Victory gardens gave people more control over their access to fresh produce and allowed more food to be sent to the troops that were keeping our country free.
Wait! Isn’t gardening a lot of work? It can be, but doesn’t have to be. If you are starting a garden from scratch, it will involve work to prepare the soil (removing sod, large rocks and testing the soil for fertility). However, if you want a garden bed already prepared for you, consider renting a garden bed at a local community garden. There are several community gardens located throughout the Orange County with raised beds full of soil and ready for planting. Chances are there is one not too far from where you live! There is a short list of community gardens at the end of this article, but there are many more located throughout the county.
During this time, community gardens are taking precautions that allow members to safely grow food. Although community gardens usually have communal garden tools, at the moment, you should bring your own tools. Other considerations include limiting the number of people in the garden at one time and finding safe ways to water your garden plot with the communal water source. When you join a community garden, make sure you are aware of and follow all the rules set in place to keep you and your fellow gardeners safe.
Another perk of community gardens are community plots, like an herb garden, for all to share. Many also have compost bins for recycling organic material like vines, stems and leaves leftover after you have harvested the edible part of a plant. This debris decomposes and is then returned to the garden beds as a type of fertilizer.
Maybe a community garden isn’t right for you at this time and you don’t have any space in your yard either. In that case, you can grow vegetables in containers. Whether you put them on your patio, your deck, or even your balcony, as long as the plants get enough sun and water you should have a bountiful harvest. You just can’t beat the terrific taste of fresh produce picked straight from the garden, so grow a garden this summer!
Location: Warwick Valley Community Center
11 Hamilton Avenue
Warwick, NY 10990
Cost:$35 per year (includes garden and orchard)
There are no individual plots. All members work together to plant, maintain, and harvest the entire garden.
Contact: Kelly Collins
(845) 978-8845
colli642@gmail.com
If you happen to have a garden or have decided that this is the year to start one there are lots of things to keep you busy at this time of year!
Perennial Beds
Mantis ootheca on forsythia
Hopefully you waited until spring to clean up your garden to allow beneficial insects and other arthropods such as bees and butterflies to overwinter. Now that spring has sprung you should leave debris as long as you can to give these creatures a chance to emerge from their winter hiding places. You should start carefully removing debris from around blossoming plants. If you must cut back hollow stems, bundle them so any pollinators overwintering inside have a chance to emerge. As you are cleaning up be on the look out for praying mantis egg cases know as ootheca. This is one time when you should leave things till tomorrow!
Freshly mulched garden beds
Mulching is another spring time activity. There are many different types of organic mulch that will not only suppress weeds, but also add organic material to the soil as they break down. You don’t have to mulch everything, in fact many ground nesting bees such as bumble bees need a bit of bare earth to make their nests. And if you are mulching your trees make sure to keep the mulch at least 3 inches away from the base of the tree so that it is not touching the bark.
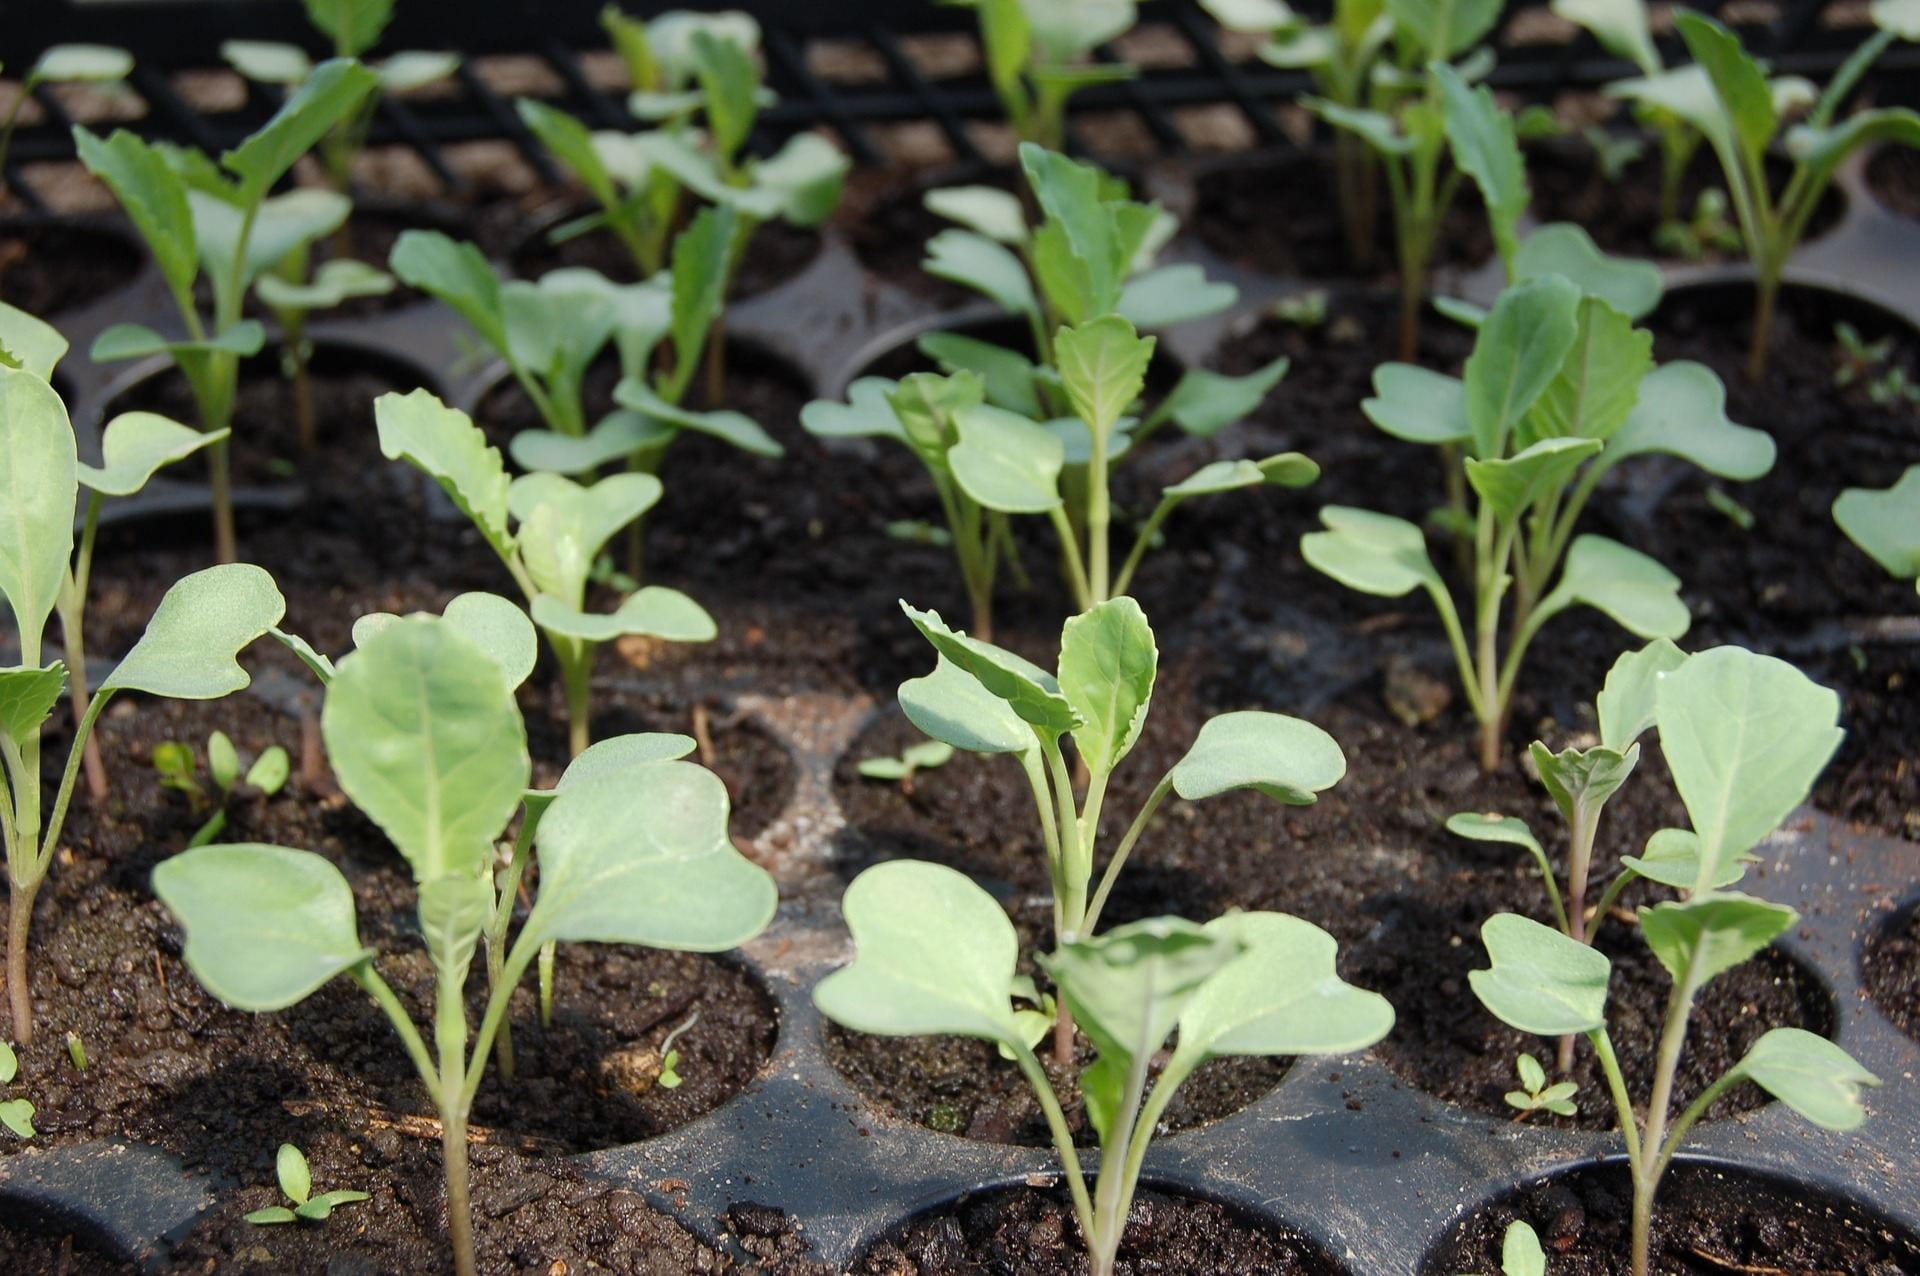
It is not to late to seed one more round of cool season crop such as cabbage, kale, and lettuce, but it is also time to start seeding warm season crops such as eggplant, peppers, and tomatoes.
To start seeds you will need:
seeds
Flats of seedlings
There are lots of places online where you can purchase seeds. If you still have seeds left over from last year and don’t know if they are still good, don’t throw them out, try this simple home germination test.
sterile potting mix
It is important to use sterile potting mix to avoid disease issues like damping off. Do not reuse potting mix and do not use garden compost.
container
Rainbow chard seedlings in a supermarket salad container
You don’t need to buy a fancy container to start seeds. Just make sure the container has been sterilized and has drainage holes.
water
You want to keep the soil moist, but be careful not to over water or you may have a problem with damping off.
light source
Bookcase converted into a grow frame
Some seeds need light to germinate, but all seeds need light after they germinate. Once your seeds sprout a light source will help prevent them from becoming leggy. You can purchase grow lights or just use a soft white fluorescent bulb. Here are directions on how to build a Low-Cost Grow-Light Frame.
heat
Mini greenhouse
Most seeds will germinate between the temperatures of 55°F and 75°F, but the optimal temperature for each type of seed varies. You can create a mini-green house to trap heat and moisture. You can also buy heating mats to warm the soil. Click here to see Soil Temperature Conditions for Vegetable Seed Germination.
Out in the Garden
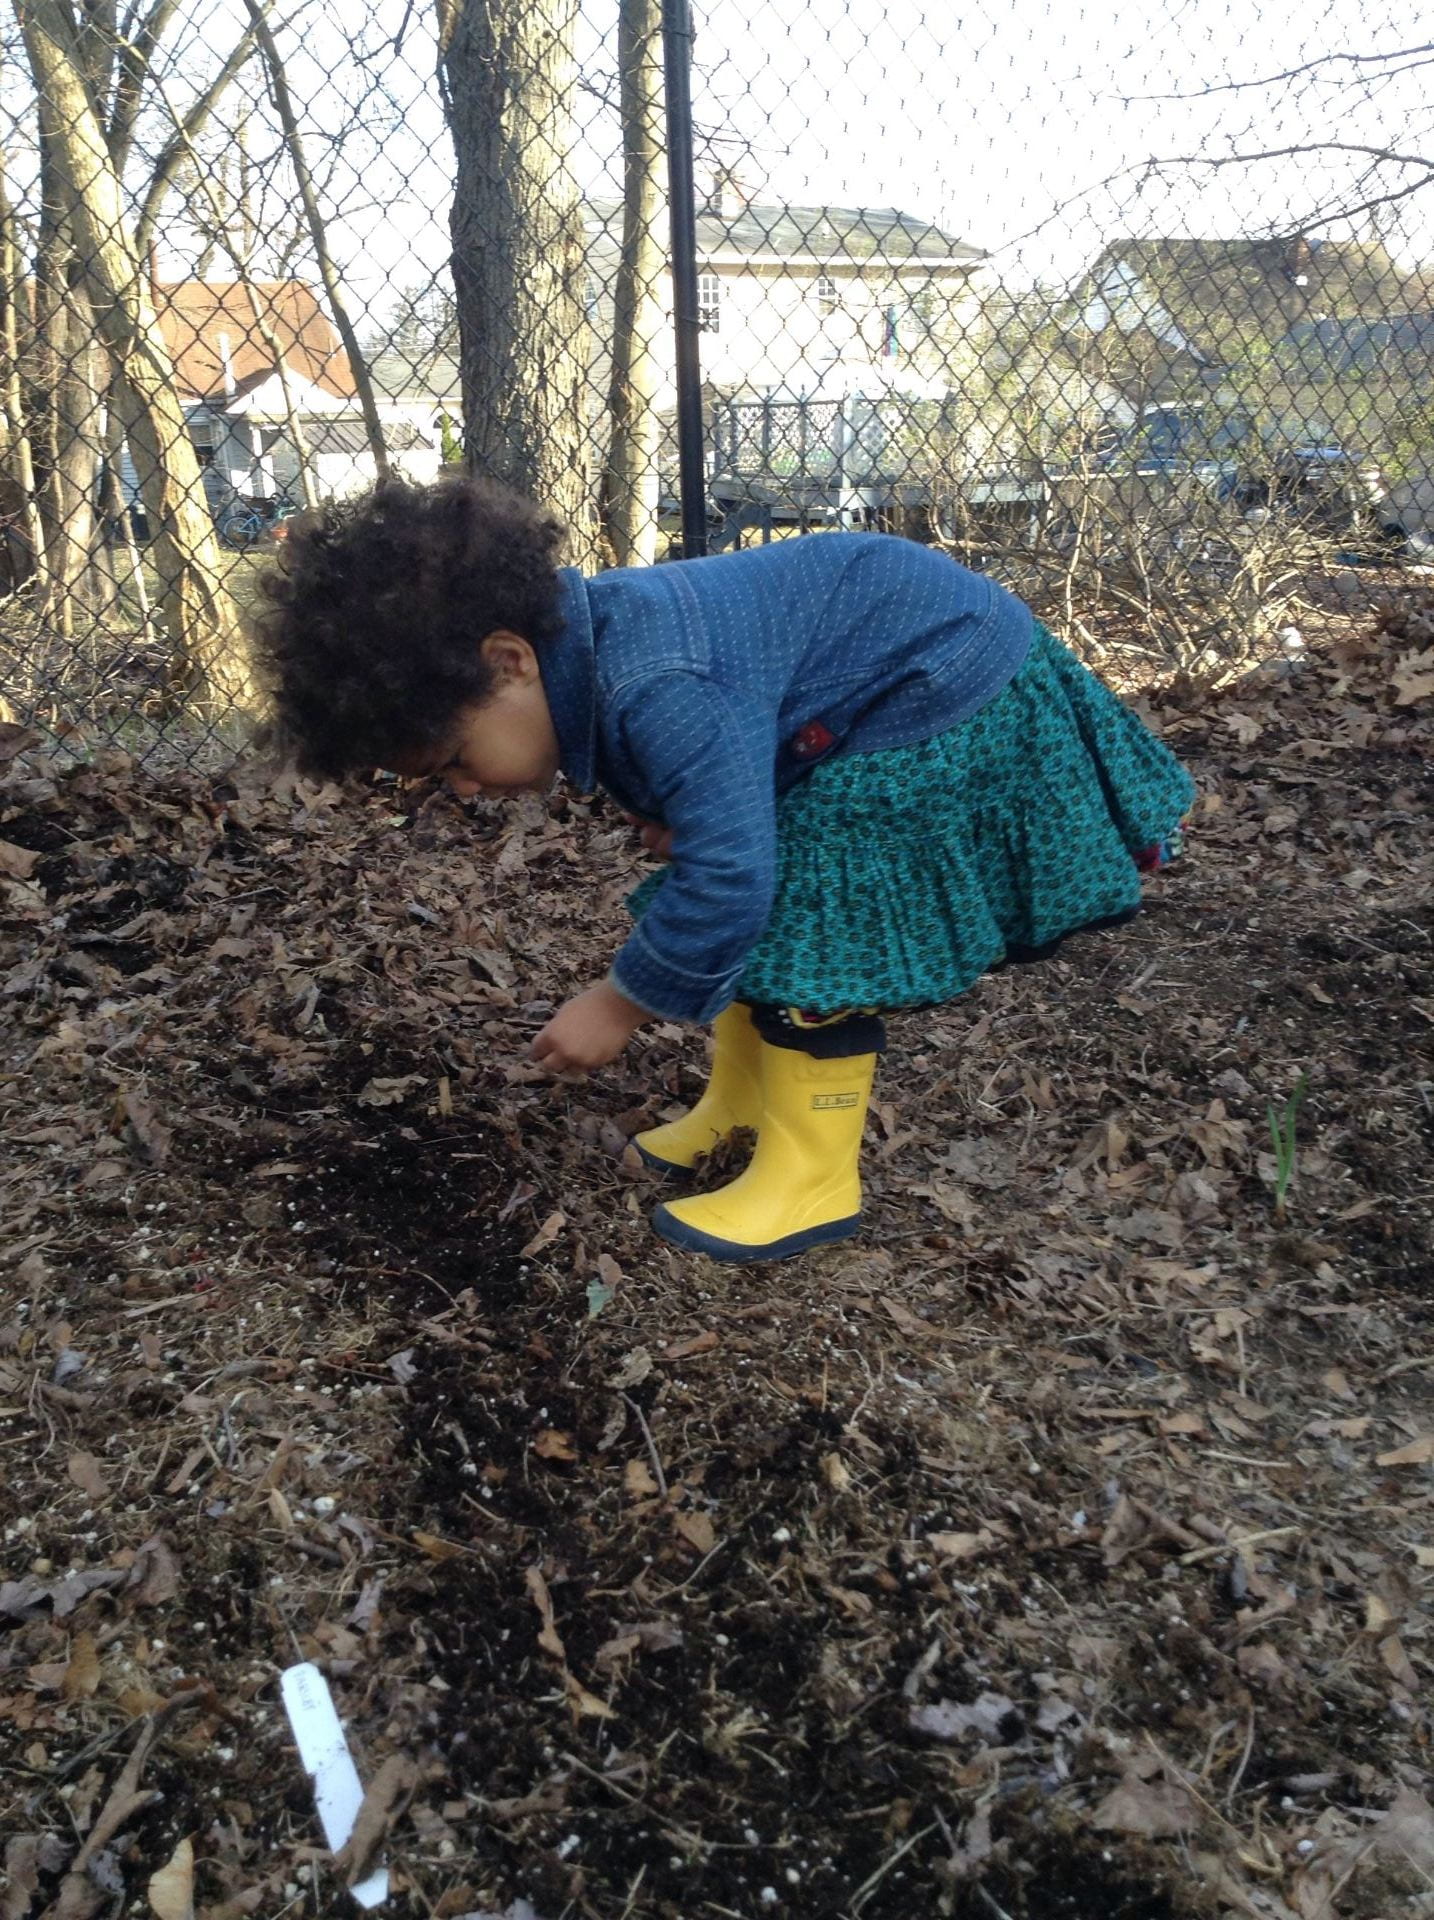
Planting peas
Gardening is an activity for the whole family! Children love helping plant seeds! Right now you can be direct seeding cool season crops in your garden such as beets, carrots, lettuce, peas, radishes, spinach, and turnips. If you want to have a continual harvest, consider succession planting or seeding several smaller plantings of the same crop at timed intervals, rather than all at once.
Chives
While most people are busy seeding, some perennial plants are already coming up or even ready to harvest! Chives are a great example of a perennial that allows you add something fresh and green to your meals in the early spring. If you planted chives in your garden last year, they are probably already making their way to your table. This perennial of the onion family begins growing in early March and is able to be snipped with scissors and eaten soon after and throughout the growing season right up until the fall frost.
Rhubarb
Another perennial making an appearance is rhubarb! Rhubarb is a great addition to any vegetable garden and as it is deer resistant and highly attractive it can also be used as part of your edible landscape. Although the leaves of rhubarb are considered poisonous, the stems of this spring crop that can be used to make the classic strawberry rhubarb pie as well as many other delicious snacks.
And as always, if you are having any issues in your garden, need help identifying the cause of a problem or figuring out a management strategy give us a call. Our Garden Helpline phones are staffed April – November, Monday, Wednesday, and Friday, from 9:30 am – 12:30 pm. But you can always leave us a message or send us an e-mail.
 Many sources provide great advice on sowing seeds. Key factors include sufficient light and temperature for growing the seeds. But the question inevitably arises when to transplant them outdoors. Don’t rush. Cold soil and air temperatures can stress plants. Wait at least a week or two after the last frost.
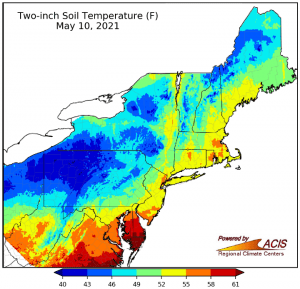 Nighttime temperatures should be consistently above 45°F, and the soil should be warm, about 70°F. You can use black plastic mulch to warm soil and/or row covers, hot caps or other protection to keep plants warm early in the season. Remove covers whenever temperatures exceed 85°F.
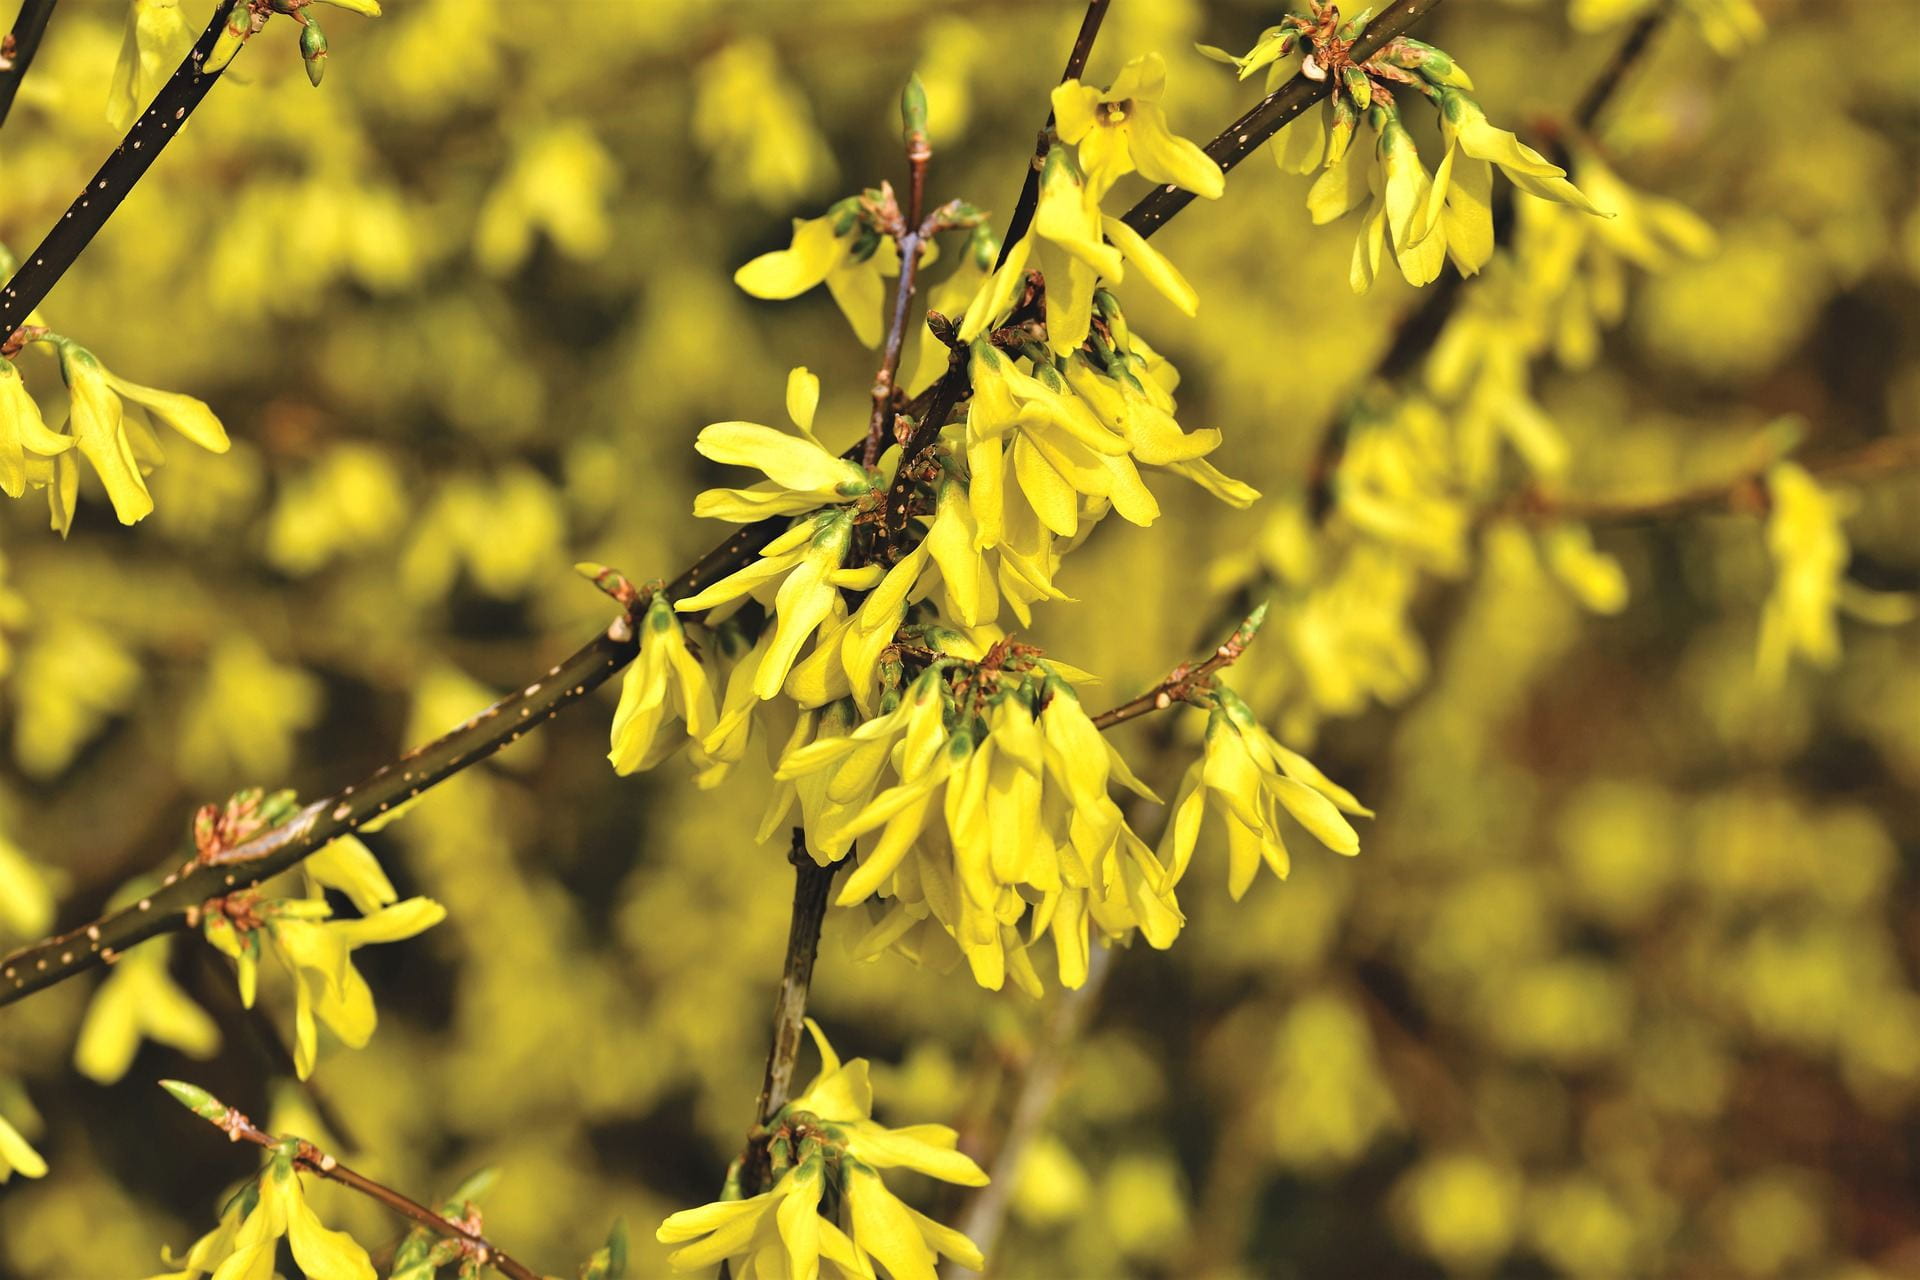 Phenology is a branch of science that studies the relationships such as the life cycles of plants and animals and environmental changes. Seasonal changes such as weather or temperature can be correlated with natural events such as bird migration, plant budding, flowering or fruiting and insect activities. For example, in the Hudson Valley migrating hummingbirds usually arrive when forsythia bloom. Centuries ago, Native Americans began planting corn when oak leaves are the size of a Snowdrop (Galanthus nivalis).
 Plant peas when forsythia blooms.
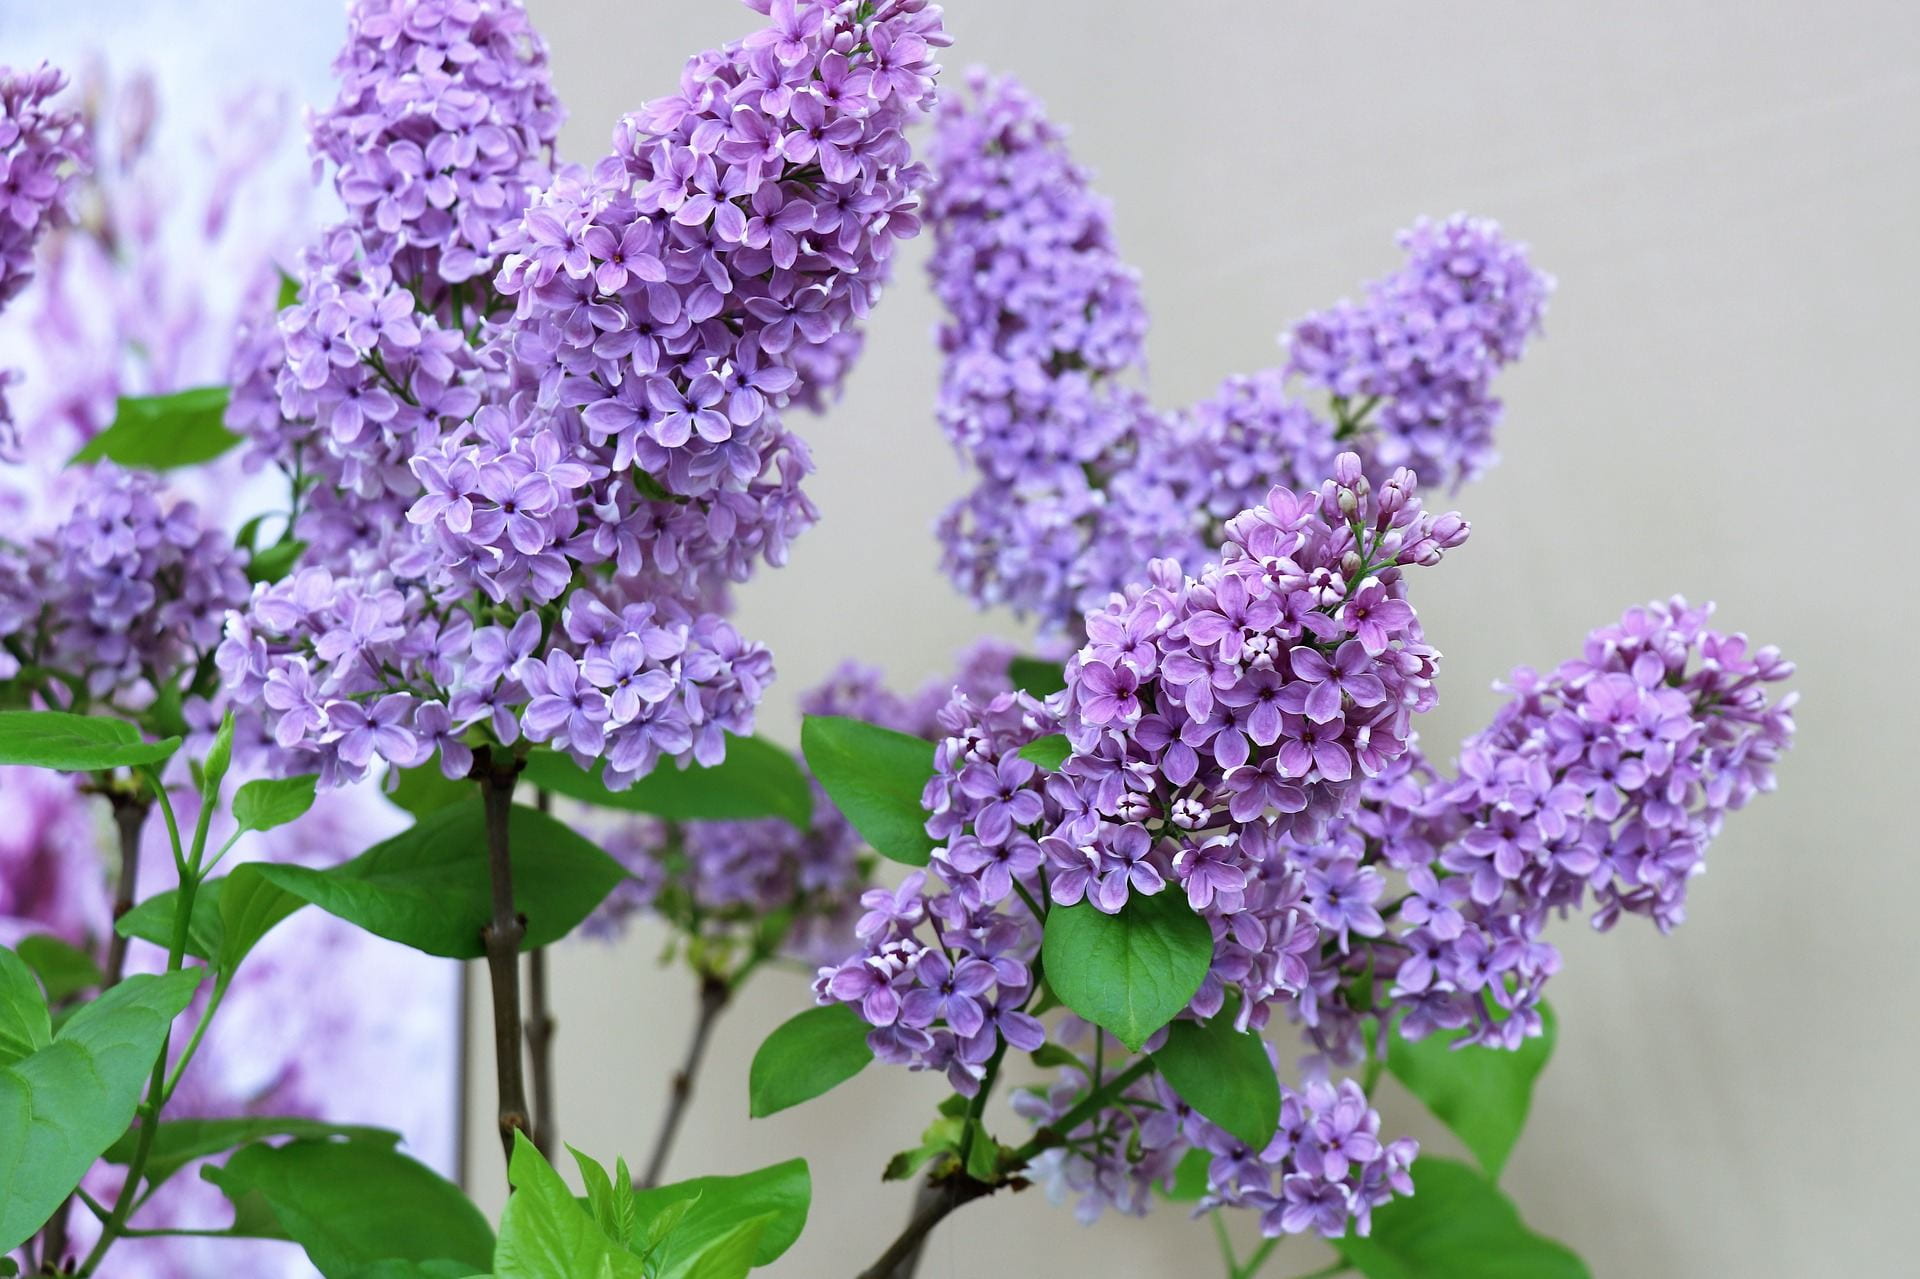
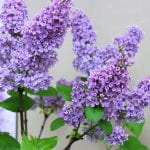 Plant bean, cucumber, and squash seeds when lilac is in full bloom.