
So, you’ve found your dream dehydrator and you are ready to get started. The dehydrating process is not especially complicated: Food is dehydrated by subjecting it to low heat and a steady airflow, evaporating enough moisture to inhibit the growth of bacteria, yeast, and mold—things that spoil precious food. You want food to be as dry as possible before storing it. Along with your dehydrator’s manual, the Internet has many reliable sources of dehydrating instructions (see resources below), so I won’t reinvent that wheel, but I will share some things I encountered during my first year of dehydrating.
Prepping Food
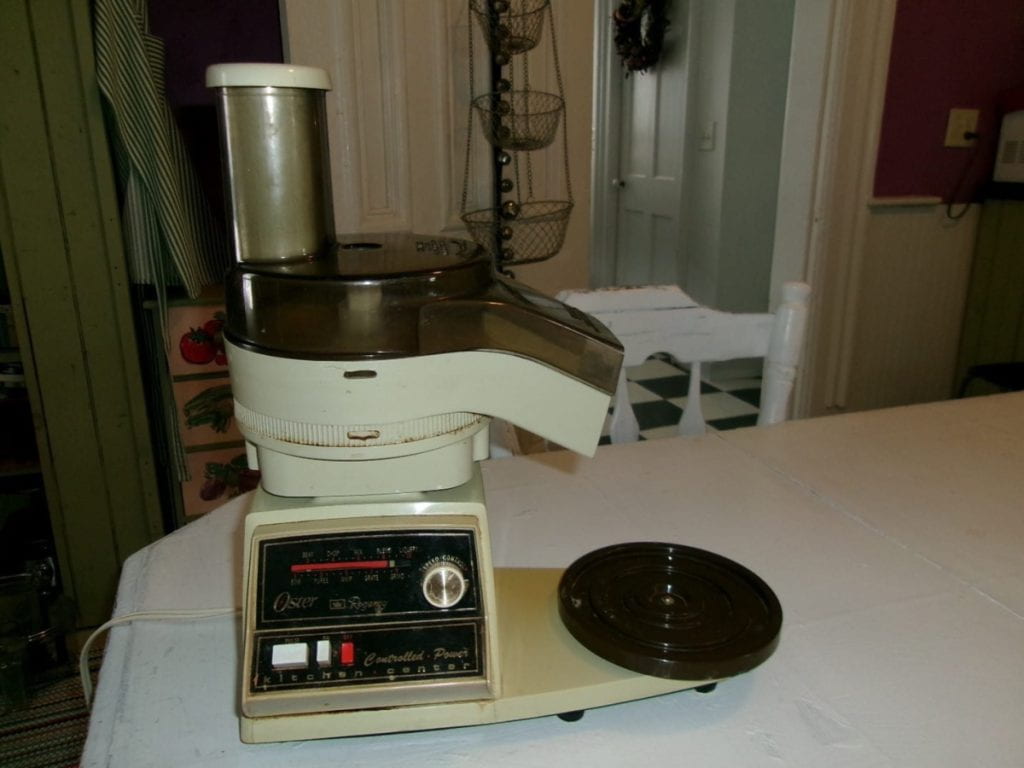
Ideally, all dehydrated food should end up at the same level of dryness, so chopping, cutting, or slicing food into uniform pieces makes sense, right? Imagine starting one thick and one thin burger on the grill at the same time: You know that the thin one will cook more quickly. Some obliging vegetables like corn and peas come uniformly sized. To cut up larger produce, many people use a mandolin. Since I typically shred my knuckles on a plain old cheese grater, a mandolin is probably not in my future. Seriously, mandolins are out for blood. An egg slicer works great for strawberries and mushrooms. Depending on the size and shape of the food, I either use sharp knives or my trusty Oster Kitchen Center.
Dehydrating Times
As shown in the chart below, dehydrating times vary, with juicier foods like peaches and pears taking longer to dry than, say, apples.
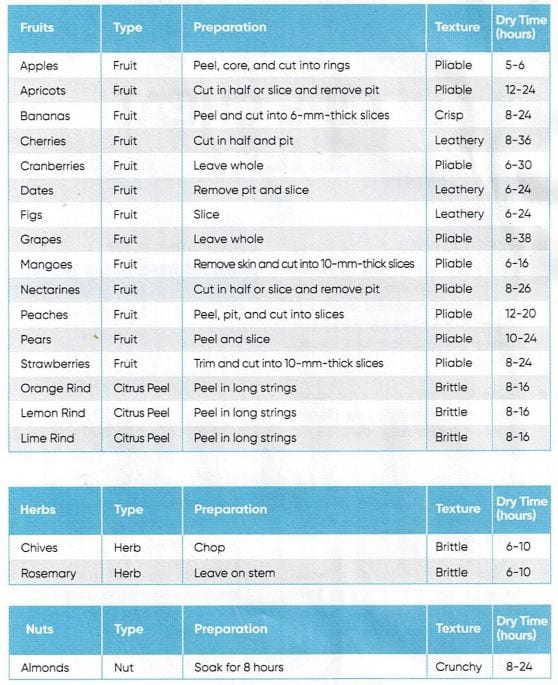
Some people ignore the recommended times altogether, leaving the dehydrator on for 24 hours no matter the food. Can you over dry food? Most sources say no. So how do you tell if the food is “dry enough”? The USDA says that dried vegetables should be hard and brittle, to the point that some will shatter when hit with a hammer. Before you pull out the ol’ ballpeen, take out a few pieces of food and let them cool before testing—warm food tends to seem moister and more pliable.
You may end up varying dehydrating times, but do not mess with the recommended temperatures. For example, if the initial temperature is too high, the food surface might dry, making it hard for moisture to escape. Instead of upping the temperature to speed up drying time, cut food into smaller or fewer pieces.
Conditioning Food
Definition from Missouri Extension ‘Conditioning is the process used to equalize, or evenly distribute, moisture left in the food after drying. It is usually done to fruits, herbs and seeds to improve storage, because it decreases the chance of spoilage, especially by molds.’
Before this year, I had no idea that it is recommended to “condition” some dehydrated food before storing it. But, even uniformly sized pieces of food, especially fruit, will dry at different rates, so before you store food, you need to make sure every piece is completely dry. Note, because vegetables dry to a nearly waterless state, conditioning them is not always necessary, but I still do it.
To condition, I fill a glass canning jar about two-thirds full of dried food, cover it with a non-permeable lid, and leave it on my kitchen counter for a week. Half gallon jars work great for this. Every day, I shake each jar to separate any pieces that are stuck together. If I see moisture inside the jar, I dehydrate it again.
Storing Food
You can store dried food in pretty much any clean, dry container that has a tight-fitting lid, such as canning jars, freezer containers, plastic/mylar freezer bags, etc. As with canned foods, store dried foods in a cool, dry, dark area. Recommended storage varies greatly among sources, but in general, you can store dried foods from four to twelve months.
I store dried foods in vacuum-sealed glass canning jars, mainly so that I can admire my stash, but also so that I can easily see any moisture in the jars. Vacuum sealing jars is not required, but it helps extend food’s shelf life. After much research, I bought a “brake bleeder” and reusable jar sealers (both regular and wide mouth) to vacuum seal jars. I’d had no idea that brake bleeders even existed, but using one turned out to be an inexpensive and (for me) convenient way to suck the air out of jars. I love that it can be used to seal jars of other foods, too. I buy staples like flour, grains, etc., in bulk, transfer them into glass jars, and then seal them. Note that vacuum sealing jars using the brake bleeder is NOT a substitute for canning!

The Results
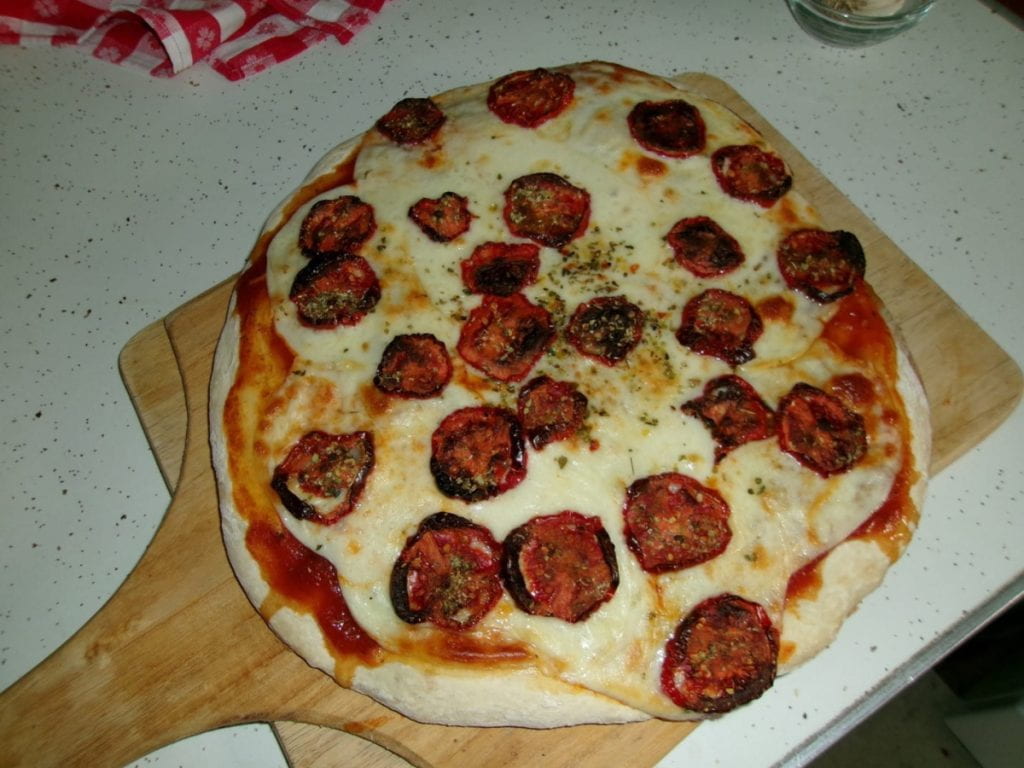
I used my dehydrator a lot during the season to dry “standard” vegetables, my very favorite being tomatoes. I sliced all of those smallish tomatoes that are inconvenient to peel, and then sprinkled them with garlic salt, nutritional yeast, and Italian seasoning. I put them on everything but corn flakes.
I started getting excited about dehydrating “non-standard” food: How about garlic? Yes! Normally, you would dehydrate garlic for 8-10 hours, but since mine had already cured in the garage for several weeks, I put it in the dehydrator for 3-4 hours, just to remove that last bit of moisture. This worked great but be aware: You cannot plant dehydrated garlic.
You can use the dehydrator to proof bread dough—who knew? I gave that a shot, but truthfully, it was more convenient for me to proof it in the oven. Some things I haven’t yet tried are making yogurt, drying seeds or cheese, curing nuts, and de-crystallizing honey.
For more inspiration check out the slideshow below to hear what other St. Lawrence County Master Food Preserver volunteers enjoy dehydrating.


The bottom line, as with many food-related practices, is to make choices that reflect your lifestyle, budget, and preferences. Give dehydrating a try, but don’t be surprised if you get started and just can’t stop!
Resources
Adventures in Dehydrating, Part 1
https://blogs.cornell.edu/fruition/2023/01/26/drying1/
National Center for Home Food Preservation (NCHFP) dehydrating web site
https://nchfp.uga.edu/how/dry.html#gsc.tab=0
Home Drying of Fruits and Vegetables
https://naldc.nal.usda.gov/download/IND79001206/PDF
How do I Know if Fruit is Dry?
https://nchfp.uga.edu/how/dry/csu_dry_fruits.pdf?fbclid=IwAR1ntcE8CGTT7IrOKFb7a8cE_AaLv-6JpB7d7AQe0zmJwR9POtIRLIo27MY
How do I Know if Vegetables are Dry?
https://nchfp.uga.edu/how/dry/csu_dry_vegetables.pdf?fbclid=IwAR2PV10exNxzQv8Tob2ACEEujQCs0cT4-0VMRvJICzYMgf0XSpQ2UJ-GjHM
How to Store Dehydrated Foods (including a video, “Four Ways to Vacuum Seal Jars”)
https://www.thepurposefulpantry.com/how-to-store-dehydrated-foods/#:~:text=To%20use%20with%20dehydrated%20foods,them%20down%20to%20small%20pieces
HTOMT 2 in 1 Brake Bleeder Kit Hand-held Vacuum Pump Test Set ($19)
https://www.amazon.com/gp/product/B07471TKRF/ref=ppx_yo_dt_b_search_asin_title?ie=UTF8&psc=1
FoodSaver Jar Sealer for Vacuum Sealer ($20)
https://www.amazon.com/gp/product/B016OL1AB6/ref=ppx_yo_dt_b_asin_title_o00_s00?ie=UTF8&psc=1
Kathryn Farr has been growing and preserving vegetables and fruit for many years. She completed the Extension’s Master Food Preserver Volunteer training earlier in 2022 and was recently certified as a Cornell Cooperative Extension Master Food Preserver.