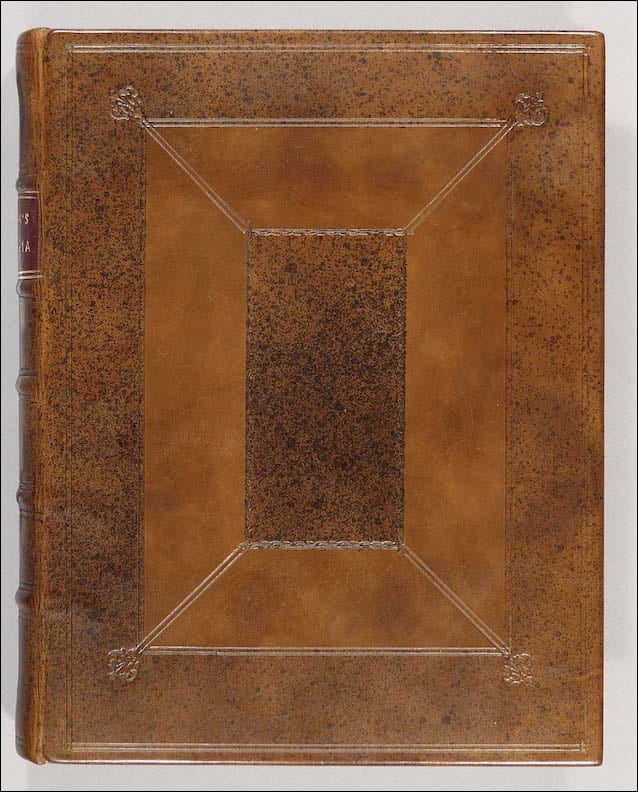
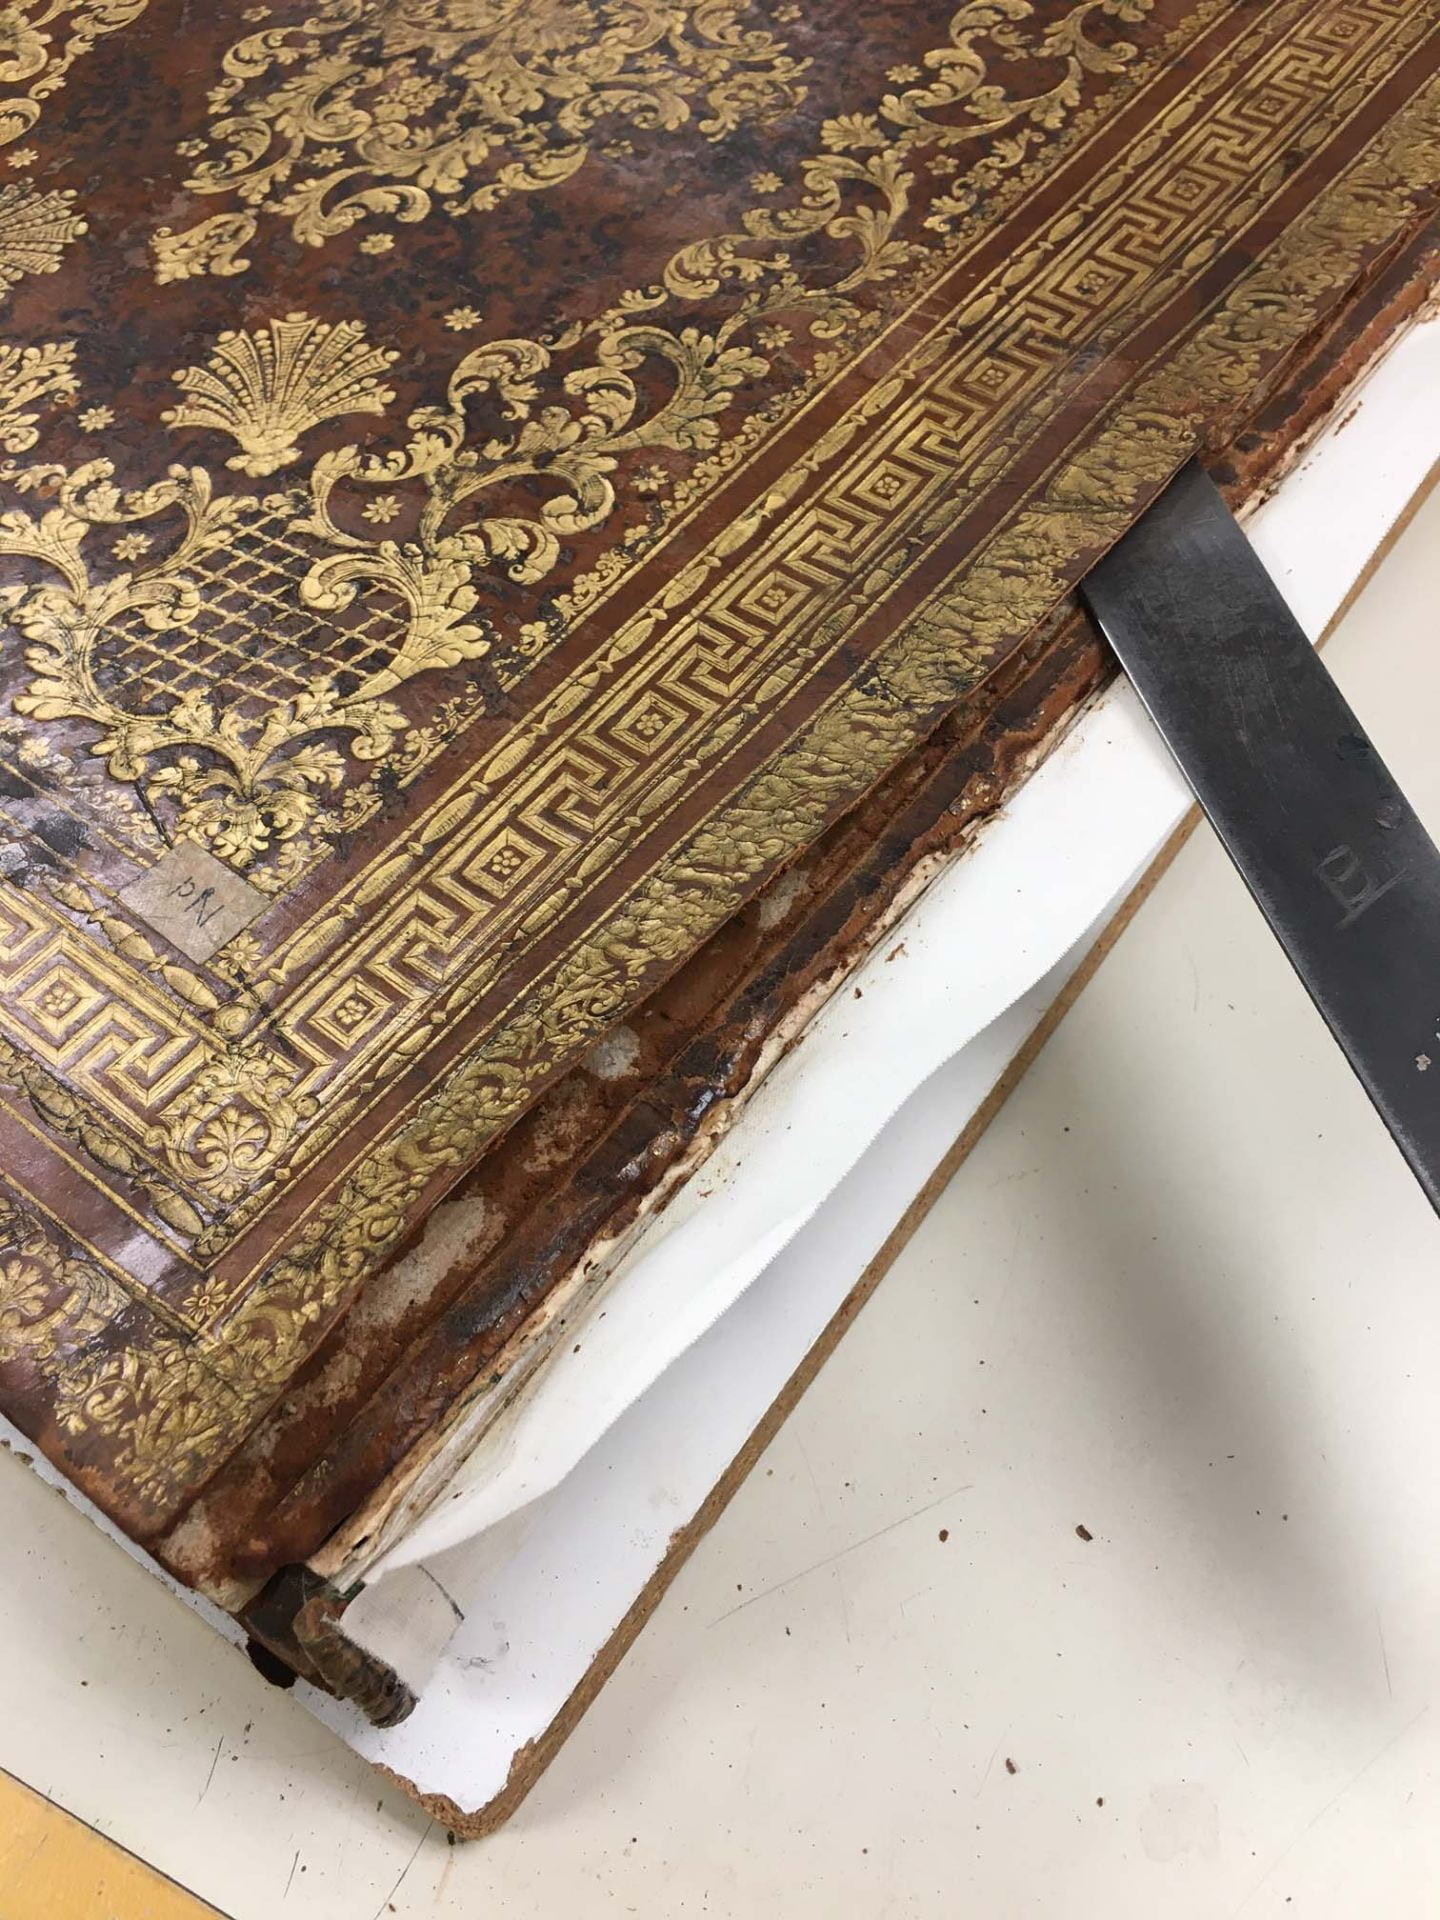
An Equestrian Zusetsu

J.M.Iaccheirolled scroll and partially unrolled scroll
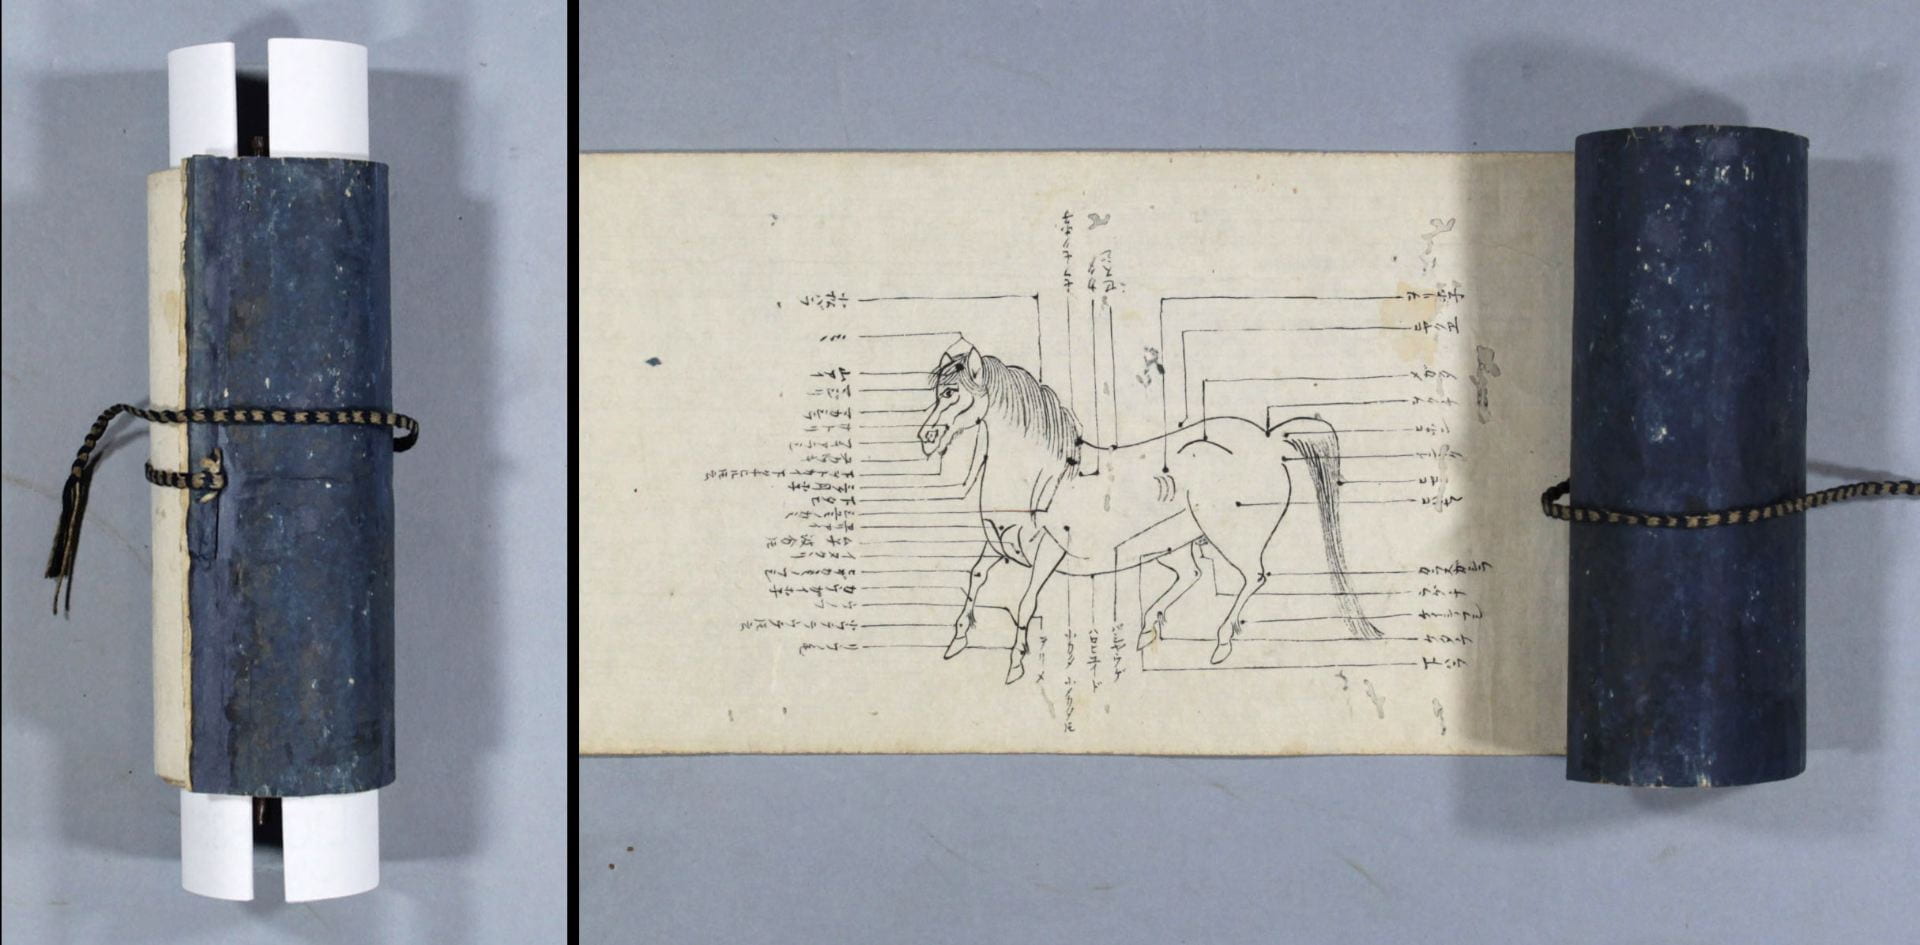
Cornell University Library curators build our rare and distinctive collections to enhance strengths, expand subject areas, and respond to instruction and research needs. Laurent Ferri, curator of pre-1800 collections, Rare and Manuscript Collections, Kroch Library, has had a long scholarly and personal interest in Japan and the equine subject area. He has added a few important equine manuals and scrolls to the collection, which complement Cornell’s equine strengths, like the Cornell Vet School, Equine Hospital, and Equine Park. For example, Laurent recently acquired this Japanese equestrian arts scroll from a family of New York-based booksellers. Assessing, stabilizing, and rehousing new acquisitions are a priority area of responsibility for the Conservation Lab so new collection items can be safely made available for use, instruction, and research.

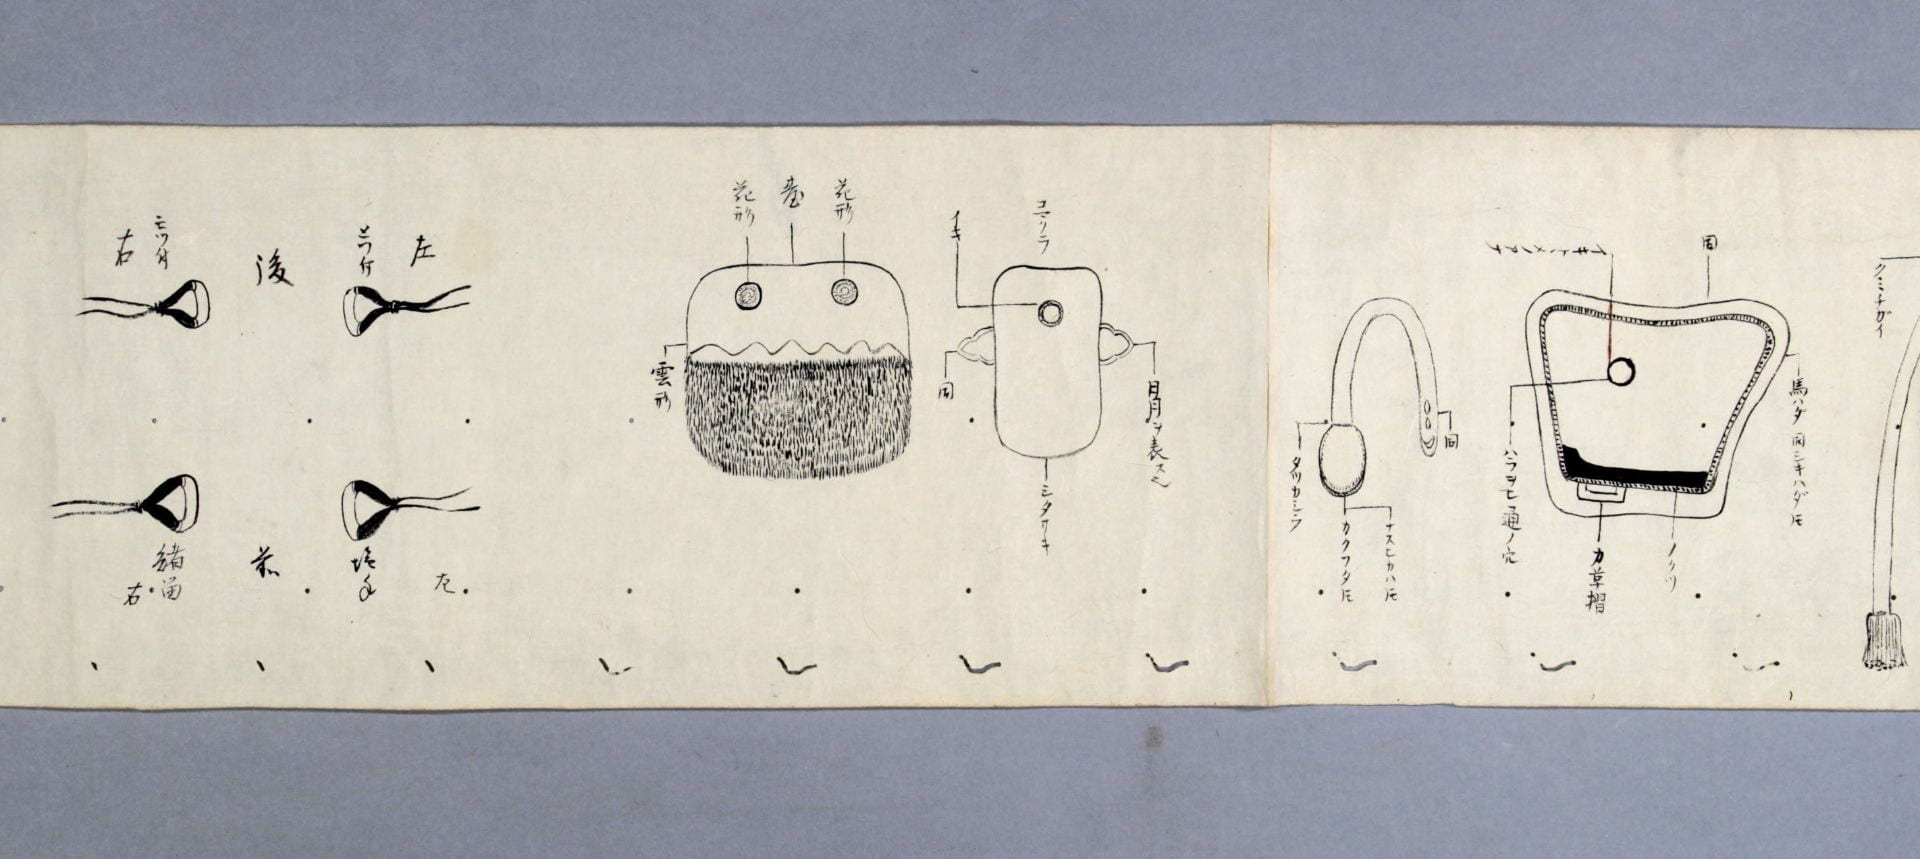
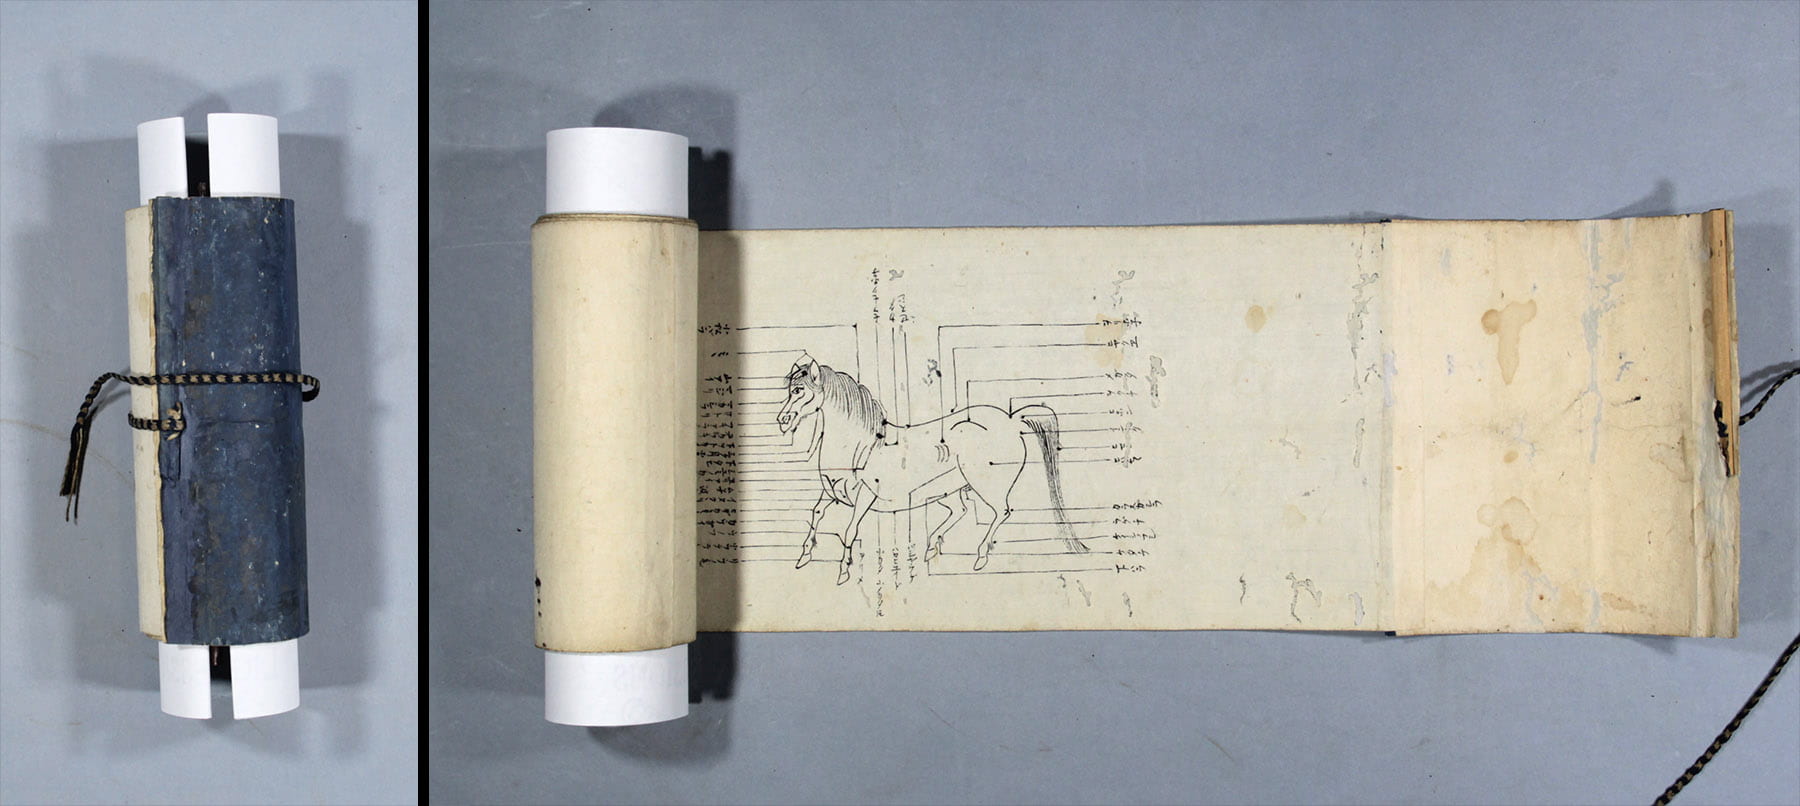
The scroll is a zusetsu, or “graphic dictionary.” It is undated, but thought to be from the 19th century. Our Japanese Bibliographer Daniel McKee, from the Asia Collections, Kroch Library, provided additional insight about the scroll’s content noting that the imagery throughout the scroll is focused on horseback riding with the accompanying text giving detailed names to the parts of the horse and equestrian accessories– saddle, the stirrups, the cinch, the bridle, etc. He explained that in the high court culture of Japan, detailed naming was a way of asserting specialized knowledge and control. On our scroll, this detailed naming went so far as to include the term for the hairs on the back of the horse’s legs.

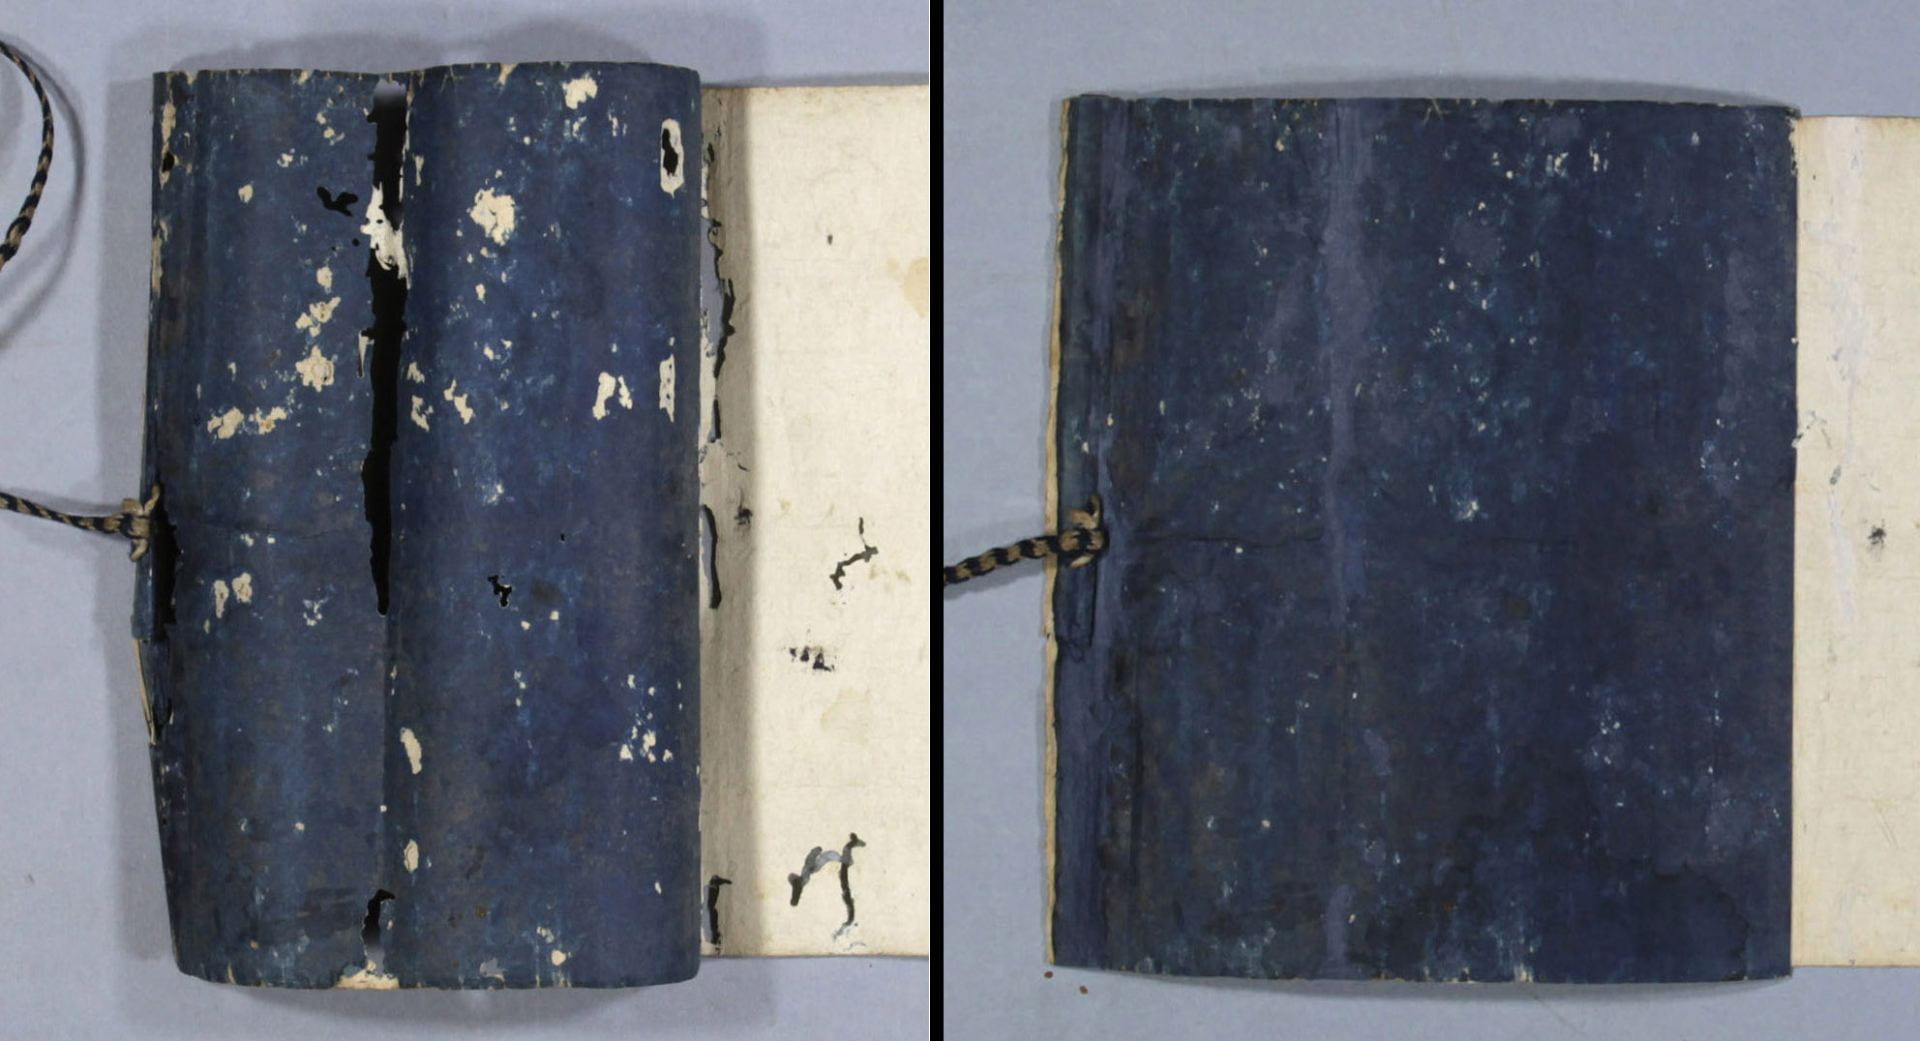
The scroll is composed of six smaller sheets of handmade Asian paper joined together at their edges producing a full length of over 10 feet with a width of approximately seven inches. Attached at the beginning of the scroll, a blue colored leader wraps around to protect the remainder of the scroll. It is uncertain if the blue color of the leader is dyed with indigo; however, the color evokes the past tradition of using indigo dye to denote high status and class.

The scroll is rolled on a thin wooden dowel. A dark blue and tan woven cord attached through a thin wooden slat at the end of the leader helps to further secure the scroll while rolled.

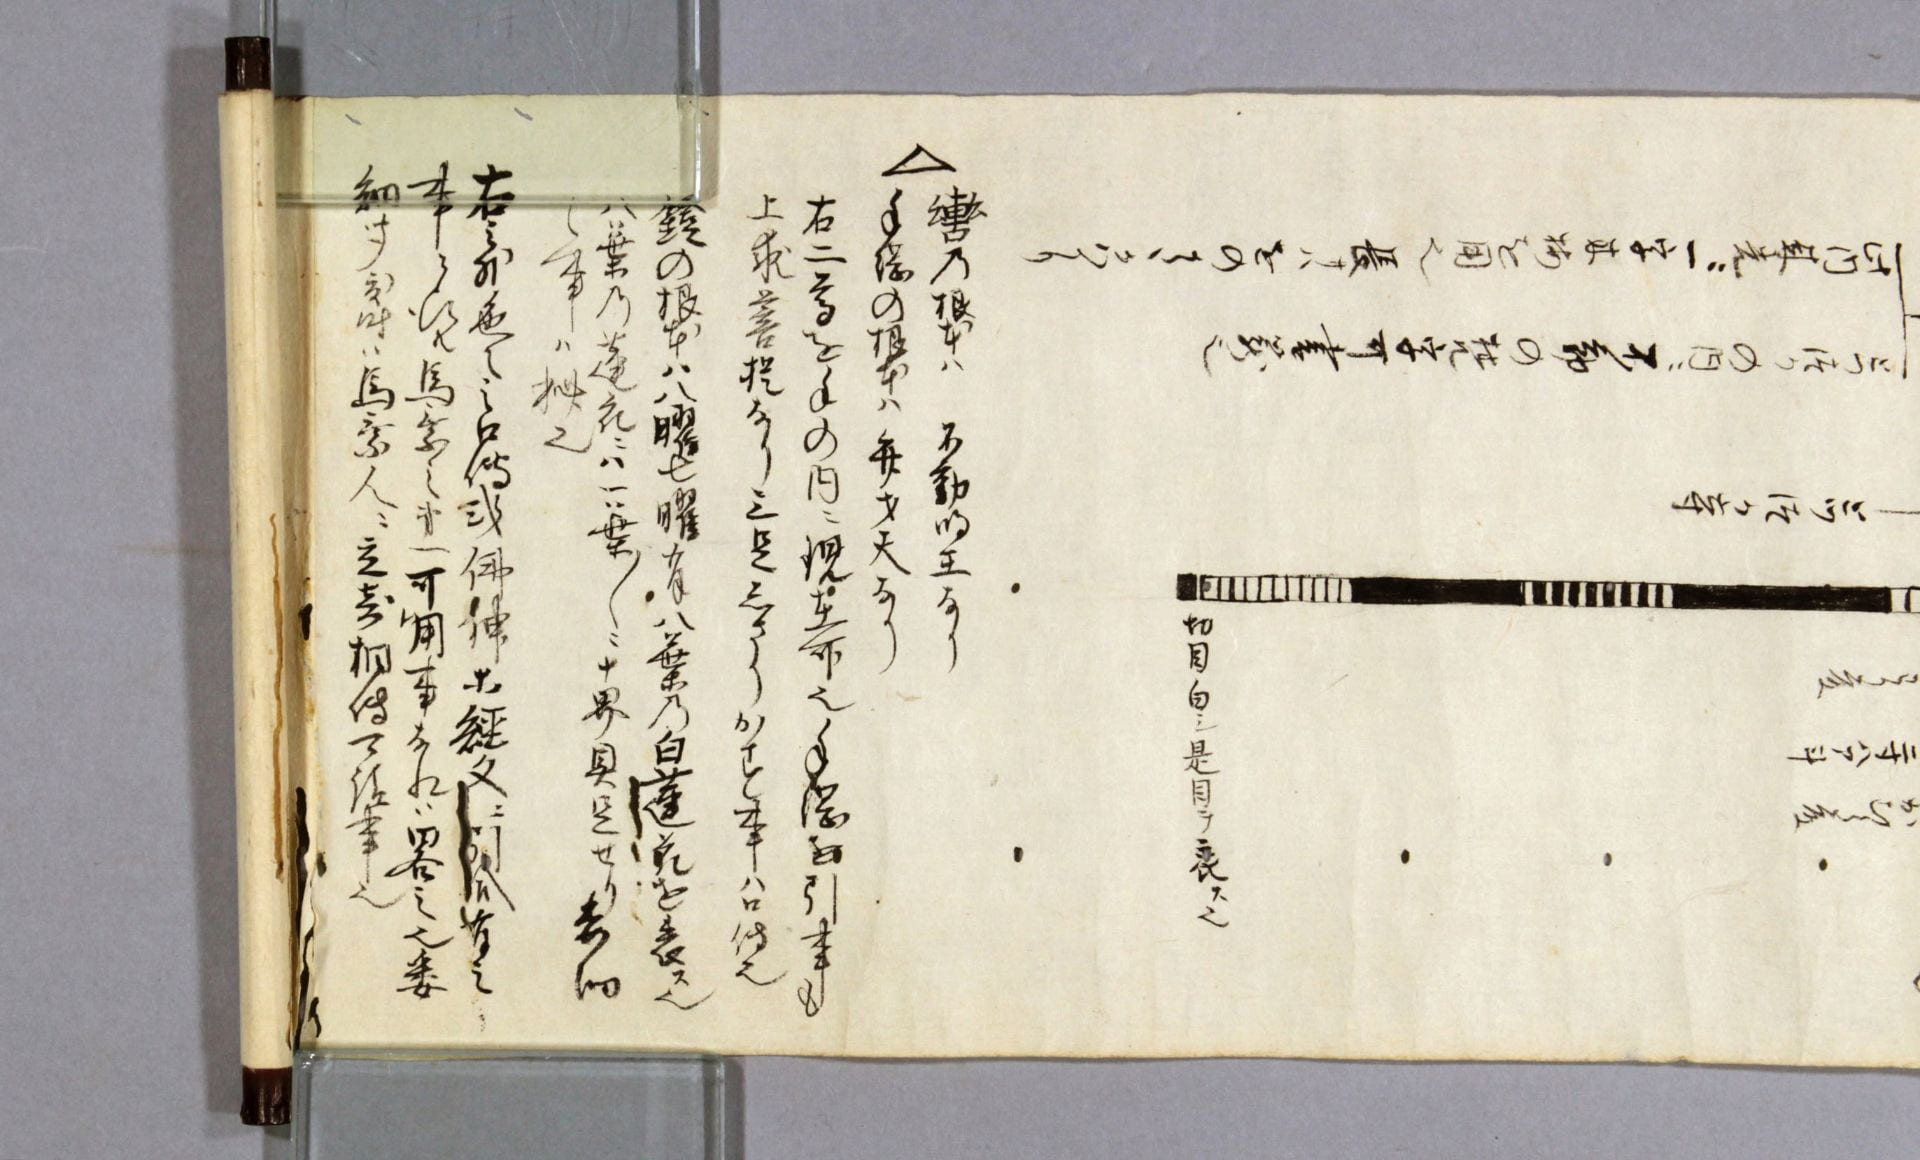
The images and manuscript notations on the scroll are hand drawn in carbon black ink. The condition of the black ink media is very good, with crisp detail and rich black color.

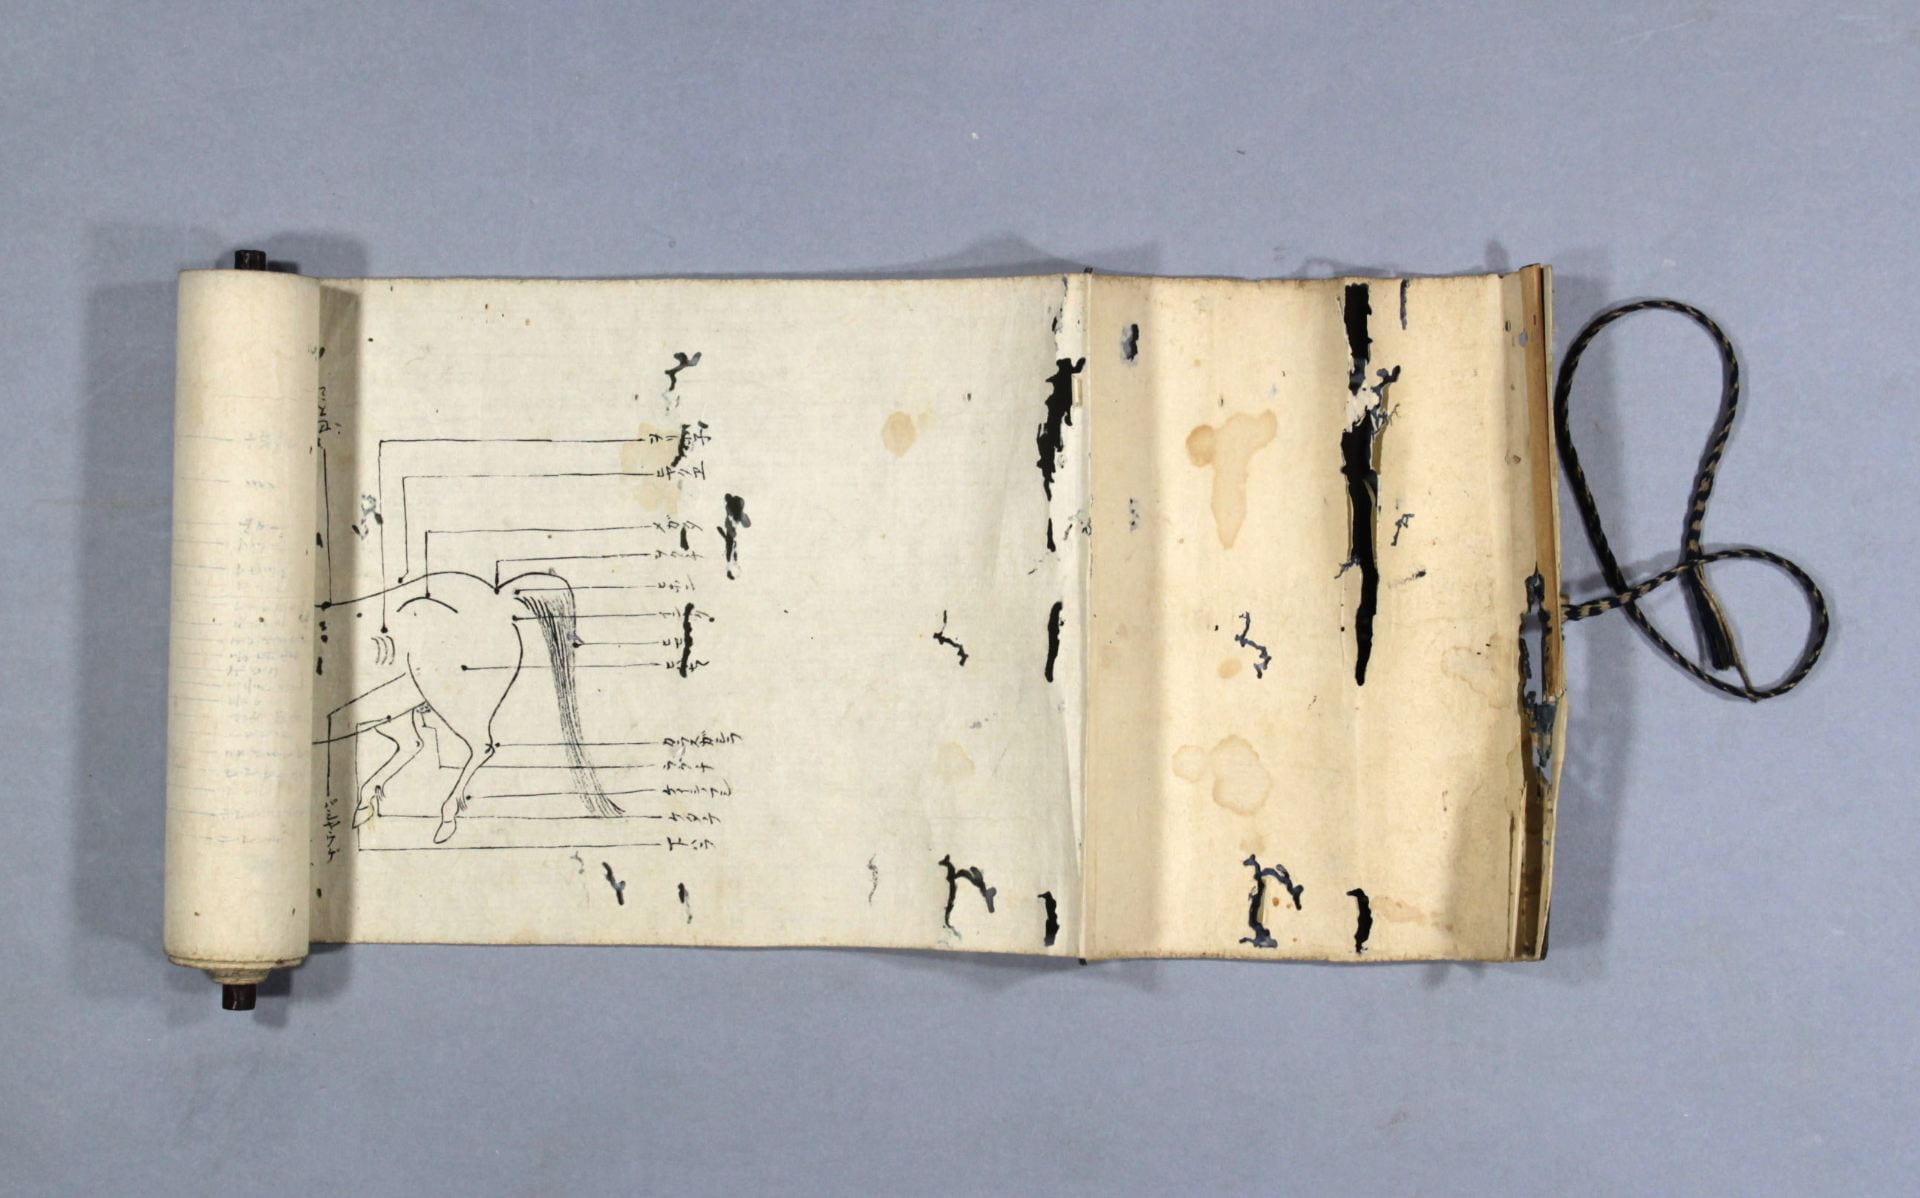
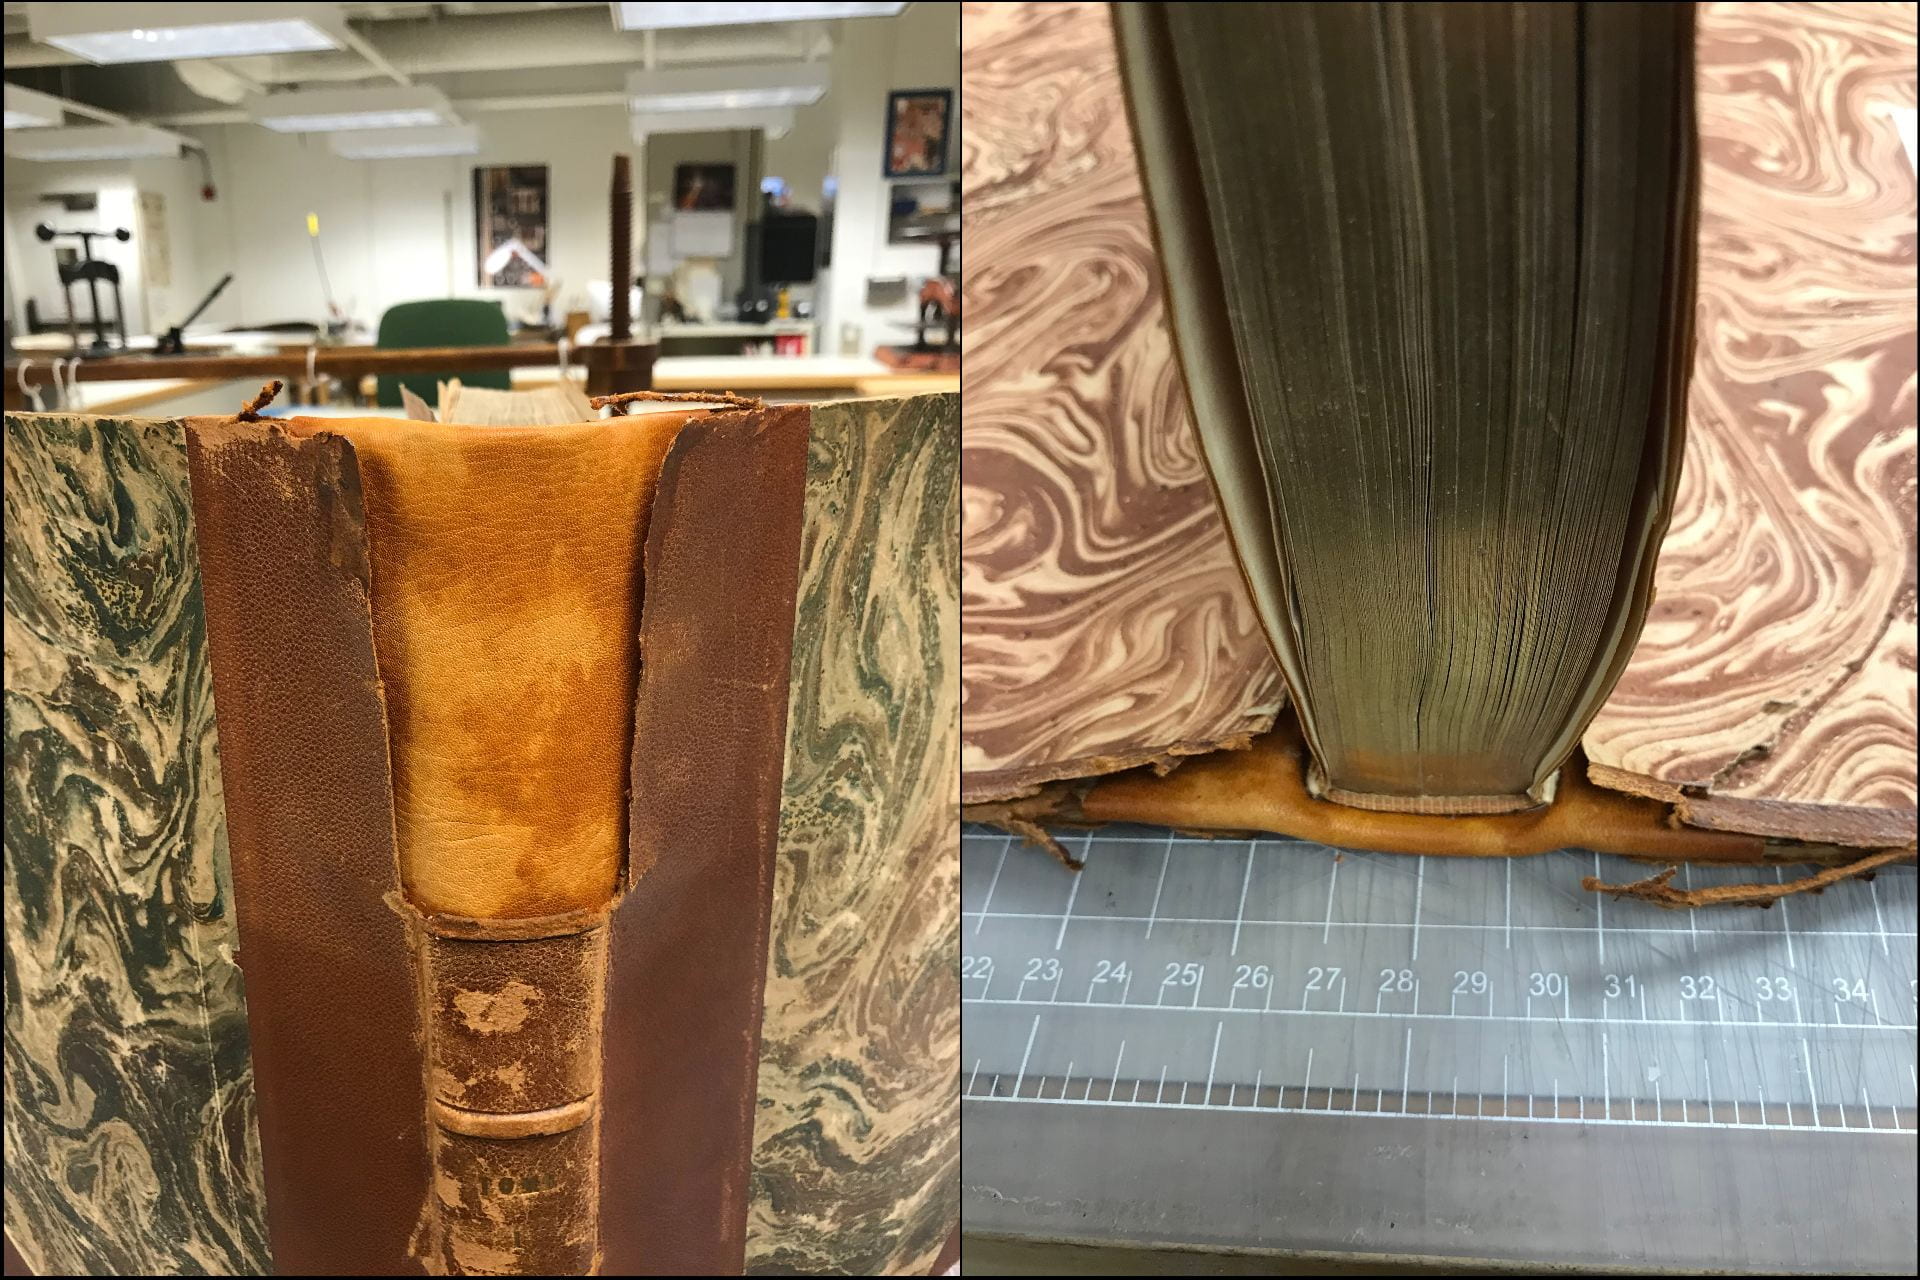
In the past, the scroll was damaged by insect activity while it was rolled leaving portions in poor condition. Insects are attracted to organic materials like the cellulose found in wood and paper. They find nourishment in the proteins and carbohydrates that are found in sizing used to make paper less permeable to ink and the starches found in adhesives. The insect left its mark throughout the scroll in the form of irregularly shaped, yet nearly replicated contours, as it tunneled through the layers of the scroll. This is most evident in the leader and at the end of the scroll where the final section is adhered to the wooden dowel.

Unrolled scroll showing insect damage within the leader

Insect damage at the beginning of the scroll and on the paper leader

Insect tunneling found at the dowel end of the scroll

Insect tunneling on the paper wrapped around the wooden dowel, as well as on the wooden dowel.

Insect damage found on the interior of the scroll

Insect damage seen on the interior of the scroll

Irregularly shaped, nearly replicated contours, seen on the lower edge, tunnel through the layers of the scroll resulting in numerous losses across the scroll.

The paper leader is composed of three layers of Asian paper laminated together, likely with a plant based starch adhesive. The laminated paper layers of the leader are not the same composition as the paper of the scroll. The leader paper layers are thinner and show embrittlement and discoloration while the scroll, aside from the insect damage, remains flexible, showing only some darkening along the edges where it would have been exposed to the environment.

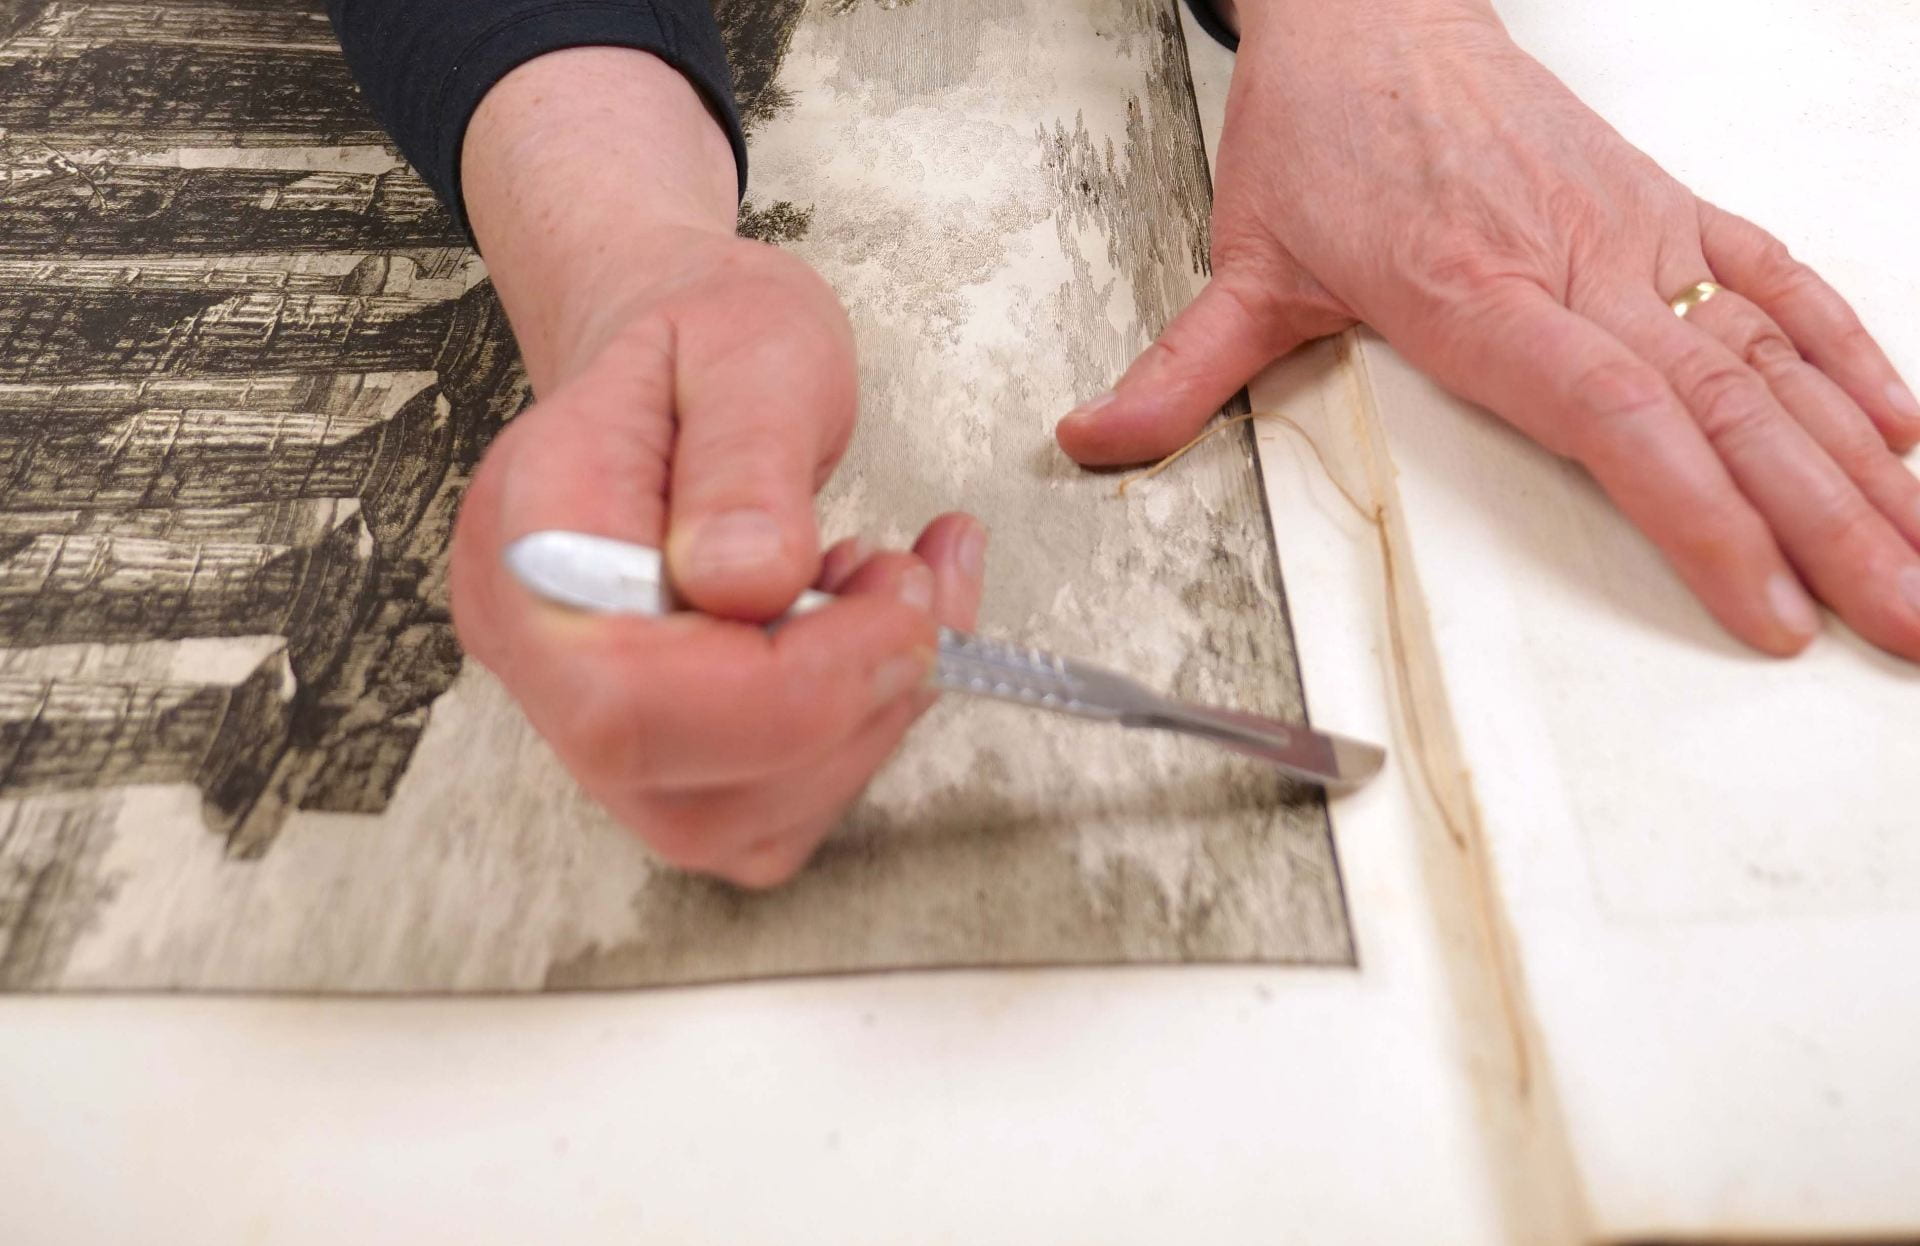
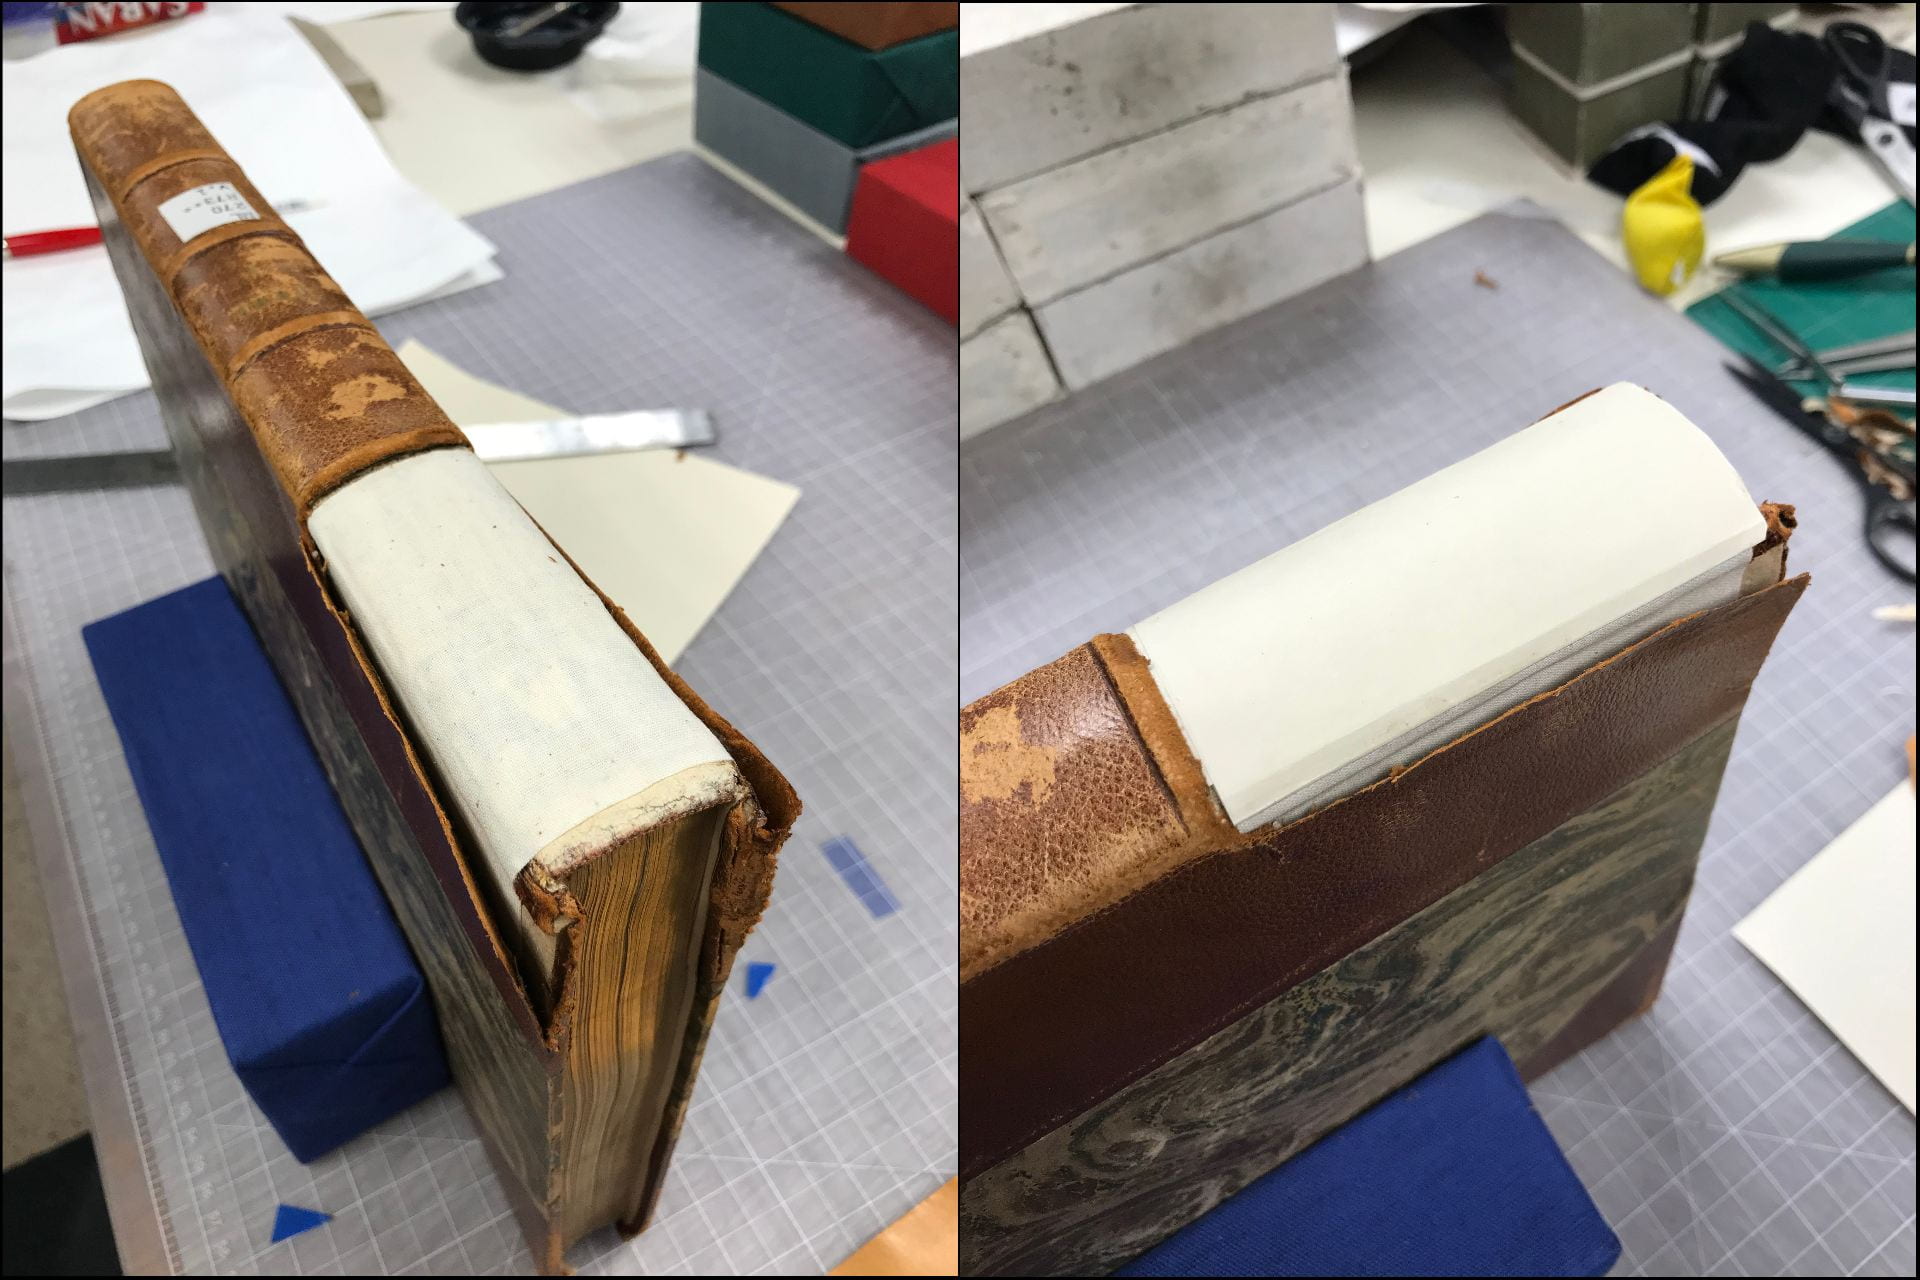
The insect damaged paper with the associated recurrent losses, plus the separation of the paper layers in the leader due to insect damage, made this scroll very fragile to handle and at risk of further damage when used in research or instruction. The goal of conservation treatment was to stabilize the damaged areas and construct a custom housing to provide support and protection.

Due to the composition and current condition of the leader, it was not possible to stabilize the fragile areas from the verso, our preferred method. A light table was used to illuminate the area of loss. A protective piece of polyester was placed between the surface of the scroll and the Japanese mending tissue. This allowed the tissue to be precisely shaped to bridge the loss with minimal extension onto the surface of the blue layer.

Image of leader before and after treatment

Left: Leader before treatment. Right: Leader after treatment.

The small losses found throughout the scroll were mended in a similar manner. The light table was again used to create a precisely shaped tissue to bridge the loss. An additional, slightly larger, mending tissue was placed over the initial mend for a double layer to help match opacity and thickness of the paper. Once mended, the length of the scroll was humidified between felted Gore-tex and dried under weight. Due to the length of the scroll, this was done in two sections. While the first half was under humidification and being flattened, the other half was rolled around an archival tube.

Once treated, the scroll also needed a housing solution that would keep it securely stored as well as provide a mechanism for safely unrolling and re-rolling during use in research and instruction. A channel, just wide enough to accommodate the width of the wooden dowel, was cut into an archival tube to provide support to the scroll, and the scroll then rolled onto the tube. The rolled scroll was placed within an archival box custom fit with a removable tray. The slotted bumpers of the tray securely hold the scroll. This construction allows the scroll to be supported within its storage box while also allowing it, or the tray, to be removed and safely unrolled for viewing.

After treatment image of scroll rolled and partially unrolled

Removing the scroll from the tray and unrolling it for viewing

Scroll held within tray and scroll partially unrolled within tray.

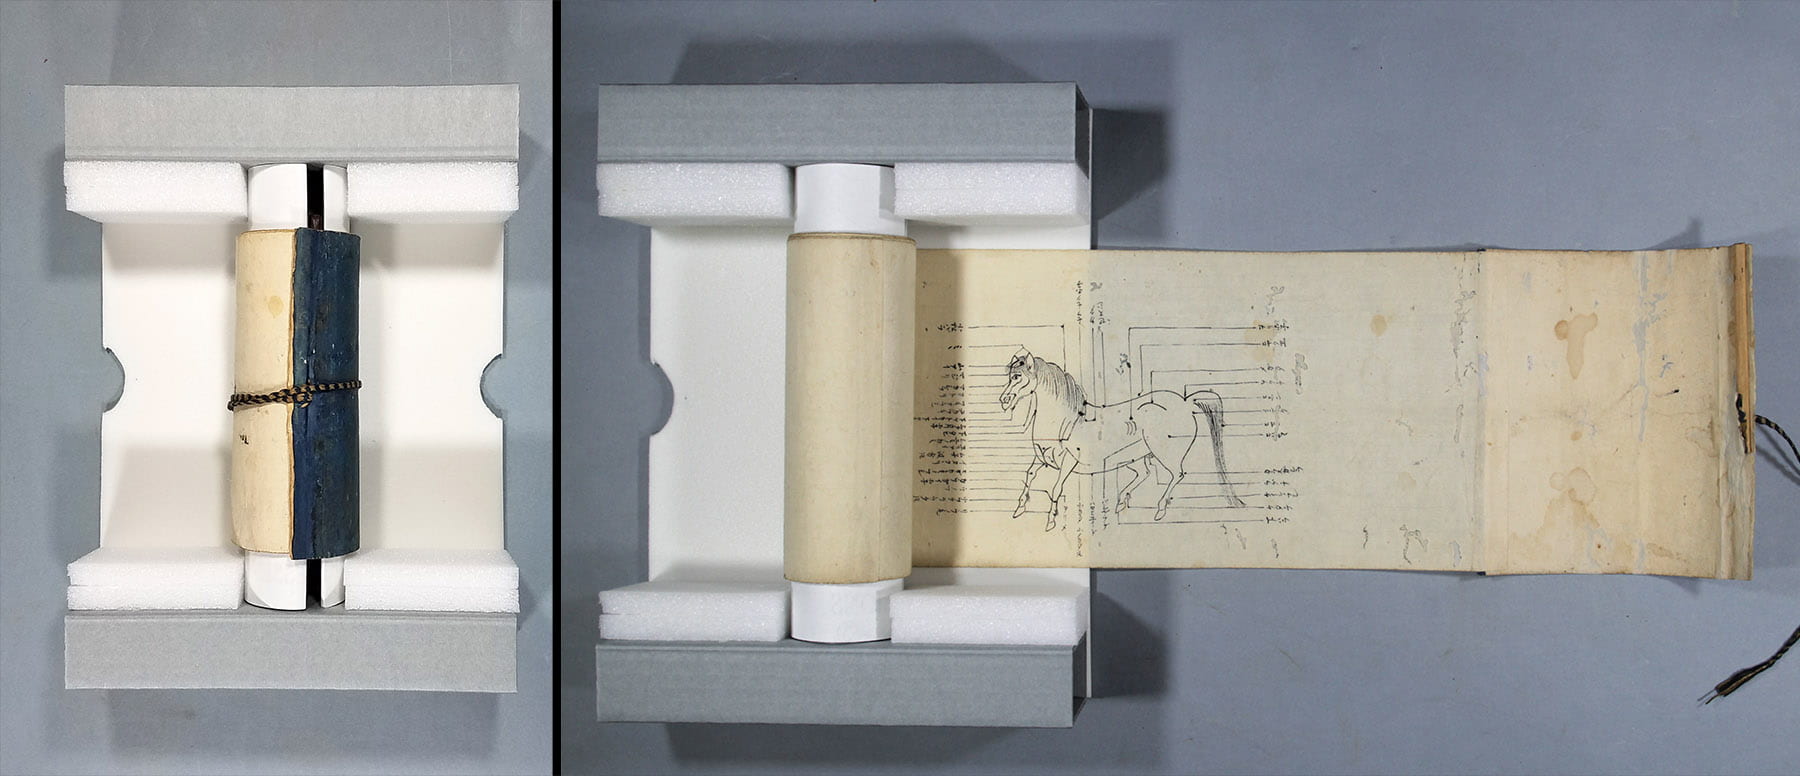
Viewing the scroll within the tray by manually rolling and unrolling. This construction helped to keep the scroll aligned while re-rolling.

This was a unique item to come into the lab. It provided the opportunity to reach out to colleagues and conservation experts, and to look to existing literature in order to learn more. Many thanks to all those who contributed to the treatment of this scroll and to the writing of this blog, especially Yoshi Nishio at the NEDCC for his insights about the scroll and conservation treatment, and to Michele Hamill, Laurent Ferri, and Daniel Mckee for providing clarity and context about this item and its significance to Cornell’s rare and distinctive collections. Now treated and safely accessible, our equestrian scroll is available to students, faculty, and researchers.

You can read more about Japanese scrolls, their construction, and the unique challenges they present from the Metropolitan Museum of Art and the Chester Beatty Library.

“Who fixes these, anyway?”


woman stands atop a stonestructure with Great Wall receding in the distance

Michele Brown at the Great Wall of China in 2014

“Who fixes these, anyway?” That was Michele’s Brown’s question. She was a recent graduate of Fordham University who studied English Literature. She was working in Harvard University’s Houghton Library typing catalog cards for rare books. At the end of every week, she would attach loose boards to textblocks with cloth ties, and she wondered what happened to them next. She was told that it was difficult to find people to fix the books. When Michele discovered that she could study bookbinding and conservation in London, the decision made itself. She attended Camberwell School of Arts and Crafts in London and never looked back.

Michele has been Rare Books Conservator at Cornell University Library since 1995. She is preparing to retire on March 10th, so she shared some thoughts with us about her career here in Ithaca. She observed that each treatment had its own challenges, and that one of her favorite treatments was the rebinding of Newton’s Principia. See her blogpost here: https://blogs.cornell.edu/culconservation/2012/09/14/rebinding-newtons-principia/ One year she was showing the book at a reunion event. An alumnus who was a physicist teared up as he examined the volume. “It reminded me how important books are to people, and making it so people can use them is important,” Michele commented.

brown leatherbound book

Cornell University Library’s copy of the first edition (1687) of “Philosophiæ Naturalis Principia Mathematica” by Isaac Newton, generally referred to as Newton’s “Principia,” rebound by Michele Brown in 2012

Michele’s favorite tools are her bone folder, which she uses every day, and her dividers, because they are the first pair she bought. She recalls finding the dividers at a hardware store down the street from Camberwell and paying a couple of pounds for them.

metal dividers and bone folder on gray background

Michele’s favorite tools: her first dividers and her bone folder

A high point for Michele was traveling to China three times to work with library professionals on a Luce funded grant. The focus of the grant was the care of circulating collections. She remembers, “The people were really interested in what we were teaching. We met lots of great people and saw interesting things.” In addition to visiting libraries and universities, Michele also visited the Great Wall and the Three Gorges Dam.

three women in casual clothes stand in front of a stone archway

Michele Brown at the Great Wall of China with colleagues Pat Fox of Cornell University Library and Cao Li of Renmin University Library

“It’s a given that it’s great to work with Cornell’s outstanding collections, but I’ve also enjoyed working with great colleagues who are as passionate about book conservation as I am,” Michele reflected.

Michele’s plans for the future include gardening, joining the Ink Shop to learn printing, and making more artists books. She is currently working on a book with 3D printed covers!  Best of luck, Michele!

Conservation of Piranesi bound etchings: treatment

by Michele Brown

In my previous post, I described the overall condition of Cornell’s set of bound Piranesi engravings. Now, let’s look at the treatment of these volumes.

Objectives:

The usual objectives for rare book restoration are compatibility, strength, usability, reversibility and longevity. Repairs should be sympathetic with the original binding, and also strong and flexible so the volume may once again be used. Since nothing lasts forever, reversibility is important for future repairs. For example, once the original spine has been removed, lining the back with tissue and paste provides a barrier against succeeding lining materials applied with pva, and enables removing them, if necessary. Materials should be archival and of high quality. When possible, original components should be saved or reused. I thought of these objectives when considering treatment for the Piranesi volumes.

Treatment:

Rare Books and Manuscripts curators Katherine Reagan (Ernest L. Stern Curator of Rare Books & Manuscripts) and Laurent Ferri (Curator of the pre-1800 Collections) agreed that due to their size and condition, the Piranesi volumes should be fully rebacked with leather. The original spines would be saved. Missing endbands would be replaced, but weak endbands would be retained and reinforced. Original sewing would be strengthened or repaired if necessary.

Mid brown book calf from J Hewit & Sons worked well for the new spines, and needed only mild toning to blend in with the original leather. I used Fiebing’s Pro Oil Leather Dye, now called Pro Dye, to mimic the mottled calf found on the bindings. (1)

The steps for rebacking were essentially the same for all of the volumes that were treated:

  • Photography and assessment. Due to their size, Simon Ingall of DCAPS (Digital Consulting and Production Service) photographed them “before” and “after” in the DCAPS studio.

    Photographing Piranesi volume.

    Photographing Piranesi volume.

  • Removing the original spine. The original spine was lifted using a single-bevel knife. In most cases the spine was already peeling so this process was fairly easy.

    Spine of volume 4, before treatment. treatment.

    Volume 4 spine before treatment.

  • Cleaning the back with a wheat starch paste poultice.Stiff wheat starch paste (Aytex P and filtered water) was applied to the spine, allowed to sit, and then scraped off with a blunt knife.

    Spine linings being removed.

    Removing spine linings.

  • Repairing/reinforcing weak sewing. In some cases, the sewing at the beginning and/or last sections was weak or broken. If so, the section was repaired and then resewn around the original sewing support using unbleached linen thread.

    Resewn sections,

    Resewn sections in volume 4.

  • Resewing on new cords. Volumes Vols 15 and 16  had extensive structural damage, including broken cords. Consequently, both volumes were pulled and then resewn with new cords before rebacking.
  • Lining the back with Hanji 1101 using wheat starch paste. This served to protect the spine from adhesives used later in the repair process, and helped consolidate weak sewing.

    Spine lined with tissue.

    Volume 2 lined with tissue.

  • Lining the back with a strip of unbleached cotton stretch cloth, followed by by hand-made paper. Unbleached cotton was cut with slots to accommodate raised cords, and glued to the back using pva (Jade 403). After lifting the board leather, the cotton lining was extended across the joints and glued under the lifted leather using pva. This strengthened the joint and board attachment. For additional strength, panels of hand-made paper were glued between the cords


Unbleached cotton lining.

Back lined with unbleached cotton stretch cloth.


  • .Reinforcing existing, or replacing missing, endbands. If necessary, new endbands were sewn over cords (Clarkson BC cord) using silk twist.

    Endband in process.

    Replacement endband in process.

  • Lifting the sides and paste downs to accommodate a new leather spine. Using a “lifting” knife, the sides were lifted a few millimeters away from the joints.

    Lifting the leather at the joint.

    Leather being lifted at the joint.

  • Attaching the new spine. The new calfskin spine was pared and dyed and then attached using stiff wheat starch paste.
  • Putting down the lifted leather on the outside and inside of the boards. A mix of 50/50 wheat starch paste and pva (Jade 403) worked well.
  • Covering the inner joints with compatible, tinted tissue.  Color Kozo from Hiromi Paper was attached using paste.

    Front inner joint, volume 4.

    Lifted areas of the inner joints covered with Color Kozo.

  • Replacing the original spine. The edges of the original spine pieces were beveled using a Dremel tool and then attached using the 50/50 paste/pva mix.)
  • Consolidating deteriorated leather. Dry and deteriorated leather was treated with Cellugel (hydroxpropyl cellulose in isopropanol) and SC6000 leather conditioner.

    Volume 4, after

    Finished rebacking, volume 4.

The corners of most volumes were worn and damaged. These were repaired with 100% kozo Moriki (2). The leather of the original corners was lifted, the new corner material was attached using a mix of 50/50 wheat starch paste and pva, and then toned using Golden acrylics. This was usually done before starting the rebacking process.

As a result of the above repairs, the bindings were strengthened and made functional while their original components were retained. Cornell’s Piranesi is now more accessible to scholars.

A 2014 post from the Cornell in Rome’s blog provides an excellent overview of Piranesi’s work.

Notes:

(1) Traditional Fiebing’s dye is alcohol-based. Although Pro Dye is supposed to retain its color longer, it is known to fade. The Leather Conservation Centre in London has developed water-based dyes that when used with a fixative, have been shown to be more stable than other leather dyes. Unfortunately, these have been unavailable to US conservators for a while. Hewit’s also markets water-based leather dyes.  I prefer Fiebing’s dyes, but use them sparingly. Skin Deep, Volume 30 offers a good overview of leather dyes.

(2) Moriki tissue is a convenient leather substitute for corner repair. It may be difficult to find 100% kozo Moriki, but we have a supply in the Cornell conservation lab.

Suppliers:

Gane Bros. (unbleached cotton stretch cloth)

J Hewit & Sons (calfskin)

Hiromi Paper (CK Color Kozo)

Polistini Conservation Material (Hanji)

Talas (Aytex P, Jade 403, SC6000, unbleached linen thread, silk twist)

University Products (Cellugel)


Many ways to do the same thing

Gothic cathedral at night under a full moon with a cloudy sky

Basilica of the Sacred Heart,
University of Notre Dame, South Bend, Indiana

I was fortunate to attend the Conservation of Leather Bookbindings workshop sponsored by AIC/FAIC (the American Institute for Conservation and the Foundation for Advancement in Conservation Endowment for Professional Development) in March, 2020, just before COVID-19 changed everything. The workshop was led by Jeff Peachey, an independent book conservator and toolmaker, who was a generous instructor, meeting every student at our own level, guiding us toward a more thorough understanding of why to pursue certain treatments and how to carry them out. Liz Dube, Head of Analog and Preservation Services at the Hesburgh Libraries, University of Notre Dame, hosted us in the conservation lab in the Reyniers Building. Special thanks are due to Liz and Jennifer Hunt Johnson, Special Collections Conservator, Maren Rozumalski, The Gladys Brooks Conservation Fellow, Neil Chase, Preventative Conservation Specialist, and Tosha McComb, General Collections Conservation Technician. They were welcoming, friendly, and helpful.

The nine participants came from seven institutions: University of Chicago, Indiana University, Hagley Museum and Library, Cornell University, Public Library of Cincinnati and Hamilton County and the University of Cincinnati, Johns Hopkins University, and University of Notre Dame. With Jeff,  we investigated several methods of reattaching the boards of leather bound books. A detached board or a weak attachment at the hinge of the board and the bookblock is a common problem that conservators often encounter in special collections materials.

leather bound book with detached covers

Detached board on leather book

We explored many treatment options: sewing extensions, joint tacketing, hinge repairs, board slitting, and leather rebacking. Jeff asked us to bring several practice books that we could experiment on. I found good candidates at local used book shops: some with hollow backs, some with tight backs, all with laced-on boards. In advance of the workshop, I emailed him photographs and condition reports; he wrote back with treatment possibilities. At the workshop, Jeff led discussions and demonstrated techniques for the class. He asked us to develop treatment proposals for our books which he discussed with us individually. And we had plenty of time to try out what we were learning at our benches, all the while consulting with each other and asking Jeff questions. One of the most valuable parts of the workshop was producing a list of pros and cons for all of the treatments we talked about and practiced. We drew on everyone’s experiences to produce nuanced lists of reasons to pursue a certain treatment or to try something more appropriate. I’ll refer to these often in the future. I’ve created a lab resource to share with our conservation staff, along with my workshop notes and photographs, Jeff’s handouts and bibliography, and some newly purchased tools and supplies.

magic marker text on flip chart

A theme of the workshop

At the top of this page of the class flipchart, Peachey quoted the motto of the Elkhart Institute of Science and the Arts, the predecessor of Goshen College, his alma mater: “Practical knowledge is the great power that rules the world.” This was a theme of the workshop – refining our hand skills using the tools of the trade.

Jeff Peachey standing a the workbench

Jeff Peachey at the bench

Jeff Peachey develops and produces many bookbinding specific tools that address the idiosyncratic needs of a conservator at the bench. I use his carbon lifter to gently free cloth from boards and one of his paring knives to reduce the thickness of leather when rebacking books.

Conservators working on their own often improvise innovative solutions to common problems we all face. One of these problems is propping up a lifted layer of leather or cloth while working on a book, getting ready to slide a reinforcing layer of cloth, paper, or leather under the original board covering. The lifted layer is very thin and fragile, and yet it must be secured out of the way while adhesives are applied to the board underneath it.

Don Etherington, founder of the Etherington Conservation Center, uses what he refers to as a “handy gadget” in his article Repairing an Original Cloth Case Binding that he distributed at the Brodsky Lecture and Workshop held at Syracuse University in 2009, although he was using the metal gadget long before then.

diagram of Etherington gadget

Drawing Of Don Etherington’s “handy gadget”

Some workshop participants had their own solutions to this problem. Jennifer Jarvis and her colleague Alessandro Scola from the Milton S. Eisenhower Library at Johns Hopkins University developed a prop made of Vivak (a transparent thermoplastic sheet that is easily bent on a metal brake) to serve this purpose.

book with lifted leather side

Jarvis/Scola vivak prop

Another participant, Melina Avery from the University of Chicago Library, drew a diagram of her solution on our flipchart. She uses heavy duty aluminum foil, string, and a weight.

magic marker diagram

Diagram of Avery prop

Elise Calvi, from Indiana University Libraries came up with another idea using folded clear polyester film and a weight.

Hands with book, leather lifted with mylar

Calvi polyester prop

By the following week, Jeff Peachey himself had devised another solution to address the problem using brass and Delrin (a thermoplastic polymer) that he calls the rebacking jig.

metal, plastic and delrin device

Peachey rebacking jig

I appreciate the ingenuity that resulted in the creation of all of these solutions! The first one I’ll try is the folded clear polyester film because I have that on hand in the lab.

I am grateful to Jeff Peachey, to the staff who work at the Conservation Lab at the University of Notre Dame, and to all of the participants for a wonderful workshop. I look forward to reading the following articles that were referenced in Jeff’s bibliography:

Brockman, James. “Rebacking – An alternative Approach,” The New Bookbinder. Journal Of Designer Bookbinders, Vol. 11, 1991: 36-46.

Espinosa, Robert. “Joint Tacketing: A Method of Board Reattachment,” Book and Paper Group Annual, v. 10, 1991.

I’m interested in learning more about these approaches to reattaching boards and to compare them to some of the methods I experimented with at the workshop. I look forward to trying some new techniques and tools and to sharing this knowledge with our staff when post-COVID lab workflows begin.


Conservation of Piranesi’s bound etchings

by Michele Brown

The 18-volume set of bound etchings by the Italian artist, architect and print maker, Giovanni Battista Piranesi (1720-1778) is one of Cornell’s treasures. The Cornell set contains volumes presented in 1774 by Pope Clement XIV (1704-1774)  to Henry Frederick, Duke of Cumberland (1745-1790) and brother of the King of England, during his residence in Rome;  the volumes that contain works by other artists were added later in the 18th century.

Beautifully bound in full calf (1) in the rococo style, the volumes have matching full gilt spines. Of interest is the difference between the decoration and sewing on Volumes 1 and 2, and the rest of the set. The first 2 volumes are decorated with an elaborate roll around the perimeters of the boards but are otherwise relatively plain; whereas the boards of the remaining volumes are heavily decorated. The first 2 volumes are sewn with recessed sewing and have fake bands on the spines. The remaining volumes are sewn on raised cords

Example of damaged Piranesi volume 1.

The front board of volume 1, before treatment.

Front board of volume 3, showing elaborate decoration.

The front board of volume 3, before treatment.

Spine of volume 2.

Portions of the fake bands are missing on volume 2.

Peeling spine.

The raised cords are clearly visible under the peeling spine on volume 3. Note the similarities in spine tooling on both volumes.

When Willard Fiske acquired  the volumes in 1873, he wrote the following to Ezra Cornell:

“Ithaca, New York, Feb. 19, 1873. Wednesday morning. [To] the Hon. Ezra Cornell. Dear Sir, I am rejoiced to tell you that I last evening received a note from our agent in London, saying that he had secured the Piranesi. All the parts are of the first and best edition — much superior to the second edition published by Piranesi’s son in the early part of this century. Appleton’s Cyclopaedia speaks of these works as “unique in art”. […] The work fills two cases, which arrived in New York [the] day before yesterday [and] we shall probably have them here in ten or twelve days. Respectfully yours, W. Fiske.” (2)

For many years, they were readily accessible to architecture students and were heavily used. Now, due to their fragile condition, access is by appointment only. Restoring them to a usable, working condition is the final project of my career at Cornell.

Their size and condition provide some interesting challenges for restoration and conservation.

Size:

The volumes are atlas folios.  Volumes 11-18 measure 21.75” wide by 31” long. Volumes 1-10 are a more manageable 16.5” wide by 21.5” long, but still pose challenges for handling.

Condition:

Most of the bindings are in poor condition. In addition to cracked joints, worn corners, missing endbands, and losses to the covering material, the sewing components (cords and thread) on most of the bindings are extremely brittle.The cords pulled completely away from the spine of volume 16 when we opened the front board for photo documentation. The spine panels of several of the books are in various stages of peeling away from the backs, showing the backs have minimal or no linings. The spine photo of volume 3 (above) shows this clearly.

The sewing was weak or broken in some volumes, resulting in sections becoming detached.

Cropped inage of volume 15.

Loose sewing thread indicates a weakness or break in the sewing.

Volumes 15 and 16 have significant water and mold damage. Two etchings had been removed from volume 15 and mounted separately. We decided not to reverse this treatment and reinsert them into the volume.

Water stained flyleaf, Volume 15.

Water stains on volume 15, before treatment.

Previous repair

At some point, the joints and losses of all of the volumes had been treated with a plastic-like substance that matches the description of Liquick Leather, a pva product developed in the 1950s and used to repair leather bindings. (3) Unfortunately, this sort of quick “repair” was common in the 1950s and is seen on books in many libraries . It is impossible to remove without causing damage to the area it has covered. Although, some conservators have experimented with using solvents, it is often removed mechanically. Either way, the original leather surface is usually damaged.

Detail of the front board, volume 3.

Detail of the front board of volume 3, showing Liquick residue.

The spines and corners of Volumes 11, 12, 13 and 14 have been skillfully repaired with goatskin, but unfortunately, there is no record of who repaired these volumes or when. Until the 1980’s many of Cornell’s rare books were sent to contract binders for restoration. As was the custom during earlier periods of book restoration, missing tooling was replaced as part of the restoration process. Again, this was expertly done, apparently by someone trained in bookbinding and gold tooling.

Look for upcoming posts about the history of bookbinding and conservation at Cornell.

Proposed Treatment:

These volumes will be rebacked with calfskin; corners will be repaired with Moriki tissue. The missing endbands will be replaced; original spines will be retained, but missing tooling will not be replaced.

My next post will describe treatment of the volumes in more detail.

Thank you to Laurent Ferri, Curator of Pre-1800 Collections, Rare and Manuscript Collections, for his information and suggestions for this post.

Notes:

(1) The books are bound in smooth leather, which looks like calfskin. However, the leather separates and “peels” in a way that’s similar to sheepskin.

(2) In the Ezra Cornell Papers, 1-1-1, box 34, folder 11. Transcribed by Laurent Ferri.

(3) This pdf describing the benefits of Liquick Leather was posted in the discussion section in a blog post by Rita Udina: https://ritaudina.com/en/2015/02/17/bibliopaths-lacquer-binding-book-restoration/


Rehousing the Dora Erway Doll Collection | A custom-fitting

J.M. Iacchei

Thank you to Eileen Keating, University Records Manager, RMC, for proving the information on the history of the Dora Erway dolls included in this blog post.

A selection of dolls from the Dora Erway Doll Collection

A selection of dolls from the Dora Erway Doll Collection representing dress from the 13-20th centuries. From left to right: 19th century Italian Renaissance, 20th century American Formal, 15th century English, and 13th century English

The Dora Erway doll collection is frequently used for instruction and outreach.  The dolls were made by Cornell University students between 1924 and 1928, under the direction of Professor Dora Wetherbee Erway who taught in the former Department of Household Arts.  The collection was donated by Erway in 1957 and is housed in the Division of Rare and Manuscript Collections, Kroch Library.

The dolls are representative of various historical periods and nationalities and were made in order to assist students in their study of the history of costume.  Many of the dresses are exact replicas of authentic gowns.  Some of the material in the costumes was over one hundred years old at the time the dolls were made.  With the exception of the heads, the students made the dolls as well as the clothing.  Some of the students donated their own hair in order to have authentic hair styles representative of the periods.

Some details showing the dolls head, handmade feet and shoes, and elaborate undergarments characteristic of the time represented.

Details showing the head, handmade feet shoes, and elaborate undergarments characteristic of the time represented.

For many years, the dolls were individu,ally wrapped in tissue paper for protection within archival boxes. The tissue paper wrapping covered the dolls, meaning researchers and staff couldn’t see or use the dolls without unwrapping and re-wrapping the tissue each time.  The tissue could catch on some of the hair, delicate cloth, or embellishments, making handling difficult.  A new housing solution needed to be developed that would allow visual access, and provide protection and stability.  In addition to the challenge of creating stability and preventing movement within the boxes, each doll presented its own challenges – loose limbs, delicate embellishments added to the handmade costumes, and accompanying accessories, like elaborate hats. Using archival materials, the housing solution supports each doll within its own compartment, secures the heavy bases, heads, and any unstable parts, and allows full visibility and accessibility for use and instruction.

A custom fit housing solution in six steps:

https://media.giphy.com/media/H6uaGwIF4QwKOuTsNN/giphy.gifhttps://media.giphy.com/media/H6uaGwIF4QwKOuTsNN/giphy.gif

1) Side walls, lower wall, and lower edge of the archival box base were lined with Ethafoam for cushioning and support.

2) Supports for each doll were constructed from blue corrugated board, padded with Ethafoam, and notched to hold the wood bases and prevent movement.

3) Dividers constructed from blue corrugated board padded on each side with Ethafoam were placed between each doll’s support to secure them in place.

4) Blue corrugated bumpers padded with Ethafoam were placed at the upper end of each support just beyond the heads of the dolls to custom-fit each compartment to the size of the doll.

5) Foam bumpers were fit around the neck of each doll to further prevent movement when the boxes are moved and handled.

6) After rehousing the dolls are held securely in their custom-made compartments.


An Update on Conservation Lab Staffing, Service Priorities, and Current Strategies

News

Over the last year and a half, a major effort was undertaken by the Cornell Library Conservation Lab to clarify roles, responsibilities, and priorities, the result of which has gone into effect over the last 6 months. Beginning in April 2019, the lab has been restructured to reflect changes in staffing, streamline the reporting structure, improve communication and workflows with partners, and focus capacity in priority areas. We would like to share information about this effort, our current staffing, our priorities, and how we are planning for the future to respond to both the traditional and changing needs of CUL’s collections.

In April, Michele Hamill assumed the position of Head Conservator and now oversees lab staff and operations. Her time is divided between supervisory responsibilities, strategic and workflow planning, and as Cornell University Library’s Paper and Photograph Conservator.

In August, Michele Hamill conducted a research trip to the White House to examine their copy of the Gettysburg Address, seen here, to inform the preservation of CUL’s Gettysburg Address.

Also in April, Michele Brown, Cornell University Library’s Book Conservator of over 20 years, began phased retirement, working half-time until Spring 2021. Her time is being focused on a large, high-priority treatment project that requires a conservator of her experience – the Division of Rare and Manuscript Collections’ Piranesi volumes.

Laurent Ferri, RMC Curator, and Michele Brown examining one of the spectacular Piranesi volumes.

Pat Fox, Assistant Book Conservator, is increasingly working on rare and special collections, while maintaining responsibility for circulating book repair. Caitlin Jochym, Senior Conservation Technician, is now half-time and will be indefinitely. Jill Iacchei, Senior Conservation Technician, is our only staff member working full-time on rare and special collections. The lab hosts 2-3 student employees whose assistance is limited to circulating book repair and basic stabilization of collection materials during academic semesters.

Over the last year, the conservation lab has had a reduction in staff of 1FTE, primarily through personal choice. It is a priority for all of the departments of Digitization and Conservation Services to maintain a healthy work/life balance and that includes life decisions. Currently, the lab is staffed at 3.875 FTE across 5 people, but there is a larger, strategic plan in place to recruit and hire a Conservator for Special Collections over the next year. This new position will fill needs around conservation strategy for bound volumes, work prioritization and facilitation, and further increase our newly focused capacity to properly care for CUL’s collections.

Priorities

With our current level of staffing, we have limited capacity to respond to collection materials (even with notable condition concerns) that are not in our current priority areas. We are no longer staging large amounts of collection materials in the Conservation Lab awaiting treatment and we are only accepting items into the lab for treatment when we can identify that a staff member has the capacity to complete the work in 3 months. This represents quite a shift for some of the collection owners we serve and we realize this. We want to be clear about what we can realistically get done in a responsible amount of time, leaving little to fall into the cracks.

In an analysis of available staffing and the range of services we could offer, we determined that our efforts should focus on the 5 priority areas:

  • Exhibitions of rare and special collection materials – assess, treat, and mount collection materials for best presentation and safety.

Pat Fox and Caitlin Jochym constructing custom exhibit supports.

  • Instruction – evaluate where the condition and/or the enclosure interfere with safe use and handling, and needs are immediate or demand is high; provide treatment and/or enclosures as needed.
  • Digitization projects – assess for condition concerns, advise on safe handling, and treat as needed.

Jill Iacchei and Simon Ingall, DCAPS, imaging barkcloth for a digitization project.

  • New acquisitions and processing needs – provide treatment stabilization and/or enclosures to enable new acquisitions and newly processed collections to be safely shelved and available for research, instruction, and exhibition.
  • Other one-time priorities or pressing needs – including special donor or researcher requests, grant projects, or condition concerns requiring rapid response, like water damage or mold.

Strategies

In order to treat as many rare and special collections items as possible with limited staff, we are exploring different treatments and workflows, more stabilization options, and a variety of enclosures. We are now utilizing all lab staff, with the necessary skills and experience, on all collections types, which has increased our ability to respond to priority areas. You may notice differences from past approaches as we continue to develop our strategies. As we continue to explore new approaches, we welcome input as a necessary and valuable part of the decision-making, particularly regarding the nature of the collection material and how it is used and how often.

Along with all of the work detailed above, here are a few things we’re also currently working on:

  • Rapid response plan for collections emergencies – This includes automated communications strategies, vendor and insurance preparedness, keeping the current disaster plan up to date, and preparation with the Office of Risk Management. We hope to expand to include a rapid response plan for digital content as well in the future.
  • Better facilitation with Library Annex – When routinely consulting on storage strategies across the library, better understanding the needs of our high-density storage is imperative for sharing reliable information for coordinating long-term storage.
  • Mellon Foundation Grant: Assessing the Physical Condition of the National Collection – We are one of the 5 participating US libraries in this project led by the Library of Congress to assess the condition of circulating collections. This project is informing an update to CUL’s Brittle Books Program—We are reviewing the decisions and criteria for the brittle book workflow from a conservation perspective and including digitization for preservation and access to a digital format.
  • Updating the Conservation job family – This is a result of the recent staffing changes and to incorporate the new position of Conservator for Special Collections.

Please reach out to us at conservation@cornell.edu with questions and comments.

Tre Berney, Director, Digitization and Conservation Services

Michele Hamill, Head Conservator


Preservation Week: Photo-Albums and Scrapbooks

j.m. iacchei

Today’s blog reports on the Conservation Center for Art and Historic Artifacts (CCAHA) workshop Your Photographic Scrapbook: Identification and Preservation and is the 4th in our Preservation Week series highlighting Cornell University Library Conservation Lab’s continuing educational efforts to better preserve and protect our collections.

Our family albums and scrapbooks are treasured heirlooms. Each page offers a new story or anecdote about the people and places held within the album’s pages. They bring forth the memories, conversations, and storytelling that help us define who we are and where we come from–our family roots.

table with spread of ablums

As part of the CCAHA’s Collections Care Training initiative, Barbara Lemmen, Senior Photograph Conservator, offered a workshop entitled, Your Photographic Scrapbook: Identification and Preservation hosted by the Historical Society of Pennsylvania. The workshop took on three main areas of focus. First, a lecture presentation providing background on the history of scrapbooks and albums, an overview of the styles of bound structures that developed to hold the contents contained within, the structural characteristics and components that deteriorate with age and use, and the ways in which to preserve and care for these items. Second, a visual sampling of a variety of photo albums and scrapbooks within the Historical Society of Pennsylvania’s collections. And lastly, a hands-on component evaluating condition and discussing possible preservation options for specific items.

A lot of material was covered in this one-day workshop. As a Senior Conservation Technician working within an academic institution, I found these last two components of the workshop to be the most informative. Chronologically, we may be able to place albums and scrapbooks into categories but as individual items they all present unique challenges and needs. The historical significance of the structure, the original format and placement of the images, intended use, budget, and available time are all considerations in determining appropriate treatment and storage options.

Scrapbook or Photo album?

scrapbook and photoalbumScrapbooks are not a new or recent trend. Their roots date back to the 1700’s. In effect, the scrapbook is about 100 years older than the photo album. They typically contain clippings and articles, and after the advent of photography in the mid-1800’s – photographs. The distinction between the two is that scrapbooks can be continually added to, while albums are usually themed with a specific direction – for example a wedding album.

The earliest structures used for scrapbooks and albums were blank books sold by stationers intended for writing. The addition of dimensional material adhered to the pages places stress on the binding and inhibits the covers from fully closing-causing distortion that allows light and dust to enter the pages. With the advent of photography in the mid 1800’s, albums were developed specifically to accommodate the added dimension of photographs. The structure of each album or scrapbook and the materials used in its construction inform the present condition. Below are three examples of albums more commonly found among family collections.

Carte-de-visite and Cabinet card albums (ca. 1850-1900)Album cover and open pagesThe album structure and page construction of carte-de visite and cabinet card albums were made to allow for the thickness of mounted photographs. The photographs could be slipped into the window through slots located in the pages.  Each window could accommodate two photographs – one viewed from each side of the page. carte-de-visited album and cabinet card albumThe album shown above accommodated both CDV’s (left) as well as cabinet cards (right).

If carefully placed, the paper windows held the photographs in position. However, the slots could be easily torn when the photograph was placed (as seen in the right image above). A torn window left the photographs less securely held and prone to shifting out of position.

Loose Leaf Bindings (ca. 1920-1970)

side-laced, chicagopost and three-ring albumsLoose-leaf bindings were less expensive to make and pages (leaves) could be easily added or removed. There are various types of loose-leaf bindings including: side-laced (left) Chicago or screw post (center), and 3-ring (right).

Albums of this era were often made from less expensive wood pulp paper. In addition to the albums pictured above, black paper albums were also very common. Black paper was chosen intentionally by the manufacturer. Not only did it provide a strong contrasting background to the black and white photographs held within but it also hid the discoloration caused by the deterioration of lignin (a naturally occurring substance in wood that darkens and breaks down into acidic byproducts as it ages) common to wood pulp papers.

Photographs could be held in position by a few mechanisms: overall or corner mounting using an adhesive, photo corners (left) or slits cut into the support page (right).

Photographs mounted using adhesive presented two issues: 1) page distortion and undulations from additional moisture added by the adhesive and 2) adhesive failure leaving loose photographs, adhesive residue and staining, and possibly abrasion to the paper support. Mounting the photographs with photo-corners or through slits alleviated the distortion caused by adhesive and allowed the photographs to flex with the movement of the page. However, paper slits tear and placement of the photograph’s corners into photo-corners and through slits places stress on the corners which can become bent when inserted. Additionally, the photograph may become discolored in the area placed under the slot or corner.

 Magnetic albums (ca. 1960-2000)

Magnetic albums

Magnetic photo albums are often spiral bound. Each page was coated overall with a pressure sensitive adhesive and wrapped in a plastic overlay. At purchase, the plastic overlay is clear, smooth, free of wrinkles, and held photographs firmly in place. Over time, the plastic material used as overlays can wrinkle, distort, and become creased or folded (right image).  If they remain firmly in place over the photographs, any patterns of distortion (wrinkles) can be transferred to the photograph’s surface. They can also give off acid and plasticizers causing deterioration to the photographs.

The adhesive on the pages deteriorates as well, oxidizing when exposed to air. The oxidation will cause the adhesive bond to react in one of two ways – it will either strengthen, making it difficult to safely move the photos, or it will fail, resulting in loose photographs (center image above).

To better preserve your personal albums and scrapbooks they can be placed in an enclosure in an environment where temperature and humidity don’t fluctuate. The main level of your home may offer a more stable environment than the basement or the attic. Archival boxes can be purchased from Gaylord Archival Products. When they are brought out to be looked at, handle them with care. A soft pillow(s) can offer support to albums with fragile bindings. The cushioning of the pillow supports the opening, allowing the pages to be viewed without compromising the binding. For specific concerns to your personal albums (broken sewing, loose pages, photographs stuck firmly to magnetic pages), contact a conservator. They may be able to offer feasible suggestions to help preserve and extend the life of your albums and scrapbooks into the future.

For more information about preserving scrapbooks, see ALA’s Preservation Week Preserving Historic Scrapbooks and Making New Ones That Last (Melissa Tedone, 2014). The recording as well as handouts, slides, questions and answers are available as a PDF.

Below are some additional resources discussing preservation and history of photograph albums and scrapbooks.

Zachary, Shannon, ed. (2000) Conservation of Scrapbooks and Albums: Postprints of the Book and Paper Group/Photographic Materials Group Joint Session at the 27th Annual Meeting of the American Institute for Conservation of Historic and Artistic Works, June 11, 1999, St. Louis Missouri. Washington, D.C.: American Institute for Conservation.

Haley, Alan and Adrienne Lundgren (2011) Preserving Photographic Albums. Photographic Memory: The Album in the Age of Photography. Verna Posever Curtis, ed. New York: Library of Congress and Aperture Foundation, 277-279.

Long, Jane S. and Richard W. (2000) Scrapbooks and Albums. Caring for your Family Treasures. New York: Abrams, 38-45.


Treatment of a 19th C. hydrographical map

The Conservation Lab mentors students interested in library and archives conservation and their conservation projects are great learning opportunities for us all. Margaret Canfield, a Cornell University junior majoring in art history, has been a student employee in our lab for several semesters.  Her blog describes the treatment of an early 19th century map.

Margaret Canfield

In the field of conservation, the history of an object helps inform its treatment. A survey of the coasts of Cornwall and Devonshire in the Bristol Channel from St. Agnes Head to Hartland Point includes interesting additions of mailing labels and postage stamps that form part of its unique history. This map is from the Maps and Geospatial Information Collection, an extensive collection in Olin Library that contains over 650,000 maps. The treatment of this map took the historical evidence of the mailing labels and stamps into consideration and focused on stabilizing areas that were detaching from the cloth backing, to prevent loss of the paper support and media.

The geographic area depicted in the map was surveyed in 1772 by Murdoch Mackenzie and published by the Hydrographical Office in 1810 by Captain Hurd. Hydrography is the science that measures and describes bodies of water and adjoining coastal areas for improved navigation, safety, and efficient transport.

The map is an engraving in black ink on good quality, handmade, wove paper.

The Man and his Man refer to two small islands north of St. Agnes. Also known as Bawden Rocks and Cow and Calf.

Raking light shows the many surface undulations on the map.

The map was lined overall on the verso with a coarse, sturdy fabric, resembling burlap.  The edges of the map were reinforced with dark green ribbon.  Because maps at this time would have been working documents—in this case, used and referenced in the study of this geographic area—it was common for them to be made more robust with strong fabric linings and edgings.

On the fabric lining, there are stamps, labels, and postage marks that reveal a glimpse into the story of the map’s life. A paper stamp on the upper left corner of the verso (shown here on left), and another paper label on the front that covers some original text, indicate the map was sold by James Wyld, the geographer to the King. This could refer to either James Wyld Sr. (1790-1836) or his son James Wyld Jr. (1812-1887), who partnered with him in the family business of cartography.

A shipping label on the verso (on right, above) shows the map was mailed from James G. Commin to E.J. Bailey, of Eddy St, Ithaca. Commin was a noted bookseller in Exeter, England and there is evidence that he was in possession of maps from Devon and Cornwall from various newspaper ads in The Publisher’s Circular and Bookseller Record of British and Foreign Language Volume LVIII.

The canceled stamp on the verso shows the map was mailed from Commin in 1912 to E.J. Bailey, and arrived postage due. An Ithaca directory from 1912 corroborates Bailey’s address as Eddy Street.  E.J. Bailey (Elmer J) got his PhD from Cornell in 1909 and was a professor in English until his leave from the university in 1919. There are no records detailing how the map came to reside in the Maps Collection in Olin Library but it may have been donated by Professor Bailey.

The presence of the many labels and stamps directly on the map’s cloth backing indicate it may have been mailed from Exeter to Ithaca without additional packaging. The map was in good condition considering its age and history of being shipped overseas with just the cloth backing as protection. The map had significant surface dirt on both the recto and the verso. The lining of the map was loose in some areas and detaching from the paper support. The map had two small losses in which the cloth backing was torn completely through. The surface of the map was creased in many locations with several breaks in the paper support.  There is evidence of some fold lines, with one prominent fold through the vertical center, which bisects the mailing label.  On the bottom left corner of the recto, there was a small amount of glassine adhered to the map; its purpose is unknown. There are four ink Cornell Library ownership stamps on the map’s recto.

Several factors were considered in creating a treatment plan for the map, including: the map was in good condition with only minor issues, the cloth backing was not actively causing concern, and the mailing labels and stamps form an important part of its history.  Accordingly, the cloth lining was left intact and the treatment focused on stabilizing the minor condition concerns and providing a protective enclosure.

Stabilizing lifting paper with wheat starch paste and drying in place under weight.

The treatment consisted first of thorough surface cleaning. The recto was cleaned with cosmetic sponges and then three iterations of vinyl eraser crumbs. The recto was then carefully vacuumed with a HEPA vacuum. The cloth verso was cleaned with a sponge eraser while the labels and postage stamps were cleaned with cosmetic sponges. The verso was also vacuumed. Small areas of lifting of the labels on the verso were pasted down with wheat starch paste. The lifting areas of the paper support were reattached to the cloth backing with wheat starch paste. The glassine was removed using a methylcellulose poultice. The losses and frail areas were mended on the verso using acrylic toned Japanese tissue and wheat starch paste.  While the black engraving ink was stable in water, the Library ownership stamps were soluble.  So the map was gently humidified using felted Gore-Tex, which is a controlled method that did not disturb the ownership inks. After humidification, the map was dried and flattened between thick blotters and under weight to reduce surface creases and undulations. After treatment, it was sleeved in polyester to protect it in storage and during handling.

Recto and verso of the map in raking light, shown before treatment on the left and after treatment on the right.

This map has such an interesting history, from its assortment of mailing labels and postage stamps, to its connection to Cornell University faculty, and finally as part of the Maps Collection. After treatment that retained its historical evidence, the map is better preserved and available for study–perhaps for a future researcher to discover why Professor Bailey was interested in a hydrographic map of the coast of Cornwall!


Partial Leather Rebacks: A Case Study


Today’s blog describes a book conservation treatment informed by a resource from our Conservation Lab’s library of reference materials.  The Conservation Lab’s library has hundreds of resources on conservation and preservation topics (treatment, handling, environment, disaster planning and recovery), bookbinding, and artist’s materials and techniques. We add new resources to our library frequently and the collection is open to all users. This is the 2nd in our Preservation Week series highlighting Cornell University Library Conservation Lab’s continuing education to better preserve and protect our collections.

Caitlin Jochym


Books bound in leather are susceptible to a number of problems. Because of this, we see a lot of them in the lab. The leather can deteriorate over time, weakening the joints and causing boards to detach and spines to be lost. Part of our working philosophy is to do as little as we can in the way of treatment while stabilizing the item enough that it is not damaged by handling. The following treatment decision was made with that in mind.

A leather reback is called for in certain cases where a book bound in leather is in a condition that leaves it vulnerable to damage by handling. This often means the leather is deteriorating, the spine is partially detached or missing, the boards are detached, the sewing compromised, or any combination of these things. We “reback” a book by applying a new leather spine to strengthen the book structure while retaining as much of the original material as possible. In the case of this book from the Cornell Music Library, the board attachment was very strong and the spine was in great condition except for one detached section.

The top portion of the spine is detached, exposing the original spine linings.

Rebacking is an invasive and complex treatment that should only be undertaken when absolutely necessary. Since the board attachment was sound and the shoulders of the book where the spine was intact were in great shape, I was reluctant to do a full reback. I knew there was a way the leather of the headcap could be replaced without going to the extreme of a full reback.  A full reback would have required cutting through the shoulder and removing the remaining spine to expose the back of the book.  Though I had never done this particular repair myself, I decided to do a little research and give it a try.

In our conservation library we have a copy of “The Restoration of Leather Bindings” by Bernard Middleton, who is considered to be one of the most skilled and influential bookbinders of our time. This book is an invaluable resource for all types of leather book repairs. It includes detailed instructions and wonderful illustrations on the various ways to repair books bound in leather (there are many). I’ve used this in the past and luckily it has a section on repairing headcaps!

middleton illustrations

Illustrations demonstrating the headcap repair technique I adapted. Middleton, Bernard C. The Restoration of Leather Bindings. Rev. ed., American Library Association, 1984.

In Middleton’s book he is working on a tightback, which means the leather is adhered directly to the spine. This can be more complicated because it’s often very hard to separate the leather from the back of the book without damaging it. The book I was working on had a hollowback which made things much simpler. With a hollowback, the leather is attached to a folded tube of paper adhered to the back of the book, which allows for a more flexible opening. It was fairly easy to adapt Middleton’s method to fit the structure I was working with.

I first removed the linings from the exposed part of the spine. Leaving original linings makes even adhesion of new linings difficult.  It adds bulk and stress to that section of the spine which can inhibit the opening. To remove the linings, I used a poultice of wheat starch paste. This softened the adhesive and allowed me to scrape off the residual paper linings with a dull knife.

lifting leather

Next, I lifted the original leather on the sides of the book and slightly underneath the intact part of the spine. I also lifted the paste downs on the inside corners of the boards where I would tuck the turned in leather.

linings

I lined the exposed spine with Japanese kozo paper and attached a piece of cloth which was carried across the shoulders and adhered to the boards under the lifted leather. A new paper hollow of archival wrapping paper was attached to the spine on top of the cloth lining.

leather

I prepared a new piece of leather (vegetable tanned goat) by paring it very thin around the edges so it could be tucked under the original leather without being too obvious and to minimize the thickness so the functionality of the opening would not be affected.

Normally when doing a leather reback, we would attach the leather to the back of the book and then turn it over to the inside to form the headcaps. What Middleton suggested was to actually adhere the leather “upside down” to the inner boards and back of the book and then turn it back onto the spine. I made two slits in the cloth and the hollow to allow for the new leather being turned over the boards. Using wheat starch paste I attached the new leather around the spine through the slit cloth and hollow and under the paste downs.

new leather

New pared leather inserted “upside down”.

turning in

I then folded it over the slit hollow carefully inserting it under the original leather. Using a bone folder I made sure the leather was stuck down and then formed the headcap.

I set the joint by opening the front and back board and applying a downward pressure while the leather was damp. Setting the joint coaxes the leather into a shape it will “remember” when it dries and allow a free and flexible opening. I used pieces of mylar (precut to size) between the old leather and the new to prevent moisture transferring to the old leather, which can cause discoloration. The book was then put between boards and left overnight to dry.

The next day, I cleaned up and reattached the original spine to the new leather with PVA (Poly Vinyl Acetate is a synthetic adhesive which is useful because it introduces very little moisture which can stain old leather.) The inside paper paste downs were readhered with wheat starch paste.

old spine

The original spine piece was readhered to the new leather.

kozo lining

Lastly, a strip of colored kozo was attached with wheat starch paste to protect the inner joint.

before and after

Before treatment on the left; after treatment on the right.

This isn’t a treatment we will use often, but it goes to show what a valuable resource a library can be, and how much can be learned from the countless years of experience gathered in a few books!

For more information on Bernard Middleton’s extraordinary career. See: https://blogs.bl.uk/collectioncare/2019/01/remembering-legendary-bookbinder-bernard-middleton-1924-2019.html