J. M. Iacchei
Our work in Conservation requires collaborative efforts with our colleagues throughout the library. Digitization projects are becoming increasingly more common. Together with Digital Consulting & Production Services (DCAPS) and the College of Human Ecology, Department of Fiber Science and Apparel Design, we recently treated 12 pieces of Polynesian barkcloth, also called tapa, from the Cornell Costume and Textile Collection.
 Barkcloth, called siapo by the Samoans and Futunans, ngatu by the Tongans and Uveans, ahu by the Tahitians, masi by the Fijians and kapa by the Hawaiians, is widespread. Historically produced throughout the Pacific, Eastern Asia, and Africa, this cloth-like material is made from the inner bast fibers of select plants. The most prevalent fiber source throughout the Pacific was the Broussonetia papyrifera of the Moracaea family, more commonly known as paper mulberry. Depending on geographic region, other varieties of the Moraceae Family were also used, notably the Artocarpus (breadfruit) and the Ficus (fig and banyan). [1] Additional sources of fiber were obtained from the poison tree (Antaruis Toxicaria) and the Mamaki (Pipturus Albidus), in the far eastern tropics and in Hawaii, respectively.[2] Each fiber produced a cloth of its own color, quality, and fineness. Traveling in 1769 with Captain Cook, Joseph Banks wrote, “of this thin cloth they have as many different sorts almost as we have of linen; distinguishing it into different fineness and the different materials of which it is made.”[3]
Paper mulberry does not grow natively on the Pacific Islands but must be propagated from cuttings or suckers. [4] 7000-9000 years ago (5000-7000 BC), the inhabitants of the Asian mainland began to migrate to the Pacific Islands.[5] Among the items of necessity that they would need on their sea voyage and upon their arrival for settlement (food, fresh water, livestock, and plants), they brought with them paper mulberry. Transporting paper mulberry required great care; its survival depended upon shelter from the saltwater of the ocean and the use of fresh (drinking) water to keep it alive.[6] This was not a risk-free undertaking, suggesting the significance of both the plant and the material made from it to the people who made the effort to bring it with them across such vast distances.
Traditional uses of barkcloth range from utilitarian household purposes (curtains, room dividers, bedding, mosquito nets, bandages, candle wicks) to ceremonial (burials, deaths, births, taxes to the chiefs, and offerings to the gods). Barkcloth as clothing seems to have been a privilege of the nobility, reserving certain fashions and coloring that could be worn only by select individuals. Barkcloth carried with it a symbol of wealth, second it seems, to finely woven mats, also given in events of gift exchange, as tribute, or tax.
The fundamental steps of barkcloth production are shared among practitioners of the craft; however, the specific processes involved vary by location. Harvesting, preparation, beating, implements used, decoration techniques, and patterns each contribute to the unique qualities and characteristics that make one place of origin distinct from another.
Historically, women were responsible the manufacture of the cloth, often taking place as a communal event. The degree of the men’s participation in this activity varied by island. On the whole, they were given the responsibility of making the implements needed for their manufacture – the wooden beaters and anvils, carved designs on bamboo stamps, and wooden printing boards. It was the women of the village who were responsible for the harvesting of the bark, the beating and manufacture of the cloth, the preparation of the dyes, and the construction of the vegetal (pandanus leaves, coconut midrib, sennit) printing tablets used in their decoration.
In very general terms, the practice was to harvest the fiber, separate the outer bark from the inner bark which was then cleaned and beaten on a wooden anvil. The cleaned thin strip of bark was laid on an anvil, often hollowed for resilience and musical resonance, and beaten until it became a soft, widened, thin piece of cloth expanding in width from about 2 inches to 14-18 inches. Larger pieces of cloth were made by overlapping the edges of smaller beaten strips and adhering them together with a starch adhesive (arrowroot). Thickness was determined by the number of layers, usually 2, but more (4-5) for items like bedding. With the exception of traditional Fijian cloth, the practice was to lay the upper layer perpendicular to the lower.
Above: Wooden mallets (beaters) used to transform the strip of inner bast fibers into a soft widened piece of cloth. (Images from: Brigham, William T. Ka Hana Hapa: The Making of Barkcloth in Hawaii. Memoirs of the Bernice Pauahi Bishop Museum of Polynesian Ethnology and Natural History, Vol 3, Honolulu, HI: Bishop Museum Press, 1911.)
Various beating methods were found throughout the islands including: folding and beating in bundles, beating strips individually, and felting. The sides of the wooden mallets (beaters) used to beat out the bast fibers were grooved, often in varied width and depth, with at least one side left smooth. Initial beating was done with the coarser side of the beater, moving progressively towards the smooth. In Hawaii, this process was at times taken one step further – giving a final beating with a beater with a carved surface (far right image above) to impart texture and pattern into the finished cloth.

Above is an example of barkcloth without a printed design. Right: A detail of the image on the left showing the texture imparted by a patterned I’e kuku (beater)
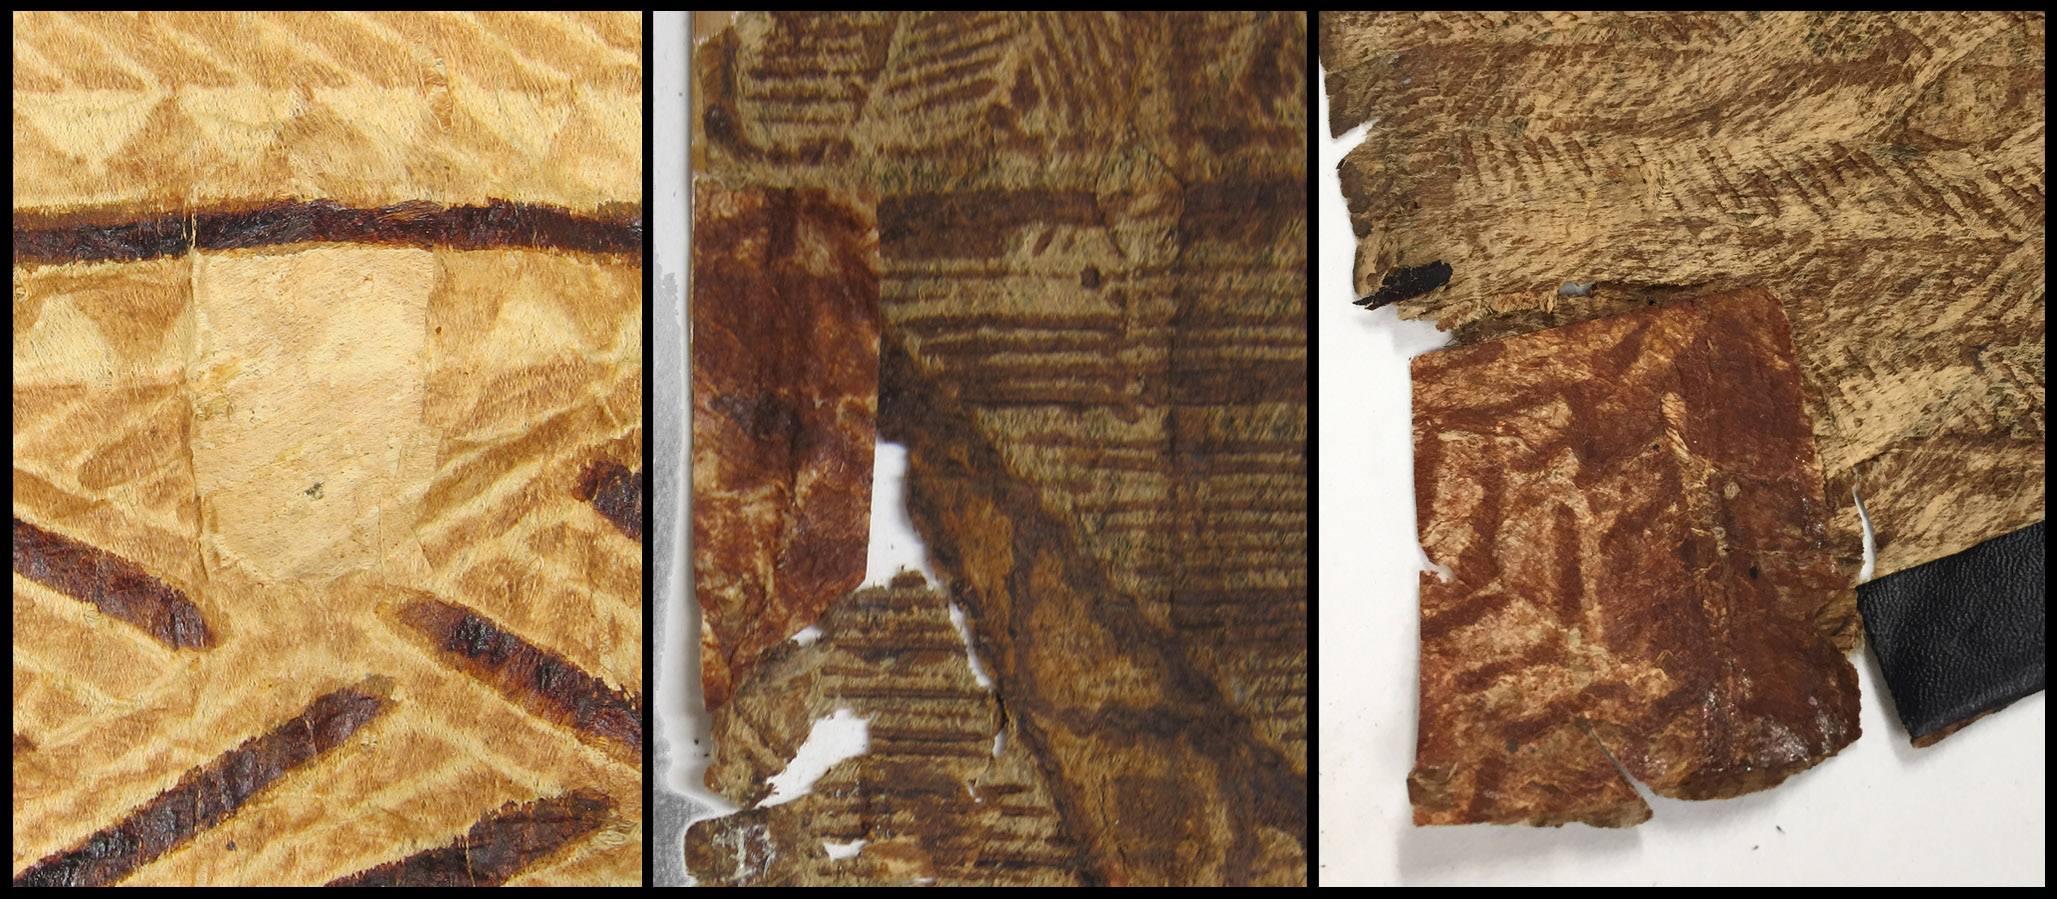
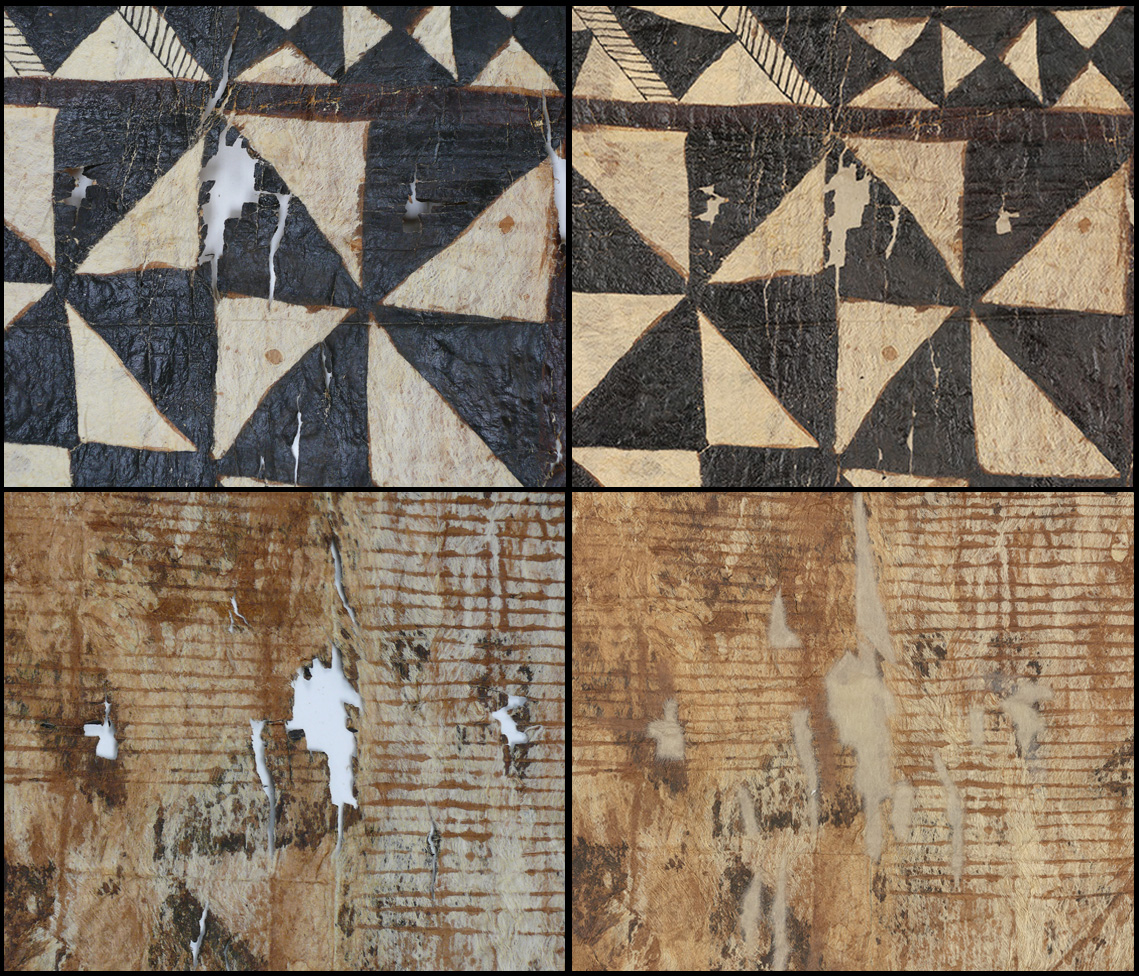
Methods of decoration found among barkcloth varied by location. There was some overlap, but distinct practices, patterns, motifs, and overall look to a finished cloth by island developed. The designs and patterns are applied by a variety of methods: freehand, stencils, stained with local dyes, smoked, and/ or printed.
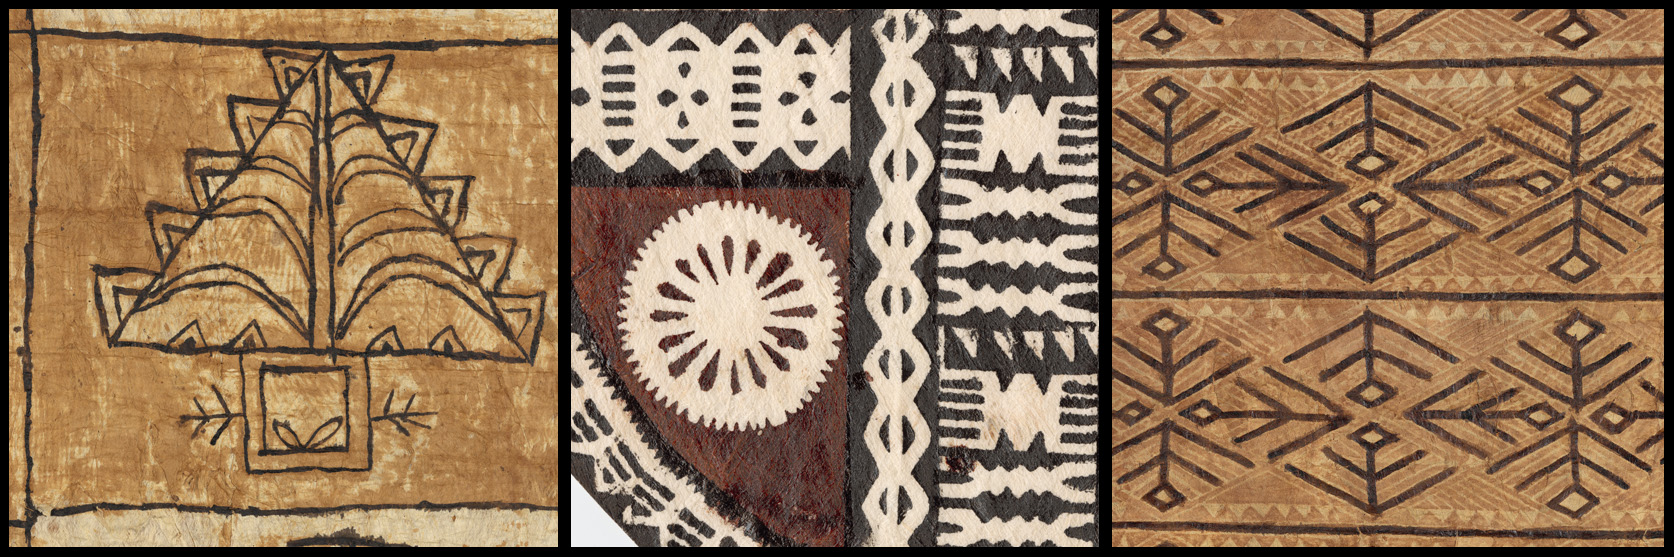
Left: Freehand; Center: Stenciled; Right: Freehand over printed design
Before the introduction of synthetic dyes, native plants were used to create dyes and impart color to a finished cloth. It is no longer known exactly how these dyes were made, but it is know that they were often made from the bark, fruit, and roots of local flora. For example: brown from the bark of the candlenut tree, reddish brown from the bark of the Bischofia javanica, black from the soot of burnt candlenut kernels, and yellow from the root of the Curcuma viridiflora.[7]
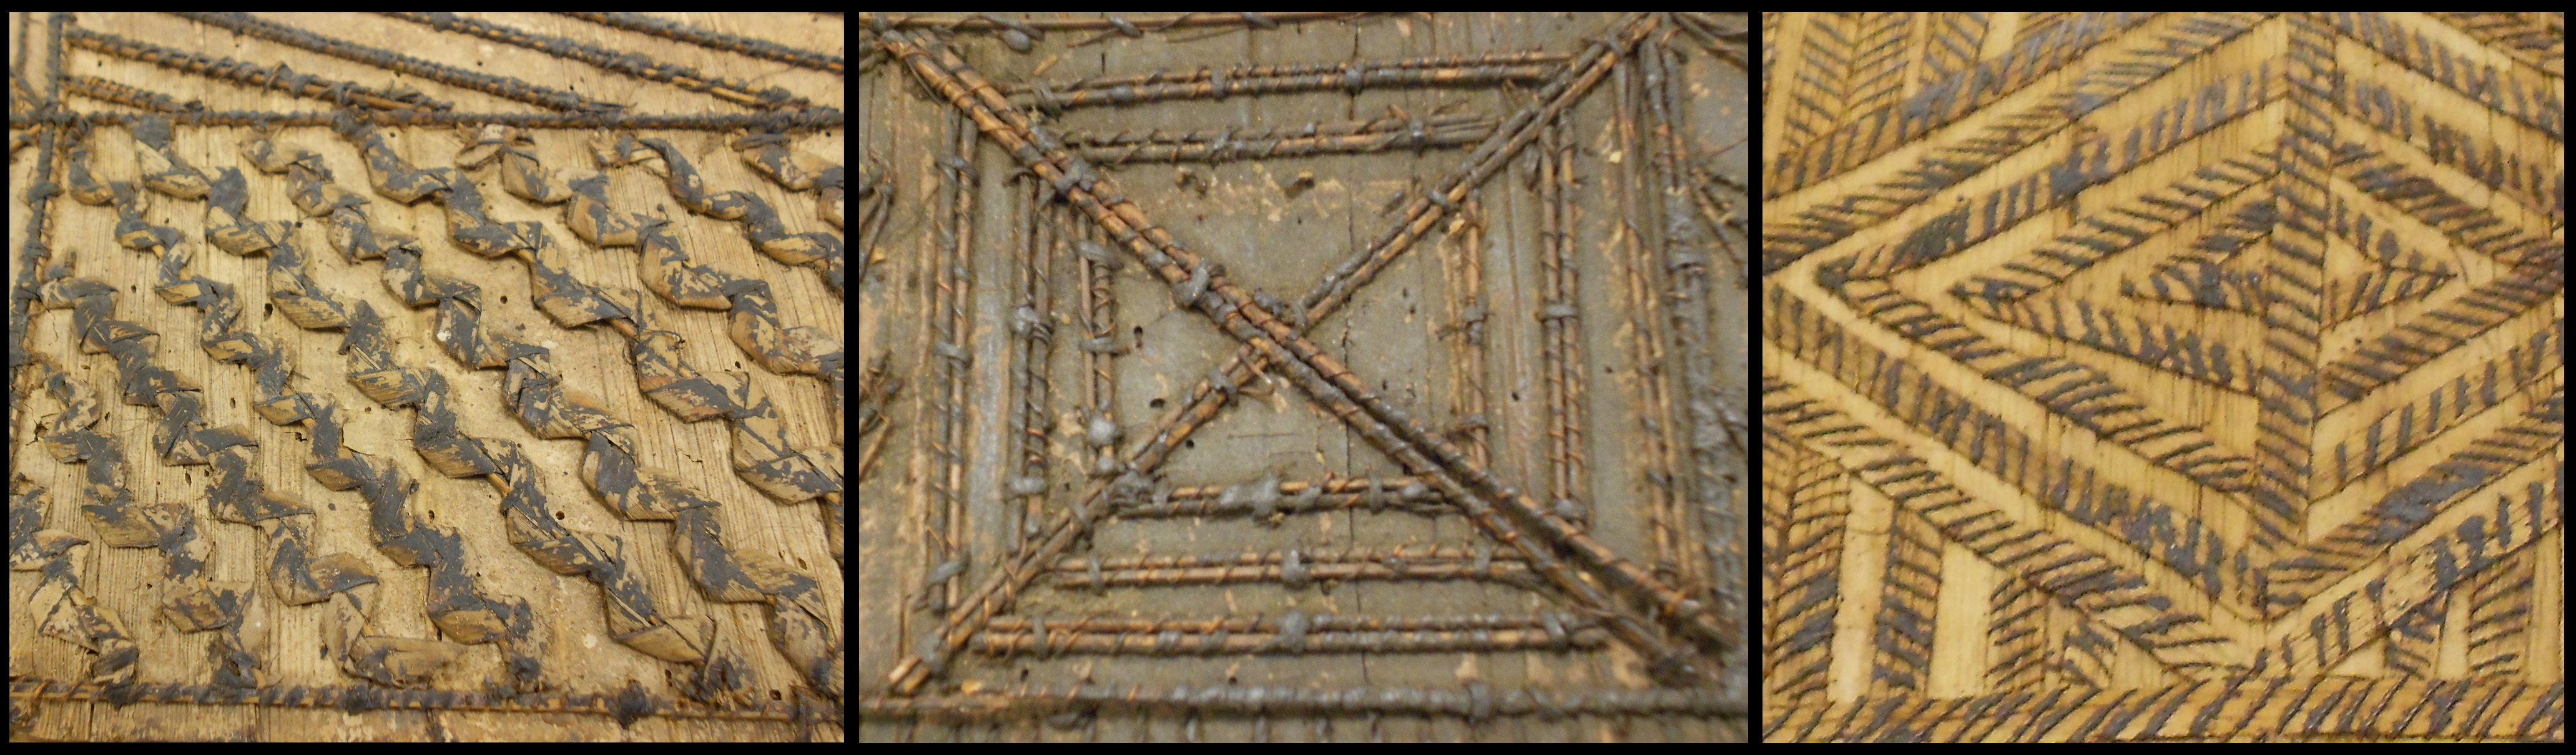
One method of design application, practiced in Samoa, Tonga, and Fiji, is the use of design tablets or printing mats to transfer an image onto the cloth. These mats and tablets, called upeti in Samoa, kupesi in Tonga, and kupeti in Fiji, were constructed of two layers of pandanus or coconut leaves. The top layer carried a relief pattern most commonly created from pandanus leaves, sennit, coconut midribs, bamboo, and hibiscus fiber. A rubbing technique was used to transfer the relief pattern to the beaten cloth.

In 2012, I visited the Field Museum of Natural History in Chicago while researching barkcloth as part of a final project at The University of Iowa Center for the Book. Shown above and below are some examples of Vegetal printing mats from that visit.

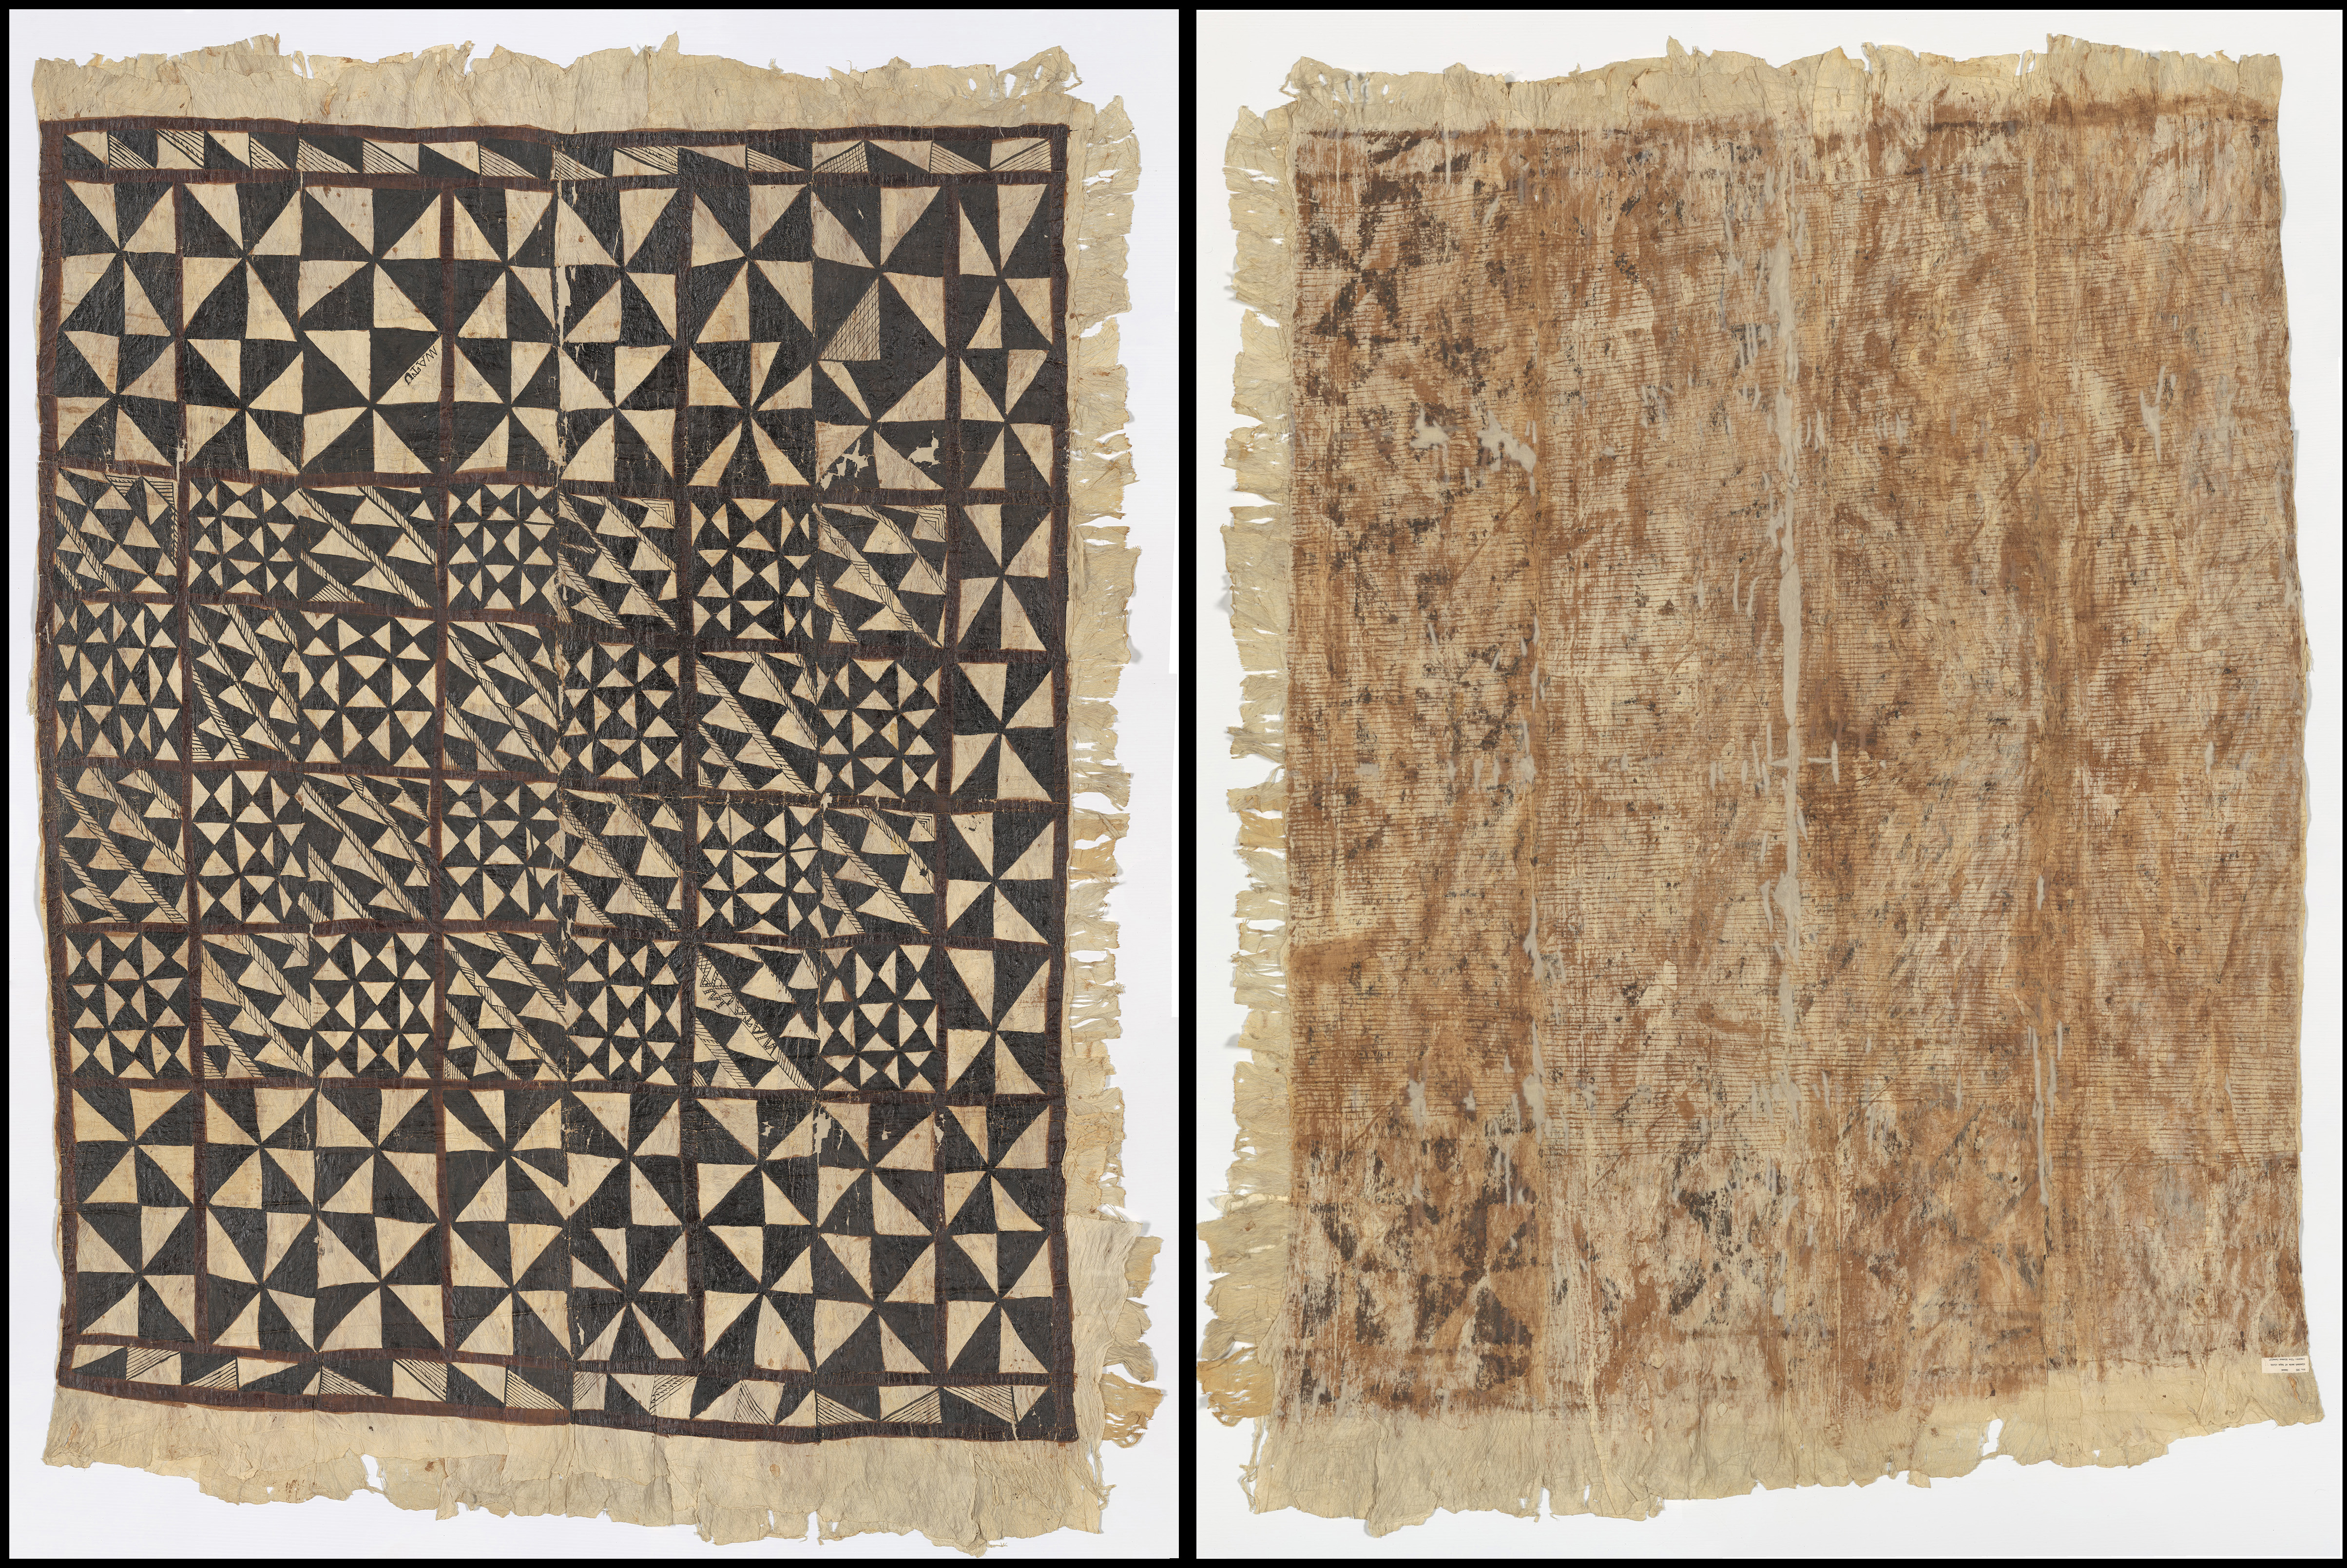
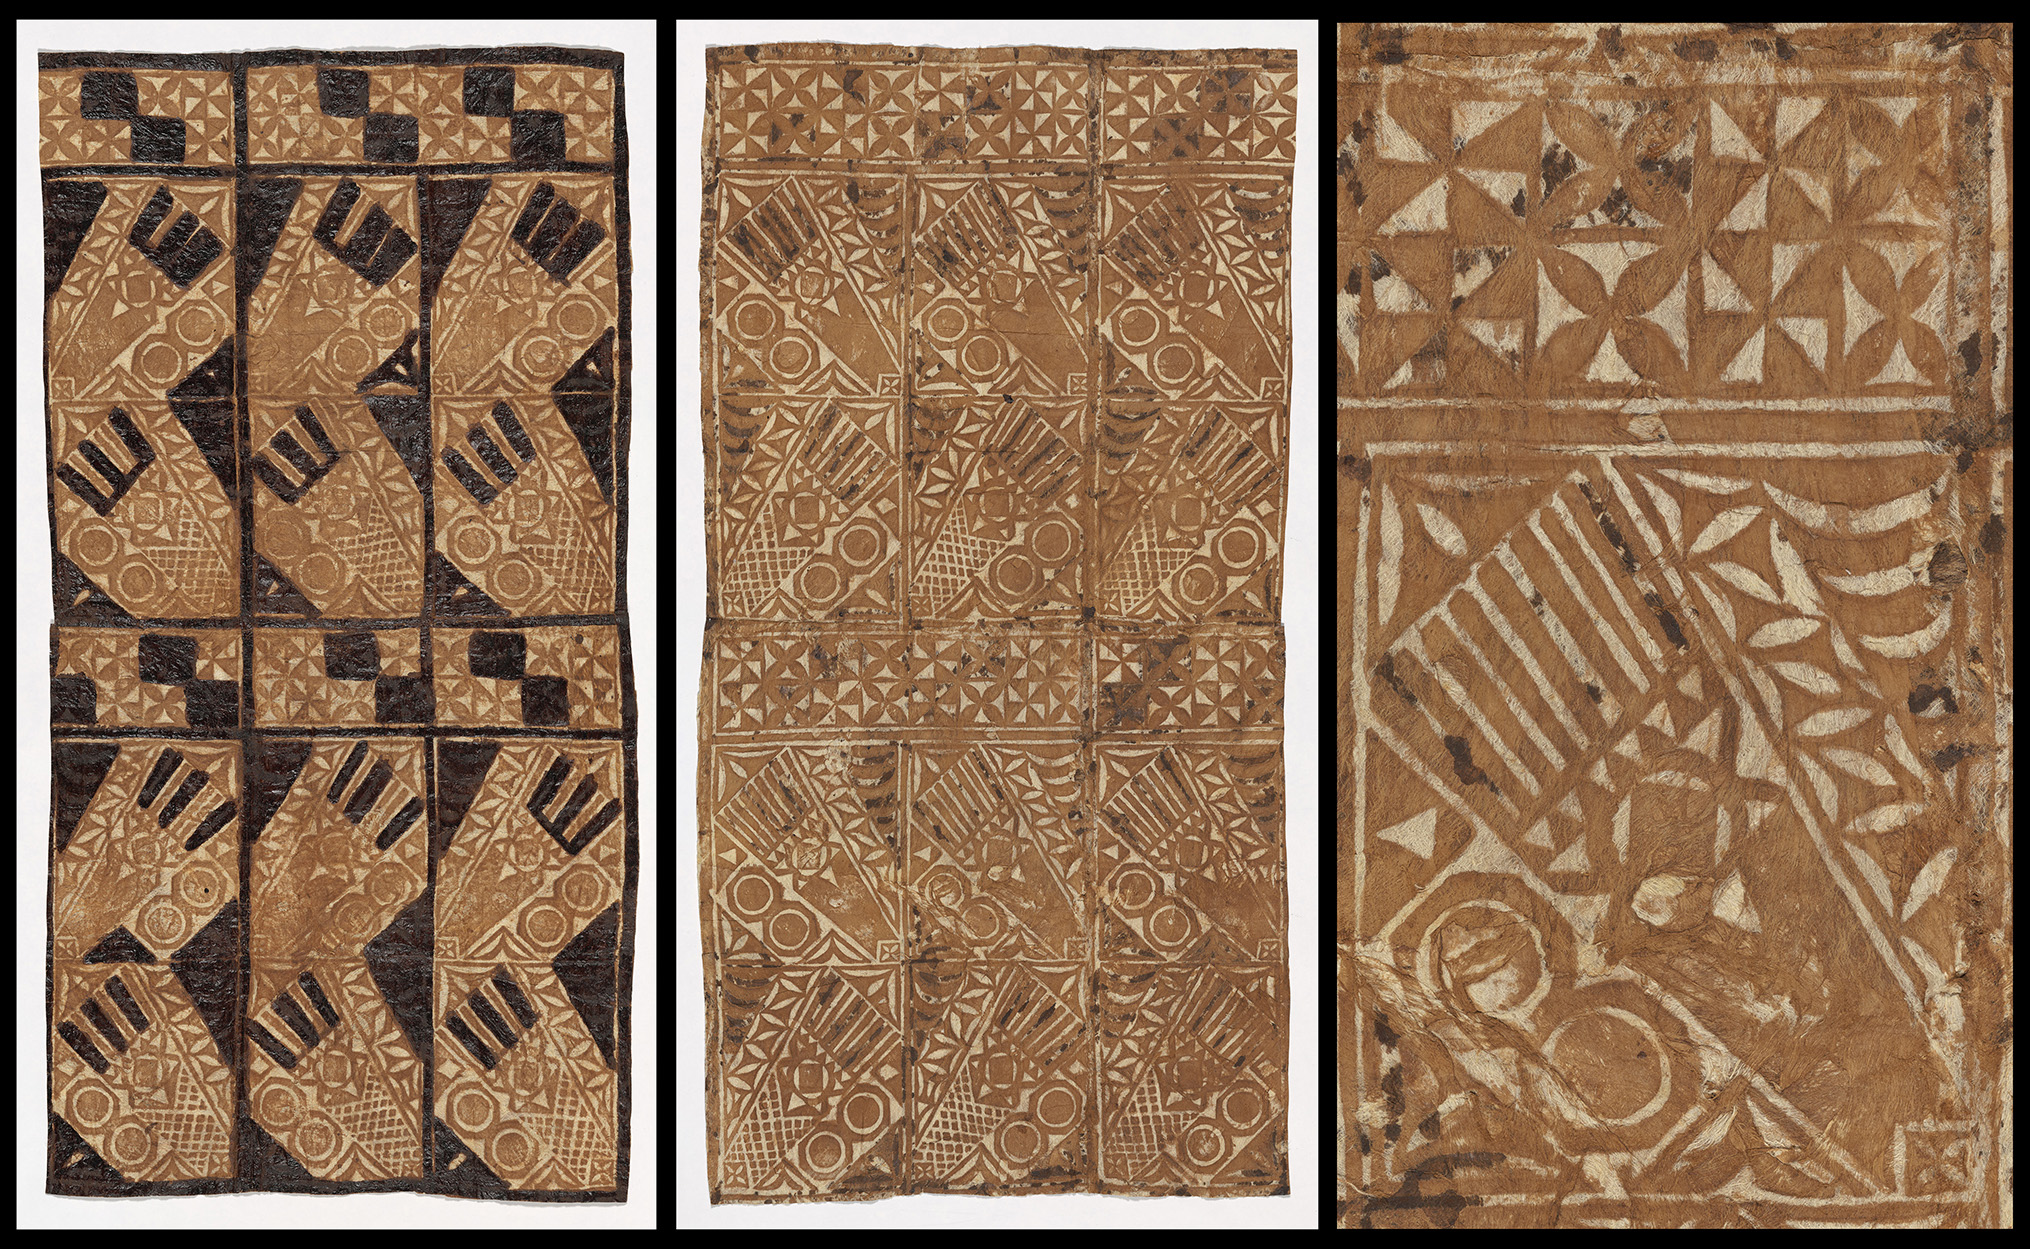
Recto, verso, detail: The origin of this cloth was labeled as “unknown”. The patterns seen on the verso are indicative of the use of a vegetal printing tablet. Considering that this method was used most notably in Samoa and Tonga, and the designs are similar to known cloths of each location, it is likely that one or the other is the place of origin.
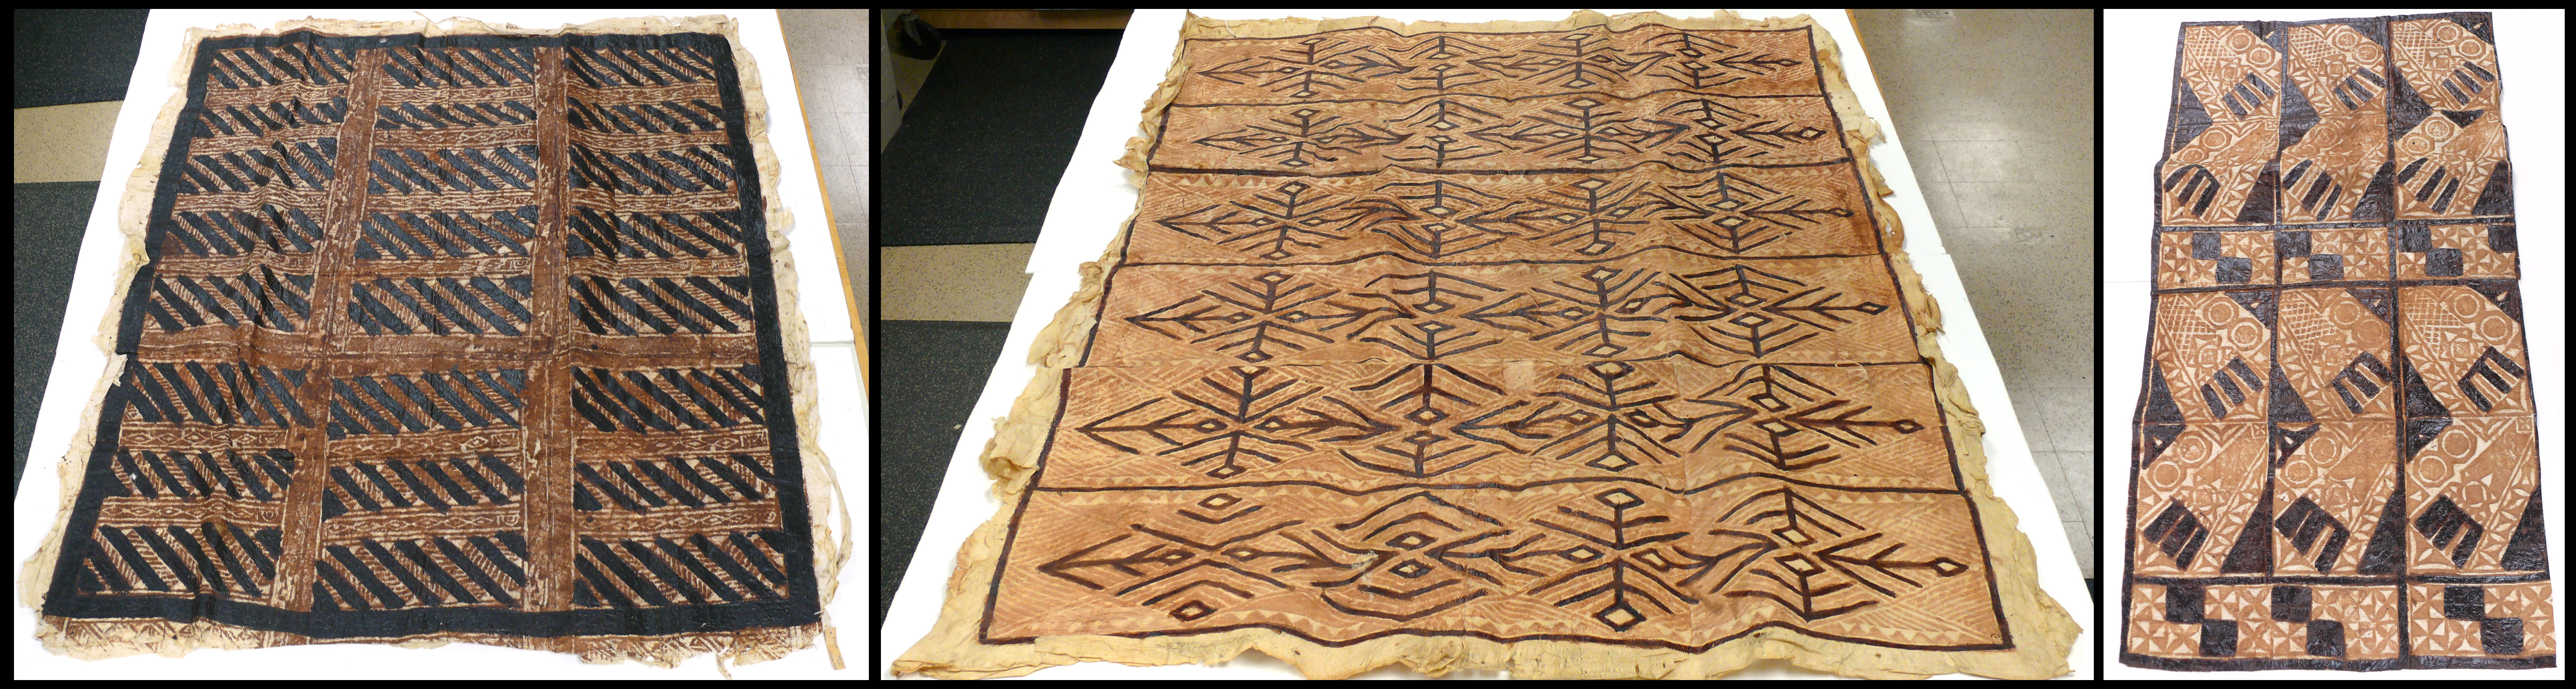
Recto, verso, detail: The origin of this cloth was labeled as “unknown”. The patterns seen on the verso are indicative of the use of a carved wooden printing board. Considering that this method was used most notably in Samoa and Tonga, and the designs are similar to known cloths of Samoa, it is possible that Samoa is the place of origin.
On Samoa, the use of vegetal upeti began to decline in the 1930’s after the introduction of metal tools proved the use of carved wooden upeti a more durable alternative. About this change, Patricia Lorraine Arkinstall quotes Margaret Mead writing in 1930: “But so well defined is the province of tapa making as women’s work, that men have not exercised their imagination on the carving of these boards.” Arkinstall further adds, “Thus, the patterns on the rubbing boards have become somewhat stereotyped. The women are not happy with the situation, but since wood carving has traditionally been men’s work, they do nothing but sit by as their patterned tapas become less and less interesting.” [8]
The Importance of Conserving Barkcloth
Because production of barkcloth has ceased in the majority of the islands, the methods of production originally used by the ancestors of today’s inhabitants are not wholly known.
The effects of European influence and missionary initiatives began to heighten during the 18-19th centuries. The introduction of European cloth, synthetic dyes, and the replacement of vegetal design tablets used in Tonga, Samoa, and Fiji with wooden ones are a few examples. By 1890, production of barkcloth in Hawaii had ceased.[9] Adrienne Kaeppler, of the Smithsonian Institution, noted that by 1984 of the Polynesian Islands, only Tonga, Samoa, and Fiji were still producing barkcloth. [10] With few exceptions, the production and high cultural regard of barkcloth has waned and current manufacture is produced in lesser quality for the tourist market.
The indigenous technologies that were once used have been altered, and over generations, have become lost to unrecorded history and memory. Because nothing of equal quality is being produced today, conservation efforts to identify the material, environmental, and technological influences responsible for current condition are necessary in order to determine appropriate treatments. In preserving these materials, an abundance of cultural, historical, sociological, and artistic information is retained for further research and study of the Pacific Islands and Pacific Island culture.
Read more about the treatment of this collection in Part II.
[1] [1] Neich and Pendergrast, Traditional Tapa Textiles of the Pacific, 9.
[2] Leonard and Terrell, Patterns of Paradise, 13.
[3] Ann Leonard and John Terrell, Patterns of Paradise: The Styles and Significance of Bark Cloth Around the World (Chicago: Field Museum of Natural History, 1980), 22.
[4] Neich and Pendergrast, Traditional Tapa Textiles of the Pacific, 9.
[5] Rod Ewins, “Bark-cloth and the Origins of Paper”(Paper presented at the First National Paper Conference, Hobart, Australia, 1987), 13.
[6] Ewins, “Bark-cloth and the Origins of Paper,” 13.; Anthony Meyer, foreword to Tapa: Bark Cloth of Oceania, written by Pascal Cusenier (Paris: Galerie Meyer, 1998), 2.
[7] Kooijman, Simon. Tapa in Polynesia. Bernice P. Bishop Museum Bulletin 234. Honolulu: Bishop Museum Press, 1972, Table E.
[8] Arkinstall, Patricia Lorriane, A studty of barkcloth from Hawaii, Samoa, Tonga, and Fiji: An exploration of the regional development of distinctive styles of barkcloth and its relationship to other cultural factors, Thesis, 1966, p119.
[9] Arkinstall, Patricia Lorriane, A studty of barkcloth from Hawaii, Samoa, Tonga, and Fiji: An exploration of the regional development of distinctive styles of barkcloth and its relationship to other cultural factors, 109.
[10] Mary J. Pritchard, Siapo: Bark Cloth Art of Samoa (American Samoa: Council on Culture, Arts and Humanities Special Publication Number 1, 1984), vi.