Soil Testing Primer

On the Growline we get a lot of questions about how to take or submit soil samples, so we’ve put together some frequently asked questions and answers to make it easier. After the why, where, when, what and how of this process, read on to find out who can help you interpret the test results.

Why should I test my soil?

The health of your soil will determine the health of the plants you grow, whether it be a lawn, a field of flowers, vegetables, berries or trees. A thoughtful approach considering the physical, chemical and biological factors that play a role in the total health of your soil will help you get the best results.

So where do you start?

Have a clear idea of what you want to know about your soil and what you want to learn from getting your soil tested. What will you plant? Where is it located? What was planted there before? What are the “neighbors” – plants or trees surrounding the area? Do you know your soil type – sandy, clay, loamy? Each unique area will need to be sampled separately.

  • Web Soil Survey use to get description and identify type of soil (sandy, clay, loamy)

When should I test my soil?

Fall is generally considered to be the best time to collect a sample for testing, especially when considering the pH of your soil, however it can be done in the spring or anytime during the growing season. 

What do I need?

Gather a few clean tools without rust. Avoid brass or galvanized tools or containers as they will skew your results. A stainless steel probe or soil auger is ideal, but a clean plastic bucket and a rust free trowel or shovel will work for any home gardener. You will also need to double bag your sample in 2 quart-sized sealed zip-lock baggies for each sample area.

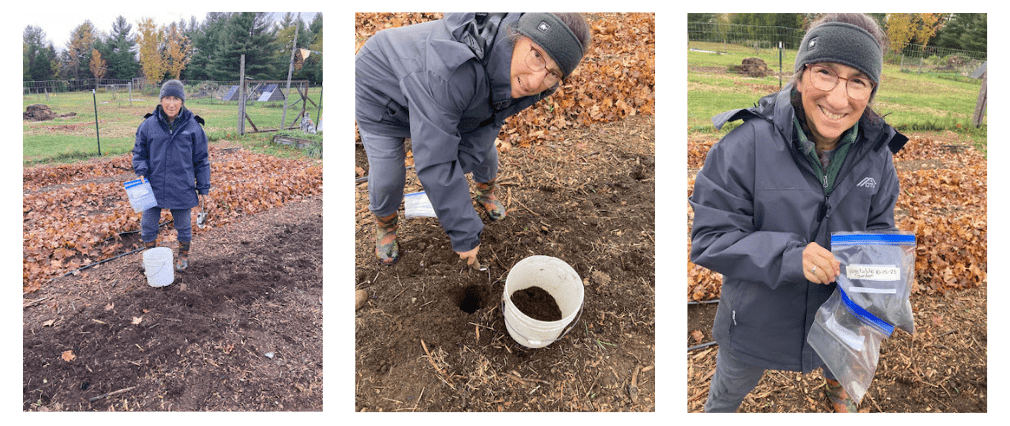
How do I take a soil sample?

Walk across and around your garden area in a random, zigzag manner and make about 10 different 4-6 inch deep holes. From each hole, carefully slice a thin vertical section that represents all depths of the soil. Put each slice in your bucket and mix thoroughly. Remove large roots and stones, crush any large lumps or clods, and place about 2 cups of the well mixed soil in a double zip-lock bag. Avoid sampling in wet conditions and in areas where lime or fertilizer has been recently applied. 

Read more Soil Testing Primer

Timing a gorgeous Christmas cactus bloom

Plants don’t often bloom when we tell them to, but ever since a friend gave me some instructions back in 1997, I’ve been able to get my amaryllis and Christmas cacti to bloom on demand. When I took the time to mark a few dates on my calendar and follow through, I got lovely blooms for the holiday season exactly when I wanted them. That little bit of knowledge piqued my interest, and I’ve done a bit of research since then. This post and the previous one convey what I’ve learned about amaryllis and Christmas cacti and controlling their bloom time.A Christmas cactus in fool bloom

Christmas cacti have been known to live 100 years when cared for properly! Both plants naturally grow in the spring and summer, and bloom in fall and winter, so we need to recreate those conditions if we want gorgeous flowers.

GENERAL CARE

Before we talk about blooming, we should talk about general care. Many people hear the word “cactus” and immediately think “hot sun,” and “dry soil.” In fact, the term “cactus”is a misnomer. This plant is an epiphyte (grows on trees) from the Brazilian rainforest, not a desert cactus. It doesn’t like blazing sun or dry soil. While Christmas cacti are pretty tolerant in terms of water and light amounts, if your cactus isn’t blooming, it’s a sign that you’re not quite treating it the way it wants to be treated. Read more Timing a gorgeous Christmas cactus bloom

Timing a Glorious Amaryllis Bloom

Plants don’t often bloom when we tell them to, but ever since a friend gave me some instructions back in 1997, I’ve been able to get my amaryllis and Christmas cacti to bloom on demand. When I took the time to mark a few dates on my calendar and follow through, I got lovely blooms for the holiday season exactly when I wanted them. That little bit of knowledge piqued my interest, and I’ve done a bit of research since then. This post and the next convey what I’ve learned about amaryllis and Christmas cacti and controlling their bloom time. Let’s start with Amaryllis.

Amaryllis will bloom for you each year and believe it or not, you can use the same bulb for literally decades if you treat it right. These plants naturally grow in the spring and summer, and bloom in fall and winter, so we need to recreate those conditions on a timeline to get gorgeous flowers when we want them.

amaryllis blossom
amaryllis blossom

Timeline:

Start waking your dormant, bare bulbs 10-12 weeks before you want blooms (October 1 if planning for Christmas.) Note: If your bulb isn’t already dormant, start creating the artificial dormancy in mid-September.

Tip: For Christmas blooms, starting October 1 plant a bulb per week for 3 weeks if you want to ensure blooms happen on the desired date. Environmental conditions are naturally variable– the bulb, the soil, the moisture in the air, and a myriad of other things contribute to how fast a plant grows. Three bulbs will provide good insurance.

When purchasing an amaryllis bulb, go big. The bigger the bulb, the bigger the stems to support the blooms. Also, small bulbs may not flower for you as they may not be mature. Read more Timing a Glorious Amaryllis Bloom