So, you’ve found your dream dehydrator and you are ready to get started. The dehydrating process is not especially complicated: Food is dehydrated by subjecting it to low heat and a steady airflow, evaporating enough moisture to inhibit the growth of bacteria, yeast, and mold—things that spoil precious food. You want food to be as dry as possible before storing it. Along with your dehydrator’s manual, the Internet has many reliable sources of dehydrating instructions (see resources below), so I won’t reinvent that wheel, but I will share some things I encountered during my first year of dehydrating.
Prepping Food
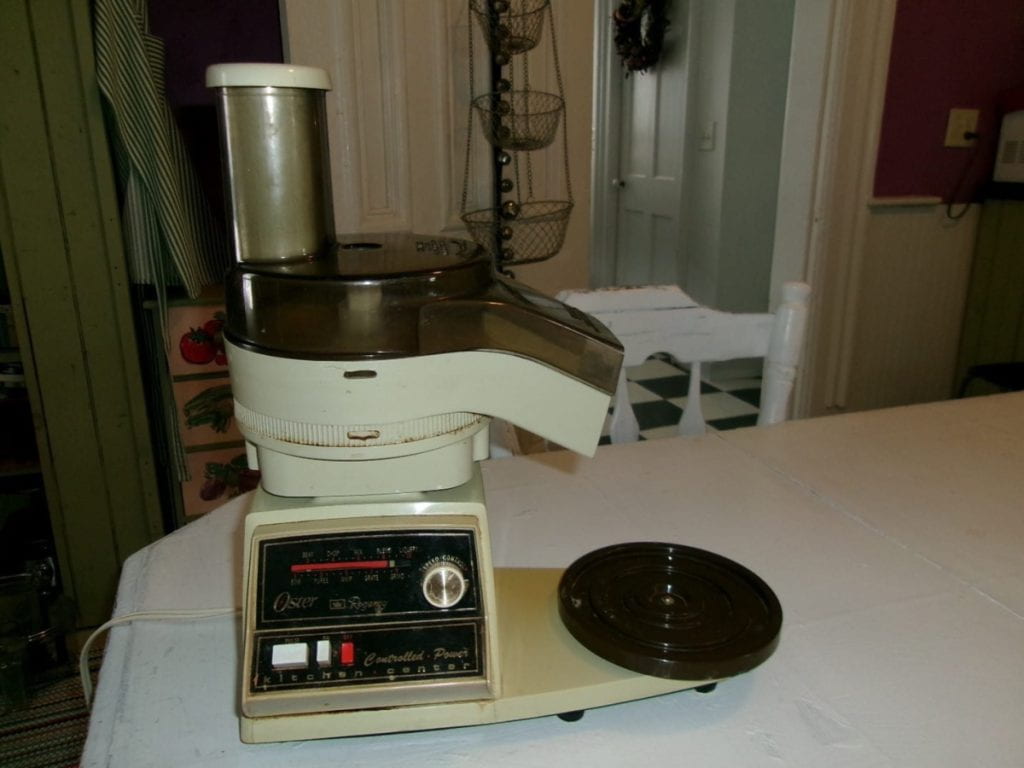
Ideally, all dehydrated food should end up at the same level of dryness, so chopping, cutting, or slicing food into uniform pieces makes sense, right? Imagine starting one thick and one thin burger on the grill at the same time: You know that the thin one will cook more quickly. Some obliging vegetables like corn and peas come uniformly sized. To cut up larger produce, many people use a mandolin. Since I typically shred my knuckles on a plain old cheese grater, a mandolin is probably not in my future. Seriously, mandolins are out for blood. An egg slicer works great for strawberries and mushrooms. Depending on the size and shape of the food, I either use sharp knives or my trusty Oster Kitchen Center.

Dehydrating Times
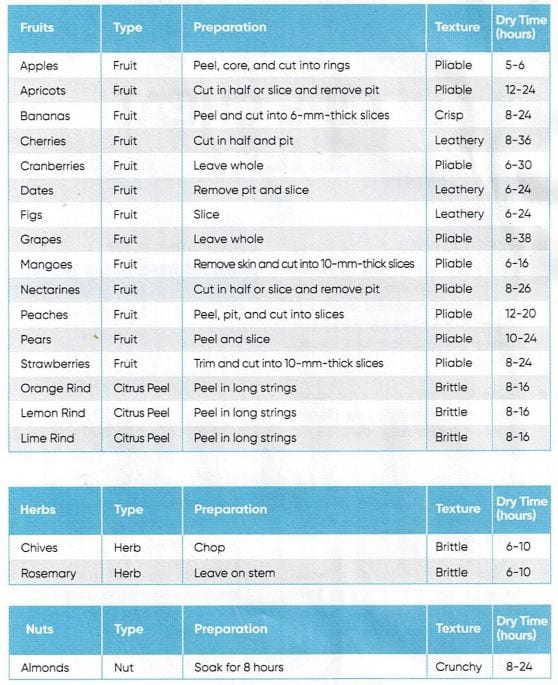
As shown in the chart below, dehydrating times vary, with juicier foods like peaches and pears taking longer to dry than, say, apples.

Some people ignore the recommended times altogether, leaving the dehydrator on for 24 hours no matter the food. Can you over dry food? Most sources say no. So how do you tell if the food is “dry enough”? The USDA says that dried vegetables should be hard and brittle, to the point that some will shatter when hit with a hammer. Before you pull out the ol’ ballpeen, take out a few pieces of food and let them cool before testing—warm food tends to seem moister and more pliable.
You may end up varying dehydrating times, but do not mess with the recommended temperatures. For example, if the initial temperature is too high, the food surface might dry, making it hard for moisture to escape. Instead of upping the temperature to speed up drying time, cut food into smaller or fewer pieces.
