Learn to make culinary extracts and you can add amazing flavor to baked goods and beverages at a fraction of the cost of buying them . Use extracts in cakes, cookies, muffins, or pancakes, in frostings and fillings, in ice cream, or as a flavoring for coffee, tea, sparkling water, or cocktails. You can make extracts from herbs, spices, fruits, nuts, or edible flowers. Create single flavor extracts or try a mix such as chocolate-peppermint or cherry-almond. They are easy to make and great for gifting but you need to plan ahead because these take time!
To make an extract you need a solvent as the medium to “extract” the flavoring. The solvent you use is a personal choice. Usually the solvent is alcohol and the most commonly used alcohol is vodka as it has the most neutral flavor. You can also use rum, brandy, or bourbon. For a non-alcohol alternative you can use food grade liquid glycerin in a ratio of 3:1 with water (a little water is needed to thin the glycerin). This is called a glycerite. Using glycerin produces more of a syrupy extract and adds a touch of sweetness to the finished product. It is also slower to extract the flavors so you need to give it more time to develop flavor.
How to do it:
The basic procedure for making extracts is to put your prepared flavor agent in a jar, fill the jar to within 1” of the top with your solvent of choice (make sure your flavoring is fully covered), cap the jar tightly and shake, then set it aside to wait for the flavor to develop. Don’t forget to label the jar with contents and date! The enemies of the process are air, heat, and light. Tight fitting lids will keep the alcohol from evaporating. Placing jars in a cool, dark place will help keep the contents from degrading.
To aid in the extraction process, shake the jar during the process. Is it necessary? It is probably not essential but shaking allows the solvent to mix thoroughly with the flavor agent and prevents the flavor agent from settling on the bottom of the jar. There are various recommendations on how often to shake ranging from every day to whenever you think about it. A good middle ground would be to shake the jar every day for the first week or two and then gradually taper off to every other day, then a couple times a week, then once a month for the remainder of the time. Don’t fret if you don’t remember to shake the jar. The flavor will still develop but shaking can help the process.
You can begin to check on the flavor after about 6 weeks. Keep tasting every week or so until the extract has reached the depth of flavor you prefer. Six weeks may be enough time to develop a good flavor but you will often need to wait longer, as long as 3-6 months, for deeper flavor to develop and to be comparable to what you can purchase. Once you have the flavor you like, strain out the solids, pour the extract into a clean bottle or jar with a tight-fitting lid and label it. Extracts don’t go bad due to the alcohol content. Keep them sealed and in a location away from light and heat and they should keep indefinitely. If you’ve used glycerin as the solvent the flavoring doesn’t last indefinitely but it should last 2-3 years.
Some notes about alcohol as the solvent: Vodka and rum (70-80 proof) are the typical solvents used. Alcohols like whiskey and tequila can be used but the finished extract will likely have an alcohol “bite” to it. You can use a lower proof alcohol but it will take longer to extract the flavor. And conversely, a higher proof alcohol will take a shorter time but will likely lend an alcohol bite to the finished product. Typically unflavored alcohols are used but you can use flavored alcohols. Be aware that spiced rums can overtake your flavoring agents. But coconut rum makes a tasty vanilla extract if steeped long enough for strong vanilla flavor. And bourbon works well for a chocolate extract. Feel free to experiment but remember to label your jars carefully so you know what combinations produce results you like.
What you need:
- Your solvent of choice (70-80 proof alcohol or food grade liquid glycerin and water).
- Your flavor agent of choice.
- A jar with a tight-fitting lid such as canning jars or recycled glass jars. Pint or half pint jars are good sizes but feel free to make larger amounts.
- A fine mesh strainer, coffee filter, or cheesecloth for removing solids from the finished product.
- Bottles or jars with tight-fitting lids for the finished product. Often dark colored bottles are used but if kept in a dark location such as a cupboard they aren’t a necessity.
- Labels
Some Basic Flavor Ratios per 8 oz of vodka. Making your own extracts is not an exact science and you can experiment by adding a little more of the flavor agent to shorten the time or intensify the flavor. Just make sure the flavor agent is completely submerged in your alcohol and that you taste test periodically after the first 6 weeks until the flavor suits you. If the flavor gets too strong, use less of the extract in your recipe. Additional notes for each flavor agent can be found below.
- Almond: 1 cup raw blanched almonds roughly chopped (you can use unsalted, slivered almonds)
- Berries (blueberry/raspberry/strawberry): ¾ cup crushed fruit
- Cherry: 1 cup pitted and cut in half
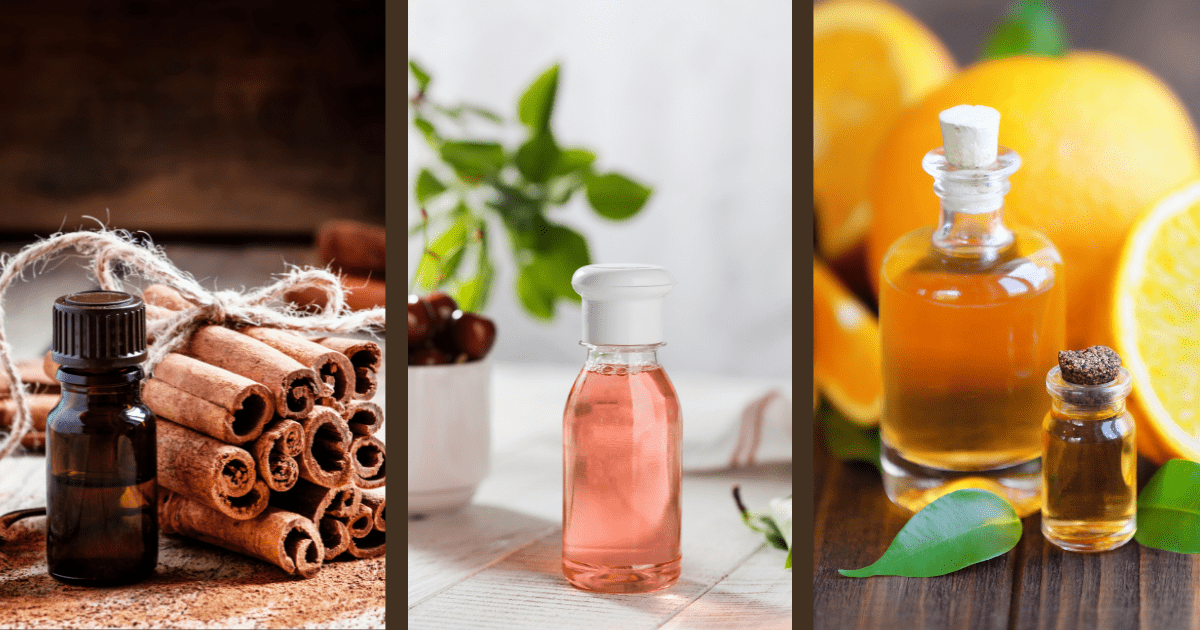
- Cinnamon: 4-6 sticks whole cinnamon
- Citrus (lemon/lime/orange): 1 cup peel (zest) in strips, no pith
- Chocolate: ½ cup cocoa beans lightly crushed or cacao nibs
- Coconut: ½ cup fresh coconut meat roughly chopped or grated (you can also use shredded, unsweetened coconut or coconut flakes)
- Coffee: ¼ c coffee beans, roughly chopped
- Hazelnut: 1 cup whole raw nuts
- Lavender: ¼ cup dried culinary lavender buds
- Mint: ¾ cup fresh mint leaves (any kind) roughly chopped
- Vanilla: 1 oz of beans (the number of beans depends on size)
Enjoy the process and savor the goodness of your finished extracts!
RECIPE NOTES:
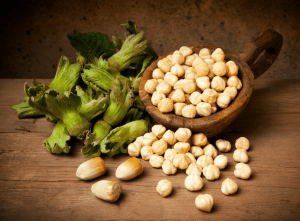
Almond or Hazelnut: Get the freshest nuts possible. If you don’t have blanched, skinless nuts, you must remove the skins or you will get a bitter taste because the alcohol pulls the flavor from whatever it’s covering while it steeps. Skin removal can be done a couple of ways. Either dehydrate the skins in the oven at 350 degrees for 10 minutes and then rub the dry flaky skins off or pour boiling water over the nuts and rub the skins off in the water after the water has cooled down. Alternately you can drop them into boiling water for 1 minute, drain, then rub off the skins. After removing the skins, spread them out to dry. I’ve read that using boiling water makes the skins come off easier than oven drying.
Almonds: You may choose to roast them in a 350 degree oven for 10 minutes but you don’t need to do so. Roughly chop whole almonds to increase surface area. Making almond extract can be a challenge so fill your jar ¾ full (or completely) with the almonds, then add your solvent. It will likely take months for good flavor to develop.
Hazelnut: After removing the skins of hazelnuts, roast them in a 350 degree oven for 10 minutes to bring out the natural oils and make the flavor extra nutty. While the nuts are fresh out of the oven and hot, put them in the jar and add the solvent. You’ll hear a sizzle as you add the solvent. These will need to steep a minimum of 2 months.
Berries: Simply add ¾ cup crushed berries to each 1 cup solvent and let steep at least 8 weeks until desired flavor is achieved.
Cherry: Remove stems and pits and cut cherries in half. Add to jar and cover with solvent to within 1” of top of jar. You can begin taste testing after 4 weeks. Longer steeping gives stronger flavor and you can steep for a couple of months or longer. When you strain out the cherries the extract should be clear, not cloudy.
Cinnamon: The more cinnamon sticks you add to the jar the stronger the flavor will be in a shorter amount of time. Simply place sticks in jar and cover with solvent. You may choose to break up the sticks to increase surface area but it isn’t necessary. Make sure all sticks are covered with solvent. Begin your taste testing at about 6 weeks if you’ve used the recommended amount. If you let the extract get too strong simply use less of it in your recipes.
Citrus: You can use any citrus (lemons, oranges, limes, mandarins, grapefruits). Use a vegetable peeler or knife to carefully slice away the colored part of the peel so that you have strips of peel (zest) with no white pith. The pith will impart a bitter flavor. It is best to use organic fruits for this. Give each strip of zest a little squeeze as you put it into the jar to release some of the oil. Fill the jar with the strips of zest. You may fill the jar half full but completely filling the jar will give you a nice rich extract. Then top off with your solvent leaving 1” headspace. Citrus extracts can easily steep 4-6 months for a rich flavor.
Chocolate: It is optional to crush the cacao beans but it will increase the surface area and speed the extraction process. Alternately you can use cacao nibs. Fill the jar halfway with crushed beans or nibs or ¾ full if using whole beans and fill the remainder of the jar with your solvent, leaving 1” headspace. Store for at least 6-8 weeks, up to 6 months, until desired flavor depth is reached. These are slower to extract the flavoring so plan on 3 months or more for a rich chocolate flavor. When the extract has reached the depth of flavor you prefer, strain out the solids and place the extract in the freezer safe container and freeze for at least 6 hours. If any fat was extracted from the beans or nibs it will rise to the top and you can skim it off. Then thaw and bottle it. Sometimes this extract is made with bourbon for a deeper flavor.
Coconut: The smaller the pieces the less you need in the jar because of increased surface area. If you use shredded coconut, fill the jar halfway. If using flakes or larger pieces of coconut meat, fill the jar to just below 1” from the top (so your solvent can cover it). This can develop flavor rather quickly (especially if you use shredded coconut) so it may be to your liking at about 6 weeks. You can let it steep longer if you prefer.
Coffee: It is optional to crush the coffee beans but it increases the surface area and will speed the extraction process. Just lightly break up the beans. Do not make powder of them. For a rich flavorful extract use espresso beans. You can use other coffee beans and a dark roast is recommended. Lighter roasts have a lighter flavor so they will need to steep longer. Fill the jar halfway with the coffee beans if you are using espresso or dark roast. Fill jar ¾ full if using a light or medium roast. Then fill the jar with your solvent leaving 1” headspace. Steep for at least 6-8 weeks, but longer is recommended.
Lavender: While all lavender is edible, culinary lavender (English lavender or what’s commonly referred to as True Lavender) has a sweet floral flavor and won’t have a soapy or medicinal taste. There are lots of lavender varieties and each has a slightly different taste. Measure the lavender buds into the jar and cover with your solvent leaving 1” headspace in the jar. Shake to make sure all the lavender is submerged. While steeping, it will start out purple but will quickly turn brown and continue to darken as it ages. It should steep 4-8 weeks.
Mint: If you’ve washed your mint make sure it is thoroughly dry before combining with the solvent. Any excess water will dilute the extract and may lead to spoilage. Instead of chopping the mint you can put the mint in the jar and crush it down to break the leaves and release the oil. Fill your jar with leaves, crush them down, then fill again and crush down until your jar is about ¾ full. Then add your solvent to within 1” of the top of the jar. The leaves must be completely submerged. If there are any floaters, remove them. Mint can steep quickly and will often be ready in 6 weeks or so rather than in months. The mint leaves may change color and get paler or begin turning brown and that’s ok if they stay submerged.
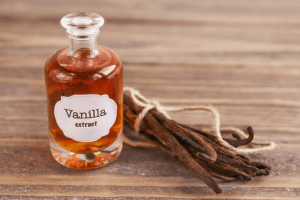 Vanilla: There are over 150 types of vanilla beans but the three most common are Madagascar, Tahitian and Mexican. Each type of vanilla has a slightly different taste but any can be used to make vanilla extract. Vanilla beans come in two grades – A and B. Grade A (also called the “gourmet” bean) are plumper and have a higher water content. So not only are Grade B vanilla beans a little better for this process because of the lower water content, they are also cheaper. Either will work with good results.
Split the vanilla beans down the length of the bean to expose the seeds (called the “caviar”) and membranes. If the beans are longer than the height of your jar cut them into pieces to fit, making sure they will be completely submerged in the solvent. A good vanilla extract will take many months to develop. Plan on at least 3 but most likely 6 months for flavor equivalent to what you can purchase. You can steep the beans for a year and you will have terrific flavor but the extract will be a little syrupy.