Today’s blog describes a book conservation treatment informed by a resource from our Conservation Lab’s library of reference materials. The Conservation Lab’s library has hundreds of resources on conservation and preservation topics (treatment, handling, environment, disaster planning and recovery), bookbinding, and artist’s materials and techniques. We add new resources to our library frequently and the collection is open to all users. This is the 2nd in our Preservation Week series highlighting Cornell University Library Conservation Lab’s continuing education to better preserve and protect our collections.
Caitlin Jochym
Books bound in leather are susceptible to a number of problems. Because of this, we see a lot of them in the lab. The leather can deteriorate over time, weakening the joints and causing boards to detach and spines to be lost. Part of our working philosophy is to do as little as we can in the way of treatment while stabilizing the item enough that it is not damaged by handling. The following treatment decision was made with that in mind.
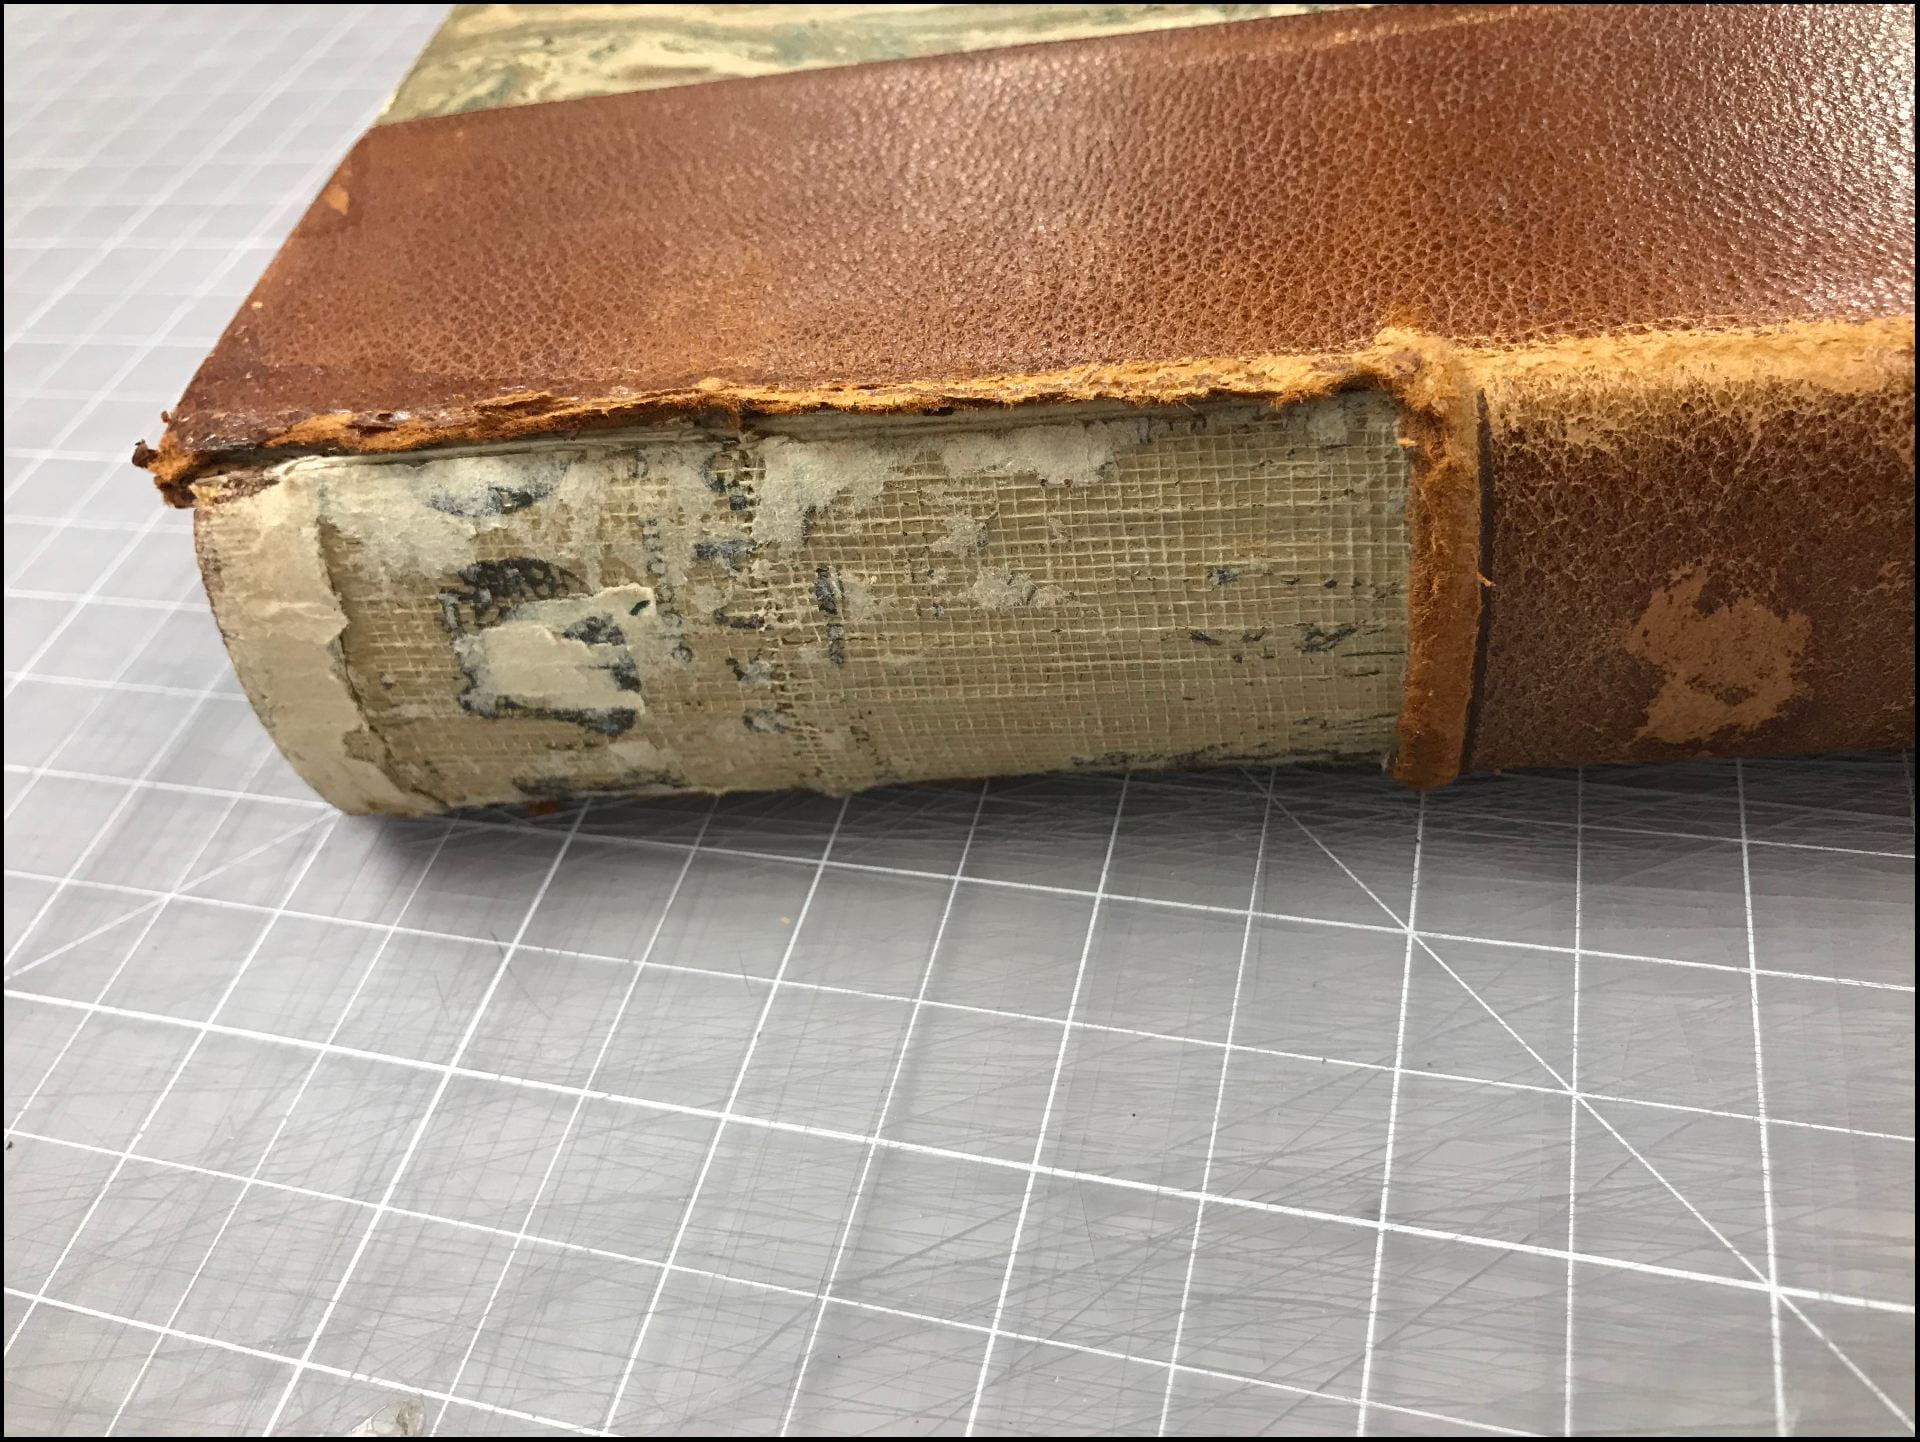
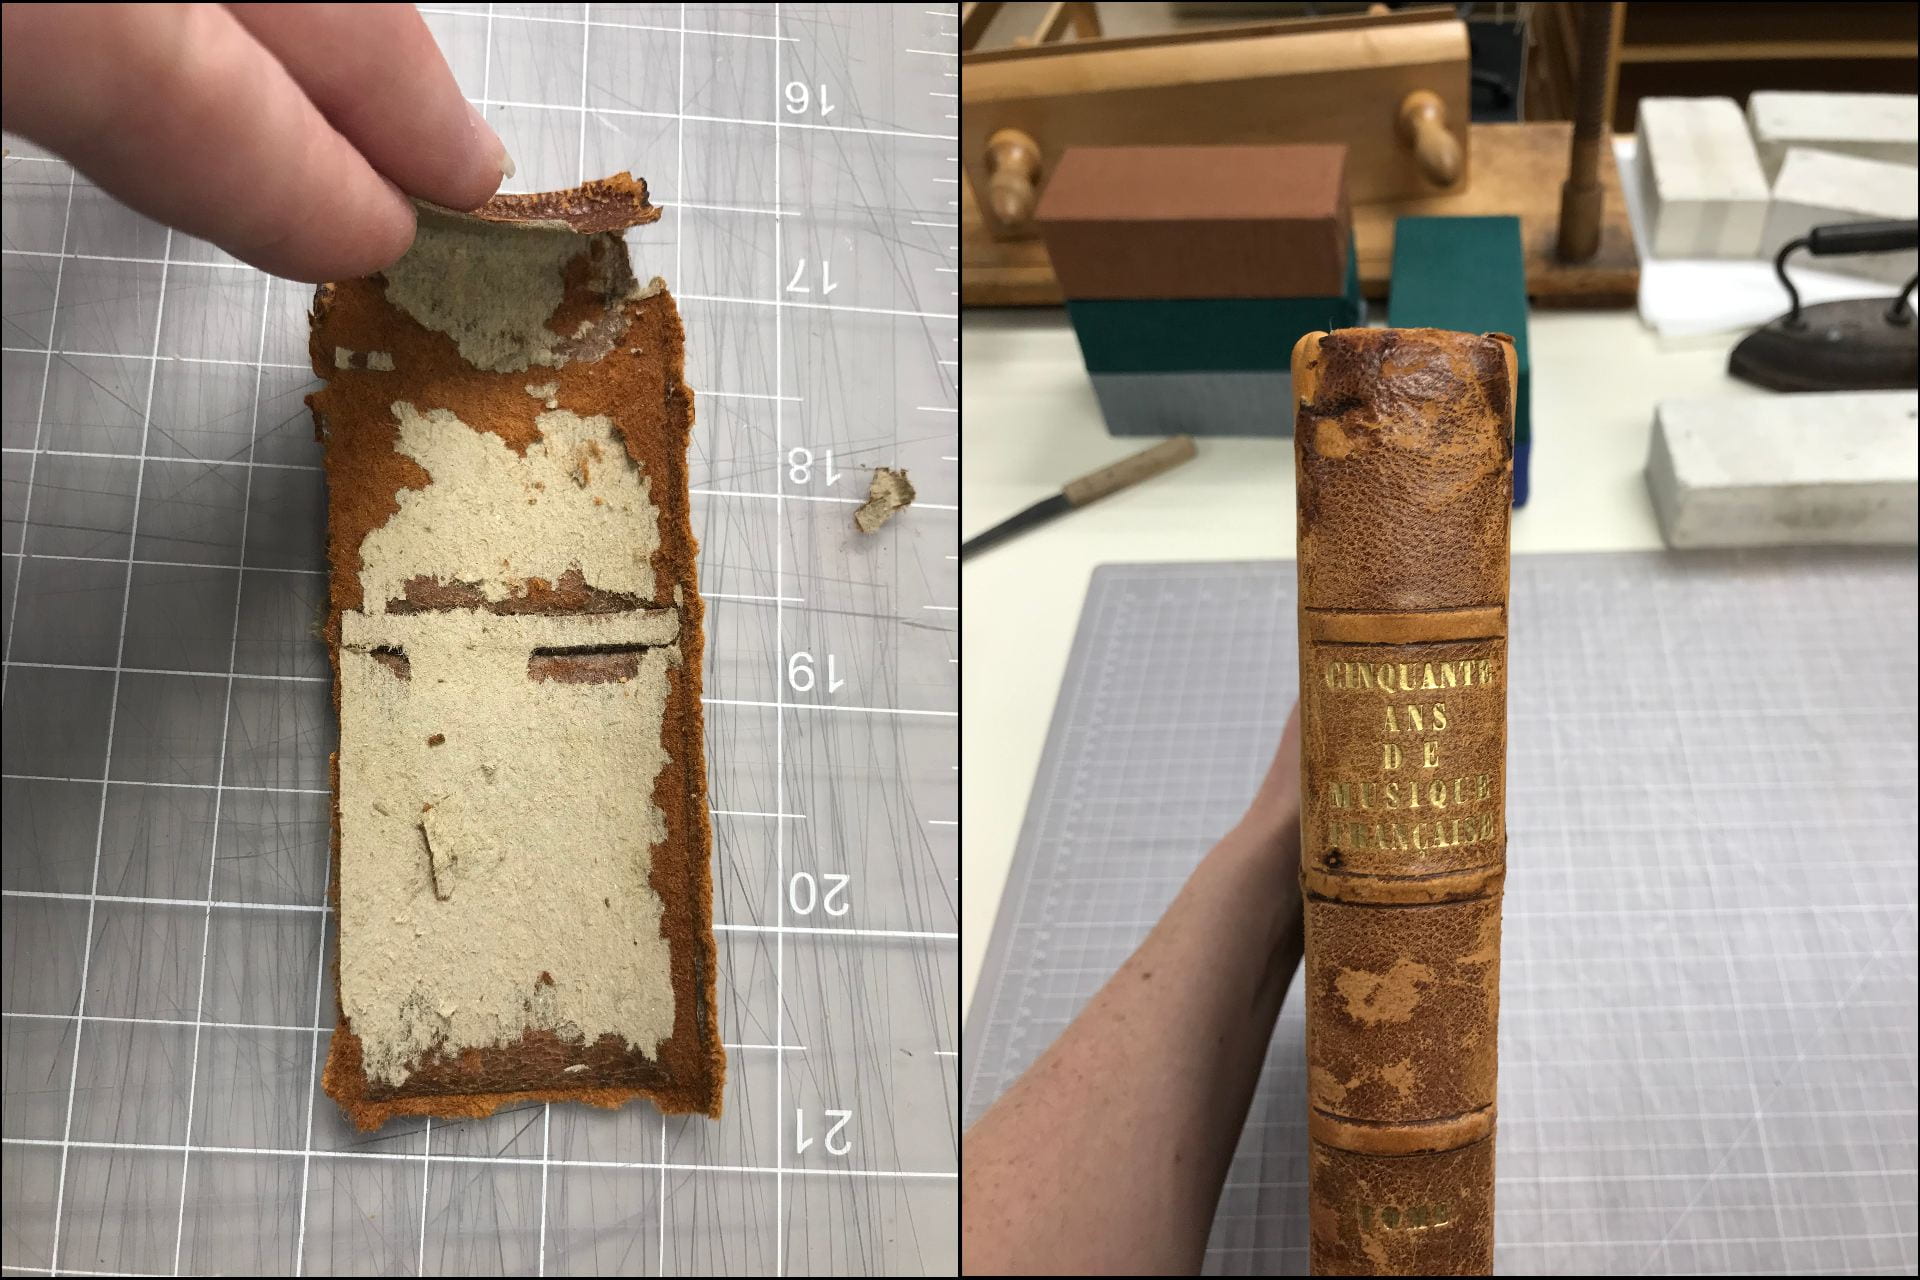
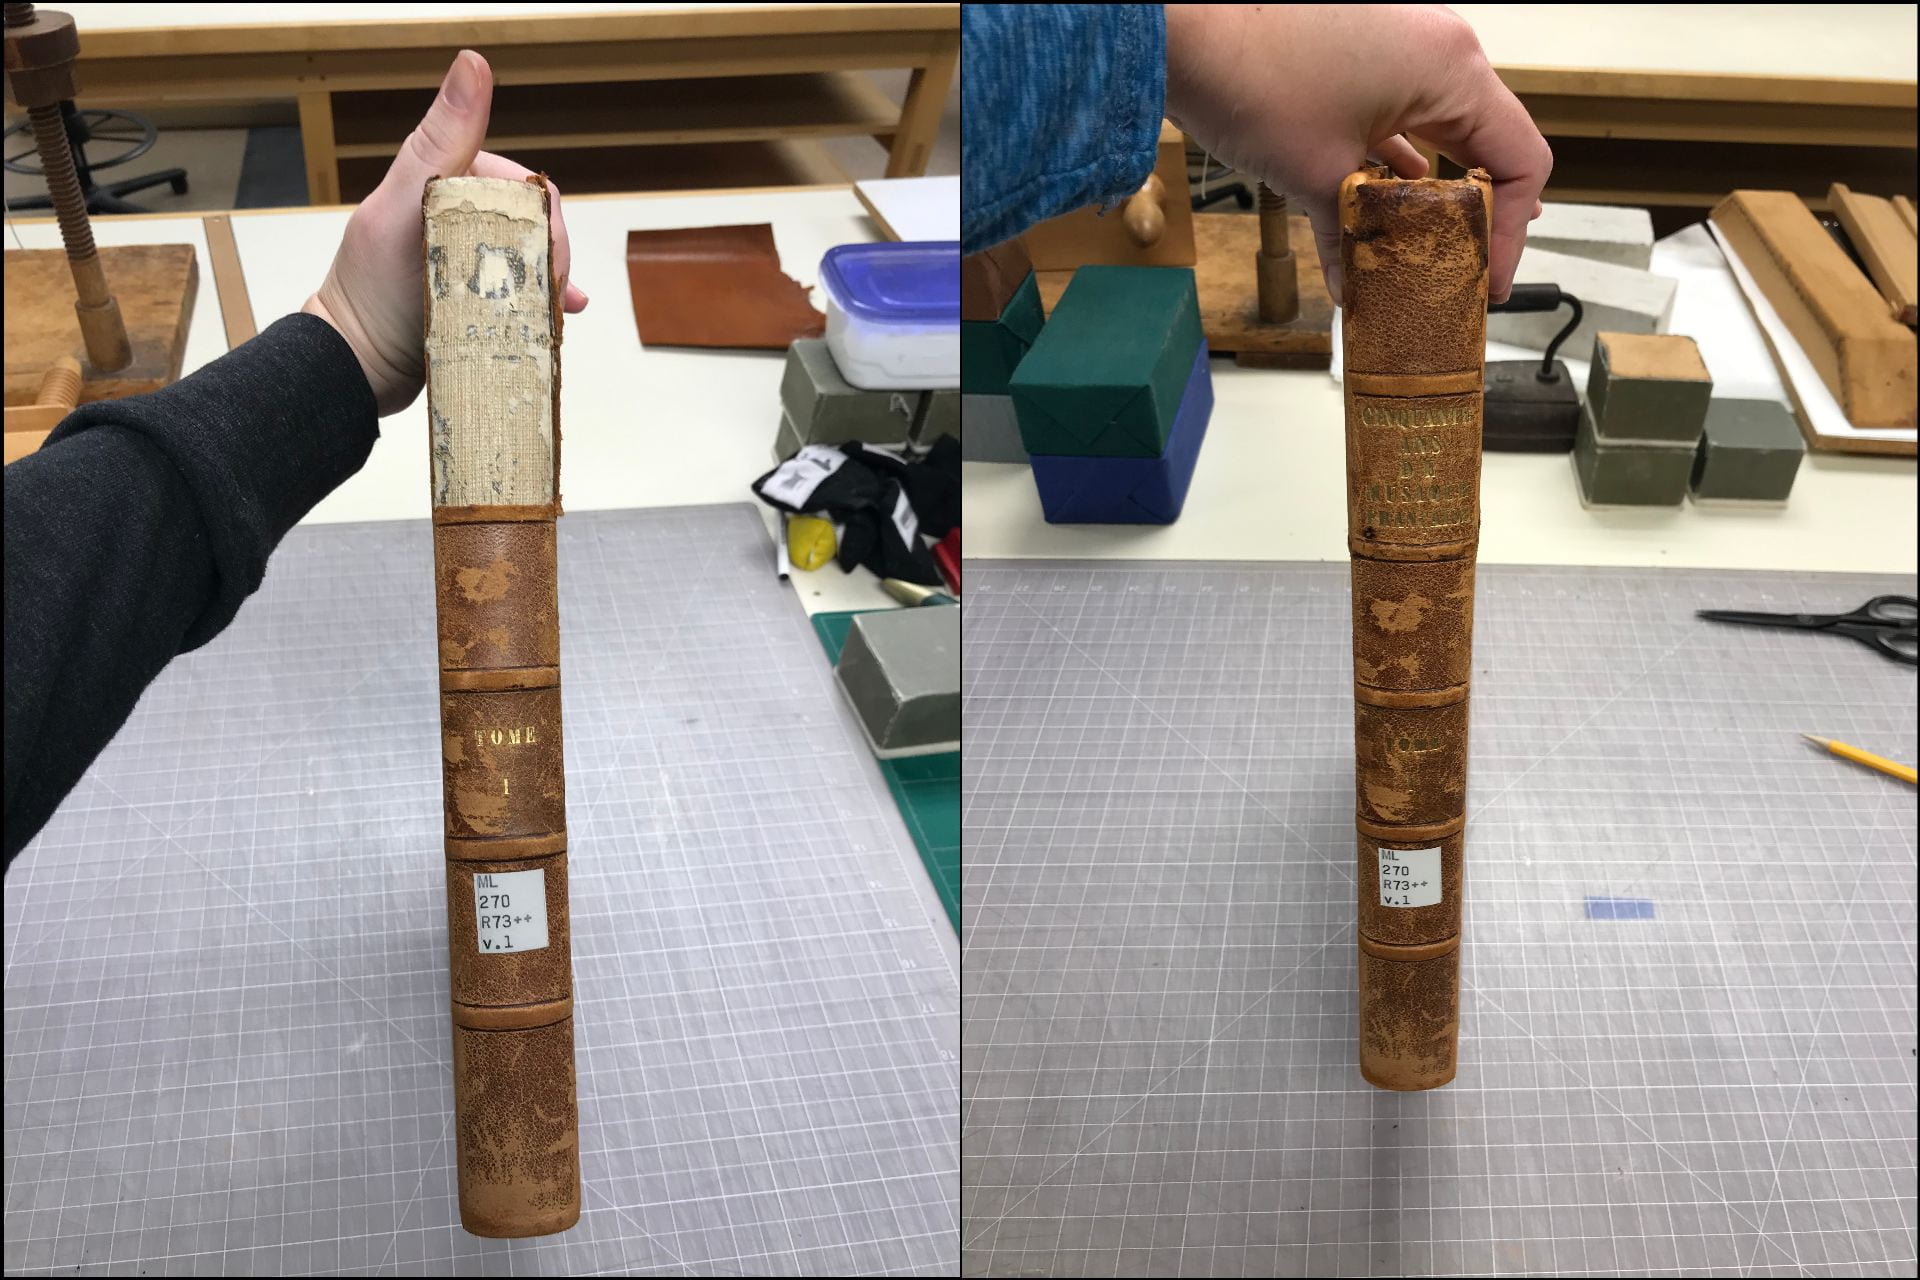
A leather reback is called for in certain cases where a book bound in leather is in a condition that leaves it vulnerable to damage by handling. This often means the leather is deteriorating, the spine is partially detached or missing, the boards are detached, the sewing compromised, or any combination of these things. We “reback” a book by applying a new leather spine to strengthen the book structure while retaining as much of the original material as possible. In the case of this book from the Cornell Music Library, the board attachment was very strong and the spine was in great condition except for one detached section.
Rebacking is an invasive and complex treatment that should only be undertaken when absolutely necessary. Since the board attachment was sound and the shoulders of the book where the spine was intact were in great shape, I was reluctant to do a full reback. I knew there was a way the leather of the headcap could be replaced without going to the extreme of a full reback. A full reback would have required cutting through the shoulder and removing the remaining spine to expose the back of the book. Though I had never done this particular repair myself, I decided to do a little research and give it a try.
In our conservation library we have a copy of “The Restoration of Leather Bindings” by Bernard Middleton, who is considered to be one of the most skilled and influential bookbinders of our time. This book is an invaluable resource for all types of leather book repairs. It includes detailed instructions and wonderful illustrations on the various ways to repair books bound in leather (there are many). I’ve used this in the past and luckily it has a section on repairing headcaps!

Illustrations demonstrating the headcap repair technique I adapted. Middleton, Bernard C. The Restoration of Leather Bindings. Rev. ed., American Library Association, 1984.
In Middleton’s book he is working on a tightback, which means the leather is adhered directly to the spine. This can be more complicated because it’s often very hard to separate the leather from the back of the book without damaging it. The book I was working on had a hollowback which made things much simpler. With a hollowback, the leather is attached to a folded tube of paper adhered to the back of the book, which allows for a more flexible opening. It was fairly easy to adapt Middleton’s method to fit the structure I was working with.
I first removed the linings from the exposed part of the spine. Leaving original linings makes even adhesion of new linings difficult. It adds bulk and stress to that section of the spine which can inhibit the opening. To remove the linings, I used a poultice of wheat starch paste. This softened the adhesive and allowed me to scrape off the residual paper linings with a dull knife.

Next, I lifted the original leather on the sides of the book and slightly underneath the intact part of the spine. I also lifted the paste downs on the inside corners of the boards where I would tuck the turned in leather.
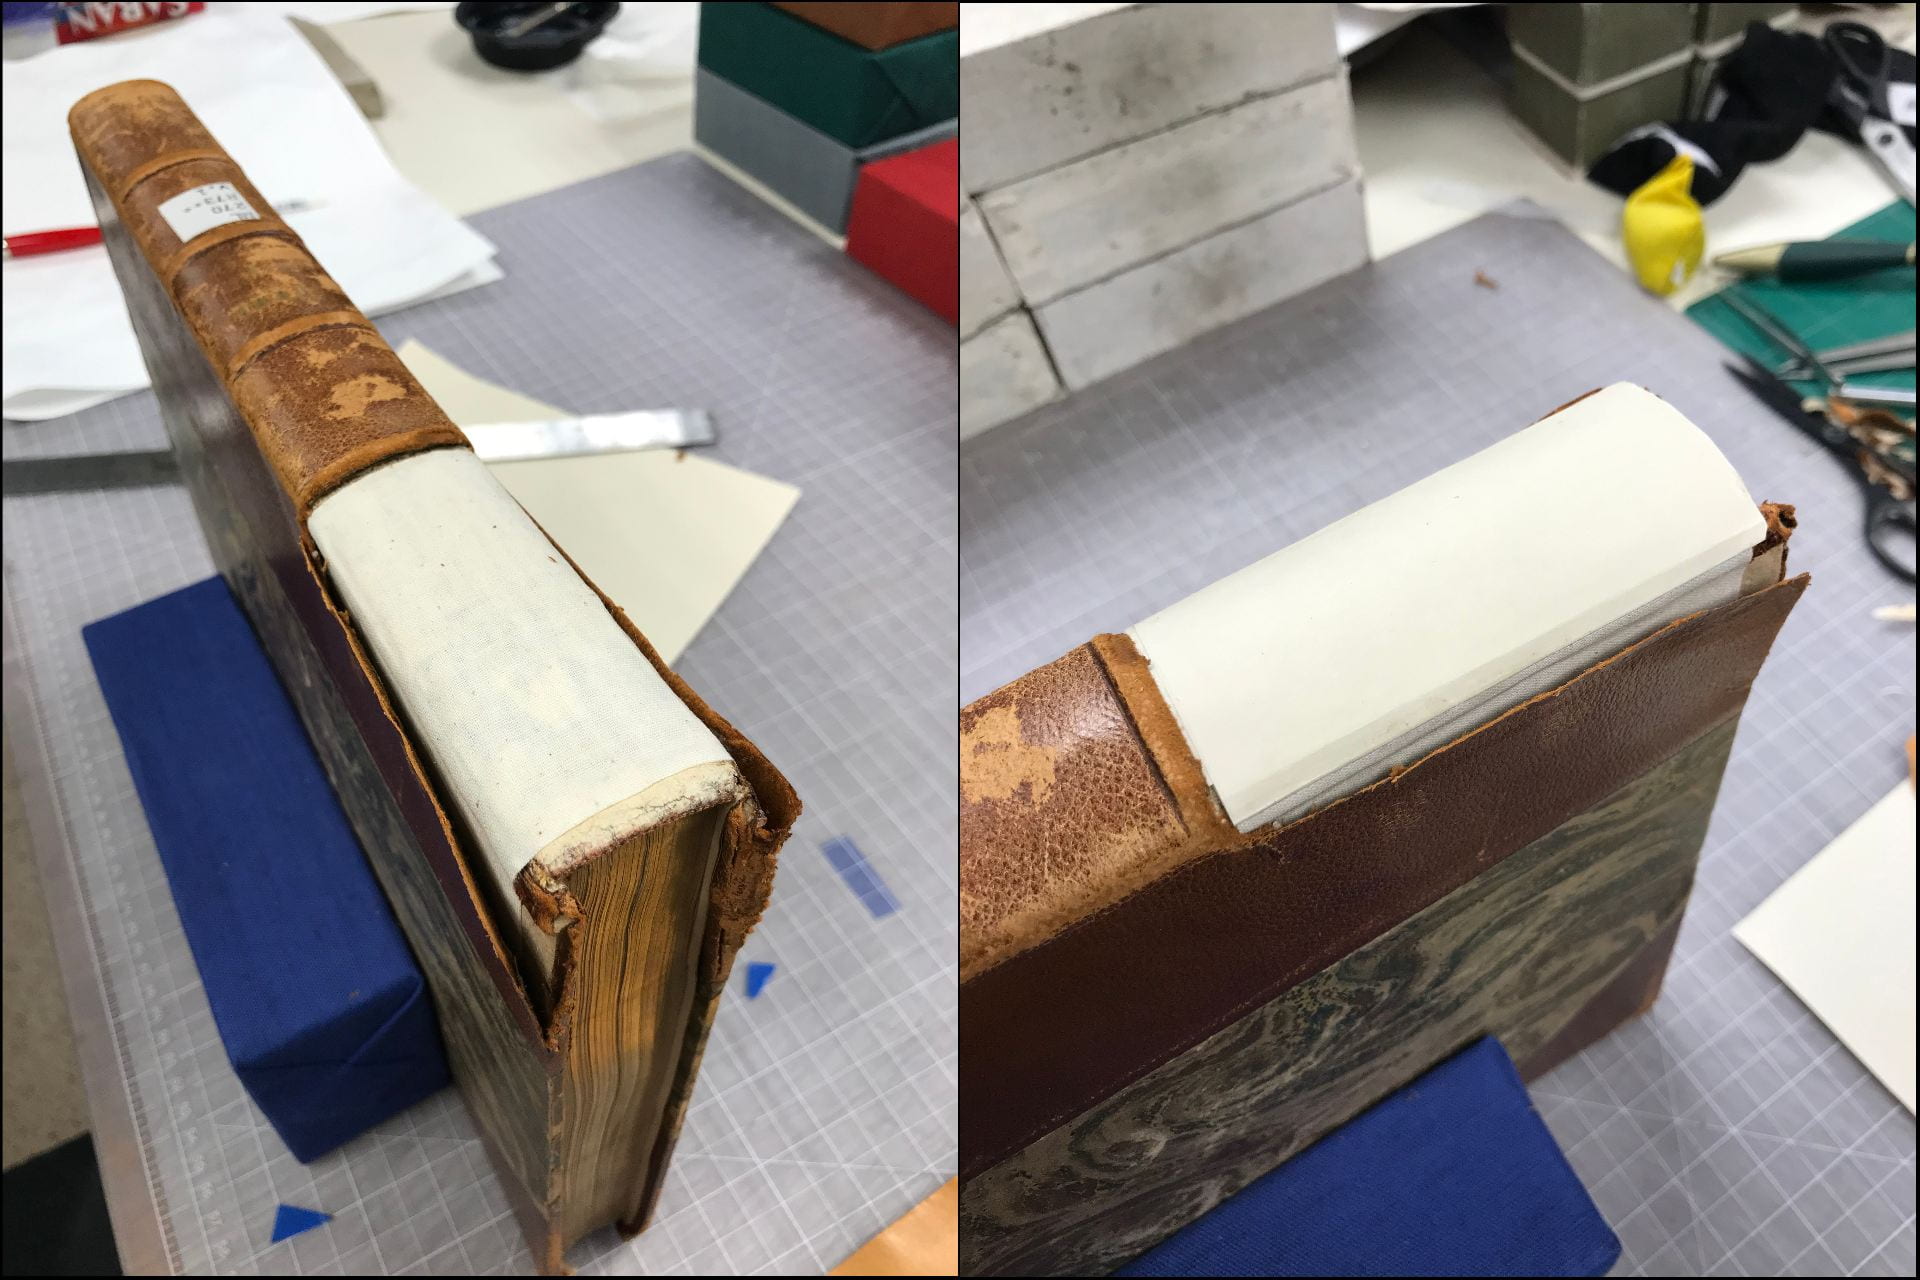
I lined the exposed spine with Japanese kozo paper and attached a piece of cloth which was carried across the shoulders and adhered to the boards under the lifted leather. A new paper hollow of archival wrapping paper was attached to the spine on top of the cloth lining.
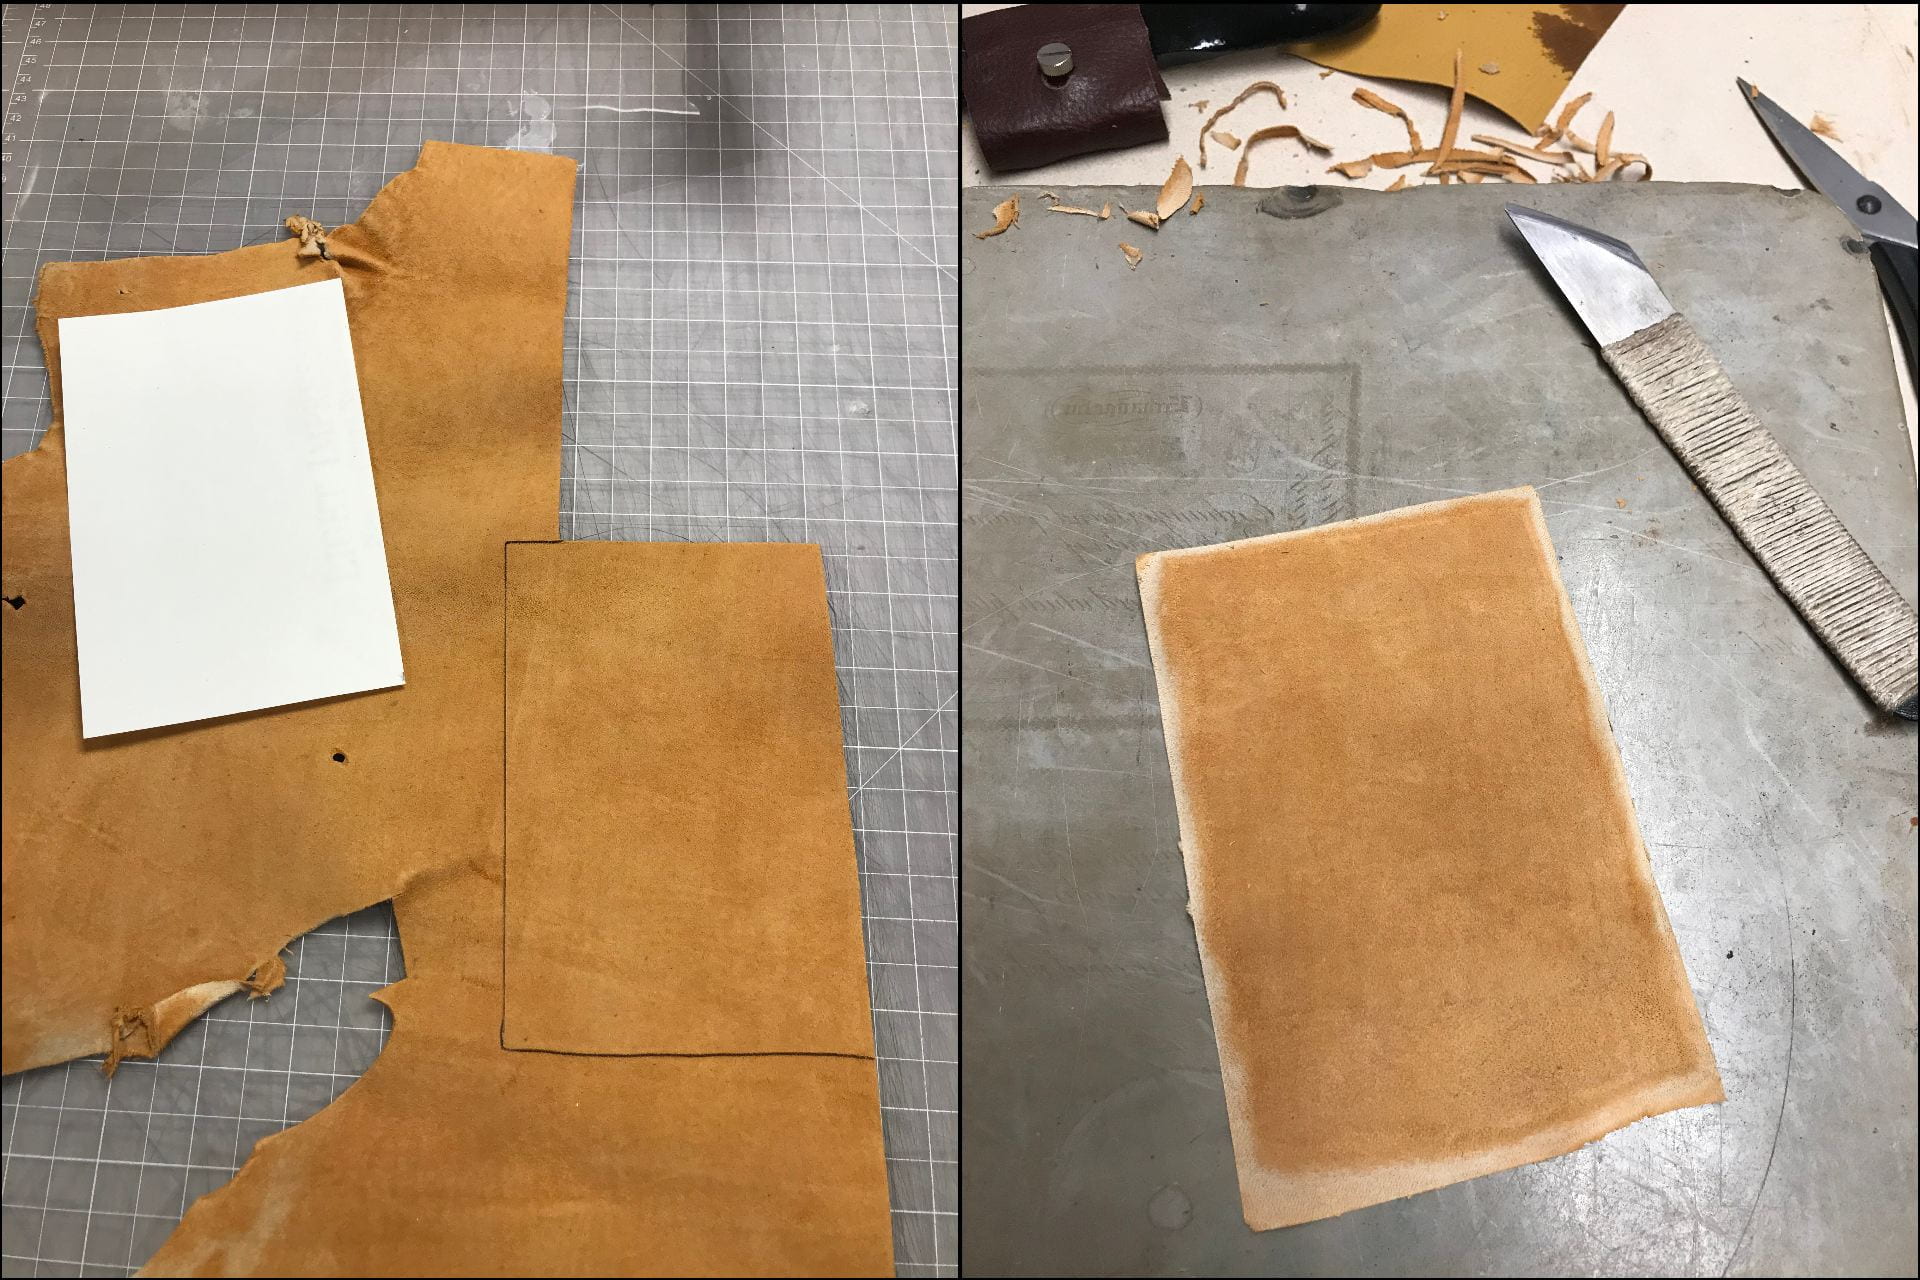
I prepared a new piece of leather (vegetable tanned goat) by paring it very thin around the edges so it could be tucked under the original leather without being too obvious and to minimize the thickness so the functionality of the opening would not be affected.
Normally when doing a leather reback, we would attach the leather to the back of the book and then turn it over to the inside to form the headcaps. What Middleton suggested was to actually adhere the leather “upside down” to the inner boards and back of the book and then turn it back onto the spine. I made two slits in the cloth and the hollow to allow for the new leather being turned over the boards. Using wheat starch paste I attached the new leather around the spine through the slit cloth and hollow and under the paste downs.
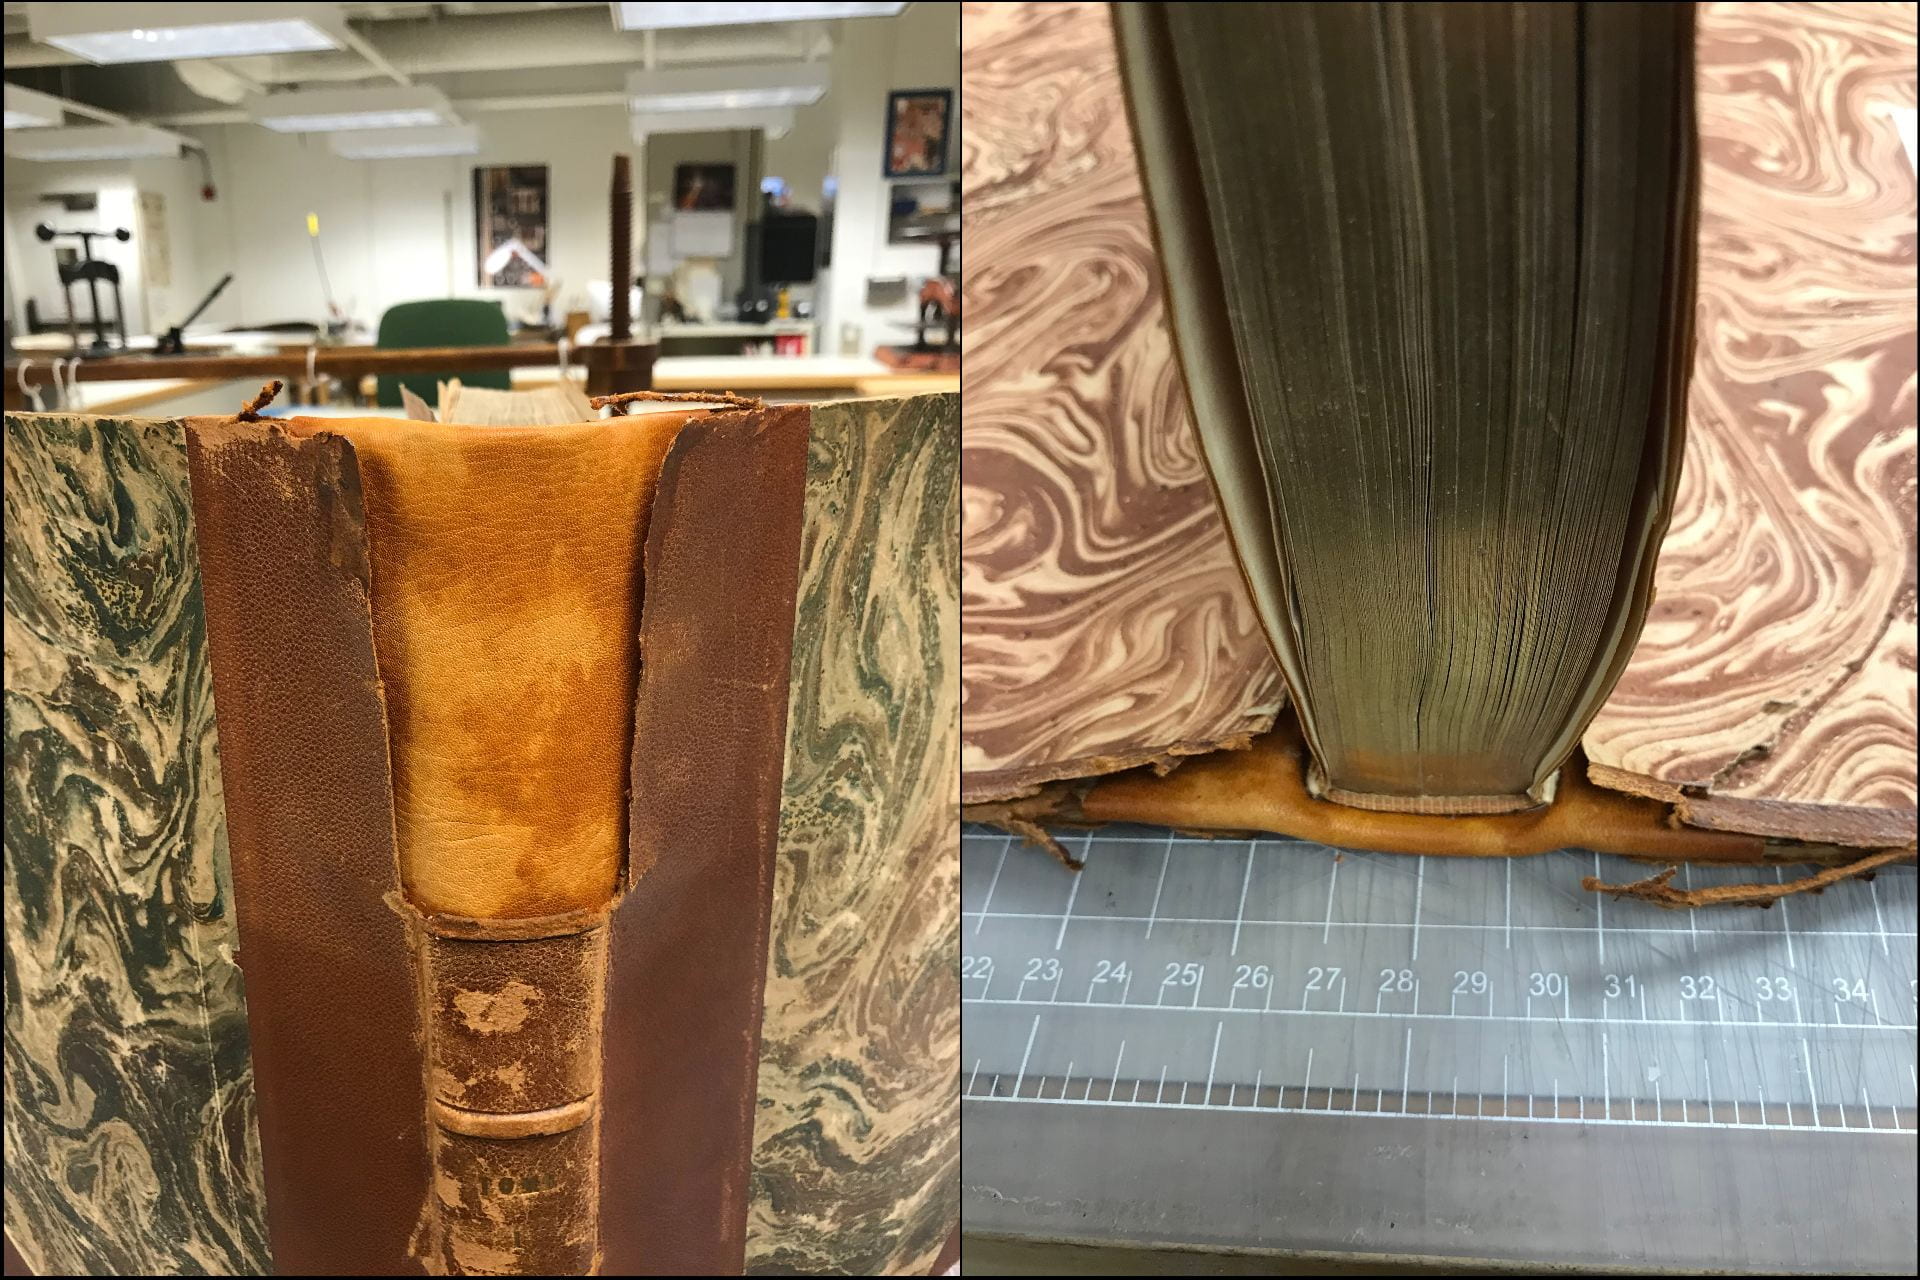
I then folded it over the slit hollow carefully inserting it under the original leather. Using a bone folder I made sure the leather was stuck down and then formed the headcap.
I set the joint by opening the front and back board and applying a downward pressure while the leather was damp. Setting the joint coaxes the leather into a shape it will “remember” when it dries and allow a free and flexible opening. I used pieces of mylar (precut to size) between the old leather and the new to prevent moisture transferring to the old leather, which can cause discoloration. The book was then put between boards and left overnight to dry.
The next day, I cleaned up and reattached the original spine to the new leather with PVA (Poly Vinyl Acetate is a synthetic adhesive which is useful because it introduces very little moisture which can stain old leather.) The inside paper paste downs were readhered with wheat starch paste.
This isn’t a treatment we will use often, but it goes to show what a valuable resource a library can be, and how much can be learned from the countless years of experience gathered in a few books!
For more information on Bernard Middleton’s extraordinary career. See: https://blogs.bl.uk/collectioncare/2019/01/remembering-legendary-bookbinder-bernard-middleton-1924-2019.html
