Drink Less Sugar…You’re Sweet Enough Already

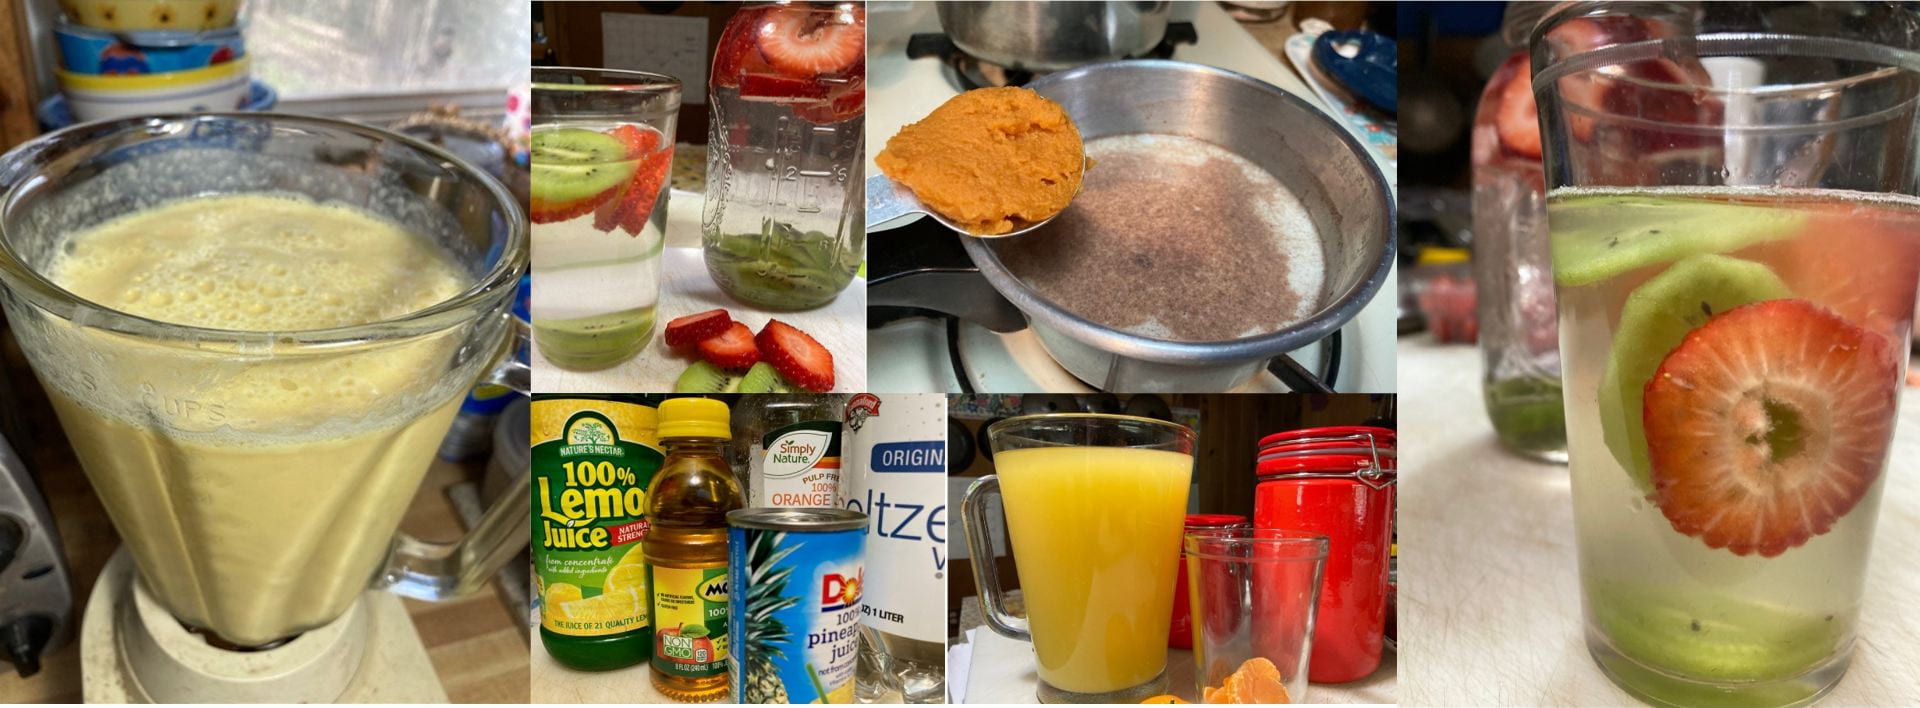
Collage of drinks described in this blog
Try these drinks instead of soda, iced tea, and other drinks with added sugars.

You may already know it’s not in the best interest of your health to have a lot of added sugar in your diet. The Dietary Guidelines for Americans recommends no more than 10% of your calories come from added sugar—that works out to 12 teaspoons for a 2000 calorie diet. But did you know that the average American gets 42 teaspoons of added sugars a day? That’s a lot more than recommended, and more than half of the added sugars a typical American consumes are from sugary drinks like soda, iced tea, fruit drinks, and energy drinks. These drinks can be delicious treats, but they are problematic when drunk every day with every meal:

  • they’re “empty calories” (calories with no other nutrition to recommend them)
  • they tend to fill you up so they might keep you from drinking or eating something nutritious
  • diets high in added sugars are associated with obesity, heart disease, diabetes, and tooth decay

So, what’s someone with a sweet tooth supposed to do to get a fix???

Water and lowfat (or nonfat) milk are good options any time, but sometimes they just aren’t that exciting to your taste buds. Back around Valentine’s Day we looked at some healthier sweet treats, and on offer today are some healthier sweet beverage options. Here are some ways to make our friends water and lowfat milk more fun and flavorful.
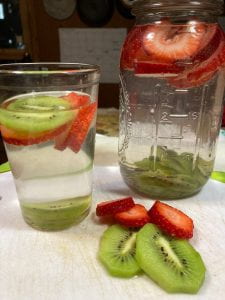
Strawberry-kiwi water

Fruited Water

Adding a lemon slice to your water is nothing new, and is a quick and easy way to add a little zing. Consider adding other fruits and herbs; be creative with your favorites, or take some ideas from this recipe for Strawberry-Kiwi Flavored Water or from this video that has some inspired combinations like strawberry-watermelon-basil and lemon-cucumber-ginger.

Sparkling punch ready to drink
Sparkling punch

Ingredients to make Sparkling Punch: lemon juice, apple juice, pineapple juice, orange juice and seltzer water.

Sparkling Punch

If giving up soda will be hard for you because you will also miss the fizz in addition to the sweet taste, try this recipe for Sparkling Punch. It’s a simple recipe that combines seltzer with fruit juices. Like the fruited water, don’t be afraid to experiment with other flavor combinations; just be sure that you’re using 100% fruit juice, and not fruit punch or other fruit drinks that have added sugars.

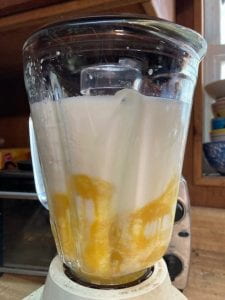
Orange julius ingredients ready to be blended.

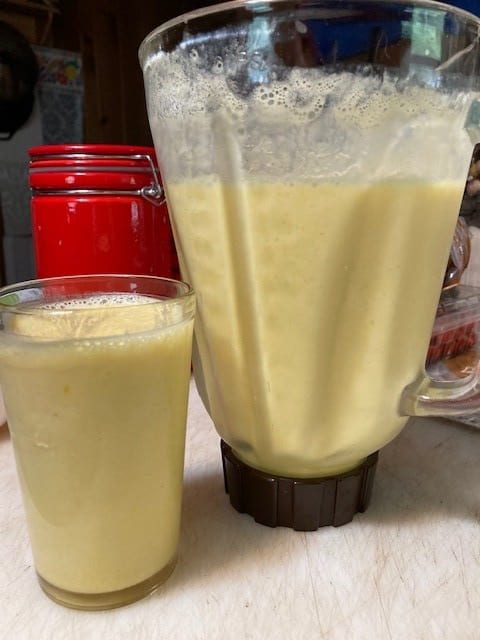
Orange juliusOrange julius ready to drink

Orange Julius

As a teenager, there was a small booth in the food court called Orange Julius that made this drink, and I thought it was an exotic treat. It was also the official drink of the 1964 New York World’s Fair, and a similar drink is sold by Gibeau Orange Julep in Montreal.

It turns out that it’s not at all hard to make a copycat version at home using just a blender and lowfat milk, frozen orange juice concentrate, cold water, and ice cubes. Here is the recipe; add a teaspoon or two of vanilla extract for a little extra appeal.

Pumpkin spice milk ready to drink
Pumpkin spice milk

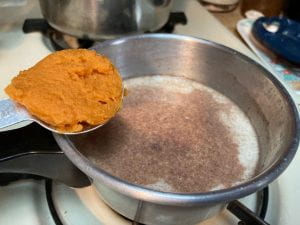
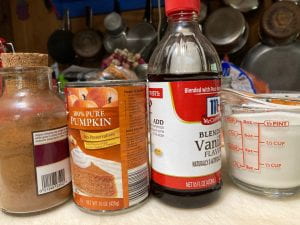
Pumpkin spice milk ingredients Pumpkin spice milk warming

Pumpkin Spice Milk

I bet you’re thinking: this isn’t pumpkin spice season!

I promise you, this drink is lovely all year round, not just for Autumn. Plus, it’s a relaxing drink to help you settle down for the evening (warm milk!), and is a good way to help get one of the three daily recommended servings of dairy.

When you try out this recipe, do not allow milk to scald or boil; microwaving to warm the milk can also work. And make some for your friends and family: this recipe can be doubled (or tripled or quadrupled).

Ingredients:

  • 1 cup lowfat milk or unsweetened soy milk
  • 4 tbsp canned pumpkin
  • ¼ tsp pumpkin spice
  • ¼ tsp vanilla extract

Instructions:

  1. Add milk to small saucepan over low heat
  2. As it begins to warm, add pumpkin and pumpkin spice; stir to combine.
  3. When warmed and thoroughly combined, take off heat and add vanilla.
  4. Drink warm.

If you don’t have pumpkin pie spice, you can make your own. Combine 4 teaspoons of ground cinnamon, 2 teaspoons of ground ginger, ½ teaspoon of ground cloves, ½ teaspoon of ground nutmeg, and ½ teaspoon of ground allspice. Store in an airtight container.

———-

If you are interested in more helpful tips or nutrition information, or to participate in our free nutrition/cooking classes, visit our website or contact our nutrition educators: Michelle Leveski, mml39@cornell.edu, 518-234-4303 x115 or Kimberly Ferstler, kmf239@cornell.edu, 518-234-4303 x 120.

My Kingdom for a Gadget!

Sometimes I get turned off from a recipe immediately when I read that it needs a kitchen tool or gadget I don’t have. For example, with limited counter space and limited budget, I never acquired a big food processor; and with limited drawer space, if a gadget can’t do double duty, I often don’t have it either. But then again, there are a few gadgets that have been gifted to me that I never use but haven’t parted with.

So, if you’re like me and you need some ideas on how to make do without a specific gadget, or have a gadget you’d like to put to more use, read on!

No food processor?

I did break down recently and bought a 1-cup food processor. It was on very reduced sale, and was really small, and I knew I could store it on top of the big mixing bowls that live on the corner of the counter because they don’t fit in the cabinets. Anyway, you don’t need to know that part, but what you should know is that I lived without a food processor for years because I did have a blender.

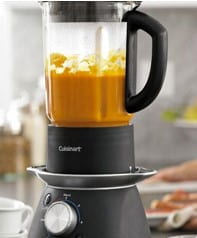
Blender half filled with soup
This Photo by Unknown Author is licensed under CC BY-SA-NC

It doesn’t do everything well, but if you stick with small batches, cut ingredients smallish to begin with, don’t overdo it (the pulse function is helpful), and focus on recipes using liquids or oils (like pesto), it can suffice when a good sharp knife isn’t enough.

No immersion blender?

Regular blender to the rescue again! Some soup recipes call for immersion blenders, but you can use a regular blender instead. It’s usually best to do in multiple smaller batches rather than pour it all in at once, especially if the soup is hot. Try it with this Butternut Squash and Apple Soup recipe.

No muffin pan?

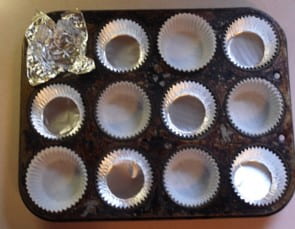
Cupcake tin with sample homemade aluminum foil liner
This Photo by Unknown Author is licensed under CC BY-SA-NC

A mini meatloaf recipe I tried called for a muffin pan (they had sauce on top, which meant I couldn’t just put them on a baking tray directly without a lot of the sauce oozing away). Google helped me out and suggested making forms from aluminum foil—a tip originally meant as cupcake liners—which could then go directly on the baking tray. This would work nicely for muffin batter, too (try these Blueberry Corn Muffins).

Apple corer

I have never understood the apple corer, because I’ve never had an apple so perfect that it actually got rid of the core properly. That, plus the one time I used it when I thought it would be really handy—making a big batch of applesauce—the palms of my hands hurt a lot from its repeated use more than 2 dozen times.

Making potato wedges with an apple corer
This Photo by Unknown Author is licensed under CC BY-NC-ND

So, it sat in the overflow gadget tub until I came across an alternate purpose for it: making potato wedges for oven roasting. Yes, cutting potato wedges with a knife works really well, but the cylindrical potato wedge created by the center of the corer makes me chuckle.


Making meatballs with an ice cream scoop
This Photo by Unknown Author is licensed under CC BY-NC

Ice cream scoop

Eating healthier may mean that your ice cream scoop isn’t as useful as it used to be (good for you!). Here’s another way to give it some life: use it for portioning meatballs (try these Baked Meatballs), or batter for muffins (check out our recipe for Apple Oatmeal Muffins), or serving mashed potatoes. If it has nice sharp edge, use it to scoop the seeds out of a butternut squash, pumpkin, or cantaloupe.

Speaking of batter…

It’s not really a gadget, but if you have kids or someone who might appreciate it, you can try making pancake art without any special tools. Hold on to an empty squeeze bottle (not too small, say a 20 oz or bigger), give it a good wash, and the next time you make batter, fill it up and use it to draw shapes in your frying pan.

Squeeze bottle making pancakes
This Photo by Unknown Author is licensed under CC BY-NC

You might need to cut the tip a little for better flow. Draw the outline first, and then fill it in, for best effect. Works best for a batter without lumpy additions like blueberries, but works well with these Pumpkin Pancakes.

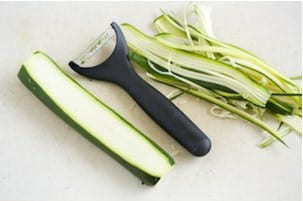
Vegetable peeler making zoodles
This Photo by Unknown Author is licensed under CC BY-SA


Vegetable peeler

After learning how much nutrition is in the skins of vegetables, I stopped peeling them for the most part, and suddenly my vegetable peeler didn’t see much action. However, it does also make lovely lasagna-like zoodles (the cute name for zucchini “noodles”), and other decorative vegetable ribbons and curls. And if you want just a little shaved parmesan for your salad, it’s also a useful tool. Try the zoodle shape with this Zucchini Au Gratin recipe.

Cookie cutters

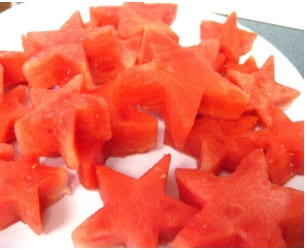
I inherited a set of cookie cutters. I’m not a fan of sugar cookies, so I gave most away, but I do use the remaining ones occasionally just to make fun shapes out of other foods (melon slices, cheese slices, sandwiches, bread/toast). If you have metal ones, they can also be used in pans to give shapes to pancakes or fried eggs.

Watermelon stars
This Photo by Unknown Author is licensed under CC BY-NC-ND

If you’ve got any gadget tips you’d like to share, or questions about the recipes we’ve shared, please let us know, we’d love to hear from you! Contact our nutrition educators: Michelle Leveski, mml39@cornell.edu, 518-234-4303 x115 or Kimberly Ferstler, kmf2349@cornell.edu, 518-234-4303 x 120.
 

Show them (and yourself!) some LOVE

Valentine’s Day. You may have celebrated a few in your lifetime.

Are you a little tired of the unimaginative gifts of boxes of assorted chocolates and bouquets of overpriced flowers? It’s been said that food is the language of love: this Valentine’s Day get inspired by sweet homemade treats you and everyone will love, and that also happen to be healthy, easy to make, and affordable!

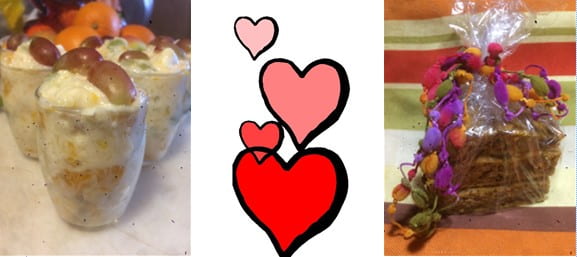
Close up photos of Ambrosia and Chocolatey Pumpkin Bars with Valentine's Day Hearts

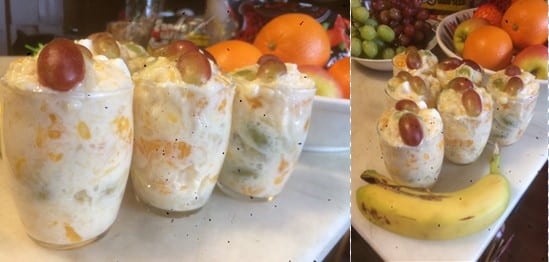
Our first offering includes nature’s sweet treats: fruit! This recipe calls for canned pineapple and mandarin oranges, dropping the prep time to a minimum, though freshly cut can be substituted if you’d prefer. Other fruits of your choice can also be swapped for any of the fruits in the recipe if these tropicals aren’t your favorites. In the pictures, I used crushed pineapple because that was the kind I could get in its own juices. It also calls for vanilla yogurt, but if you only have plain on hand go ahead and sweeten it with 1-2 tsp of your favorite sweetener (maple syrup or honey would work especially well).

Ambrosia

Ingredients: 1 (20-ounce) can pineapple chunks in juice; 1 (11-ounce) can mandarin oranges; 1 medium banana; 1½ cup seedless grapes; ½ cup miniature marshmallows; ¼ cup flaked coconut; 1 (8-ounce) carton lowfat vanilla yogurt

Instructions: Drain pineapple and mandarin oranges. (Note: save the juice, it makes a delicious beverage.) Place fruit in a medium bowl, set aside. Cut banana into slices. Wash grapes and cut into halves. Add them to pineapple and oranges. Add the marshmallows and coconut. Mix well. Fold in the yogurt. Chill before serving.

Valentine’s Day Tip: Before chilling, place each of the 6 servings in an attractive glass or bowl. Decorating will make it even more special: some options to consider are dusting with cinnamon, and/or topping with a few chocolate curls, cut strawberries, raspberries, or red seedless grapes.

Printable version of recipe with nutrition facts: Ambrosia (cceschoharie-otsego.org)

Photos of 6 servings of Ambrosia

Fruit is wonderful, but you’re probably hoping for an idea that includes chocolate. This blondie-like recipe boosts the health factor by including whole wheat flour and pumpkin puree.

Chocolatey Pumpkin Bars

Ingredients: 1 cup flour; 1 cup whole wheat flour; 2 Tablespoons chopped walnuts; ¾ cup sugar; 2 teaspoons baking powder; 1 teaspoon cinnamon; ½ teaspoon baking soda; ½ teaspoon salt; 2 large eggs; 2 large egg whites; 1 (15 ounce) can 100% pure pumpkin or 2 cups fresh pumpkin puree; ¼ cup vegetable oil; ¼ cup 1% milk; 1/3 cup mini chocolate chips; vegetable spray; optional: 1/8 teaspoon nutmeg

Instructions: Preheat oven to 350° F. Coat a 15x10x1-inch baking pan (jelly roll pan) with vegetable oil spray, set aside. Whisk together the flour, whole wheat flour, walnuts, sugar, baking powder, cinnamon, nutmeg (if using), baking soda, and salt in a large bowl. In a separate bowl, combine the eggs, egg whites, pumpkin, oil, and milk. Add to the dry ingredients along with the chocolate chips and stir to combine. Spread the batter evenly in the prepared pan and bake for 20-25 minutes or until a wooden toothpick inserted in the center comes out clean. Cool on a wire rack. Cut into 40 bars.

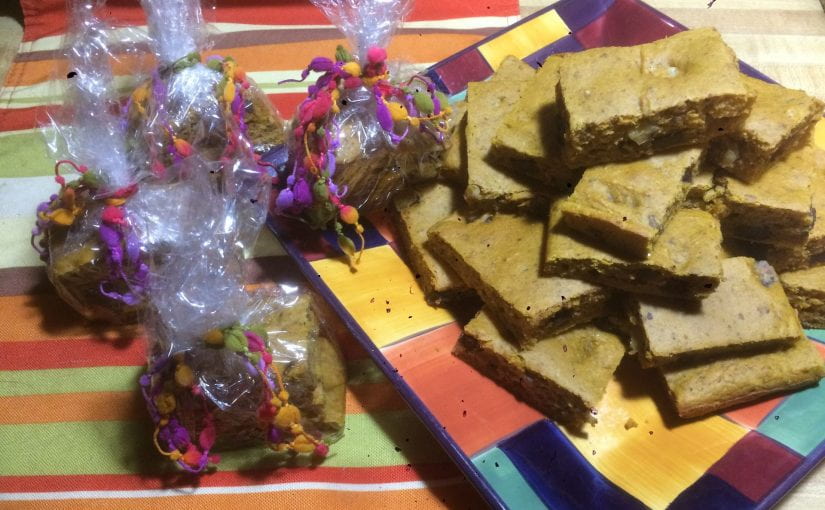
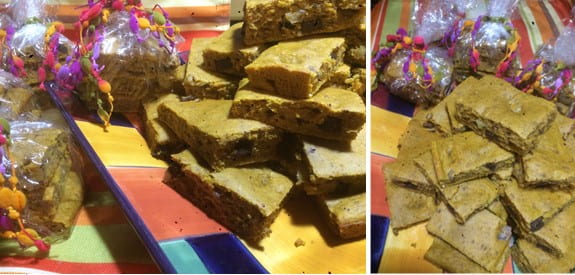
Valentine’s Day Tip: Though it will be tempting to eat them all, encourage appropriate servings by wrapping in plastic wrap tied with colorful ribbon and a gift tag with their name. For maximum freshness, store leftovers in a plastic container or zip-top bag in the refrigerator.

Printable version of recipe: Chocolaty Pumpkin Bars (cceschoharie-otsego.org)


Photos of Chocolatey Pumpkin Bars both wrapped and on a decorative plate

Find more healthy dessert ideas like Carrot Squares and Fresh Fruit Pizza at our website Cornell Cooperative Extension | Schoharie-Otsego Recipes (cceschoharie-otsego.org). Even more recipes can be found at MyPlate.gov; check out Easiest Banana Ice Cream | MyPlate and Instant Chocolate Mousse | MyPlate

Want to make a Valentine’s Day treat for Fido? Check out the recipe for Butternut Nutter-Butter Dog Biscuits in one of our previous blog posts: Kitchen Gifting – Life’s Solutions (cornell.edu)

Wishing you a Happy and Healthy Valentine’s Day!

—————-

Give yourself a treat any time of the year and try one of the free online classes offered by our EFNEP or Healthy Connections nutrition education programs!

Visit our website at www.cceschoharie-otsego.org or contact our nutrition educators: Michelle Leveski, EFNEP Nutrition Program Educator at mml39@cornell.edu  or 518-234-4303 ext. 115 (please leave a message) or Kimberly Ferstler, Healthy Connections Nutrition Educator at kmf239@cornell.edu or 518-234-4303, ext. 120 (please leave a message).

To read more articles like this, subscribe to the “Life’s Solutions” blog at www.blogs.cornell.edu/efnep-schoharie-otsego/.

Take A Closer Look

Life’s Solution – Take a Closer Look

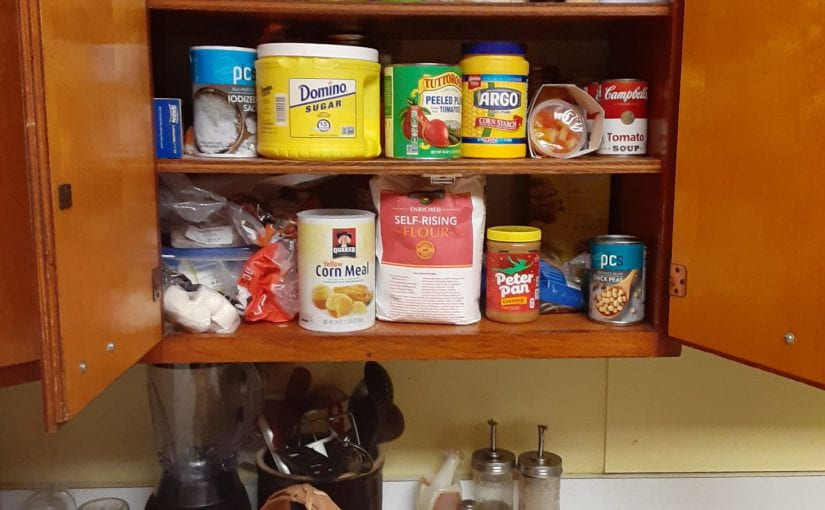
At the beginning of the new year many of us make a New Year’s resolution to eat healthier, and even if you didn’t, it wouldn’t hurt to take a closer look at what’s in your cupboard and fridge.

Ultra-processed foods have become commonplace in many of our daily lives from fast food to what we serve in our own kitchens. So common that many of us considered them everyday foods using them to nourish our families and ourselves. Ultra-processed foods aren’t new; nutrition educators have been calling them red light foods for years. But the term ultra- processed is new. This term was popularized by a group of South American researchers a few years ago who developed a food classification system called NOVA that categorizes foods according to the extent and purpose of food processing, rather than in terms of nutrients. Their research showed that people with an over-abundance of ultra-processed foods in their diet were at greater risk for developing a myriad of health issues. It splits foods into four categories:

1) Unprocessed or 2) minimally processed foods (cooking or freezing are processes): Think vegetables, grains, legumes, fruits, nuts, meats, seafood, herbs, spices, garlic, eggs and milk. Make these real, whole foods the basis of your diet.

3) Processed foods: When ingredients such as oil, sugar or salt are added to foods and they are packaged, the result is processed foods. Examples are simple bread, cheese, tofu, canned tuna or beans, canned vegetables, and canned fruit. These foods have been altered, but not in a way that’s detrimental to health. They are convenient and help you build nutritious meals. See? Not everything in a package is bad for you!

4) Ultra-processed foods: Here’s the category where almost 50% of our calories come from and where we should cut back. These foods go through multiple processes (extrusion, molding, milling, etc.), contain many added ingredients and are highly manipulated. Examples are soft drinks, chips, chocolate, candy, ice-cream, sweetened breakfast cereals, packaged soups, chicken nuggets, hotdogs, fries and more.

The basic problem with ultra-processed foods is that some have not been designed with health in mind. Manufacturers prefer to make taste, cost, safety, shelf life, and mouthfeel the priority. Heavily processed foods often include unhealthy levels of added sugar, sodium and fat. These ingredients make the food we eat taste better, but too much of them may lead to serious health issues like obesity, heart disease, high blood pressure, and diabetes.

Try this life’s solution- take a look in your kitchen. You’re likely to find a whole host of processed foods. From granola bars high in processed sugar to sodas, sports drinks, and sweet treats, ultra-processed foods are virtually everywhere. Now make the commitment to eliminate a few of the ultra-processed foods you found in your cupboard or fridge; it can have a huge impact on your overall health. From increasing energy levels to combating chronic disease there are many reasons to start incorporating healthier whole or less processed foods into your daily diet, and don’t forget those New Year’s resolutions you’re working towards.

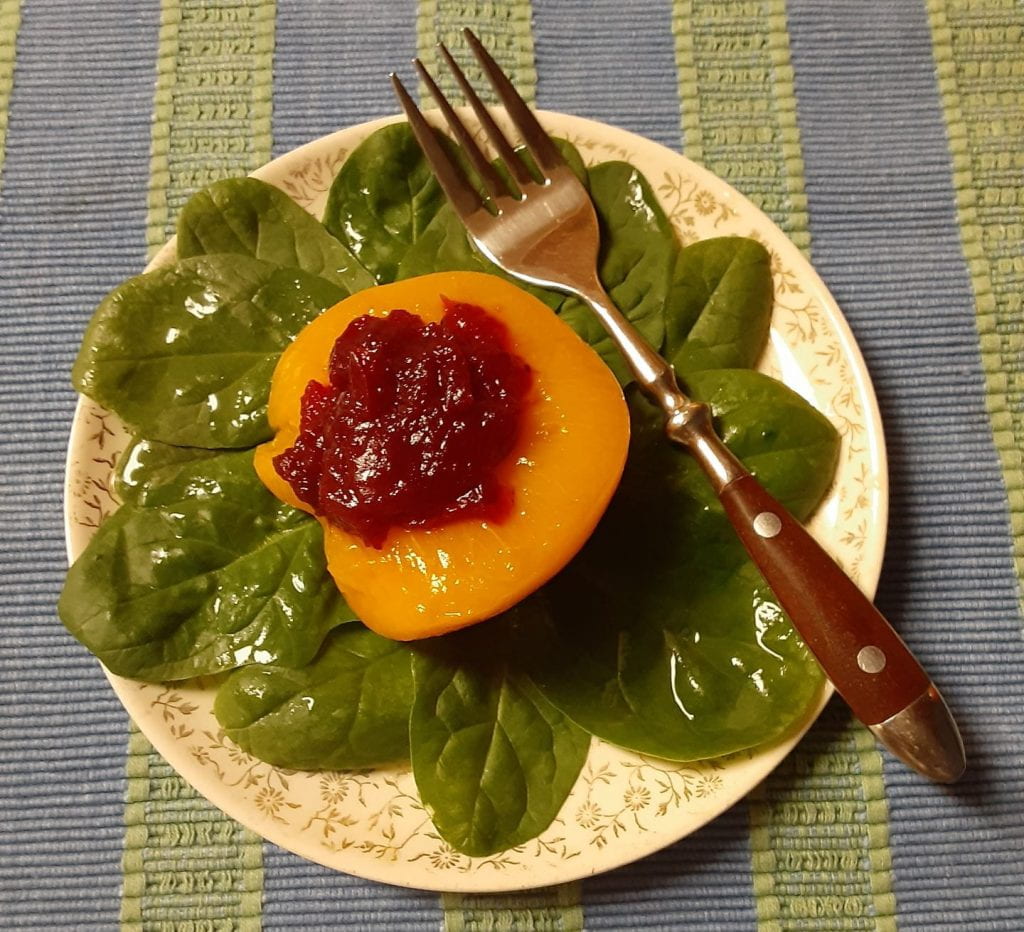
Cooking at home is a great proactive way to eat less ultra-processed foods.  Start one meal or snack at a time. This could be as simple as replacing your afternoon snack with this easy to and quick to make Peach Cranberry Salad or some grapes and nuts instead of a packaged granola bar.Take a closer look - Peach Cranberry Salad

Peach Cranberry Salad

Ingredients:
4 canned peach halves
½ cup whole homemade or canned cranberry sauce
Makes 4 servings

Instructions:
1. Place a peach half on each salad plate.
2. Spoon 2 Tablespoons cranberry sauce into the center of each peach.

Notes:
– Use peaches canned in fruit juice or light syrup.
– Serve fruit on a bed of fresh spinach, lettuce, or shredded cabbage.
– Make an individual serving with ½ a peach and 2 Tablespoons of Cranberry sauce.
– Top each salad with 1 Tablespoon of chopped walnuts or pecans.

Nutrition Facts per serving:
Calories: 80; Total Carbohydrates: 21g; Fiber: 2 g; Sugar 15 g, Protein: 1 g; Total Fat: 0 g, Saturated Fat: 0 g; Trans Fat: 0 g; Cholesterol: 0 mg; Sodium: 15 mg

For other healthy recipes and tips on reducing dependence on ultra-processed foods you could try one of the online classes offered by our EFNEP or Healthy Connections nutrition education programs.  Visit our website at www.cceschoharie-otsego.org or contact Michelle Leveski, EFNEP Nutrition Program Educator at mml39@cornell.edu  or 518-234-4303 ext. 115 (please leave a message) or  Kimberly Ferstler, Healthy Connections Nutrition Educator at kmf239@cornell.edu or 518-234-4303, ext. 120. To read more articles like this subscribe to the “Life’s Solutions” blog at www.blogs.cornell.edu/efnep-schoharie-otsego/.
Just remember the first step is to take a closer look.

Kitchen Gifting

The holiday season is a time that we traditionally share gifts with one another. A lot of time is spent figuring out just that special gift for the right person. Sometimes a gift from the kitchen can be that just right present. Whether purchased or homemade a special little bit of us is wrapped up with each cheerful package that we pass on to family and friends.

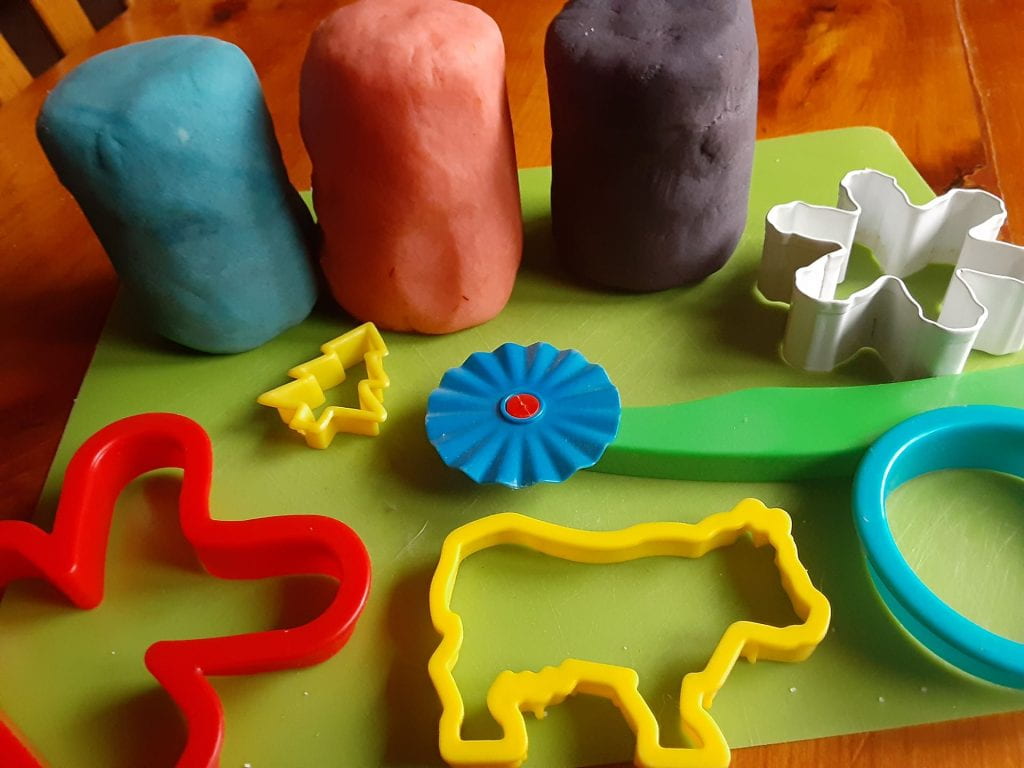
Try this life’s solution for kitchen gifting to those just right children in your life. I can remember thinking as a child when it came to playdough, the more colors the better. With this recipe for homemade playdough you can whip up in under 15 minutes, from start to finish, the color possibilities are endless.

Homemade Playdough Homemade Playdough
In a medium saucepan mix;
stir to combine:
2 cups of flour
1 cup of salt
4 teaspoons cream of tartar (do not omit)
Add:
2 cups of water
2 Tablespoons of cooking oil
Several drops oil of wintergreen, peppermint, or other essential oil
(optional- for aroma only)
Several drops of food coloring
(if doing multiple colors from 1 batch add to dough after cooking)
Instructions for cooking:
Cook over medium-high heat stirring constantly about three to four minutes. Mixture will pull away from sides of the pan forming a dough ball. Remove from pan and knead on a flat surface immediately (be careful dough can be very hot to handle). If you are coloring dough after cooking separate into smaller dough balls, add the drops of desired food coloring to each ball, and continue kneading until each color is mixed (wear gloves as color can stain hands until it is thoroughly mixed). Store in an airtight container (zip-lock bags work great). Keeps 3 to 4 months.
For gifting:
Wrap playdough separate or add some plastic silverware, cookie cutters, small plastic toys or cars, and a small plastic cutting matt or tray.

Homemade Playdough Gift Sets

Try this life’s solution for kitchen gifting to those just right canine tail-waggers. This recipe for dog bones can be made with whole wheat flour or grain free. When making homemade food for dogs be aware there are some commons foods that should be avoided because they are toxic (chocolate, xylitol- an artificial sweetener, nutmeg, macadamia nuts, grapes and raisins, and foods in the allium family- onions, garlic, chives, shallots, leeks- raw, cooked, or dried) or cause sensitivity to some dogs (avocadoes, citrus, and most dairy foods).

Butternut Nutter-Butter Dog BiscuitsButternut Nutter-Butter Dog Biscuits
In a large bowl combine; then stir to combine forming a dough ball, knead if necessary:
2 cups whole wheat flour
  or for grain free – 2 cups coconut flour
½ cup unsweetened applesauce
½ cup butternut squash puree
or pure pumpkin puree
1/3 c. natural peanut butter
(check label for xylitol –toxic to dogs)
1 Tablespoon molasses, honey, or maple syrup
(optional)
1 tablespoon canola or soybean oil
2 eggs

Butternut Nutter-Butter Dog Biscuits
Instructions for baking:  
Roll dough out on a floured surface about ¼ inch thick, cut with a shaped cookie cutter of shape by hand. Place biscuits on a sheet pan lined with parchment paper or baking mat and bake at 350°F for 30 minutes, turn oven off and leave in for an additional 20 minutes to continue the drying process while cooling. Remove from oven. May need to leave out 1 to 2 days to continue drying before packaging, especially the grain free ones. Package in an airtight container. Can be stored on counter for up to 2 weeks, in the refrigerator for 1 month, and in the freezer for 6 months.

Makes 26 – 3 inch biscuits, serving 1
Nutrition Information for whole wheat biscuit: Calories: 66, Total Carbohydrate: 9g, Fiber: 1g, Sugar: 2g, Protein: 3g, Total fat: 3g, Saturated Fat: .5g, Trans Fat: 0g, Cholesterol: 14mg, sodium: 29mg
Nutrition Information for grain free biscuit: Calories: 72, Total Carbohydrate: 7g, Fiber: 4g, Sugar: 3g, Protein: 3g, Total fat: 4g, Saturated Fat: 2g, Trans Fat: 0g, Cholesterol: 14mg, Sodium: 29mg

For gifting:
Package batch of biscuits in an airtight container.  If for multiple canines tie a small stack of bones with a ribbon, and wrap. Make sure ribbon and packaging is removed before gifting to your canine friend.

Butternut Nutter-Butter Dog Biscuits

Try this life’s solution for kitchen gifting for all the rest of those just right people in your life.  The idea is to put together a Meal Basket/Box (you can do even better than the one’s they sell in the catalogs). This gift requires no cooking unless you want to include homemade items. The example pictured above is a Breakfast Basket. These instructions will provide you guidelines on putting a meal box together, but feel free to get creative with yours personalizing your basket is what makes it the just right present.

Breakfast Basket
Gather:
Basket or decorated box
New dish towel (to line basket or box)
Small packets of tea
Fruit
Bagels – packaged or homemade (if you make them include the recipe as an extra)
Jam (store bought or homemade)
Container of cream cheese (optional; add just before gifting as it requires refrigeration)
Placemats (buy them, have fun making them, or get the kids involved- some scissors, paper, tape, and page protectors or clear contact paper is all it takes to be creative you can even add a special picture)

Instructions for Packaging: Be creative, try a couple of arrangements, pick the one you like the best. Don’t forget to add any refrigerated items just before delivering.

For Gifting: The basket or box can go as is, or wrap and decorate. If items need refrigeration do not leave at room temperature for more than 2 hours.

There are many other meal baskets you could put together an Italian Meal Basket, a Beverage Basket, or A Family Secret Meal basket, just use your creativity and knowledge of that just right person you are creating this gift for and you will have that just right present.

EFNEP logo

Healthy-connections logo


Happy holidays from EFNEP!

If you are interested in more recipes, nutrition information, or classes, visit our website at www.cceschoharie-otsego.org or contact Michelle Leveski, EFNEP Nutrition Program Educator by calling 518-234-4303 ext. 115 (please leave a message), or emailing her at mml39@cornell.edu.

To read more articles like this subscribe to the “Life’s Solutions” blog at www.blogs.cornell.edu/efnep-schoharie-otsego/.


Three to Four Days and Beyond

We are all faced with some challenges during this holiday season.  With the recommendation to spend the holidays with members of our own households, and to join with extended family and friends virtually one of those challenges might be the quantity of leftovers remaining at the end of the meal, when we have prepared everyone’s favorite holiday dish.  To meet that challenge here is some information that might help.

As long as leftovers are put into the fridge right away in a sealed container, most will keep between 3 to 4 days. Some may say that you could keep them in the fridge a little longer, but by that point the taste and texture of the dishes will most likely be affected, and safety could become an issue. Here is a handy reference chart with recommended refrigerator and freezer storage times for some favorite holiday dishes that sums it all up.


Food Fridge Freezer
Turkey, cooked 3-4 days 2-3 months
Meat (ham, beef), cooked 3-4 days 2-3 months
Gravy 1-2 days 2-3 months
Cranberry sauce 10-14 days 1-2 months
Stuffing, cooked 3-4 days 1 month
Mashed potatoes, yams 3-5 days 10-12 months
Soup 2-3 days 4-6 months
Vegetables, cooked 3-4 days 2-3 months
Pumpkin pie, baked 3-4 days 1-2 months
Apple pie, baked 2-3 days 3-4 months
Custard pie, baked 3-4 days Not recommended

Because freezing keeps food safe almost indefinitely and recommended storage times are for quality only, freezer storage recommendations are a little more flexible then refrigerator ones as long as proper packaging that is moisture vapor proof is used. Freezer burn that can occur when food is kept in the freezer too long is safe to eat, but may affect the texture and taste negatively, so it’s still best to follow the recommended storage times.

Try this life’s solution recipe during that 3-4-day window when leftovers are residing in your fridge before they need to go in the freezer for storage beyond.


Ingredients:

2 slices Italian bread (or bread of your choice)
1 teaspoon vegetable/olive oil
2 ounces of leftover cooked turkey or cooked ham
1 slice cheese of your choice (approx. 1 ounce)
4 thin slices peeled or unpeeled and cored apple
1 Tablespoon cranberry sauce
lettuce leaves (optional)

Instructions:

  1. Using a pastry brush spread oil on one side of each piece of bread and lay the bread oil-side down on the work surface.
  2. Place the turkey or ham, cheese, apple slices and cranberry sauce on top of one of the slices of the bread. Place the second slice of bread on top, oil-side up.
  3. Heat a grill or frying pan over medium heat. Grill the sandwich on each side until golden brown, about 3-4 minutes per side.
  4. Transfer the sandwich to the work surface, lift one piece of bread and arrange the lettuce inside, then replace the bread. Slice the sandwich in half and serve.

Note: For a little extra creativity you could add a thin slice of leftover stuffing or sweet potato to the sandwich.

Servings: 1
Nutrition information per serving:
Calories: 370, Total Carbohydrates: 33g, Fiber: 2g, Sugar: 8g, Protein: 28g, Total Fat: 14g, Saturated Fat: 5g, Trans Fat: 0g, Cholesterol: 55mg, Sodium: 430mg

Safely stored holiday meal leftovers can be that gift that keeps on giving throughout the holiday season.

If you are interested in more recipes, nutrition information, or classes, visit our website at www.cceschoharie-otsego.org or contact Michelle Leveski, EFNEP Nutrition Program Educator by calling 518-234-4303 ext. 115 (please leave a message), or emailing her at mml39@cornell.edu.

Intensify the Taste

Roasted Vegetables

We all know it’s important to eat our veggies. The challenge often comes in how to prepare them. Nothing brings out the flavor profile of vegetables more than roasting. Roasted vegetables achieve a caramelization factor that leads to vegetables that are crisp on the outside while being tender on the inside with a sweetened flavor that tantalizes the taste buds.

Almost any vegetable can be roasted, the only variation necessary is the length of cooking time. The range in temperatures for roasting vegetables are between 350°F to 425°F. Higher temperatures shorten the roasting time required; but vegetables that are cut small or are delicate do better at lower temperatures for a longer time period. The following are approximate cooking times for roasting vegetables cut into 1-inch pieces at 400°F – 425°F. Don’t forget to toss the vegetables half way through the suggested cooking time:
Asparagus – 20 minutes
Bell Peppers – 20  minutes
Broccoli – 25 minutes
Brussels Sprouts (halved) – 25 minutes
Butternut Squash – 30 minutes
Cabbage (cut into 1-inch thick slices) – 30 minutes
Carrots (cut into 1-inch chunks or whole baby carrots)- 30 minutes
Cauliflower – 25 minutes
Corn (cobs left whole with husks) – 40 minutes
Green Beans – 20 minutes
Kale – 15 minutes (it doesn’t need to be in a single layer)
Onions – 35 minutes
Potatoes – 45 minutes
Sweet Potatoes – 30 minutes
Tomatoes (grape or cherry) – 15 minutes
Yellow Squash – 20 minutes
Zucchini – 20 minutes

If the vegetable you want to roast isn’t listed here, just pick the timing required for a vegetable with a similar density. For instance, if you were roasting radishes (halved or whole) they would be similar in density to carrots, so you would roast them for approximately 30 minutes.

There are three ways to roast mixed vegetables. First, and easiest, you can roast the individual vegetables on separate trays and combine them after they are cooked. This method may require reheating the combined dish at the end. Second, you can pair together “vegetable friends” — ones that roast at roughly the same rate. For instance, you could roast cauliflower and broccoli together, or butternut squash with cabbage. Combine them on the same baking sheet and roast them together. If the baking sheet is getting crowded, split the vegetables between two sheets to prevent steaming instead of roasting. When using two sheets be sure you put the top rack in the upper third of the oven and the lower rack in the bottom third of the oven. This will allow the heat and air to circulate better to help get the vegetables tender and caramelized. If the baking sheets are only an inch or two apart, the bottom vegetables will steam rather than roast. Be sure to rotate baking sheets between the racks half way through to ensure even roasting at the same time as you toss the vegetables. Third, you can add different vegetables to the baking sheet in stages — start roasting the hardest, longest-cooking vegetables first, and then add softer, quicker-cooking vegetables later on. If the baking sheet starts to get full, split the vegetables between two pans so you don’t crowd them. Doing it this way allows the vegetables finish roasting around the same time, and remember: A little extra roasting time is unlikely to hurt.

Try this Life’s Solution and intensify the taste by roasting up your favorite vegetables using the following directions. Be sure to do a large batch if you want leftovers. They can be refrigerated 3 to 4 days in an airtight container and be reheated in a 450°F oven for 4 or 5 minutes before serving. Leftover roasted vegetables can also add a burst of flavor to your favorite soups, casseroles, quesadillas, omelets, pizzas, and grain bowls (directions for making a grain bowl can be found in Life’s Solutions-Making the Most From What You Have).

How to Roast Any Vegetable
Serves 4-6
Ingredients
1- 2 lbs. of any vegetables, cut to a like size
1-2 tablespoon of oil or vegetable oil spray
½ teaspoon of salt (optional)
¼ teaspoon of pepper
½- 1 teaspoon of additional seasonings of your choice (you might want try a seasoning mix described in Life’s Solutions- Tasteful Additions

Directions:

  1. Arrange oven rack to the middle of the oven then pre-heat to 425°F.        
  2. Prepare vegetables by washing, peeling (if desired), and cutting into uniform pieces so they cook evenly. If your vegetables still have some moisture after washing, be sure to pat them as dry as possible; the drier the vegetable, the better it will roast.
  3. Put the vegetables to a large bowl. Add the oil and toss to coat. Vegetables should be lightly coated and glistening but not doused in oil or spray with vegetable oil spray.
  4. Spread the vegetables out on a rimmed baking sheet or in a baking dish. Make sure they are in a single layer with a little space in between. Use two baking sheets if needed to prevent crowding. Sprinkle vegetables with salt, pepper, and seasonings.
  5. Estimate your cooking time based on the vegetables you are cooking and the method you chose if roasting combined vegetables.
  6. Place the vegetables in the oven and begin roasting. Toss vegetables halfway through the cooking time, if using two racks rotate baking sheets at this time.
  7. Continue roasting until the vegetables are easily pierced with a fork or knife and they are showing crispy, browned bits at the tips and edges.
  8. Remove from oven and transfer the vegetables to a serving dish.


If you are interested in more recipes, nutritional information, or classes, visit our website at www.cceschoharie-otsego.org or contact Michelle Leveski, Nutrition Program Educator by calling 518-234-4303 ext. 115 (please leave a message), or emailing her at mml39@cornell.edu.
To read more articles like this subscribe to the “Life’s Solutions” blog at  https://blogs.cornell.edu/efnep-schoharie-otsego/ .

EFNEP logoHealthy-connections logo


Bigger Isn’t Always Better

(Zucchinis are summer squashes that are harvested early while the seeds are still soft.)Bigger isn’t always better, true words when talking about a favorite summer garden vegetable—zucchini. Even though zucchini is served as a vegetable, it’s technically a fruit because it comes from a flower. It grows from golden blossoms that bloom under the leaves. While the male flowers are there to attract bees and pollinate only the female flowers produce squash which is best harvested when medium sized, seven to eight inches long and two to three inches in diameter.

One medium zucchini has only 33 calories, less than a gram of fat, and is high in water. It also contains significant amounts of vitamins B6, riboflavin, folate, C, and K, and minerals, like manganese and potassium. In fact, it has more potassium than a banana and it also contains antioxidant and anti-inflammatory phytonutrients. Whether from your garden, a farm-stand, a farmer’s market, or the store; look for zucchinis with shiny skin that are free of blemishes, bruises, nicks, and soft spots. The skin should be firm to the touch, especially the stem, and they should feel heavy for their size. It occurs in several varieties, which range in color from deep yellow to dark green.

Three medium zucchini equal approximately one pound of zucchini which equals about 4 cups grated zucchini; 2 cups of salted and squeezed zucchini; about 1 cup mashed zucchini; and 3 cups chunked zucchini. Store fresh zucchini unwashed on the counter in a cool spot for one to two days. To store it longer put it in your refrigerator crisper drawer in a perforated plastic bag (remember in Life’s Solutions-Keep It Fresh we learned the University of California at Davis has done the math and 20 pin-sized holes in a medium bag will do the trick) or in a loosely closed plastic or paper bag for up to one to two weeks. You can freeze zucchini without blanching, but blanching one to three minutes deactivates enzymes that would otherwise cause the zucchini to become mushy and discolored. For more details on freezing zucchini (summer squash) go to cceschoharie-otsego.org/food-preservation and click on the Extension Fact Sheet-Handy Reference for Freezing Vegetables in right menu. When your garden abounds or your generous neighbors share their bounty it’s good to remember that zucchini is a very versatile vegetable. You can…

  • Cut it up raw and add it to salads or serve it with a dip.
    • Shred it, drain it, and bake it into breads, pancakes, muffins, or cakes.
    • Stew it with other summer fruits and vegetables to make ratatouille.
    • Stuff with rice, lentils, or other vegetables, then bake it.
    • Stir-fry solo or with other vegetables by adding a little olive oil and sautéing it.
    • Boil it, then blend it into soups.
    • Serve it as a side, grilled or sautéed with a little garlic and oil.
    • Try it breaded and fried, air-fried, or baked.
    • Spiralize it into spaghetti- or linguine-like noodles, or slice it to replace lasagna sheets.Even though Life’s Solutions says bigger isn’t always better, if your zucchini played hide and seek in your garden and grew to a mega size you can always make personal pan pizzas instead of the pizza bites described below or remove over large seeds, shred it, drain it, and freeze it for use in breads, pancakes, muffins, or cakes.


(This zucchini played a successful game of garden hide and seek - “Olly olly oxen free”.)

Zucchini Pizza Bites
Makes approximately 20 pizza bites- 4 servings

Ingredients
1 medium zucchini
½ cup marinara sauce
½ cup shredded mozzarella cheese
2 tablespoons parmesan cheese
salt, pepper, garlic, or spice blend of choice to taste
vegetable oil spray

Directions

  1. Wash zucchini in cold running water. Slice into ¼ inch slices, then place slices (do not overlap) onto
    a parchment lined baking sheet then spray lightly with vegetable oil spray, flip slices and spray again.
  2. Sprinkle slices with salt, pepper, garlic, or spice blend of choice. Bake in a 400°F oven for 15-
    20 minutes. Flip slices halfway through baking time.
  3. Remove from oven and top slices with marinara sauce and mozzarella cheese evenly divided
    between slices; then sprinkle with parmesan cheese. Bake an additional 5 minutes in a 400°F oven,
    and if browning is desired finish under the broiler for one to two minutes. Serve immediately.
    Leftover pizza bites can be refrigerated and reheated.

One serving (5 pizza bites) has approximately 86 calories, 4.5 grams of carbohydrates,7 grams of protein and 4.5 grams of fat.

(Yummy Zucchini Pizza Bites.)

For another tasty version of sliced zucchini try our recipe for Zucchini Rounds at http://cceschoharie-otsego.org/resources/zucchini-rounds.

If you are interested in more recipes, nutritional information, or classes, visit our website at

www.cceschoharie-otsego.org or contact Michelle Leveski, Nutrition Program Educator by calling 518-234-4303 ext. 115 (please leave a message), or emailing her at mml39@cornell.edu.
To read more articles like this subscribe to the “Life’s Solutions” blog at  https://blogs.cornell.edu/efnep-schoharie-otsego/


Tasteful Additions

Herbs fresh or dried are a great way to add either subtle nuances or a blast of flavor to some of our favorite culinary creations. They will enhance the flavors present or provide a complexity of layered flavors in the dishes they are added to. Whether you are growing your own herbs in the garden or containers or buying them at farmer’s markets, the store, or online take some time to learn more about them. Check out Healthy Cooking with Fresh Herbs for ideas on herb- food combinations, storing fresh herbs, and even basic growing tips. Then peruse Uses and Culture of Culinary Herbs to further explore more herb usage and explicit planting tips.  If this information sparks an interest in growing herbs in your own garden or in containers you can find helpful how-to information in Gardening with Herbs and Planting Herbs in a Container. These resources can all be found at cceschoharie-otsego.org/culinary-herbs.

Using herbs can be simple. Try adding your favorite fresh mint leaves to water for a refreshing beverage.  Caraway seeds are not just for rye bread, added to mashed potatoes they elevate that dish to another level. Dill weed and celery seed added to sour cream or plain Greek yogurt makes a great vegetable dip, though go sparingly as both herbs impart a strong flavor. When using fresh herbs use a sharp knife or herb scissors for chopping so the delicate herb leaves are cut rather than crushed. Dried herbs are concentrated and tend to have stronger flavors than their fresh counterparts. If you are substituting fresh herbs for dried in a recipe you would use three to four times the amount of fresh than the recipe calls for dried and add them towards the end of the cooking time.

For more Life’s Solutions tasteful additions try these fresh and dried herbs herb combinations right out of the pages of French cuisine.

Fines Herbes- Known for its delicate, bright, and fresh flavors, this mixture uses fresh herbs and is commonly used in mild flavored dishes like saladsegg dishes, and poultry recipes that won’t overpower its pleasantly subtle flavor. Fines herbes are typically added at the end of cooking, as excessive heat or cooking time can deplete their gentle aroma and flavor.
Ingredients
1 tablespoon chopped fresh parsley
1 tablespoon chopped fresh chervil
1 tablespoon chopped fresh tarragon
1 tablespoon chopped fresh chives

Combine the chopped herbs in a bowl. Use at the end of cooking to achieve the most flavor, or freeze in ice-cube trays filled with water or chicken stock for later use.

Herbes de Provence- This dried herb blend packs a more powerful, hearty flavor. While the recipe for this mixture is flexible, the basic recipe includes basil, fennel, marjoram, parsley, rosemary, tarragon, and thyme. Other recipes may include crushed bay leaves, savory, chervil, sage, oregano, lavender, and mint. This herb blend can be added at the beginning of the cooking time allowing flavors to develop in vegetable dishes, soups, and stews. It can also be used as a dry rub to season meats or chicken or sprinkled on fish and salads for a pop of flavor.
Ingredients
1 tablespoon dried fennel seeds
2 tablespoons dried rosemary
2 tablespoons dried basil
2 tablespoons dried marjoram
2 tablespoon dried parsley
2 tablespoons dried thyme
1 tablespoon dried tarragon

Grind the fennel seeds and rosemary in a spice grinder or with a mortar and pestle. Pour into a mixing bowl. Stir in the remaining herbs until well combined. Store the mixture in an airtight container. Mixture can be kept in a cool, dark, dry place for six months to a year.

For an easy Provençal chicken dinner, coat a skinless chicken breast(s) in olive oil and sprinkle both sides with salt and herbes de Provence, marinate for an hour in the refrigerator in a covered container or resalable bag, then cook on the grill or roast in a 400°F oven for 22 to 26 minutes.
Use a meat thermometer to check for doneness, poultry should reach an internal temperature of 165°F.

If you are interested in more recipes, nutritional information, or classes, visit our website at

www.cceschoharie-otsego.org or contact Michelle Leveski, Nutrition Program Educator by calling 518-234-4303 ext. 115 (please leave a message), or emailing her at mml39@cornell.edu.
To read more articles like this subscribe to the “Life’s Solutions” blog at  https://blogs.cornell.edu/efnep-schoharie-otsego/ .

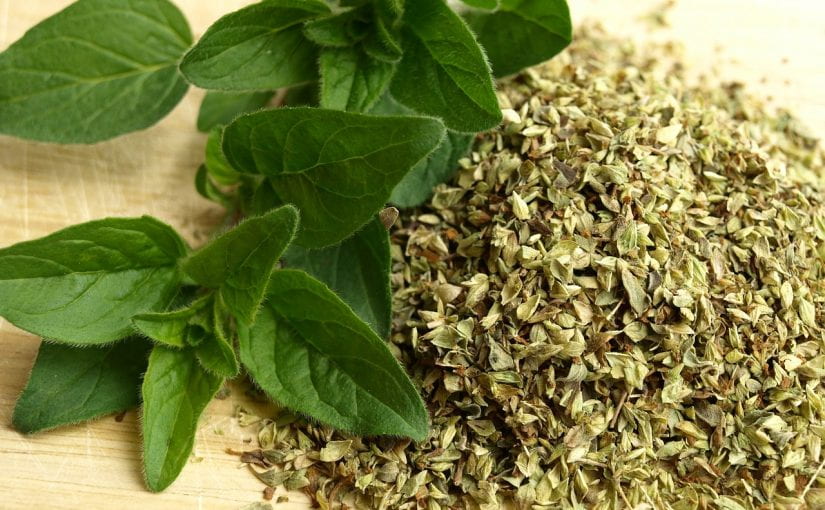
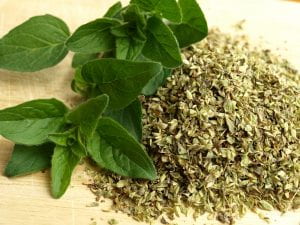
Fresh and Dried Oregano
Oregano fresh and dried can be used on pizzas, in sauces, and in vinaigrettes to add a burst of flavor

Savor the Flavor

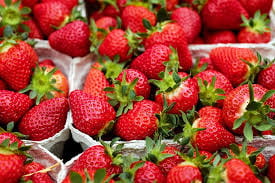
Strawberries(Flavorful fresh picked strawberries.)

Do you want the flavor of fresh fruit with a longer shelf life? Try making an uncooked freezer jam or jelly. This type of jam or jelly is quick and easy to make.  Because they are not cooked the fruits and juices used retain brighter colors and fresher fruit tastes. However, be aware that the finished product has a slightly looser set than a traditional cooked jam or jelly and must be kept at room temperature for up to 24 hours to create a gel set before refrigerating or freezing.

Uncooked jams and jellies can be made from most fresh or frozen fruits, and fruit juices. When choosing fresh fruit do not use under or overripe fruit because that will be the predominate flavor of your jam and it can affect the gel set negatively. Adding extra fruit or doubling batches can also do that.

Most recipes call for the use of commercial pectin. Store-bought pectin comes in two forms: liquid and powdered – the two are not interchangeable— be sure to use the form your recipe calls for.

Sugar inhibits the growth of bacteria, keeping your jam or jelly fresh, fruity, and safe to eat.  The recipe you are using has been formulated for a certain ratio of pectin to sugar and will not gel properly if you don’t use the correct amount of sugar.  If you want to make a less-sweet jam or jelly, you need to use a special kind of pectin formulated to work with less sugar.

Acid is needed for gel formation and flavor. Certain lower acid fruits will require lemon juice be added to the recipe. If lemon juice is called for in the recipe citric acid may be substituted. One tablespoon of lemon juice has the same acidity as 1/8 teaspoon of citric acid.

Before you begin making your jam or jelly, have all your jars ready and waiting. Use either sturdy plastic containers with tight-fitting lids, or short, wide-mouthed glass jars made especially for the freezer. It’s best to choose containers that are no bigger than pint-size, smaller is better; the jam will not set up as well in larger containers. Wash them as you would any other dishes; there’s no need to boil them.

Now it is time to give this Life’s Solution a try and savor the flavor of fresh strawberries for that just picked taste.

Making Strawberry Jam
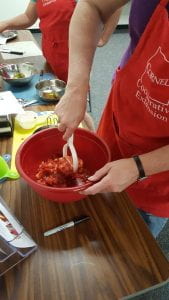
(Preparing the strawberries for freezer jam.)

UNCOOKED STRAWBERRY JAM FROM FRESH FRUIT
 (makes about 4 half-pint jars)
Ingredients
1-3⁄4 cups crushed strawberries (about 1 quart)
4 cups sugar
2 tablespoons lemon juice or ¼ teaspoon of citric acid
1 pouch liquid pectin
Directions
1. Crush strawberries in a large bowl with a potato masher one layer at a time.
2. Measure 1-3⁄4 cups crushed strawberries into an extra-large bowl. Add sugar, mix well.
3. Measure lemon juice into a small bowl; add the liquid pectin and stir well.
4. Pour pectin mixture into the prepared fruit and sugar mixture and stir for 3 minutes.
5. Ladle jam into clean, dry freezer containers or half-pint canning jars, leaving 1⁄2-inch headspace, wipe rims, and close with lids. Let stand at room temperature until gel is set (up to 24 hours).
6. Once jam is set it can be refrigerated for up to three weeks or you can freeze it for up to a year. When removed from freezer thaw jam in the refrigerator; stir before serving.

It can again be stored in the refrigerator for up to 3 weeks. Once a container is opened, the product should be kept refrigerated. Room temperature is not recommended because uncooked jellied products will mold or ferment in a short time.

For uncooked jam and jelly recipes using powdered pectin follow this link- ceschoharie-otsego.org/uncooked-jams.

If your uncooked jam or jelly doesn’t set within 24 hours follow the directions at the following links to remake your product. If your recipe called for using liquid pectin go to cceschoharie-otsego.org/liquid-pectin-freezer-jam. If your recipe called for using powdered pectin go to cceschoharie-otsego.org/powdered-pectin-freezer-jam.

If you are interested in more recipes, nutritional information, or classes, visit our website at www.cceschoharie-otsego.org or contact Michelle Leveski, Nutrition Program Educator by calling 518-234-4303 ext. 115 (please leave a message), or emailing her at mml39@cornell.edu.