Author Archives: mh92@cornell.edu

An Update on Conservation Lab Staffing, Service Priorities, and Current Strategies

News

Over the last year and a half, a major effort was undertaken by the Cornell Library Conservation Lab to clarify roles, responsibilities, and priorities, the result of which has gone into effect over the last 6 months. Beginning in April 2019, the lab has been restructured to reflect changes in staffing, streamline the reporting structure, improve communication and workflows with partners, and focus capacity in priority areas. We would like to share information about this effort, our current staffing, our priorities, and how we are planning for the future to respond to both the traditional and changing needs of CUL’s collections.

In April, Michele Hamill assumed the position of Head Conservator and now oversees lab staff and operations. Her time is divided between supervisory responsibilities, strategic and workflow planning, and as Cornell University Library’s Paper and Photograph Conservator.
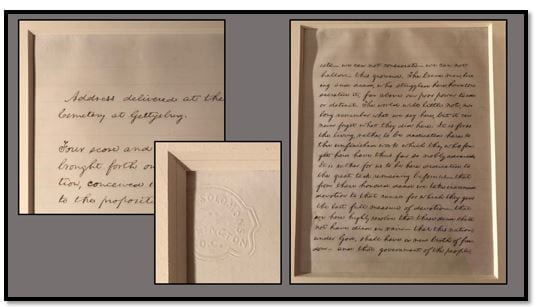
In August, Michele Hamill conducted a research trip to the White House to examine their copy of the Gettysburg Address, seen here, to inform the preservation of CUL’s Gettysburg Address.

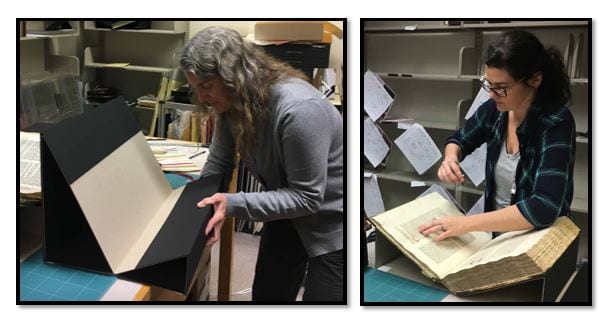
Also in April, Michele Brown, Cornell University Library’s Book Conservator of over 20 years, began phased retirement, working half-time until Spring 2021. Her time is being focused on a large, high-priority treatment project that requires a conservator of her experience – the Division of Rare and Manuscript Collections’ Piranesi volumes.

Laurent Ferri, RMC Curator, and Michele Brown examining one of the spectacular Piranesi volumes.

Pat Fox, Assistant Book Conservator, is increasingly working on rare and special collections, while maintaining responsibility for circulating book repair. Caitlin Jochym, Senior Conservation Technician, is now half-time and will be indefinitely. Jill Iacchei, Senior Conservation Technician, is our only staff member working full-time on rare and special collections. The lab hosts 2-3 student employees whose assistance is limited to circulating book repair and basic stabilization of collection materials during academic semesters.

Over the last year, the conservation lab has had a reduction in staff of 1FTE, primarily through personal choice. It is a priority for all of the departments of Digitization and Conservation Services to maintain a healthy work/life balance and that includes life decisions. Currently, the lab is staffed at 3.875 FTE across 5 people, but there is a larger, strategic plan in place to recruit and hire a Conservator for Special Collections over the next year. This new position will fill needs around conservation strategy for bound volumes, work prioritization and facilitation, and further increase our newly focused capacity to properly care for CUL’s collections.

Priorities

With our current level of staffing, we have limited capacity to respond to collection materials (even with notable condition concerns) that are not in our current priority areas. We are no longer staging large amounts of collection materials in the Conservation Lab awaiting treatment and we are only accepting items into the lab for treatment when we can identify that a staff member has the capacity to complete the work in 3 months. This represents quite a shift for some of the collection owners we serve and we realize this. We want to be clear about what we can realistically get done in a responsible amount of time, leaving little to fall into the cracks.

In an analysis of available staffing and the range of services we could offer, we determined that our efforts should focus on the 5 priority areas:

  • Exhibitions of rare and special collection materials – assess, treat, and mount collection materials for best presentation and safety.

Pat Fox and Caitlin Jochym constructing custom exhibit supports.

  • Instruction – evaluate where the condition and/or the enclosure interfere with safe use and handling, and needs are immediate or demand is high; provide treatment and/or enclosures as needed.
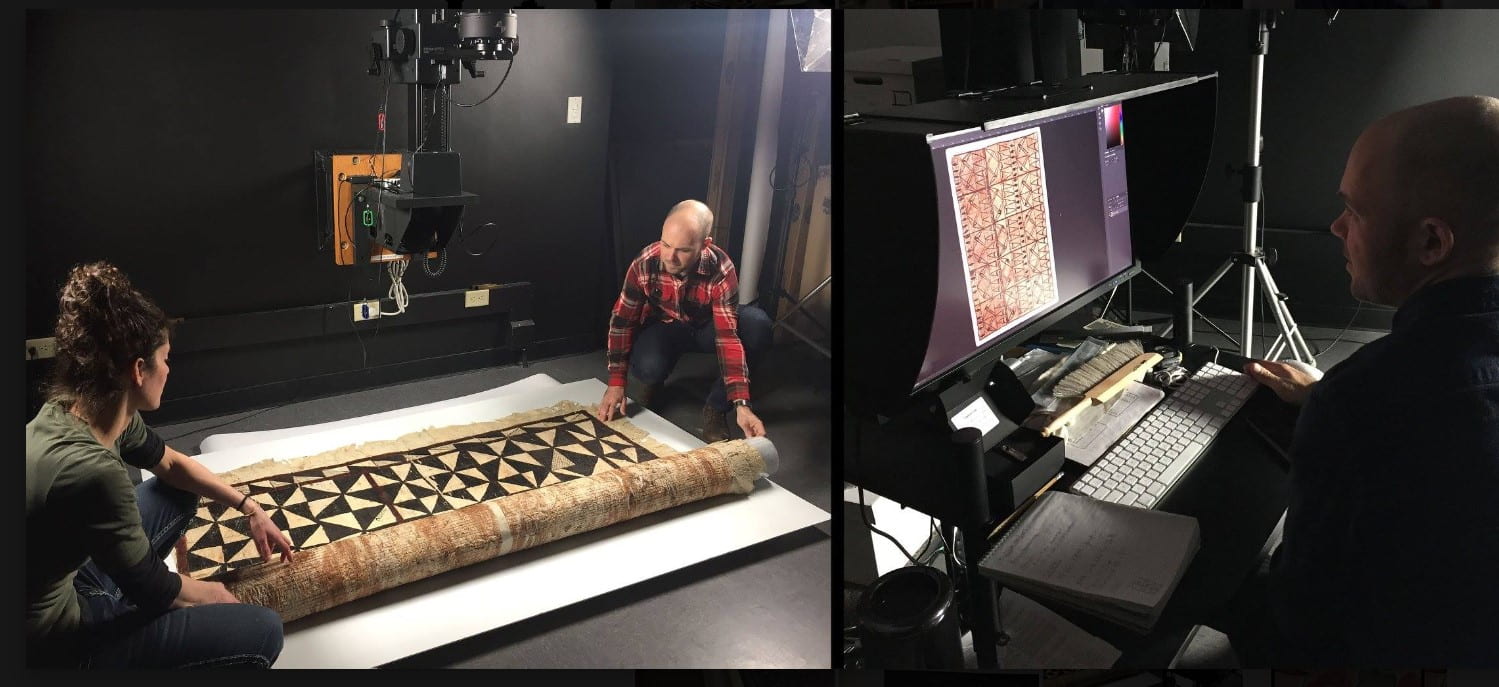
  • Digitization projects – assess for condition concerns, advise on safe handling, and treat as needed.

Jill Iacchei and Simon Ingall, DCAPS, imaging barkcloth for a digitization project.

  • New acquisitions and processing needs – provide treatment stabilization and/or enclosures to enable new acquisitions and newly processed collections to be safely shelved and available for research, instruction, and exhibition.
  • Other one-time priorities or pressing needs – including special donor or researcher requests, grant projects, or condition concerns requiring rapid response, like water damage or mold.

Strategies

In order to treat as many rare and special collections items as possible with limited staff, we are exploring different treatments and workflows, more stabilization options, and a variety of enclosures. We are now utilizing all lab staff, with the necessary skills and experience, on all collections types, which has increased our ability to respond to priority areas. You may notice differences from past approaches as we continue to develop our strategies. As we continue to explore new approaches, we welcome input as a necessary and valuable part of the decision-making, particularly regarding the nature of the collection material and how it is used and how often.

Along with all of the work detailed above, here are a few things we’re also currently working on:

  • Rapid response plan for collections emergencies – This includes automated communications strategies, vendor and insurance preparedness, keeping the current disaster plan up to date, and preparation with the Office of Risk Management. We hope to expand to include a rapid response plan for digital content as well in the future.
  • Better facilitation with Library Annex – When routinely consulting on storage strategies across the library, better understanding the needs of our high-density storage is imperative for sharing reliable information for coordinating long-term storage.
  • Mellon Foundation Grant: Assessing the Physical Condition of the National Collection – We are one of the 5 participating US libraries in this project led by the Library of Congress to assess the condition of circulating collections. This project is informing an update to CUL’s Brittle Books Program—We are reviewing the decisions and criteria for the brittle book workflow from a conservation perspective and including digitization for preservation and access to a digital format.
  • Updating the Conservation job family – This is a result of the recent staffing changes and to incorporate the new position of Conservator for Special Collections.

Please reach out to us at conservation@cornell.edu with questions and comments.

Tre Berney, Director, Digitization and Conservation Services

Michele Hamill, Head Conservator


Treatment of a 19th C. hydrographical map

The Conservation Lab mentors students interested in library and archives conservation and their conservation projects are great learning opportunities for us all. Margaret Canfield, a Cornell University junior majoring in art history, has been a student employee in our lab for several semesters.  Her blog describes the treatment of an early 19th century map.

Margaret Canfield

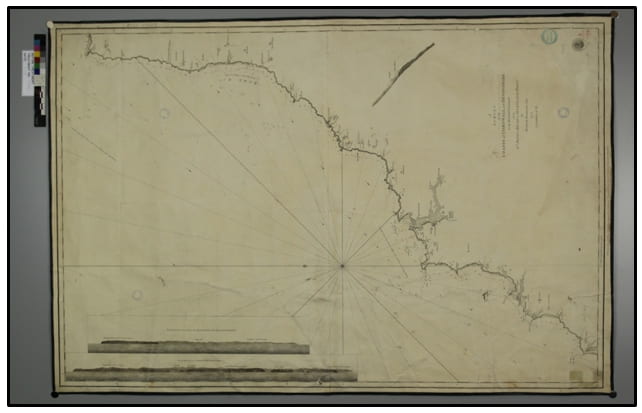
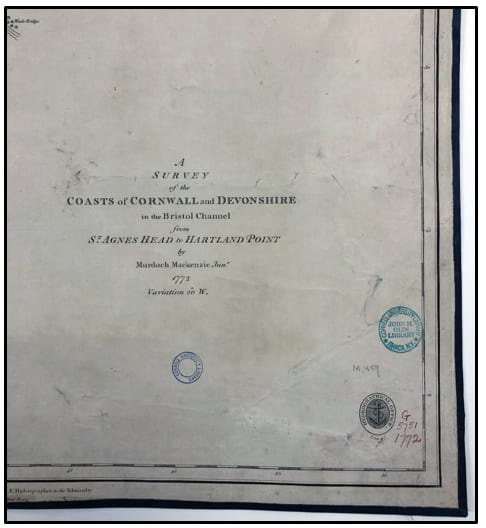
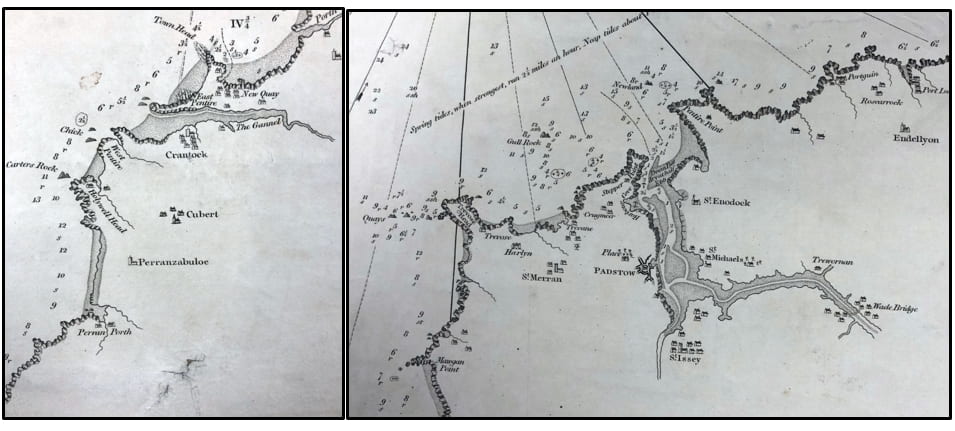
In the field of conservation, the history of an object helps inform its treatment. A survey of the coasts of Cornwall and Devonshire in the Bristol Channel from St. Agnes Head to Hartland Point includes interesting additions of mailing labels and postage stamps that form part of its unique history. This map is from the Maps and Geospatial Information Collection, an extensive collection in Olin Library that contains over 650,000 maps. The treatment of this map took the historical evidence of the mailing labels and stamps into consideration and focused on stabilizing areas that were detaching from the cloth backing, to prevent loss of the paper support and media.

The geographic area depicted in the map was surveyed in 1772 by Murdoch Mackenzie and published by the Hydrographical Office in 1810 by Captain Hurd. Hydrography is the science that measures and describes bodies of water and adjoining coastal areas for improved navigation, safety, and efficient transport.

The map is an engraving in black ink on good quality, handmade, wove paper.

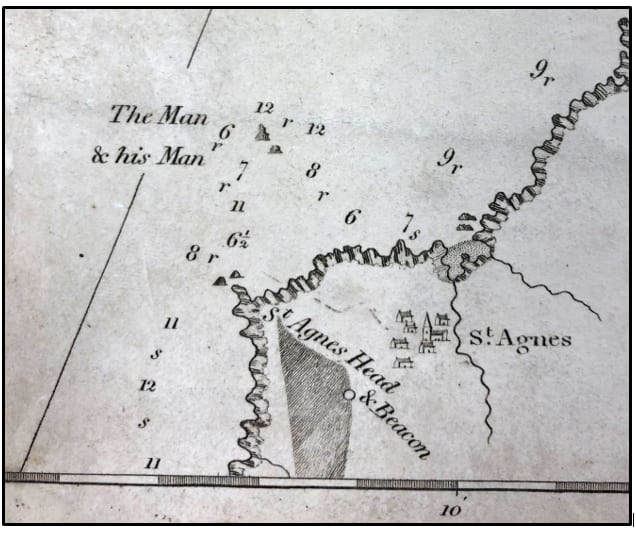
The Man and his Man refer to two small islands north of St. Agnes. Also known as Bawden Rocks and Cow and Calf.

Raking light shows the many surface undulations on the map.

The map was lined overall on the verso with a coarse, sturdy fabric, resembling burlap.  The edges of the map were reinforced with dark green ribbon.  Because maps at this time would have been working documents—in this case, used and referenced in the study of this geographic area—it was common for them to be made more robust with strong fabric linings and edgings.

On the fabric lining, there are stamps, labels, and postage marks that reveal a glimpse into the story of the map’s life. A paper stamp on the upper left corner of the verso (shown here on left), and another paper label on the front that covers some original text, indicate the map was sold by James Wyld, the geographer to the King. This could refer to either James Wyld Sr. (1790-1836) or his son James Wyld Jr. (1812-1887), who partnered with him in the family business of cartography.

A shipping label on the verso (on right, above) shows the map was mailed from James G. Commin to E.J. Bailey, of Eddy St, Ithaca. Commin was a noted bookseller in Exeter, England and there is evidence that he was in possession of maps from Devon and Cornwall from various newspaper ads in The Publisher’s Circular and Bookseller Record of British and Foreign Language Volume LVIII.

The canceled stamp on the verso shows the map was mailed from Commin in 1912 to E.J. Bailey, and arrived postage due. An Ithaca directory from 1912 corroborates Bailey’s address as Eddy Street.  E.J. Bailey (Elmer J) got his PhD from Cornell in 1909 and was a professor in English until his leave from the university in 1919. There are no records detailing how the map came to reside in the Maps Collection in Olin Library but it may have been donated by Professor Bailey.

The presence of the many labels and stamps directly on the map’s cloth backing indicate it may have been mailed from Exeter to Ithaca without additional packaging. The map was in good condition considering its age and history of being shipped overseas with just the cloth backing as protection. The map had significant surface dirt on both the recto and the verso. The lining of the map was loose in some areas and detaching from the paper support. The map had two small losses in which the cloth backing was torn completely through. The surface of the map was creased in many locations with several breaks in the paper support.  There is evidence of some fold lines, with one prominent fold through the vertical center, which bisects the mailing label.  On the bottom left corner of the recto, there was a small amount of glassine adhered to the map; its purpose is unknown. There are four ink Cornell Library ownership stamps on the map’s recto.

Several factors were considered in creating a treatment plan for the map, including: the map was in good condition with only minor issues, the cloth backing was not actively causing concern, and the mailing labels and stamps form an important part of its history.  Accordingly, the cloth lining was left intact and the treatment focused on stabilizing the minor condition concerns and providing a protective enclosure.

Stabilizing lifting paper with wheat starch paste and drying in place under weight.

The treatment consisted first of thorough surface cleaning. The recto was cleaned with cosmetic sponges and then three iterations of vinyl eraser crumbs. The recto was then carefully vacuumed with a HEPA vacuum. The cloth verso was cleaned with a sponge eraser while the labels and postage stamps were cleaned with cosmetic sponges. The verso was also vacuumed. Small areas of lifting of the labels on the verso were pasted down with wheat starch paste. The lifting areas of the paper support were reattached to the cloth backing with wheat starch paste. The glassine was removed using a methylcellulose poultice. The losses and frail areas were mended on the verso using acrylic toned Japanese tissue and wheat starch paste.  While the black engraving ink was stable in water, the Library ownership stamps were soluble.  So the map was gently humidified using felted Gore-Tex, which is a controlled method that did not disturb the ownership inks. After humidification, the map was dried and flattened between thick blotters and under weight to reduce surface creases and undulations. After treatment, it was sleeved in polyester to protect it in storage and during handling.

Recto and verso of the map in raking light, shown before treatment on the left and after treatment on the right.

This map has such an interesting history, from its assortment of mailing labels and postage stamps, to its connection to Cornell University faculty, and finally as part of the Maps Collection. After treatment that retained its historical evidence, the map is better preserved and available for study–perhaps for a future researcher to discover why Professor Bailey was interested in a hydrographic map of the coast of Cornwall!


Workshop Summary: The Use and Creation of Pre-Coated Repair Materials

Michele Hamill

Increasingly in libraries and archives conservation there is a need for practical, safe, and efficient repair materials that address diverse collections and priorities, and can be used by a variety of practitioners (conservation staff, interns, and supervised students and volunteers). Pre-coated repair materials can fill some of this need with their versatility, convenience, and ease of use.   Pre-coated repair materials (usually Japanese tissue coated with an adhesive and then dried) supplement traditional conservation mending techniques like wet wheat starch paste applied to tissue.  At the point of use, the adhesive on the pre-coated tissue is reactivated with water, solvent, a combination of water and solvent, or heat.  A low amount of water, or no water at all, make them very useful in a variety of treatment scenarios with sensitive media, coated papers, easily stained papers, and in prepping collections for digitization, in production projects, and off-site work.  There is time and effort in preparing the pre-coated tissues, but once made, they can last a long time which adds to their convenience.

The conservation community is highly interested in these pre-coated materials and how they may benefit their collections, as evidenced by the over 150 conservators, technicians, and students who have taken this workshop.  I was interested to learn how these pre-coated materials may be used with Cornell Library’s paper and photograph collections, particularly modern archives collections (often with brittle paper and modern media), iron gall ink documents, architectural drawings, newspapers, and resin-coated photographs.  The workshop was a great learning experience which increased my knowledge and familiarity with these repair materials and techniques.

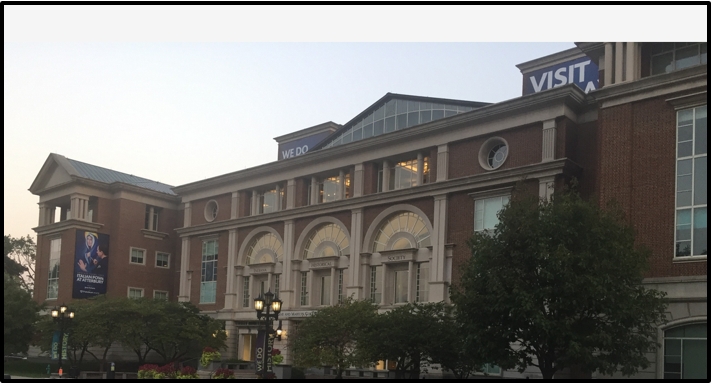
The beautiful Indiana Historical Society served as host for this recent workshop on the use and creation of pre-coated repair materials, sponsored by FAIC.

The workshop was organized by IHS book conservator Kathy Lechuga, with assistance during the workshop by IHS conservators Stephanie Gowler and Ramona Duncan-Hines. The IHS conservators did an outstanding job preparing the vast amount of materials for the workshop and generously opening their lab for our use.

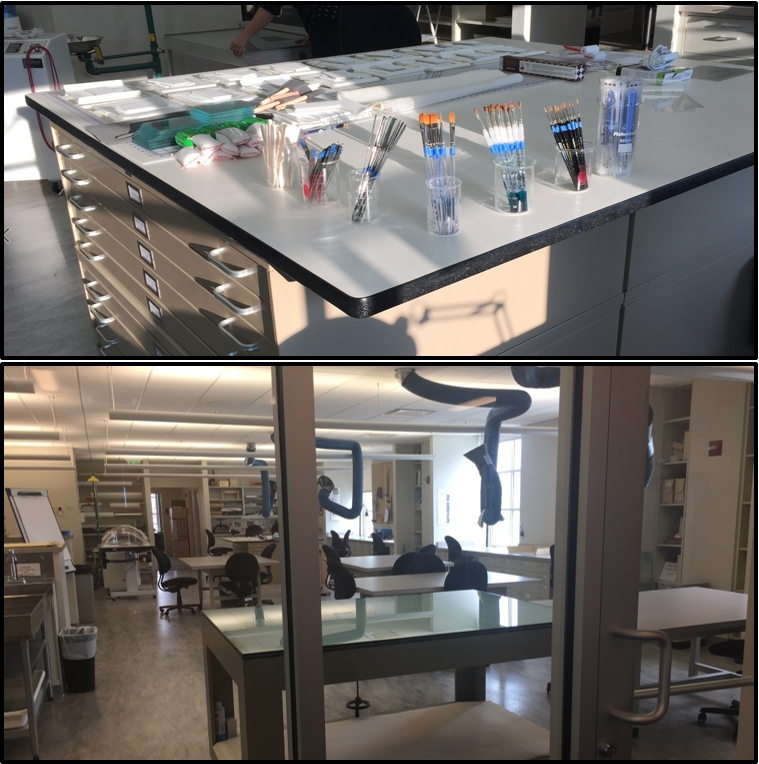
The IHS was a fantastic site for a workshop with convenient lecture facilities and their wonderfully outfitted conservation lab, large enough to accommodate 18 conservators working there over 3 days.

The workshop instructor, Sarah Reidell, Head of Conservation at University of Pennsylvania Libraries, has deep expertise in the subject of pre-coated repair materials and her website is a great resource with a bibliography and photo galleries of previous workshops.  Sarah was an outstanding instructor, knowledgeable, enthusiastic, and encouraging.  Encouragement played a key role in the workshop as the techniques and materials involved were many, and skill levels and prior experience were diverse.  Using a combination of informative lectures, instructor-led demonstrations, and group discussions, Sarah presented information on a variety of adhesives and techniques to apply them successfully to tissue, and then how to reactivate the pre-coated tissue for use on a wide variety of collection materials.

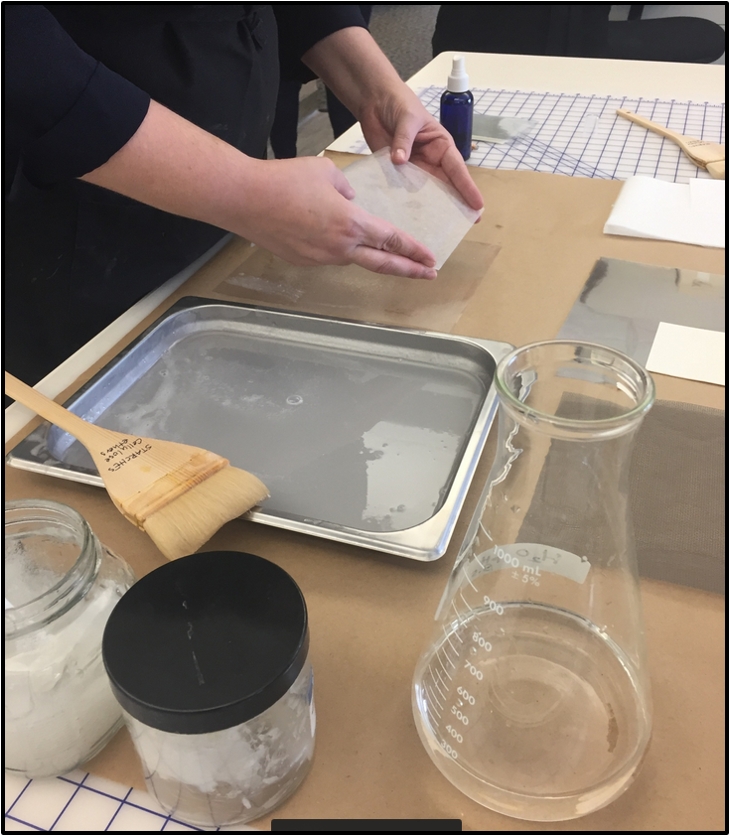
Sarah is shown here demonstrating preparing pre-coated tissue using a mix of wheat starch paste and methyl cellulose.

One of the best parts of the workshop was being guided by Sarah to experiment, critique, engage with other participants, and move outside your usual pattern when approaching repair, in a supportive, collegial environment.

The advantages of pre-coated repair materials are many and include versatility, increased choice (type of paper, adhesive, reactivation method), more control, customization, ease, speed, portability, consistency, and production.  Disadvantages can include “hand” (your skill level) in making and using the tissues, possible solvent sensitivity of conservator and object, and inadequate reactivation which could lead to adhesive failure.  Through the workshop, we learned many techniques for applying the adhesive(s) onto very thin Japanese paper and reactivation methods to optimize adhesion success.
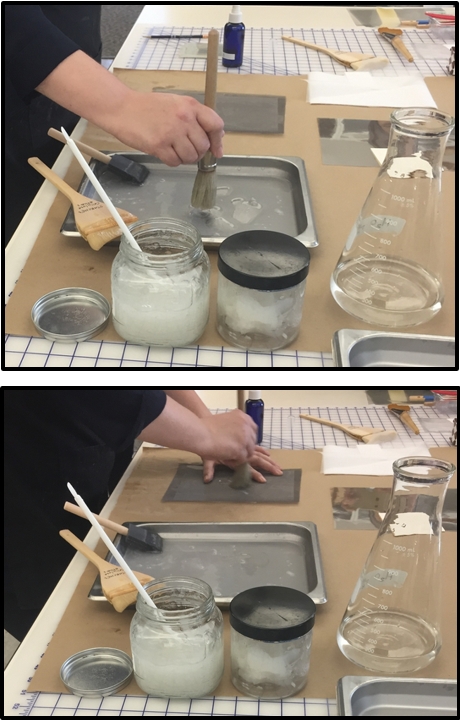
The first afternoon of the workshop was spent making tissues with starch and cellulose ether adhesives.  These are easier to make than the acrylics so we were able to hone our application techniques (drop, brush, screen) and application direction (left to right, Union Jack) and then adding the tissue (top edge laid down first, or bias drop—my favorite), or applying the adhesive directly to the tissue (Tricky! A light hand and mindfulness help a lot).  For me, applying a layer of adhesive to the polyester and then dropping the tissue onto the adhesive created a nice adhesive layer, without roughing up the paper fibers which can happen with the brush-through method. We experimented with applying the adhesives to the polyester support in a variety of ways (Hake or synthetic brushes (easier to clean!), rollers, foam brushes, and stipple brushes).  Helpful tips include humidifying thicker papers in advance and adding a spritz of water to the applied adhesive layer to encourage capillary action.  But resist the urge to “fix” the tissue (a strong inclination in a conservator!) once it is down.  Practice and patience are key.

Sarah is seen here showing the “top edge down first” method of dropping very thin Japanese tissue onto adhesive. Her preference (and mine as I practiced) is to drop the tissue on the bias, center first.

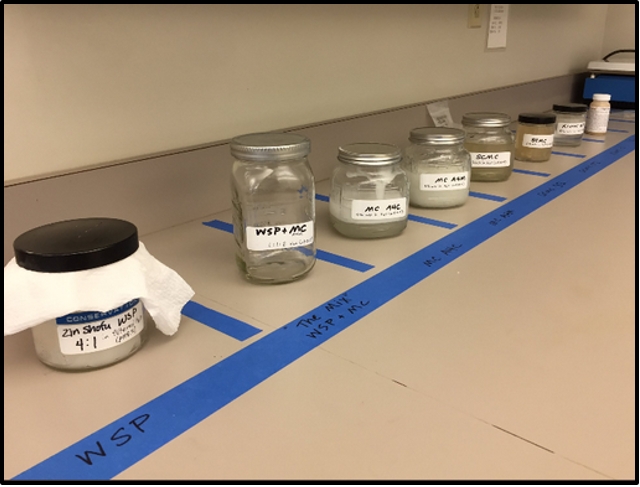
The adhesives covered in the workshop included wheat starch paste (the staple adhesive of many conservation labs), cellulose ethers (like methyl cellulose), proteins (including gelatin and isinglass) and synthetic adhesives (including those used to prepare your own heat-set tissues). Great tip: Soak wheat starch paste in water (in whatever proportion your lab uses) for 20 minutes prior to cooking. This soaking promotes swelling of the starch granules which makes for a shorter cook time (since they are already swelled) and a velvety smooth paste.

Included in the outstanding workshop handouts were detailed descriptions of the adhesives (shown here taped to the wall near the adhesive) noting concentration, common preparation, application and reactivation methods.

The application techniques included drop, brush, foaming, screen, and squeegee. The self-leveling effects of paste and cellulose ethers eased many a tissue that was a bit wrinkled during application but dried into useful sheets. Here, Sarah is foaming adhesive with a stiff brush through a screen to create a light adhesive layer.

Throughout the workshop Sarah created visual and descriptive summaries of observations and critiques. The “vertical tideline” illustrated how water evaporates from the coated tissue, creating the adhesive film layer.

The practical information shared during the workshop was really helpful—like keeping dedicated brushes for this purpose; prewetting brushes to aid cleanup; preparing the tissues over a darker surface (like Kraft paper) helps visibility during the coating; which polyester (regular or silicone coated) would allow the prepared tissue to release (hint: use silicone release polyester for the acrylics OR peel them off of regular polyester when almost dry, otherwise they will be stuck); tips to avoid contaminating adhesive stock (chop clean mat board scraps into disposable sticks or get a cheap bag of craft sticks); labeling techniques (the future usefulness of the pre-coated papers depends on good labeling including date, adhesive, concentration, and paper type, and application technique); move and dry the newly made tissues flat (or the adhesive will pool down to one edge); smaller sheets are easier to make (yes, yes, they are!); and how to store the prepared tissue (use the creation polyester as a support for thin tissues; and label folders by adhesive and paper type).

The second day of the workshop was spent working with the acrylic adhesives.  The advantage of acrylic adhesives is they can be reactivated with solvent or heat.  Concern of heat applied to collection materials is mitigated by keeping the temperature controlled with a rheostat and using small tips (no home irons here!) on the tool to deliver the necessary activation heat over only the affected area, limiting heat exposure to the surrounding area.  Weighting the treated area allows the reheated adhesive to cool and become solid which helps secure the mend. My comfort zone is very much in starch, protein, and cellulose ether adhesives so I really valued this opportunity to work with a variety of synthetic adhesives.  Sarah’s bibliography (on her website) includes some great articles describing synthetic adhesives. While there are some commercially available heat set tissues, there is a distinct advantage to creating your own tissue which allows for full control over the type of adhesive, type and weight of paper, and tone.

Pre-coated repair materials can be prepared on a variety of weights of Japanese tissue.  Very thin Japanese tissue (like tengujo, Berlin tissue, or RK-00) have the advantage of translucency so text or image is still visible through the repair. For convenience in the workshop we used untoned Tengujo tissue (5 g/m2) but the tissue can be toned with acrylics in advance to better match the item being treated.  The thinness of the tissue helps mitigate one of the disadvantages of pre-coated materials –that you can’t tear a feathered edge but instead have to cut, score, or prick the tissue.  Thin tissues don’t have the undesirable hard edge of straight-cut, thicker repair tissue and are visually unobtrusive.

The white tengujo tissue is visible on this example but would be less obvious if toned.

The needs of the object to be stabilized determine which pre-coated tissue may work.  There is no one solution to fit every problem.  Instead the workshop gave us options that could be part of the solution while factoring the extent and degree of conservation concerns; the object’s reaction to water, solvent, or heat; the surface (texture, gloss) of the object; and need of the object to flex, fold or move.  The usual steps that may be needed for preparing an item for mending, like surface cleaning, and humidification and flattening, hold for pre-coated repair materials as well.  Surface dirt in particular could present a barrier to adhesion.

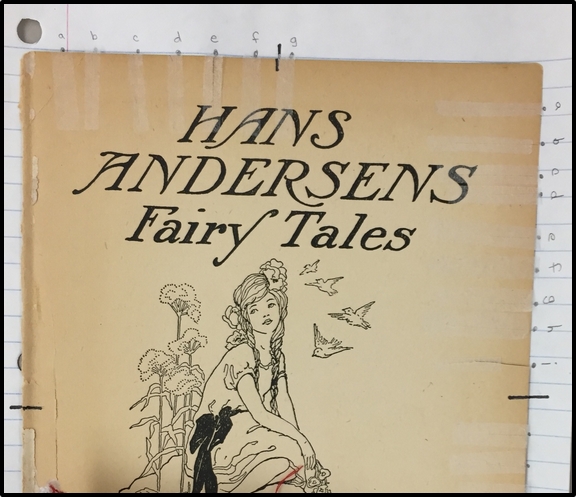
The third day of the workshop was dedicated to reactivation methods on a variety of sample collection materials—coated paper, brittle paper, newspaper, tracing paper, and photographs.  We were encouraged to create tears and add problematic media like marker and ball point pen.  Straight tears (whose edges align) respond well to pre-coated repair materials.  Scarfed tears (where the edges overlap) may need reinforcement on both sides or additional adhesive fed into the overlap areas. I had some great success with a heat-set adhesive mix used at NARA on several of the practice samples.

The IHS generously donated deaccessioned envelopes with iron gall ink (which has water sensitivity and so is an ideal candidate for pre-coated repair tissue) as practice samples. There were also lots of lignin-containing papers, waxy tracing papers, coated paper, parchment, and photographs to experiment with.

I left the workshop excited about the possibilities for using pre-coated repair materials for the paper and photograph collections at Cornell Library.  So far, we’ve prepped toned pre-coated repair tissue for a large collection of iron gall ink documents and a newspaper project.  Thanks to Sarah, Kathy, Stephanie, Ramona, and all the workshop participants for a great experience.


Conservators in Action

Michele HamillDuring a recent visit to the beautiful conservation lab of the Indiana Historical Society (IHS) for a workshop on pre-coated repair materials, we had the opportunity to tour their History Lab .  The History Lab is dedicated to advancing the public’s knowledge about conservation and preservation.Be still my conservator’s heart!  An entire exhibit space and teaching facility encouraging the exploration of how IHS collections are preserved, what visitors of all ages can do to extend the life of their family collections, and learn about the different processes involved in making photographs, books, and paper artifacts.

An engaging and fun interactive display lets visitors explore a variety of artifacts and manufacturing processes in depth.

The components of this cased photograph, a tintype (a unique photographic image on a lacquered iron base), are displayed to illustrate the complex, composite nature these artifacts.

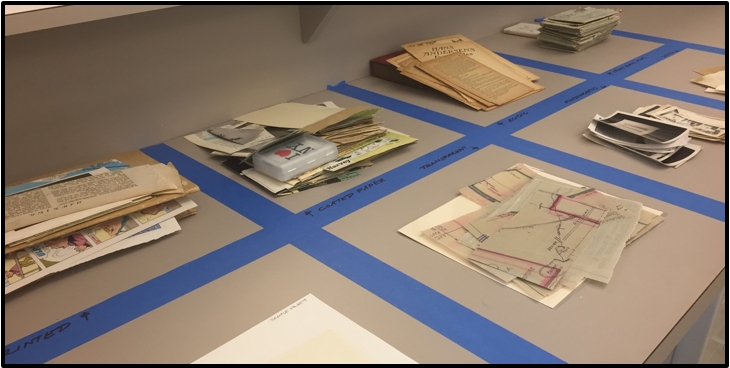
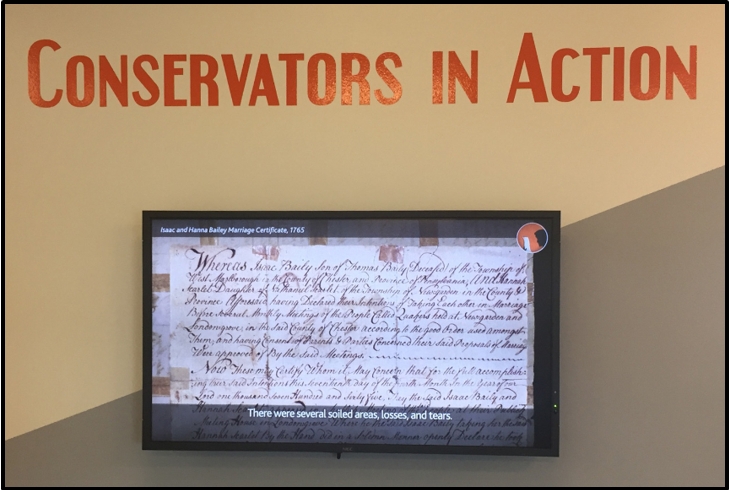
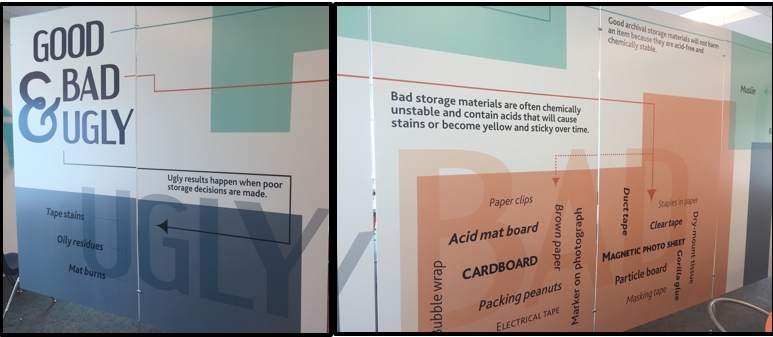
The History Lab offers a view of the state-of-the-art IHS conservation lab where visitors can see conservation in action; hands-on activities, like stabilizing paper documents; and many displays –good vs. bad paper; a recent conservation treatment, and a touchable array of materials used to make artifacts.

The visible effect of all that touching is striking. The white sheet on the far right– with the hole –is paper!

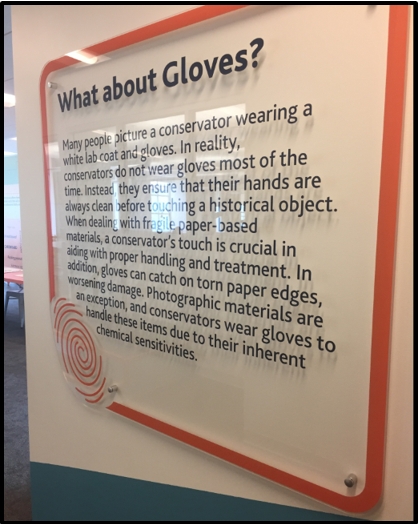
The touch display is paired with an explanation about why conservators don’t generally wear gloves during treatment. Gloves make sense in some reading room situations and with some types of vulnerable collection materials.

A detailed explanation of this conservation project was accompanied by water samples showing the discolored, acidic, degradation products that are released during careful aqueous treatment.

An impressive display illustrating how enclosures impact collection materials.

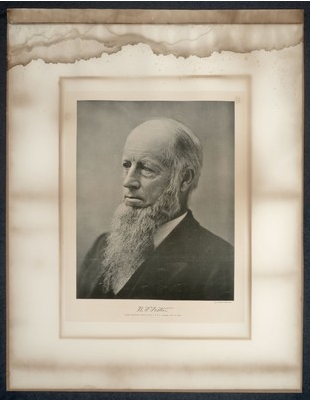
The “Unfortunate Mr. Foster” helps to illustrate how to avoid damage in home collections.

On the left is the instruction space in the History Lab for walk-in visitors, groups, and families to learn about paper conservation stabilization techniques. On the right, is the larger teaching space where the IHS hosts students from colleges and high schools, volunteers, and members from surrounding cultural institutions. The IHS store also sells archival storage boxes and basic mending kits (with instructions) to promote care of collections to its visitors.

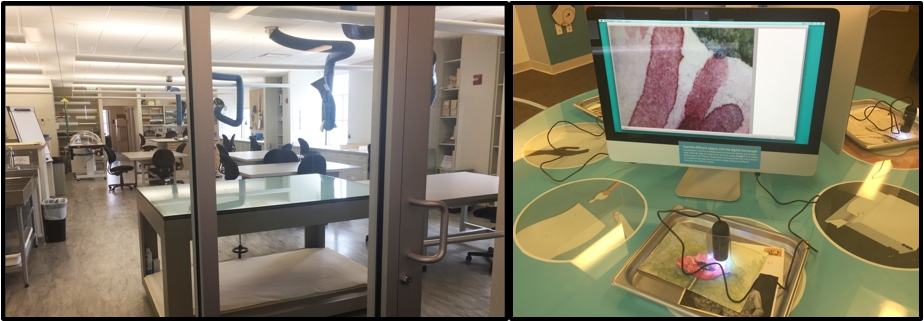
The tools and technology used in conservation are also evident in the History Lab—on the left is a view of the IHS conservation lab and, on the right, the digital microscope exploration station showing a detail of the red watercolor used in the flower illustration.

The History Lab is welcoming, engaging, and instructive. What a wonderful way to promote how conservation benefits collections, and as a powerful teaching tool about the material culture in our everyday lives. It was also a good prompt to share what we do here at Cornell so stay tuned for a recap on the pre-coated repair materials workshop held at IHS and how we may use those techniques on our collections, and a fascinating look at squeezes (paper cast impressions) from the Parthenon.  Conservators in action!