Monthly Archives: November 2015

Simple Ways to Protect Plants Now from Winter Injury

Weather conditions for the past two years have favored all sorts of winter injury to landscapes; this year may be no different. Droughty summers and autumns followed by long winters filled with wide temperature fluctuations can wreak havoc with plants and soil. But fear not! Here are some simple ways to help your plants come out of this winter unscathed.

Needled and broad-leaved evergreens such as arborvitaes, cherry laurels, and rhododendrons often suffer severe winter discoloration, browning, and even death from several causes. Winter sun (think southern exposure) combined with wind can create excessive transpiration, or foliage loss of water, at the same time as soils are frozen so plant roots can’t replace the lost water. This can be particularly disastrous for late season plantings in October, November, and December if plants aren’t well watered and if roots haven’t had time to grow out of the existing root ball. That’s why September is best for fall planting, not November!

Bright sunny winter days when leaves warm up may trigger cellular activities such as photosynthesis and cellular respiration. This break from dormancy can result in severe plant injury when nighttime temperatures drop abruptly, for example from the 40’s down to the teens in the course of a day or so. These conditions also bleach evergreen foliage, for example on boxwood, when chlorophyll is destroyed in plant tissue and then not rebuilt due to low temperatures. Late pruning in October, which generates new late season growth, is another cause of injury or death when cold temperatures occur. This sort of injury also occurs in May when light frosts settle into low areas during the time of tender new growth.
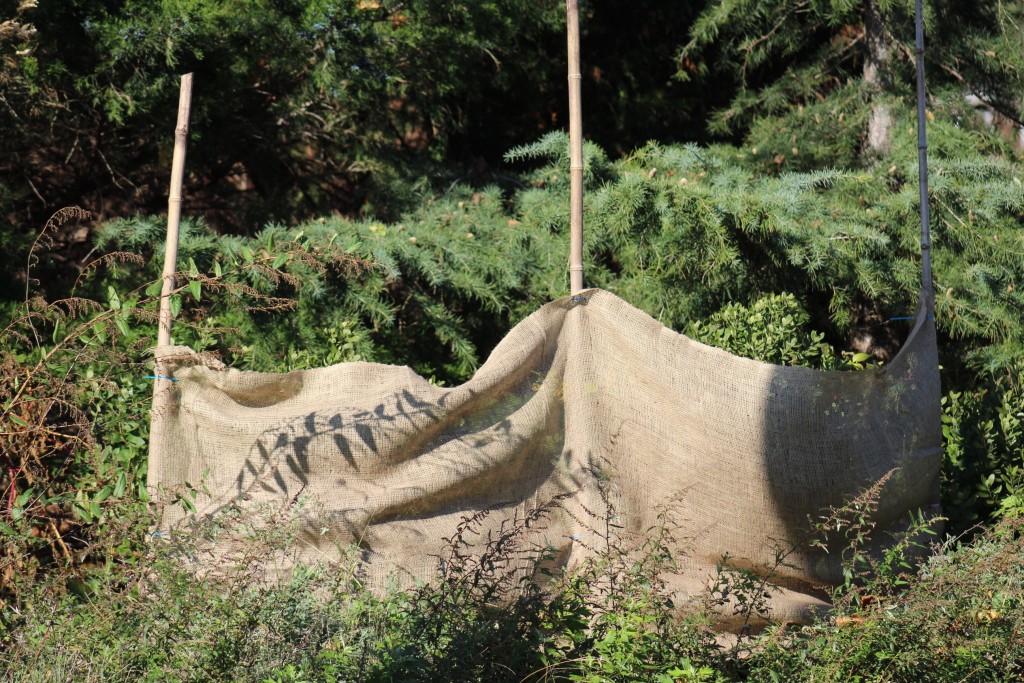
A piece of burlap posted in front of these inkberry plants will protect them from winter sun and wind. Photo c Alice Raimondo.

A piece of burlap posted in front of these inkberry plants will protect them from winter sun and wind. Photo © Alice Raimondo.

Protecting your evergreens from these sorts of winter injury is easily done. First and foremost, consider where you locate plants. South, southwest, and windy sites may not be the best places for evergreens. For plants in such sensitive conditions and for those that are less winter hardy, consider constructing a burlap barrier on the southern and/or windy side of the plant to shade it from the harsh winter sun and keep temperatures consistent, thereby reducing the injuries described above. Place the screen in front of the plant; don’t wrap it completely with burlap.

Water loss is by far the most important and misunderstood aspect of winter injury. Established plants shouldn’t be over watered in September as this will slow down their hardening off process, but they need to be well watered through October and into November if there isn’t regular, measurable rainfall. This regular watering in the autumn is particularly important for trees and shrubs in the ground for less than three or four years. Anti-desiccant and/or anti-transpirant sprays offer protection that is limited at best, but these can be applied in conjunction with correct watering and sun/wind screens.

Sunscald of thin-barked trees (cherry, maple, linden, and plum) is another common winter injury. Sunscald creates sunken, cracked, or dried areas on the trunk, which are elongate in shape. Young, newly planted trees are particularly sensitive to this damage as their bark is not well developed. Shading tree trunks from the harsh southern winter sun helps keep their living cambium tissue dormant, protecting it from freezing temperatures following a thaw. On young and newly transplanted trees, consider not pruning their lower branches for a season or two to help shade their trunks.

Cold that follows relatively warm temperatures is common on Long Island and often kills or damages less winter-hardy flower buds such as those of Hydrangea macrophylla. This is why many of us haven’t seen flowers on these beloved plants for the past two winters! The big-leafed a.k.a. mophead hydrangea has a bad habit of breaking dormancy as early as late February in sunny locations. Constructing a sun screen similar to that suggested for evergreens may help reduce this sort of cold temperature injury.

Our winters often bring heavy wet snows and ice storms that cause significant injury to plants from extra weight bending and breaking their branches. Protect plants in dangerous locations, such as where snow falls off roofs or where drifting and blowing snows accumulate, by tying or wrapping them to hold them together. If possible, carefully remove heavy, wet snows from plants before the snow freezes solid, encasing the plant in heavy ice.

For those of us with new landscapes, a real concern is frost heaving. Our soils tend to freeze and thaw and then freeze and thaw again, sometimes popping smaller shrubs and perennials right out of the ground. This is a big problem for those fall-sale beauties you may have planted in October or that late season perennial dividing and replanting you did the first week of November when it was 70 degrees. You can protect your plants by insulating the ground around them with mulch. Apply a layer of mulch three-inches thick, being careful to not bury the crowns or stems of the plants. Wait until the ground freezes before applying mulch to keep the ground frozen and discourage rodent activity. Consistent soil temperature will reduce the likelihood of frost heaving.

For more information, read the fact sheet on our website about Winter Injury. Hopefully, some of these simple tips will help your plants survive the winter and thrive come next spring. Putting in a little extra time now will reduce spring cleanup of winter-injured plants that need to be pruned or replaced. There’s still plenty of time to prep plants for the ravages of winter!

Alice Raimondo is Horticulture Consultant for CCE Suffolk. She can be reached at aw242@cornell.edu or 631-727-77850 x335.

Cornell Courses for Beginning Farmers Available Online

Winter is a great time for farmers to rest, slow down the pace, and build new skills for the coming growing season. The Cornell Small Farms Program, whose mission is to foster the sustainability of diverse, thriving small farms that contribute to food security, healthy rural communities, and the environment, is pleased to announce a winter roster of online courses available through its Northeast Beginning Farmer Project. These courses help practicing and would-be farmers learn from the latest research-based education available from Cornell University.

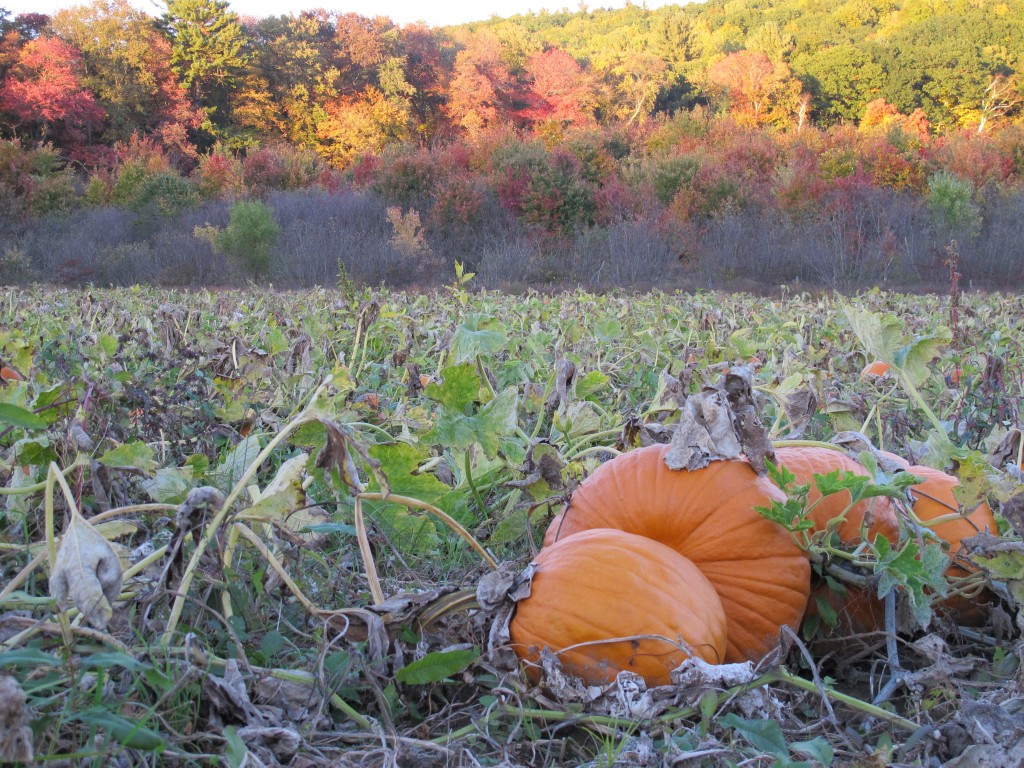
Photo c Robin Simmen.

Photo © Robin Simmen

Since 2006, the program has offered high quality, collaborative learning environments online and each year educates hundreds of beginning and established farmers through these courses. From aspiring to experienced farmers, there is a course for nearly everyone. If you are interested, a handy chart on the course homepage can direct you to the right courses for your experience level. And you may qualify for a 0% interest loan to finance your farm! Participants who complete all requirements of one or more online courses are eligible to be endorsed for a 0% interest loan of up to $10,000 through Kiva Zip.

The courses consist of weekly real-time webinars followed by homework, readings, and discussions on your own time in an online setting. If you aren’t able to attend the live webinars, they are always recorded for later viewing. Each course costs $200, but up to four people from the same farm may participate without paying extra. Courses often fill up quickly, so if you’re interested, visit the Cornell Small Farms Program website to learn more today.

Robin Simmen is Community Horticulture Specialist for CCE Suffolk. She can be reached at rls63@cornell.edu or at 631-727-7850 x215.

Sample Soil Now for Healthier Landscapes Next Year

Spring is by far the busiest time for gardeners. Between selecting plants, starting seeds, and preparing beds, we often forget about what’s basic: the soil. Suddenly remembering, in April gardeners furiously submit handfuls of soil to our Horticulture Diagnostic Lab for testing, expecting immediate turnaround, and then realize, “What!? It takes how long for limestone to change the pH of my soil!?”

This is why autumn is the perfect time to start preparing your gardens for the growing season ahead. Submitting soil samples to us now allows you enough time to collect your samples properly, understand the test results, and if you need to make amendments to the soil, time for them to activate before next spring.

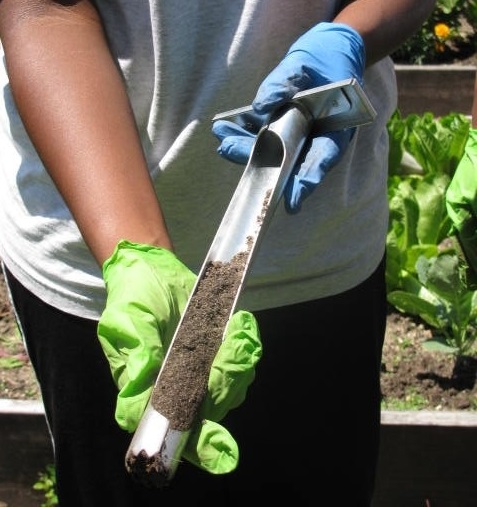
Using a soil auger makes collecting samples easy, but a trowel will work just as well.

Using a soil auger, shown above, makes collecting samples easy, but a trowel will work just as well. Photo by Robin Simmen.

Maintaining the proper soil pH is just as important for maximum crop yields as fertilizing, watering, and pest control. The decision to add lime to raise the soil pH and the amount to apply must be based on a soil pH test and the crop species to be grown. Do not guess. Some plants, like rhododendrons, azaleas, and blueberries as well as other members of the Ericaceae family grow best in acid soil (pH 5.0). Most vegetable garden plants grow best in soil with a pH in the 6.2 range. The recommended range for a lawn is between 6.0 and 7.0.

Instructions for taking a soil sample

First determine how many samples to take. Different gardens/beds, lawns, areas with different soil types, places where such amendments as limestone were added, areas with plants having different pH requirements, and good/bad areas should be sampled separately as described below:

  • In gardens or areas planned for new plantings where the soil will be turned under or rototilled, individual samples should be taken from the upper 6 to 8 inches of soil.
  • In established plantings or lawns where the soil won’t be turned under, individual samples should be taken from the upper 3 inches of soil.
  • Each soil sample should be comprised of 5 to 10 individual samples obtained by walking back and forth diagonally across the area to be sampled.
  • Use a trowel to dig a small hole to the desired depth. Remove a slice of soil from the entire side of the hole and place this in a clean plastic container. Repeat this procedure at each of your 5 to 10 random spots, and place the soil from these spots in the same container, discarding any stones, grass, or other debris.
  • Next, remove two 8-ounce cupfuls of the soil in this container and place them in a plastic bag. Secure the bag. This is your soil sample for that area. Mark the outside of the bag with an identification (i.e. #1, #2, or “A”, “B”, or “East”, “West”). Keep the identification simple.
  • Repeat this entire procedure for each additional garden, landscape bed, and/or lawn area you wanted tested.

You can find soil testing submission forms to accompany your samples on our website at http://ccesuffolk.org/agriculture/horticulture-diagnostic-labs. The cost of a soil pH test is $5 per sample; if you submit five or more samples, they cost $3.50 each. Mail or drop off your samples at 423 Griffing Avenue, Riverhead, NY 11901. Our office hours are Monday through Friday 8:30 a.m. to 4:30 p.m.

Sandra Vultgaggio is Horticulture Consultant for CCE Suffolk. She can be reached by email at sib7@cornell.edu or by phone at 631-727-7850 x387.

Rosemary for Remembrance

Rosmarinus officinalis is a wonderfully aromatic plant with a wide range of uses. An herb steeped in folklore and tradition, “There’s rosemary, that’s for remembrance,” Ophelia says to Laertes in Shakespeare’s Hamlet. The plant has long been used as a memory strengthener, and in Elizabethan times appeared at both weddings and funerals as a token of remembrance. Besides the beliefs that add to the lore of this beautiful plant, rosemary provides great culinary flavorings, is used in toiletries and potpourri, and appeals to gardeners as a simple decorative container plant. With all these accolades, its only drawback is that it cannot survive cold Long Island winters outdoors. With some preparation, however, you can ensure your rosemary plant will follow you indoors and out throughout the years.

In-ground rosemary thrives in coastal California, but not in colder Long Island gardens. Photo c Sandra Vultaggio.

In-ground rosemary thrives in coastal California, but not in colder Long Island landscapes. Photo © Sandra Vultaggio.

To understand how best to conserve your plant, consider where rosemary thrives. Its botanical name, Rosemarinus, comes from the Latin words ros, meaning dew, and marinus, meaning sea. “Dew of the sea” probably refers to the herb’s native habitat among the misty cliffs of the Mediterranean seaside. Rosemary is winter hardy to USDA Zone 8-10, just shy of our cooler, Zone 7 climate. The herb enjoys growing in light, slightly acidic, dry-to-medium, well-drained soils in full sun. Much like the lavender you may already grow, rosemary has very good drought tolerance and cannot abide wet, heavy soils that usually prove fatal to it.

If you intend to keep your rosemary plant alive during winter, bear in mind its Mediterranean home. Since we aren’t able to grow rosemary in our landscapes, keeping it in a pot is often better than planting it in the ground. A well-draining clay pot gives its roots the breathability they crave. Use a high-quality, lightweight potting mix, and consider amending it with additional perlite. This will aid in drainage and keep the media loose, which helps mimic the conditions where the plant grows naturally. Provide a water-soluble fertilizer every two weeks if the growing media doesn’t already contain fertilizer.

During winter, keep the soil in the pot evenly moist: not wet and not dry. A clay pot allows the soil to dry out sooner than non-porous pots do, so use your finger to test soil moisture and decide when to water. Water the plant deeply, allowing water to run through the pot and into the catch tray. Discard the water that runs through.

The two most important factors you must remember about growing rosemary indoors during winter is that it will not tolerate wet feet or dry air. Forced hot-air heat inside the home can dry out its foliage quickly, so misting the plant weekly is important. Keep rosemary indoors somewhere where it gets bright light but also stays on the cooler side.

Follow these tips, and come the spring thaw, your rosemary plant should still be thriving. Once all danger of frost has past, take the plant out of the pot, tease its roots apart a bit (cutting out a small portion of them if necessary) and add some fresh potting soil. Place the re-potted rosemary outdoors in a full-sun location for the remainder of the growing season, and enjoy its beauty again for another year!

Sandra Vultgaggio is Horticulture Consultant for CCE Suffolk. She can be reached by email at sib7@cornell.edu or by phone at 631-727-7850 x387.