
Completing Personal Information
Much of the personal information in Concur is populated from Workday, so you may not have to make many changes. To see our video on setting up your profile, see Setting Up Your Profile in Concur on YouTube.
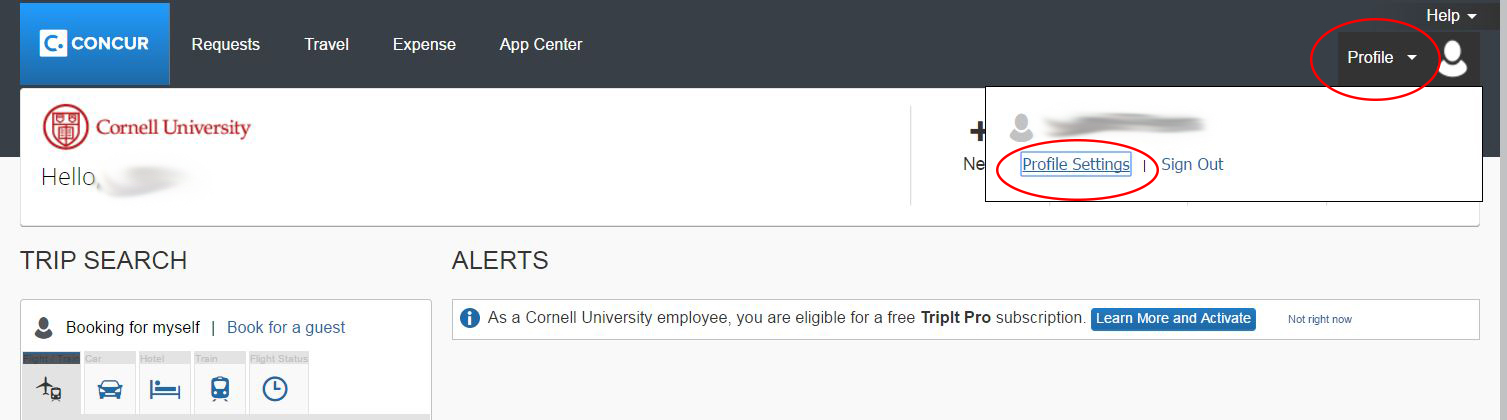
- Select Profile in the upper-right corner of the Concur screen.
- Select Profile Settings under your name.
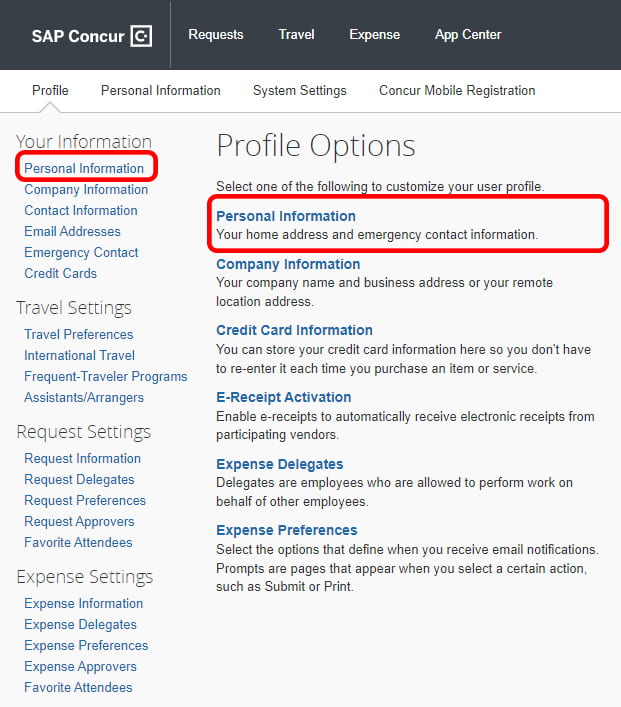
- Select Personal Information.
- In the first section, verify that your name is correct. If the photo identification you present at the airport contains a middle initial or middle name, enter it in the Middle Name field, if necessary. If you have no middle initial, select the box next to No Middle Name.
The field will be locked if your full middle name is populated in the Middle Name field. To change your middle name, contact your HR representative and have the change made in Workday.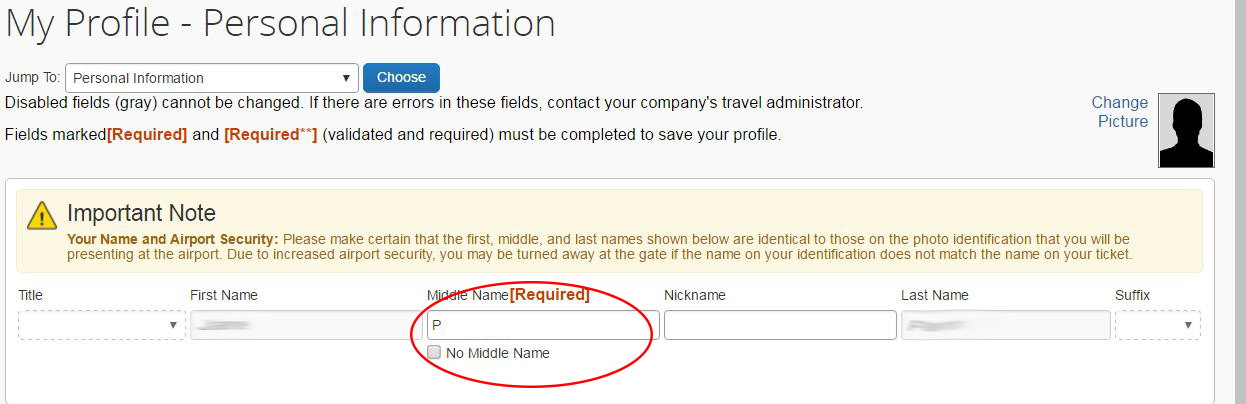
- Click Save under this section.
- Verify that your employee ID is correct in the Company Information section.
- In the Work Address section, select your location from the drop-down menu, if different from what’s there.
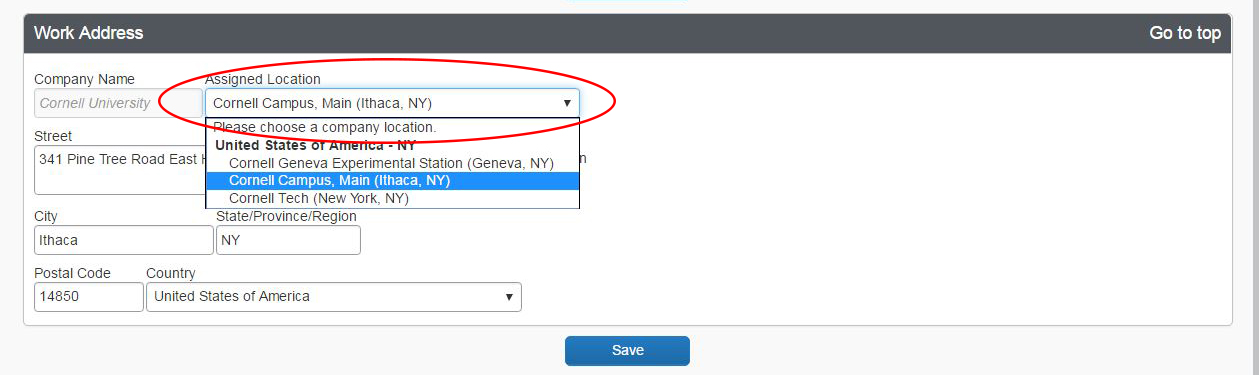
- Select Save.
- In the Contact Information section, enter either your work or home phone, if necessary. If you use your cell phone as your home phone, you can enter that as your home phone.
- Select Add a new device to add your mobile phone (i.e., cell phone, smartphone) or another device such as a tablet.

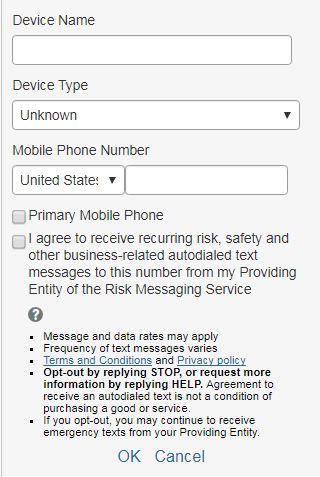
- For Device Name, enter a nickname for your device.
- Select your device type from the Device Type drop-down menu.
- Enter your Mobile Phone Number in the space provided, including the area code (i.e., 6072270000)
- Select to check the box to indicate whether this is your Primary Mobile Phone.
- Select to check the box to agree to receive text messages on your mobile phone from Concur’s risk management service (i.e., the “providing entity”) about location-specific risk and safety conditions and other travel alerts (i.e., “autodialed text”) while you’re traveling. You can opt-out of these messages at any time by replying STOP to a received text message. Request more information about a message by replying HELP.
- Select OK.
- Select Save.
- In the Email Address section, select Verify to validate your email address in Concur. Concur uses this validation to associate information you send from your email address with your Concur account and to send travel notifications to you if you choose. The email address you verify first should be your Cornell NetID address (netid@cornell.edu), not an alias address.
If you use an alias (e.g., johnsmith@cornell.edu), select Add an email address, and verify that address, too. Verify any address you might use to send plans or receipts to Concur, including personal accounts (e.g., Gmail, Yahoo, etc.).
- Open the “Email Verification from Concur Solutions” email you received from Concur (it will come from Concur Email Verification <donotreply@concur.com>), and copy and paste the verification code into the Enter Code field below Verification Status that appeared on the Concur site when you clicked Verify.
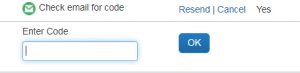
- Select OK.
- In the Emergency Contact section, enter your emergency contact, if necessary. This is not required, but useful in case of an emergency.
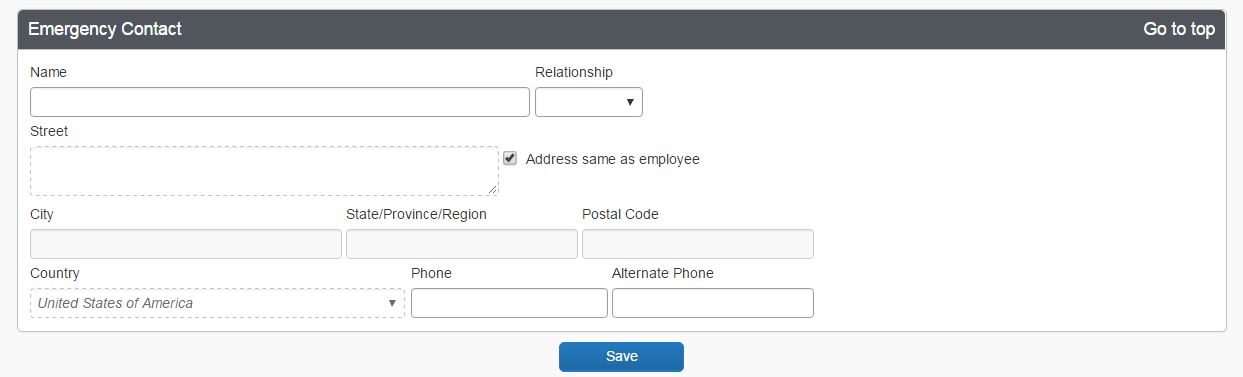
- Select Save.

Next: Complete your travel preferences
Resources: