by Paul Allen
If you are at Cornell developing and deploying sites or services using AWS, one of the things you’ll usually want to do is ensure that those sites and services can be accessed using a hostname in the cornell.edu domain. Keeping an existing cornell.edu hostname is even more critical if you are moving a service from Cornell infrastructure to AWS infrastructure. This article describes how to use the Cornell DNS system in conjunction with AWS Route53 to deploy services in AWS that respond to cornell.edu host names.
Scenario
Let’s say we want to deploy a web site running on AWS at URL http://example.cloud.cit.cornell.edu. The Cornell DNS system and Cornell IT policy won’t let you directly reference an AWS IP address in a Cornell DNS “A” record. Further, even if we could do that, we wouldn’t get to take advantage of all the flexibility and features that Route53 offers–for example health checks on backend servers and dynamic failover.
At Cornell, in order to create the example.cloud.cit.cornell.edu hostname, I need to be an administrator of the cloud.cit.cornell.edu sub-domain in the Cornell DNS system. I also need privileges to a public hosted zone in Route53. In this example, I’ll use cs.cucloud.net, a public Route53 hosted zone which I have permissions to administer in AWS.
Here’s the short version of what needs to happen in this scenario:
- Setup Route53 to serve content from example.cs.cucloud.net.
- Add a CNAME to Cornell DNS so that example.cloud.cit.cornell.edu is an alias for example.cs.cucloud.net.
The rest of this article goes through the specifics of how to accomplish that. This particular example will use:
- an AWS EC2 instance serving our site
- an AWS Elastic Load Balancer (ELB) to make our site public
- Route53 to configure the non-cornell.edu DNS name
- Cornell DNS to configure the CNAME
Step 1 – Get a site running in AWS
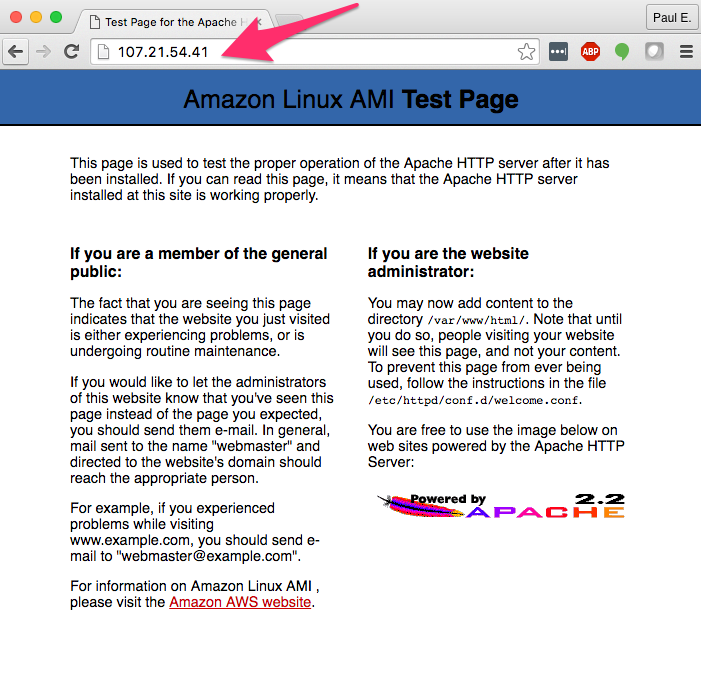
This doesn’t necessarily need to be your first step, but the explanation is easier if we start here. In this example I have an EC2 instance running a generic Apache server showing a generic test page. AWS provides very detailed instructions for setting up Apache on an EC2 instance. Right now, you don’t have to worry about any hostnames–the goal is to make sure you have content being delivered from AWS. My example instance is below.
There are many other ways to serve content or applications in AWS, but I’m just picking one of the simplest ways for this article. Other options might include using CloudFront and S3 to serve a static web site or using Elastic Beanstalk to run an application. There are a plethora of other ways to accomplish this as well.
Here are the important things about this instance configuration:
- It is running in a public subnet with a public IP assigned. In a real situation, we would run the instance on a private subnet. But, this configuration is easier to test as you work through the example.
- The Security Group (named “dns-example”) attached to the instance allows HTTP (port 80) and SSH (port 22) access from anywhere (0.0.0.0./0). Again, not how we’d setup things in real life, but good enough for now to accomplish our current goals.
- Apache is installed and running in the instance. You can check that by pointing your browser to the public IP address of your instance as shown below.
Step 2 – Configure an Elastic Load Balancer
Strictly speaking I don’t need an ELB to accomplish my goal, but using an ELB is a best practice and allows us to easily configure Route53 to direct users to our content.
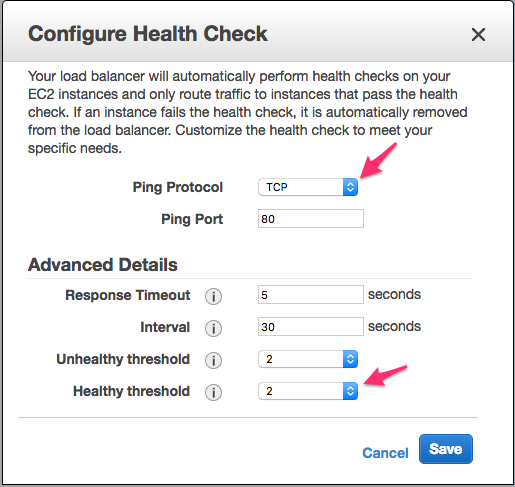
Again, AWS provides step-by-step instructions for creating an ELB and I’ll register the instance I already have running to my new load balancer. Those AWS instructions are great for our situation, except for one thing: the ELB health check configured in the instructions won’t quite work if the only content I’m serving from my instance is that default test page. The reason for that is that the test page returns a HTTP status of code 403 instead of 200. That 403 code will cause the ELB heath check configured in the instructions to fail and the ELB will take your instance offline. Instead of a having the ELB check whether “http:/107.21.54.41:80/” returns a 200 status, we need to loosen that up to a TCP check on port 80 as shown below. The TCP check just makes sure that something on my instance is accepting connections on port 80. I’ll set the “Healthy threshold” value to 2 so that the ELB will bring my instance back online more quickly–useful for our scenario but maybe not in real life.
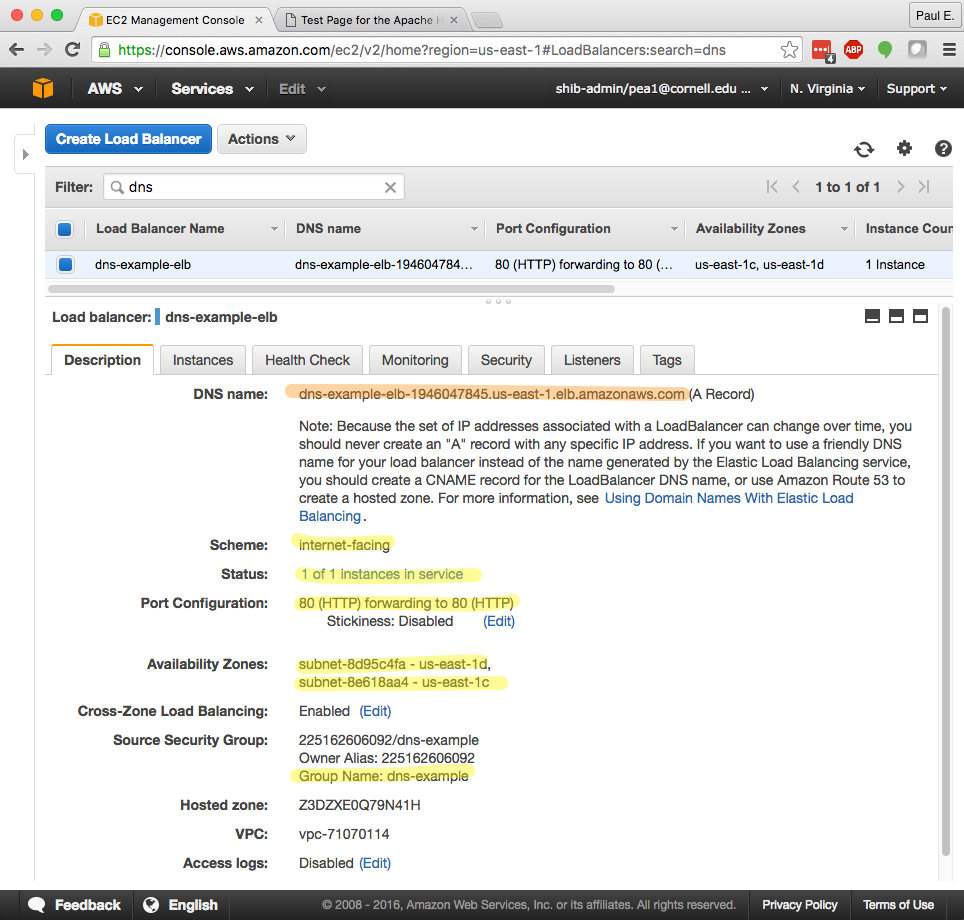
Besides the health check configuration, the key points of my ELB configuration are highlighted in yellow on the screenshot below:
- The ELB scheme is “internet-facing”.
- My EC2 instance is registered with the ELB and it is recognized as healthy (because of the looser health check). I.e., “1 of 1 instances in service”.
- The ELB is configured to use public subnets in my chosen availability zones. You’ll have to take my word for it that “subnet-8d95c4fa” and “subnet-8e618aa4” are the public subnets in my VPC.
- The Source Security Group allows HTTP traffic to the ELB on port 80. In this case I’m using the same security group as I did for my EC2 instance.
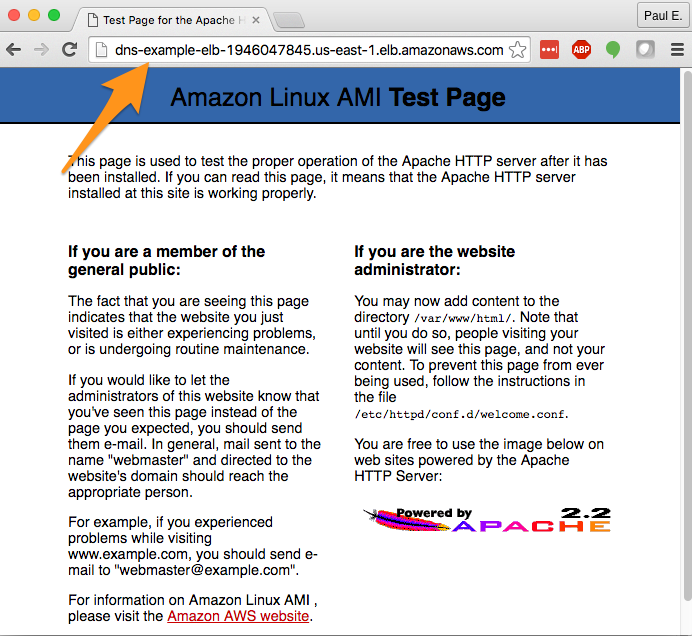
Note that the ELB “Description” tab also provides you with information about the DNS name for the ELB, highlighted in orange above. You should be able to point your browser to that name and see your test page appear. If not, go back and confirm the key configuration details in your EC2 instance and ELB.
Step 3 – Configure Route53
Now we are ready to get Route53 looped into our configuration.
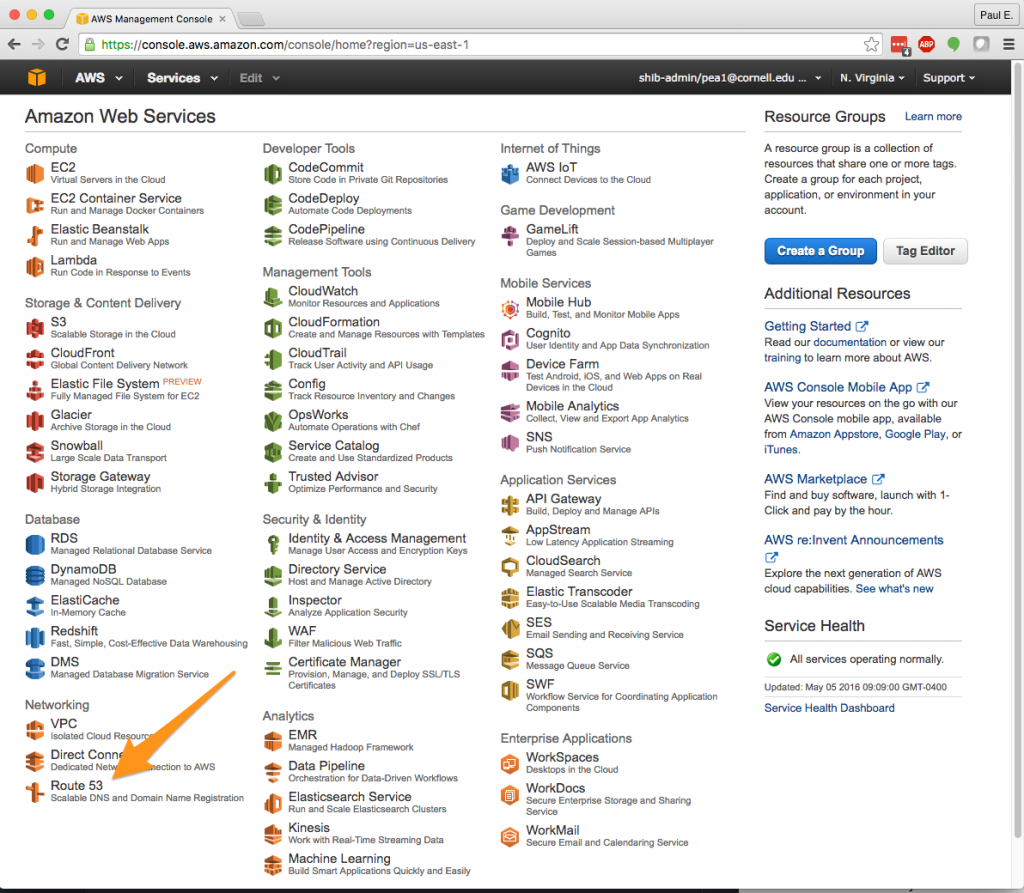
1. Start by pointing your AWS Console to the Route 53 service.
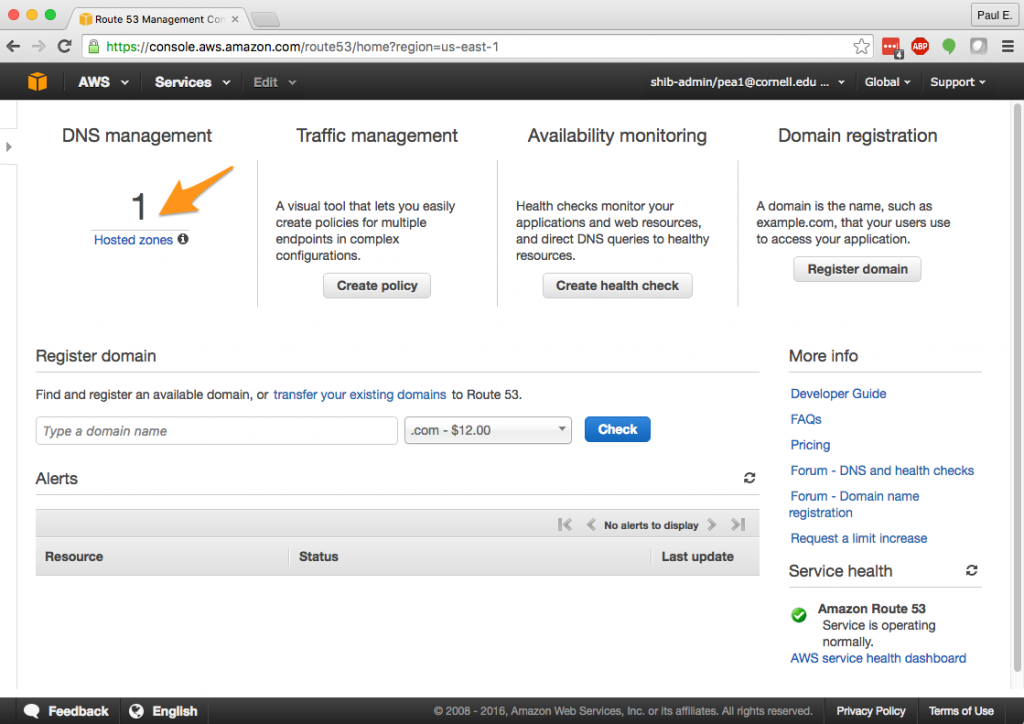
2. You will need to have privileges over at least one public Route 53 hosted zone. Setting up a public hosted zone is beyond the scope of this article, but contact cloud-support@cornell.edu if you need a hosted zone for your Cornell AWS account but don’t have one. I’ll be using cs.cucloud.net as the hosted zone for this article.
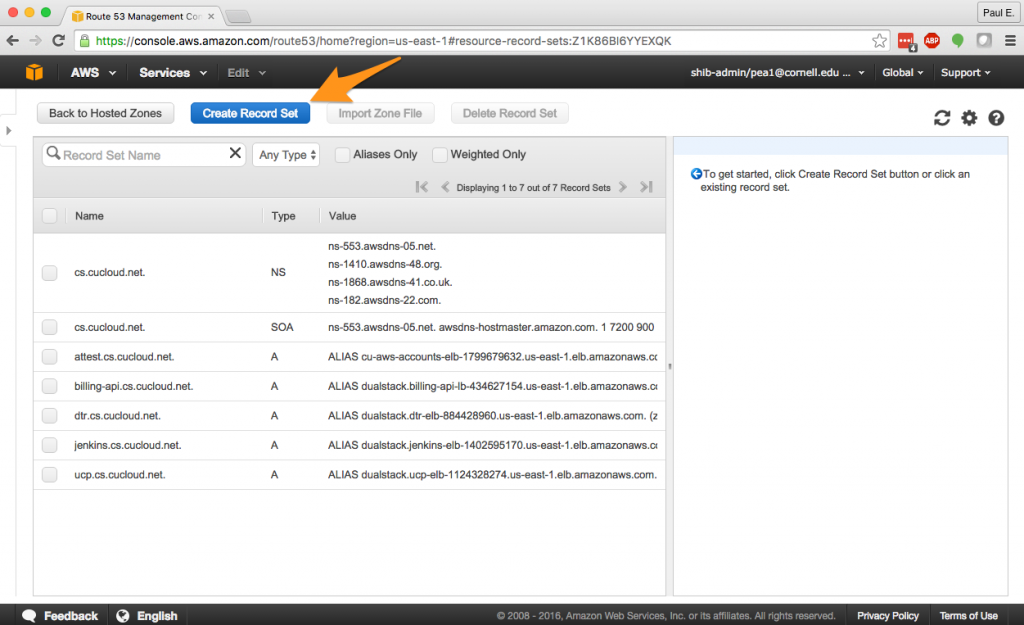
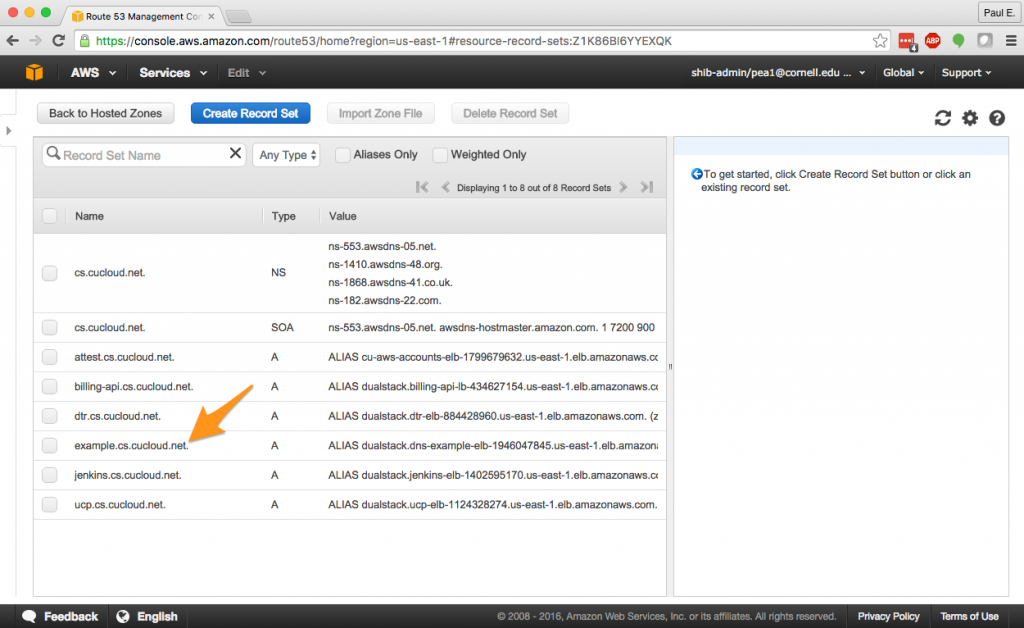
3. In the cs.cucloud.net hosted zone, I’m going to “Create Record Set”.
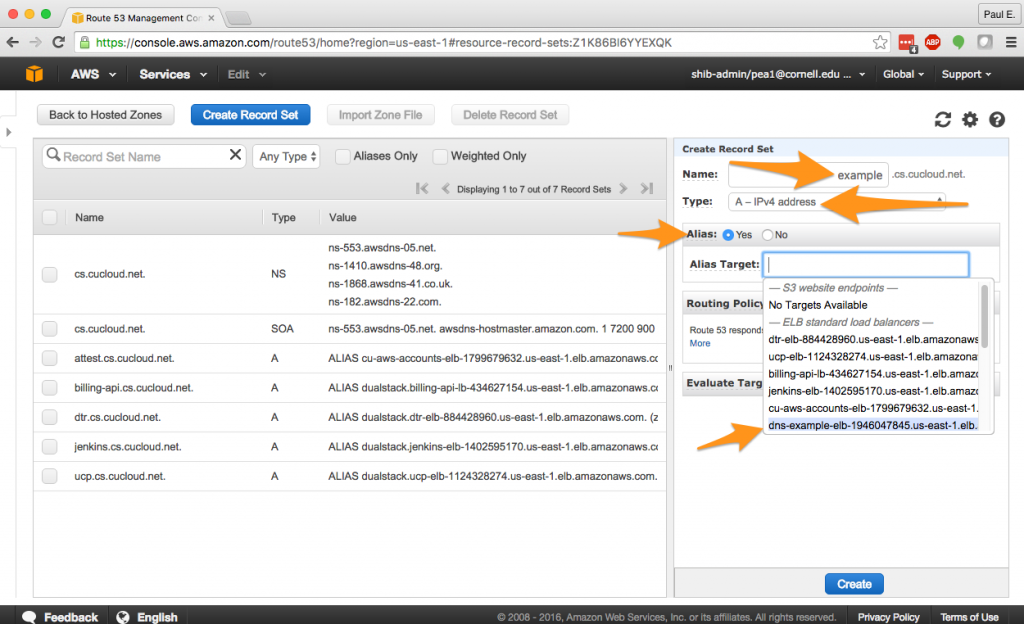
4. In the “Create Record Set” dialog, enter “example” as the name, which will configure the name “example.cs.cucloud.net”. Ensure that the record type is “A – IPv4 address”. Select “Yes” for “Alias.” and then choose your ELB from the dropdown menu. Leave the remaining items with their default values, and select the “Create” button.
This should have created a new name in your hosted zone. That’s great, but you might find yourself asking what the heck is an “Alias” record? AWS calls the Route53 Alias functionality an “extension” to the standard DNS system as we know it. Alias records in Route 53 will automatically track changes in certain AWS resources and always ensure that a Route 53 name points to the right IP address. For example, if the IP address of our ELB ever changes, the Alias functionality will automatically track that change and keep our name working. AWS documentation contains more about deciding between alias and non-alias records. If you go back and look at the fine print on the ELB “Description” tab you will see a warning there about avoiding using the IP address of an ELB in DNS records because, over time, the IP address of the ELB may change through no fault of your own.
5. Now you should be able to point your browser at the new Route 53 name and see your test page being delivered from your EC2 instance via the ELB.
You are now done with the AWS side of things. Time to move on to Cornell DNS.
Step 4 – Configure Cornell DNS
The goal in this step is to setup a new CNAME in the Cornell DNS system pointing to the new Route 53 name we just created. You will need admin privileges to the Cornell sub-domain in which you want to create the name. Here, I have privileges to the cloud.cit.cornell.edu sub-domain.
1. Navigate to the Cornell DNS batch processing interface. You will need to authenticate with your Cornell netID to access the batch interface.
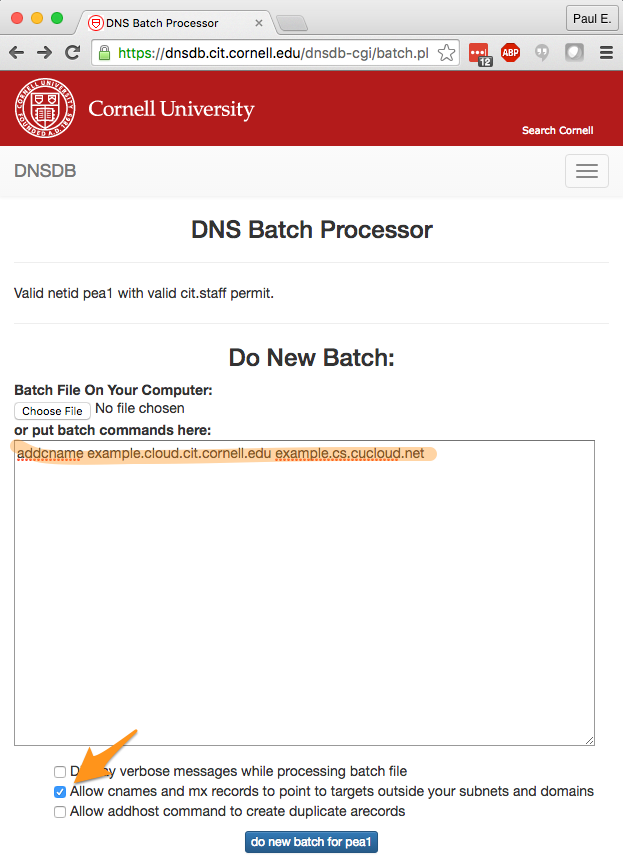
2. Enter “addcname [your-host-and-subdomain].cornell.edu [your-route-53-name]” into the batch processor. The batch command for this example is “addcname example.cloud.cit.cornell.edu example.cs.cucloud.net”. Also be sure to check the box that says “Allow cnames and mx records to point to targets outside your subnets and domains”.
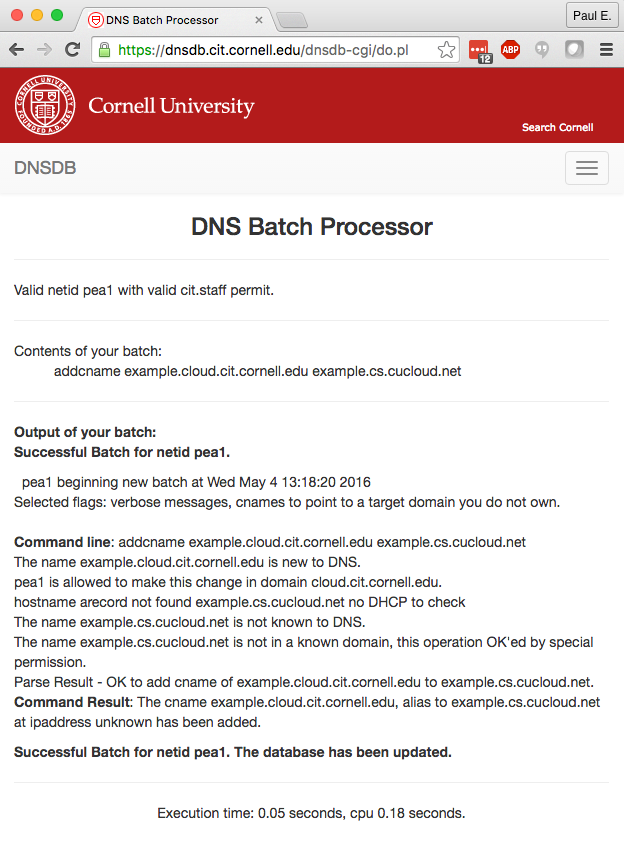
This should result in output confirming that the CNAME was created.
3. Now wait. The Cornell DNS changes may not take effect immediately. In the worst case, they are pushed out about 5-10 minutes after the top of each hour. You can use ping to test whether the Cornell name has been published. E.g., “ping example.cloud.cit.cornell.edu”. As soon as ping stops reporting that it cannot resolve the name, you are in business.
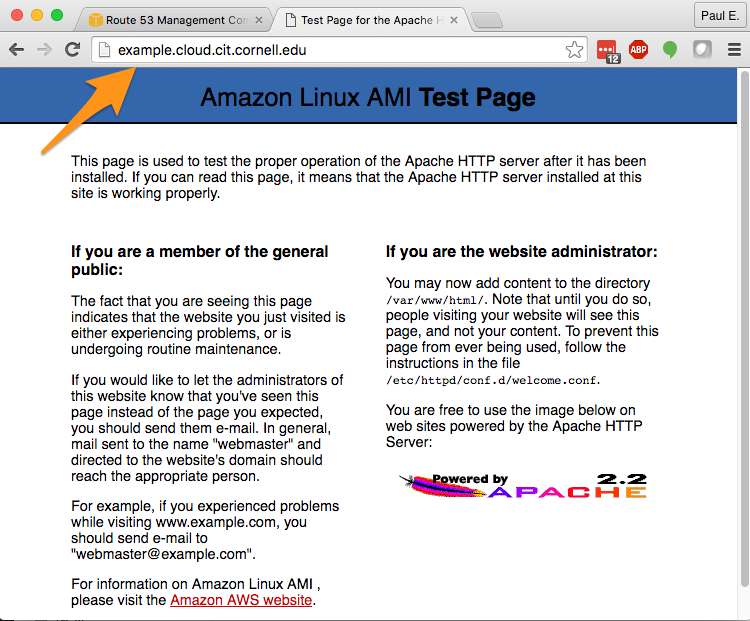
4. Point your browser to your new Cornell DNS name. If you see your your AWS Apache test page, you have achieved your goal. If not go back and troubleshoot, examining the key configuration items pointed out earlier in this article.
Improvements
Now that you know how to configure an AWS service to respond to Cornell DNS names, there are several things you might want to do to transform this example into something nearing a production configuration.
- To achieve better fault tolerance, add more EC2 instances serving your content/service. You might even want to setup an AWS autoscaling group. If you manually add instances, be sure not to forget to register them with your ELB.
- Instead of running EC2 instances on public subnets, move them to your private subnets to better protect them from the bad guys.
- Review the Security Groups you used for the ELB and your EC2 instance(s). Improve them by reducing access to the minimum needed for your service. That might mean allowing only HTTP/HTTPS traffic on ports 80 and 443 to your ELB. For the EC2 instance(s), you could reduce the scope of traffic on ports 22, 80, 443 to just the IP range in your VPC subnets. Be sure that the ELB sitting on your public subnet(s) can still access the appropriate ports (e.g., 80, 443) on your EC2 instances. Also be sure not to block yourself from getting to port 22 if you need to admin your EC2 instance(s).
- Once you begin serving real content on your backend server (i.e., not the default test page), change the ELB health check to use an HTTP or HTTPS check.
- Consider adding health checks and failover to your Route 53 configuration.
- Setup the ELB to serve HTTPS traffic by uploading a server certificate into AWS Identity and Access Management Service and configuring your ELB to use it.
- Turn on access logging for the ELB.


