Category Archives: agriculture

Creating habitat for beneficial insects: We planted it. Did they come?

Woman wearing sunglasses and a baseball cap is emptying blue and yellow bowls filled with soapy water and dead insects into a deli cup.
Here I am collecting insects from our yellow and blue pan traps last September.

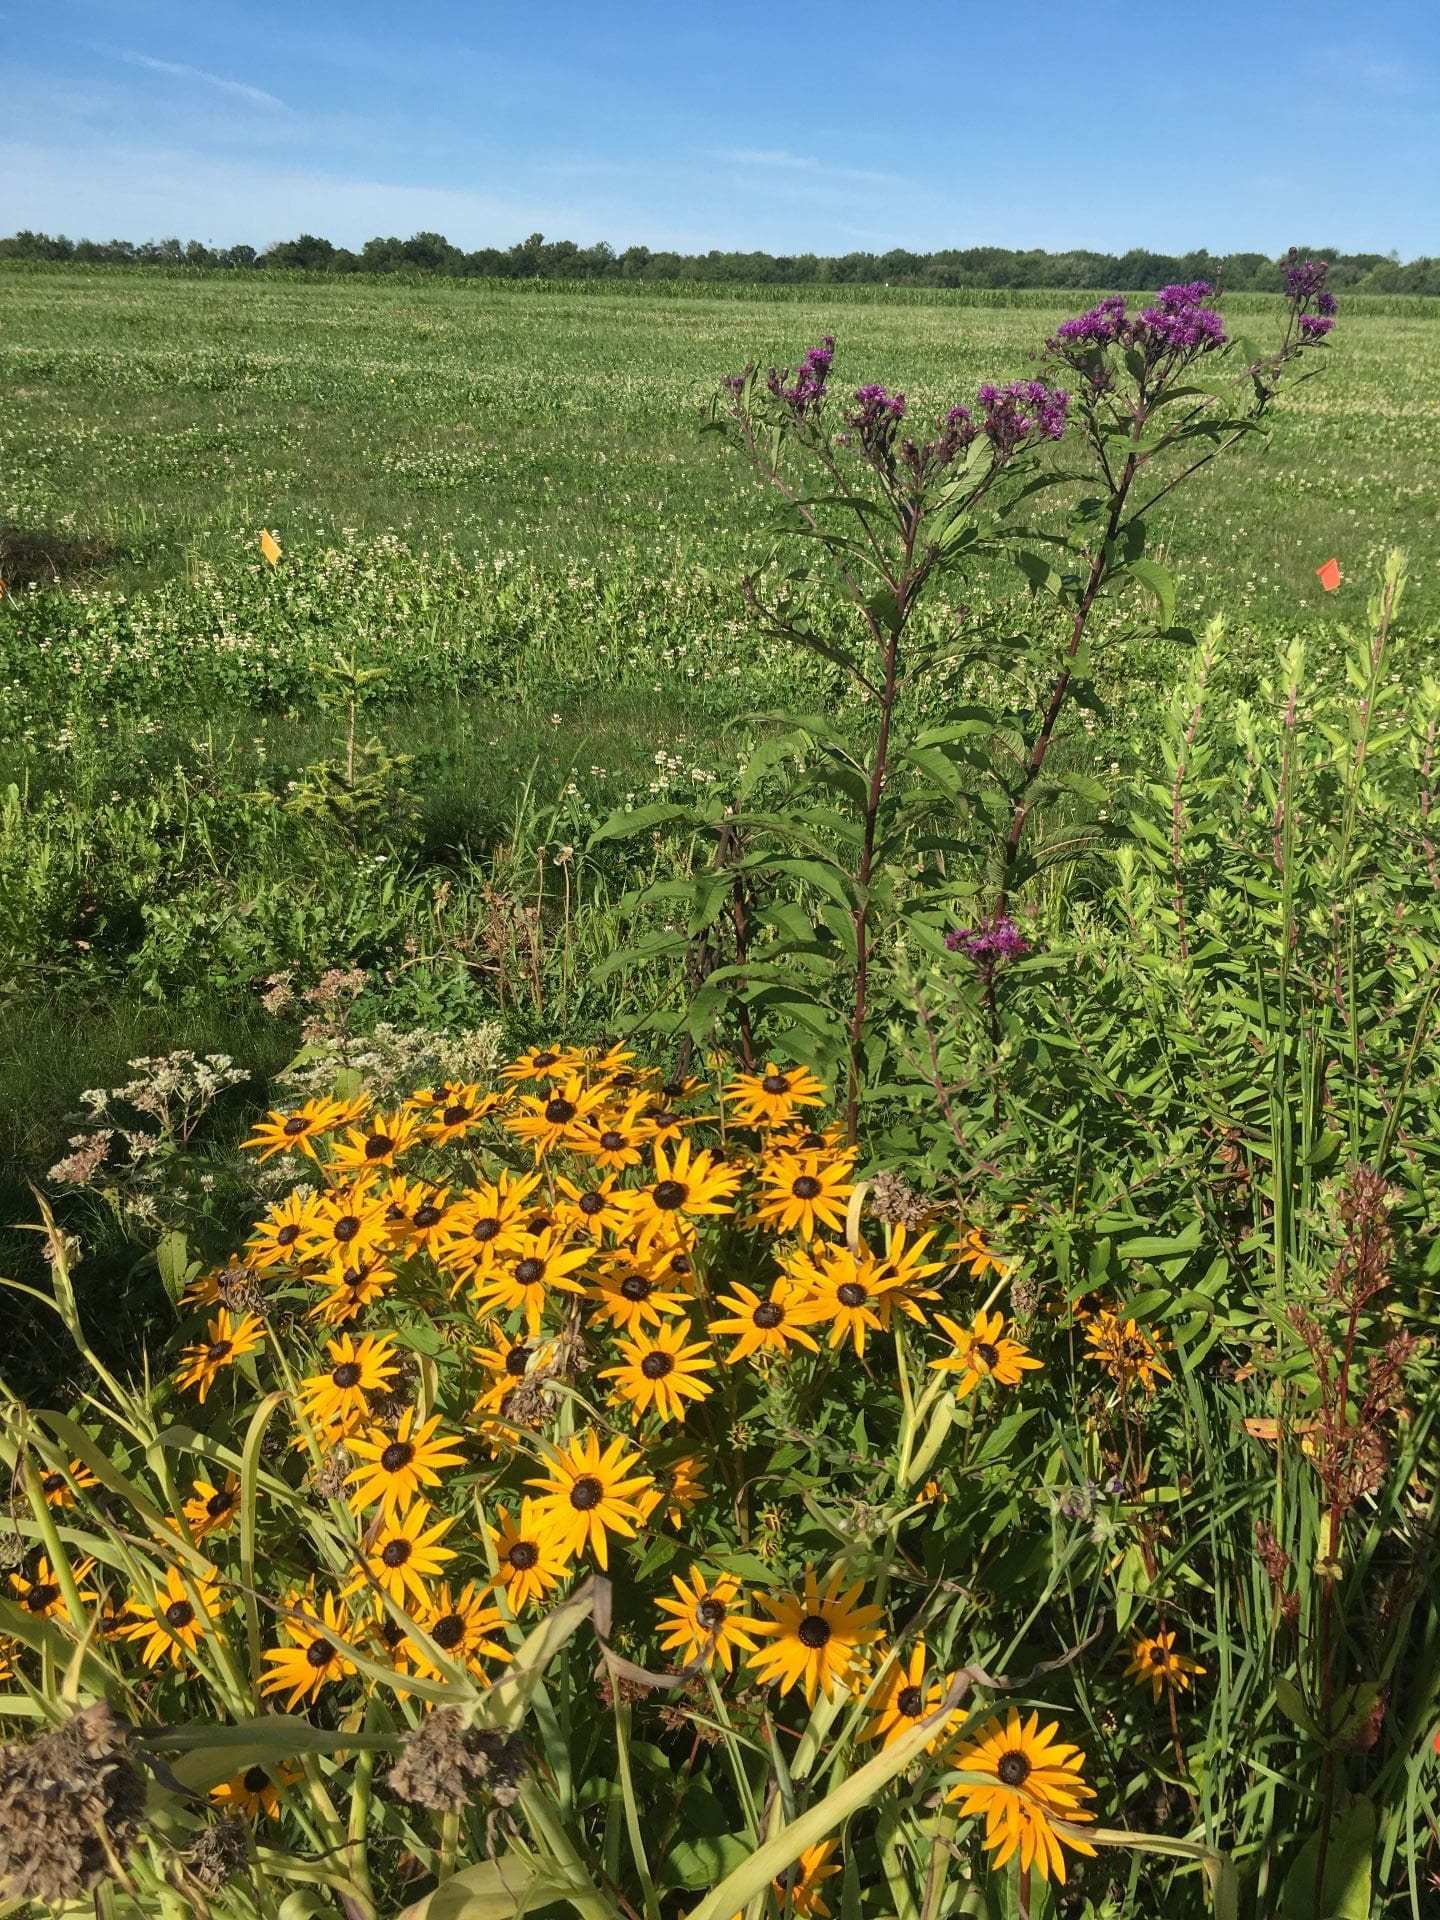
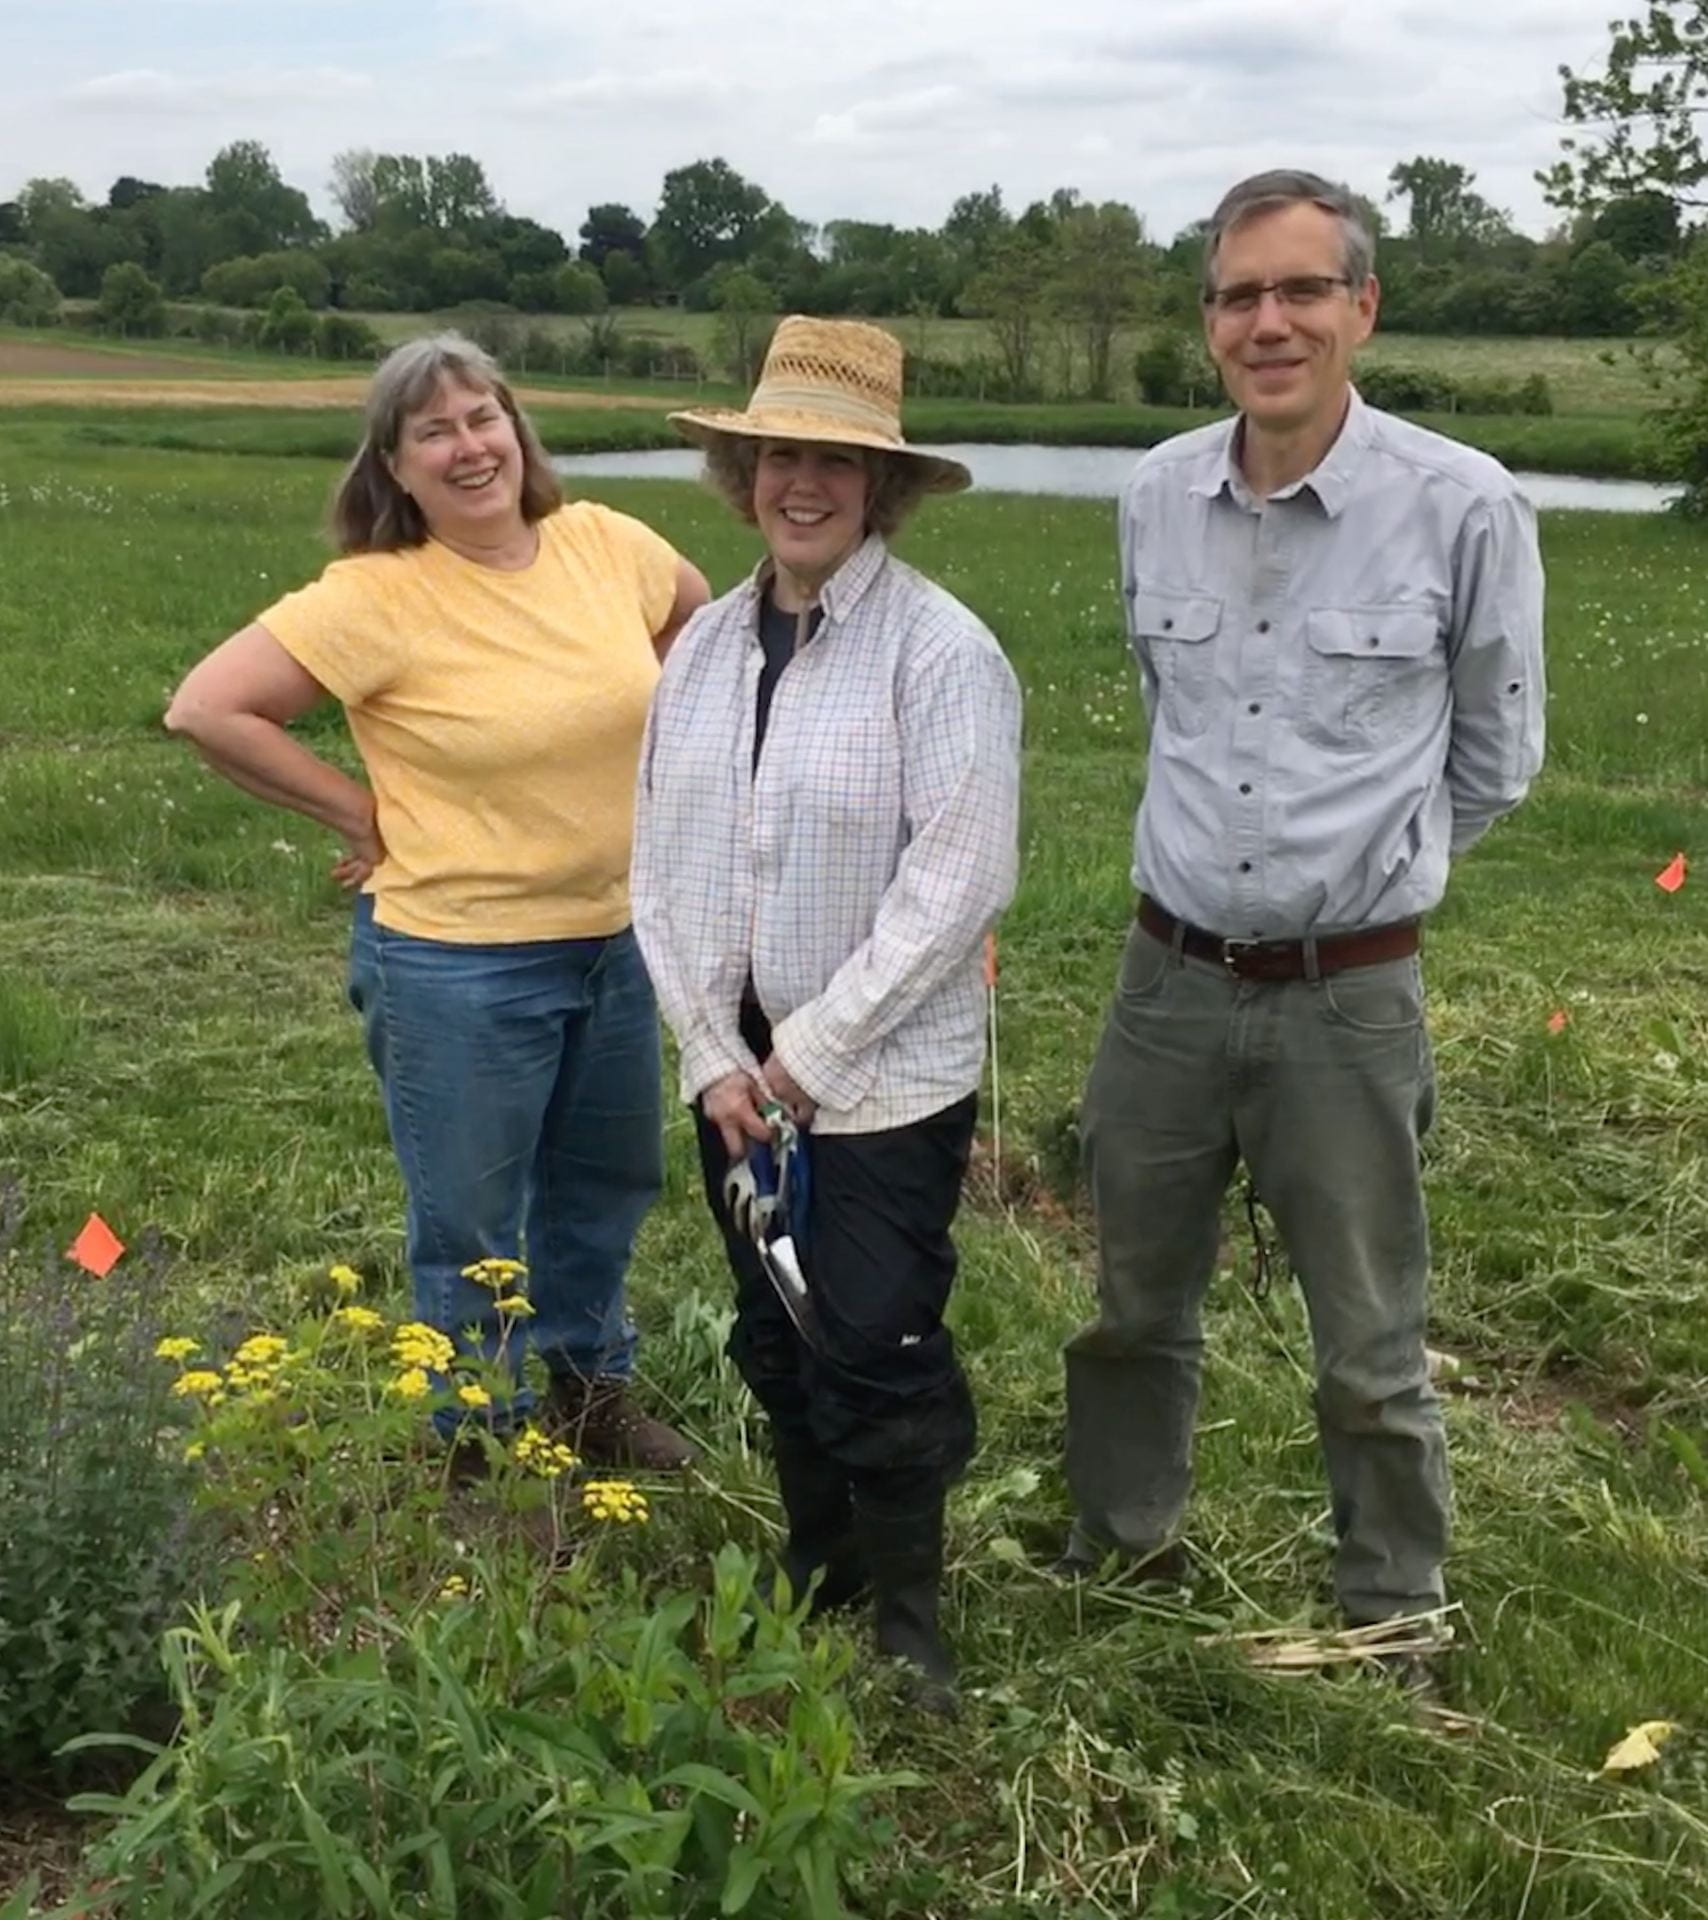
Hopefully you’ve been following along with a project I’m working on with Betsy Lamb and Brian Eshenaur to establish (and document the impacts of) habitat for natural enemies of pests and pollinators (collectively, beneficial insects). In December, I wrote about how the plants were growing, and in February I wrote about the time and money we’d invested in the project so far and the success of our weed management strategies. I promised an update on insect sampling, and here it is!

First of all, let me clarify that we were collecting more than just insects. Insects only have six legs. We also collected arachnids like spiders (and harvestmen), which usually have eight legs, and pillbugs, millipedes, and centipedes, which have many more than eight legs. All of these “bugs” could be correctly called arthropods. But there’s more! We also counted earthworms (which are annelids) and slugs and snails (which are mollusks). Hopefully the entomologists in my audience will pardon my use of the term “insect” to include creatures that crawl or fly but may have more (or less) than six legs throughout the rest of this post.

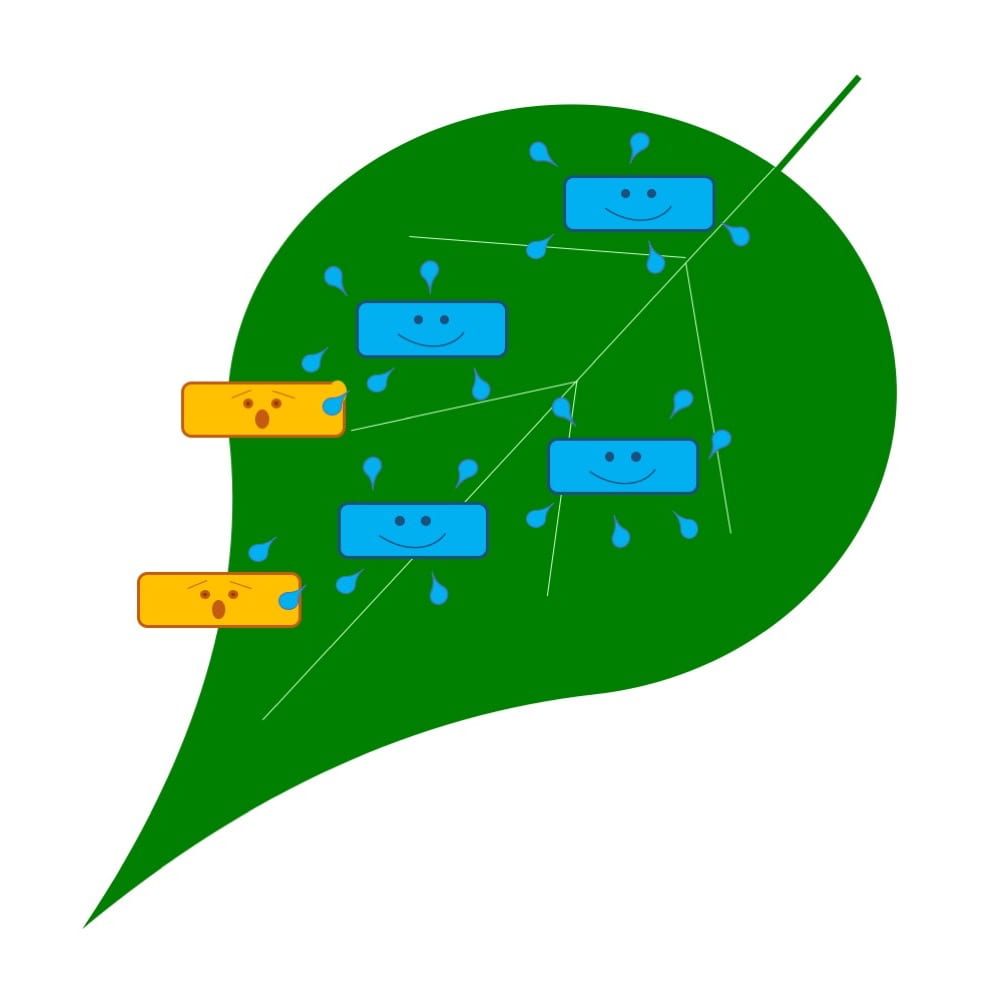
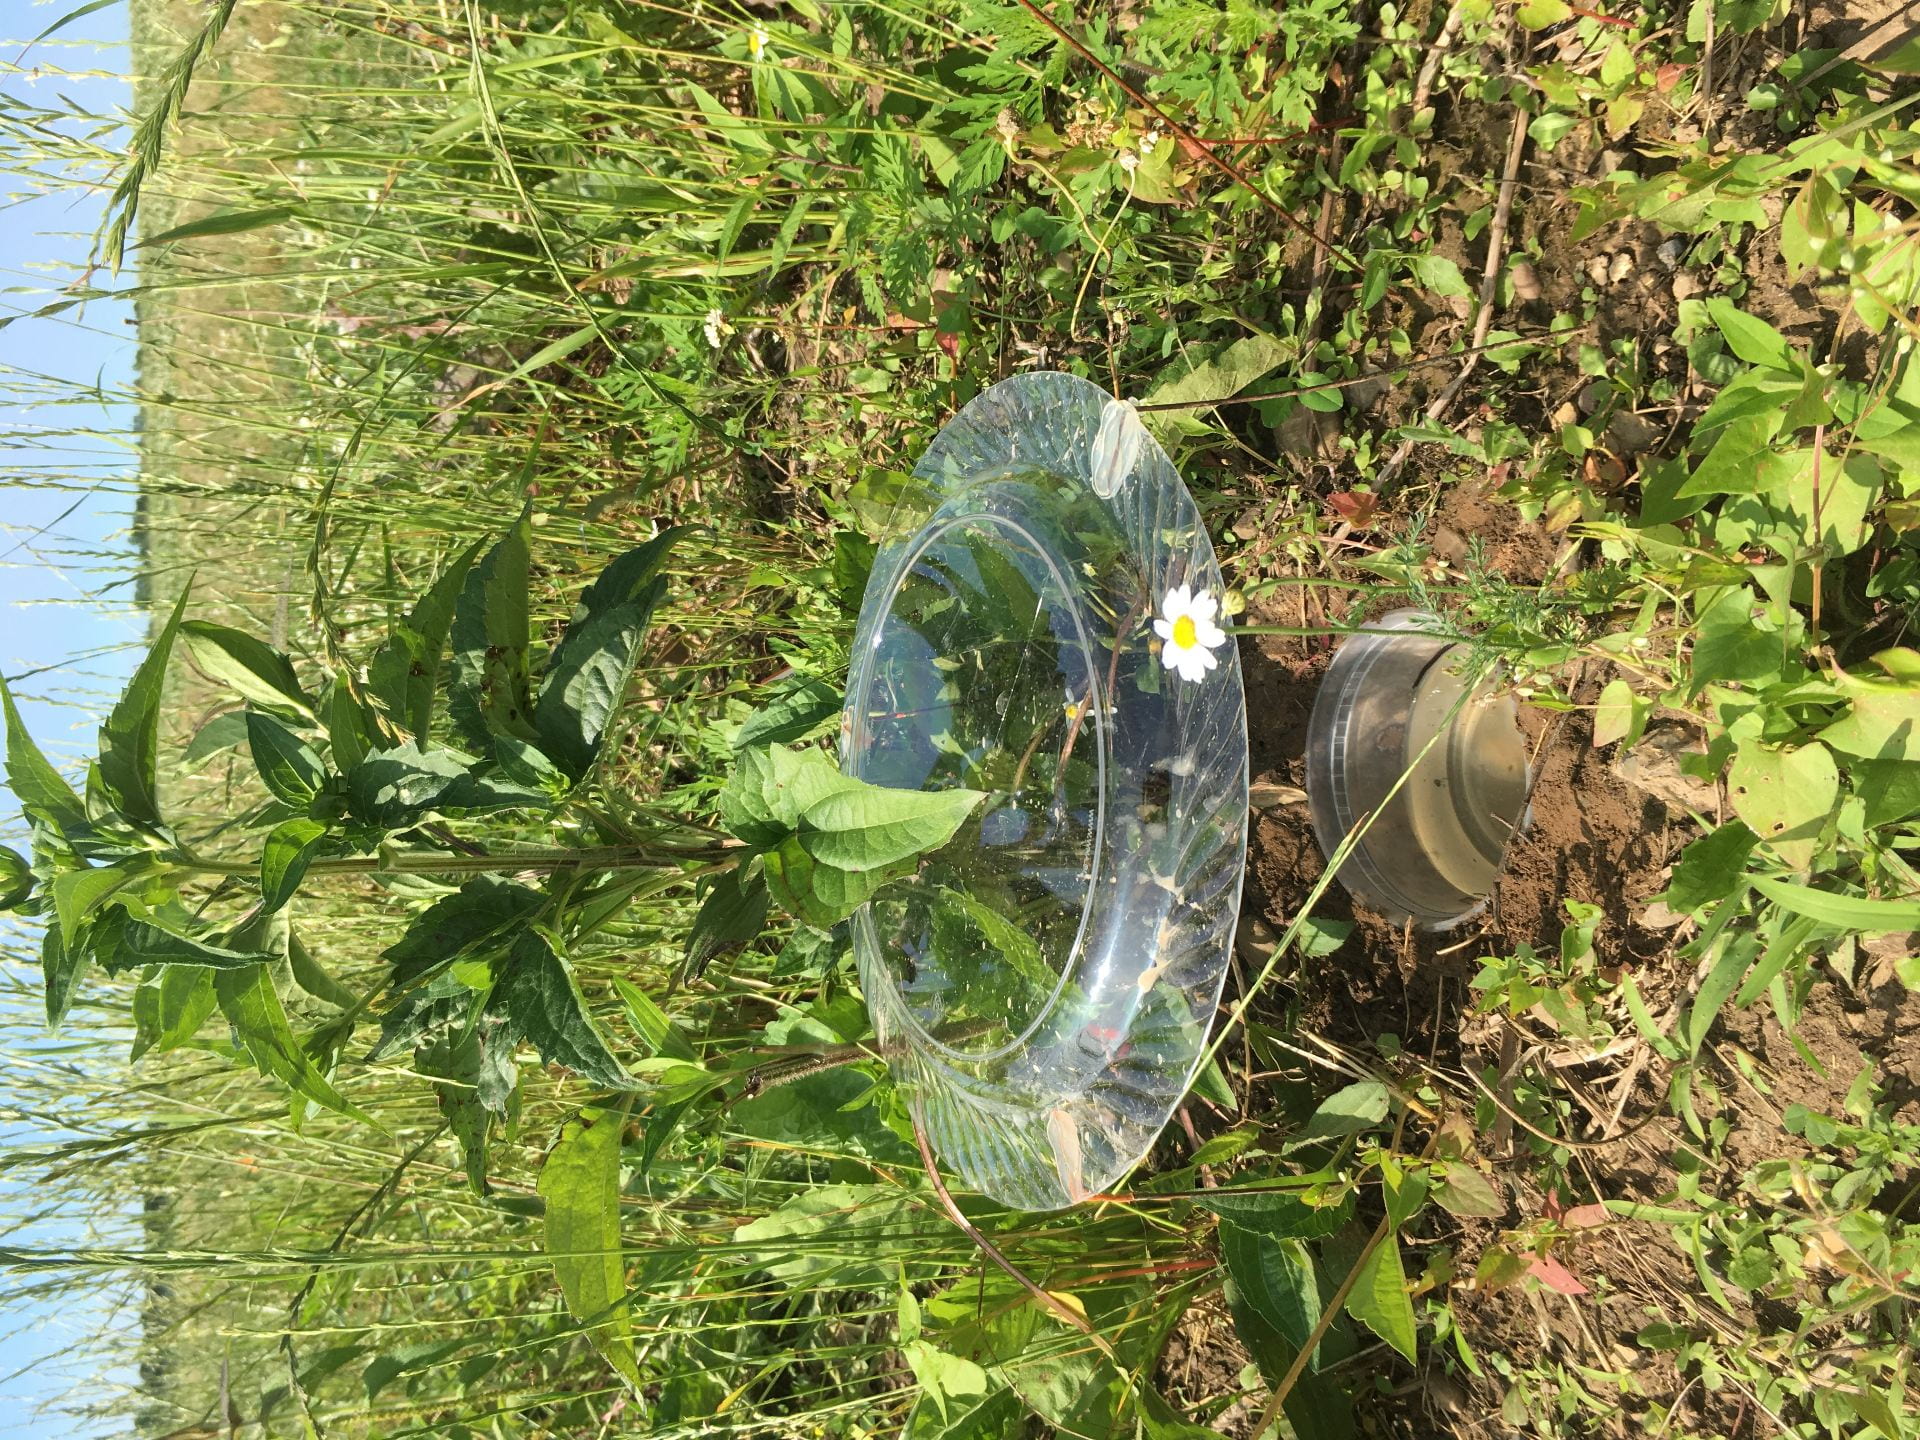
I described the ways that we collected insects in an earlier post. As a quick refresher:

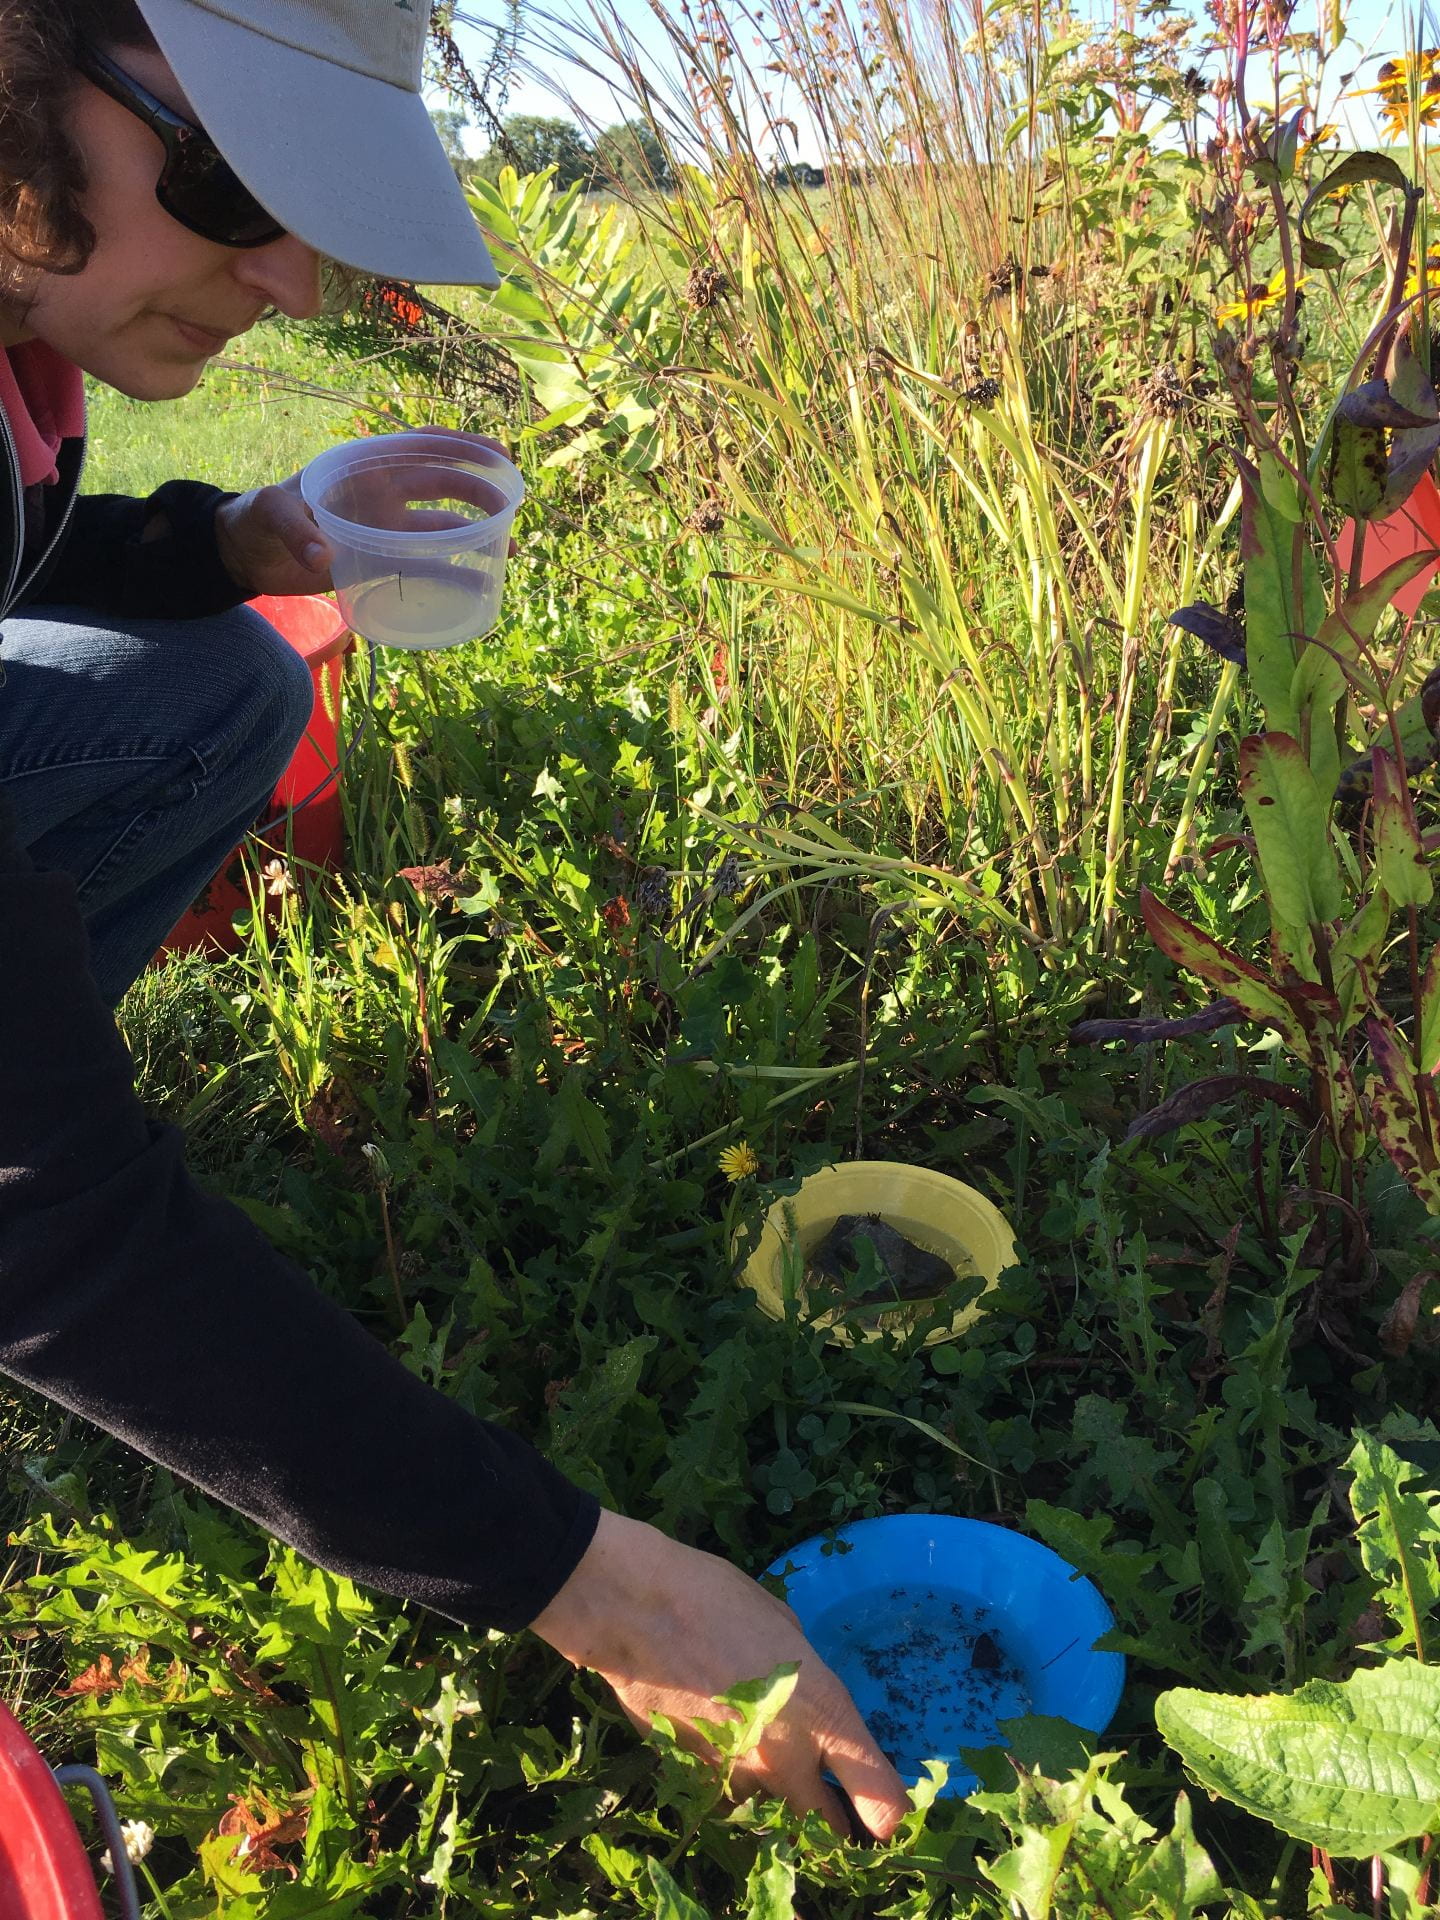
  • Pan traps catch flying insects, especially those attracted to the colors yellow and blue.
  • Pitfall traps catch insects that crawl along the soil surface.
  • Sweep nets catch insects that are flying or hanging out on plants.
The left picture (pan traps) shows a yellow and a blue plastic bowl sitting amongst grass and weeds. Each contains a rock and is filled with soapy water. The middle picture (pitfall trap) shows a deli cup buried in the ground to its rim and filled with liquid. A clear plastic dinner plate is held above the deli cup by wire legs. The picture on the right (sweep net) shows a woman wearing a t-shirt, jeans and a baseball cap sweeping a large white canvas net just above the ground as she walks through a field.
Different methods used for sampling insect from our habitat plots included pan traps, pitfall traps, and a sweep net.

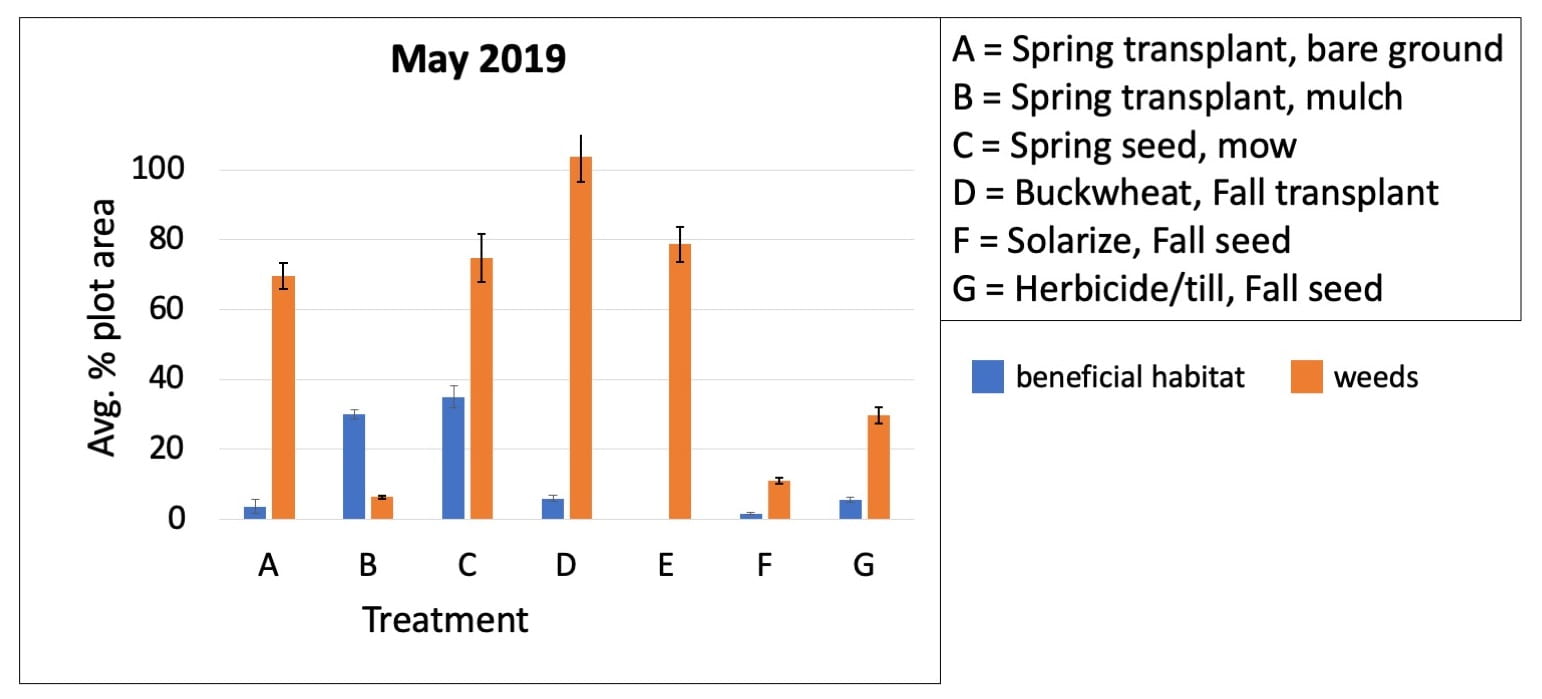
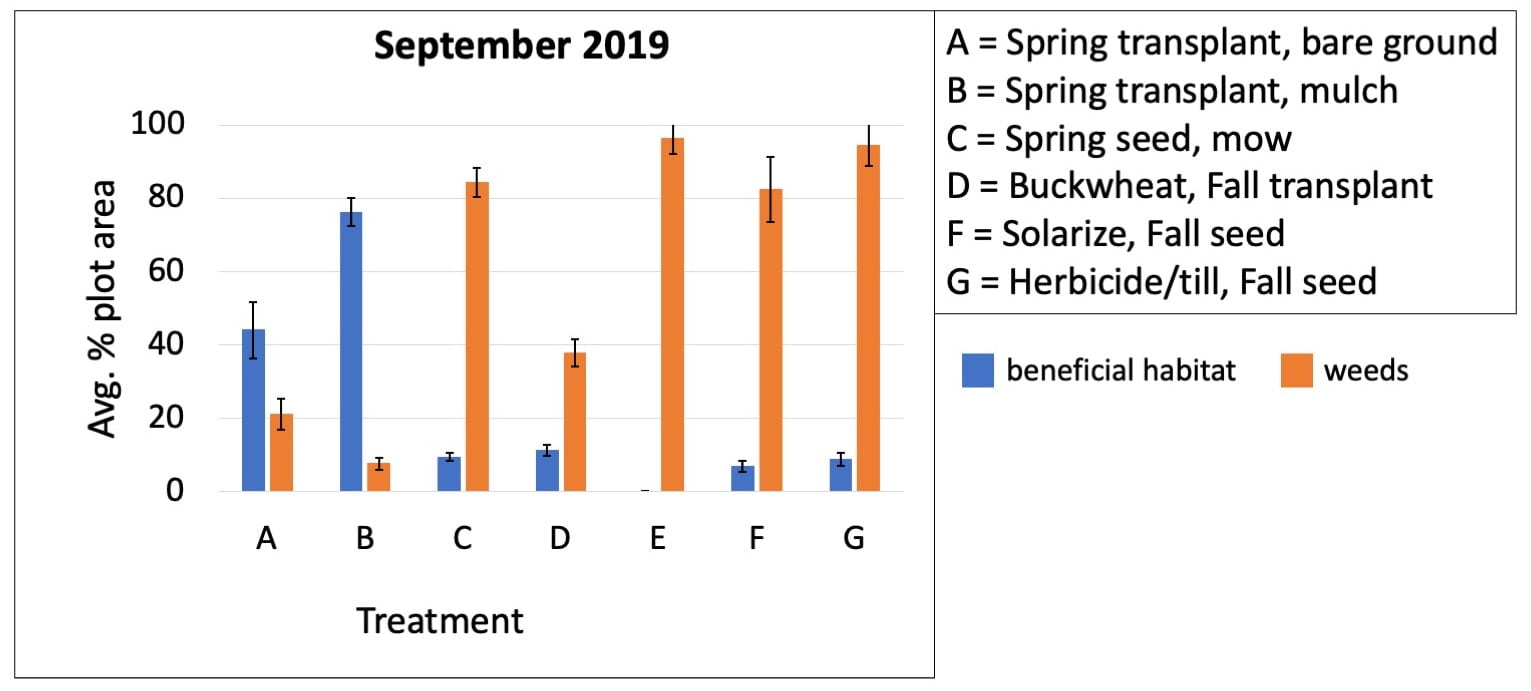
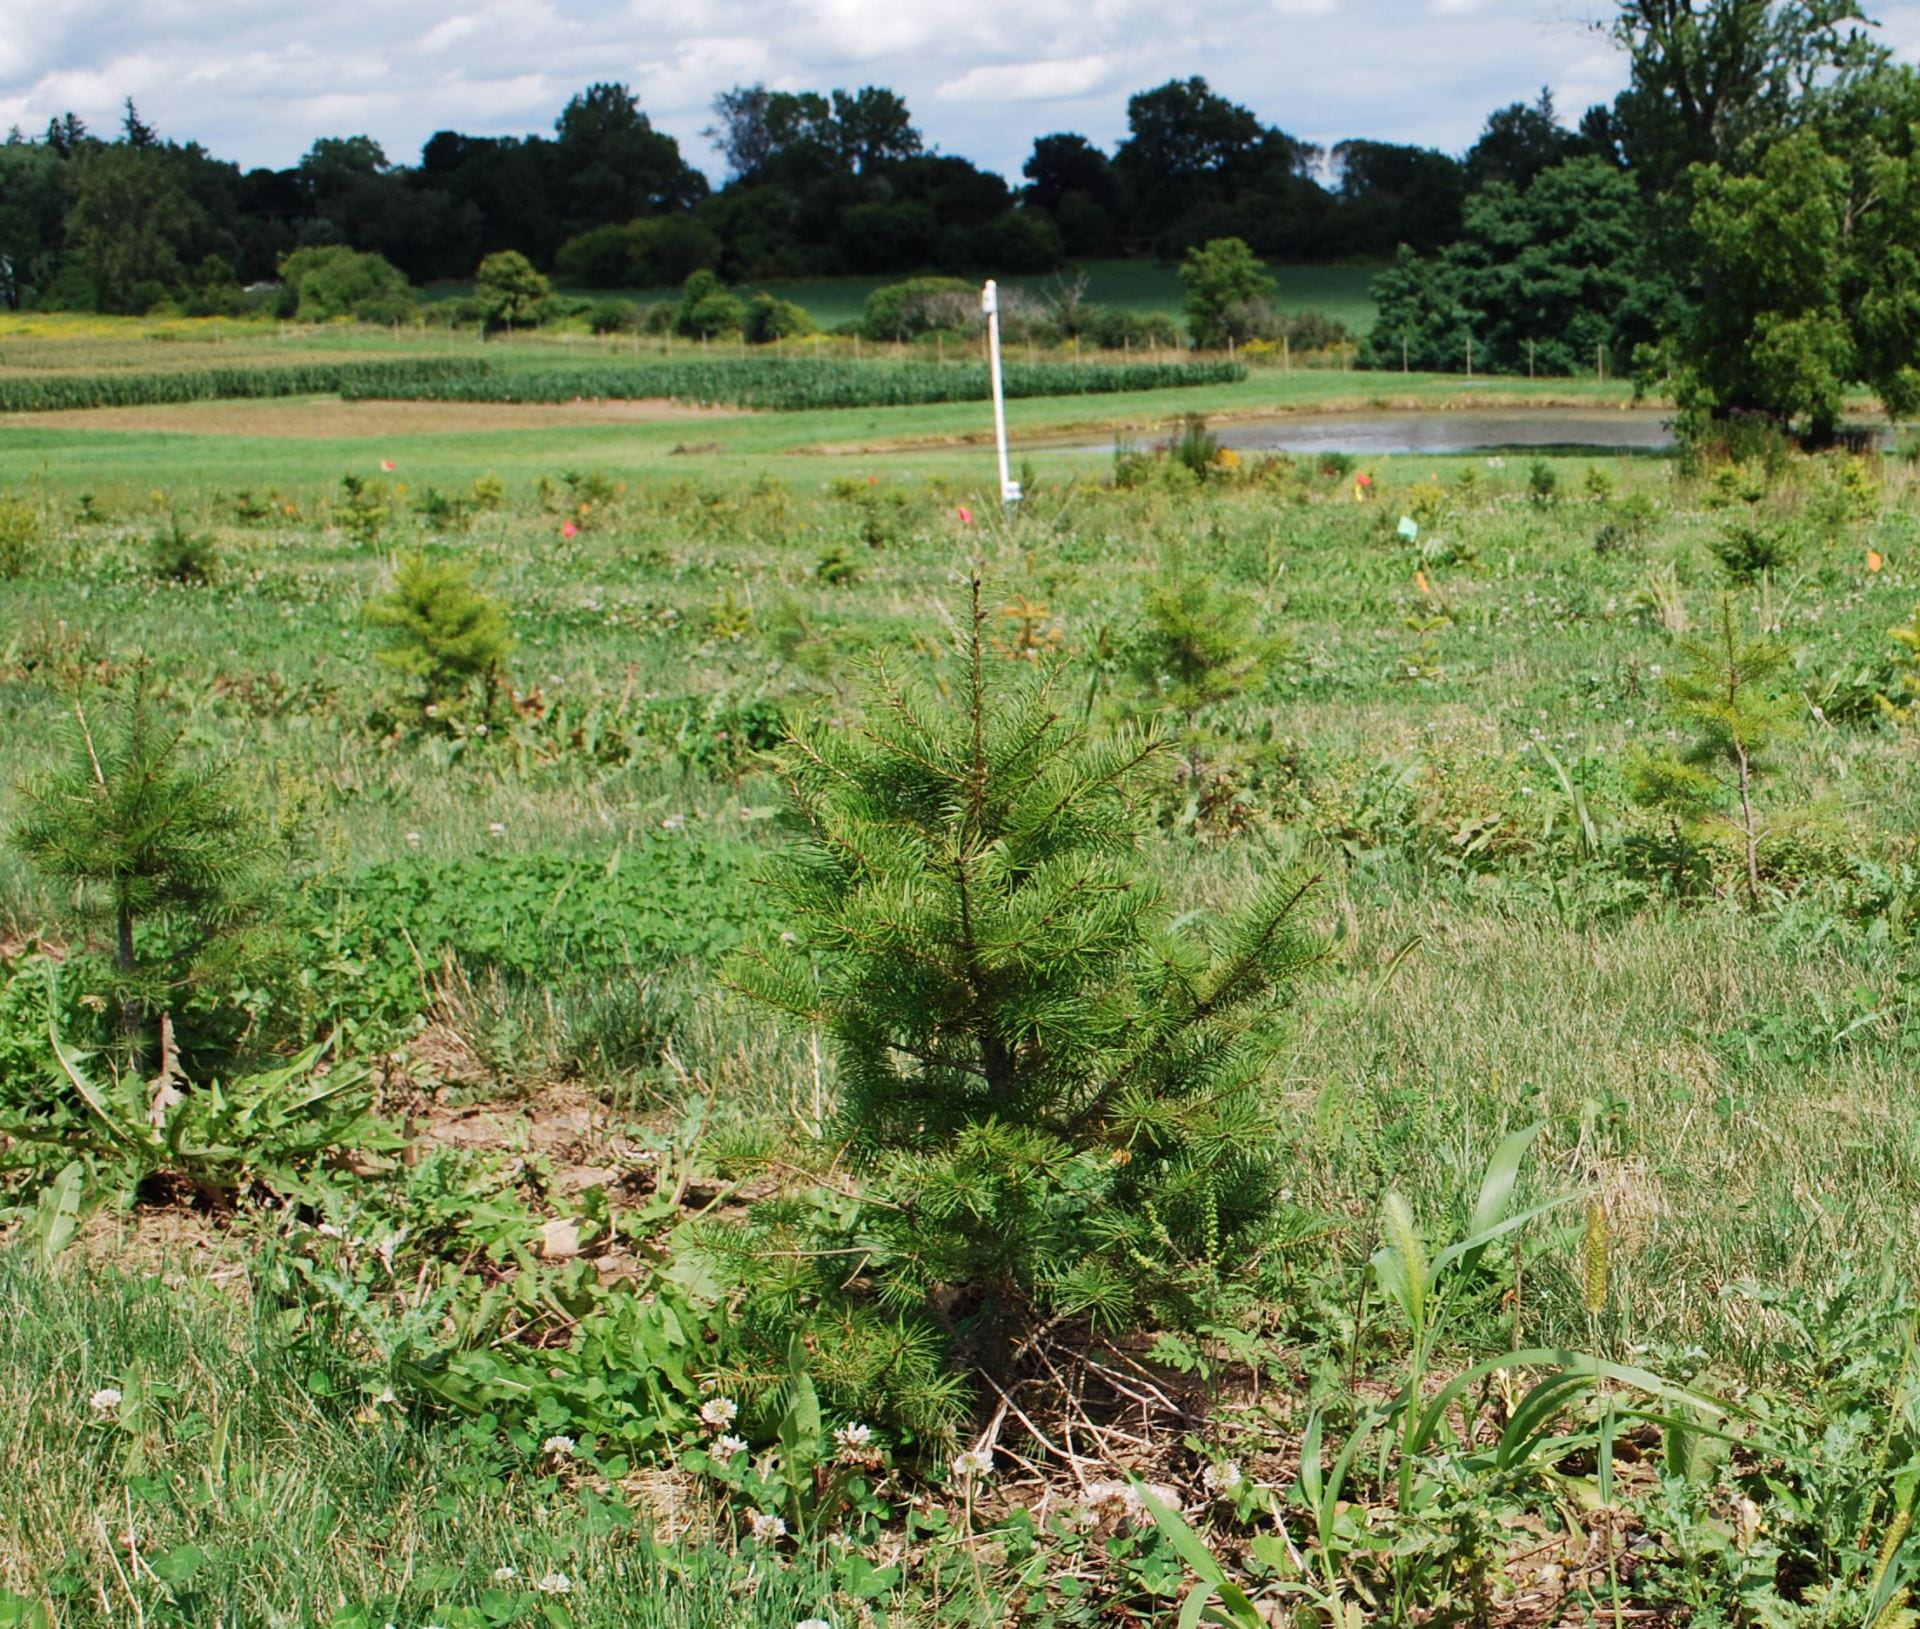
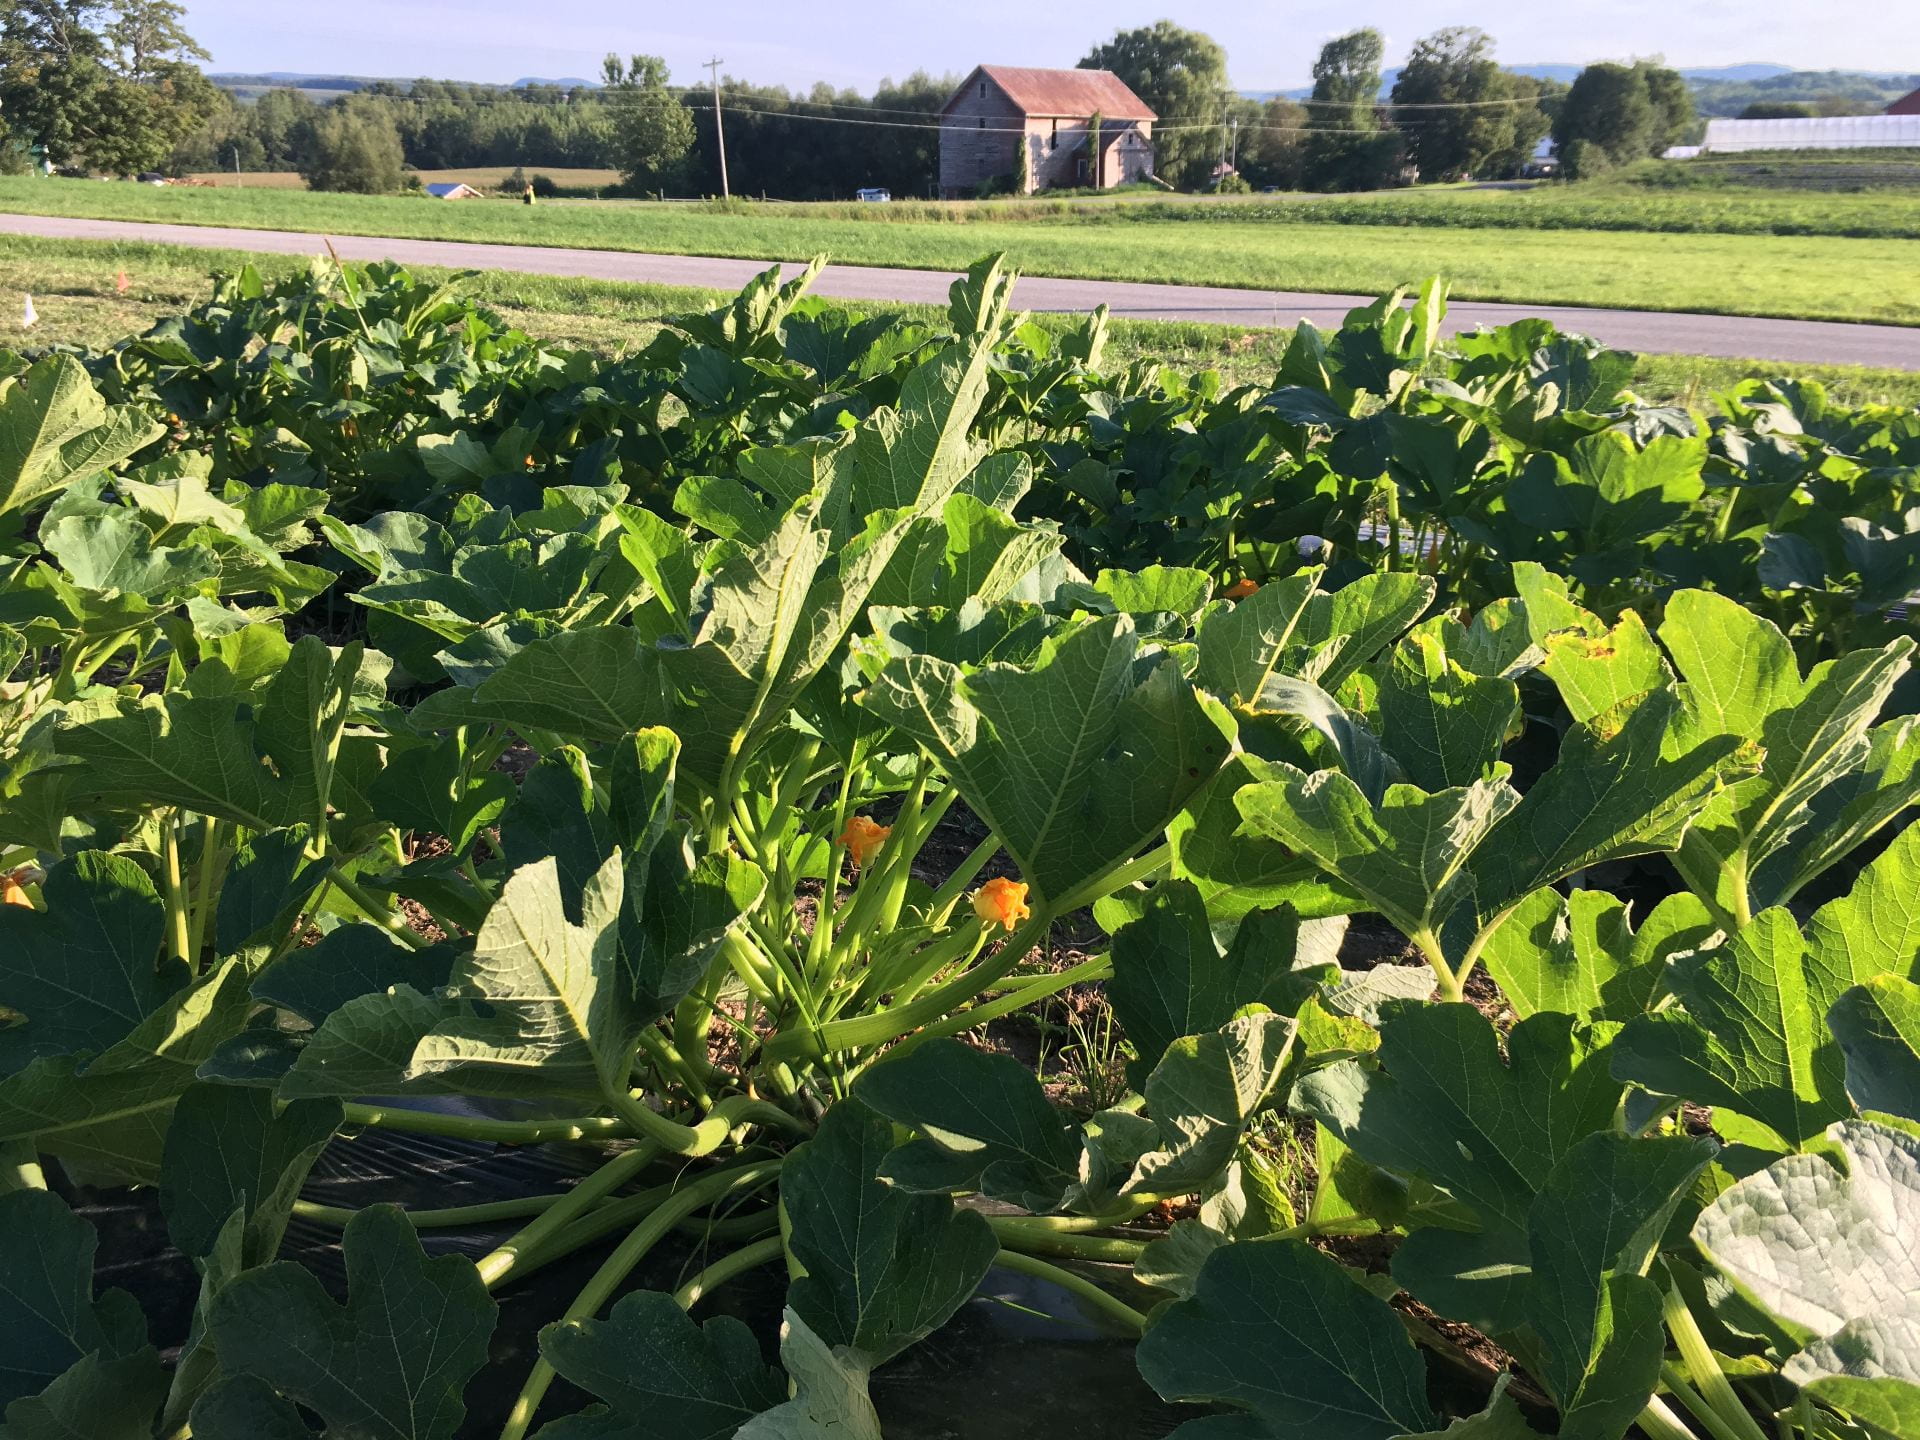
Below is a quick reminder of our treatments. You can read all the details here. Except for Treatment H. These are “new” plots that we added in 2019. I just measured out four, 23-foot long sections of grass planted between rows of Christmas trees in the middle of the field. These row middles are mowed by the excellent Field Research Unit staff at Cornell AgriTech, where our research field is located. The grass mixture was seeded right after the Christmas trees were planted in Spring 2018, but it does include some blooming weeds from time to time (dandelions and clover, especially).

Treatment Description
A Spring transplant, no mulch
B Spring transplant with mulch
C Spring direct seed
D Buckwheat cover crop, then fall transplant
E – control Whatever was growing there, just keep it mowed
F Soil solarization, then fall direct seed
G Herbicide and tillage, then fall direct seed
H – control Mow seeded orchard grass mix
Mowed grass between rows of small Christmas trees
Mowed grass between rows of Christmas trees in the middle of the field is a second control treatment for insect sampling.

And one last note before we get into the actual results. These are still preliminary results. Many, many thanks to Jason Dombroskie and Paige Muñiz for helping us with insect identification. Identification and number crunching of the data are still ongoing.


Ok, ready to see some cool insects (etc.)? Here we go!


Spiders and harvestmen

On the left, a harvestman with a plump body lacking distinct segments. In the middle, a spider with two distinct body segments. These two pictures were taken by David Cappaert, and are available on Bugwood.org. On the right, a black and yellow garden spider.
Spiders and harvestmen both have eight legs and are useful predators to have in a field or garden. The garden spider on the right was probably the largest arachnid I spotted in our habitat plots. The left and middle pictures were taken by David Cappaert.

We caught a lot of spiders and harvestmen, mostly in pan and pitfall traps. What’s a harvestman? You might know it by the name daddy long legs. It looks a lot like a spider, but instead of having a distinct narrowed “waist” (actually where the two body segments of the arachnid meet), their bodies just look like single “blobs”. Both spiders and harvestmen are predators and will eat many other insects (including some pests). They may also eat nectar and pollen. Very few spiders you are likely to encounter in New York are venomous, so welcome these eight-legged biocontrol agents to your fields and gardens without fear!

A bar graph showing numbers of spiders and harvestmen caught in each treatment (mostly in pan and pitfall traps). The most spiders and harvestmen were caught in treatments C (spring seeded) and H (grass control). Treatment B (transplanted and mulched) had the fewest spiders and harvestmen.
I added up all of the spiders and harvestmen we caught in each plot, then took the average of these summer-long counts from the four plots of each treatment in our field. The black lines stretching above and below the top edge of each bar show one standard error (measure of variability amongst the four plots) above and below the mean value.

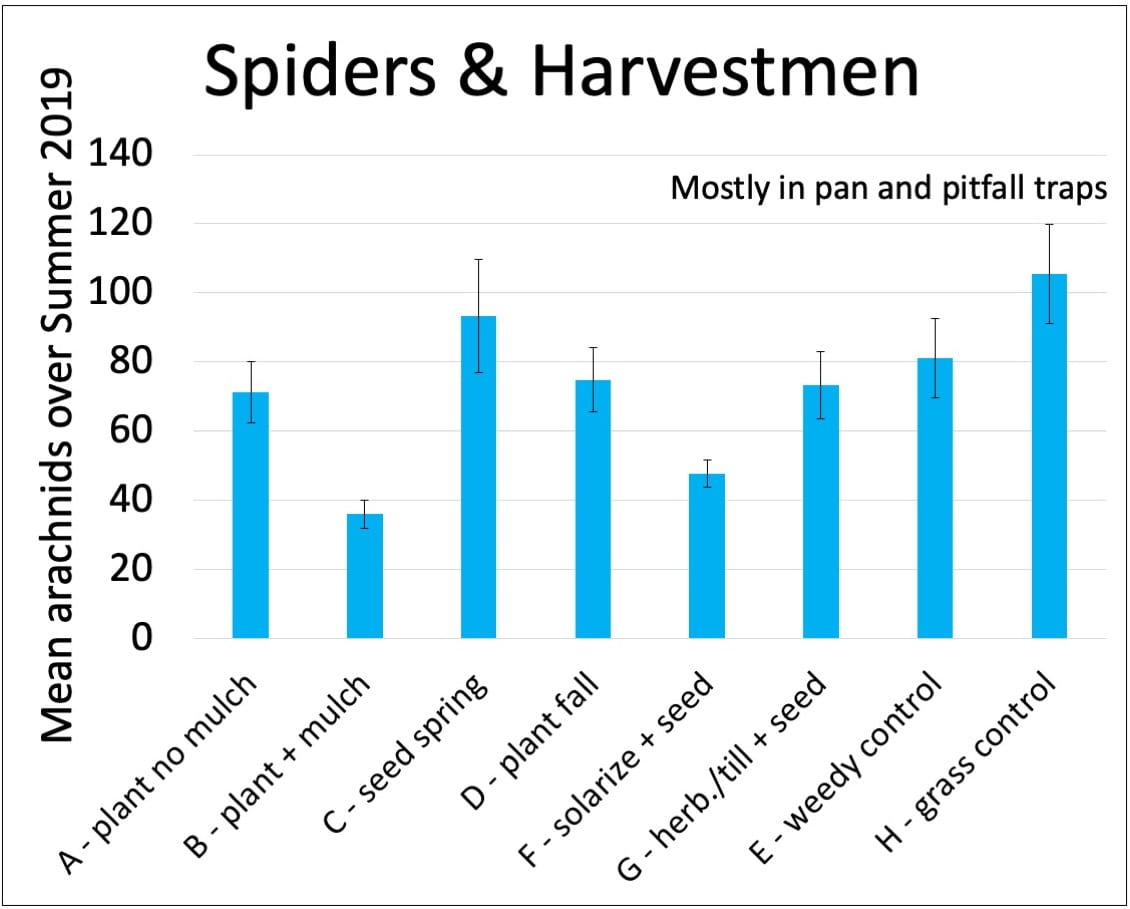
We caught a lot of spiders and harvestmen, but it looks like there were fewer in the plots that were mulched at transplanting or solarized prior to seeding.

Carabid beetles

Top: several tiger beetles with brown backs but iridescent green bellies; Bottom: picture of a black ground beetle taken by Mary C. Legg and available at Bugwood.org
We caught a lot of tiger beetles (top picture) in our plots last summer, but carabid beetles come in many shapes, sizes, and colors.

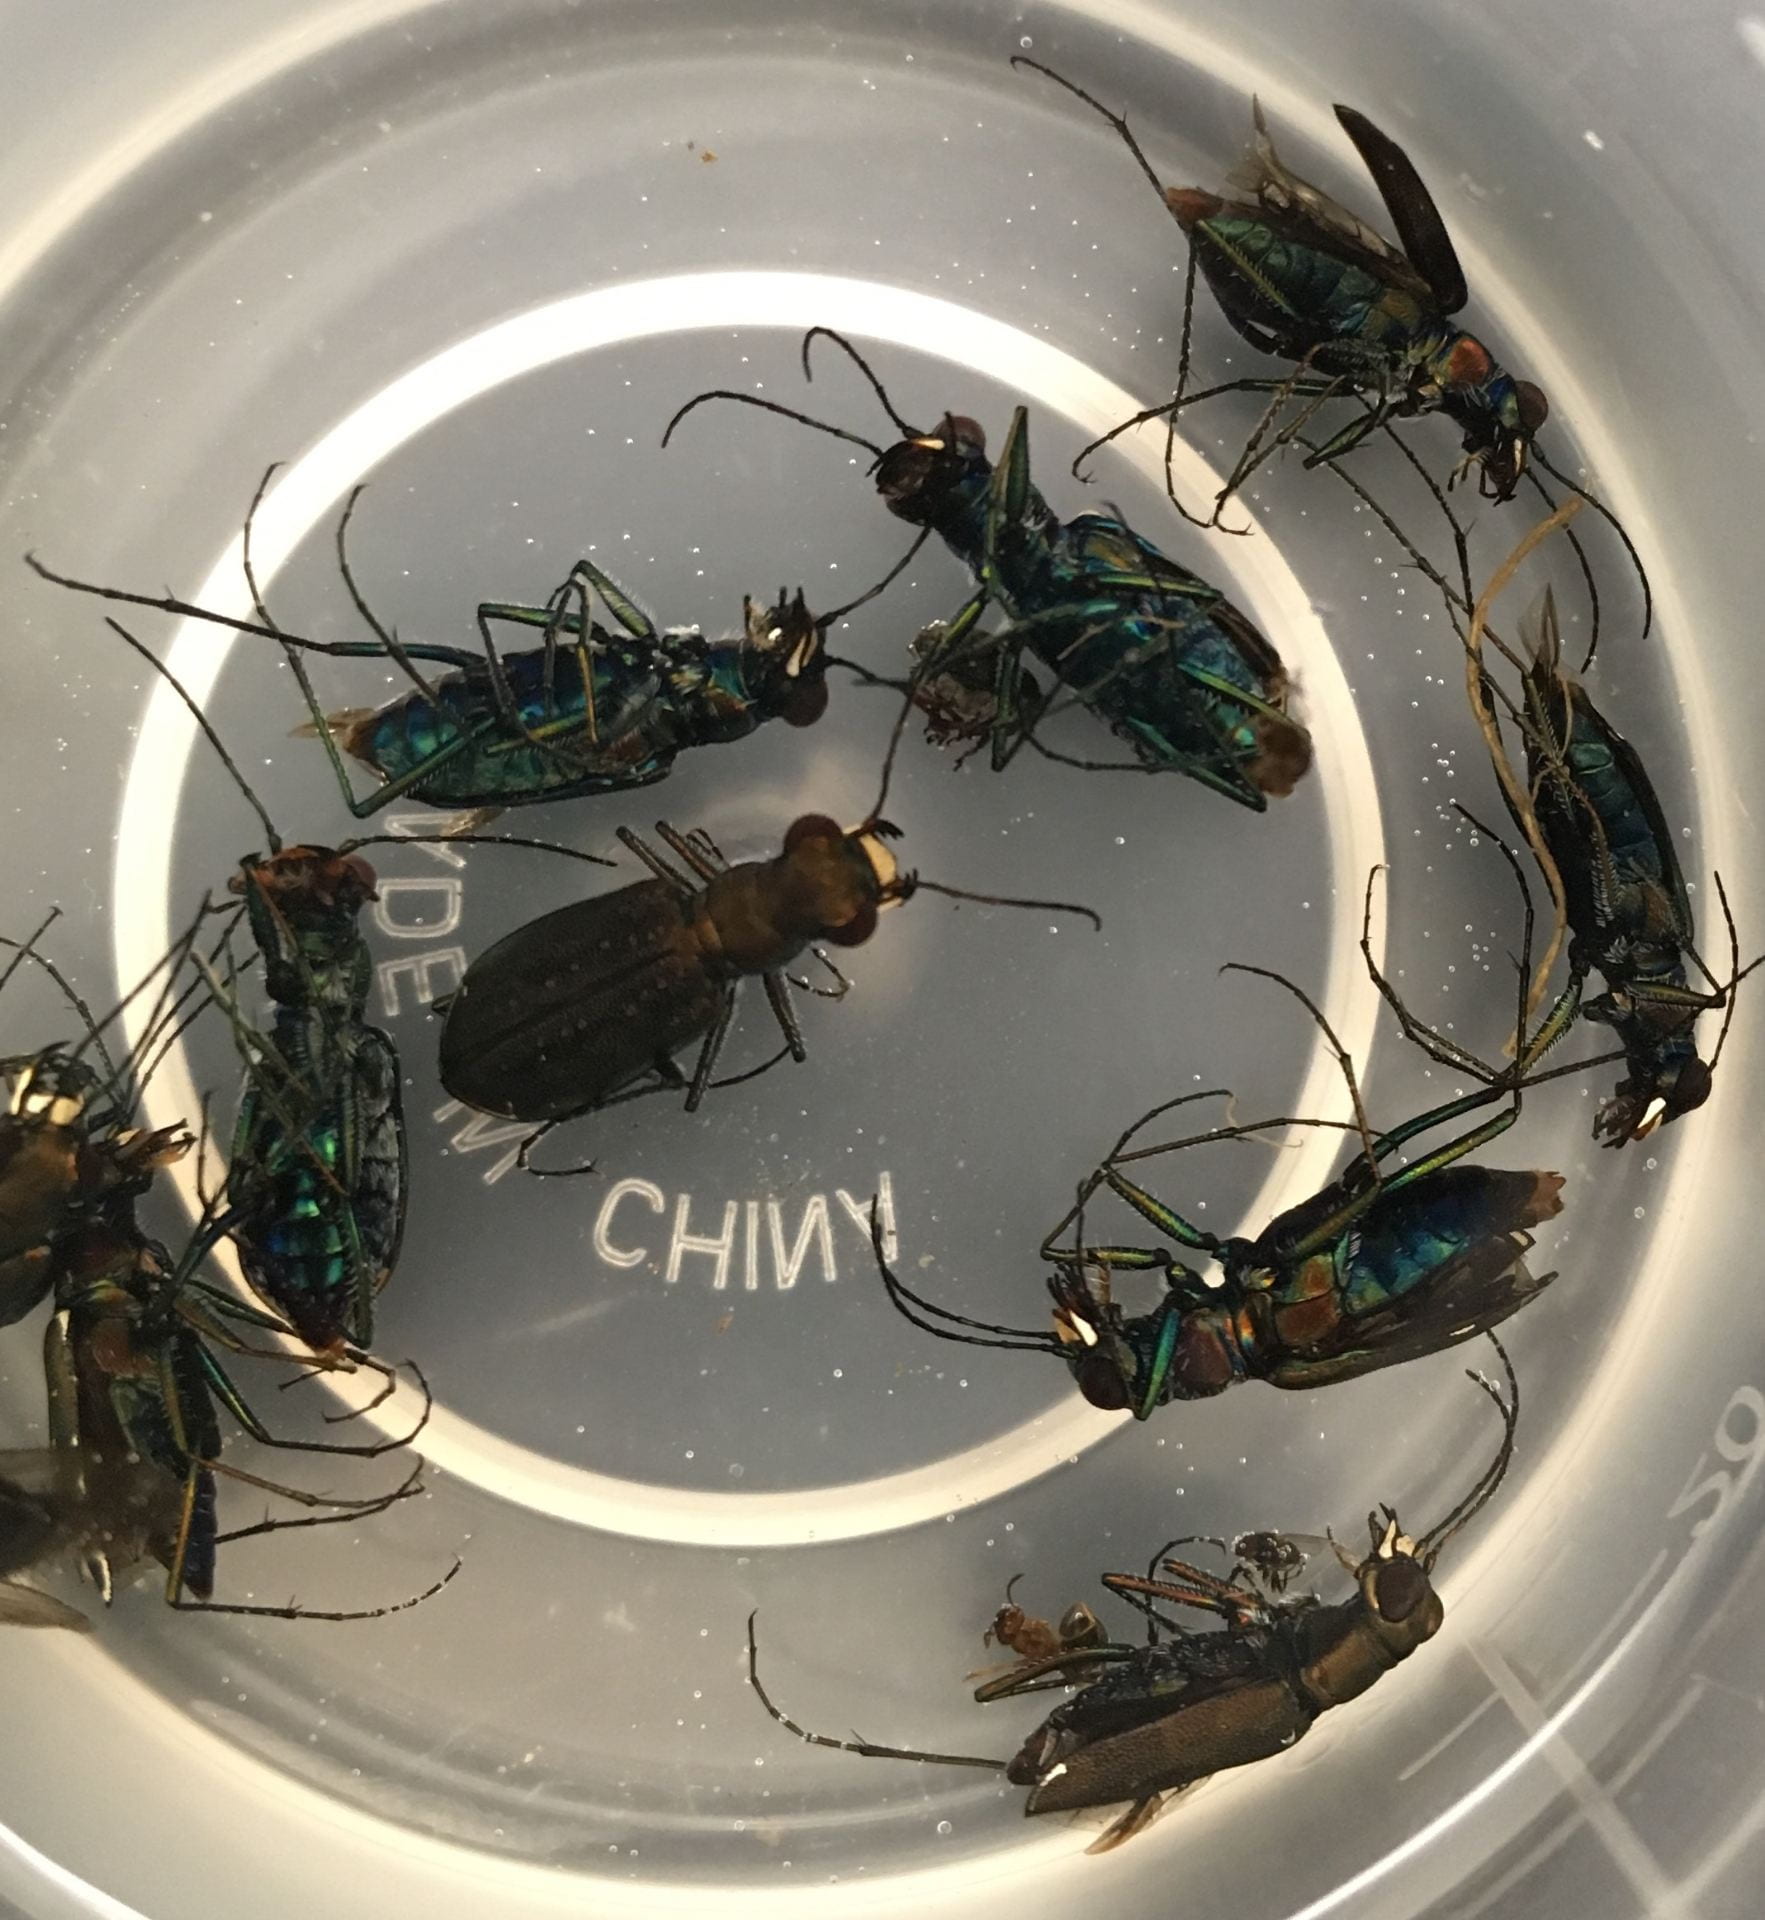
You may not notice carabid beetles (also called ground beetles) because they crawl along the surface of the soil and are usually more active at night. Also, many of them move very quickly. They are great predators of insects (and other arthropods), as well as mollusks like slugs. Some also eat seeds.


A bar graph showing numbers of carabid beetles caught in each treatment (mostly in pitfall traps). The most carabid beetles were caught in treatments D (fall transplant after buckwheat), F (fall seed after solarizing soil), and G (fall seeding after using tillage and herbicide to control weeds). The fewest carabid beetles were caught in the control plots (E and H).
I added up all of the carabid beetles we caught in each plot, then took the average of these summer-long counts from the four plots of each treatment in our field. The black lines stretching above and below the top edge of each bar show one standard error (measure of variability amongst the four plots) above and below the mean value.

From these preliminary results, it looks like we tended to catch more carabid beetles in the fall-planted treatments (whether they were transplanted or direct-seeded). We’ll have to see if this turns out to be a consistent pattern. There were generally fewer carabids in the two control treatments.

Rove beetles

Two pictures of insects. The one on the left has an arrow pointing to the short wing covers visible on its back (labeled ‘elytra’). The one on the right is courtesy of Joseph Berger, and can be found at Bugwood.org.
Rove beetles come in different sizes, but they all have short wing covers called elytra.

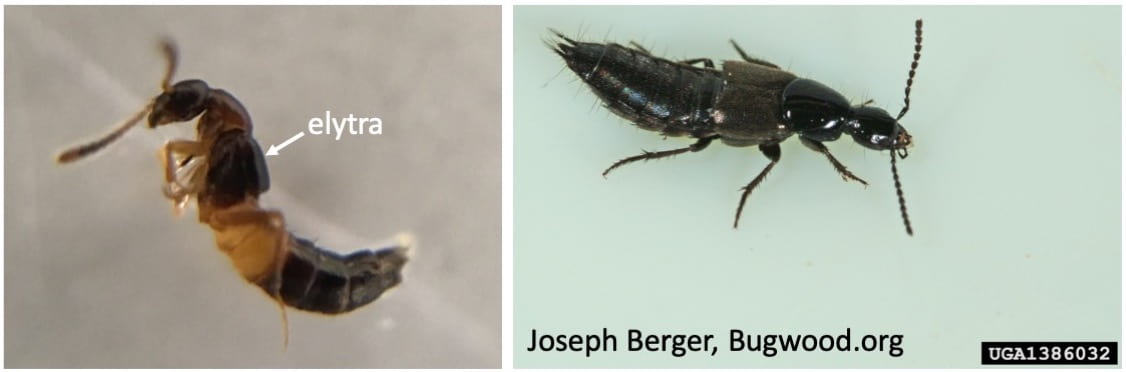
We did not catch very many rove beetles (only 55 in all of the plots for the entire summer), but like carabid beetles these predators live at the soil surface or in the soil. Some also scavenge things that are already dead or eat seeds. You can recognize them by the short wing covers (called elytra) on their backs. I think they look like mini capes.
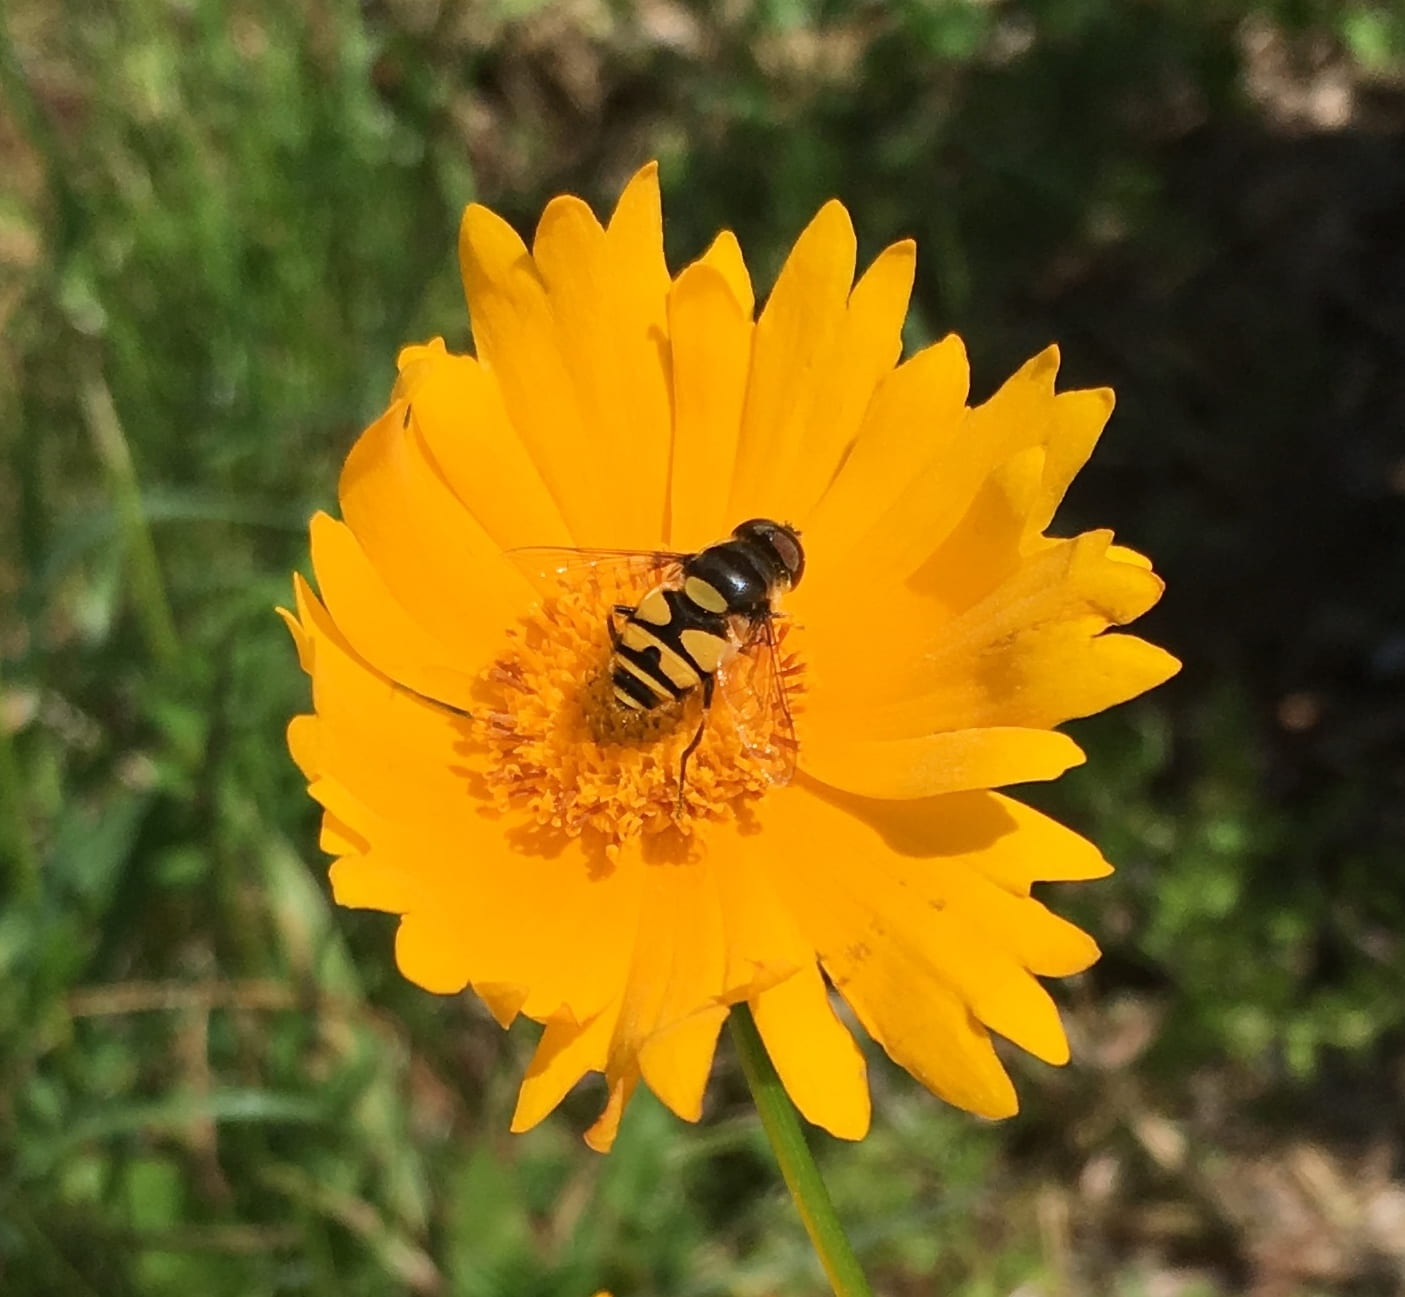
Hover flies

Left: black and yellow hover fly on a bright yellow coreopsis flower; Middle: a different kind of adult hover fly perched on a person’s skin; Right: a larval hover fly that looks like a small translucent caterpillar on a leaf near a green aphid. This picture was taken by Ken Wise.
Adult hover flies (left and middle pictures) have only two wings and big eyes, even though they are often black and yellow striped like bees. The visually unimpressive larva in the picture on the right is about to eat an aphid.

Hover flies (also called syrphids) come in many shapes and sizes and get their name from the way the adults hover in the air when traveling between flowers. Many look like bees, but if they hold still long enough and you look closely, you will see that they only have two wings (bees have four), and they have very large eyes. The adults feed on pollen and nectar and are also pollinators. The larvae are predators, eating aphids, whiteflies, and scales.

A bar graph showing numbers of hover flies (syrphids) caught in each treatment (mostly in pan traps and sweep nets). More hover flies were caught in direct-seeded treatments (C, F, and G), treatment D (buckwheat during the summer, transplanted in the fall), or the weedy control (treatment E). Fewer hover flies were caught in the spring transplanted treatments (A and B) or the grass control.
I added up all of the hover flies we caught in each plot, then took the average of these summer-long counts from the four plots of each treatment in our field. The black lines stretching above and below the top edge of each bar show one standard error (measure of variability amongst the four plots) above and below the mean value.

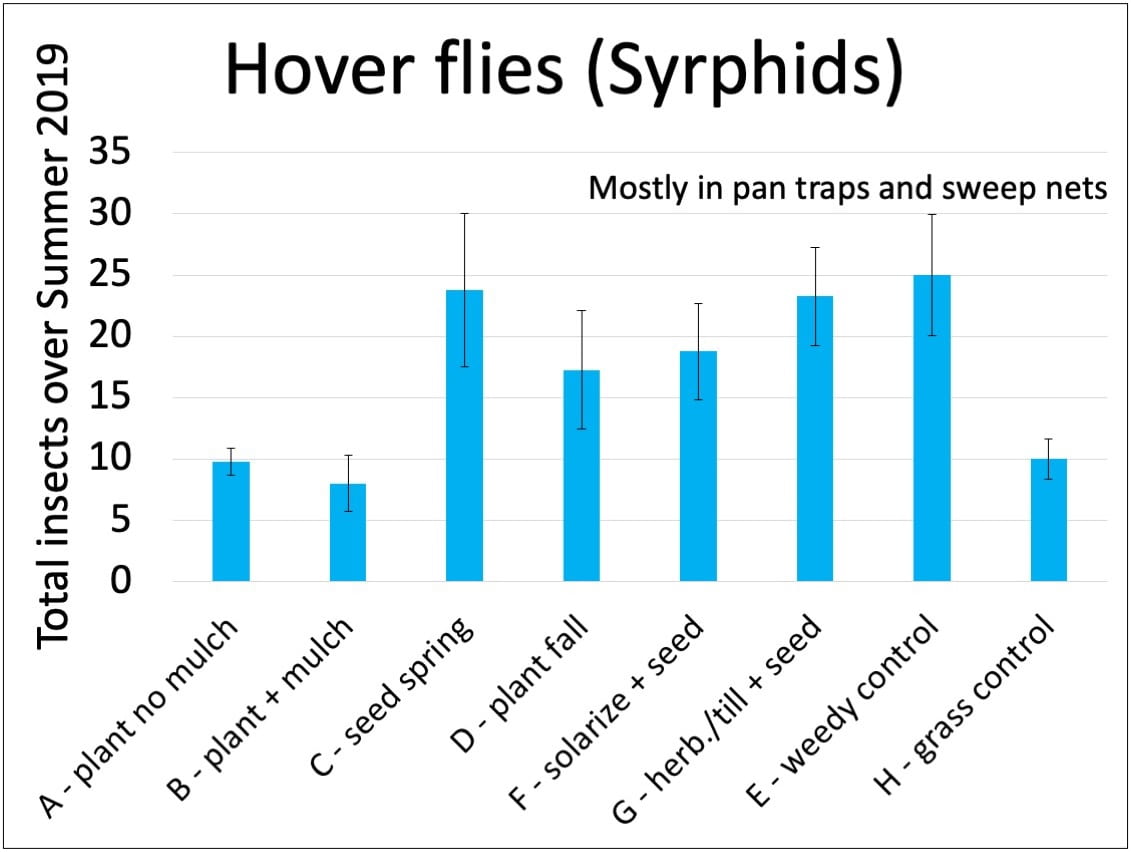
We were surprised to see similarly low numbers of hover flies in the two spring transplanted plots (in which deliberately-planted wildflowers were largest and produced the most flowers) and in the mowed grass control. More hover flies were collected from the weedy control, all the direct seeded plots, and the fall transplanted plots (which had smaller wildflowers with fewer blooms). We don’t know why.
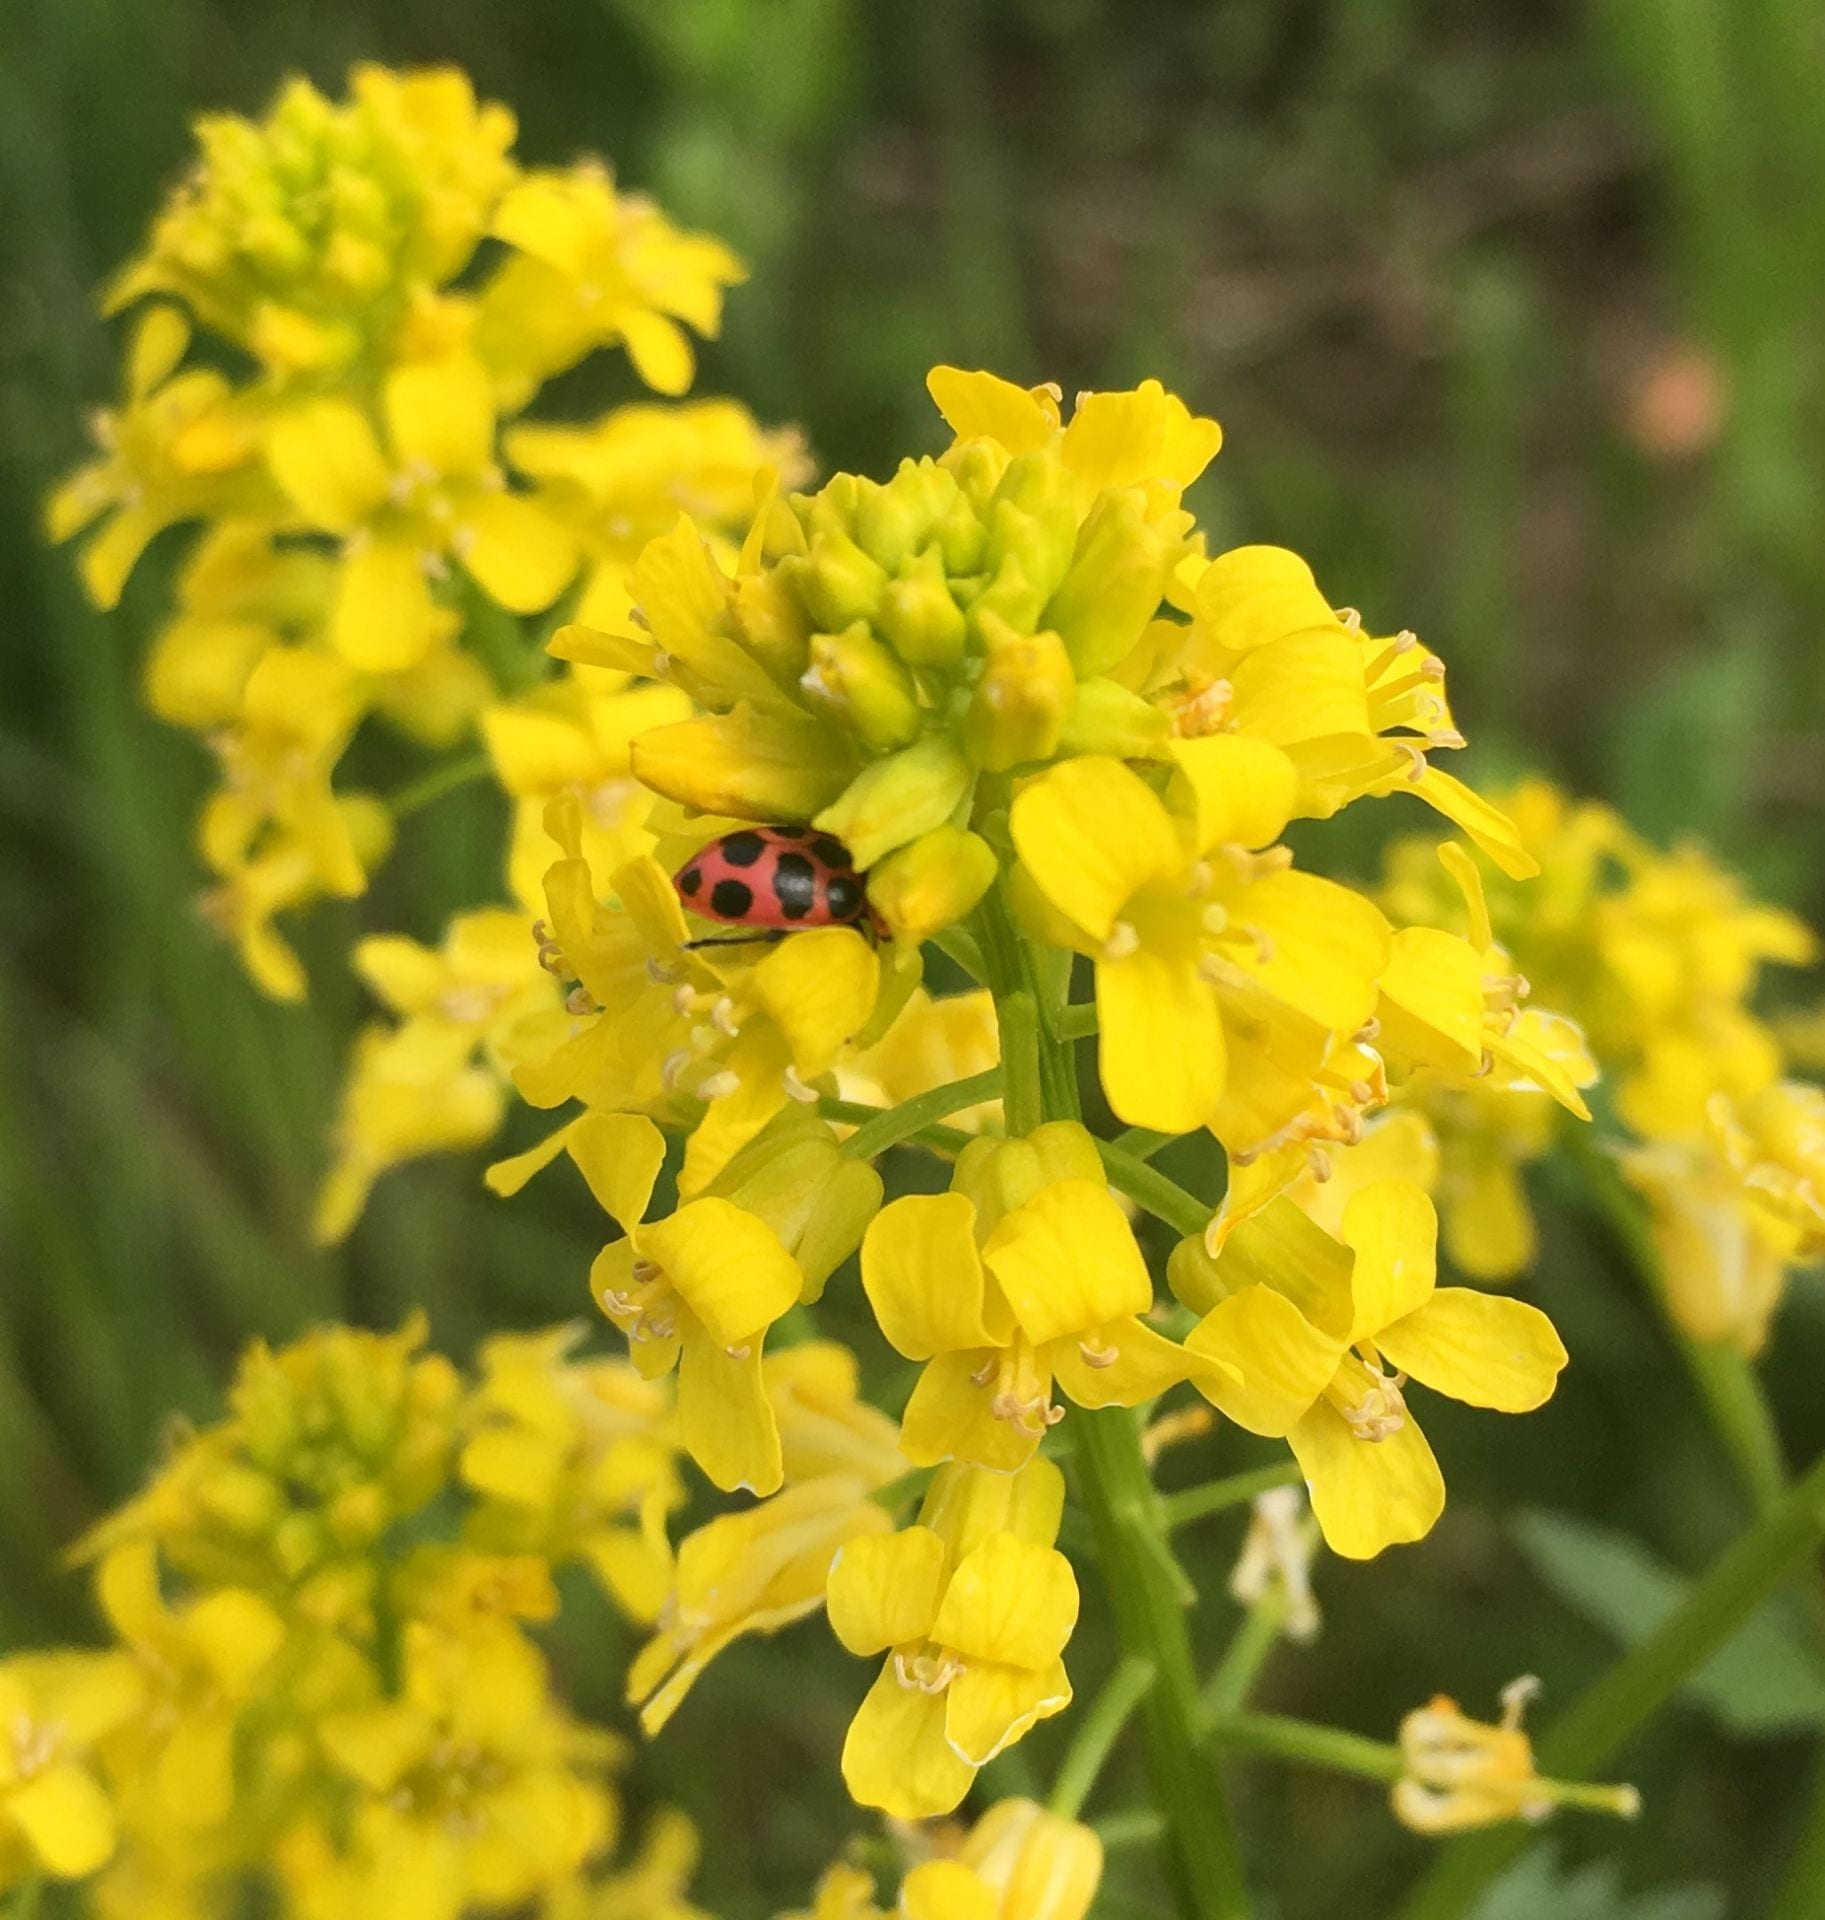
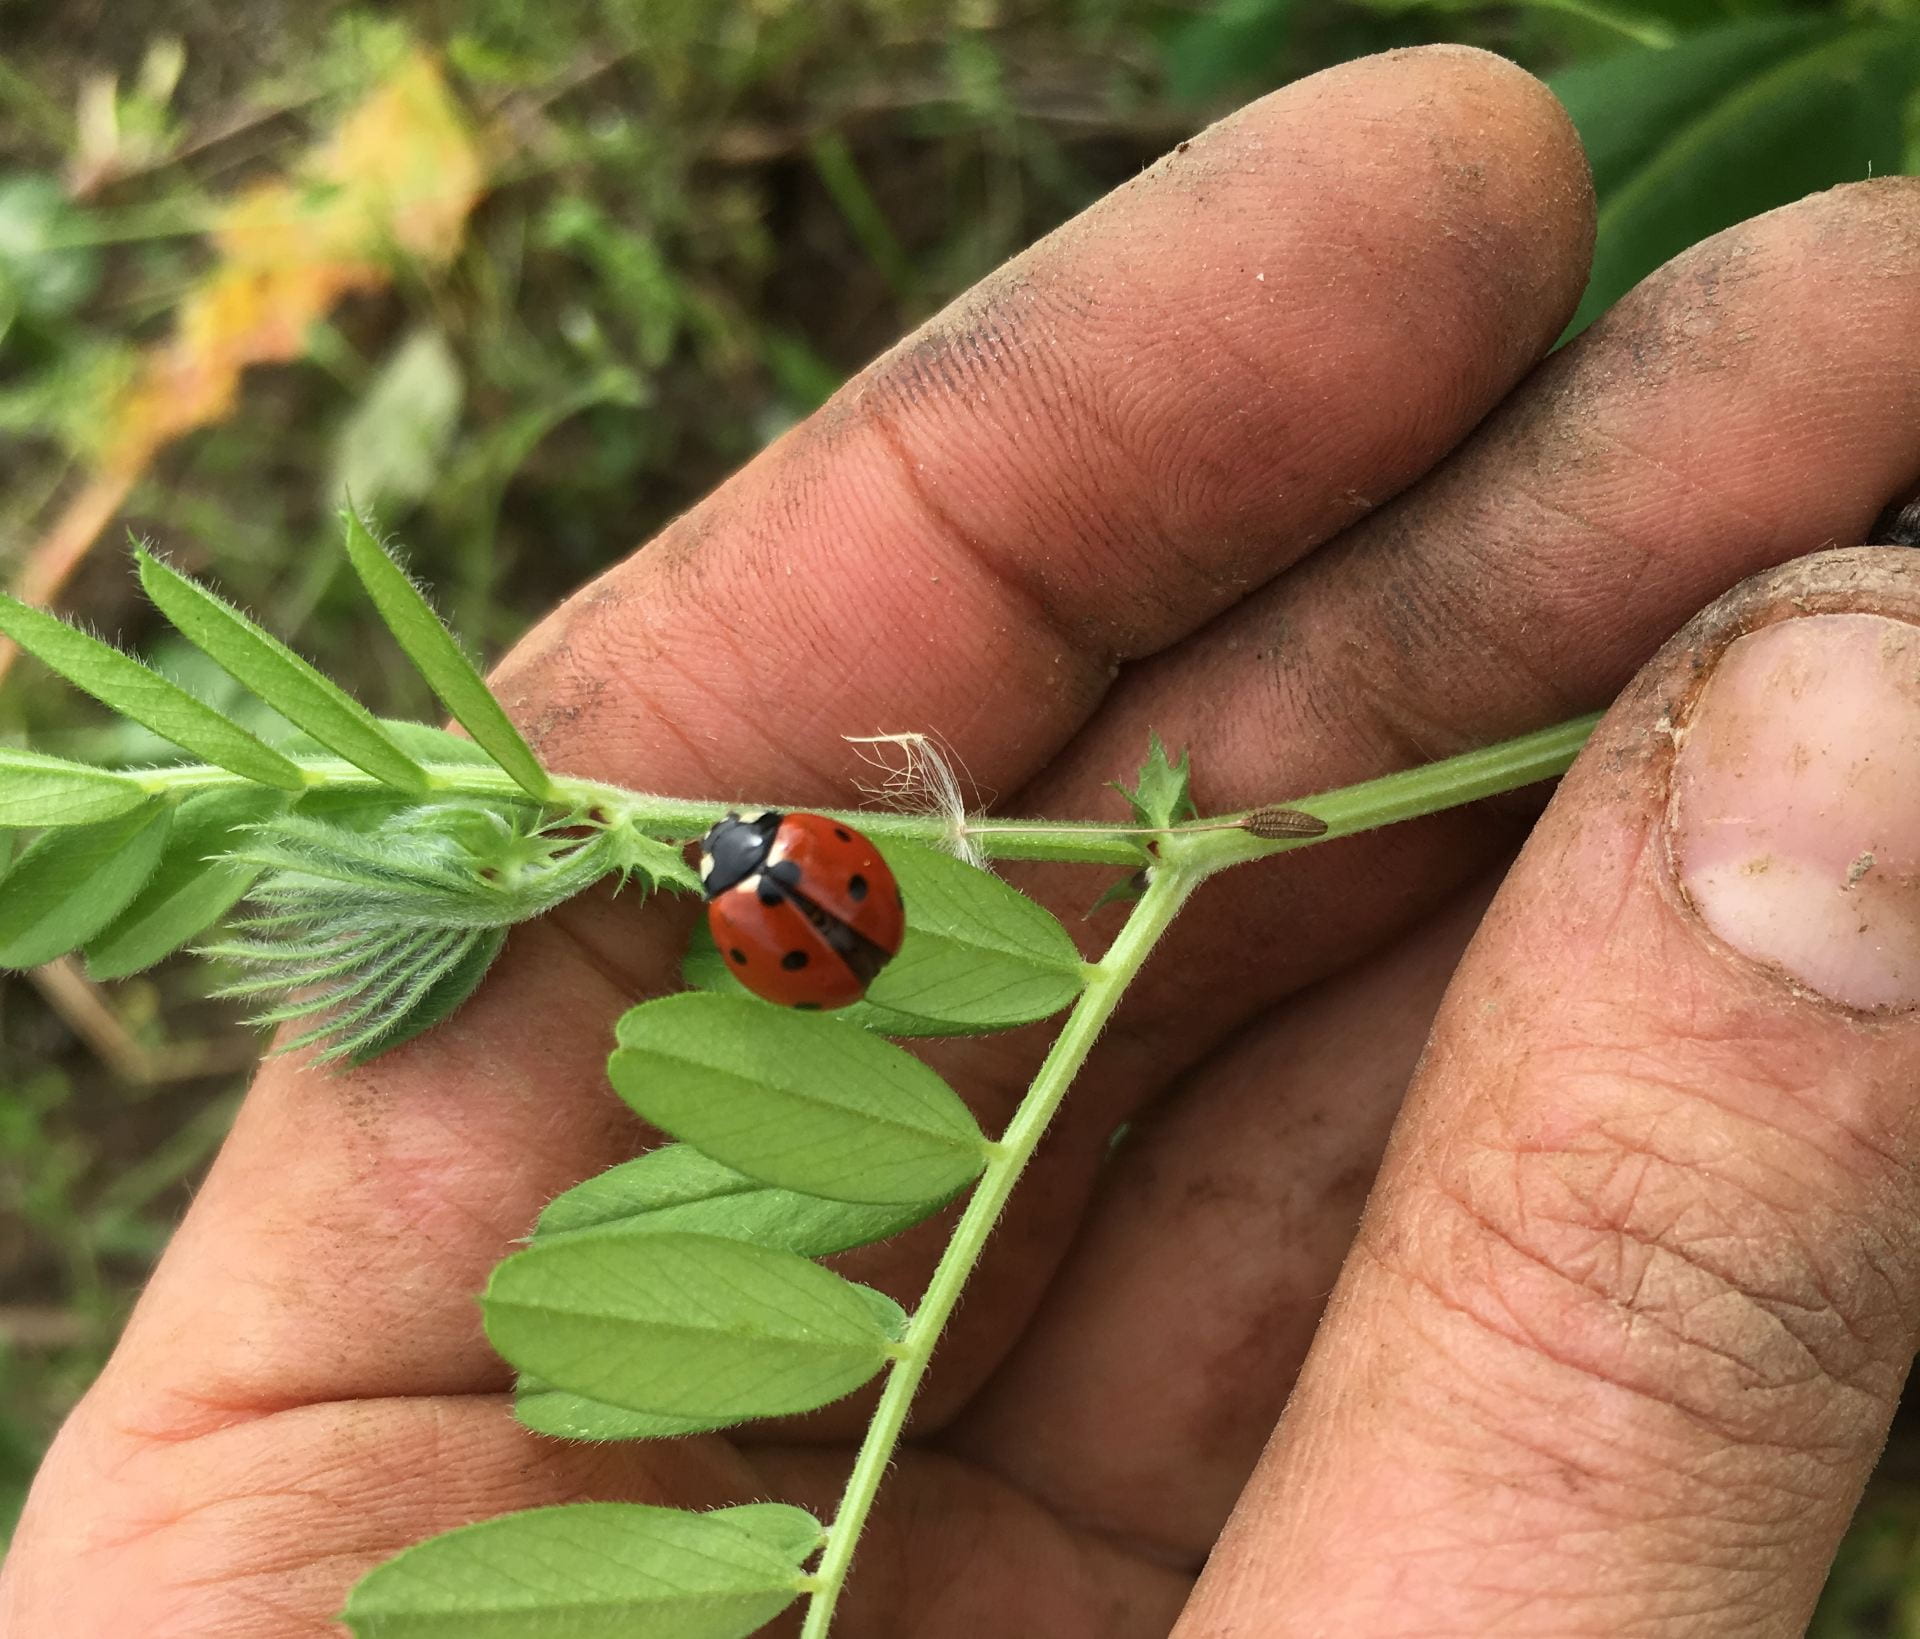
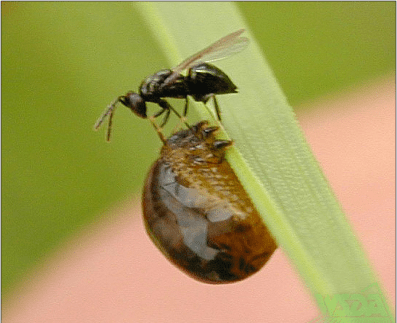
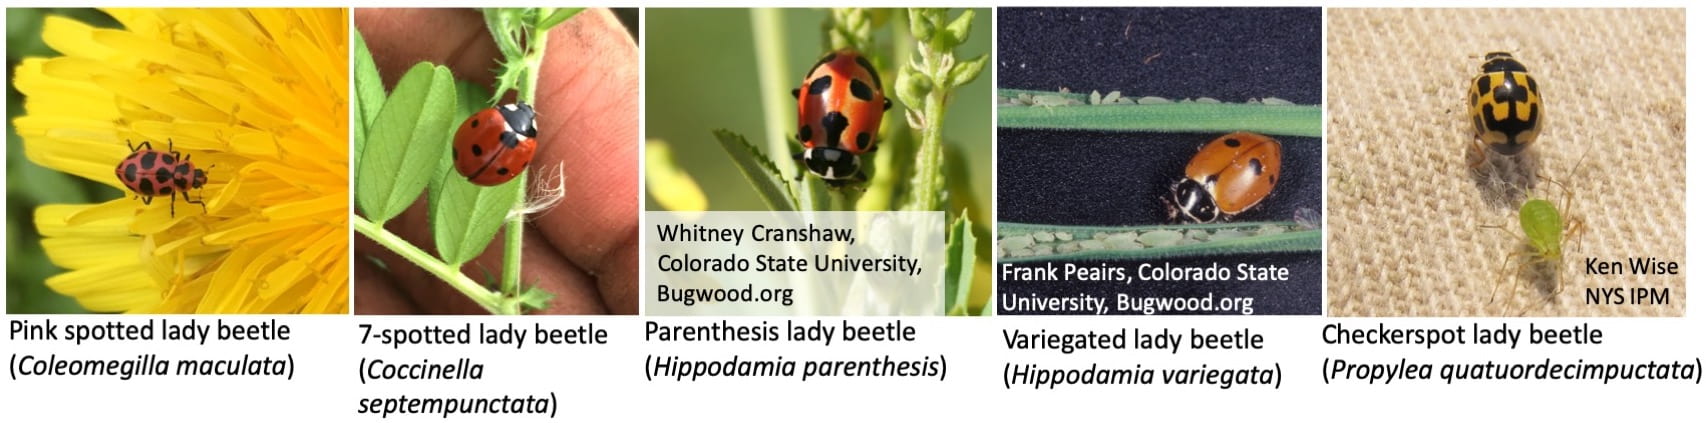
Lady beetles

Spiny black and orange larval lady beetle on a green leaf.
Although lady beetles are familiar as natural enemies of pests, their larvae (like this one) are not always so easily recognized. Larvae are often (but not always) elongated, look a bit spiny, and are orange and black.

Lady beetles may be the most well-recognized biocontrol agent, but they were not the most abundant one collected in our sampling. We only collected 65 larvae or adults from all plots over the entire summer. Both life stages are predators, but adults of at least some species will also eat pollen and nectar. We identified the species of each adult (but not the larvae), and a picture of each is below.

From left to right: Pink lady beetle with black spots on a dandelion flower is the pink spotted lady beetle (Coleomegilla maculata); red lady beetle with black spots crawling on a plant stem is a seven-spotted lady beetle (Coccinella septempunctata); another red lady beetle with black spots - including two elongated spots near its rear end that look like parentheses – is the parenthesis lady beetle (Hippodamia parenthesis) whose picture was taken by Whitney Cranshaw, Colorado State University and is available on Bugwood.org; another red lady with black spots is the variegated lady beetle (Hippodamia variegata) and its picture was taken by Frank Peairs from Colorado State University and is available at Bugwood.org; the final lady beetle has a black and orange-yellow checkerspot pattern and is the checkerspot lady beetle (Propylea quatuordecimpuctata) whose picture was taken by Ken Wise with the NYSIPM Program.
We collected adults of these five lady beetle species in our plots during Summer 2019.

Lacewings

Top picture is a magnified picture of an elongated larval lacewing with prominent pincher-like jaws; bottom picture is a green lacewing feeding on pollen from a white buckwheat flower.
Lacewing larva (top) and adult (bottom). Adults may also be brown, but will have a similar shape.

All lacewing larvae are predators, and the more easily recognized adults of some species are also predators. Others eat pollen as adults. We did not catch very many in our plots; only 40 all summer from all plots.
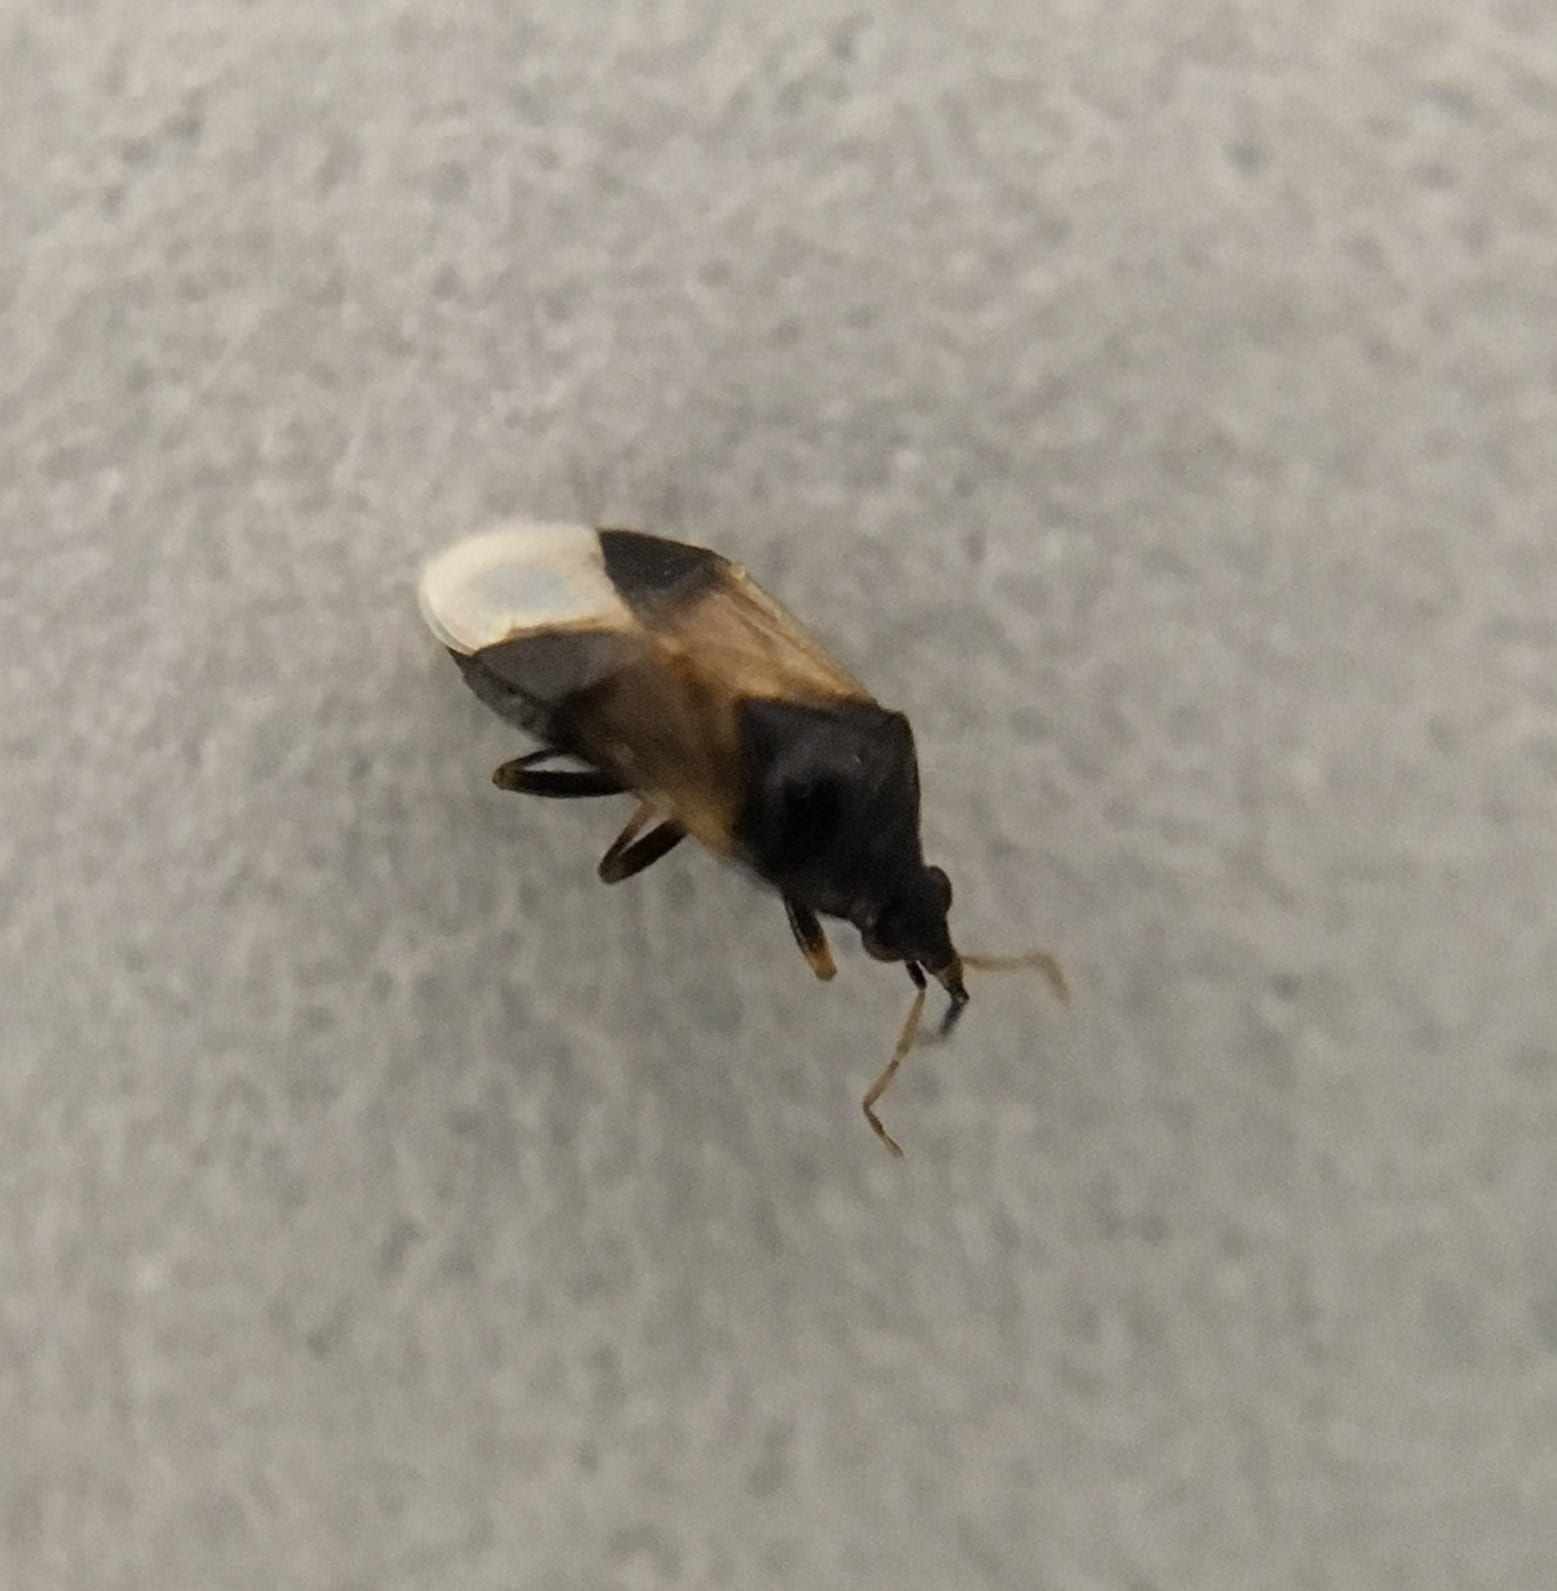
Minute pirate bugs

Small black and white insect, magnified.
Minute pirate bugs may be small, but they are mighty predators!

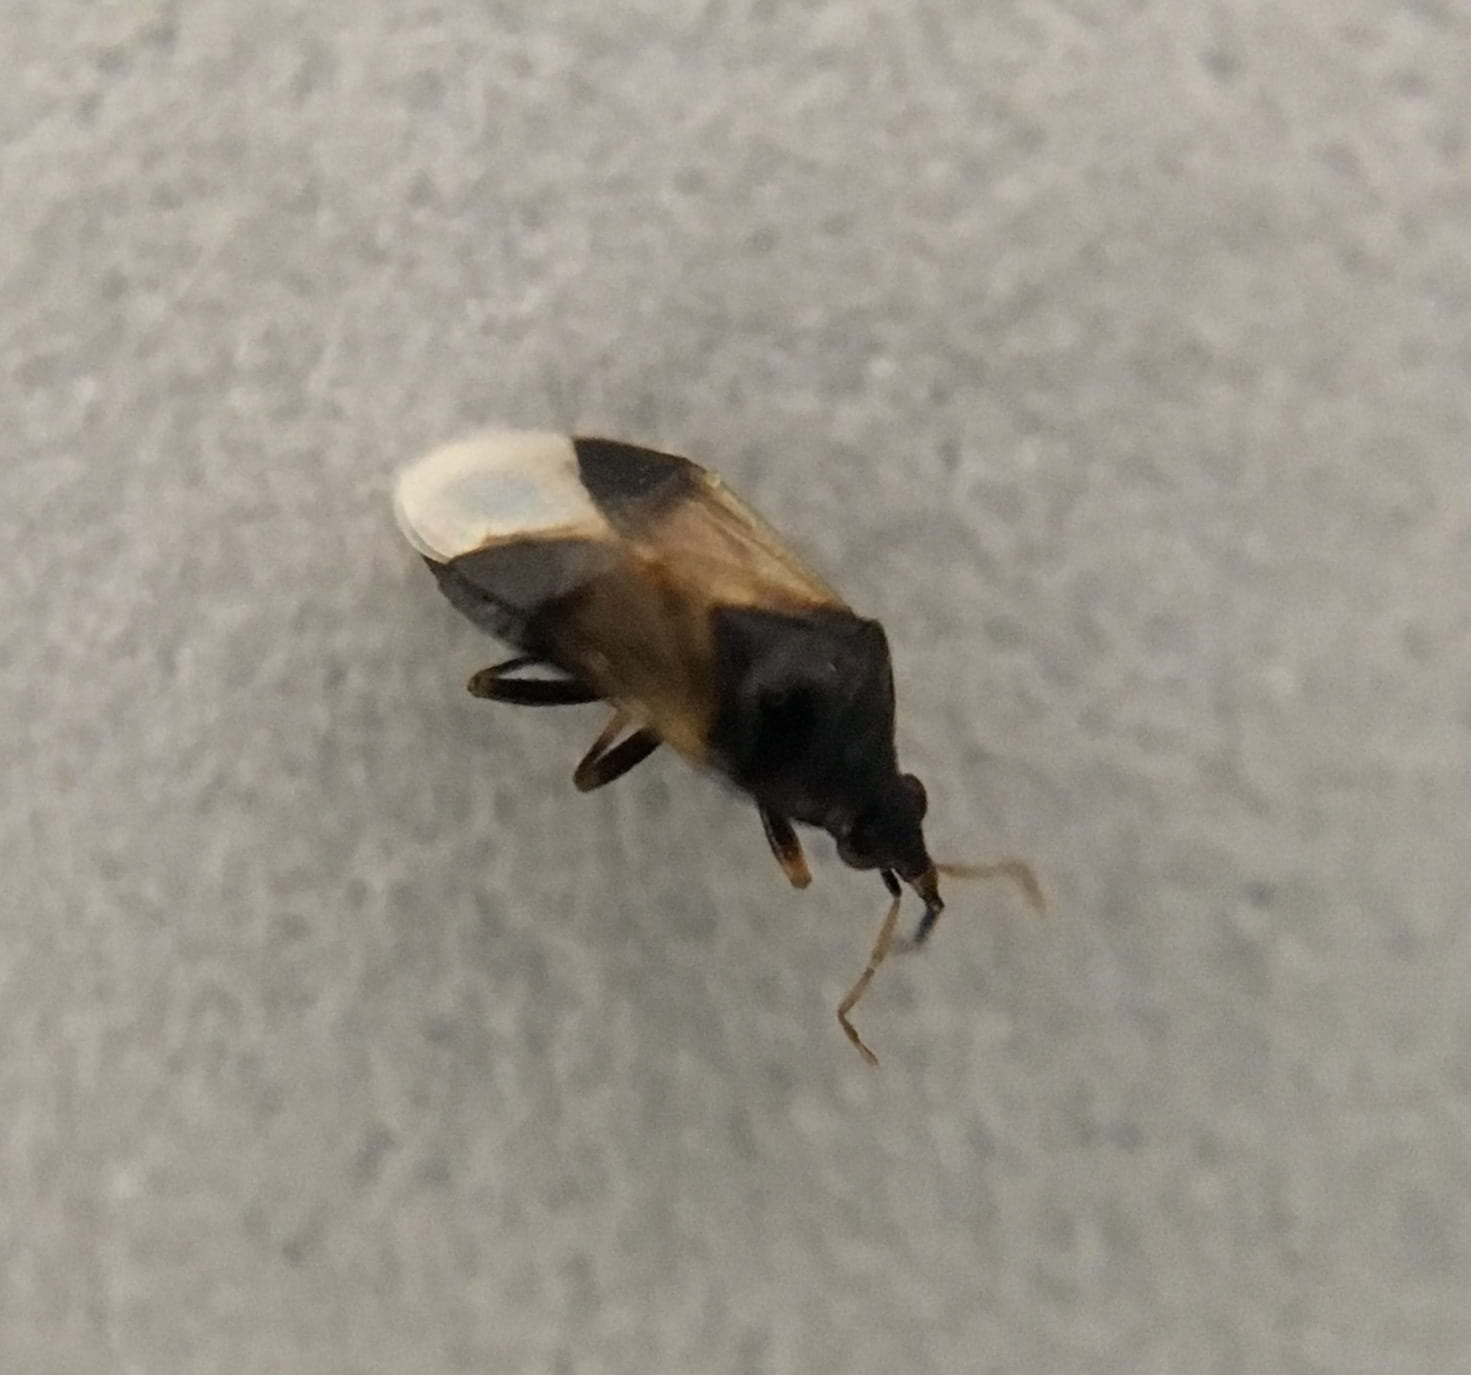
This may be one of my new favorite natural enemies. They are definitely minute (no more than a quarter of an inch long) but feed on small insect pests like aphids, mites, scales, and thrips, as well as pollen and nectar. We only collected 19 from all plots over the whole summer. At home, I sometimes find them running across my table after I’ve brought freshly cut flowers inside. In this video, you can see one exploring the map of a corn maze. Actually, it was looking for thrips to eat.

minute pirate bug on corn maze map
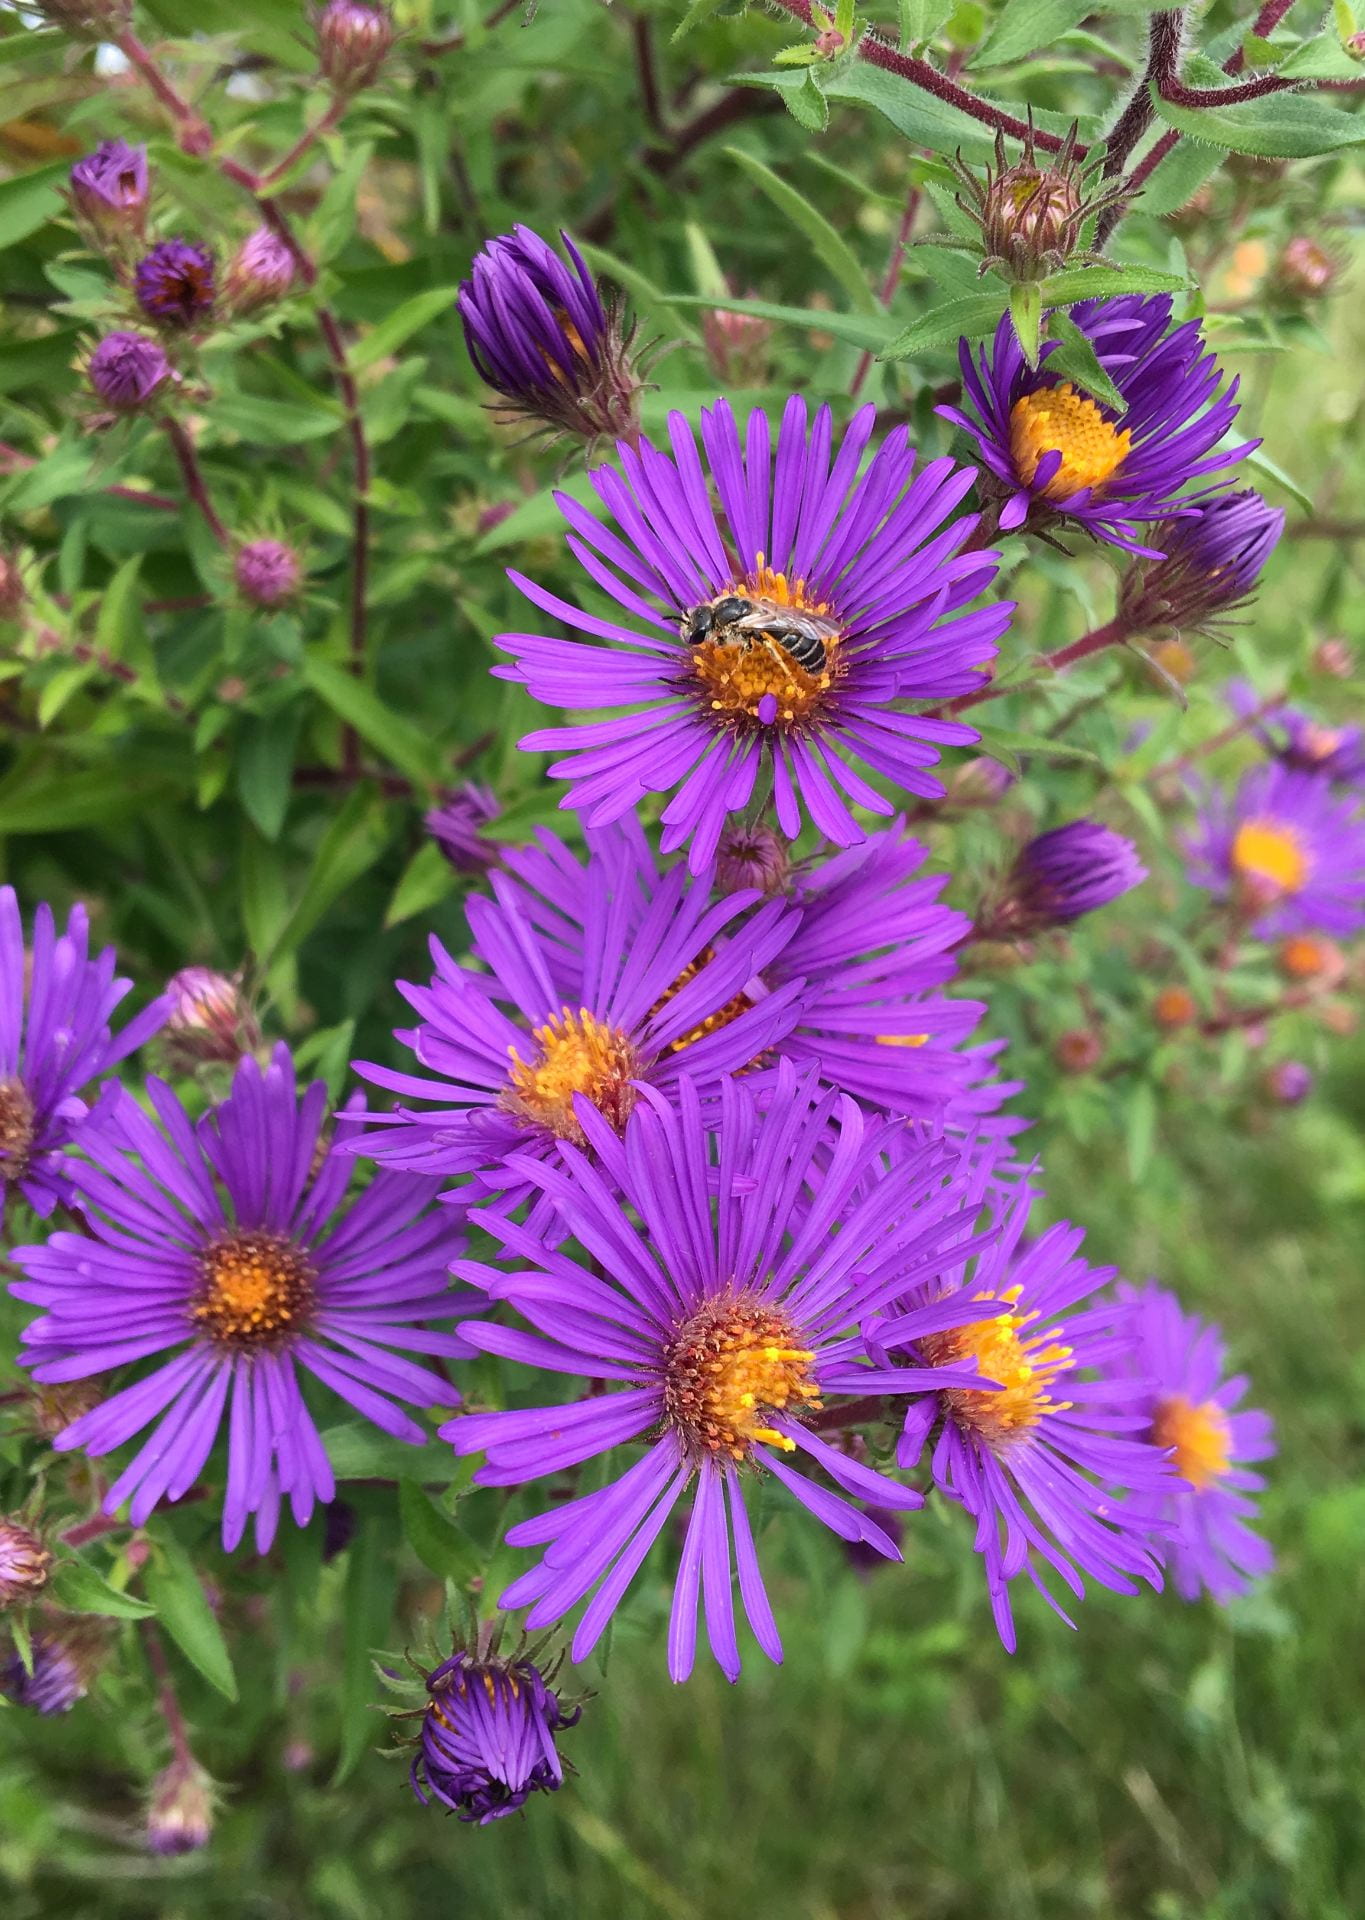
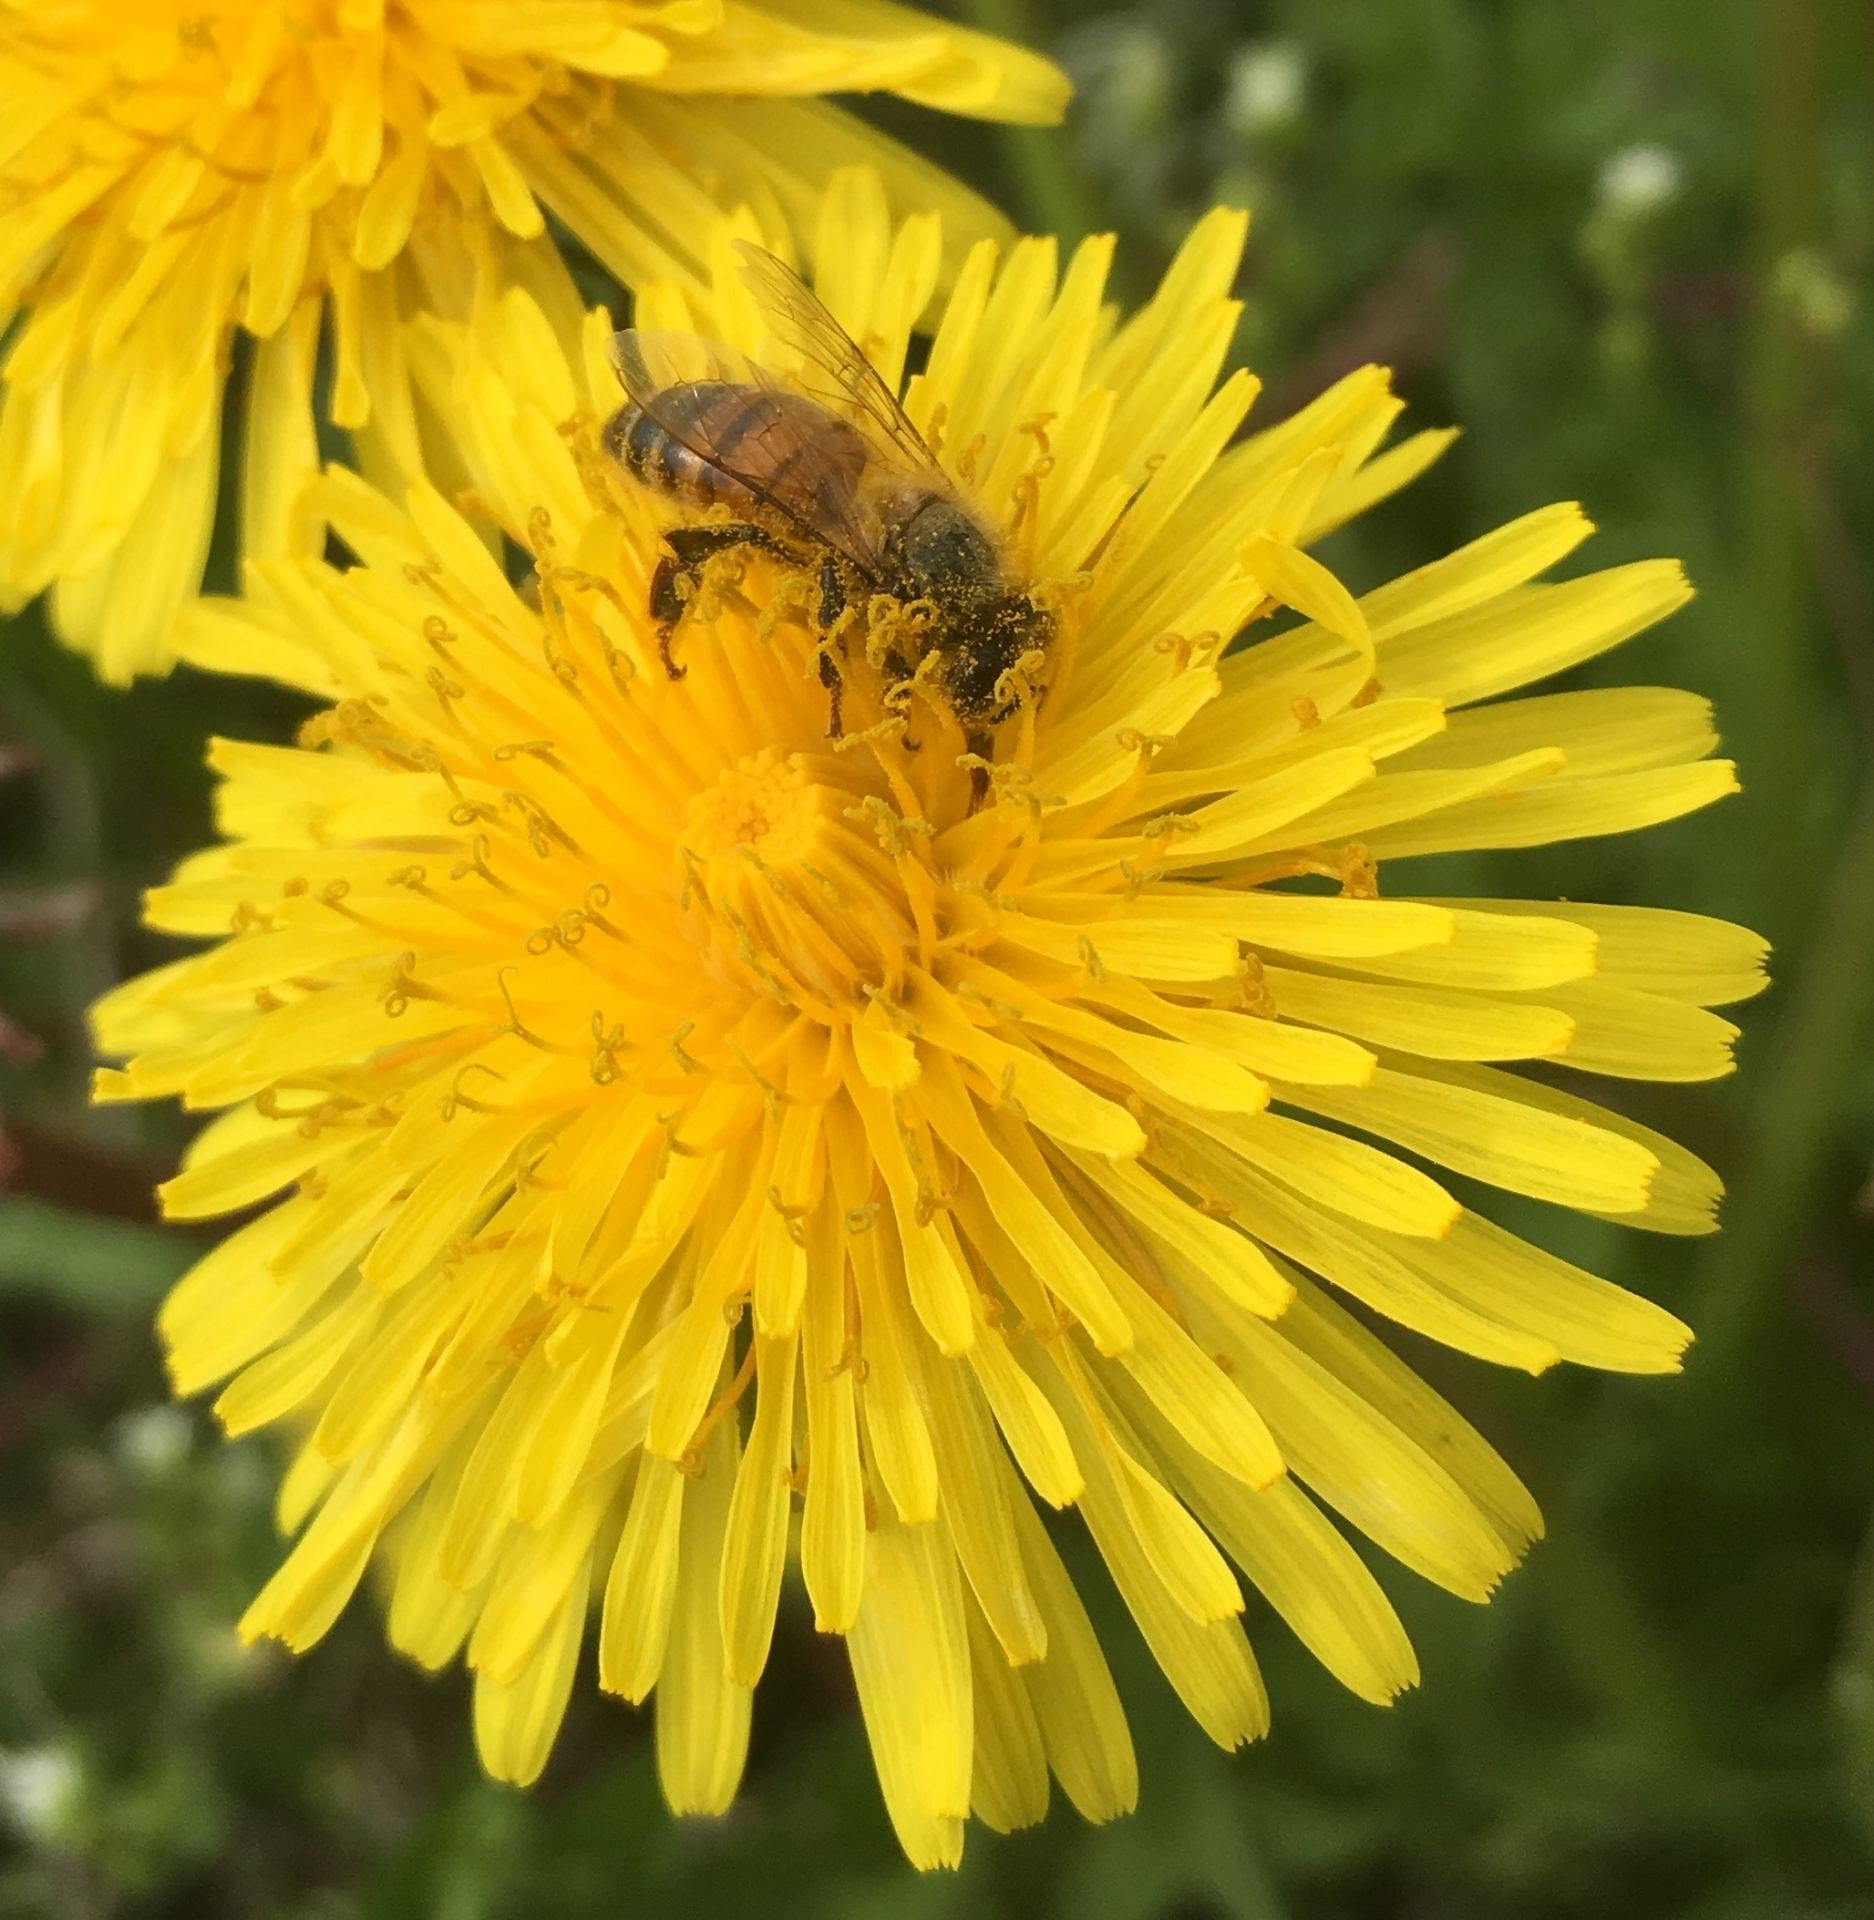
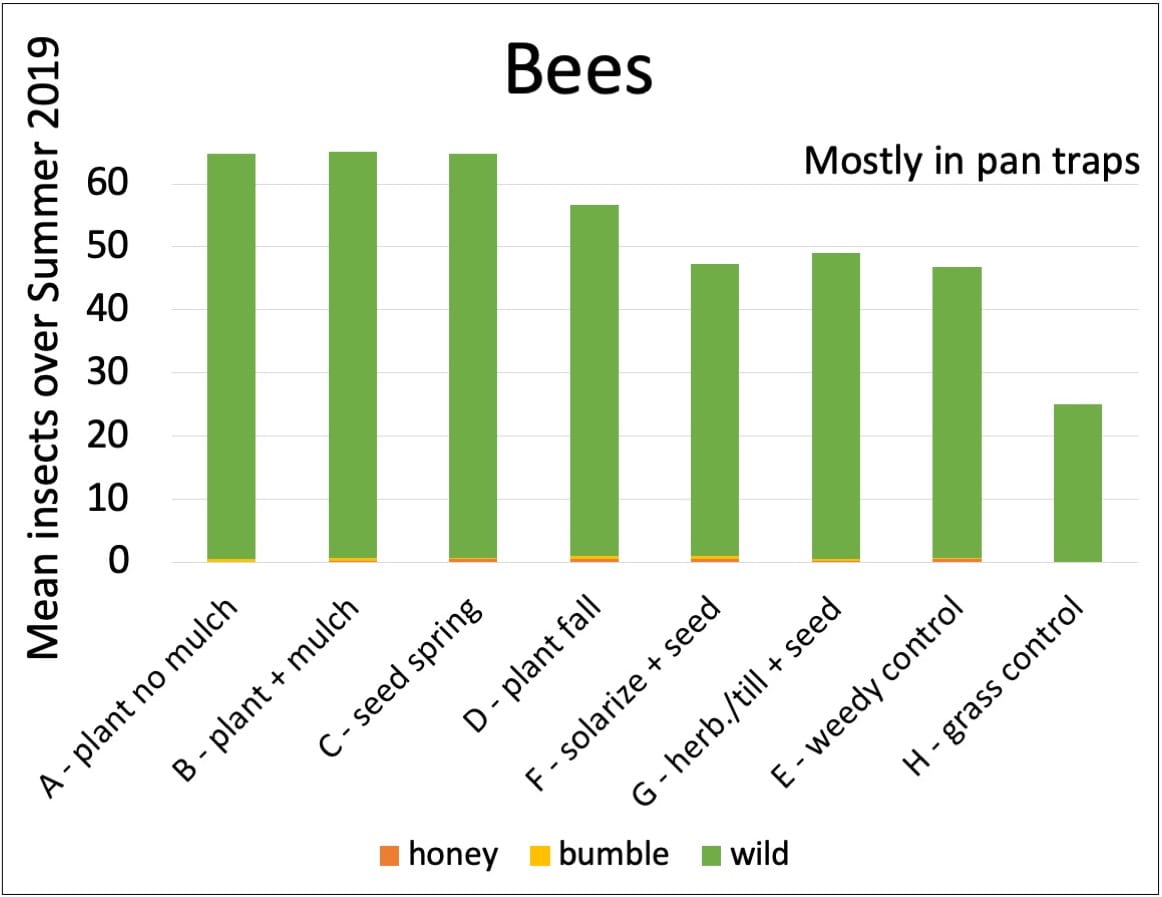
Bees

Six pictures of different bees. Some are large like bumble bees or carpenter bees, some are smaller, and one is green.
When we think of bees, sometimes we think of just honey bees and bumble bees. But many different bees utilized the pollen and nectar from the wildflowers we planted. Just a few are pictured here.

Interestingly, while we collected a lot of bees of many different kinds over the summer (at least 18 different genera), very few were the iconic honey bees or bumble bees. I have been told by a bee expert that the pan traps tend to catch bees other than honey or bumble bees, and we did set these traps about twice as often as we used sweep nets. So this may have impacted the types and numbers of bees we collected. Nevertheless, these data are a reminder that there are lots of bees out there besides the ones we’re most familiar with. I encourage you to learn more about wild bees of New York.
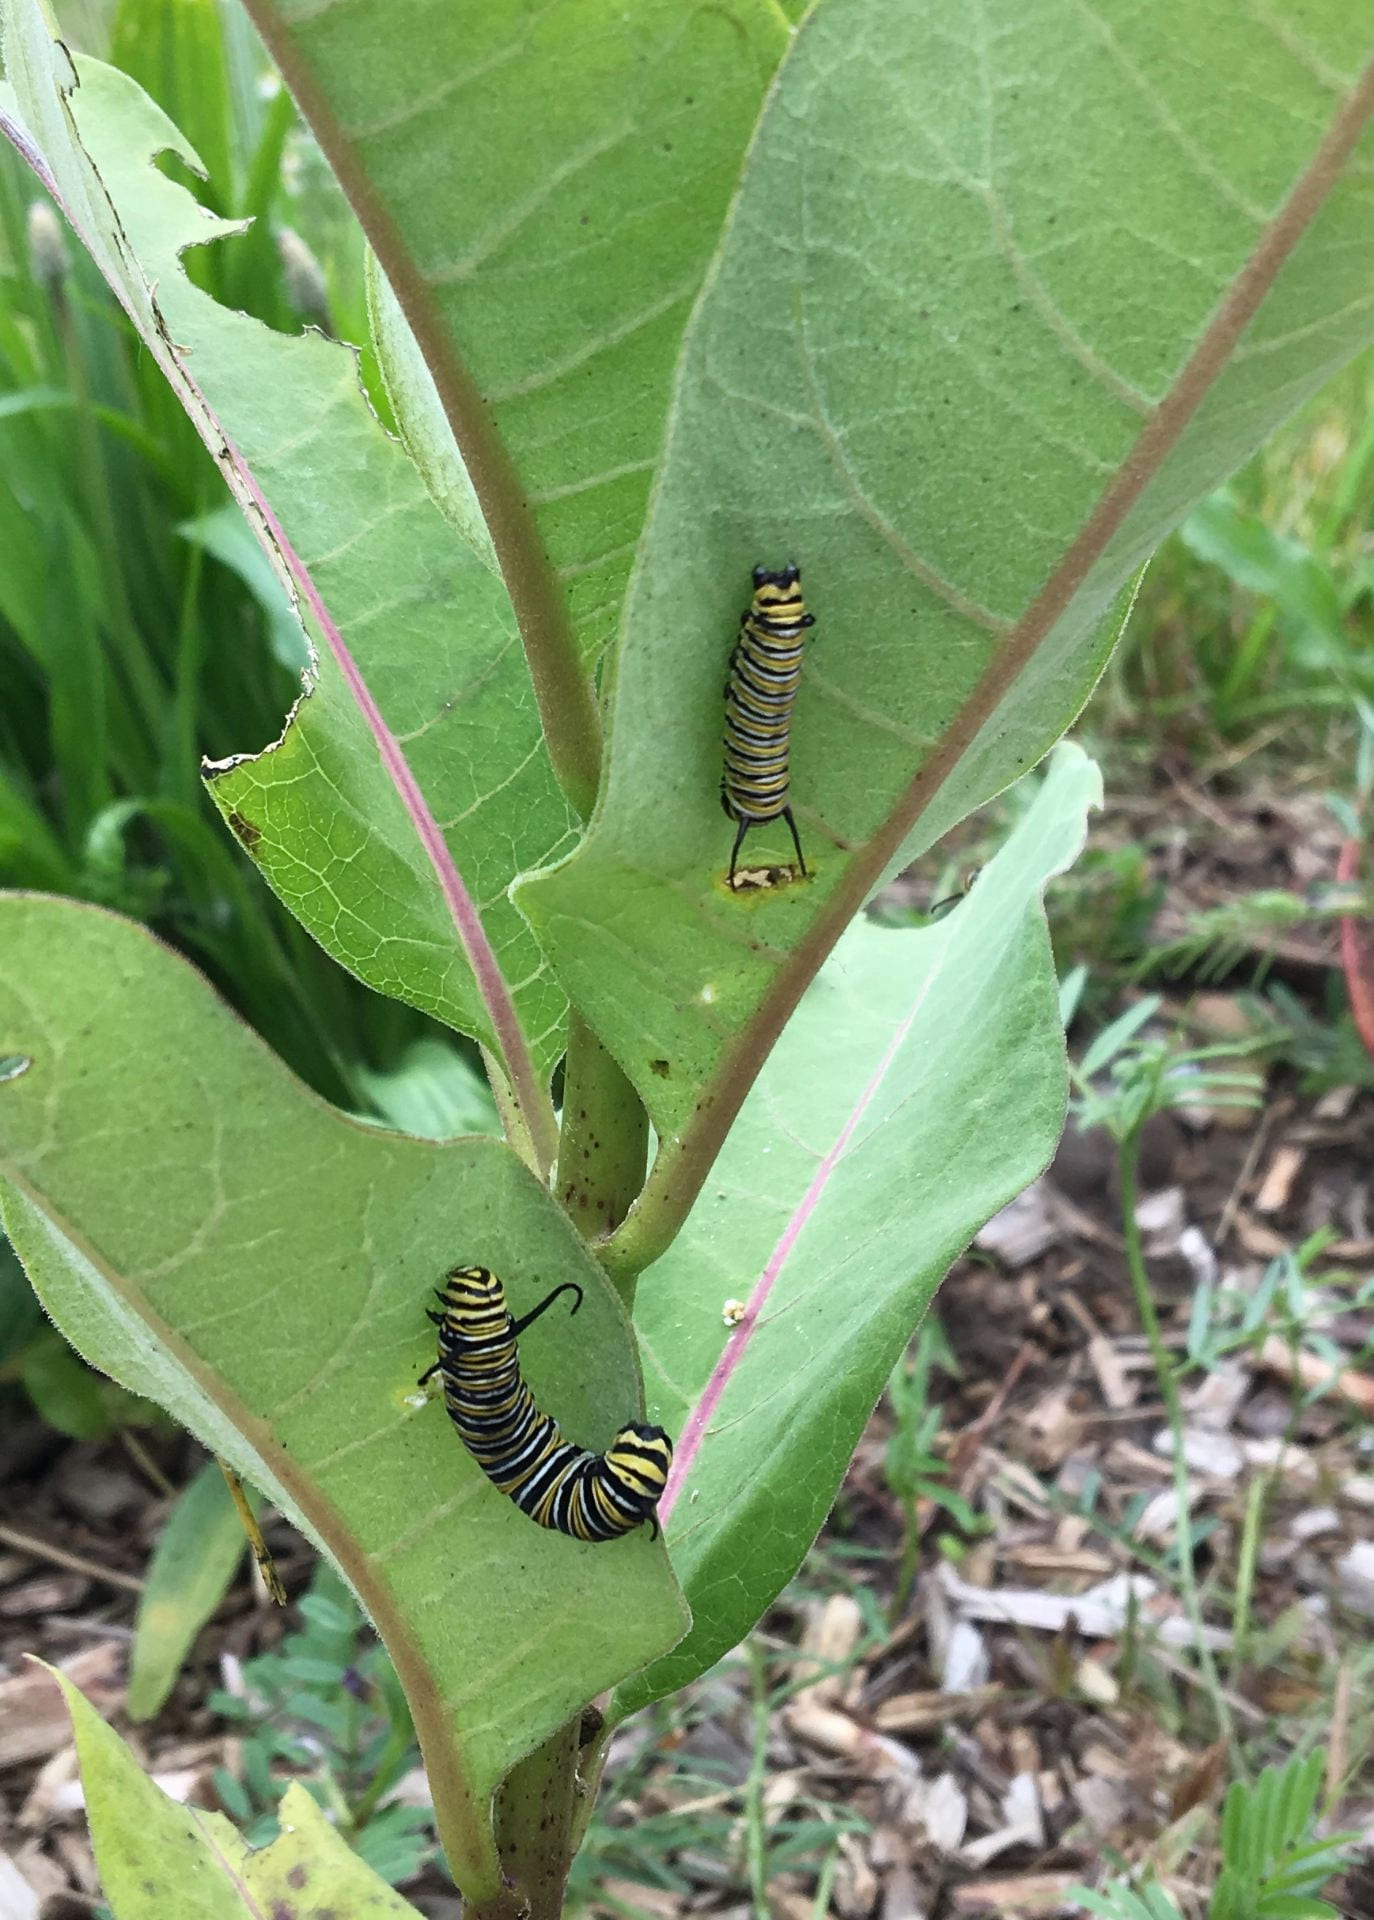
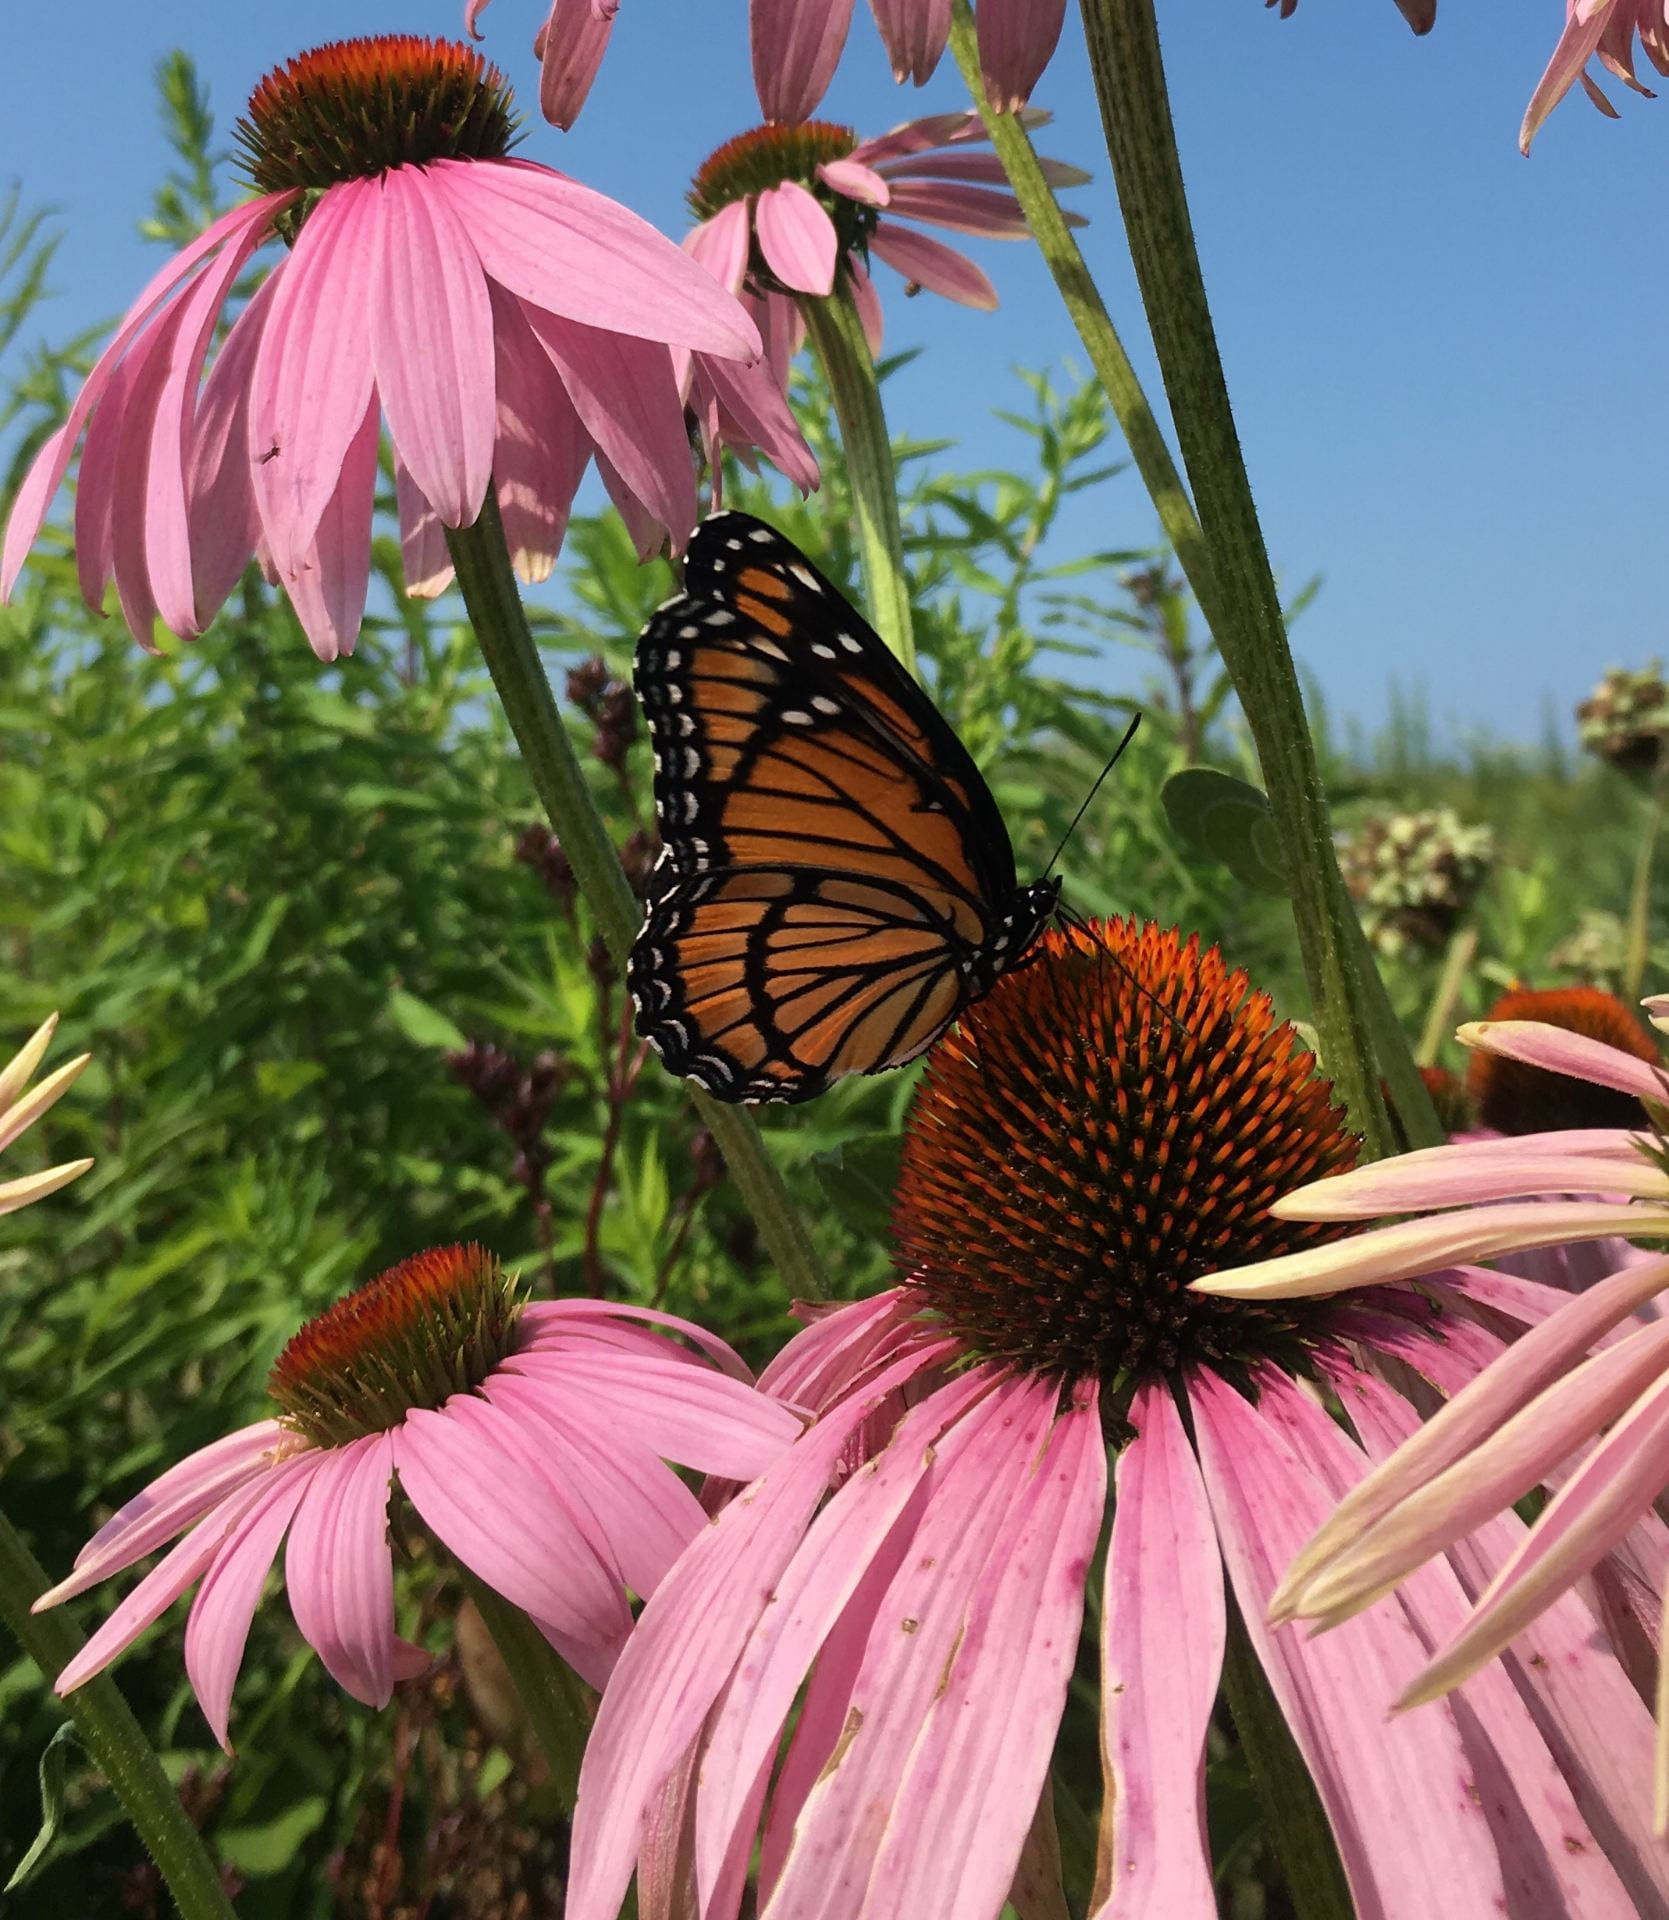
A bar graph showing the average number of bees caught in each treatment (mostly in pan traps) summed over the entire summer. The most bees were caught in spring-planted treatments (A, B, and C) and the least bees were caught in the grass control treatment (H). The bars contain very small orange (for honey bee) and yellow (for bumble bee sections) sections. The vast majority of bees caught were other wild bees (green).
We caught quite a few bees last summer! However, the vast majority of them were not honey or bumble bees. Importantly, we don’t have bee counts for all sampling dates, yet.

Butterflies

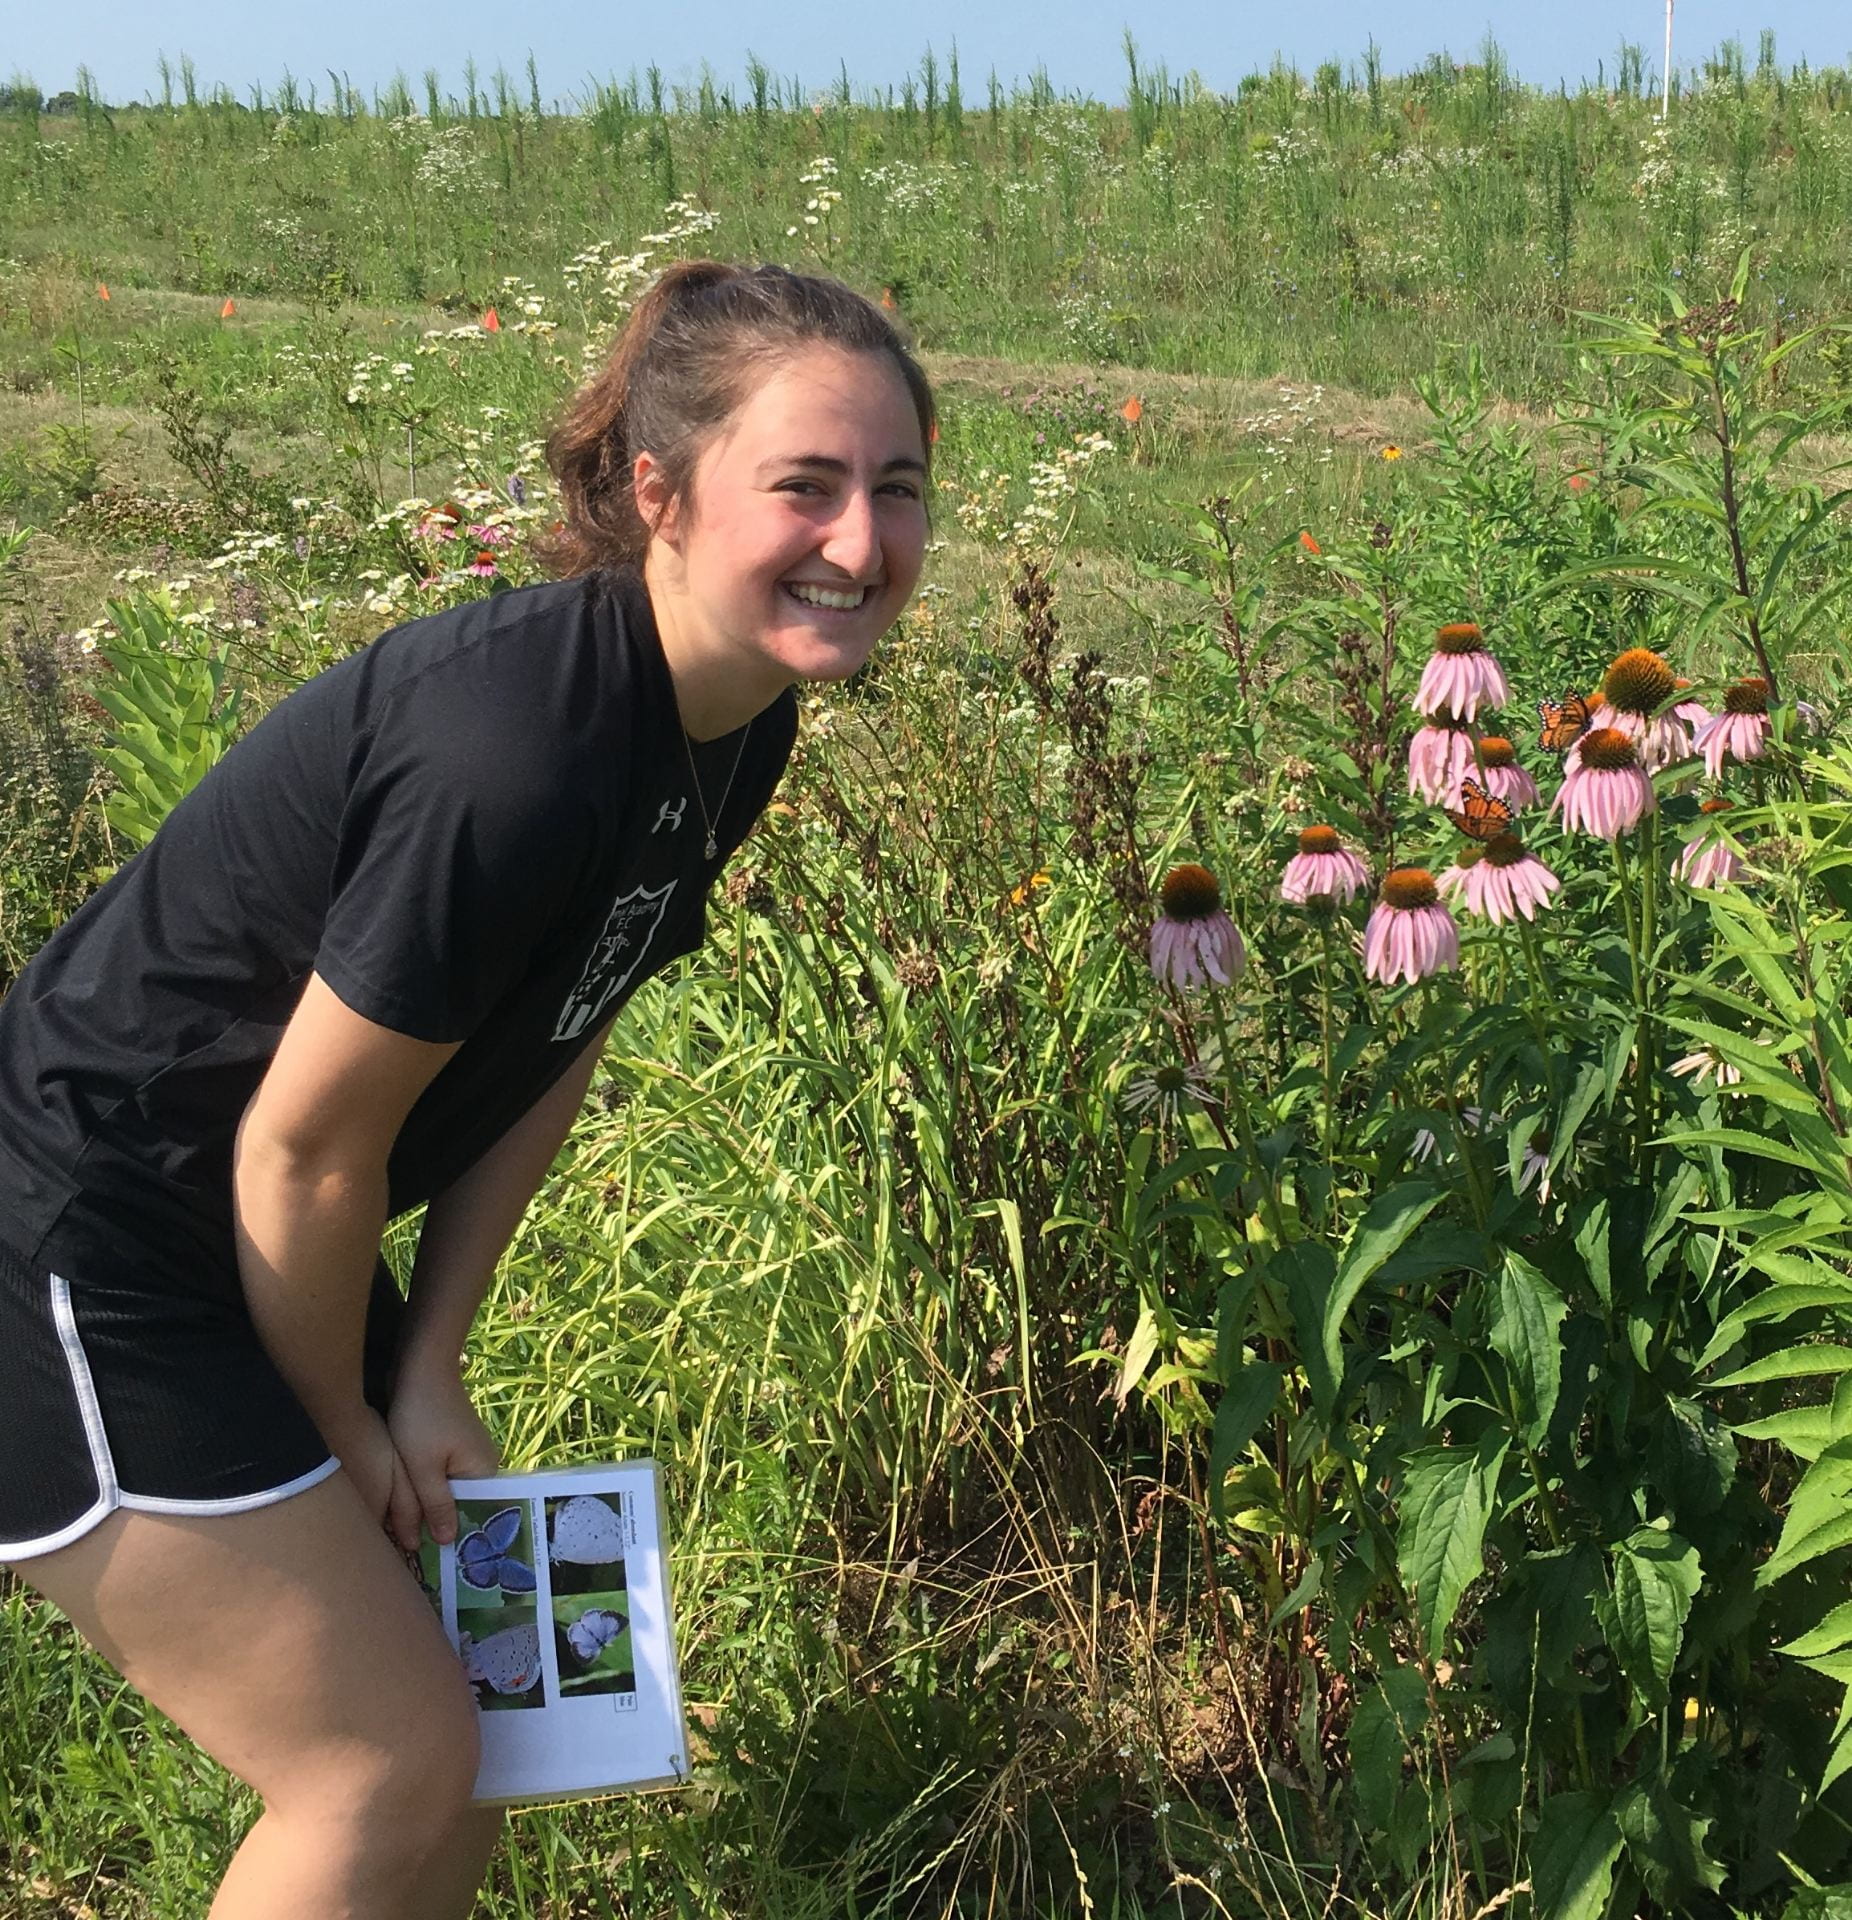
At the beginning of this post, I listed three methods we used to collect insects. Well, actually there was a fourth method, but it was used to count insects rather than to collect them. We did a Pollard Walk through each plot once a month by simply walking along the side of the plot and counting the number and type of butterflies we saw. We counted very few butterflies during these walks, but here are pictures of the species that did visit our plots (either in the adult or caterpillar life stage).

Collage of six different butterflies (Milbert’s tortoiseshell, viceroy, clouded sulphur, red admiral (photo by Daniel Herms, The Ohio State University and available on Bugwood.org), cabbage white (photo by Mary C Legg, available on Bugwood.org), and painted lady) and two caterpillars (monarch and swallowtail).
These are the butterflies we observed in our beneficial insect habitat plots during Summer 2019. Some, like the monarch and swallowtail we only saw as caterpillars; never as adults.

So that’s it for the beneficial insects I’m going to write about today. We also caught some not-so-beneficial insects (and mollusks).

Tarnished plant bugs

Three pictures of tarnished plant bugs, feeding on the stem of a yellow flower, up close, and sitting on a white aster flower.
Tarnished plant bugs have a distinct pattern on their backs, and also benefit from the same floral resources that support beneficial insects.

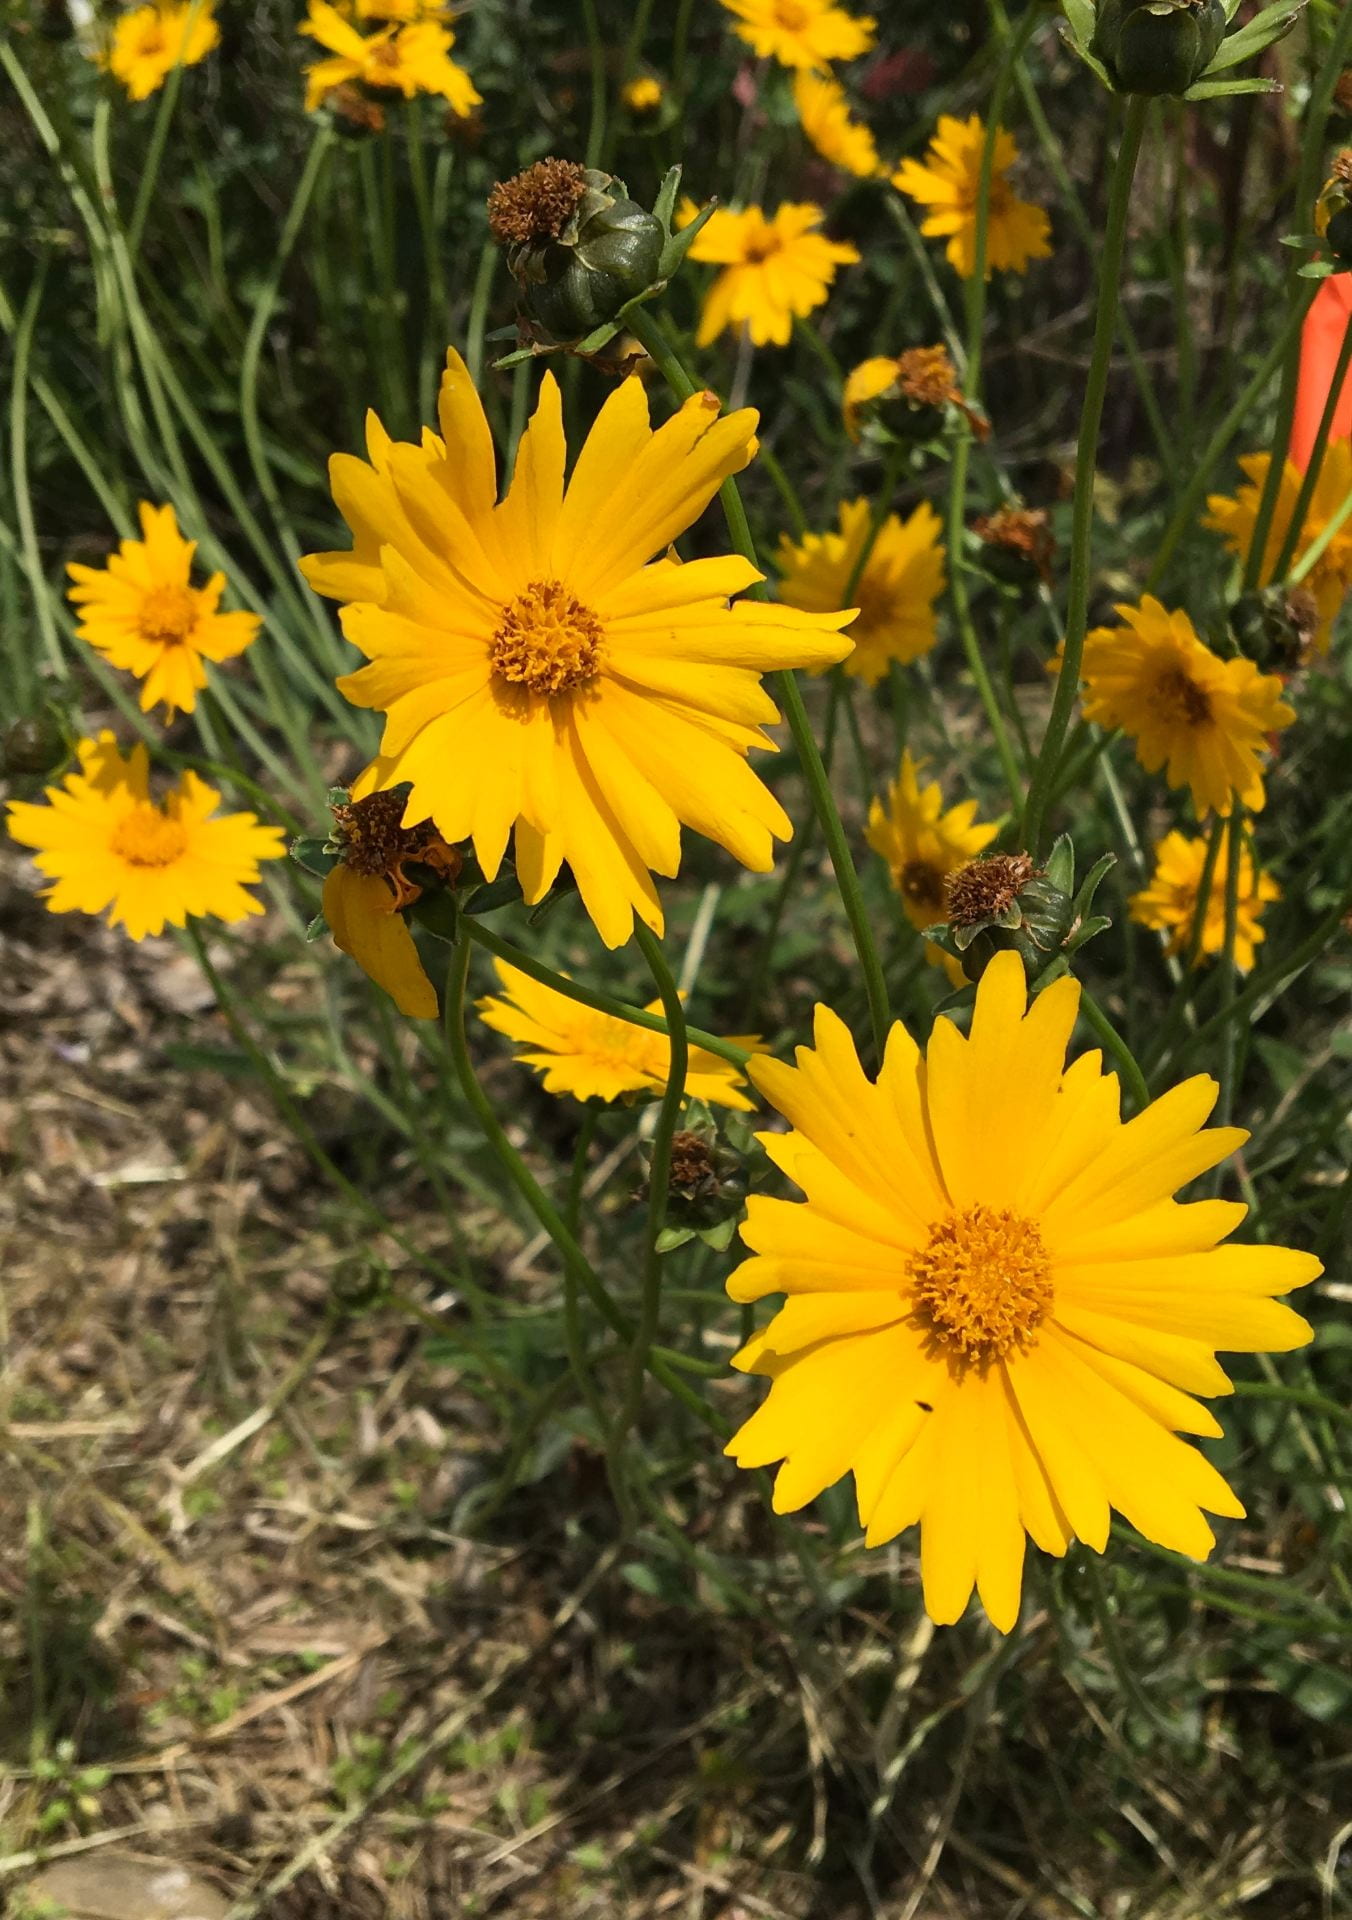
These are generalist herbivores, feeding on leaves, fruits and flowers of many plants. They can be damaging pests on some fruits (like strawberries) and vegetables. In our plots, I think they caused some damage to the coreopsis flowers. We’re not too worried because they aren’t pests of Christmas trees, but we were disappointed to find the largest numbers of tarnished plant bugs in the more mature habitat plots (those started by transplanting, as opposed to direct-seeding). Other researchers also reported that planting wildflower strips adjacent to strawberries could increase tarnished plant bug populations.

A bar graph showing numbers of tarnished plant bugs caught in each treatment (mostly in sweep nets, but some in pan traps). More tarnished plant bugs were caught in treatments with transplanted wildflowers (A, B, and D), and also quite a few in the weedy control. The fewest tarnished plant bugs were caught in the grass control plots.
I added up all of the tarnished plant bugs we caught in each plot, then took the average of these summer-long counts from the four plots of each treatment in our field. The black lines stretching above and below the top edge of each bar show one standard error (measure of variability amongst the four plots) above and below the mean value.

Leafhoppers

Two different leafhoppers (one yellow and one green) magnified to clearly show their pointy heads and bristled back legs.
There are many different species of leafhoppers out there, but they all have pointy heads that are flattened and bristles on their back legs. The bristles are much easier to see with magnification, as in these pictures.

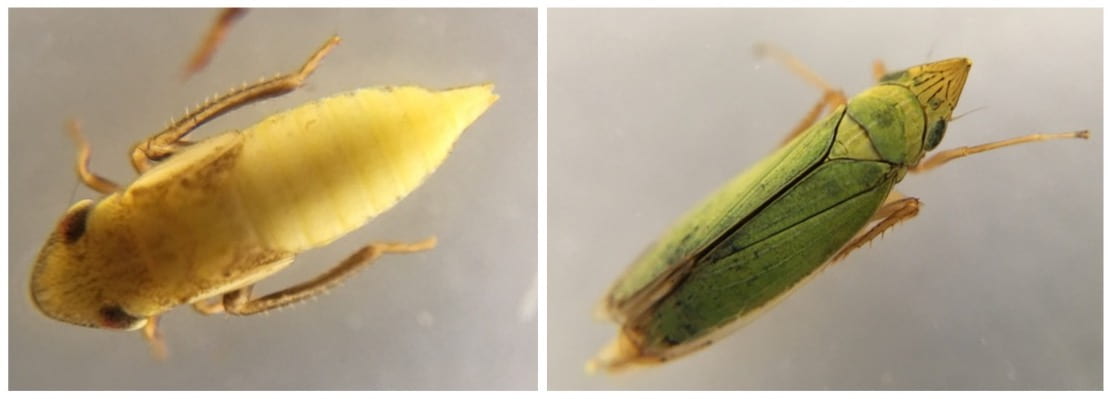
Leafhoppers are another insect that we aren’t too concerned about with Christmas trees, but can be a pest of other crops. I learned that you can distinguish this group of insects by their pointy flattened (top to bottom) heads and the bristles on their back legs. The spring transplanted plots in which wildflower plants were most mature and produced the most blooms also had fewer leafhoppers than other treatments.
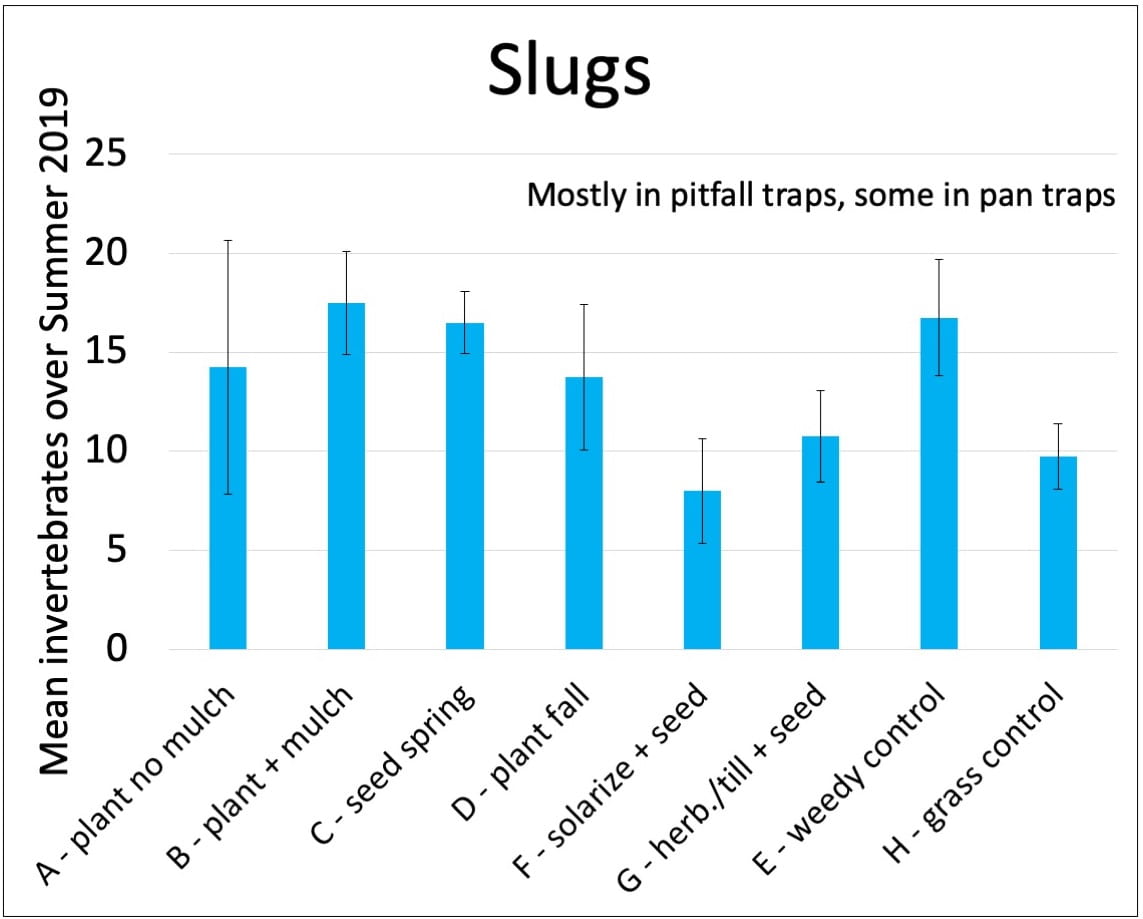
A bar graph showing numbers of leafhoppers caught in each treatment (mostly in pan traps, but many in pitfall and sweep nets, too). Although we caught a lot of leafhoppers, we caught fewer in the treatments where wildflowers were transplanted in the spring (A and B).
I added up all of the leafhoppers we caught in each plot, then took the average of these summer-long counts from the four plots of each treatment in our field. The black lines stretching above and below the top edge of each bar show one standard error (measure of variability amongst the four plots) above and below the mean value.


Slugs

Slimy slug being held next to a ball point pen for size comparison. The slug is about one third the length of the pen.
Biggest slug of 2019 insect sampling!

As I mentioned at the beginning of this post, slugs are mollusks, not insects (or even arthropods) and they can be pests of many different crops. The picture above is definitely the largest slug that we collected during 2019. Interestingly, there seemed to be fewer slugs in the plots where we solarized the soil during the 2018 growing season. I was interested to learn that soil solarization is known to kill slug eggs, and I wonder if we’re seeing that effect here. I don’t know how far slugs move from where the eggs hatch, and it will be interesting to see if this effect persists in future years.

A bar graph showing numbers of slugs caught in each treatment (mostly in pitfall traps, but some in pan traps). We caught fewer slugs in the plots that were solarized and had wildflowers direct seeded in the fall (treatment F) than in other treatments.
I added up all of the slugs we caught in each plot, then took the average of these summer-long counts from the four plots of each treatment in our field. The black lines stretching above and below the top edge of each bar show one standard error (measure of variability amongst the four plots) above and below the mean value.

Believe it or not, this is not the full list of insect (or arthropod, mollusk, or annelid) groups we collected and counted. Also, I will remind you again that these data (especially the bee data) are preliminary. Although I’m sad to be unable to collect insects this summer due to COVID-19, I’m looking forward to finishing the analysis of the 2019 data and getting ready to hopefully collect insects again in 2021. In the meantime, you can see pictures of what’s happening in these plots throughout the summer on my Twitter and Instagram accounts. And I will write at least one more post about this project later this year.


This post was written by Amara Dunn. All pictures or videos were taken by her, unless otherwise credited.

This work is supported by:

  • Crop Protection and Pest Management -Extension Implementation Program Area grant no. 2017-70006-27142/project accession no. 1014000, from the USDA National Institute of Food and Agriculture.
  • New York State Department of Agriculture and Markets
  • Towards Sustainability Foundation

Compatibility: Pesticides and natural enemies of pests

Green insect with lacey wings
Lacewings (especially larvae; this one is an adult) are great natural enemies of pests. You want to keep them happy and healthy!

Natural enemies of pests are going to help you out with pest control, so when you are applying pesticides, it’s in your best interest to choose products that will have the least impact on them. Two quick points before we get into details for where to find this information:

  1. Remember that the information in this post is not a substitute for a pesticide label. The label is the law, and you must read and follow the label of any pesticide you are using. Laws and labels change. It is your responsibility to use pesticides legally. Trade names used here are for convenience only; no endorsement of products is intended, nor is criticism of unnamed products implied. For questions about pesticide use, regulations, and safety, contact the Cornell Pesticide Management Education Program: pmep_webmaster@cornell.edu.
  2. A great way to protect natural enemies is by following the steps for IPM. Preventing pests (e.g., through cultural strategies and exclusion), scouting to detect pests early when populations are low, and proper identification of pests will help you reduce your need to use pesticides and can save you money. Win win!

Ok, let’s assume you’re doing good IPM and you’ve gotten to the point where you need to choose a pesticide. How do you make the best choice for protecting natural enemies? Here are a few options. (Note that I did post about this about 2 years ago. I’ve learned more, so I thought an update would be in order.)

Read the label

This should go without saying. You should be doing this anyway when you are considering using a pesticide. The label may contain information about the compatibility of a pesticide with either natural enemies or pollinators. And of course it will contain important information about how to minimize risks to yourself and the environment when you use it.

EIQ

EIQ stands for Environmental Impact Quotient. You can read more details on the NYSIPM website, but in a nutshell the EIQ puts a number on the risks of pesticides at the rates they are applied in the field. You can use the EIQ calculator on our website to compare these numbers for different pesticides. The higher the number, the higher the risk. There are different components to the EIQ; risks to consumers, workers, and the environment (ecological). The ecological risk will include risks to natural enemies (as well as fish, birds, and bees).

Pocket IPM Greenhouse Scout App

The Greenhouse Scout app provides information for doing IPM in greenhouses, including pest insects, beneficial insects, application technology, and pesticide interactions. It also gives you a place to record scouting results and track product applications.
A screenshot from the home screen of the Pocket IPM Greenhouse Scout App. You can find information about compatibility with natural enemies under either “Beneficials” or “Pesticide Interactions”.

Temporary update: As of January 2024, this app is in the process of being updated and is not currently available. Hopefully a new and improved version will be available again soon!

Especially if you are growing in a greenhouse and releasing a lot of natural enemies, you may find this app helpful. In addition to providing information about compatibility of pesticides with arthropod natural enemies you may be releasing, you can also use it to help you keep records of scouting and product applications.


Cornell Guidelines

If you are a commercial producer, hopefully you are already utilizing the Cornell Guidelines, as they are a wealth of information on many subjects. At least some of them also include information on the toxicity of different pesticides to natural enemies. For example, if you have the grape guidelines, check out Table 4.2.2 for insecticide toxicity to natural enemies.

Websites and apps from companies that produce natural enemies

Companies that sell natural enemies (especially predatory and parasitoid arthropods for greenhouse pest control) have an interest in making sure that customers don’t inadvertently kill the natural enemies they buy with pesticides they are applying. I am aware of searchable databases, apps, or charts describing pesticide compatibility from four companies that sell (mostly) arthropod and nematode natural enemies: Agrobio, Biobest, BioWorks, and Koppert. If you know of some I’ve missed, please let me know! There are of course other companies that supply natural enemies. Here I’m focusing on resources that help you choose pesticides to conserve natural enemies.

Agrobio

This website is also available as an app for Android (but not Apple) devices. To use it, start by clicking Organisms selection and choose the natural enemies you want to conserve. Then, click Ingredients selection and choose the pesticides you are thinking about applying. You can only search active ingredients, not product names. Finally, click Query. Use the legend to help you interpret the table that’s produced.

Biobest

Biobest has put their compatibility information into an app for Android and Apple devices. Select pesticides by either active ingredient or commercial product name. Then, search for the name of the Beneficial organism you want to conserve. Note that there are a lot of pesticide/natural enemy combinations for which toxicity data just aren’t available. If you select a pesticide, then natural enemies for which no data are available will be grayed out in the Beneficial organism list. As you check boxes next to pesticides and natural enemies, a chart is automatically generated. The results include information on toxicity to different life stages of the beneficial organisms and persistence of the product.

BioWorks

BioWorks provides a table of the compatibility of their products with pesticides, fertilizers, and adjuvants. You can filter the table by several criteria to find the information you’re looking for.

Koppert

This website is also available as an app for Android and Apple devices. Start by entering the name of the Beneficial organism you want to protect. You can search by either the Koppert product name, or the Latin (scientific) name, but you can’t select from a drop-down menu. Just start typing. Then, choose the Agent (pesticide you are considering applying), by either trade name or active ingredient. Again, you need to know the name; you can’t select from a drop-down list. Start typing, and then check the box next to the product you are interested in. Click Results and be sure to click on ‘Legend’ at the bottom to help you interpret the table. There is also a more complete explanation of information in the legend under Info.

Some caveats about these websites

Admittedly, finding information about conserving natural enemies that are not commercially available for release (e.g., in greenhouses) has some challenges. These websites tend to focus on what you can buy and release, rather than on what may be naturally occurring in a field. Although sometimes there is some overlap. These apps/websites don’t include all natural enemies, and data aren’t available for all natural enemy/pesticide combinations. Also, these websites/apps usually list natural enemies by scientific names. Do you know what the scientific name of a lacewing is? I didn’t before I started this job!

To help with this last barrier, I created a chart (also below) to help you figure out what scientific names you should look for on these websites/apps if you want to conserve a particular natural enemy. It also includes information about which pests the natural enemies target, whether they are commercially available, and whether they are naturally occurring (not necessarily native) in NY.

Arthropod and nematode natural enemies

Can I buy them? Found in NY? If I want to conserve this beneficial arthropod… (whose scientific name is…) that helps me control… I should look for these names on the compatibility apps: 
yes yes aphid midges Aphidoletes aphidimyza aphids Aphidoletes aphidimyza
some yes beetles that are predators (for example, rove beetles, ground beetles, and others) Coleoptera is the scientific name of the insect group that includes all beetles. The following families are generally predatory: Coccinellidae (lady beetles), Carabidae (ground beetles), Staphylinidae (rove beetles), Cantharidae (soldier beetles), Melyridae (flower beetles) many insect pests Coleoptera is a beneficial insect listed on at least one compatibility app. However, some coleoptera are pests. And, since this is such a broad group, the compatibility information provided may not be correct for all beneficial beetle species.
yes hover flies, syrphid flies Syrphus spp, and many, many others aphids Syrphus spp.; Syrphus corollae; Episyrphus balteatus
some yes lacewings Chrysoperla spp. and some others aphids, insect eggs, small larvae Chrysopa carnea = Chrysoperla carnea; Chrysoperla spp.
some yes lady beetles Coccinellidae aphids, mites, small insects, insect eggs Coccinelidae, Coccinella 7-punctata, Hippodamia convergens
some yes minute pirate bug Orius insidiosus insect eggs, small caterpillars, thrips, mites, aphids Orius laevigatus may be a reasonable proxy; Orius spp.; Orius insidiosus
yes yes nematodes Steinernema spp., Heterorhabditis spp. thrips, fungus gnats, shore flies, some grubs Nematodes (note that this is a very broad category and it’s possible there are differences among species), Heterorhabditis bacteriophora, Steinernema, Steinernema feltiae, Steinernema carpocapsae
some yes parasitoid wasp Aphidius spp. aphids Aphidius spp., Aphidius colemani, Aphidius matricariae, Aphidius ervi
some yes parasitoid wasp Eulophidae, Diglyphus spp. leafminer larvae Diglyphus isaea
yes yes parasitoid wasp Braconids, Dacnusa sibirica leafminers Dacnusa sibirica
yes parasitoid wasp Aphelinidae, Aphelinus semiflavus aphids on potatoes Aphelinus abdominalis or Aphelinus mali may be reasonable proxies
yes yes predatory gall midge Feltiella acarisuga spider mites Feltiella acarisuga
some yes predatory mites Amblyseius (= Neoseiulus) fallacis, Typhlodromus spp., and probably others thrips, whitefly, pest mites; may vary among natural enemy species Amblyseius californicus, Amblyseius cucumeris, Amblyseius swirskii, Phytoseiulus persimilis are sold commercially and may be good proxies for the pesticide compatibility of naturally-occurring predatory mites
yes yes spined soldier bug Podisus maculiventris many immature insects, including many species of caterpillars Podisus maculiventris
 

some

some trichogramma wasps Trichogramma spp. moth eggs Trichogramma spp., Trichogramma brassicae, Trichogramma cacoeciae, Trichogramma evanescens, Trichogramma pretiosum

Other species of interest…

Can I buy them? Found in NY? If I want to conserve this beneficial insect… (whose scientific name is…) that helps me control… I should look for these names on the compatibility apps: 
yes yes bumble bee Bombus spp. NA – pollinator Bombus spp., Bombus terrestris
yes yes European honey bee Apis mellifera NA – pollinator Apis, Apis mellifera

Notes:

Different strains or populations of these natural enemies are sold by different companies and each population may differ from natural populations. Each company is most likely to report compatibility data that applies to their population. It’s not perfect, but it’s a start.

When the first word in the scientific name of an insect (e.g. Trichogramma) is followed by the designation ‘spp.’, it means multiple species that all belong to the same genus. Some compatibility information is given for only the larger group (e.g., Aphidius spp. or Syrphus spp.).

Natural enemies that are pesticides (active ingredients are microorganisms, i.e., fungi, bacteria, viruses)

If I want to conserve this microbial natural enemy… (whose scientific name is…) that helps me control… I should look for these names on the compatibility apps: 
Bt Bacillus thuringiensis (various strains are available, and they control different pests) many caterpillars and some immature beetle and fly pests (target pest varies by strain) Bacillus thuringiensis
entomopathogenic fungus Paecilomyces fumosoroseus = Isaria fumosorosea, Beauveria bassiana, Metarhizium anisopliae (= M. brunneum) (various strains) many insects (target pest depends on fungal species and strain) Paecilomyces (=Isaria) fumosoroseus, Beauveria bassiana, Metarhizium anisopliae (= M. brunneum)
fungi that attack plant diseases there are multiple species, including Trichoderma harzianum (several strains) Plant pathogens (the target pathogen depends on the fungal strain) Trichoderma harzianum T-22 is the only fungal natural enemy I found on these apps, so far. It is unlikely that its compatibility is representative of other fungi that are natural enemies.

Notes:

Different strains or populations of these microorganisms are sold by different companies and each of these populations may differ from natural populations. Each company is most likely to report compatibility data that applies to their population. It’s not perfect, but it’s a start.

In these apps/websites, the microbial active ingredient may be listed as the natural enemy (e.g., Paecilomyces fumosoroseus on Biobest website), but sometimes it’s only listed as a pesticide active ingredient. For compatibility of biopesticides with chemical pesticides, you should start by reading the label, then seek information provided by the manufacturer. I am starting to create biopesticide profiles that include available compatibilitiy information for these products.

All tables were assembled by Amara Dunn, NYSIPM using information from Natural Enemies of Vegetable Insect Pests (Hoffman & Frodsham) and were last updated January 2020.

Give it a try!

Imagine you were considering using one of the following active ingredients:

abamectin

acequinocyl

fenpyroximate

…to control spider mites. (Of course, before you did this, you’d read the labels and be sure that the use you were considering was legal!) If you were concerned about hurting parasitoids that help with aphid control (for example, the species Aphidius colemani and Aphidius ervi) which of these active ingredients would be the best choice (from a compatibility standpoint)?


Go ahead!


Look it up!


A note about microorganisms as natural enemies

Green leaf with blue rectangles with smiling faces representing microbes as natural enemies of the pest microbes (yellow rectangles with shocked faces). The blue microbes are producing blue droplets (representing antimicrobial compounds).
Microbes used to control pests are biopesticides. In this conceptual diagram, the happy blue microbes are producing antimicrobial compounds that are killing the plant pathogens (represented by yellow rectangles with shocked faces).

There are a few “natural enemies” on this chart that are actually biopesticides, and I have listed them separately. Remember that microorganisms (fungi, bacteria, viruses) that are natural enemies of pests are biopesticides. A few of them can be found in the websites/apps summarized above. There are two compatibility questions when it comes to using biopesticides with living microorganisms as active ingredients: (1) Will this biopesticide harm other natural enemies (e.g., predators and parasitoids)? and (2) Will the living microbe in this biopesticide be killed by other pesticides I might use? The websites/apps have some information about the compatibility of biopesticides with arthropod natural enemies. If you’re wondering about the compatibility of biopesticides with other pesticides, that may be a topic for another post (so many posts to write, so little time!). I’ll just offer two quick pieces of advice here:

  1. Read the label of the biopesticide. If it doesn’t contain compatibility information (for use with other pesticides) or doesn’t answer your questions about compatibility with other natural enemies, contact the manufacturer to get your questions answered.
  2. If you happen to be using one of their products, BioWorks describes the compatibility of their products with other pesticides, and this information is linked to individual product pages.

And what about the bees?

Take a look at the resources created by the Pollinator Network @ Cornell. They have prepared decision-making guides for several crops already, with more to come.


This post was written by Amara Dunn, Biocontrol Specialist with the NYSIPM program. All images are hers, unless otherwise noted.

How do biofungicides fit in vegetable disease management? An update after Year 2

Healthy squash plants, just starting to flower in the foreground, with a field and barn in the background.
Some of the squash plants in one of our 2019 field trials looking at the role of biofungicides in managing cucurbit powdery mildew.

We have been working on a 2-year project funded by the New York Farm Viability Institute to look at adding biofungicides to the management of two vegetable diseases: cucurbit powdery mildew and white mold. In addition to summarizing results from Year 1 of the trial, previous blog posts also covered some of the details about how to best use the biofungicides we’re testing. During the summer of 2019, we completed our second year of trials. The numbers have all been crunched, and here’s a summary of what we learned. If you want to read all the nitty gritty details, a lengthy full report from Year 2 is available here.

Project goals

During the second year of this project, we wanted to answer a few questions for growers:

  1. Can you replace some conventional fungicide applications for cucurbit powdery mildew in winter squash with one of three OMRI-listed biofungicides (LifeGard, Regalia, or Serifel) while maintaining disease control, crop quality, and yield?
  2. Can you get better control of white mold in green beans by Contans prior to planting, and Double Nickel at bloom?
  3. What are the costs (versus benefits) of using these biofungicides in these ways?
  4. Can NDVI sensors help us detect disease early? Can they help us detect differences in plant health as a result of using biofungicides?

White mold – what we did

This table summarizes the white mold treatments in green beans. Replicated plots were treated with Contans in the third week of May, prior to planting; Double Nickel when snap beans were at 10% bloom (late June or early July) and 7 days later; both Double Nickel and Contans; or neither. Treatments are summarized below.

Timing Non-treated Contans Double Nickel Contans + Double Nickel
Pre-plant Contans
(2 lb/A)
Contans (2 lb/A)
10% bloom Double Nickel LC (2 qt/A) Double Nickel LC (2 qt/A)
7 days later Double Nickel LC (2 qt/A) Double Nickel LC (2 qt/A)

White mold – what we saw and what it means

There was very little disease in the white mold trials on either collaborating farm in 2019. This is great news for the collaborating farms, but it means that we couldn’t answer our question about whether using both Contans and Double Nickel in a single season would improve control of white mold. Sarah Pethybridge did three years of efficacy trials with Double Nickel and other OMRI-approved products. In small plot trials with uniform disease pressure Double Nickel was as effective as the conventional fungicides it was compared to in reducing disease. You can read about her results here.

Cucurbit powdery mildew – what we did

We conducted the cucurbit powdery mildew trials on one farm in Eastern NY and on research farms on Long Island and in Western NY, always using the bush acorn squash variety ‘Honey Bear’. This table summarizes the treatments we compared. Essentially, we started with two early biofungicide sprays, then shifted to rotating products when disease was detected. But, in some treatments we replaced the scheduled conventional product with a biofungicide every other week. The biofungicides we looked at were the same as last year: LifeGard, Regalia, and Serifel. We compared these treatments to both a regular conventional fungicide program and a “Conventional + skip” program where we just skipped every other conventional fungicide. And, we included an organic program with traditional OMRI-listed products plus the biofungicides. Important note: Luna Experience is NOT allowed for use on Long Island. We used it in a research plot in order to be able to make comparisons to trials conducted in other parts of the state. You can learn more about fungicide options for managing cucurbit powdery mildew here, and here.

Date Non-treated Conventional Conventional + skip Conventional + LifeGarda Conventional + Regaliaa Conventional + Serifelb Organicab 
~14 days before disease LifeGard WG (4 oz/100 gal) Regalia (2 qt/A) Serifel

(8 oz/A)

LifeGard WG (4 oz/100 gal)
~7 days before disease LifeGard WG (4 oz/100 gal) Regalia (2 qt/A) Serifel

(8 oz/A)

LifeGard WG (4 oz/100 gal)
First disease detection Vivando (15 fl oz/A) Vivando (15 fl oz/A) Vivando (15 fl oz/A) Vivando (15 fl oz/A) Vivando (15 fl oz/A) MilStop (3 lb/A)
+7-10 days Luna Experiencec (10 fl oz/A) LifeGard WG (4 oz/100 gal) Regalia (2 qt/A) Serifel

(8 oz/A)

Serifel (8 oz/A)
+14-17 days Quintec (6 fl oz/A) Quintec (6 fl oz/A) Quintec (6 fl oz/A) Quintec (6 fl oz/A) Quintec (6 fl oz/A) Suffoil-X (1% v/v)
+21-24 days Vivando (15 fl oz/A) LifeGard WG (4 oz/100 gal) Regalia (2 qt/A) Serifel

(8 oz/A)

MilStop (3 lb/A)
+28-31 days Luna Experiencec (10 fl oz/A) Luna Experiencec (10 fl oz/A) Luna Experiencec (10 fl oz/A) Luna Experiencec (10 fl oz/A) Luna Experiencec (10 fl oz/A) Serifel (8 oz/A)
+35-38 days Quintec (6 fl oz/A) LifeGard WG (4 oz/100 gal) Regalia (2 qt/A) Serifel

(8 oz/A)

Suffoil-X (1% v/v)

a LifeGard and Regalia were tank mixed with Nu Film P (1 qt/100 gal)

b Serifel was tank mixed with EcoSpreader (4 fl oz/100 gal) when applied at spray volumes of 30 to 40 gal/A.

c Luna Experience is not allowed for use on Long Island. The Long Island trial was conducted on a research farm.


We summarized disease severity on multiple dates over the season by calculating the area under the disease progress curve (AUDPC). This value describes with a single number how quickly disease developed and how bad it got. We also measured NDVI using a GreenSeeker as a way to quantify how green and healthy the leaves were. At the end of the season, we collected yield and Brix data.

Cucurbit powdery mildew – what we saw

Not surprisingly, there was some variability among sites. But at two sites disease severity was not statistically different when we compared the standard weekly conventional fungicide program to skipping every other fungicide spray. This was disappointing, since we were expecting more severe powdery mildew from extending the spray interval, providing room for the biopesticides to improve control. However, in the Long Island trial, although powdery mildew was more severe when the spray interval was extended, applying a biopesticide during the skip week did not improve control.

For the most part, replacing alternate conventional fungicides with biofungicides resulted in disease levels that were somewhere between the conventional fungicide program and the non-treated control. At two sites LifeGard and Serifel performed slightly better than Regalia. To keep this post a reasonable length, we’re only showing results from the Long Island trial, here.

Bar graph showing the amount of disease observed in each treatment in the Long Island trial. Alternating LifeGard, Regalia, or Serifel with conventional fungicides resulted in disease levels similar to skipping every other conventional fungicide. But skipping every other conventional fungicide did not result in statistically worse disease than the full fungicide program. The costs per acre of the conventional, conventional + skip, organic, conventional alternated with LifeGard, conventional alternated with Regalia, and conventional alternated with Serifel treatments were $204, $114, $274, $207, $268, and $348, respectively.
In the Long Island trial, the conventional, conventional + skip, and all three of the conventional/biofungicide programs provided pretty good powdery mildew control. The organic program was still better than the non-treated control. This graph shows only disease on the upper surface of the leaves (AUDPC = area under the disease progress curve). The black lines on each bar show one standard error above and below the mean value for that treatment. Bars with the same letter are not statistically different from each other. This graph also shows the cost (per acre) of the cucurbit powdery mildew fungicides for each treatment above each bar.

The above graph shows a summary of disease on the upper leaf surface over the whole season. We’re not reporting the data here, but if you look at disease ratings on individual dates or on the lower surface of the leaves, skipping every other fungicide or alternating conventional fungicides with biofungicides were not as good as the weekly conventional fungicide program.

At all three sites, yield was not statistically different when we compared the standard weekly conventional fungicide program to skipping every other fungicide spray. There were no statistically significant differences in yield in the Eastern NY trial, and few differences in the Western NY trial. In both trials, when Regalia was alternated with conventional fungicides the yield was slightly but not significantly lower than the conventional/LifeGard and the conventional/Serifel treatments. In the Long Island trial, only the full conventional treatment and treatments that included LifeGard or Regalia had significantly higher yields than the non-treated control. Again, we’ll show just the data from Long Island to keep this story briefer.

Bar graph showing the average weight of marketable fruit harvested from each treatment in the Long Island trial. The heights of the bars are fairly similar, but the bars representing the conventional, conventional/LifeGard, and conventional/Regalia treatments are the tallest. The value per acre of the marketable fruit harvested from the conventional, conventional + skip, organic, conventional/LifeGard, conventional/Regalia, and Conventional/Serifel treatments is $37,837, $46,335, $42,550, $38,561, $48,022, $45,661, and $43,862, respectively.
Yields from all treatments in the Long Island trial were pretty high. The black lines on each bar show one standard error above and below the mean value for that treatment. Bars with the same letter are not statistically different from each other. The yield per plot of 12 plants was extrapolated to the yield per acre (assuming 6 ft between rows and 2 ft between plants within rows, resulting in 3,620 plants/A) and used to estimate the average grocery store value (per acre) of each treatment, shown above each bar. The value of the organic treatment (*) was not adjusted to account for presumably higher prices for certified organic produce.

Our data did not suggest that NDVI readings taken with the GreenSeeker were a good replacement for visual scouting, or that this was a good tool for detecting differences in plant health among treatments. When NDVI readings differed among treatments, powdery mildew symptoms were readily evident. The most substantial differences in NDVI values among treatments were in the Long Island trial, where both the non-treated control and the organic treatment had much lower average NDVI values over the season.

On the whole, Brix were unaffected by powdery mildew management strategy. The only statistically significant differences in Brix values among treatments were in the Eastern NY trial where the conventional/LifeGard treatment had significantly lower Brix than the conventional/Serifel treatment.

Cucurbit powdery mildew – what it means

When the full conventional fungicide program didn’t result in statistically better disease control than skipping every other spray at 2 of the 3 sites, it’s not possible to say whether or not the biofungicides were good replacements for conventional fungicides against powdery mildew. However, they did not prove to be in the Long Island trial. Our results did not suggest that measurement of NDVI values with a GreenSeeker should replace visual scouting for cucurbit powdery mildew.

Depending on the trial location (and accompanying variations in spray schedules and rates), replacing some conventional fungicides with biofungicides ranged from slightly less expensive than the full conventional program to more than twice the cost. Although in most cases there were no statistically significant differences in the value of the crop between the conventional/biofungicide programs and the full conventional program, the numerical value of the marketable crop ranged from being slightly higher (LifeGard alternated with conventional fungicides on Long Island) to lower (all other biofungicide treatments). Again, the lack of statistically significant differences between the full conventional spray program and the conventional spray program with skips in 2 of the 3 trials makes any conclusions about the economics of replacing some conventional fungicides with biofungicides, tentative, at best. There’s a lot of room to fine-tune incorporation of biofungicides into spray programs to maximize cost effectiveness.

Recall from last year’s results that we did not detect any benefit from adding biofungicides to a full cucurbit powdery mildew fungicide program. So if you’d like to use biofungicides for cucurbit powdery mildew, replacing a conventional fungicide application or two is probably a better way to go. If you’ve tried this, we’d love to hear how it worked for you!


Remember that the information in this post is not a substitute for a pesticide label. The label is the law, and you must read and follow the label of any pesticide you are using. It is your responsibility to use pesticides legally.


This post was written by Amara Dunn (NYSIPM) and Meg McGrath (Plant Pathology & Plant-Microbe Biology, School of Integrative Plant Science, Cornell University). Thank you to the New York Farm Viability Institute for funding.

Creating habitat for beneficial insects: Time, money, and weeds

On the left is a picture of a woman in a sundress and straw hat standing in the middle of a sunny sunflower field with her arms raised in the air. Written at the top of the picture is the title “What I thought establishing habitat for beneficial insects would be like…”. On the right is a picture of three people, either on their hands and knees or bending over, pulling weeds (including dandelions) that are several feet tall. This picture has the title: “What it’s actually like.”In December, I updated you on how perennial wildflowers and grasses were establishing in our beneficial insect habitat plots during the 2019 growing season. As I wrote that post, I quickly realized that there was too much good information for just one post. So here’s the rest of the story when it comes to plant establishment – time, money, and weeds.

Before I get started, below is a quick reminder of what our treatments were. You can read all the details here.

Treatment Description
A Spring transplant, no mulch
B Spring transplant with mulch
C Spring direct seed
D Buckwheat cover crop, then fall transplant
E – control Whatever was growing there, just keep it mowed
F Soil solarization, then fall direct seed
G Herbicide and tillage, then fall direct seed

Weed control

One thing that has surprised me about this project (although others certainly gave me fair warning) was how big a role weed management plays in establishing habitat for beneficial insects. It’s definitely still a struggle in our plots.

Bryan Brown did weed assessments for us in May and September of 2019. The graph below shows the average percent of the area of each plot covered by either weeds (orange) or beneficial habitat flowers and grasses (blue).

Bar graph shows the average percent of plots covered with either weed or beneficial habitat plants in May 2019. Weed control in the treatment (B) where transplants were mulched had the best weed control. The worst weed control was in treatment D, where seedlings were planted in Fall 2018 after a buckwheat cover crop.
Mulching provided the best weed management when plots were assessed in May of 2019. Each bar shows the average of four plots per treatment, and has an error bar showing variation among these plots (one standard error above or below the average for the treatment).

This was before we did any hand-weeding. By far, the plots that were mulched in Spring 2018 (treatment B) had the fewest weeds compared to beneficial habitat plants. You’ll also notice that in May there were still relatively few weeds in the plots where we tried to deplete the weed seed bank in the soil through solarization (treatment F) or repeated herbicide and tillage (treatment G).

Picture on the left is of treatment B (Spring transplant and mulch) and shows small wildflower plants surrounded by mulch and few weeds. The middle picture shows treatment C (spring direct seed), a weedy plot. The picture on the right shows treatment F (solarization and fall direct seed), where you can still see at least 50% of the plot is bare soil, although many small and a few larger weeds are visible.
What some of the plots looked like on May 16, 2019 when Bryan did the weed assessment.

By September 2019, the spring transplant treatments looked even better. Our wildflowers grew well during 2019 (with the help of some extra hand weeding). The plants we transplanted in Fall 2018 are still struggling and not nearly as large as the wildflowers in treatments A and B. I think this may have more to do with the weed competition they experienced that first fall (when we couldn’t plant for a few weeks after the buckwheat was mowed) than transplant timing. Hopefully they will catch up.

Picture on the left is of treatment A (spring transplant, no mulch) and shows tall wildflower plants with some weeds. The middle picture shows treatment B (Spring transplant and mulch), full of large wildflowers and few weeds. The picture on the right shows treatment D (buckwheat and fall transplant), where the wildflower plants are much smaller, there are more weeds, and some bare ground is visible.
What some of the plots looked like on September 19, 2019 when Bryan did the weed assessment.

There are still a lot of weeds in the direct-seeded treatments (C, F, or G). Remember that our weed management strategy in these plots is repeated mowing to control annual weeds. Over time, the perennial wildflowers and grasses should take over. But it’s not supposed to be a quick method.

Bar graph shows the average percent of plots covered with either weed or beneficial habitat plants in September 2019. Weed control in the treatment (B) where transplants were mulched still had the best weed control. The worst weed control (besides the control plot where no beneficial habitat plants were planted) was in the three treatments using spring or fall direct seeding (C = spring direct seeding, F = soil solarization and fall direct seeding, G = herbicide and tillage with fall direct seeding).
Spring transplant treatments (A and B) looked the best after their second full growing season. The fall transplants (D) had more weeds, but these plants also have been in the ground for one less growing season. I’m still hoping they will catch up. Each bar shows the average of four plots per treatment, and has an error bar showing variation among these plots (one standard error above or below the average for the treatment).

Effort

Most of the treatments we are comparing required much less work in their second year (2019) than in their first (2018). The exception is that we spent a lot more time hand weeding treatment D (buckwheat cover crop followed by fall transplanting) in 2019. Although we weeded the two spring transplanted plots the same number of times in 2019 (twice), it took longer to hand weed the plots without mulch. I’m not surprised. If you’re looking for the right establishment method for your project, you really need to ask yourself how much help you have available and when. If you can get a lot of people excited about helping you install the planting, but worry about getting consistent volunteers year after year, mulch may be the right choice for you. In the direct seeded treatments (C – spring; F – fall following solarization; G – fall following herbicide and tillage), the time input for 2019 was mowing, which was relatively quick. And we did just a little hand weeding of perennial weeds.

Bar graph shows time (in person hours) spent on each treatment for both 2018 (in blue) and 2019 (in orange). The tallest bars are for treatments A, B, and D, but most of the bar for treatment B is blue (representing transplanting, mulching, and hand weeding in 2018). For treatment D, half the bar is orange (representing hand weeding in 2019). Treatment A shows more orange than treatment B, but less than treatment D.
Transplanting (treatments A, B, and D) still takes more time than direct seeding, but the extra time we spent mulching in 2018 paid off in 2019 when we spent less time hand weeding (treatment B compared to A and D).

Costs

Nearly all of our costs were incurred in the first year of the project (2018). The only additional costs from 2019 were for gas to run the mower. We did replace a few plants in transplanted plots in Fall 2019, but we used some extra plants we had purchased in 2018. Below is the total cost of the plants and other supplies for each treatment. Transplanting will always be more expensive than direct seeding.

Treatment Costs
A $417.12
B $539.29
C $18.83
D $390.55
E $3.40
F $149.10
G $23.12


You may remember that we were also collecting insects. I promise I will write more about the insects we caught in another post. If you are tired of looking at snow and bare trees outside, you can see pictures of some of the insects we caught in my post from August 2019.

This post was written by Amara Dunn. All pictures were taken by her, unless otherwise credited.

This work is supported by:

  • Crop Protection and Pest Management -Extension Implementation Program Area grant no. 2017-70006-27142/project accession no. 1014000, from the USDA National Institute of Food and Agriculture.
  • New York State Department of Agriculture and Markets
  • Towards Sustainability Foundation

Creating habitat for beneficial insects: How are things growing?

Planting of purple, yellow, and white flowers with blue sky in the background
Lots of flowers bloomed in 2019 in our habitat plots. Some we had planted, and some we hadn’t.

Obviously, nothing is growing right now, but I thought this would be a good time to update you on the success of our beneficial insect habitat plots during the 2019 growing season.

When things bloomed

Recall that the goal is to have at least one plant blooming all season long. We choose wildflower species accordingly, and it worked! The following table shows which months each species bloomed in 2019 (at least in the transplanted plots). An ‘X’ means the species was blooming during that month.

Wildflower May June July Aug Sep
Golden alexanders X X
Catmint X X X  X
Lanced-leaved coreopsis X X
Tall white beard tongue X X
Ohio spiderwort X X
Anise hyssop X X  X
Echinacea X X  X
Orange coneflower X X  X
Boneset X X X
Wild bergamot X X
Common milkweed X
NY ironweed X  X
Showy goldenrod  X
New England aster  X
Blue false indigo

You may notice that the blue false indigo never bloomed in 2019, which was disappointing. Most of these plants are still alive (as you’ll see later in this post). They just didn’t bloom. Maybe next year?

Here’s what each species looks like:

Plant with tiny yellow flowers arranged like Queen Anne’s Lace.
Golden alexanders (Zizia aurea)
Small purple bell-shaped flowers on stems with frosty-green leaves
Catmint (Nepeta faassinii)
Yellow daisy-shaped flowers with toothed edges
Coreopsis (Coreopsis lanceolata)
Clusters of white or pink bell-shaped flowers on top of tall stems
Tall white beard tongue (Penstemon digitalis). Obviously not all of these flowers are white!
Three-petaled purple flowers growing on plant with grass-like leaves.
Ohio spiderwort (Tradescantia ohiensis)
Small, pale purple flowers clustered at the top of a stem
Anise hyssop (Agastache foeniculum)
Pink daisy-shaped flowers with organge centers
Echinacea (Echinacea purpurea)
Large clump of daisy shaped flowers with yellow petals and dark brown centers
Orange coneflower (Rudbeckia fulgida var. fulgida)
Small white flowers in flat clusters
Boneset (Eupatorium perfoliatum)
Pale pink-purple flowers that look like small tufts on the top of stems
Wild bergamot (Monarda fistulosa)
Pale pink flowers with 5 sets of petals and a complex shape
Common milkweed (Asclepias syriaca)
Bright magenta flowers formed into small tufts at the top of the plant
NY Ironweed (Vernonia noveboracensis)
Large clump of small, bright yellow flowers
Showy goldenrod (Solidago speciosa)
Purple daisy-shaped flowers with yellow centers and very narrow petals. A small bee is visiting one of the flowers
New England aster (Symphyotrichum novae-angliae)
Pale blue-purple legume flowers. One is being visited by a bumble bee
Blue false indigo (Baptisia australis); hasn’t bloomed yet in our field. Photo credit: Ansel Oommen, Bugwood.org

Transplanted wildflowers

The wildflowers in our transplanted plots are surviving pretty well (>80%). In the plots that were transplanted in the fall after the buckwheat cover crop, the survival is a bit lower. I think this has to do with some weed control issues (more on this in a future post).

Percent of plants surviving was lowest in treatment D, but still above 80%. Survival did not change very much from Spring to Fall 2019.
How well have the transplanted wildflowers survived so far? Treatment A was transplanted in Spring 2018 and not mulched. Treatment B was transplanted in Spring 2018 and mulched. Treatment D was transplanted in Fall 2018 following a buckwheat cover crop. All have been hand weeded periodically. In both Spring and Fall of 2019 I counted plants to see how well they survived. The black lines on each bar in the graph show one standard error above and below the mean percent survival.

Some species have survived better than others, as the following chart shows. Again, we counted plants both in Spring and Fall 2019.

Bar graph showing the mean percent of plants of each species that were still alive in Spring and Fall 2019. With the exception of milkweed, all survival rates were at or above 80%, and losses were minimal from Spring to Fall.
Do some species of wildflowers survive better when transplanted? There’s a little bit of variability, but overall most are surviving pretty well.

What about the direct-seeded plots?

Only three species of wildflowers planted by seed in Spring or Fall 2018 bloomed during the 2019 season. The table below shows which months these blooms were seen (marked with an ‘X’).

Common name May June July Aug Sep
Coreopsis X X X
Blackeyed susan X X X
Partridge pea X X

Here’s what the flowers of blackeyed susan look like. The plant has much hairier leaves than the orange coneflower.

A daisy-shaped flower with yellow petals and a dark brown center
Blackeyed susan (Rudbeckia hirta)

And here’s the partridge pea:

Yellow flower with compound leaves cupped in a person’s hand
Partridge pea (Chamaecrista fasciculata)

But, I also spotted some wild bergamot, tall white beard tongue, asters, golden alexanders, and either echinacea or orange coneflower seedlings. (I haven’t honed my horticultural skills enough yet to distinguish the foliage of these last two wildflowers.)

Pictures of seedlings labeled (left to right, top to bottom) aster, golden alexanders, echinacea or orange coneflower, wild bergamot, and beard tongue.
Seedlings of some wildflowers could be identified in the direct-seeded plots by September 2019.

There were also plenty of weeds blooming throughout the summer, and many of them were providing pollen and nectar for pollinators and natural enemies. Here are just a few examples:

Four pictures showing a bee on a yellow flower, several daisy-shaped flowers with white petals and yellow centers, a yellow dandelion with a pink lady beetle on it, and a bumble bee visiting a pink clover flower
From left to right: A bee feeding on a weed in the aster family, blooming chamomile, a lady beetle on a dandelion, and a bumble bee visiting clover (that wasn’t planted).

This table summarizes when during the season different weeds were in bloom. Again, an ‘X’ indicates the weed was blooming that month.

Weed May June July Aug Sep
Campion X X X X X
Chamomile X X X X X
Clover X X X X X
Dandelion X X X X X
Vetch X X X X X
Viola X X X X X
Mustard X X X X
Deadnettle X X
Baby blue eyes X
Henbit X
Asters X X X X
Buckwheat X X X X
Oxalis X X X X
Plantain X X X X
Wild lettuce X X X X
Cinquefoil X X X
Indian hemp X X X
Redshank X X X
Chickweed X X
Galinsoga X X
Geraniums X
Sandwort X
Grass X X
Horse weed X X
Lambsquarters X X
Ragweed X X
Black bindweed X
Chicory X

There’s more!

In addition to keeping track of what bloomed from May through September, we were also still tracking costs and time spent on each plot in 2019. And of course we collected a LOT of insects. But those stories will have to wait for another post.

This post was written by Amara Dunn. All pictures were taken by her, unless otherwise credited.

This work is supported by:

  • Crop Protection and Pest Management -Extension Implementation Program Area grant no. 2017-70006-27142/project accession no. 1014000, from the USDA National Institute of Food and Agriculture.
  • New York State Department of Agriculture and Markets
  • Towards Sustainability Foundation

Learn more about classical biocontrol

Several brown, slimy-looking larvae on a leaf of a lily plant that has been chewed up. A small black wasp that is less than a third of the size of the larva is perched on one of them.
A tiny wasp lays its eggs in the larvae of the invasive lily leaf beetle. Releasing these wasps in the northeastern U.S. is a form of classical biocontrol. Photo credit: Dan Gilrein

Last week, some colleagues told me about a cool online database that will help you learn more about how classical biocontrol is helping us fight invasive insects.

Classical biocontrol means introducing a natural enemy of a pest to help manage that pest. The natural enemy establishes a population where you have released it (and maybe even spreads), so that you don’t need to repeatedly release more natural enemies. It is a strategy that can be especially useful against invasive pests.

One thing that makes a pest invasive is the fact that when it arrives in a new place (for example, on a new continent), native organisms don’t eat it because they have not evolved with this new pest as a food source. Sometimes scientists can search the geographic area from which the invasive pest came and find a natural enemy of that pest. Many tests are done over a long period of time in order to assess potential unintended consequences of introducing this natural enemy to a new place. For example, scientists determine whether the new natural enemy is likely to also impact populations of native organisms (especially those that are not pests). Only after extensive study will this new natural enemy be released to help reduce populations of the invasive pest.

When done carefully, classical biocontrol can be a lower-risk solution to managing invasive pests compared to chemical pest management. It is also a long-term solution. The new natural enemy reproduces in its new geographic range and brings the invasive pest population into balance. The invasive species won’t be eliminated, but it will likely do less damage.

A new database from the University of Massachusetts lets you learn more about insects that have been introduced to North America to control invasive insect pests as classical biological control agents. You can Search the Catalog by the scientific name of the target pest, the scientific name of the natural enemy, information about where and when the natural enemy was first released, or other criteria.

Held against the background of a person's hand, you can see the underside of a hemlock branch. It looks like there are small tufts of white cotton where each needle attaches to the branch.
The invasive hemlock woolly adelgid on a hemlock branch. Several different classical biocontrol agents have been released in the U.S. to manage this invasive pest. Photo credit: Amara Dunn

You will need to know the scientific name of the pest or natural enemy you are interested in, but a quick Google search can help you with that. For example, Adelges tsugae is the hemlock woolly adelgid, which you may have heard about. If not, you can learn more here. Laricobius nigrinus was released to help manage hemlock woolly adelgid. Other examples include Agrilus planipennis (emerald ash borer) and Lilioceris lilii (lily leaf beetle). NYS IPM is involved in a project to use classical biocontrol to manage this last pest in NY.

As the days start to get shorter and cooler, you might find yourself spending more time indoors. And if that’s the case, why not spend some time learning more about how classical biocontrol is helping to manage pests in the landscapes around you?

Come visit our beneficial insect habitat plots!

In the foreground you can see a small Christmas tree. In the background, you can see a patch of mixed wildflowers. Behind it are trees, and partly cloudy sky, and a pond.

You’ve read about all the different methods we are testing for establishing native wildflowers and grasses as habitat for pollinators and natural enemies of pests. You know we learned a lot in our first season. You know we’ve been using several different techniques to collect insects in these plots. And you saw a pictorial summary of our sampling and some of the insects we’ve caught in Summer 2019.

Wouldn’t you like to come see these plots in person, hear about our preliminary results, and learn more about attracting pollinators and other beneficial insects to your farm or yard?

If you live reasonably close to Geneva, NY, you can! We are having two field events this fall:

On Wednesday, September 25, 2019, stop by our field between 3:30 and 6:30 PM for an Open House. There will be no program, just stop by and talk with Betsy Lamb, Brian Eshenaur, and I. All the details can be found here, including the address and a map to help you find our field.

On Thursday, September 26, 2019, we have a Twilight Field Day from 5 to 7 PM. This meeting has been planned with growers in mind (especially Christmas tree and nursery growers). DEC credits (1.5) will be available for categories 1a, 3a, 24, 25, and 10, and dinner is included. The cost for this meeting is $15, and we need you to register so we know how much food to provide. All the details (including the registration link) can be found here.

If you’re coming to either of these events, we’ll have lots of signs up to help you find our field. Look for the following image:

illustration of a pink daisy-shaped flower with orange center and a Christmas tree, next to the logo for New York State Integrated Pest Management

This work is supported by:

  • Crop Protection and Pest Management -Extension Implementation Program Area grant no. 2017-70006-27142/project accession no. 1014000, from the USDA National Institute of Food and Agriculture.
  • New York State Department of Agriculture and Markets
  • Towards Sustainability Foundation

A summer of biocontrol…in pictures

Several types of wildflowers (yellow, white, deep magenta, purple, pink) growing in a field.
Summer isn’t over yet for farmers and extension staff doing field experiments!

Labor Day weekend may be viewed by some as the end of summer, but farmers know that the summer growing (and harvesting!) season is far from over. Similarly, the field projects I’m involved with this summer (read more here and here) are still running. Over the fall and winter I’ll be analyzing data and sharing results (on this blog, and at winter meetings). In the meantime, here’s a pictorial summary of my summer projects (so far).

Plant whose leaves have 3 lobes (like elongated clover leaves) with toothed edges. Flower is an open cluster of tiny yellow flowers, similar to Queen Anne’s Lace.
Golden alexanders (Zizia aurea) was our earliest-blooming wildflower in our beneficial insect habitat plots around the Christmas trees. It was blooming on May 16 in Geneva, NY.
A bee already covered in fine yellow dust looks for nectar and (more) pollen in a dandelion bloom.
Some of us may not like them in our lawns, but starting in the first week of May (Geneva, NY) dandelions were providing food for beneficial insects like this bee.
You can see the rear-end of a lady beetle (red body, with black spots) as it searches for pollen and nectar among small, bright yellow flowers.
This shy lady beetle was finding food in the flowers of this weedy mustard plant in mid-May (Geneva, NY).
Man walking through a field of grass on a cloudy day, swinging a long white net on a long wooden handle just above the ground.
After expert training from Cornell entomologist Jason Dombroskie (pictured here during our training session in late April), we’ve been using a sweep net to catch insects that fly or perch on the wildflowers in the habitat plots we started last summer. We sampled this way once every month.
One blue and one yellow bowl filled with soapy water and rocks set on ground covered with wood chip mulch. Several different types of plants are growing nearby.
Starting the week of May 20th, we set out pan traps (blue and yellow plastic bowls filled with soapy water and weighed down with rocks) approximately every other week. These traps catch insects flying through our plots, especially those that are attracted to the colors blue and yellow. This includes many bee species.
Various types of weeds and other plants grow around a spot where a deli cup is buried up to the rim in the ground. The deli cup is also full of liquid. Suspended over the deli cup on “legs” of thick wire is a clear-plastic dinner plate.
Also during the week of May 20th, we started setting pitfall traps once each month. Insects walking along the ground fall into these deli cups filled with a drowning solution. We put rain covers over them (made out of clear plastic dinner plates and wire from old flags) to prevent a heavy rain from flooding the deli cups during the 3 days the traps are set.
A red lady beetle with 7 spots on its back crawls across a green stem of vetch that is being held by a hand that is dirty (probably from weeding).
We caught and saw so many insects (and non-insects, like spiders) this summer! This seven-spotted lady beetle was a frequent visitor to our plots.
A fly with big eyes and black and yellow stripes on its body perches on a yellow coreopsis flower, probably looking for pollen and nectar.
Many flies are important pollinators, like this one that resembles a bee at first glance. Many flies are also important natural enemies of pests (either as adults, or as worm-like larvae).
Small insect with eyes that bug out to the sides of its head, triangular and diamond-shaped black and white patches on its otherwise brown wings and body.
This minute pirate bug may be tiny (it’s magnified 20X), but it is an important natural enemy of pests.
Looking down into a clear plastic cup that contains eleven different bees and wasps, ranging from a large bumble bee to tiny wasps that you can barely see.
We caught so many different kinds of bees and wasps!
Two black, yellow, and white striped caterpillars feed on the broad green leaves of a milkweed plant.
Plenty of caterpillars (like these monarchs) enjoyed munching on the foliage of our wildflowers.
A black and orange striped butterfly visits a daisy-shaped flower with pink petals and an orange cone-shaped center.
And in late July, we started seeing adult butterflies visiting the flowers like the viceroy butterfly on these purple coneflowers (Echinacea purpurea).
Eight beetles with eyes that bug out from the sides. They look brown when viewed from the top, but when viewed from underneath they look iridescent blue-green.
I learned that these are tiger beetles. They are fast-moving ground predators, and we caught a lot in our pitfall traps.
Plant stems covered in small purple flowers in the background, and plant stems covered in large white bell-shaped flowers in the foreground.
Different wildflowers bloomed at different times, like these purple catmint (Nepeta faassinii) and tall white beard tongue (Penstemon digitalis) in June.
On left, an open cluster of tiny white, slightly fuzzy flowers. On the right, flowers that look like pale purple puffs at the top of the stems.
White boneset (Eupatorium perfoliatum) and pale purple wild bergamot (Monarda fistulosa) were blooming in late July.
In the foreground, daisy-shaped flowers with yellow petals and black centers. In the background, a tall plant with open clusters of deep magenta flowers that look slightly fuzzy. You can see a field and blue sky in the background.
And now the rudbeckia (two different species, but Rudbeckia fulgida var. fulgida is pictured here) and deep magenta NY ironweed (Vernonia noveboracensis) are in full bloom. But the asters and goldenrod haven’t started, yet.
Short Christmas trees, planted in rows with grass in between. A pond, several fields, a line of trees, and a cloudy sky are in the background.
And the Christmas trees planted around these beneficial insect habitat plots keep growing!
Three people (two women and a man) wearing work clothes, holding gardening tools, and standing in the middle of a field with some yellow flowers in the foreground and a cloudy sky in the background.
I couldn’t have done this without the help of my great co-workers, Betsy Lamb, Deb Marvin, and Brian Eshenaur! They were still smiling after a morning of weeding the wildflowers by hand!
Smiling young woman holding a sheet with pictures of butterflies, and standing next to blooming purple coneflowers. You can see a field in the background.
A student from a local college helped me a lot with insect collection!
Several rows of cucurbit plants just starting to flower. In the background, you can see a road, a field, and a barn.
Meanwhile, field trials with biofungicides are ongoing, targeting cucurbit powdery mildew on winter squash and white mold on snap beans and tomatoes (not pictured). This project is funded by the New York Farm Viability Institute.
: Two women, both in red shirts, standing in the middle of a field. One holds two weeds. The other holds a clipboard and a water bottle.
Elizabeth Buck (left) and Crystal Stewart (right) are running the trials in western NY and eastern NY, respectively. This project is funded by the New York Farm Viability Institute.
Woman on left is wearing a red shirt, talking, and gesturing with her hands. Woman on right in wearing a green shirt and watching and listening to the woman on the left.
Meg McGrath (left) is running the trial on Long Island, but we all got together at a twilight meeting in eastern NY last week. This project is funded by the New York Farm Viability Institute.
Woman in a blue shirt and baseball cap looking into the camera. In the background you can see white bell-shaped flowers and blue sky with a few puffy clouds.
So far, it’s been a good summer! I’ve really enjoyed working with great colleagues and learning new things!

The field projects I’ve just described will be wrapping up in September. Check back to learn about the results. Better yet, click the green “Subscribe” button towards the top and right of this page, and you’ll receive an email when a new post is available!


In the meantime, there will still be at least a few more weeks of pictures posted regularly on Twitter (@AmaraDunn) and Instagram (@biocontrol.nysipm).

Biofungicide project was funded by the New York Farm Viability Institute.

Creating habitat for beneficial arthropods was supported by:

  • Crop Protection and Pest Management -Extension Implementation Program Area grant no. 2017-70006-27142/project accession no. 1014000, from the USDA National Institute of Food and Agriculture.
  • New York State Department of Agriculture and Markets
  • Towards Sustainability Foundation

Have you been meaning to learn more about spotted lanternfly? Here’s your chance!

This isn’t biocontrol, but it’s very important! Have you heard about the invasive spotted lanternfly? Do you want to learn where we are in our efforts to keep it out of New York, and to manage it if (and when) it does show up?

New York State Integrated Pest Management is hosting a meeting in Binghamton, NY on Thursday August 15 where you can get answers to these questions.

This conference has been approved for 7.5 Certified Nursery Landscape Professional credits, and 6 NYS Pesticide Recertification credits in the categories of 1a, 2, 3a, 6a, 9, 10, 22 and 25.

Details:
August 15, 2019
8:30 am – 4:30 pm
Broome County Regional Farmers Market
840 Upper Front St., Binghamton NY

Register online.

Get more information here about speakers and registration costs.

5th Annual New York State Integrated Pest Management Conference Spotted Lanternfly: At our doorstep or already in our fields? It's not if but when and where this invasive pest will show up in NYS. Be on the front line of stopping the invasion! Learn where to look and how to correctly identify and report sightings of all spotted lanternfly life stages. Spotted lanternfly is a concern to: growers; foresters; nursery, greenhouse, and Christmas tree operations, landscapers, Master Gardeners and all NYS residents. In fact, anyone whose business or travel takes them through quarantine zones should understand New York State's regulations. Experts from across PA and NY will provide updates on what is b doen to prevent SLF's establishment in New York and tools available to combat this threat to our fields, forests and homes.

Cereal Leaf Beetle Biocontrol Project Underway

This month’s post is about a project being led by Jaime Cummings, the Field Crops and Livestock IPM Coordinator at NYS IPM. The goal is to improve biological control of the cereal leaf beetle, a pest of small grains. Before we tell you about the biocontrol project, you’ll need some background information on this pest and the other management options available. You can use the following links to navigate to each section of this post:

Cereal leaf beetles and damage they cause

Scouting for cereal leaf beetle and deciding when to spray

Biocontrol of cereal leaf beetle

Our project: Improving biocontrol of cereal leaf beetle

Cereal leaf beetle damage on the flag leaf of a winter wheat plant. (Photo by J. Cummings, NYS IPM)

Cereal leaf beetles and the damage they cause

The cereal leaf beetle (CLB), Oulema melanopus, can be a significant pest of winter and spring small grains production in NY, especially in parts of western NY.  This invasive species was first detected in Michigan in 1962, and has since become established in many grain producing states in the US, despite quarantine and pesticide eradication efforts in the 1960’s and 1970’s.

Left: a black beetle with a red middle (thorax), sitting on the leaf of a small grain crop; Right: a yellowish larva sitting on the leaf of a small grains crop
Figure 1. Cereal leaf beetle adult (A) and larval (B) stages. (Photos by J. Cummings, NYS IPM)

You may be familiar with this pest either in the larval or beetle stage (Fig. 1).  CLB has one or two generations per growing season, and the adults overwinter in hedgerows, woods or field margins.  We usually start seeing the adults move into small grains fields in April or May to lay eggs which develop into the damaging larvae.  The larger the larvae get, the more damage they inflict on the crop.  After about two weeks of feeding, the larvae drop to the ground and pupate for about two weeks before the adults emerge again.

When looking for these pests, keep an eye out for the typical larval feeding damage that looks like strips of green tissue missing between leaf veins.  Severely damaged leaves may appear skeletonized, and intense feeding pressure in a field may result in a ‘frosted’ appearance of flag leaves (Fig. 2).

green heads of winter wheat surrounded by leaves that have tan stripes on them
Figure 2. Severe cereal leaf beetle larval feeding on winter wheat. (Photo by J. Cummings, NYS IPM)

Considering that the top two leaves of the wheat/barley/oat crop are what contributes most to grain yield, severe infestations of CLB can significantly impact yield and grain quality.  Even in small grain or mixed stand forage crops, this pest can have negative effects on the yield and quality of the forage because they can significantly reduce leaf area and photosynthetic capability of the crop.

Scouting for cereal leaf beetle and deciding when to spray

It’s important to scout for this pest, usually starting in early to mid-June when larvae are first appearing.  The economic threshold for insecticide application for CLB is when you count an average of three or more larvae per plant before the boot stage or one or more larvae per flag leaf after the boot stage.  Occurrence of this pest can be inconsistent within a field, therefore plan to scout weekly and walk a random pattern throughout each field stopping at 10 random locations to count larvae on 10 plants at each location.  Because insecticides labeled for CLB target the larval stages, in order for your pesticide applications to be most effective, make sure that at least 25% of CLB eggs have hatched and that larvae are present and actively feeding when you decided to spray.  And, if you’re seeing adults in late June or beyond, it’s probably too late to spray for the larvae.  (Always follow label recommendations and restrictions when applying pesticides)

Paying attention to CLB populations in your fields via scouting is an important part of an integrated management approach for minimizing losses to this pest.  A growing degree day (GDD) model for CLB developed in Michigan determined that adult CLB begin to emerge around 350-400 GDD (base 48) to begin egg laying.

Biocontrol of cereal leaf beetle

Unfortunately, there is no specific host plant resistance available for CLB, but there are natural predators of the larvae and eggs which can help to keep the pest population in check, and possibly below the economic threshold when well-established in an area.  Lady beetles are known to prey on CLB larvae and eggs, and there is at least one egg parasite though it is not widely distributed.

There is also a CLB larval parasitoid wasp, Tetrastichus julis, which was originally introduced from Europe as a biological control agent in Michigan in 1967 (Fig. 3).  Subsequent releases into other states, including NY in 1973, have led to a sporadic establishment of this biological control parasitoid throughout small grain production areas of the US.

Tiny black wasp perched on dark brown larva clinging to a leaf
Figure 3. Tetrastichus julis, a parasitic wasp on a cereal leaf beetle larva. (Photo courtesy of Washington State Department of Agriculture)

Our project: Improving biocontrol of cereal leaf beetle

Given that CLB damage can be widespread and undermanaged in many small grains fields in NYS, and under the advice of Dr. Elson Shields (Cornell University Field Crops Entomologist), the NYS IPM program decided to try to determine the parasitism levels of CLB larvae in various locations around the state and to try to increase populations of the parasitoid in the Aurora area of Cayuga County, where the CLB tends to be a perennial pest.  The multiyear project was initiated this year, with CLB larval collections from locations in six counties.  However, there were no CLB present to collect at two of the locations, so the data collected in 2019 includes only four locations (Table 1).

Table 1.  Cereal leaf beetle collection efforts for determining parasitism levels in 2019.

Location County Collection date Crop # CLB larvae collected
Seneca Falls Seneca 6-Jun winter wheat, rye, barley 96
Aurora/Musgrave Cayuga 12-Jun spring barley 92
Ithaca Tompkins 12-Jun winter wheat, rye, barley 45
Penn Yan Yates 13-Jun spring oats and peas 110
Oriskany Oneida 11-Jun winter wheat 0
Homer Cortland 10-Jun winter wheat 0


At each location, a target of approximately 100 CLB larvae of all different sizes/growth stages were collected by hand from wheat, barley or oat fields.  The larvae were temporarily reared in incubation chambers on host plant leaves until approximately half of the larvae were dissected to determine baseline parasitism levels for each location (Fig. 4).

Left: Petri dishes with white filter paper and torn up leaves of oats; Right: Brown and yellow larvae of the cereal leaf beetle (some are squished) on a moist white filter paper in a petri dish
Figure 4. Cereal leaf beetle rearing chambers (A) and dissection process (B). (Photo by J. Cummings, NYS IPM)

The eggs of the parasitoid are visible when the CLB larvae are cut open under a microscope (Fig. 5).

close-up image of squashed yellow larvae. Dark head capsules are still visible, and small oblong eggs of the parasitoid can be seen next to one squished larva. The picture has the following labels: Dissected CLB larvae, and T. julis parasitoid wasp eggs from inside CLB larva
Figure 5. Dissected CLB larvae, and one with T. julis parasitoid eggs. (Photo by J. Cummings, NYS IPM)

After baseline parasitism levels were determined for each collection location, the other half of the CLB larvae were then released at the Cornell Musgrave research farm near Aurora, NY (Fig. 6).  This process will be repeated over the next few years.

Left: Hand hold an open petri dish filled with oat leaves, cereal leaf beetle larvae, and white filter paper; Right: Small dark larvae on an oat leaf with feeding damage
Figure 6. Cereal leaf beetle larvae with known level of parasitism being released in Cayuga County (Photos by J. Thomas-Murphy, Cornell University)

The goals of this project are to determine the established levels of the T. julis parasitoid around the state since the initial release in 1973, and to try to determine if we can increase its population at the research farm through consecutive releases.  From this first year of data collection, we know that the parasitoid population is low at the research farm in Cayuga County (6%) and at two of the collection sites (7% and 10%, in Seneca and Yates Counties, respectively), but was at approximately 30% at the Ithaca (Tompkins County) collection site (Fig. 7).

Graph shows that in Seneca County and Cayuga County only 7% and 6% (respectively) of cereal leaf beetle larvae were parasitized, while in Tompkins County the parasitism rate was 30%, and in Yates County the parasitism rate was 10%
Figure 7. Percent T. julis parasitized cereal leaf beetle larvae collected from various locations.

We also know that although there has been a need to spray insecticides to manage CLB at the research farm in Cayuga County and near the other collection sites, there has been no need to spray for CLB at the Ithaca (Tompkins County) collection sites.  It’s likely that the T. julis parasitoid population at the Ithaca site keeps the CLB population below economic threshold levels.  We hope that by intentionally distributing this parasitoid into an area with known CLB problems, we can establish a robust parasitoid population that may result in a reduction of necessary insecticide sprays for this pest.

This post was written by Jaime Cummings, Ken Wise, and Amara Dunn, all of the New York State Integrated Pest Management Program.