 Winter has arrived! While there isn’t much to be doing outside in our gardens, the winter is a great opportunity to spend time learning more about gardening. So grab one of these books recommended by our Master Gardener Volunteers, sit by the fire, and spend time cultivating your mind this winter.
Book List
Freedom’s Gardener: James F. Brown, Horticulture, and the Hudson Valley in Antebellum America by Myra Beth Young Armstead
Garden Alchemy: 80 Recipes and Concoctions for Organic Fertilizers, Plant Elixirs, Potting Mixes, Pest Deterrents, and More by Stephanie Rose
Good Garden Bugs by Mary M. Gardiner, Ph. D.
The Know Maintenance Perennial Garden by Roy Diblik
Natural Companions: The Garden Lover’s Guide to Plant Combinations by Ken Druse
Square Foot Gardening with Kids by Mel Bartholomew
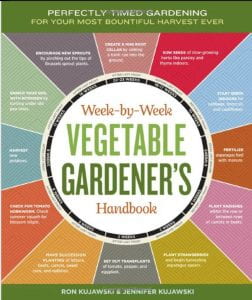
The Week-by-Week Vegetable Gardner’s Handbook by Ron and Jennifer Kujawski
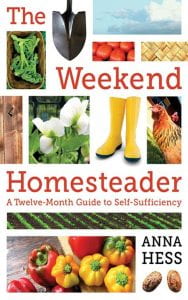
The Weekend Homesteader: A Twelve Month Guide to Self-Sufficiency by Anna Hess
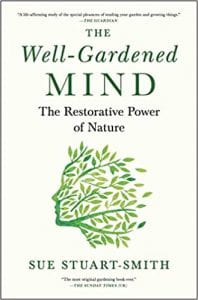
The Well-Gardened Mind: The Restorative Power of Nature by Sue Stuart-Smith
A Year at Brandywine Cottage by David L. Culp
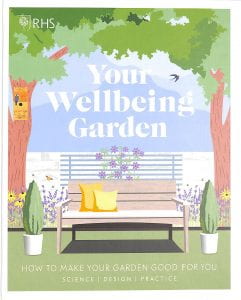
Your Wellbeing Garden: How to Make Your Garden Good for You – Science, Design, Function by D.K. Publishing
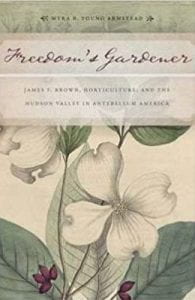 Freedom’s Gardener: James F. Brown, Horticulture, and the Hudson Valley in Antebellum America
by Myra Beth Young Armstead
Reviewed by Madelene Knaggs, New Windsor Master Gardener Volunteer
Freedom’s Gardener is impeccably researched and full of detail. It is the kind of book that grabs the attention of readers interested in gardening, local history, Black history, and the concept of freedom. Armstead, a professor of history at Bard College, extracts small details from the diary of James F. Brown to compose a story illustrating the concept of freedom as it developed in the United States in the decades following the Revolutionary War.
James F. Brown was born a slave in 1793 and died a free man in 1868. He escaped slavery in Maryland to the Hudson Valley of New York State, where he was employed as a gardener by the wealthy Verplanck family in Beacon, NY (on what is presently the Mount Gulian Historic Site).
Brown kept a detailed diary over 39 years, with entries covering weather, gardening, and steamboat schedules, as well as domestic matters. James began his career with the Verplancks as a waiter and a laborer, but eventually assumed the duties as the Verplanck Estate’s master gardener. He managed and supervised garden, farm, and nursery workers. He was also responsible for making major purchases for the Verplanck house and garden. He frequently interacted in Newburgh with Andrew Jackson Downing, the famed lAmerican landscape designer and editor of The Horticulturist magazine (1846–1852). Brown attended the Pennsylvania Horticultural Society Show in Philadelphia as well as the New York Horticultural Society Exhibition.
This book has been recommended by the Library Journal to historians of antebellum America and the social aspects of horticulture, as well as those interested in historical diaries. Armstead’s well-researched study of Brown’s work greatly expands our understanding of the Hudson Valley and the people and plants that have shaped it.
Back to Book List
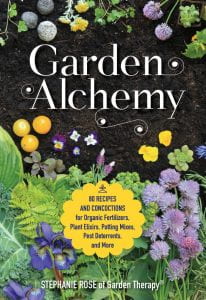 Garden Alchemy: 80 Recipes and Concoctions for Organic Fertilizers, Plant Elixirs, Potting Mixes, Pest Deterrents, and More
by Stephanie Rose
Reviewed by Mary Presutti, New Windsor Master Gardener Volunteer
As a newly minted Master Gardener Volunteer, I frequently turn to my class notes for advice in the garden. Now I have another, more portable source. In this one handy, slim volume, Canadian Master Gardener Stephanie Rose has compiled a nifty hands-on guide with useful recipes to get everyone’s garden in top shape.
The book is loaded with step-by-step instructions beginning with homemade methods to test your soil, then on to recipes for soil amendment, custom mulch, compost boosters, fertilizers, garden teas, potting soils, and even a method to produce your own worm castings. The ingredients are common items available in your home.
Even wildlife has not been left out. There are techniques for encouraging as well as discouraging nature in the garden. Some of my plants go outdoors in the summer months. They invariably bring fungus gnats back indoors in the fall. She has a fix to keep them away. She also includes a bottle trap for flies, wasps, and stinkbugs—all with their own individual bait recipes.
As a plus, Ms. Rose has included some fun activities to keep gardeners occupied while their plants are sleeping this winter season. You can make seed bombs, suet holders, butterfly puddlers, and more.
Garden Alchemy is chock full of beautiful, interesting photographs and diagrams that complement the easy to understand, straight to the point text. I recommend it for all gardeners.
Back to Book List
 Good Garden Bugs
by Mary M. Gardiner, Ph.D.
Review by Donna Beyer, New Windsor Master Gardener Volunteer
All gardeners must deal with bugs — good bugs, bad bugs — but some of us aren’t sure which is which. Good Garden Bugs is directed to the home gardener who might not know the difference. As gardeners, we invest time and effort into making our gardens the most beautiful and productive they can be, yet bugs can present challenges to our efforts. Most of us understand the need for good bugs, but sometimes find it difficult to live in harmony with them.
The book begins by providing information on the classification, anatomy, and the life cycle of garden bugs. The information helps the gardener understand how each stage of a bug’s development has different enemies and threats, and is presented in a way that non-academics can understand. How bugs overwinter and mature provides the gardener with valuable insight into promoting good garden bugs.
The chapter that discusses controls we use to regulate bug populations can help gardeners understand how their actions affect them. This section also stresses the need for native plants to promote healthy habitats that support good bug populations.
The chapters that follow are the core of the book. Each subsequent chapter is dedicated to an order of bug that describes the unique attributes and common examples of bugs that fall into that order. The book also includes large color photos with descriptions of each.
Over half the chapters are dedicated to wasps, beetles, and spiders. These bugs are the most plentiful and can be difficult to identify. These orders can do serious damage to plants and humans alike, so being able to identify these “good” bugs is especially important. Gardeners want to promote good bugs that fall into these orders, but also want to protect themselves and their gardens.
Currently, in the age of the internet, having a resource you can carry to the garden that will assist with pest identification is invaluable. This book is slim but does not skimp on content and is a valuable addition to a home gardener’s library.
Back to Book List
 The Know Maintenance Perennial Garden
by Roy Diblik
Reviewed by Cecille Jones, Monroe Master Gardener Volunteer
If the title of this book doesn’t hook you, perhaps the words on the cover will. In red ink, it loudly declares knowing your plants means less work. Or perhaps you’ve heard of Roy Diblik, the renowned plantsman behind the Lurie Garden at Millennium Park in Chicago.
Diblik’s approach to gardening stresses harmony with how plants grow and interact with each other. He advocates knowing your plants so you can plant them in self-sustaining communities. By doing so, you will spend less time maintaining them and more time enjoying them.
The author focuses on perennials because he believes they are the foundation of durable, diverse and beautiful gardens. According to Diblik, once you’re familiar with perennials, then you will recognize how and when to add annuals, vegetables, herbs, shrubs and trees.
Diblik believes that traditional gardening has become so culturally defined over the last 50 years that it is now a source of frustration and defeat for most gardeners.
In the first four chapters, he covers the basics – from understanding plant growth to soil, light, site preparation, and more. Chapter 5 covers 74 key perennials selected for their dependability, suitability to the northern half of the U.S., adaptability to soil & seasonal changes, and durability.
The true treasure is saved for Chapter 6 and beyond, where Diblik provides more than 60 garden plans, each designed to cover a 10 – 14’ rectangle, categorized by plans for growing in sun or shade, and complete with notes on care and maintenance. Assuming you are diligent about care and maintenance, Diblik claims that each plan should take about 3 to 4 hours of work per week.
Diblik’s approach will put you on a path to a style of gardening that stresses harmony, simplicity and enjoyment.
Back to Book List
 Natural Companions: The Garden Lover’s Guide to Plant Combinations
by Ken Druse
Reviewed by Gerda Krogslund, Middletown Senior Master Gardener Volunteer
For this book, author Ken Druse worked in conjunction with artist Ellen Hoverkamp who provided the beautiful botanical photographs throughout. Each chapter explores plants in a different light looking at season, family, form, function, color, spirit of place, or theme.
Take a journey through the seasons starting with signs of spring and continuing through the year concluding with winter and new awakenings. Learn about different plant families and delve into the numerous varieties found in each. Form follows function – examine the many different shapes, textures, structures and growth habit of flowers and other plants. Be inspired by pictures of flowers with both similar colors and exciting color combinations. Consider the spirit of place and think about what you can plant in woodlands, meadows, wetlands, rain gardens, and rock gardens. Explore themed gardens grown for fragrance, roses, pollinators, birds, cutting, edible plants, herbs, medicinal plants, and toxic plants.
This is not a “how-to” manual but a book that suggests possible plant combinations for your consideration. It gives you lots of ideas in which you can take your reliable basic plants and add others to make your garden even more spectacular. Ken Druse knows that gardening is very personable and suggests that while you read through the book, you make lists of combinations that appeal to you.
A garden is never really complete but more a work in progress as we continually experiment with new plants and new plant arrangements. I’ve spent hours going through this book and I know I’ll come back again and again.
Back to Book List
 Square Foot Gardening with Kids
by Mel Bartholomew
Reviewed by Brooke Moore, New Windsor Master Gardener Volunteer
Getting children interested in growing food and learning more about the natural world is an admirable goal. And one that does not have to be boring or pedantic.
This lovely book by the master of Square Foot Gardening, provides kids from toddlers to teens with all the tools they need to build, manage, grow and harvest a vegetable garden. It encourages starting small and building more as confidence and experience lead one to wanting a larger planting area.
With a format that provides age-appropriate tasks and goals at every step, this book also works for the whole family. I loved that there are clues to help parents not be overly involved but rather encourage the children to figure out how to do things themselves. It covers building raised beds, making soil mixes, how to make a grid system, water issues, protecting plants from predators, best growing practices, and much more.
Teachers and classroom projects are also a part of the book, and these can be used by anyone. Math, science, art, and history are all related to gardening, and the book provides simple and interesting activities to bring these skills into the garden and to use the garden to develop entirely new ones. Measuring, weighing, keeping a planting journal are all well described and encouraged. There are good photos and illustrations for each step and lots of handy tips and “how to” suggestions.
This is a book with “kids” in the title, but it truly is a book for anyone and everyone interested in exploring how to use this simple system to have a successful garden harvest.
Back to Book List
 The Week-by-Week Vegetable Gardner’s Handbook
by Ron and Jennifer Kujawski
Reviewed by Kimberly Marshall, Washingtonville Master Gardener Volunteer
If there were only one vegetable gardening book I could use throughout the gardening year, it would be The Week-by-Week Vegetable Gardener’s Handbook by Ron and Jennifer Kujawski. This dynamic father-and-daughter gardening duo have made an indispensable resource that should grace the bookshelves of vegetable gardeners everywhere.
It provides week-by-week vegetable gardening how-to’s that coincide with each planting season. A chart at the beginning of the book helps you identify where you are in your own area’s growing season, using your first and last frost dates as a guide. For example, if your last frost date is mid-May, as it is for many of us here in Orange County, you enter that date in the calendar’s “Week 1,” which starts your weekly to-do’s (first week, two weeks out, three weeks out, etc.).
Based on these dates, the book explains which week to start seeds indoors, plant cover crops, look for pests, harvest your crops, and fertilize each and every vegetable you can think of, with plenty of gardening tips and tricks along the way. There are even steps for gardening in the winter, with instructions for planning gardens and ordering seeds, so you can work on or think about your garden all year long.
The book also includes space for journaling your thoughts and experiences. There is ample room for notes in each section to remind yourself of what you planted and any issues you might have experienced, helping you to avoid making the same mistakes the following year.
If you’re looking for a step-by-step vegetable gardening book that tells you exactly what to do and when to do it, give this one a try—especially if you find the idea of vegetable gardening a bit overwhelming, like I do. It breaks everything down into easy steps, making even the scariest parts of gardening seem effortless while helping you realize what’s truly possible for your garden along the way.
Back to Book List
 The Weekend Homesteader: A Twelve Month Guide to Self-Sufficiency
by Anna Hess
Reviewed by Robin Portelli, Cornwall Master Gardener Volunteer
As I was perusing through gardening books on the Libby App from my local library, the book title, The Weekend Homesteader: A Twelve-Month Guide to Self Sufficiency by Anna Hess caught my attention. I was envisioning a book with information that would inspire me to become a self-sufficient gardener without feeling overwhelmed or pressured that I needed to go off the grid or never buy grocery produce again. I was not disappointed.
In her introduction, Anna Hess immediately connects with the novice homesteader. She understands that the dream of full-time homesteading can be daunting for most people. “Weekend Homesteader is full of short projects that you can use to dip your toes into the vast ocean of homesteading without becoming overwhelmed,” she writes. So, I began to read.
The book is divided by months beginning in the month of April or October if you live down under. Each month introduces you to topics that are important factors in growing a successful garden and maintaining a small homestead. Some homesteading basics covered that are more familiar to most of us include budgeting skills and record keeping (ugh!), healthy soil, garden rotation, and how to build a chicken coop. Anna Hess also touches upon less well-known details and tips such as how to find space to plant if you live in the city, how to stay warm without electricity for longer periods of time, and how to extend the gardening season by making your own garden hoops. Recipes, canning, cooking, and details of food/seed storing options are among some of the other multitude of topics.
Overall, I would give this book 4.5/5 stars.
Pros: It was well organized and gave many tips that only an experienced homesteader would know. It could help a novice homesteader avoid rookie mistakes. This book was published in 2012, but the topics and information are still very practical and relevant.
Cons: It covers the basics so an already experienced homesteader may not reap much benefit by reading it. Also, it is missing a chapter specific to urban gardening topics.
Back to Book List
 The Well-Gardened Mind: The Restorative Power of Nature
by Sue Stuart-Smith
Reviewed by Sharon Lunden, Goshen Master Gardener Volunteer
In The Well-Gardened Mind, Stuart-Smith, a British psychiatrist and psychotherapist, delves into the therapeutic aspects of immersing yourself in a garden. This is not a how-to garden book but instead outlines the well-researched benefits to the human body, mind, and soul to be found in the natural world around us.
Our brain cells are like branching trees, requiring pruning, weeding, and room to grow. Experience and pain can be “composted” into something beneficial. Gardens reflect our lives, periods of yield and beauty, loss and rest. Our minds as gardens seek light, cultivation, seeding, nourishment, watering, and replenishment. Souls and bodies begin to heal and thrive in the peace, safety, and beauty of the confines of a flower or vegetable garden. We need the earth as much as the earth needs us to care for and cherish it, a full circle. By learning to care for a garden, we better learn to care for ourselves and others.
This is a fascinating book which I recommend to you, as it can prove helpful and comforting in the midst of the stress of these difficult times.
If we put energy into cultivating the earth, we are given something back. There is magic in it and there is hard work in it, but the fruits and flowers of the earth are a form of goodness that is real; they are worth believing in and are not out of reach. When we sow a seed, we plant a narrative of future possibility. It is an action of hope. Not all the seeds we sow will germinate, but there is a sense of security that comes from knowing you have seeds in the ground. (pp. 65–66)
Back to Book List
 A Year at Brandywine Cottage
by David L. Culp
Reviewed by Madelene Knaggs, New Windsor Master Gardener Volunteer
A Year at Brandywine Cottage leads us on a journey through an exquisite garden that represents a lifetime of hard work, passion, successes and disappointments, experience and knowledge. Engaging prose and beautiful photography take the armchair gardener on a virtual tour through each season as the author informs us of the Latin genus and species and the botanical and historical facts about each plant.
Author and gardener David Culp states, “By looking closely at my garden over a period of time, and allowing it to speak to me, I find that the garden at Brandywine Cottage wants six seasons. As you will see, this book chronicles what happens in my garden over the course of those seasons.”
Culp demonstrates his deep knowledge of plants season by season with such tips and techniques for a successful layered garden as adding pots of tropicals (he has 400 pots) into the beds to boost a tired August garden, or clipping distracting dead leaves off hellebores before they bloom. He also weaves in family and local recipes using ingredients from his own beautiful vegetable garden.
Beginning in February (in the chapter “Early Spring”), he shows us the sleepy phase in the garden when most people are oblivious to any plant life. He proves that there is much to behold—the emerging bulbs of crocus, dwarf iris, glory-of-the-snow, winter aconite, witch hazels, and the author’s large collection of snowdrops. As the season progresses into March, daffodils and hellebores take center stage. He continues to show the progression and overlapping from season to season and from outdoors to inside the home.
This book will inspire readers with ideas for their own gardens, and will encourage plans in anticipation of the upcoming season.
Back to Book List
 Your Wellbeing Garden: How to Make Your Garden Good for You – Science, Design, Function
by D.K. Publishing
Review by Patricia Henighan, Walden Master Gardener Volunteer
If you have been gardening for a while, you probably don’t need to be convinced that your garden is good for you. Nevertheless, this delightfully designed and easy to digest book uses scientific research drawn together by a team of scientists from the Royal Horticultural Society to present the whys and hows of creating an outdoor space that nourishes both the mind and the body, and is good for the planet. Each section encapsulates the latest research on topics such as how to fight air pollution, reduce noise pollution, help pollinators, address climate change, and provide fodder for your brain.
The authors use diagrams and illustrations to explain concepts such as how different types of leaves trap air pollutants and why vegetation is a better at reducing noise pollution than a fence or a wall. They explore topics such as Ogren Plant Allergy Scale (OPALS) which rates plants from 1 to 10 for allergenicity using eye-catching illustrations that show why certain flower and tree species are better choices if you are looking to avoid flying pollen.
Many people spend time outside to find peace and tranquility in a chaotic world. Research has found that when seeking “natural restoration”, we respond best to natural features that are moderately complex – not too smooth and not too busy. A grassy area with openings and some trees provides the highest rewards for inducing tranquility. Fractals or repeating branching patterns, which occur frequently in nature, can be added to a garden to ensure the landscape provides release for the brain from stress and anxiety. The authors encourage you to design a mindfulness corner with a comfortable seat in an area cushioned from street noise with a soothing sound of water or bees buzzing. Who said gardens must be all work?
Gardening can be a solitary pursuit or a communal activity. It can benefit people from all walks of life. Children and adults with special needs can benefit from the experience of growing flowers and food crops. Horticultural therapy is a way in which gardening is used to help people suffering from trauma and illness. For immigrants, growing crops from their home country can help to allay homesickness. And when it comes to children and gardening, psychologists have found that children can cultivate character by taking care of their own individual garden plots. It is also thought that by handling dirt at an early age, children increase their exposure to beneficial microbes, which may boost the immune system.
Since climate change is an ongoing challenge for everyone, the last section covers many aspects of creating a sustainable garden. There are suggestions on how to change barren, water-gobbling lawns into more resilient spaces and the latest recommendations on how to care for your soil, avoid impermeable surfaces, capture run-off, and design rain gardens. Obviously, it is a win-win situation as making your garden better for you will also make it better for the environment.
Back to Book List

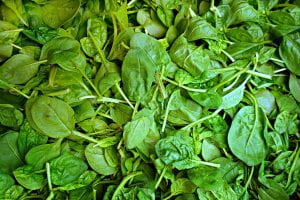
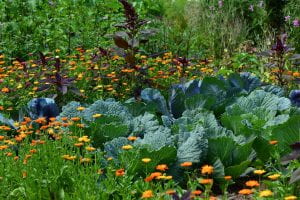 Canadian wildfires are impacting air quality here in the Northeast. Smoke has filled the sky and warnings are issued for outdoor activities. This is making many growers and gardeners worried about the potential impact the smoke will have on field grown vegetables. The good news is the impact will be minimal at worst.
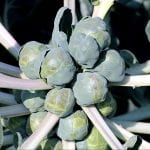
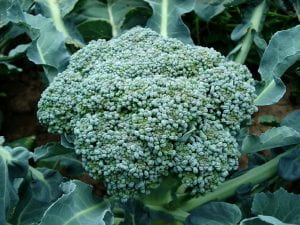 Is broccoli man-made? This was a question recently posed to me by a newcomer to the Community Garden that I frequent. I had no idea as to the correct answer, so I told the gentleman that I would have to research the topic and would share the results with him as soon as possible. What follows in this article are the results of my research.
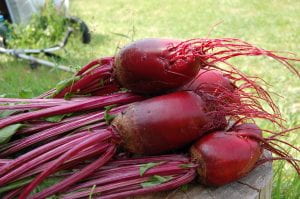
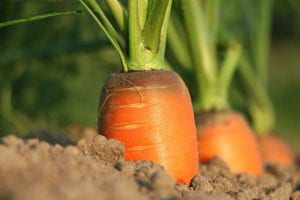
 Many of the vegetables included in the
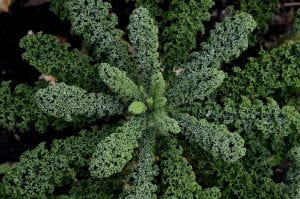

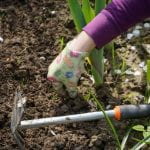
 Keep weeding and mulching.
 Check your garden for


 Until then, though, I have to enjoy the four seasons we’re blessed with in Orange County, New York. I’ve tried a number of strategies over the years to extend my growing season. Using
 One of my favorite winter road trips is a visit to the
  I settled on a solution offered by a company called “
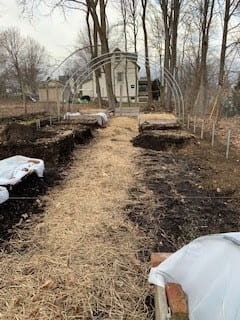 Now that I had all the materials, it was time to start my build. In hindsight, I probably should have timed the project differently. As you can imagine, building an outdoor structure in January is not what you’d call great planning. But passionate as I am, I didn’t let darkness and subfreezing temperatures prevent my dream from coming to life. So outside I worked, using a pickaxe to break through the frozen topsoil, leveling the perimeter where I’d be pounding in the 4-foot-long ground posts—22 in all for the 20’ × 40’ hoop house. Spaced every 4 feet, the ground posts are pounded 2 feet into the ground to leave 2-foot lengths sticking up above the surface. These 1-5/8” steel ground posts are the same as those used for the posts of chain-link fences, and they enable the steel hoops to slide into the 2-foot portion rising above the surface, which are each then secured with a through bolt.
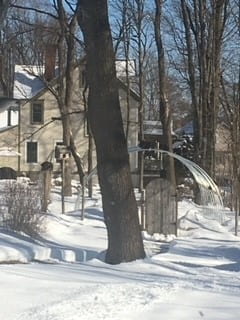 After the hoops were bent and assembled, the magnitude of the structure I was building dawned on me. With the placement of each hoop, I began to see clearly the bones of the “house” I was building over my garden. 20 feet wide by 40 feet long, with a ceiling height of 10 feet, made for a very spacious indoor growing area indeed. I was really getting excited now. And then it came: the dreaded snowstorm I had been racing against. I had hoped to get the poly covering on before the snow, but I was unfortunately not able to beat Mother Nature on that one. My progress slowed for about a month until the deep snow melted, with my activity limited to framing the end walls and building the door in my workshop.
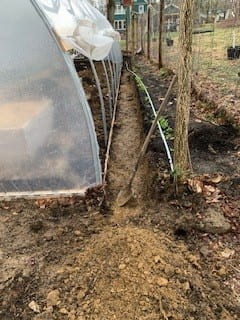 Once the snow finally cleared in March, I was back at it, bolting in place the base boards and hip boards that serve as a solid frame around the base of the structure and provide a surface on which to attach the poly. Now, there are a variety of ways to attach the poly, as the many YouTube videos I watched demonstrated, but I didn’t have to puzzle out my choice, because the Bootstrap Farmer kit I purchased included Wiggle Wire that is “wiggled” into a metal channel to set the poly in place. I screwed the Wiggle Wire along the hip boards and end wall frame boards, and arched it over the hoops at both ends of the structure. Once the poly is pulled over the hoops, the Wiggle Wire sandwiches the poly into the channels and holds the poly taut without puncturing it like staples or nails would. This is how the professional farmers do it, so it seemed like the best option for me.
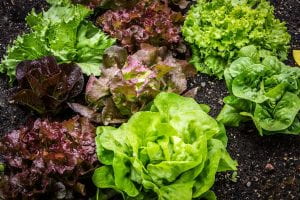
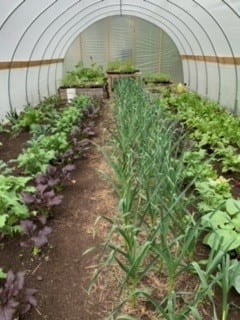 After a few additional hours of trimming the end wall poly and installing the door, our new hoop house was complete. And the next day, with temperatures in the 30’s, my tropical paradise was a reality, with temperatures inside in the upper 60’s. The soil went from being frozen solid to holding steady temperatures above 50° within a week, and my first seedlings were in the ground as of early March. A variety of lettuce, kale, mustard greens, Swiss chard, beets, and Chinese broccoli started filling our kitchen in mid-April. And as my plans are to succession plant this space through the summer and grow my heat-loving tomatoes, peppers, eggplant, and zucchini, I’m hoping to have a banner year. My ultimate goal is to follow the lessons learned in Eliot Coleman’s excellent book Four-Season Harvest and to continue gardening right through the winter. Wish me luck!
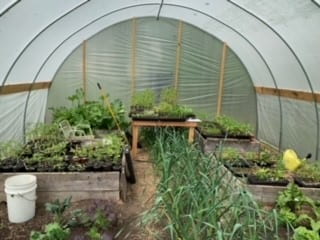
 By Kimberly Marshall, Washingtonville Master Gardener Volunteer
 How to identify the squash vine borer and the damage that it does:
 How to minimize damage if borers have found your garden anyway:
 Do a daily
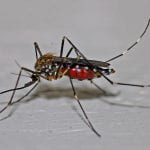 Dump out any standing water from containers in your yard to prevent mosquito breeding.
 Most vegetable plants need about