This blog post describes how we populated the 3D model with 3D models of two bench types from the 1939 and 1964 world’s fair. These benches are historic resources that are integral to the Flushing Meadows Corona Park landscape.
In order to do this we needed three main sources of data:
- A GIS shapefile with the locations of bench types as attributes. A geodatabase with
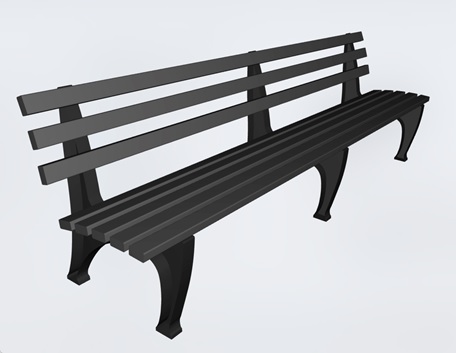
- A 3D model of the 1939 bench type. This was downloaded from Google 3D Warehouse.

Image above is from Google 3D Warehouse.
3. A 3D model of the 1964 bench. This was downloaded from Google 3D Warehouse. The GIS bench point file is from the NYC Park Department.
The following were the steps we used:
1. Data about landscape features was obtained from the New York City Parks Department and a consultant who worked on a 2004 Framework Plan for the Park.
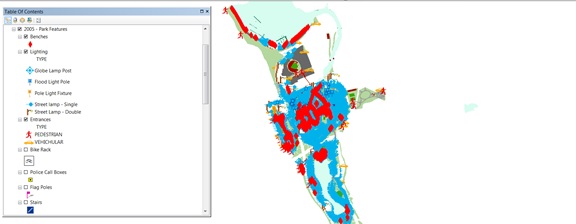
2. A map document called “Park Features” contained a Bench file. The attributes contained data about the Bench type.
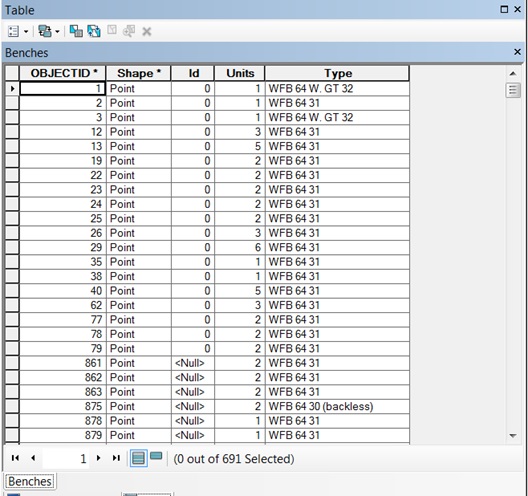
3. I copied the Bench layer and created a new shapefile with my initials, so that I could distinguish between original data and a modified shapfile.
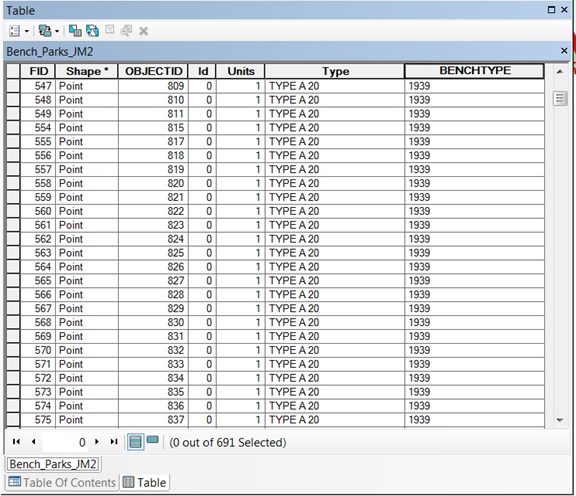
4. I added an Attribute field called “BenchType” that translated the Types in the Parks Database into a more easily understood field that I could use in CityEngine.
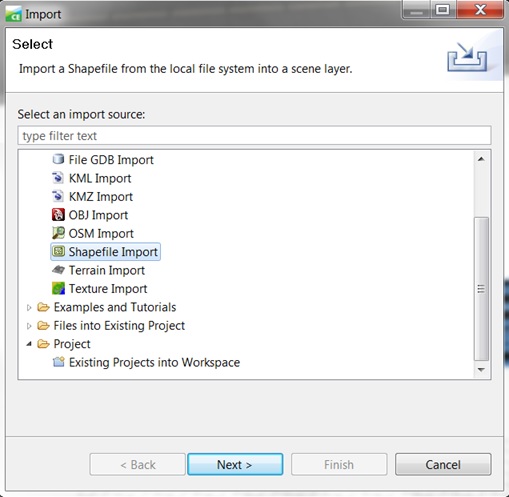
5. I imported the shapfile into the scene.
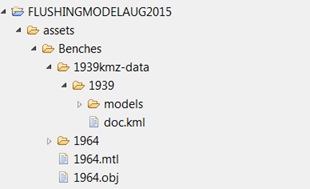
6. In the Assets folder of my Project, I copied the 1939 and 1964 bench models:
7. I created a new rule file by right clicking the “rule” folder on the left column and click new rule file.
Note: Since CityEngine has a large collection of rule scripts from both their own developers and users, we can always refer to their rule scripts rather than write our own script from scratch. I found this is most helpful for those who just start to learn CityEngine and its advanced coding skills.
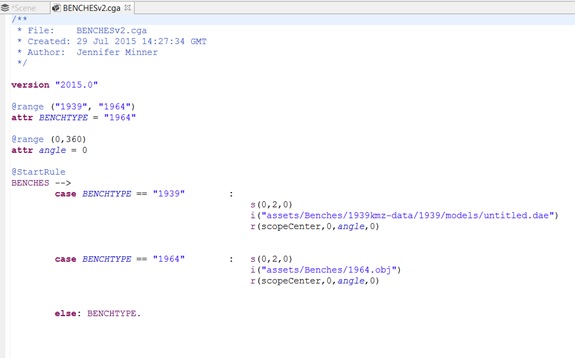
The CityEngine rule file is based on Python scripting. However, it has its own grammar that is sometimes quite different from standard Python. In the following part, I will explain the bench rule we used to place the benches line by line.
(The ** mark means comments and explanations to the script)
version “2015.0”
**This is the version of CityEngine used to create the rule.
@range (“1939”, “1964”)
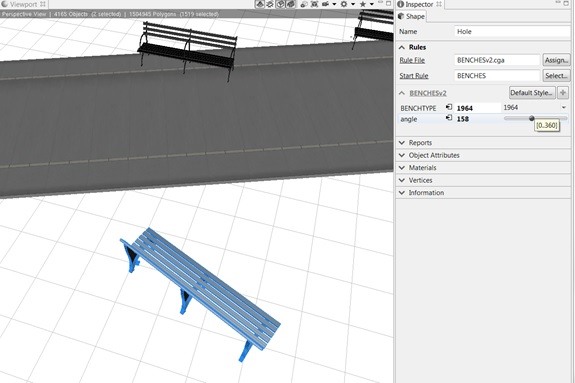
Attr BENCHTYPE = “1964”
** The key word “attr” will define a variable or attribute that we can refer to and adjust in our model. This code basically indicates that there are two attributes under BENCHTYPE that CityEngine should pay attention to when populating models in the scene. These are 1939 and 1964. There are other bench types in the shapefile, but they will be ignored if they are attributes other than 1939 and 1964. 1964 is defined as the default value.
attr angle = 0
** For this one, I created an attribute called angle which is later used to define the orientation of the benches. The attribute created here will also appear in the inspector which will allow us to change value for each single model generated by this rule. Here we just define the angle to a default value of 0. However, we change the value of angle for any single bench later and rotate the bench models in order to make them face the correct way.
See http://cehelp.esri.com/help/index.jsp for example and more explanation.
@StartRule
** This marks the start of the real rule. This indicates that we are getting down to business after defining attributes. Code from here on, tells CityEngine what should happen with the attributes.
BENCHES –>
** This is the name of this rule. Sometimes there are multiple sub-rules in a rule set. Each sub-rule is started with a “–>” mark which is unique in CityEngine.
case BENCHTYPE == “1939” :
s(0,2,0)
i(“assets/Benches/1939kmz-data/1939/models/untitled.dae”)
r(scopeCenter,0,angle,0)
**”case” tells the computer to populate the scene with the 1939 model located here: assets/Benches/1939kmz-data/1939/models/untitled.dae, if the attribute BENCHTYPE = 1939.
s(0,2,0)
** The s(float xSize, ySize, zSize) operation sets the size vector.
** See http://cehelp.esri.com/help/index.jsp for example and more explanation.
i(…)
** The i(geometry path) operation inserts the model of the geometry asset.
r(scopeCenter,0,angle,0)
** The rotate operation rotates the model around the scope center. Parameters “0, angle, 0” are angles in degrees to rotate about each axis.
See http://cehelp.esri.com/help/index.jsp for example and more explanation.
** This is the end of this rule file.
The above is an introduction to some basics of CE rule file. After creating your own rule file, you just need to right click the layer you want to apply the rule and select apply rule.
Once the rule is applied, I can select individual benches and modify either the bench type or the angle.
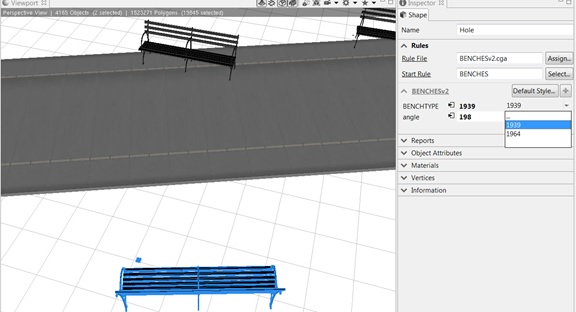
If I find or create a better 3D model for either type of bench, I can copy and paste into my “Asset” folder and regenerate all of the models.
what apps did you use for make a prototype?